

Page 1
GEAppliances
J
GHD1106
GSD1005
GSD1103
GSD2422
GSD2432
GSDL112
GSDL622
GSDL632
www.GEAppfiances.com 165D4700P22249-5896 9-OOJR
Page 2
Congratulations!
YouAreNow Partof theGEFamily.
Welcome to the GE l_(milv.
We're proud of our quality
products and we are
committed to providing
dependable sec,'ice. You'll
see it in this easy-to-use
()wner's Manual and you'll
hear it in the fl'iendly voices
of 0111" O.IStOlller servi(e
department.
Best ()fall, you'll experience
these values each time roll
use your dishwasher. That's
important, because your
new dishwasher will be part
of your t)mily tor many
years. And we hope rot1 will
be part ofotu's lot a long
time to come.
We thank you tor bu}ing
(;E We appreciate V°m"
purchase, and hope you
will cominue to rely on us
whenever you need quality
appliances lot your home.
Important!
Fill out and return the Consumer t'roduct
(hvnership Registration card that is packed
with this product. [t}_m camlot find it,
please send in the duplicate card printed in
the back of this manual.
Write the model andserial
numbershere.
#
Youcan find them on the tub wall just
inside the door.
Staple salesslip or cancelled check
here.
Proofof the original purchase date is
needed to obtain service under the
warran_.
Page 3
GE& You,
A ServicePartnership.
Ask any GEappliance owner andthey will
tefl you we stand behind our products with
unmatched quality service. However, did
you know that most questions result from
simple problems that you can easily fix
yourself injust a few minutes? This
Owner's Manual can tell you how.
thisManual
Inside you will find many
helpful hints on how to use and
maintain your dishwasher
properly.Just a little preventive
care on your part can save you a
great deal of time and money
over the lite of your dishwasher.
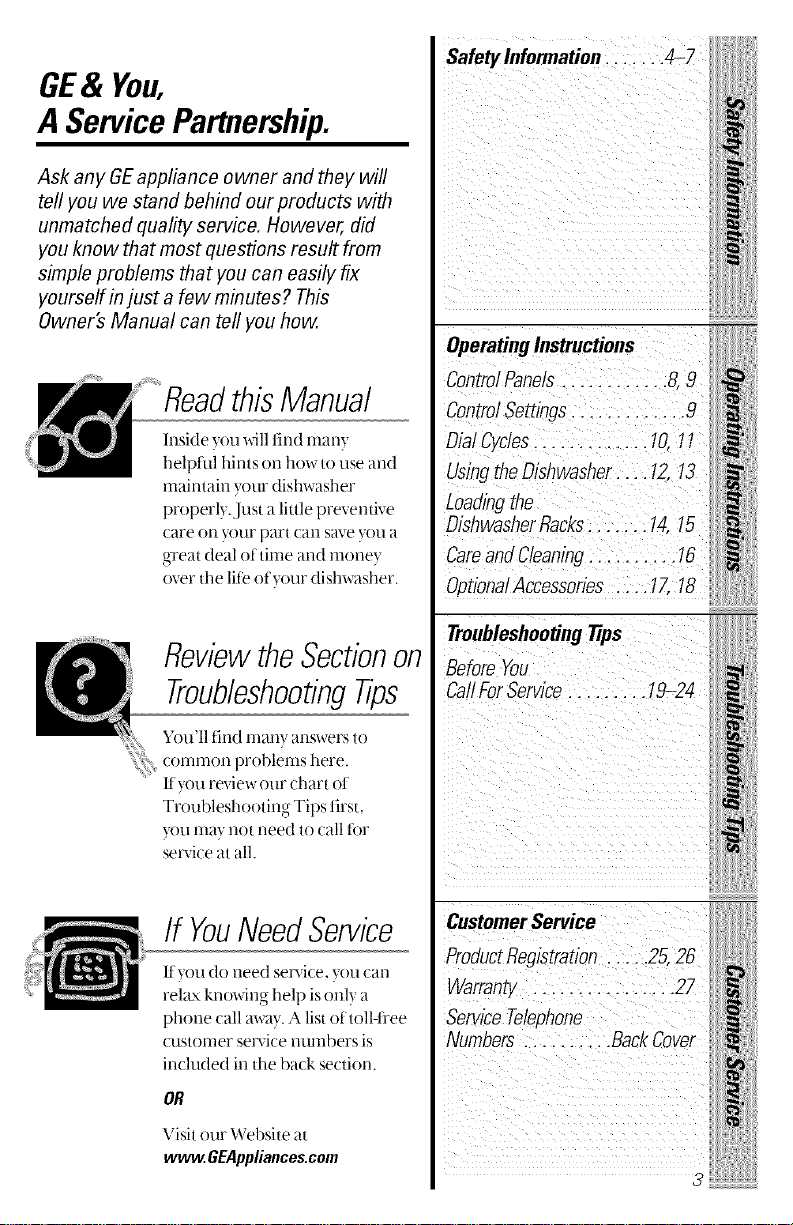
Safety Information....... 4-7
OperatingInstructions
ControlPanels .... 8,9
ControlSettings... 9
Dia! Cycles............. 10,11
UsingtheDishwasher.... 12,13
Loadin9the
DishwasherRacks....... 14,15
CareandCleaning.......... 16
OptionalAccessories .... 17,18
ReviewtheSectionon
TroubleshootingTips
You'll find many answers to
common problems here.
Ilyou review our chart ot
Troubleshooting Tips first,
you may not need to call tot
service at all.
If YouNeedService
llyou do need service, you can
reke_,knowing help is onl) a
phone call away. A list of toll-fl'ee
_a_stomer service numbers is
included in the back section.
OR
Visit our Website at
ww_.GEAppliances.com
TroubleshootingTips
Before You
CallForSerwce......... !9-24
CustomerService
ProductRegistration ..... 25,26
Warranty ................ 27
ServiceTelephone
Numbers.......... BackCover
iiiiiiliiSi
ii!i iiiiiii!
Page 4
IMPORTANTSAFETYINFORMAtiON.
READALLINSTRUCtiONSBEFOREUSING.
A WARNING!
For your safeW, the information in this manual must be
followed to minimize the risk of fire, explosion, electric
shock, or to prevent property damage, personal injury,
or loss of life.
WATERHEATERSAFETY
Under certain conditions hydrogen gas may be produced in
a water heater that has not been used for two weeks or
more. HYDROGEN GAS IS EXPLOSIVE.
If tile hot water has not been used tor tt_x)weeks or more, prevent
tile possibility of damage or inju U by turning on all hot water
taucets and allow them to mn tbr several nfinutes. Do this betbre
using an} electrical appliance which is connected to tile hot water
s)stem. This simple procedure will allow am built-up hydrogen gas
to escape. Since tile gas is flammable, do not smoke or use an open
flame or appliance during this process.
i!iiiii_iiiiiiii
Page 5
Use your dishwasher only for its intended purpose as
described in this Owner's Manual
PROPERINSTALLAtiON
ANDMAINTENANCE
This dishwasher must be properly installed and located in
accordance with the Installation Instructions before #is used.
ff you did not receive an Installation Instructions sheet with
your dishwasher, you can receive one by calling us toll-free
at the GE Answer Cente_ 800.626.2000.
;_,Connect to agrourlded
rnetal, perrnar_ent wirin_
system; or nin an equipment-
gTounding conductor with
the circuit conductors and
connect to the equipment-
grounding terminal or lead
of the appliance.
i_ hnproper connection ot
the eqtfil)mentNrounding
conductor can resuh in a
risk ot electric shock. Check
with aqualified electrician
or service representative
ifyou are in doubt whether
the appliance is properly
grounded.
_;i_Dispose of discarded
appliances and shipping or
pa(king material properly.
N I)o not attempt to repair
or replace any part ot your
dishwasher unless it is
specitically recommended
in this manual. All other
servicing should be reterred
to aqualified technician.
N To mininfize the possibility
ot elecu'ic shock, disconnect
this appliance ti'om the
power supply bet(we
attempting any maintenance.
NOTE:Turning the
dishwasher oil does not
disconnect the appliance
fl'om the power supply.
We recommend having a
qualitied technician service
your appliance.
_iiiiii!!i:i:iiii_iiiili,liiiii/iiii
iii!!ii/ i!iHiii
5
Page 6
IMPORTANTSAFETYINFORMAtiON.
READALLINSTRUCtiONSBEFOREUSING.
WARNING!
DONOT...
i!iiiii_iiiiiiii
i¢ Do not tamper with controls,
i_ Do not abuse, sit on, or stand
on the door or dish rack of
the dishwasher.
s_?'I)o not discard a dishwasher
without first removing the
door ot the washing
compartment.
i¢ Do not store or rise
combustible materials,
gasolir_e or other tlamlilal)le
vapors and liquids in the
vicinity of this or any other
appliance.
i¢ Do not allow children to
play inside, on or with this
appliance or any discarded
appliance.
Page 7
WHENUSINGYOURDISHWASHER
_;_Use only powder, tabs or
liquid detergents or wetting
agents recommended t_r
use in a dislr_-asher and
keep them out ot the reach
of children. Cascade*
Automatic l)ishwashing
Iletergent has been approved
ti)r use in all GE dishwashers.
s_?'I,ocate sharp items so that
the) are not likel} to damage
the door seal.
i¢ I,oad sharp knives with the
handles up to reduce tile risk
of/alt-t}T_e ir{iuries.
i¢ Do not wash plastic items
unless marked dishwasher
safe or the equivalent. For
plastic items not so marked,
check the manuti_cturer's
recommendations,
_f_Non-Dishware Items: Do not
wash itenls Stlch as electronic
air cleaner filters, flu'nace
filters and paint brushes in
your dishwasher. Damage to
dishwasher and discoloration
or staining of dishwasher
may result.
s_?'I)o not touch the heatino
element during or
immediately after use.
i_ I)o not operate your
dishwasher unless all
enclosure panels are
properly in place,
N Close supervision is necessm T
it this appliance is used 1)yor
near children.
_ Ix_ad light plastic items
so they Mll not become
lsl ) _ "n r
d" (dgeda dd optotlle
bottom of the dishwasher-
tile}, nfight come into contact
with the heating element
and be damaged.
READAND FOLLOWTHIS
SAFETYINFORMATIONCAREFULLY.
SAVETHESEINSTRUCTIONS
_iiiiii_,,,i_,,liiiiiii!i!l
iiiiiiiiiiii_iiii!iit
7
Page 8

iiiJi!iiiii/iiiiiii!!!iiiHiiiiii
Aboutthe dishwasher controlpanel
Youcan locate your model number on the tub wall just inside the door.
Throughout this manual, features and appearance may varyfrom your model
GIlD 1106,GSD1005and GSD1103
GSD2422and GSD2432
oFF....
(_FF
GSDL112
Page 9
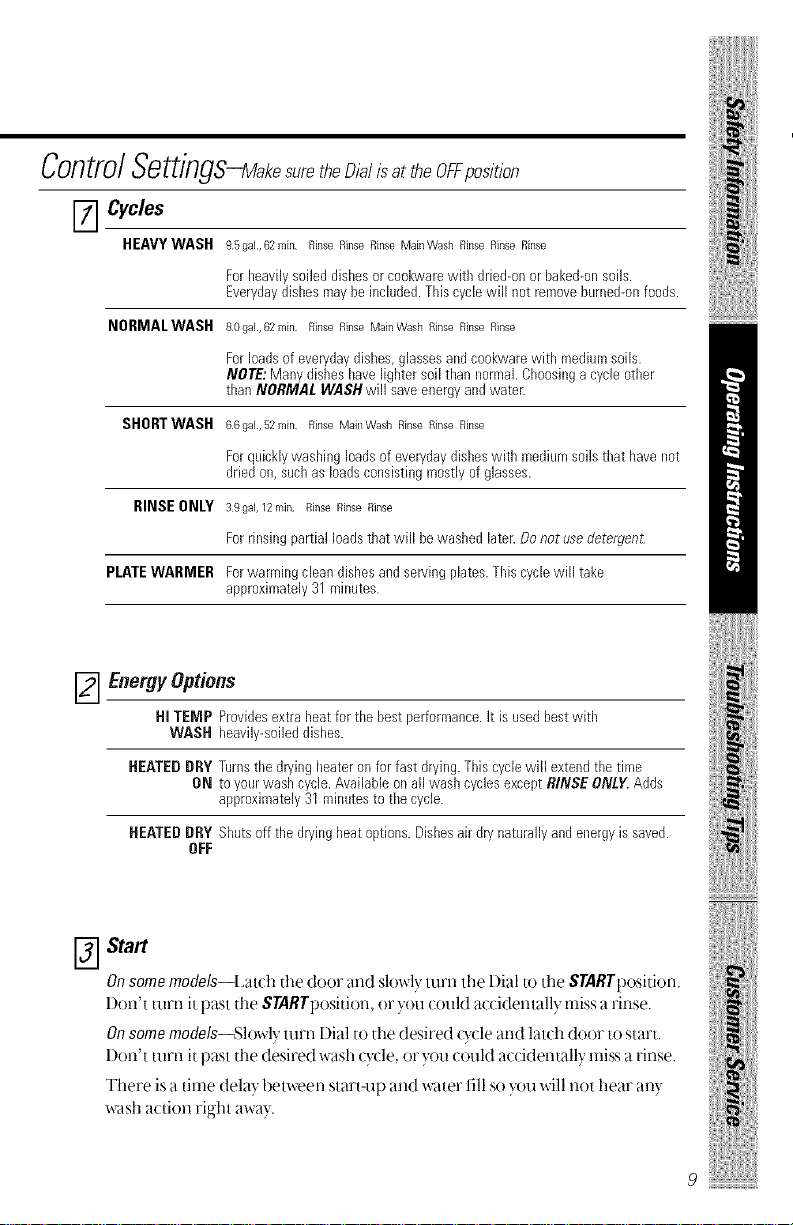
Controlo ..-__OemtlgS_MakesuretheD,: iisattheOFF os,t on
F_ Cycles
HEAVYWASH 95gal,62min RinseRinseRinseMainW_shRinseRinseRinse
ForI_eaviiysoileddishesorcookwarewith dried-onor baked-m1soils.
Everydaydishesmaybeincluded.Tldscyclewill not removeburned-onfoods,
NORMALWASH 80gN,62min Rinse Rinse Main\A/ash Rinse Rinse Rinse
Forloadsof everydaydishes,glassesandcookwarewith mediumsods.
NOTE:ManydishesI_avelightersodthannormal.Choosingacycle otller
tllan NORMAL WASHwiii saveenergyandwater.
SHORTWASH 66gN,52min Rinse MainWash Rinse Rinse Rinse
Forquicklywashingloadsof everydaydisheswith mediumsoilstMt havenot
driedon, suchas leadsconsistingmostlyofglasses.
RINSEONLY 39gN, 12min Rinse Rinse Rinse
Forrinsingpartial loadsthat will bewastled later.Donot usedetergent
PLATEWARMER Forwarmingclean dishesandservingplates.Tiffs cyclewill take
approximately31 minutes.
il/i/!
Energy Options
HITEMP ProvidesextraIleat for the best performance,it is usedbestwitll
WASH heavily-soileddishes.
HEATEDDRY Turnsthe dryingheateron for fast drying.Thiscyclewill extendthetime
HEATEDDRY Shutsoff the dryingheatoptions.Dishesairdry naturallyand energyissaved.
ON toyourwashcycle.Availableonall washcyclesexcept RINSEONL_ Adds
approximately31minutesto the cycle.
OFF
_ Start
On some modds--Lauh the door and slowly turn the Dial to the STARTpositkm.
l)on't turn it past the STARTposition, or you could accidentally miss a rinse,
On some models--Slowly turn Dial to the desired Qvle and latch door to start,
Don't turn it past the desired wash cT<le, or you could accidentally miss a rinse.
There is a time delay between start-up and water till so 7,x_uwill not hear any
wash action right awax.,
Page 10

7iiJi!iiiii/iTiiiii!!!iiiHiiiiii
Aboutthe dial cycles.
iiiiiiiiiiiiiiiiiiiiiiiiiiiiiiiiiiiii
Z elOrtMt,LWASH
ii i i i i i i
RINSEOmYI_
Short Wash (on some models)
For quickl} washirig loads of eyed day dishes with
mediuna soils that have not dried on.
[_] Select the NORMALWASHcycle and any options.
['2-] Besure the door is unlatched,
[_] Slowly mm the Dial to SHORTWASH.
[-_I_atch the door to start the cy(le.
Rinse Only
For rinsing partial loads that will be washed later. Do not
use detergent
[-_ Make sure HEATEDDRYOFFisselected.
['2-] l?,esure the door is unlatched.
[_] Slowl_ turn the I)ial to RINSEONLY,
iiiiiiiiiiiiiiiiiiiiiiiiiiiiiiiiiiiii_ O
[_l_atch the door to start the cycle,
Plate Warmer (on some models)
O_F
For warmino-odean dishes and serving plates. This (?cle
will take approximately 31 minutes.
[_]I x)ad clean dishware to be warmed.
['_ Select HEATEDDRYON.
['_Be sure the door isunlatched.
['_ Slowly turn the Dial to PLATEWARMER.
N I_atch the door to start the c?_:le.
Page 11

il/i/!
0F_
Heavy,Norma/ and Short Wash (on some models)
[_]ge sure the door is unlatched.
['_ Slowly mrn the dial to the cycle you want. Don't
turn it past this position, or yon could accidentally
miss a rinse.
[_] Select an} options.
[_]l_atch the door to start the cy(le.
iiiiiiiiiiii iiii!iit
77
Page 12

iiiJi!iiiii/iiiiiii!!!iiiHiiiiii
Usingthe dishwasher.
Checkthe WaterTemperature
The entering water must be at least 120°1_.and not more than
150°F., t_)r etlective cleaning and to prevent dish damage. Check
the water temperature with a candy or meat thermometer. Ttlrn oil
the hot water faucet nearest the dishwasher, place the thermometer
in a glass and let the water run continuousl} into the glass until the
temperature stops rising.
UseJet-Drg® RinseAgent
det-Dt_ rinse agent removes spots and prevents new tilm btfild-up
on }our dishes, g a 'ses tlatware cookware and plastic.
Fill tile rinse agent dispenser
until it reaches the bottom of lip
inside the opening. Replace cap.
ls
To check if rinse agent is needed,
remove the cap and look into tile
dispenser.
Afull dispensershouldlastabout
onemonth.
If rinse agent spills, wipe up the excess.
Page 13

ProperUseof Detergent
Use ordy deterger_t specifically made tot use in dishwashers. Cascade'
Automatic I)ishwashir N Detergent has l)een approved t?)r use in all
(;E dishwashers Keep your detergent ti'esh and (h)_ Don't put powder
detergent into tile dispenser until you're ready to wash dishes,
Tile 3rllOlltlt oI detergent to use depends on whether }our water is
hardor soft. With hard water. )ou need extra detergent. With sotk
water, }Oilneed less detergent.
Protect)our dishes and dishwasher by contacting your water
deparunent and asking how hard your water is. Twelve or more gTains
is extremel? hard water. A water sotiener isrecommended. Without
it, lime can build up in tile water valve, which could stick while open
_lrld cause t]oodin _ Too rntlch deter_,-ent with s()t'lwater can cause a
permanent cloudiness of glassw_u'e,called etching.
You'll find two detergent dispensers on tile f v_--_
except RINSEONtYrequire detergent in the open Cup ,_
111_1illcup. _ _tStlcycles with txsowashes will also
use the open cup. _ lien using atltoinati(;
illil!
dishwashing detergent tabs, simply place one .__
tab ill tile main cup and close,
Be sure tile Dial is OFFbet_)re additw- deter_ent ()therwise. tile
detergent cup _11 not close mad latch properly. Add detergent, then
close tile main cup.
NOtE:To open detergent cup alier it has
been closed, simply turn the detergent cup
handle counter<lockwise until it releases.
A snapping sound ma)be heard.
ForgettoAdd a Dish?
A tk_rg-otter_dish can be added an? time betk)re tile rnair_wash.
_ t'ush tile door latch to tile letL
()rice the water calms, open tile door. Steam ma) rise out of tile
::::::::::::dishwasher.
3Add tbrgotten dishes.
_(;lose tile door and push the latch to tile t_r right.
_iiiiii_,,,i_,,liiiiiii!i!l
iiiiiiiiiiii iiii!iit
13
Page 14

iiiJi!iiiii/iiiiiii!!!iiiHiiiiii
Loadingthe dishwasher racks.
For best dishwashing results, follow these loading guidelines. Features and
appearance of racks and silverware baskets may vary from your model.
UpperRack
Tile upper ra/k is t_)rglasses, cups and sau/ers.
Cups and glasses fit best alor N tile sides. This is
also a secure place ti)r dishwasher-sate plastics.
Ttle upper rack is good tor all kinds of odd-
shaped utensils. Sauce _3aIls_,mixinoo bowls,an(l
other items should be placed thee down.
Securelargerdishwasher-safeplasticsovertwofingers
whenpossible.
Makesuresmallplasticitemsaresecuresotheycan'tfall
ontotheheatingelement.
The Wash Tower
Keep the center areaclear in thelower rac/_
Tile wash tower rises throug-h tile center ot tile
lower rack during tile wash and rinse portions
ot ttle _)cle.
Don'tblockit or toadtallthingsnexttoit
Also, be careflll not to let a
portion otan item such as a pot
or dish handle extend through
the bottom rack. This could
block the wash arm and cause
poor _stling resuhs.
Page 15

!:
i_ 'i,,I......
Don'tletany
itemextend
Lower Rack
Whenloadingthelowerrack,donot/oadlargeplattersor
traysinthefrontrightcorner.Theymaypreventdetergent
fromcirculatingduringthewashcycle.
The lower rack is best used tor plates, saucers,
and cookware, l_arge items Stl(h as broiler
pans and racks should go along the sides.
Is)ad platters, pots and bowls along the sides,
in corners, or in the back. The soiled side of
items should titce the center of the rack.
Silverware Basket
t'ut tlatware in the removable basket with tork
and knite handles up to protect your hands.
Place spoons in the basket with handles down.
Mix knives, torks and spoons so they don't nest
together. Distribute evenly. Small plastic items.
such as rneasuring spoons and lids ti'om srnall
containers, should go in the bottom otthe
silve_avare basket with silve_avare on top.
iiiiiiiiiii! iii :m
15
Page 16

7iiJi!{iiii/iT{iiii!!!iiiHiiiiii
Caringfor the dishwasher.
Toclean the control panel use a lightly dampened cloth then dry
thoroughly. Toclean the exterior use agood appliance polish wax.
Never use sharp objects, scouring pads or harsh cleaners on any
_art of the dishwasher.
Protect Against Freezing
11your dishwasher is lell in an unheated pla{e (lurirzg
the winter, ask a service techrfidan to:
_ CuI otl electrical power to the dishwasher
Remove fuses or trip circtfit breaker.
_UHK cov£r SC[SWS
2 Turn ()tl the waier supply and disconnect the water
irfiet line trom tile water valve.
l)rain water t]rom the inlet line and water valve.
' (Use a par_ to catch the water.)
_ Recormect the water inlet line to the water valve
:_ Remove tile plastic surnp cover in the tub
' a bottonl and use a sponge to soak lip water
in tile rubber boot.
Does YourDishwasher Have an A# Gap?
An air gap protects your dishwasher against water
backing up into it ira drain cloo's The air gap is
igl._::==== not apart ofthe dishwasher. It is not covered b?
__ _our warratm, Not all phunbing codes require
__ air g-aps, so ,ou rna, not have one.
gap easy
The a# is to clean.
Chockthoairflapanytimoyour Turn ott tile dishwasher and liti off the
dishwasherisn'tdrainingwolZ dlronle cover.
Unscrew tile plastic cap and dean with a toothpick.
Page 17

Aboutoptionalrack accessories.
Baby Bottle Holder
Part Nmnber: WX69X200
i_ Prevents movement of baby bottles during the
dishwasher cycle
i_ Snaps easily onto any dishwasher upper rack
i_ Eliminates hand washing
For best results,
the Baby Bottle
Holdershould
beinstalled on
the upper rack
of the dishwasher.
_ Fits all baby bottles
You can order a package of 5 Baby Bottle Holders, at extra
cost, by calling 800-626-2002, or through the Intemet at
www GEAppliances.com (Visa, MasterCard, or Discover
cards accepted).
illil!
;_iiiiii_,,,i_4iiii!i!l
iiiiiiiiiiii_iiii!iit
17
Page 18

iiiJi!iiiii/iiiiiii!!!iiiHiiiiii
Aboutoptionalaccessories.
Youcan change the door and lower access panel appearance of your
dishwasher by ordering one of these optional accessories:
These accessories are available at extra cost (VISA,MasterCard, or Discover
cards accepted) by calling 800-626-2002.
Specify accessory number when ordering.
_ Color Panels
_ 1/4" Wood Panel TrimKit
_: 3/4" Trimless PanelKit
Descriptionsof OptionalAccessories
Colorpanels--Replacernent door panels and lower accesspanels
are availal)le in the following colors:
i_ GPF3OOA(Almond)
GPF3OOB(Black)
_':_GPF3OOW(White)
Woodpaneltrimkit--This ac(essoD-(ontains trim and instructions
t()r you to supply and inst_dl a 1/4" thi(k de(orative wood door and
lower access panel:
N GPF325A(Almond)
i_ GPF325B(Black)
i_ GPF325W(White)
NOTE:The GPFIO0dishwasherdoorspring kit must also be ordered
mM inst_dled whenthe doorpanel weighsfour Ibs.ormore.
Trimlesspanelkit--This ac(essory (ontains parts andinstructions
ti)r you to supply and install a 3/4" thkk de(orative x_x)o(ldoor and
lower access panel:
N GPF375
NOTE:The _PFIO0dishwasher doer spring/tit will be included with
the trimloss panel kitand must be installed with it.
Page 19

Beforeyoucall forservice...
Troubleshooting tips
Review the charts on the following pages first and
you maynot need to call for service.
: Possible Causes What To Do
Dishwasher won't run Fuse is blown, or the
circuit breaker 1ripped
Noise Some of the sounds
you'll hear are normal
Utensils are not sectwe
in the rack or something
small has dropped into
the rack
Motor hums ' l)ishwasher has not been
Replace fuse or reset
circuit breaker, P.emove
an} other appliances ti'om
the circuit.
Hard tood disposal
shreddino- action
Drain valve operfir N to
pump water out.
Timer control as t?cle
progresses,
Detergent cup opening.
The motor stopping during
the (hying period.
Make sure eveiTthing is
se(alred in dishwasher.
used on a regaflar basis,
Ifyou do not use your
dishwasher often, set it
to fill and pump out once
eve_)"week. This will help
keep the seal moist and
h ? rl , "t e ga )age (hsposer clear.
iillii!iiiiiiiiiiii ii iiiii!ii
/9
Page 20

Beforeyoucall forservice...
Troubleshooting .tips
!i!iiliiiiiiliiliiiiiiiiiiii!
Waterstandingin This is normal
thebottomof thetub
Water won't pmnp
out of the tub
Suds in thetub Correct detergent
Possible Causes
Drain is clogged
wasn't used
Rinse agent
was spilled
What ToDo
A small amount of clean
water arotlnd tile Otltlet oil
the ulb bottom at the back
ot the tub keeps the water
seal lubricated.
II}ou have an air _l:_a)
clean it.
Check to see it your kitchen
sink is draining-well. If not.
you may need a pluml)er.
I1the dishwasher drains
into a disposer, run
disposer clear.
Use only automatic
dishwasher detergents to
avoid sudsing. Cas(ade _
&utomatic l)ishwashino-
l)etergent has been
approved i0r use in
all GE dishwashers.
To remove suds t['om tile
tub, open the dishwasher
and let suds evaporate.
Add I _oallonof cold water
o
to the tub. Close and latch
the dishwasher. Pump out
xsater l)v skin lv turr_ no-the
Dial until a drain period
is reached. Repeat if
ne/essmT,
Alwa} swipe up rinse agent
spills immediatel}.
2O
Page 21

i_ Possible Causes
What ToDo
Stainedtubinterior Detergent with
colorant was used
Some tomato-based
foods can stain
Dishesdon_dry
Dishesandflatvvare
notclean
Low inlet water
temperature
Rinse agent dispenser
is empty
Inlet water temperature
is below 120°F.
Water pressure is
temporarily low
Air gap is clogged
hnproper rack loading
Some deterg-ents contain
colorant (pigment or dyes)
that will discolor the tub
interior with extended use.
Check the (letergent
cup for signs ot any
discoloration. I1_alp is
discolored, change to
detelgent without any
colorant. Cascade '_
Autonlatic Dishwashing
I) rpete ge _t has been
approved i_r use in all
GE dishwashers.
' Use otthe RINSEONLY
c?vle (on some models)
after adding tim dish to the
load can de{xease the level
ot stainin ,
Make stlre inlet water
temperature is correct.
Check the rinse agent
dispenser.
Raise the water beater
temperature to 120°1_
Ttlrn on a titucet. Is water
confing out more slowly
than usual? It so, wait until
pressure is normal bet0re
using y_ur dishwasher.
Clean the air _,-aD
Make sure lane dishware
does not block the
detergent dispenser
or the wash arnl.
iillii!iiiiiiiiiiii ii iiii!ii
27
Page 22

Beforeyoucall forservice...
Troubleshooting tips
Possible Causes WhatToDo
!i!iiliiiiiiliiliiiiiiiiiiii!
Spots and fihning
on glasses and
flatware
Cloudinesson
glassware
Extremely hard water
Low inlet water
temperature
Overloading, the
dishwasher
Improper loading
OM or damp powder
detergent
Rinse agent dispenser
empty
Too little detergent
Use det-Dry ® rinse
remove spots and prevent
new film build-up.
agent
To relllove Stllb[)Ol'i1 spots
and pre-existing fihn Rein
glassware:
I Remove all metal utensils
fi'om tile dishwasher,
2 I)o not add detergent.
3 Select the longest tycle.
4 Start the dishwasher and
allow to run tot 18 to 22
minutes, l)ishwasher will
now be in tile main _lstl.
5 Open tile door and pour
2 cups (500 ml) of white
_.ln o F"
/ ega lilt() the bottoln ot
tile dishwasher.
O(;lose the door and allow
to complete tile tycle.
If vinegar rinse doesn't
_x)i-k:Repeat as above,
except use i/4 cup (60 ml)
ot citric acid {Tvstals
instead of vinegar.
Combination of soft
water and too much
detergent
This is called etchingand
is permanent. To prevent
this ti'om happening, use
less detergent if ?_u have
soft water, Wash glassware
in tile shortest Q-cle that
will get them clean.
Water temperature 1x)wer tile water heater
entering the dishwasher temperature.
exceeds 150°E
to
22
Page 23

i Possible Causes
Yelloworbrownfihn
ontub
Tea or coffee stains
What ToDo
Remove the stain by hand,
using a solution of i/2 (_lp
bleach and 3 cups warm
water.
WARNING
Before cleaning interior,
wait at least 20 minutes
after a _ycle tor the
heating element to cool
down. Faihlre to do so
can resuh in burns.
iillii!iiiiiiiiiiii ii 'iiiii!ii
Whitefihnoninside
surfaces
An overall yellow or
brown film can be caused
by iron deposits in water
Hard water minerals
' A special filter in the water
supply line is the onlyway
to correct this problem,
Contact awater softener
company.
' To clean the interior, apply
dishwasher detergent to
a damp sponge. Wear
rubber gloves. Donotuse
any wpe of cleanser other
than dishwasher detergent
because it may cause
foanfin , or sudsing
Cascad#' Automatic
Distm ashin Detergent
has been approved tor
use in all GE dishwashers.
g ,
22
Page 24

Beforeyoucall forservice...
!i!iiliiiiiiliiliiiiiiiiiiii!
Detergent cup lid Dial is not in the OFF Turn the I)ial to OFF
won't latch position and slide the door lat(b
Detergent left in Dishes are blocking the Reposidon tl_e dishes.
dispenser cups detergent cups
Steam This is normal Steam tornes tln'ougb
Black or gray Aluminum utensils have Remove marks widl _ miM,
marks on dishes rubbed against dishes abrasive deauer.
Troubleshooting tips
Possible Causes What To Do
to the lelL
the vent by fl_e door latch
during (h)ing and when
w_uer is being pumped ore.
24
Page 25

GE Service Protection Plus TM
GE, a name recognized worMwide for qualit? and dependability,
offers you Serv ce Protection PlusVM--cornprehens ve protect (ill orl
all }our appliances--No Matter What Brand!
Benefits Include:
Backed by GE
All brands covered
Unlimited service calls
All parts and labor costs included
No out-of-pocket expenses
No hidden deductibles
One 800 number to call
You will be completel} satistied with our service protection or }ou rna} request your
mone} back on the remaining value ot }our contract. No questions asked. It's that simple.
Protectyourreti'igerator, disbwasl_er._asberanddrver,, ram,-eo TV. VCRandrnuch
more--any brand! Plus there's no extra charge for emergenc? service and low rn( ntbly
finar_cing is available. Even icernaker coverage and food spoilage protection is offered.
You can rest easy. knowino- that all '_our vahlable |lousehold products are protected
against expensive repairs.
Place }our confidence in GE and call us in the U.S. toll-fl'ee at 800-626-2224
tor rnore irfforrnation.
_AII hiands ( ox eled tip It} 20 x eal'S old ill lhe COl]linerlla] [ J.S.
............................................................. _.,_. Cut he_
We'll CoverAny Appliance.
Anywhere. Anytime.*
Please place in envelope and mail to:
General Electric Company
Warranty Registration Department
P.O. Box 32150
Louisville, KY 40232-2150
25
Page 26

Consumer Product Ownership Registration
l)ear (;ustomer:
Thank you for purchasing our pro(hut and thank )ou for placing your contidence in us.
We are proud to have you as a CllStOHleI'!
Follow these three steps to protect your new appliance investment:
M'ter mailim,-
your Consumer
Product Ownership
Complete and mail
Registration today.
Have the peace ot
mind of knowing we
can contact you m
the unlikel} 'event of
a satet} n]odilication.
the registration below,
store this docm-nent in
a sale place. It
contains intormation
you will need should
you require service.
Our service number is
800 GE (;ARES
(800432-2737).
Model Number Serial Number
I I I I I I I I I I I I II I I I I I I I I
Important: If you did not get a registration card with your product, detach and
return the form below to ensure that your product is registered, or
register online at www.GEAppliances.com.
...................................................................>__(.:_L_,_.
Consumer Product Ownership Registration
Read your ()wner's
Manual careflflly.
It will help 7,x}tl
operate yo[li" new
appliance properly.
I ........... I I,, ,, ,, ,I
Mr. [] Ms. [] Mrs. [] Miss []
Namel I I I I I I I I I Name I I I I I I t I I I I t I
Street I I
Address i i i i i i i i i i i i i i i i i i i i i i i i i i
I I I,I_ip I
(;it) i i i i i i i i i i i i i State Code i i i i
DatePlat{d InUse Pholle
Model Number Serial Number
Morn,, Da,t__J,ea&J Nurnl,erl,,I-I,, I-I , , , I
()ccasionallv, we ma_ allow selected companies to send you inforn]ation.
[] Check here if you do not want this information.
Appliances " "
GE
General Electric Company
Louisville, Kentucky
wwwGEApp/iances com
26
Page 27

GEDishwasher Warranty
All warranty service provided by our Factory Service Centers,
or an authorized Customer Care®technician. For service,
call 800-GE-CARES.
GEWill Replace:
One Year
From the date of the
original purchase
Ten Years
From the date of the
original purchase
Anypartoi the dislr, vasher wlfidl tidls due to a deiect in
materials or workmanship. During tiffs fall one-year
warranW, (;E will also provide, free of charge, all labor
and in-home servke to repla(e the dete(tive part.
The Perma Taf® tab or doer liner,it it tidls to contain water
due to a detect in materials or workmanship such as
cracking, dripping, peeling or rusting. I)uring this fall
ten-yearwarranty,GE will also provide, free of charge, all
labor and in-home service to replace the det_'ctive part.
iiiii!i iiiiiii
_iiii_ii!,!i;iiiii_iiii_iiiii_
i!iiiiiii i
_ Service trips to your home to teach
you how to use the product.
Improper installation.
_ Replacement of house fuses or
resetting of circuit breakers.
i_ Failure of the product if it is
abused, misused, or used for other
than the intended purpose or used
commercially.
Thiswarranty is extendedto the original purchaserand anysucceeding owner for productspurchased
for home use within theUSA, le Alaska, the warranty excludes thecost of shippingor service calls to
yourhome,
Some statesdo not allow the exclusion or limitation of incidentalor consequential damages. This
warrantygives you specific legal dghts, and you may also have other dghts which varyfrom state to
state. Toknow what your legal rights are, consult your local or state consumer affairs office oryour
state'sAttoreey General
Warrantor: General Electric Company. Louisville, KY 40225
_ Damage to the product caused by
accident, fire, floods or acts of God.
i_ Incidental or consequential damage
caused by possible defects with this
appliance.
_ Cleaning or servicing of the air gap
device in the drain line.
27
Page 28

ServiceTelephoneNumbers.
GEAnswer Center_ _oo.e26.2ooo
The (,E Ans',_er (;e _te_ _sopen 24 tours a day, 7 days a week.
OR
Visit our '_,tebsite at: www..GEAppIiances.com
iiiiii_iiii!iliiiiiiiii!i!,!,iiiiii!
iii!!!i iii!iii!
iiiiliiiiiii_i_ii,iiiii_iiiiiiii_
In-HomeRepairService800-GE-CARES(800-432-2737)
Expert (;E repair servke is ordya phone _all awa).
SpecialNeedsService800.626.2000
TDD 800-TDD-GEAC (800-833-4322)
tIE otiers, fi'ee ot charge, a broclmre to assist in planning a barrier-
fl'ee kitchen tbr persons with limited mobilit}.
ServiceContracts800-626-222#
lq_rchase a (;E service contract while your warranty is still in etlect
and you'll receive a substantial discount. (;E Consumer Service will
still be there after }our warrant? expires.
PartsandAccessories800-626-2002
Individuals qualified to sePdce their o'_m appliances can have parts or
accessories sent directly to their homes (VIS.\, MasterCard, and
Discover cards are accepted).
Instructionscontainedin thismanualcoverprocedurestobeperformed
byanyuser,Otherservicinggenerallyshouldbe referredto qualified
servicepersonnel,Cautionmustbe exercised,sinceimproperservicing
maycauseunsafeoperation.
ServiceSatisfaction
lfT,x)u are not satislied Mth the service you receive fl'om (;E, ti:dlow
these steps. First contact the people who sePdced your appliance.
Next it}ou are still not pleased, write all the detaUs--including your
phone number-to: Manager, Customer Relations,
GE Appliances, Appliance ['ark, I.ouisville, KY 40225.
2_ Pr;nt_d;nZol_s_;ll_/(Y
 Loading...