

Page 1
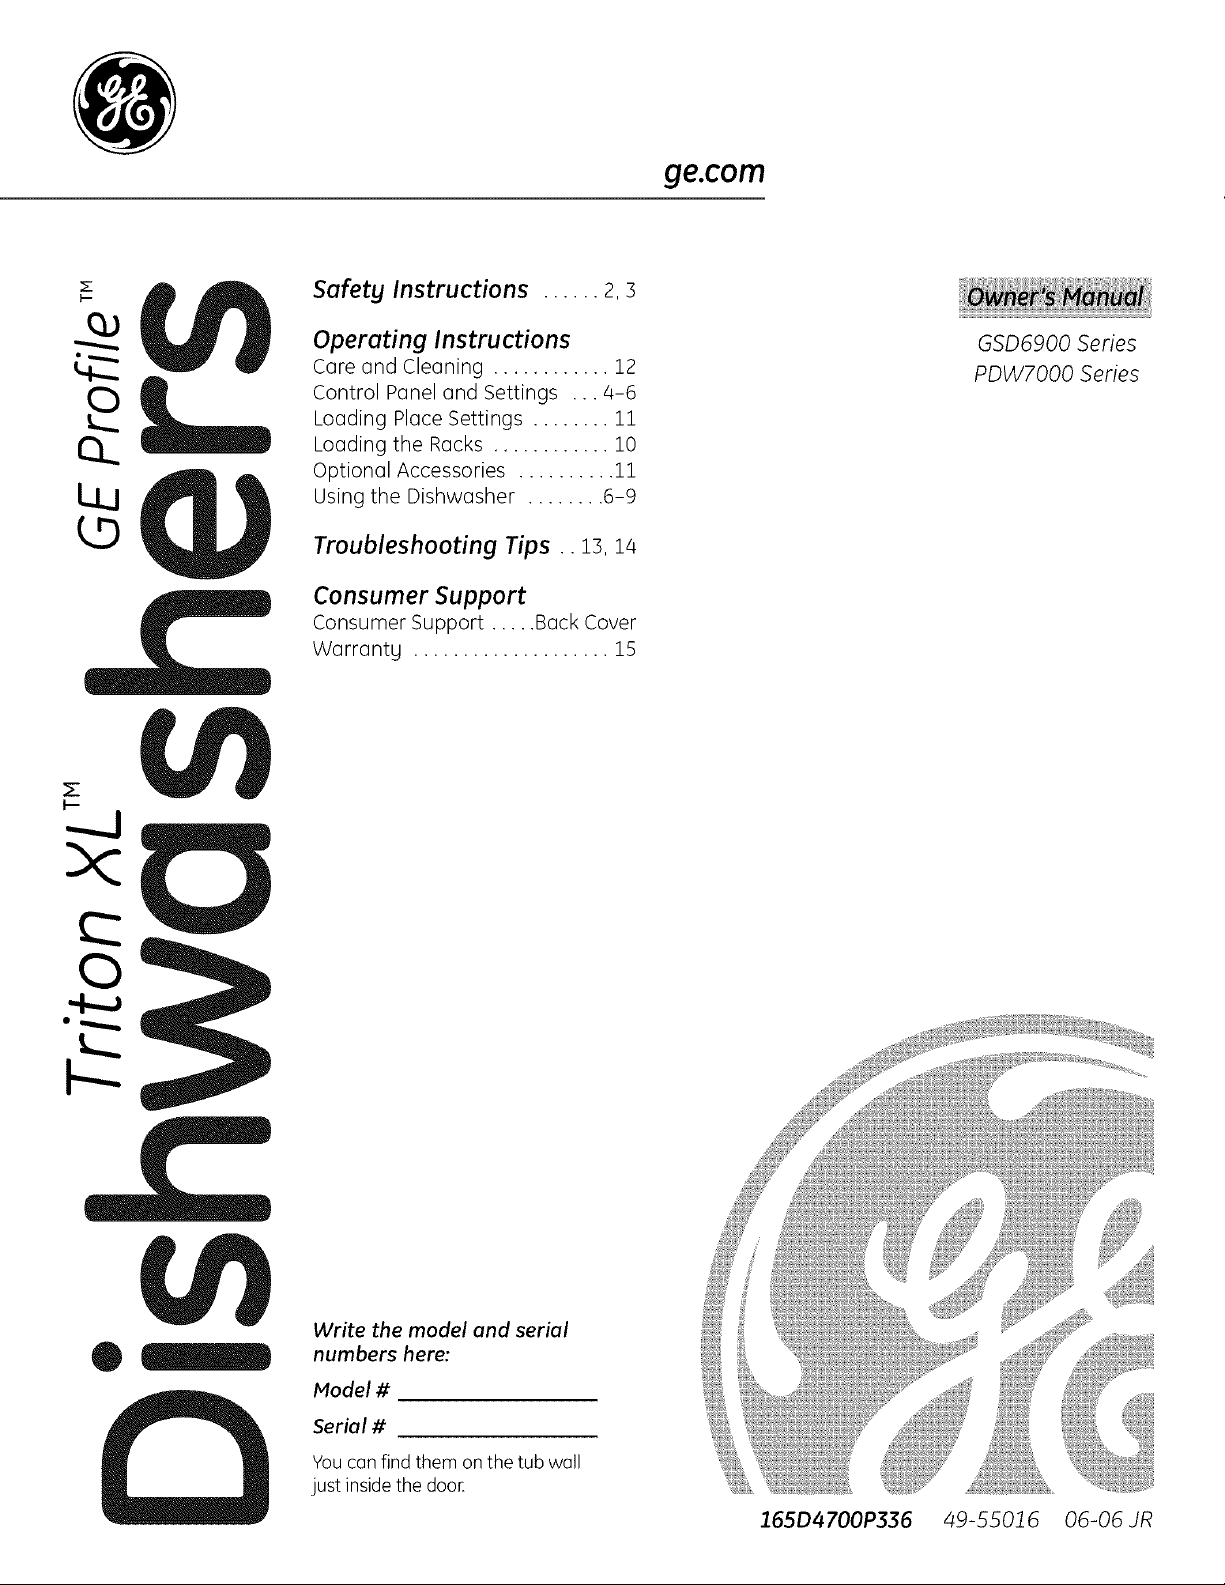
Safety Instructions ...... 2,s
ge.com
Operating Instructions
Care and Cleaning ............ 12
Control Panel and Settings ... 4-6
Loading Place Settings ........ 11
Loading the Racks ............ 10
Optional Accessories .......... 11
Using the Dishwasher ........ 6-9
GSD6900 Series
PDW7000 Series
Troubleshooting Tips .. 13, 14
Consumer Support
Consumer Support ..... Back Cover
Warrants .................... 1S
z
C)
Write the model and serial
numbers here:
Model #
Serial #
Youcan find them on the tub wall
just insidethe doon
165D4700P336 49-55016 06-06 JR
Page 2
IMPORTANT SAFETY INFORMATION.
READ ALL INSTRUCTIONS BEFORE USING --
SAVE THESE INSTRUCTIONS
WARNING!
For your safety, the information in this manual must be followed to minimize the risk of fire
or explosion, electric shock, and to prevent property damage, personal injury, or death.
WARNING! WATERHEATERSAFETY
f _,l'_ _ Under certain conditions, hydrogen gas may be produced in o water heater that has not been used
for two weeks or more. HYDROGEN GAS ISEXPLOSIVE.
If the hot water has not been used for two weeks or more, prevent the possibilitgof damage or injury
bg turning on all hot water faucets and allow them to run for several minutes. Do this before using ang
electrical appliance which isconnected to the hot water sgstem.Thissimple procedure will allow any built-
up hydrogen gas to escape.Sincethe gas is flammable, do not smoke or use an open flame or appliance
during this process.
PROPERINSTALLATIONAND MAINTENANCE
This dishwasher must be properly installed and located in accordance with the Installation
Instructions before it is used. If you did not receive on Installation Instructions sheet with
gout dishwasher, you con receive one bg visiting our website at ge.com.
• Connect to a grounded metal, permanent wiring
system; or run an equipment-grounding
conductor with the circuit conductors and
connect to the equipment-grounding terminal
or lead of the appliance.
• Improper connection ofthe equipment-grounding
conductor can result in a riskof electric shock.
Checkwith a qualified electrician or service
representative if you are in doubt whether the
appliance is properly grounded.
• Dispose of discarded appliances and shipping
or packing material properly.
• Do not attempt to repair or replaceany part
of your dishwasher unlessit is specifically
recommended in this manual. All other servicing
should be referred to a qualifiedtechnician.
• Tominimize the possibility of electric shock,
disconnect this appliance from the power supply
before attempting any maintenance.
NOTE:Turningthedishwasher off does not
disconnectthe appliance from the power supply.
Werecommend having o qualified technician
serviceyour appliance.
CAUTION: Topreventminorinjurgorpropertgdamage
• Contents washed in Anti-bacterial mode, if
available, may be hot to the touch. Usecare
before handling.
• Using adetergent that is
not specificallydesigned
for dishwashers will cause
the dishwasher to fill with
suds.
• If your dishwasher is connected to a
wall switch, ensure that the switch is
on prior to use.
• On dishwasherswith electronic controls,
if you choose to tum the wall switch
off between wash cycles,allow 5-10
seconds after turning the switch on before
touching START/RESETto allow the control
to boot.
• Non-DishwareItems:Do not wash items such
as electronic air cleaner filters,furnace filters and
paint brushes in your dishwasheEDamage to
dishwasher and discoloration or staining of
dishwasher may result.
• Closesupervisionis necessary if this appliance
is usedbg or near children.
• Load light, plastic items so they will not
become dislodged and drop to the bottom
of the dishwasher-they might come into
contact with the heating element and be
damaged.
Page 3
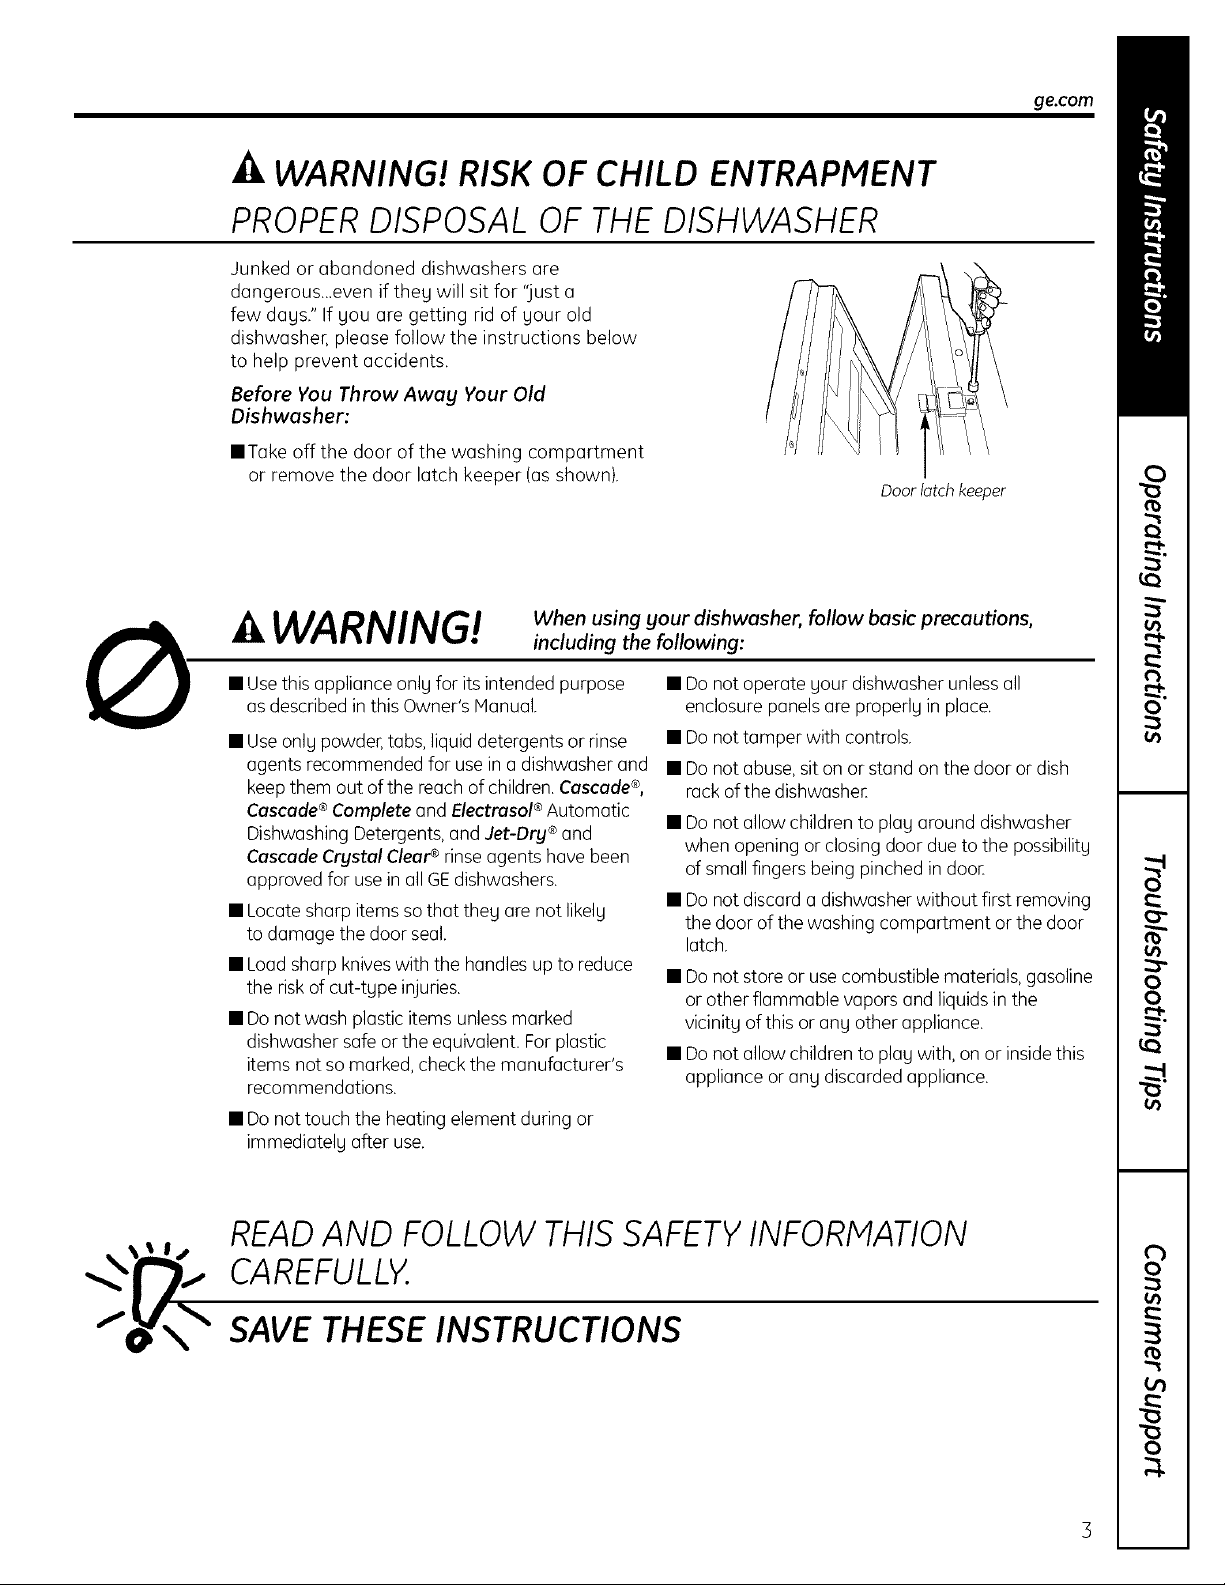
_i, WARNING! RISK OF CHILD ENTRAPMENT
PROPER DISPOSAL OF THE DISHWASHER
Junked or abandoned dishwashers are
dangerous...even if they will sit for '_justa
few days." If you are getting rid of your old
dishwasher, please follow the instructions below
to help prevent accidents.
Before You Throw Away Your Old
Dishwasher:
• Take off the door of the washing compartment
or remove the door latch keeper (asshown).
Door latch keeper
ge.com
WARNING!
• Usethis appliance only for itsintended purpose • Donot operate your dishwasher unlessall
as described in this Owner's Manual. enclosure panels are properly in place.
• Use only powder,tabs, liquid detergents or rinse • Do not tamper with controls.
agents recommended for usein a dishwasher and • Donot abuse, sit on or stand on the door or dish
keepthem out of the reach of children.Cascade®,
Cascade®Complete and Electrasol®Automatic
Dishwashing Detergents,and Jet-Dry ®and
Cascade Crystal Clear¢ rinseagents havebeen
approved for usein all GEdishwashers.
• Locate sharp items so that they are not likely
to damage the door seal.
• Load sharp kniveswith the handles up to reduce
the riskof cut-type injuries.
• Do not wash plastic items unlessmarked
dishwasher safe or the equivalent. Forplastic
items not somarked, checkthe manufacturer's
recommendations.
• Do not touch the heating element during or
immediately after use.
When using your dishwasher, follow basic precautions,
including the following:
rack ofthe dishwasheE
• Donot allow children to play around dishwasher
when opening or closing door due to the possibility
of small fingers being pinched in dooE
• Donot discard a dishwasherwithout first removing
the door of the washing compartment or the door
latch.
• Donot store or usecombustible materials, gasoline
or other flammable vapors and liquids in the
vicinity of this or any other appliance.
• Donot allow children to play with, on or insidethis
appliance or any discarded appliance.
READAND FOLLOWTHISSAFETYINFORMATION
CAREFULLY.
SAVE THESE INSTRUCTIONS
Page 4
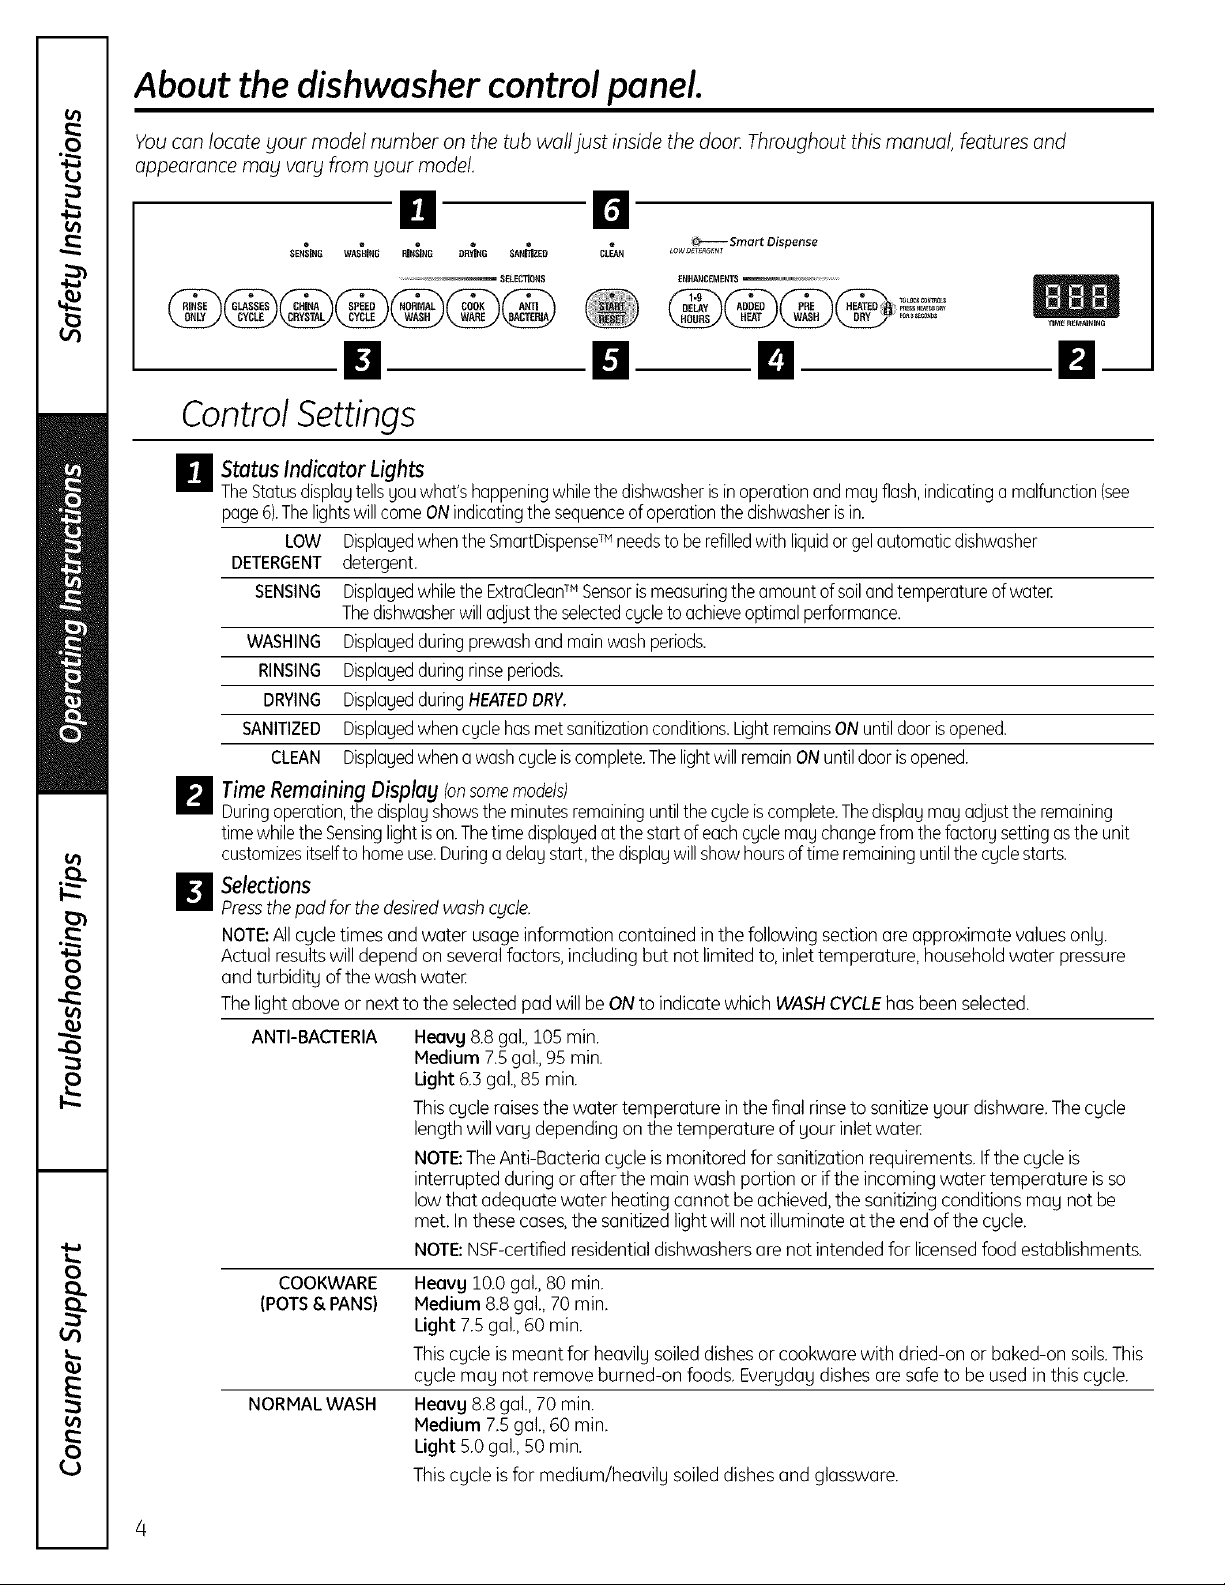
About the dishwasher control panel.
You can locate your model number on the tub wall just inside the doon Throughout this manual, features and
appearancemay vary from your model.
I!1 El
Control Settings
H Status Indicator Lights
TheStatusdisplagtellsUouwhat'shappeningwhilethedishwasherisinoperationandmauflash,indicatingamalfunction(see
page6).ThelightswillcomeONindicatingthesequenceofoperationthedishwasherisin.
LOW DisplayedwhentheSmartDispenseTM needsto berefilledwith liquidorgelautomaticdishwasher
DETERGENTdetergent.
SENSING DisplagedwhiletheExtraCleanTM Sensorismeasuringthe amountofsoilandtemperatureofwateE
Thedishwasherwilladjusttheselectedcycletoachieveoptimalperformance.
WASHING Displayedduringprewashandmainwashperiods.
RINSING Displayedduringrinseperiods.
DRYING DisplagedduringHEATEDDRY.
SANITIZED Displagedwhencycle hasmetsanitizationconditions.LightremainsONuntildoorisopened.
CLEAN Displagedwhena washcgcleiscomplete.ThelightwillremainONuntildooris opened.
D TimeRemainingDisplag (onsomemodels)
Duringoperation,the displayshowstheminutesremaininguntilthecycleiscomplete.Thedisplaymay adjustthe remaining
timewhiletheSensinglightison.Thetimedisplayedatthestartof eachcgclemaychangefromthefactorysettingastheunit
customizesitselfto homeuse.Duringa delaystart,the displagwillshowhoursoftime remaininguntilthecgclestarts.
_l Selections
Pressthepad for the desiredwash cycle.
NOTE:Allcgde times and water usageinformation contained inthe following section are approximate valuesonly.
Actual resultswill depend on severalfactors,including but not limited to,inlet temperature, householdwater pressure
and turbidity of the wash wateE
Thelight aboveor next to the selectedpad will be ON to indicate which WASHCYCLEhas beenselected.
ANTI-BACTERIA
COOKWARE
(POTS& PANS)
NORMAL WASH
Heavg8.8gal.,105min.
Medium 7.5gal.,95 min.
Ught 6.3gal.,85 min.
Thiscgcleraisesthe water temperature inthe final rinseto sanitizegour dishware.The cgcle
lengthwill vary depending on the temperature of your inlet water,
NOTE:TheAnti-Bacteriacgcle is monitoredfor sanitizationrequirements.Ifthe cgcleis
interrupted during or after the main wash portion or if the incoming water temperature is so
lowthat adequate water heatingcannot be achieved,the sanitizingconditionsmag not be
met. In thesecases,the sanitizedlight will not illuminate at the end of the cgde.
NOTE:NSF-certifiedresidentialdishwashersare not intendedfor licensedfood establishments.
Heavg 10.0gal.,80 min.
Medium 8.8gal., 70 min.
Light 7.5gal.,60 min.
Thiscgcle ismeant for heavilg soileddishes or cookwarewith dried-on or baked-on soils.This
cgcle mag not remove burned-on foods. Evergdagdishes are safe to beusedin this cgcle.
Heavg 8.8gal.,70 min.
Medium 7.5gal.,60 min.
Light 5.0gal.,50 min.
Thiscgcle is for medium/heavilg soileddishes and glassware.
Page 5
ge.com
SPEED CYCLE
(on some models
CHINA CRYSTAL
7.5gal.,35 min.
Thiscycle isfor everyday dishesand glassware.
7.5gal.,35 min.
Thiscgcle isfor lightly soiled china and crgstal.
GLASSES
(on some models
RINSEONLY
7.5gal.,35 min.
Thiscgcle isspecifically designed for glasses.
2.5gal., 10 min.
For rinsingpartial loadsthat will be washed later Donot usedetergent with this cgcle.
NOTE; The CHINA CRYSTAL/PLASTICS (some models) selector is a toggle pad, toggle the pod until the
desired cycle is indicated.
NOTE; This dishwasher is equipped with a CleanSensor TMwith automatic temperature control, therefore, cycle
length and time may vary depending on soil and temperature conditions.
NOTE; Only the Anti-Bacteria cycle has been designed to meet the requirements of Section 6, NSF 184 for soil
removal and sanitization efficacy.
_]l Enhancements/Extras
The light above the selected pad will be ON to indicate which ENHANCEMENT/ERTRA has been selected.
PRE WASH For use with heavily soiled and/or dried-on, baked-on soils. This option MUST be
(on some models) selected PRIOR to starting the cgcle. This option adds 16 minutes to the cycle time.
NOTE: Cannot be selected with RINSE ONLY cgcle.
HEATED DRY Shuts off the drying heat option. Dishes air dry naturally and energg is saved. For
Light OFF faster air dry, you can prop the door open after the CLEAN light illuminates.
HEATED DRY Turns the heater on for fast drying. This will extend the time to your wash cgcle bg 8
Light ON minutes for the SPEED CYCLE and 30 minutes for all other cgcles. NOTE: Cannot be
selected with RINSE ONLY cgcle.
LOCK
ADDED HEAT or When selected, the cgcle will run longer with heating elements on to improve both
EXTRAHOTWASH wash and dry performance. NOTE: Cannot be selected with RINSE ONLY cgcle.
(on some models)
DELAY HOURS
You can lock the controls to prevent any selections from being mode. Or you con lock
the controls offer you hove started o cycle.
Children cannot occidentally start dishwasher by touching pods with this option
selected.
To unlock the dishwasher controls, touch and hold the HEATED DRY pad for 3 seconds.
The light above the LOCK pad will turn off. To lock the dishwasher, touch and hold the
HEATED DRY pad for 3 seconds. The light above the LOCK pad will turn on.
You can delag the start of a wash cgcle for up to 9 hours. Touch the DELAY HOURSpad
to choose the number of hours you want to delag the start of the cgcle; then touch
START/RESET.The machine will count down and start automatically at the correct time.
Touching START/RESETa second time will cancel the DELAY START selection. NOTE: If
you forget to fully close the door, a reminder signal will beep until you do so.
RESET
To change a cgcle after washing starts, touch the START/RESETpad to cancel the
cycle. The START/RESETlight will flash while the water is pumped out if needed. This
takes approximately 90 seconds. When the light stops flashing, the dishwasher
can be reprogrammed and restarted.
Page 6

About the dishwasher control panel.
Start
m
Closethe dishwasherdoorandselectthecycleand
desiredenhancements.TouchtheSTART/RESETpadto
beginthecycle.Waterfillbegins,andapproximately60
secondslaterthewashactionbegins.
NOTE:Thedishwasherremembersyour lastcycleso
youdon'thaveto reprogrameachtime.Whenthe
dishwasherdoorisfullyclosed,the controlpanellights
willdisplaythe lastsettingsyouselected.
Clean
m
TheCLEANlightisilluminatedwhena washcycleis
complete.Thelightwillstay ONuntilthedoorisopened
andthenclosedandlatchedorwheno podispressed
withthedoorclosed.Youconturnoffthe CLEANlight
by pressingany padwhenthe dooris latched.
Flashing display lights.
Status Indicator Lights What It Means
If you don'twantto changeany ofthesettings,simply
touch the START/RESETpad to begin the cycle.
Ifthe door isclosed, the indicator lightswillturn
offifthe START/RESETpad isnot selected withintwo
minutes.Toactivate the display,open and closethe door
or press any pad.
Also,if a powerfailureoccurs,NORMALandHEATED
DRYwillautomaticallybe programmed.Makeanynew
selectionsandtouchtheSTART/RESETpadto begin
thecycle.
START/RESET
Using the dishwasher.
Check the Water Temperature
Theenteringwater shouldbeat least120%andnotmore
than150°Ffor effectivecleaningandto preventdish
damage.Checkthewatertemperaturewith acandyor
meatthermometenTurnonthe hotwaterfaucetnearest
Use Jet-Dry ®or Cascade Crystal Clear®Rinse Agent
Jet-Dry®orCascadeCrystalClear_rinseagentsremovespotsandpreventnewfilm builduponyourdishes,glasses,
flatware,cookwareandplastic.
Filling the Dispenser
Therinseagentdispenserholds5.5oz.of rinseagent.Undernormalconditions,thiswill
lastapproximatelyonemonth.Tryto keepitfull,but do notoverfill.
[] Makesurethedishwasherdoorisfullyopen.
r-zj Turnthedispensercaptothe leftand liftitout.
r_ Addrinseagentuntilthe indicatorwindowlooksfull.
F] Cleanupany spilledrinseagentwitha dampcloth. Indicator
r_-i Replacethedispensercop. window Dispenser cap
CyclehasbeeninterruptedbypressingtheSTART/RESETpad.Lightwillstop
flashingafterthedishwasherautomaticallydrainsoutthewaten
thedishwasher,placethe thermometerin aglassandlet
thewater runcontinuouslyintotheglassuntilthe
temperaturestopsrising.
RinseAid Setting
Theamountof rinseagentreleasedintothefinal washcanbeadjusted.Thefactory
settingisatthe midpoint.Ifthereareringsofcalcium(hardwater)spotson dishes,try a
highersetting.Ifyouseefoaminthedishwasher,movetheindicatorto a lowersetting.
Toadjust the setting
Removethe dispenser cap; then turn the adjuster counterclockwise to increasethe
amount of rinse agent, clockwise to reduce the amount of rinseagent.
Dish Preparation Prior to Loading
• Noprerinsingofnormalfoodsoilisrequired.
• Scrapeoffhardsoils,includingbones,toothpicks,skins
andseeds.
• Removelargequantitiesof any remainingfood.
• Removeleafyvegetables,meattrimmingsand
excessiveamountsofgreaseoroil.
• Removeacidicfoodsoilsthatcandiscolorstainless
steel.
agent
adjuster
Page 7

Manual Detergent Dispenser
Yourdishwashercomesequippedwithanautomaticliquid
dishwasherdetergentdispenser(SmartDispenseTM) anda
manualdispensenYoucanuseeitherofthesedispensers
butdon'tusebothatthe sametime.
SmartDispense TM
Manual Detergent
Dispenser
Thecoverofthemainwashsectionwillopenduringthe
washcgcle.IfgouareusingSmartDispenseTM, leavethe
coverofthe mainwashsectiondispenseropenbefore
startingthecgcle.
Forthe manualdispenser,Cascade®andElectrasol®
AutomaticDishwashingDetergentshavebeenapproved.
Youmagusepowder,liquid,gelortabletsinthisdispenser.It
isimportantto keeppowdereddetergentsandtabletsfresh
anddrgsothegdon'tloseeffectiveness.Therefore,do not
putdetergentintothemanualdispenseruntil gouarereadg
towashdishes.
ge.com
Forheavilgsoiledloads,usea bit moredetergent.Forwater
temperaturesabove140°F,useabit lessdetergent.
Medium Medium Extremelg
Soft Soft Hard Hard
L A' WAS
Forheavilysailedloads,usethePotsand PansorHeavyWash
eyrie.
DO NOTUSEHANDDISH DETERGENT
@_
m
m
Filling Manual Detergent Dispenser
Theamountof detergentto usedependson whethergour
waterishardorsoft.With hardwater,gouneedextra
detergent.Withsoftwater,gouneedlessdetergent.
Protectgourdishesanddishwasherbg contactinggour
waterdepartmentandaskinghowhardgourwateris.
Twelveormoregrainsisextremelghardwater.Awater
softenerisrecommended.Withoutit, limecanbuildupin
thewatervalve,whichcouldstickwhileopenandcause
flooding.Toomuchdetergentwithsoft watercancausea
permanentcloudinessofglassware,calledetching.
Usetheinformationinthetablebelowasa guideto
determinethe amountof automaticdishwasherdetergent
toplaceinthedispenser.Youmagusepowder,liquid,gel
ortabletsinthisdispenser.
Whenusingautomaticdishwashingdetergenttablets,
simplgplaceonetabletinthe mainwashsectionandclose
thecover.
Number
of Grains Detergent Cups to Fill
Lessthan 4 Fillcup to soft line (1/3full)
4 to 8 Fillcup to medium soft line (2/3full)
8 to 12 Fillcup to medium hard line
(completelg full)
Greater Fillboth main wash cup
than 12 and pre wash cup
NOTE:Usingadetergentthatisnotspecificallydesigned
fordishwasherswill causethedishwasherto fillwithsuds.
Duringoperation,thesesudswillspilloutofthedishwasher
vents,coveringthekitchenfloorandmakingthefloorwet.
Becausesomangdetergentcontainerslookalike,storethe
dishwasherdetergentina separatespacefrom allother
cleaners.Showangonewho magusethedishwasherthe
correctdetergentandwhereitisstored.
Whiletherewillbeno lastingdamagetothedishwasher,
gourdisheswillnotgetcleanusinga dishwashing
detergentthat isnot formulatedto workwith dishwashers.
Page 8

Using the dishwasher.
SmartDispense TMDetergent Dispenser Consomemodelsl
This dishwasher may have a SmartDispenseTM feature Setthe door at a comfortable angle to fill the
which automatically dispenses liquid automatic dispenseE
dishwasher detergent into each cycle based on soil
levelandwater hardness.
To utilizethe SmartDispenseTM Detergent Dispenser,
it must first befilled. Although any liquid or gel
automatic dishwashing detergent can be used in
the SmartDispenseTM system, all liquid or gel
automatic dishwashing detergents are not the same.
Most automatic dishwashing detergents are chlorine
bleach-based (such asCascade®or Electrasol®)
while others contain enzgmes(suchas Cascade
Complete®).
Do not mix ang chlorine bleach-based automatic
dishwashing detergent with any dishwashing
detergent containing enzgmes as this could cause
the detergents to congeal and lead to blockage of
the SmartDispenseTM sgstem. Checkthe detergent
label to determine if the detergent ischlorine
bleach-based or one that contains enzymes. It is
recommended that the same type of detergent be
usedwhen refilling your SmartDispenseTM system.
Aimthe detergent bottle at the opening in the door
and begin to fill.
CAUTION! Absolutely do not add
powder detergent, tablets or any liquidsoap or
detergent normally usedfor washing hands or
dishesin a sink.Only use liquid or gel detergent
specificallydesigned for use in an automatic
dishwasheE
Filling Dispenser
To open the dispenser for filling, pushdown and
turn the blue cap counterclockwise until the cap
isloose,Lift cap off,
Thedispenserwill hold 45 ozof liquid dishwasher
detergent (standard sizebottle).
smartDispense
Turn clockwise.
Whenfull, replacethe cap and turn clockwise until
tight. If residueisleft on the door,it will be washed
off in the next cgcle.
An indicator light will turn on to notify you when the
dispenser needsto befilled again. After filling, the light
will not turn off untilthe door is closed.A full dispenser
will lastapproximately ! month for the average useE
®
CLEAN
Lowo_'nart Dispense
_- Light will turn on when
it is time to refill.
Page 9

ge.com
SmartDispense :MDetergent Dispenser
Water Hardness Calibration
Priorto the first use,the dishwasher needs to Pressthe COOKWAREand DELAYHOURSpads at the
be calibrated for water hardness.Pleasefollow same time for 3 seconds.
directionsbelow to calibrate the dishwasher to
the hardness of gour tap water. Control Panel
Determine the Hardness of Your Tap Water , __ort: :L,;;L,ii_}i":_[,_i_,,-:...... ....
Inthe bag containing these instructions, gou should
find a water hardnesstest strip package. Readthe Pressatthesametime. Displag
instructions on the package,removethe test strip and
follow the instructions to determine the hardness level
of gour tap water.Youwill usethisinformation to
calibrate gour dishwasher to dispensethe optimal
amount of detergent.
Waterhardnessteststrip indication
Value to Enter
into Dishwasher
SOETOREDI I I I I I I I I 1
1RED_ I I I I I I I 2
2 RED _ 3
3 RED _ 4-
HARD 4 RED _ 5
Enter Water Hardness
Once in the water hardnesscalibration mode,the
S-digit display will appear and display a number
from a 1to 5.If the water hardnesshas never been
entered, the display will show 5. Pressthe COOl<WARE
pad to raise the value or the NORMALWASHpad to
lowerthe value shown on the display. Setthe value
according to the table at left as determined from
the water hardness test strip.
Control Panel
Set Control to Cafibration Mode
From the standby mode (dishwashernot running
a cycle and the panel lights on),enter the water
hardness selectionmode.
WASH pad to pad to raise the
lower the value, value.
Returncontrol to normal operation and savethe last
displayed value asthe new water hardnessvalue.
Calibrationiscomplete.
You shouldrecalibrate the dispenser ifwater
conditions change,for example, if a water softener
system isadded or removed from your home.
Page 10

Loading the dishwasher racks.
For best dishwashing results, follow these loading guidelines. Features and appearance of racks and silverware
baskets may vary from your model.
Upper Rack
._.p_" ,, -_',_
_X ',\
Although the upper rack isprimarily for
glasses,cups and saucers,potsand pans can
beplaced in this rack for effective cleaning.
Cupsand glassesfit bestalongthe sides.This
isalso a secure place for dishwasher-safe
plastics.
Theupperrackisadjustable (onsome models
to add flexibility in loading your dishwasheE
Tolower,push tabs in and lower rack.Toraise,
just pull up on rack until it snaps.
Theutility shelf(on some models)may be
placedin the up or down positionto add
flexibility.Awine glass holder (onsome
models)secureswine glasses for best
washability. Becausewine glassescome
in various sizes,after loading,slowly push
in the rack to make sure they will clear
the top of the dishwasheE
Theupper rack isgood for all kindsof
odd-shaped utensils.Saucepans,mixing
bowls and other items should be placed face
down. Fold-down tines (onsome models)
provide flexibility for extra-large and hard-to-
fit items.
Securelarger dishwasher-safe plastics over
2 tines when possible.
Make suresmall plastic items aresecure so
they can't fall onto the heater
Be surethat items do not protrude through
the bottom of the rack and block rotation of
the middle spray arm.This could result in
poor wash performance for items in the
upper rack.
Checkto make surethat no items will block
rotation of the wash arms.
Don't let any
item extend
through bottom.
I "It
Toremove end baskets, grasp the
basket at opposite comers and
slideapart.
Somemodels have an Angled Rack System,
which allows you to angleyour dishes,such
as coffee mugs, for better cleaning and
quicker drying. To position the tines, pullthe
leverforward, drop the tines into position
and releasethe lever
Lower Rack
Thelower rack isbest usedfor plates,saucers
and cookware. Large items such as broiler
pansand baking racks shouldgo along the
left-hand side.Load platters, pots and bowls
along the sides,in corners or in the back.The
soiledside of items shouldface the center of
the rack. If necessary, oversizedglassesand
mugs can be placed in the lower rack to
maximize loading flexibility.
Silverware Basket
Avariety of options isavailable regarding
the three-piece silverware basketin your
dishwasher The complete basket isdesigned
to fit on the right side ofthe lower rack.
Additionally, each end of the basket is
removable to add loading flexibility to
accommodate flatware and lower rack
capacity needs.
Toloadflatware, simply push the adjustable
handleto either side.Putflatware in the
basketwith knife handles up to protect
your hands. Placespoons in the basket
with handles down. Mix knives,forks and
spoons sothey don't nest together
Also,be careful not to let a portion of an item
such asa pot or dish handle extend through
the bottom rack. Thiscould block the wash
arm and cause poor washing results.
Fold-down tines (on some models)provide
flexibility for extra-large and hard-to-fit items.
Thetinesmay be left in the up position or
folded down to customize the lower rack.
Theprovided lidswith slots can be used
to avoid nesting of silverware.Smallplastic
items, such as measuring spoons and
lidsfor small containers, should go in
the bottom of the silverware basketwith
silverware ontop.
Thelidsof both end and middle baskets can
be closed to contain small items. Long items
can be placed on the utility shelf in the
upper rack.
10
Page 11

Loading place settings.., gecom
Follow these guidelines for loading 10 place settings. Features and appearance of racks and silverware baskets
mag varg from gout model. NOTE;Silverware should be individuallg loaded into the slots on the silverware basket lid.
Upper Rack--lO place settings Lower Rack--lO place settings
Follow these guidelines for loading 12 place settings. Features and appearance of racks and silverware baskets
mag varg from gout model. NOTE;Silverware should be individuall_l loaded into the slots on the silverware basket lid.
,y
i
Upper Rack--12 place settings Lower Rack--12 place settings
11
Page 12

Caring for the dishwasher.
Cleaning the Exterior Door Panel
Before cleaning the front panel, make
sure you know what type of panel you have.
Refer to the last two letters of your model
number You can locate your model number
on the left-hand tub wall just inside the dooE
Ifyour model number ends with BB,CC,WW,
SAor BG,then you have a painted door
panel. Ifyour model number ends with SS,
then you have a Stainless Steel Door panel. If
your model number ends with CS,then you
havea CleanSteelpanel.
Followthe instructions below for cleaning the
door panel for your specificmodel.
Painted Door Panel (model numbers ending
in BB-black, CC-bisque, WW-white, SA-silver
metallic or BG-graphite black)
Use a clean, soft, lightly dampened cloth,
then dry thoroughly. Youmay also use a
good appliance wax or polish.
Stainless Steel Door Panel (model numbers
ending in SS)
The stainless steel panels can be cleaned
with StainlessSteelMagic or a similar product
usinga clean, soft cloth. Do not useappliance
wax, polish,bleach or products containing
chlorine on StainlessSteeldoors.
Youcan order StainlessSteelMagic
#WXJOX15through GEParts by calling
800.626.2002.
CleanSteel Door Panel (model numbers
ending in CS)
Use a clean, soft, lightly dampened cloth,
then dry thoroughly. Do not use appliance
wax, polish or any chemical agent on
CleanSteel doors.
Do not wipe the dishwasher with a soiled
dish cloth or wet towel. These mabl leave
a residue. Do not use scouring pads or
powdered cleaners because these products
can scratch the finish.
Stainless Steel Interior--Tub and Inner Door
Thestainlesssteel usedto make the
dishwasher tub and inner door provides
the highest reliability available in a GE
dishwasher If the dishwasher tub or inner
door should be scratched or dented during
normal use,they will not rust or corrode.
Thesesurface blemisheswill not affect
their function or durability.
Cleaning the Control Panel
To clean the control panel, use a lightly
dampened cloth.Then dry thoroughly.
Protect Against Freezing
If your dishwasher is left in an unheated
placeduring the winter,aska service
technician to:
E]Cut off electrical power to the
dishwasher Removefusesor trip
circuit breaker
r-2] Turnoff the water supply and disconnect
the water inlet linefrom the water valve.
r-_l Drain water from the water inlet line
F] Reconnectthe water inlet line to the
and water valve.(Usea pan to catch
the wateR)
water valve.
Air gap _t _q'%I:I_P C
Checktheairgap anytimeyour
dishwasherisn'tdrainingwell.
12
Does Vour Dishwasher Have an Air Gap?
An air gap protects your dishwasher
against water backingup into it if a drain
clogs.The air gap is not a part of the
dishwasher It is not covered by your
warranty. Not all plumbing codes require
air gaps,so you may not have one.
The air gap is easy to clean.
m Turn off the dishwasher and lift off the
cover
p-l Removethe plastic cap and clean with
a toothpick,
Page 13

Before you call for service.., gecom
Troubleshooting Tips
Save time and money! Review the charts on the following pages,
_ or visit ge.com You mog not need to call for service.
Error Messages Possible Causes What To Do
START/RESETstatus Youhave pressedthe • PresstheSTART/RESETpadonceto startthedishwashe_Pressthe
indicator light flashingSTART/RESETpad while the START/RESETpodasecondtimewhenthedishwasherisrunningonlgif gou
dishwasheris running. This will wishto cancelthe cgcle.
cancelthe cgcle.Thelight will
stop flashing after the dishwasher
drains (about 90seconds).
Powerto thedishwasherwas • Thelightwillstopflushingafterthedishwasherdrains.Anewcgclewill
turned offwhile a cycle was start automuticallg.
runningand powerhasjust been
restoredto the dishwasher.The
blinkinglights indicatethatthe
dishwasherisdrainingthe potential
water inside.
Dishwasher BEEPS This is a reminder that gour * Closeand latchthedoorafteropeningitmid-cgcle.
onceevery 30seconds dishwasherdoor has beenleft
openduring operation. It will
continue beeping until gou close
the door.
Problem Possible Causes What To Do
Dishesandflatware Low inletwater temperature *
notclean
Water pressureistemporarilglow *
Airgapor disposerisclogged *
Improperrackloading *
Noairgapor high drainloop *
Spotsand filming Extremelghardwater •
anglassesand Lowinletwatertemperature
flatware ,
Overloadingthe dishwasher •
Improperloading ,
Oldor damppowderdetergent ,
Rinseagentdispenseremptg
Toolittle detergent
Cloudinesson Combinationof softwater and * Thisiscalledetchingand ispermanent.Topreventthisfrom happening,
glassware too muchdetergent uselessdetergentif youhavesoftwater.Washglasswareinthe shortest
Water temperatureentering * Thiscouldbeetching.Lowerthewaterheatertemperature.
the dishwasherexceeds150°F
Sudsinthe tub Correctdetergent *
wasn'tused
:& .
Rinseagent wasspilled *
Detergentleft in Dishesare blocking the *
dispensercups detergent cup
Hakesureinletwatertemperatureis correct(seepage8).Turnonthe hot
waterfaucetnearestthedishwasher,letrun untilthewatertemperature
stopsrising.Thenstartthe dishwasherandturn off thefaucet.Thisinsures
theenteringwaterishot.
Turnonafaucet.Iswatercomingoutmoreslowlgthanusual?Ifso,wait
untilpressureisnormalbeforeusinggourdishwasher.
Cleanthe airgap orflushthe disposer.
Hakesurelargedishwaredoesnotblockthedetergentdispenserorthe
washarms.Seethe Loadingthedishwasherrackssection.
Verifgthat gouhaveanair gapora highdrainloop.Refertothe
InstallationInstructions.
UseJet-Dry®orCascadeCrystalCleaPrinseagentsto removespotsand
preventnewfilmbuildup.
Hakesurewatertemperatureisat least120°F.
LoaddishwasherasshownintheLoadingPlaceSettingssection.
Hakesuredetergentisfresh.
Ifwaterisextremelghard,asoftenermagberequired.
cgclethat willget itclean.
Useonlgautomaticdishwasherdetergentsto avoidsudsing.Cascade®and
ElectrasoPAutomaticDishwashingDetergentshavebeenapprovedfor use
inallGEdishwashers.
Toremovesudsfromthe tub,openthe dishwasherandletsudsdissipate.
Closeand latchthedishwashenPumpoutwaterbgtouchingthe
START/RESETpadonce;then30secondslater,touchthe
START/RESETpadagain.Repeatif necessarg.
Alwagswipeup rinseagentspillsimmediatelg.
Repositionthedishes,sothe water from the lowersprag arm can
flushthe detergentcup. Seethe Loadingthedishwashersection.
13
Page 14

Before you call for service...
Problem Possible Causes What To Do
Blackor grag
marks an dishes
Dishesdon't dry
Aluminumutensilshave
rubbedagainstdishes
Lowinletwater temperature
• Removemarkswithamild,abrasivecleanen
• Hakesureinletwatertemperatureisat least120°R
• SelectHEATEDDRY.
• UseHOTSTART,HOTWASHorADDEDHEAToptions.
• Selecta highercgcle,suchasANTI-BACTERIA,SANIWASHor POTS&PANS.
Rinseagent dispenser is emptg
Controlpanelresponded Door latch mag not be properly
to inputs but dishwasher seated
never filled with water
Water valve may beturned off
Stained tub interior Sometomato-based foods can
cause reddish stains
• Checkthe rinseagentdispenserandfillasrequired.
• Hakesurethedoorisfirmlgclosed.
• Hakesurewatervalve(usuallglocatedunderthesink)isturnedon.
• UseoftheRINSEONLYcgcleafteraddingthedishtothe load
candecreasethe levelofstaining.GErecommendsCascade®
PlasticBoosterto helpremovethesetypesof stains.
Tea or coffee stains
• Removethestainbghand,usingasolutionof 1/2cupbleach
and3cupswarmwater.
WARNING
Beforecleaninginterior,wait at least20minutesaftera cgcleforthe
heatingelementsto cooldown.Failureto dosocanresultinburns.
Anoverallgellowor brownfilm can •
becausedby irondepositsinwater
Whitefilm oninsidesurface- •
hardwater minerals
A specialfilterinthe watersupplglineistheonlgwagto correct
this problem.Contacta watersoftenercompany.
GErecommendsJet-Dry ®or Cascade Crystal Clear_to help
prevent hard water mineral depositsfrom forming.
Rundishwasherwithcitricacidto removemineraldeposits.Citricacid
(Partnumber:WD35X151)canbeorderedthroughGEParts.Seeback
coverfororderinginformation.
Dishwasherwon'trun Fuseisblownor circuit breaker • Replacefuseor resetcircuitbreakenRemoveangotherappliancesfrom
istripped thecircuit.
Poweristurned off • Insomeinstallations,thepowertothedishwasherisprovidedthrougha
wallswitch,oftenlocatednextto thedisposerswitch.Hakesureit ison.
Controlpanelislocked • Unlockcontrolpanel.Seepage5or7.
Rebootyourcontrol • Turnoffpowertothedishwasher(circuitbreakerorwallswitch)for
30seconds;thenturn backon.
Control panel lights Timetoo long between • Eachpad mustbetouchedwithin 30 secondsof the others.
go off whenyou're touching of selected pods Torelight,touch ang pad again,or unlockandrelatchdoor.
setting controls
Water standing in This isnormal • A smallamount ofcleanwater aroundthe outlet on thetub
the bottom of the tub bottom at the backof the tub keepsthewater seallubricated.
Water won't pump Drain is clogged • Ifgou have an air gap, clean it. See page 12.
out of the tub • Ifthe dishwasher drains intoa disposer,rundisposer clear.
• Checkto seeifgourkitchensinkisdrainingwell.Ifnot, gou
magneeda plumber.
Steam Thisisnormal • Warm,moistaircomesthroughtheventbgthedoorlatchduringdrging
andwhenwaterisbeingpumpedout.Thisisnecessargfor drging.
Sanitizedlight does Thedoorwasopenedand the • Donot interruptthecgcleangtimeduringoraftermainwash.
notilluminateat the cgclewas interrupted during
endof thecycle or after the mainwash portion
(Anti-Bacteria Theincomingwater • Raisethewater heatertemperaturetobetween120°Fand 140°E
cycleonly) temperaturewastoo low
Noise Normal operating sounds • Theseareallnormal.Noactionisrequired.
Detergentcup opening
Water enteringdishwasher
Themotor stopsand starts at
varioustimesduring thecgcle
Drainpumpsoundsduring
pumpout
Rattling disheswhen the spray
1/4 dishwasherrackssection.
arm rotates
• Hake suredishesare properlg loaded.Seethe Loadingthe
Page 15

GE Dishwasher Warranty.
All warranty service provided by our Factory Service Centers,
or an authorized Customer Care ®technician. To schedule
service, on-line, 24 hours a day, visit us at ge.com, or call
800.GE.CARES (800.432.2737). Please have serial number and
model number available when calling for service.
For The Period Of:
One Year
From the date of the
original purchase
Five Years
(for models PDW730_
PDW7800 and
PDW7880)
From the date of the
original purchase
Lifetim e o f Product
(for models PDW730_
PDW7800 and
PDW7880)
GE Will @lace:
Any part of the dishwasher which fails due to a defect in materials or workmanship. During
this limited one-gear warranty, GEwillalso provide, free of charge, all labor and related service
to replace the defective part.
The dishwasher racks or the electronic control module, ifthey should foildue to a defect in
materials or workmanship. During this five-gear limited warranty, gou will be responsible for ang
labor or in-home service costs.
ThePermaTuf ®tub or door liner, if itfails to contain water dueto a defect in materials or
workmanship. Duringthislimited warranty, GEwill alsoprovide, freeof charge, oil labor and
related service to replace the defective port.
What GE Will Not Cover:
Staple your receipt here.
Proof of the original pumhase
date is needed to obtain service
under the warranty,
[] Service trips to gout home to teach you how to use [] Damage to the product caused bgaccident, fire, floods
the product, or acts of God.
[] Improper installation, delivery or maintenance. []
[] Failure of the product ifit is abused, misused, or used for
other than the intended purpose or used commemiallg. []
[] Replacement of house fuses or resetting of circuit
breakers. []
Warrantg. Ang implied warranties, including the implied warranties of merchantabilitg or fitness for a particular
I EXCLUSIONOFIMPLIEDWARRANTIES--Yoursole and exclusive remedg is product repair asprovided inthis Limited I
purpose, are limited to onegear or the shortest period allowed bg law.
This warranty is extended ta the origina! purchaser and any succeeding owner for products purchased for
home use within the USA. If the product is located in an area where service by a GE Authorized Servicer is not
available, you may be responsible for o trip charge or yau may be required ta bring the product to an Authorized GE
Service location for service. Proof af original purchase date is needed to obtain service under the warranty.
In Alaska, the warranty excludes the cost of shipping or service calls to your home.
Some states do not allow the exclusion or limitation of incidental or consequential damages. This warranty
gives you specific legal rights, and you may also have other rights which vary from state to state. To know
what your legal rights are, consult your local or state consumer affairs office or your state's Attorney General.
Incidental or consequential damage caused bg possible
defects with this appliance.
Cleaning or servicing of the air gap device in the
drain line.
Damage caused after delivery.
[]
Product not accessible to provide required service.
I
I
Warrantor: General Electric Company. Louisville, KY 40225
15
Page 16

Consumer Support.
GEAppliances Website
Have a question or need assistance with your appliance?Try the GEAppliances Website 24 hours a day,
any day ofthe year! For greater convenience and faster service,you can now download Owner's Manuals,
order parts or even schedule serviceon-line.
ge.com
ScheduleService go.cam
Expert GErepair service isonly one step away from your door Geton-line and schedule your serviceat
your convenience24 hoursany day of theyear!Orcall800.GECARES(800.432.2737)duringnormal businesshours.
RealLifeDesignStudio go.cam
GEsupports the UniversalDesignconcept-products, services and environments that can be usedby
people of all ages,sizesand capabilities.We recognizethe needto design for a wide range of physical and
mental abilities and impairments. Fordetails of GE'sUniversalDesignapplications, including kitchen designideas
for peoplewith disabilities,check out our Website today. Forthe hearing impaired, pleasecall 800.TDD.GEAC
(800.833.4322).
ExtendedWarranties
ge.com
Purchasea GEextended warranty and learn about special discountsthat areavailable while your warranty
isstillineffect. You can purchase it on-line anytime, or call800.626.2224during normal businesshours.
GEConsumer Home Serviceswill still be there after your warranty expires.
Parts and Accessories go.cam
f
Individuals qualified to service their own appliances can haveparts or accessoriessent directly to their homes
(VISA,MasterCardand Discovercardsare accepted).Order on-line today, 24hours every clayor by phoneat
800.626.2002during normal business hours.
Instructions contained in this manual cover procedures to beperformed by any user. Other servicing
generally should be referred to qualified service personnel Caution must be exercised,since improper
servicing may cause unsafe operation.
Contact Us
If you are not satisfied with the service you receive from GE,contact us on our Website with all the details
including your phone number, or write to: General Manager, Customer Relations
GEAppliances, Appliance Park
Louisville, KY 40225
Register YourAppliance
Register your new appliance on-line--at your convenience! Timely product registration will allow for
enhanced communication and prompt service under the terms of your warranty, should the need arise.
Youmay also mail in the preprinted registration card included in the packing material.
ge.com
ge.com
.... Printed in the United States
, Printed on Recycled Paper
 Loading...