

Page 1
GEAppliances
GSD4410
GSD4420
GSD4430
GSD4910
GSD4920
GSD4930
GSD4940
Part No. 165D4708P136 Pub. No. 49..5790
Page 2
Congratulations!
YouAreNow PartoftheGEFamily.
Welcome/o tim GE f_tmily.
We're proud of our quality
products and we are
commitmd toproviding
dependable se_,ice. You'll
see it in fl_iseasyqo-use
Owner' s Mmmal and you'll
hem il in tim fiiendly voices
of our customer se_,ice
departmenl.
Best of all, you'll expe_Jence
fl_ese values each time you
use your dishwasher. That's
important, because your
new dishwasher will be part
of your family for ma W
years. And we hope you will
be part of ours tor a long
time to come.
Weflmnk you tor bwing
GE. We appreciate your
purchase, and hope you
_ll continue to rely on us
whenever you need quality
appliances tor your home.
@
Staple sales dip or cancelled
check here.
Proof of the original purchase date
isneeded to obtain service under
the warranty.
Write the modeland serial
numbershere.
#
#
Youcan find them on the tub walljust
inside the door.
Page 3
GE& You,
A ServicePartnership.
Ask any GEappliance owner and they will
tell you we stand behind our products with
unmatched quality service. However, did
you know that most questions result from
simple problems that you can easily fix
yourseff injust a few minutes? This
Owner's Manual can teflyou how.
ReadthisManual
Inside you will find ma W
helpfhl hints on how to use and
maintain your dishwasher
properly..Just a little preventive
care on your part Call save you a
great deal of time and money
over the life of your dishwasher.
ReviewtheSectionon
TroubleshootingTips
Safety information ...... 4- 7
Operating Instructions
ControlPanel .............. 8
ControlSettjngs........... 8,9
Display ................ 10,11
DiagnosticCodes ...... 12 14
Soil SenserSystem ......... 75
LoadingtheRacks ....... 18,19
OptionalAccessories........ 20
CareandCleaning.......... 21
TroubleshootingTips
BeforeYou
CarlForService......... 22-26
You'll find many answers to
coinInt/n probleuls here.
If you review our chart of
Troubleshooting Tips first,
you may not need to call for
service at all.
If YouNeedService
If you do need sei_ice, you can
relax kno_dng help is only a
phone call away. A list of toll-fiee
customer sei_:ice numbers is
included in the back section.
Or you Call alwws call tile
GE Answer Center ®at
800.626.2000, 24 hours a dW,
7 days a week.
CustomerService
Warranty ................ 27
ServiceTelephone
Numbers .......... BackCover
3
Page 4
IMPORTANTSAFETYINFORMATION.
READALLINSTRUCTIONSBEFOREUSING.
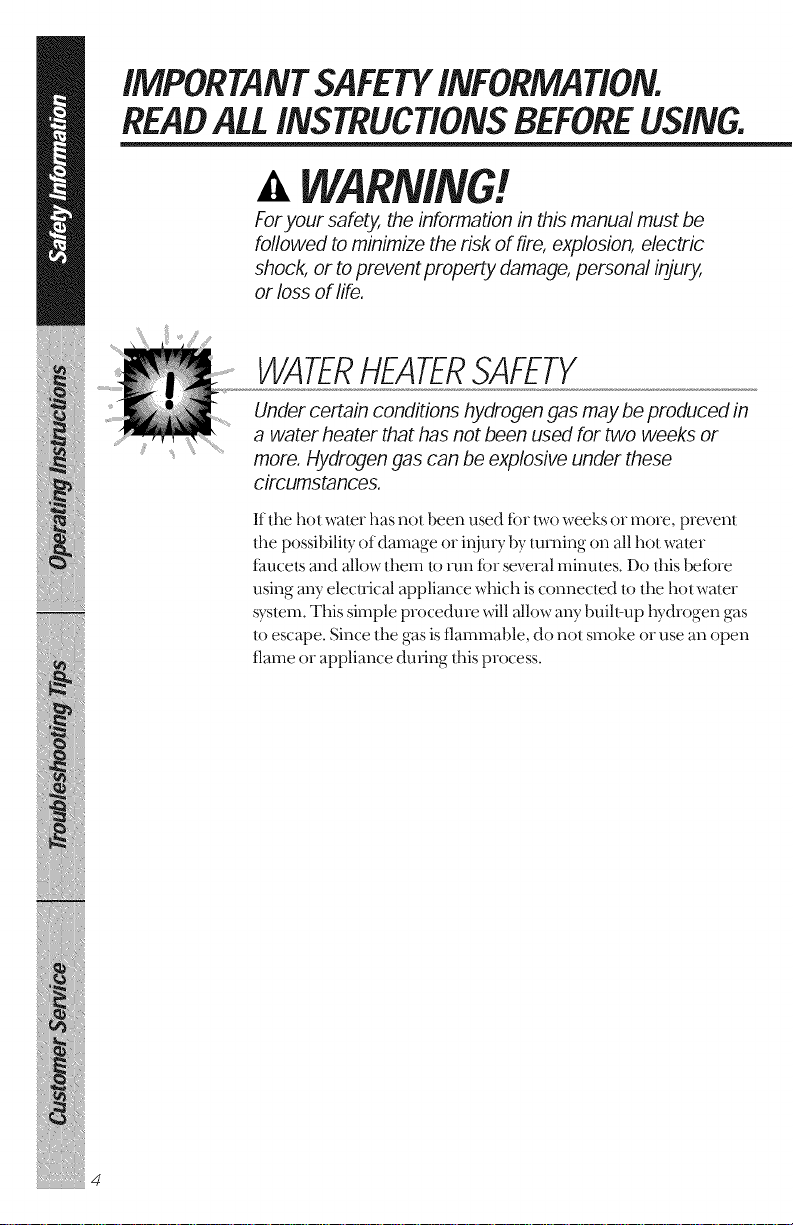
WARNING!
Foryour safety, the information in this manual must be
followed to minimize the risk of fire, explosion, electric
shock, or toprevent property damage, personal injury,
or loss of life.
WATERHEATERSAFETY
Under certain conditions hydrogen gas may be produced in
a water heater that has not been used for two weeks or
more. Hydrogen gas can be explosive under these
circumstances.
If the hot water has not been used tbr t_vo weeks or more, prevent
the possibilily of damage or injm 7 by turning on all hot water
/hucels and allow them to run tbr several minums. Do Ibis betore
using any eIectiica] appliance which is connected to the hot water
system. This simple procedure will allow any buih-up hydrogen gas
to escape. Since the gas is flammable, do not smoke or use an ()pen
flame or appliance du|ing this process.
Page 5
Use this appliance only for its intended purpose as
described in this Owner's Manual.
PROPERINSTALLATION
ANDMAINTENANCE
This dishwasher must be properly installed and located in
accordance with the Installation Instructions before it is used.
Ifyou did not receive an Installation Instructions sheet with
your dishwasher, you can receive one by calling us toll-free
at the GEAnswer Center_'800.626.2000.
Connect to a grounded
metal, permanent _4xing
system; or run an equipment_
gTounding conductox with
tile circuit conduclors and
connect 1o the equipmenI_
gTounding lenninal or lead
of tile appliance.
Improper connection of tile
equipment-gTounding
conductor can resuh in a xisk
of eleclxic shock. Check with
a qualified elecuician or
service representative if you
ae in doubt wheflmr the
appliance is properly
gTounded.
Dispose of discarded
appliances and shipping or
packing matexial properly.
Do not attempt/o repair or
replace a W part of your
dishwasher unless it is
specifically recommended in
this manual. All odmr
sex,Tieing should be refened
/o a qualified technician.
To minimize tim possibilib: of
elecuic shock, disconnecl
fllis appliance flx)m file
power supply betbre
allempfing any mainlenance.
NOEE:Turning tile
dishwasher offdoes not
disconnect tile appliance
flom tile power supply. We
recommend having a
qualified lechnician sex_ice
your appliance.
5
Page 6
IMPORTANTSAFETYINFORMATION.
READALLINSTRUCTIONSBEFOREUSING.
WARNING!
DONOL..
Do not tamper with controls. Do not allow children to play
} Do not abuse, sit on, or stand
on the door or dish rack of appliance or any discarded
the dishwasher, appliance.
Do not discmd a dishwasher
_qd_out first removing the
door of the washing
compartmenl.
Do noÁstore or use
combustible mamrials,
gasoline or other tlammable
vapors and liquids in fl_e
vicinily of this or aW other
appliance.
inside, on or _th this
Page 7
WHENUSINGYOURDISHWASHER
1Jseonly powder or liquid
dele_genls or welling agenls
recommended tbr use in a
dishwasher.
D_cate sharp ilems so that
they are not likely to damage
the door seal.
Dmd sharp knives _th the
handles up It reduce the _Jsk
of cut-type il_jmJes.
Do not wash plastic items
unless marked dishwasher
safe or the equivalent. For
plastic imms not so marked,
check the manutacmrer's
recommendations.
Do not touch the heating
element during or
immediately atier use.
iiiiiiiiiiiii_iil
Do not operate your
dishwasher unless all
enclosure panels me properly
in place.
iiiiiiiiiiiii_iil
Close supe_,ision is necessm T
if this appliance is used by or
near children.
iiiiiiiiiiiii_iil
Dmd light plastic ilems so
they will not become
dislodged and drop/o lhe
bottom of the dishwashe_
they might come into contact
_4th the heating element and
be damaged.
REMEMBER...
Your continued health and safety are important to us.
Please read and follow this Safety Information carefully,
We want you to remain a happy and healthy part of our
GE family.
SAVETHESEINSTRUCTIONS
Page 8
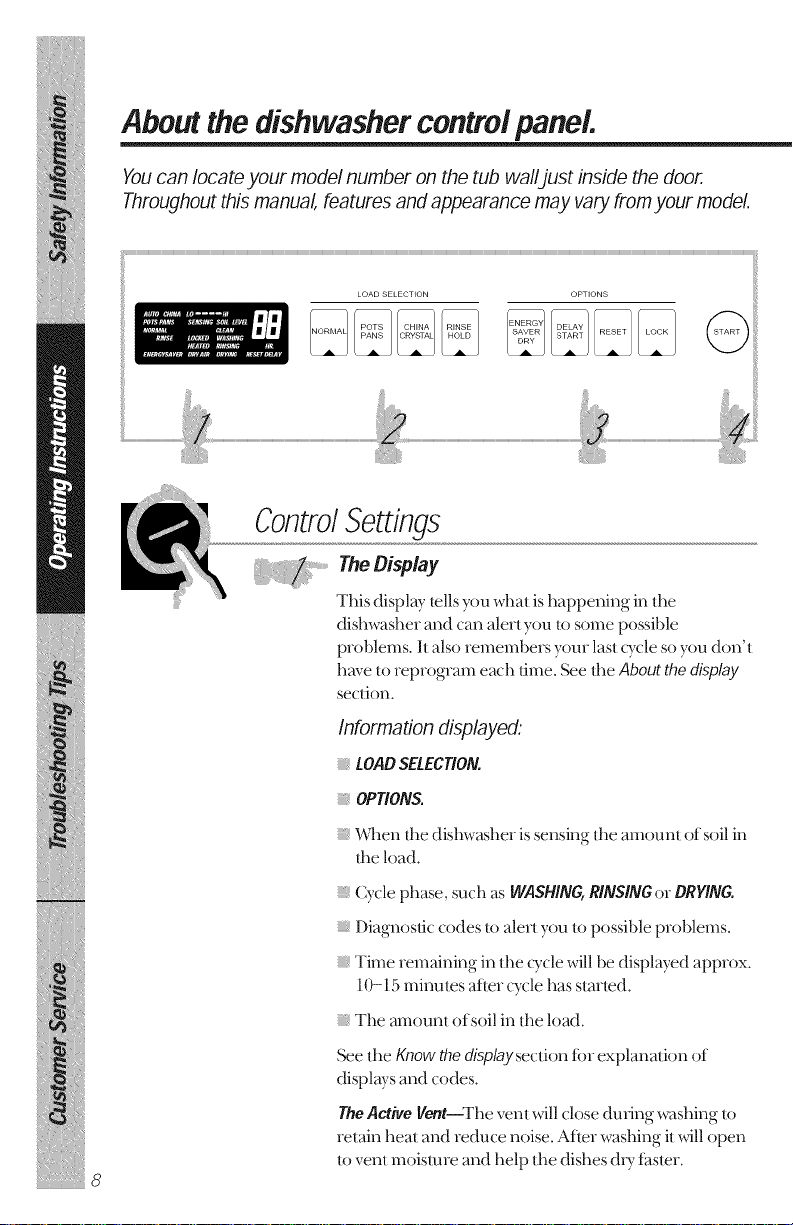
Aboutthe dishwasher controlpanel
Youcan Iocate your model number on the tub wall_just inside the door.
Throughout this manual, features and appearance may vary from)our model.
ControlSettings
T ,eDJspl y
This display mils you what is happening in dm
dishwasher and can alert you 1o some possible
problems. I1also remembers your lasl t3,cle so you donq
haveto reprogram each time. See',heAbout the display
setTIOII.
Information displayed:
LOADSELECTION.
OPTIONS.
"_4qmnd_edishwasher issensing tl_eamounl of soilin
the load.
Cycle phase, such as WASHING,RINSINGor DRYING.
Diagnostic codes to alert you to possible problems.
Time remaining in the (Tcle will be displwed approx.
10-15 minums after cycle has started.
The alnounl of soil in d_e load.
See the Know the displaysection tbr explanation of
displays and codes.
The Active Vent--The vent will close during washing to
retain heal and reduce noise. After washing it _11 open
8
tO vent moisture and help the dishes d_7 t_tster.
Page 9
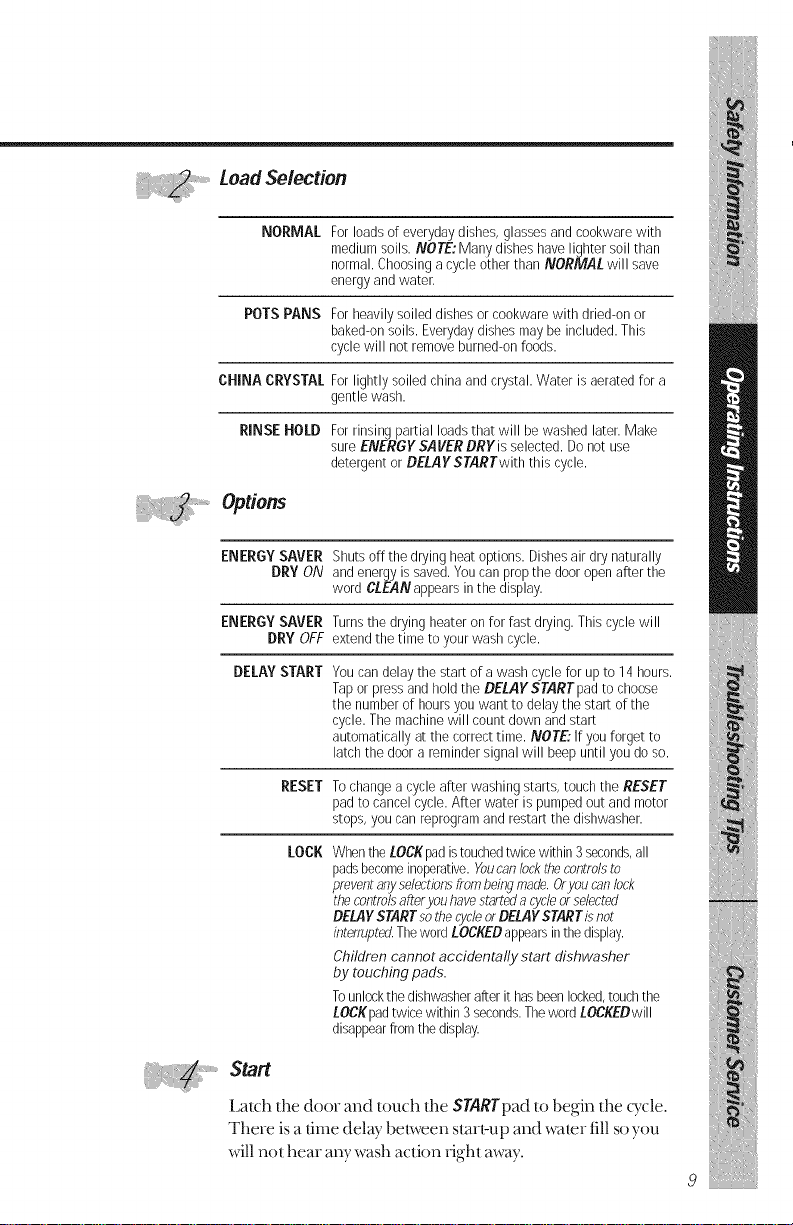
NORMAL For loads of everyday dishes, glasses and cookware with
POTS PANS For heavily soiled dishes or cookware with dried-on or
CHINA CRYSTAL For lightly soiled china and crystal. Water is aerated for a
RINSE HOLD For rinsing partial loads that will be washed later. Make
ENERGY SAVER Shuts offthe drying heat options. Dishes air dry naturally
ENERGY SAVER Turns the drying heater on for fast drying. This cycle will
DRY OFF extend the time to your wash cycle.
DELAY START You can delay the start of a wash cycle for up to 14 hours.
medium soils. NOTE: Many dishes have lighter soil than
normal. Choosing a cycle other than NORMAL will save
energy and water.
baked-on soils. Everyday dishes may be included. This
cycle will not remove burned-on foods.
gentle wash.
sure ENERGYSAVERDRYis selected. Do not use
detergent or DELAYSTARTwith this cycle.
DRY ON and energy is saved. You can prop the door open after the
word CLEAN@pears in the display.
Tap or press and hold the DELAY START pad to choose
the number of hours you want to delay the start of the
cycle. The machine will count down and start
automatically at the correct time. NOTE: If you forget to
latch the door a reminder signal will beep until you do so.
RESET Tochangea cycleafter washingstarts,touchthe RESET
padto cancelcycle.After water is pumpedout andmotor
stops,youcanreprogramand restart the dishwasher.
LOCK Whenthe LOCKpadistouchedtwicewithin3seconds,all
padsbecomeinoperative.Youcanlockthecontrolsto
preventanyselectionsfrombeingmade.Oryoucanlock
thecontrolsafteryouhavestartedacycleorselected
DELAYSTARTsothecycleorDELAYSTARTisnot
interrupted.ThewordLOCKEDappearsinthedisplay.
Children cannot accidentally start dishwasher
by touching pads.
Tounlockthedishwasherafterit hasbeenlocked,touchthe
LOCKpadtwice within3seconds.ThewordLOCKEDwill
disappearfromthedisplay
...........Start
Latch the door and touch the SYARYpad to begin the Q_cle.
There is a time delay bet:ween st_4rlmp and waler fill st) you
will l]OI hear any wash a€tion iighl away.
9
Page 10

Aboutthedisplay.
Dishwashing Shortcut
When the dishwasher is loaded and the door latch is
moved to the ON position, the control panel will display
the last settings you selected.
ffyou don't want to chan,g_ any of the settings, simply
touch START.
Thedishwasheri_membersyour!ast
cyclesoyoudon'thaveto[eprc_ram
earl7time,
These graphics show the selection NORMAL cycle with ENERGYSAVER
DRY OFF(Heated Dry) as it appears in the display.
Cycbselected Rinsecycleandminutesr_mainingZnthe _:wie
NOTE."If fl_ere has been apower t?tilure, NORMALwash
and ENERGYSAVERDRFOFFwill automatically be
programmed. Make aW new selections as desired and
touch START.
Cycle#taRedandthesoil levelis beingsensed Drying
Soilleveldetemlined Dishescleananddry
mmmmmmmmm_
/0 Mainwashandminutesrdnaininginthecycb
Page 11

Know the display.
What It Means
AUTONORMAl NORMAL_3,clehas been selected.
AUTOPOTSPANS POTSPANS_3,clehas been selected.
AUTOCHINA CHINACRYSTAL_3,clehas been seleded.
RINSE RINSEHOLD_3,clehas been selec/ed.
HEATEDDRY Displwed when ENERGYSAVERDRY is not selec/ed.
ENERGYSAVER Displwed when ENERGYSAVERDRY is selected.
DRY
SENSINGSOIL Displwed when fl_edishwasher is de/ermining the
LEVEL mnoun! of soil in the load and calculating the amount of
LO.... HI Shows the amoun! of soil in lhe load tiom lO (one bin
SOILLEVEL lighted) U) HI(all tour bras lighted).
wash time needed.
Numerals from Number ofminu|es left in/he _Tcle.
1to99minutes
WASHING Displayed during pre-wash,pre-rinseand main wash
periods.
RINSING Displayed during rinseperiods tbllo_ng the main wash.
DRYING Displwed during heated &Tiny.
CLEAN Indicates complemd _Tcle. Remains on until door is
unlatched.
LOCKED Indicates connols are locked u_prevent unauthorized use.
Numerals from Number of hours del W until s/at/of_Tcle.
1to 14HRS.DELAY
RESET The RESETpad was/ouched.
PFRESET Indicates a power t_tilure occuned.
//
Page 12

About the displaydiagnosticcodes.
What/t Means What To Do
p_ Electrlcal power to thedishwasher has been
RESET interrupted but is now
ill _ _i
_i_i_ _ii_i _ _
iii_ ii ii ii i _
iill
i i ii iii_ii (iii_
back on.
(iii!i_i_i/_!ii_i__i
IFDISHWASHERWASIN USEWHEN
THEPOWERFAILUREOCCURRED:
1 Press the RESETpad andwait
approximately 30 seconds.
2 Unlatch and ()pen the door.
A If file detergent cup is ()pen and
empty and the dishwasher was set
fbr rim NORMAL POTS PANS or
CHINACRYSTAL():cle, close
door and put the load through a
RINSEHOLD(Tcle. After the
RINSEHOLD(Tcle is completed,
add dem_gent and reset the load
tbr the washing wcle you wanl.
B If lhe demrgenl cup is closed and
the dishwasher was sel tot the
NORMAL POTSPANSor
CHINACRYSTAL_Tcle, resel the
dishwasher fbr the wash cycle
you wahl.
C If the dishwasher was sel tot lhe
RINSEHOLD(Tcle, reset the
dishwasher tbr RINSEHOLD.
IFTHEDISHWASHER WAS NOT IN USE
when power fhilure occuned, use
dishwasher as you normally would.
F ! ¸
i/(L. __ _ iii
/2
Slow draining. The
dishwasher is taking
longer than normal to
dr_ thewatero.t.
by a blockage in the drain
air gap, a kink in the
s,opped..pp pe.
dr_ hose,ora
This dishwasher is desig_ed to
automalically compensate tbr longer
than normal drain times, but cycle time
_411be extended. If this code continues
toappear flequenlly:
I Clean tl_eair gap.
2 Check fbr a kink in the drain hose.
3 Check plumbing fbr slow or
stopped-up drains.
NOTE:WmTanty service does not
cover household drain problems.
Page 13

What/t Means What ToDo
iFP ( Dr isblock .Thls
RESET isso clogged that the
indicates that the drain
dishwasher cannot
continue to operate in
a satisfactory manner.
Dishwasher will stop.
_l Drain sensor is not
functioning.
Dishwasher will
continue cycle along
with a fixed drain period.
FI !1
L_
There is too much water
in the dishwasher.
RESET
_i _ii ii_ _i_i
i i Z
Press the RESETpad to stop the beep.
Is)care and remove the blockage in the
drain system. To pump any remaining
water out of the machine:
I Lalch the door.
2 Select aW (T(le.
3 Touch SYARYand tl_en immedia|ely
touch RESET
NOTE:Warrm_ty service does not
coveI household drain problems.
If E3 repeats fbr the next (5:tie call
for service.
Press the RESETpadto slop the beep.
The dishwasher is designed to
automatically pump out extra water as
long as the door is lalched. When you
hear the motor stop running:
I
IJnlatch the door and seeifall the
wamris,gxme.
2
Ifyou see wamr enmring tim
dishwasher, close and latch the door.
Shut off lhe water supply to the
dishwasher.
3 Ifwamr is gsme and no wamr is
entering the dishwasher, restmt (Tcle.
4 If L repeals, shutoflthewater
supply to the dishwasher. Call tbr
service.
_i!il_ iiii_i_iiilii_i_i_
iii !I iii:iii
c
Page 14

About the displaydiagnosticcodes.
What/t Means What To Do
Not enough water is
iLii_ _i ii _
iiii!(i ii( iiii i_iiii i
ii(i iii iii _i/
iiiiii_ i__ii i ii
i_i_ iii_ii i iI
i/! ii iii
i i i_i i ii
ii ii
L. I in the dishwasher is not
entering the dishwasher.
OR
The drain pump could be
temporarily blocked
(usually caused by food
,_t;1 h M_v_=c.essuc..ascere_,.
The water temperature
in the dishwasher did not
reach the proper wash
temperature. This is
usually caused by lack of
hot water coming from the
household water heater.
The temperature sensor
functioning properly.
Dishwasher may condnue
to be used, but itwiR not
heat water automatically.
I)nlalch the door. If there is no water in
the bouom of d_e dishwasher, check the
wamr supply to the dishwasher.
Is lhe dishwasher waler supply lumed on?
Is lhe household waler supply lurned on?
If you use well or cistern wa|er, is d_e
supply adequate?
If the water supply is adequate, uy the
_ycle again. If E5 repeats, call for seisqce.
I)nla|ch the door. If there is standing
waler in the bonom of the dishwasher,
relatch the door, touch START, then
immedialelv touch RESETIo start the
pump. If E5 conlinues to appear, you
may need to do this several times to
break up the blockage.
Avoid showers or laun&y,just prior to
running the dishwasher. (Use the
DEtAg SYARY feature to start dishwasher
when the water hea_er is up to normal
mmperamre.) Adjust household
waler healer fl]ennostat/o 120 °F.
minimum.
If E_ appears wid_ eve U tycle and you
know the water flom the water hearer is
h()t (1_0°F. (1imore), call tOTsei_qce.
The temperature sensor needs to be
replaced. Call for sei_ice.
NOTE"You may continue to use your
dishwasher. For best resuhs a(!jusl your
household wa|er healer thermostat
to140 °F.
Before YouCall For Service
TIT the (y(le again t(/see ifthe (ode reappears. The dishwasher may
conect itself.
Elecnonic connols can be aflecmd by outside interlerence. Shutting off
power to the dishwasher (at the tuse or ciivuit breaker) could conect
lhe problem. Restore power after 15 seconds and/1T the tycle again.
Check the g_aide tOTthings you can do t15toneel the problem.
/4
See the Tmubleshootin.q_psat the back of this manual.
Page 15

Aboutthe soil sensor system.
Thedishwasher has an exclusive Soil Sensor System that measures the
amount of soil in the load,ARer the soil is measured the dishwasher decides
the length of the main wash cycle and the number of rinses needed,
CYCLE USAGE TIME
SEQUENCES GALLONS MINUTES
LQT_T HI __ 9,3 58-73
LO-- HI _ Z6 44-59
Pans Heavy _ _ _ _ _ _ _ _ 722 6"7-82
LO- _ - - HI
WATER TOTAL
PotsH_avy__
Pots Medium _ _
Pans Lo-- HI _
PotsLight
Pans LO= HJ
China Med@m
CrystalLo-_ HI
China Light
CrystaI LO= HI
5,9 29-39
Rinse PreWash/
Hold
Drying Cycle Options
ENERGYSAVERDRYOFF(Heated D_7). Available on all wash _}_cles
except RINSEHOLD.Add 38 minutes _o_}_clelime.
ENERGY SAVER DRY ON.D_Ting heater is mined off. Dishes d_),
naturally.
1,5 7
/5
Page 16

Usingthedishwasher.
Checkthe Water Temperature
The entering waler must be at least 120°F. and not more than
150 oF., for effective cleaning and to prevent dish damage. Check
the water temperalure with a can@ or meat thermometer. Turn on
the hot water fimcet nearest the dishwasher, place the thermometer
in a glass and let the water run continuously into tl_e glass until tl_e
temperature slops _Jsing. Ac!just your wamr healer, ifneeded.
Usinga RinseAgent
A _inse agent, such as JKT-DRK makes water flow off the dishes
quickly thereby reducing water spotting.
Fill the _inse agent dispenser
until it reaches the bottom of lip
inside tl_e opening. Replace cap.
To check it_Jnse a,g_nt is needed,
remove the cap and look into tim
dispenser. On some models, the
dispenser can be checked by
pressing the clear center of the
fill cap 2 or 3 times. If_inse agent
fills the cenmr of the fill cap, you
have enough.
Afull dispensershould last about3months.
Ifrinse agentspills,wipe it up immediately.It can keepyour detergent
from working.
76
Page 17

ProperUseof Detergent
Use only detergent specifically made for use in dishwashers. Keep
your detergent flesh and d U. Don't put powder detergent into tile
dispenser until you're ready to wash dishes.
Tile amount of detergent to use depends on whether your water is
harder soft.With hard water, you need extra detergent. Wifll soft
water, you need less detergent.
Protect your dishes and dishwasher by contacting your water
department and asking how hard your water is. Twelve or more
grains is extremely hard water. A water softener is recommended.
_¥ilhouI it, lime can build up in tile water valve, which could stick
while open and cause flooding. Too much detergent with soft water
cm_cause a permanent cloudiness ofglasswme, called etching.
You'll find tsvodetergent dispensers on tile OpenCUP
inside door of your dishwasher. All wash q_cles
require detergent in tile main cup. Wash (ycles
with t_vowashes will also use tile open cup.
Be sure tile control panel lights are not lit
before adding detergent. Otherwise, the
detergent cup will not close and latch Main Cup
properly. Add detergent then close tile
main cup.
NOTE:To open detergent cup after it has
been closed, simply lure tile detergent cup
handle counter-clockwise until it releases.
A snapping sound may be heard.
ForgettoAdd a Dish?
A torgonen dish can be added any time before tile main wash.
:{_()nce tile water cahns, open the door. Steam may rise out of tile
dishwasher.
{JAdd torgonen dishes.
to the fro fight.
NOYE:If you forgot to latch tile door a reminder signal will beep
until you do so.
77
Page 18

Loadingthe dishwasher racks.
For best d/shwashing results, follow these loading gu/de/ines. Features and
appearance of racks and silverware baskets may vary from your model.
UpperRack
The upper rack is tbr glasses, cups and saucers.
(]ups and glasses fit best along the sides. This is
also a secure place tbr dishwashe>sate plastics. A
cup shelf (on some models) may be placed in lhe
up or down position to add flexibility. The upper
rack is good fbr all kinds of od&shaped utensils.
Saucepans, mixing bowls and odmr imms should
be placed f_tce doxm.
SecurelargerdisiTwasher-safeplasticsovertwofingers
whenpossible,
Makesuresmalfplasticitemsaresecuresotheycan'tfail
ontotheheatingelement,
The Wash Tower
Keepthecenterareaclearin thelowerrack.
The wash tower rises tluough the center of the
lower rack during the wash and iinse portions of
d_e wcle.
78
Dont block it or !oad taft thingsnext to it,
Also, be carefbl not to let a
portion of an i/era such as a pot or
dish handle exmnd d_rougi_ the
bottom rack. This could block tl_e
wash ann and cause poor washing
results.
Page 19

Dont let any
item extend
throughbottom,
Lower Rack
When/oadingthetowerrack,donOtloadlargeplattersor
tr_s in thefrontrightCornerTheymaypreventdetergent
fromcirculatingduringthewashcycb,
Tile lower rack is best used fbr plates, saucers,
and cookware. Large ilems such as broiler pans
and racks should go along the sides. Load
platters, pots and bowls akmg tim sides, in
comers, or in lhe back. The soiled side of items
should f_tce tim cenler of file rack.
Fold<lo,m fingers (on some models) provide
flexibility fbr exua larg_ and hard-to-fit items.
The fingers may be left in tim up position or
folded do,m to customize file lower rack.
Silverware Basket
Put flatware in file removable baskel _ith fbrk
and knite handles up to promctyour hands. Place
spoons in file basket _ifll handles doom. Mix
knives, fbrks and spoons so troy don't nest
togeflmr. Disuibum evenly. Small plastic trams,
such as measuring spoons and lids flom small
conlainers, should g_)in lhe bott,)m of tile
silvem,are basket _ith silvem,are on top.
To increase file flexibility of the lower rack, file
silver,rare basket m W be split. (;rasp the baskel at
opposim comers and slide apml. Tile basket
sections should be placed in tim lower rack by
hanging them on tile top hoop.
......................... A security cell cover (on
_1/if"" SOIlle lllodels) hill_ed ill
II somehandles,anbe
g_ A/ig,'_ _: lowe,ed to eithe, side to
se,u,-e'i "lt,vei "lti,e,,ls
flom the effects of tile
vigorous wash action.
79
Page 20

About optionalaccessories.
Wood panel trim kits are available at an extra cost by calling, toll-free,
8_-626-2002. Yourorder will be sent directly toyour home. VISA,
MasterCard and Discover cards are accepted.
WoodPanelTrimKits
Wood panel Uim kils contain Uim and insu_uc6ons ff)r adding a
...................... decorauve wood door panel and bolloln access panel 1o n]aM]
your kilchen cabinels.
Specify the trimofyour choice from the followingoptions:
GPF451/4"Panel TrimKit(for all modelsexcept GSD4940)
, GPF463/4"Panel TrimKit
Page 21

Caringfor the dishwasher.
Toclean the control panel use alightly dampened cloth then dry
thoroughly. Toclean the exterior use a good appliance polish wax.
Never use sharp objects, scouring pads or harsh cleaners on any
part of the dishwasher.
Protect Against Freezing
If your dishwasher is left in an unheated place dining
lhe winlel, Ask ;4 service technician to:
umpcoverscrews _/ .
TwQtypesOf [ 4_t',_t1111
I"-¢
Checkthe airgapany timeyour
dishwas#er/snt draining_/ell,
_Cut offele(Ui(al to/he dishwasher. Remove
tuses or trip circuit breaker,
5_um off the water supply and disconnec//he water
' inleI line flom tlae waler valve.
_Drain water tiom the wa/er inlet line and water
' valve. (Use a pan/o (a/oh the wa/er.)
_F/Reconnec/lhe waler inlel line/o/he waler valve.
dRenlove the plastic sump cover in file tub
_' be/iota and use a sponge to soak up water in the
rubber boo/.
power
Does Your Dishwasher Have anAir Cap?
An air gap promcts your dishwasher against wamr
backing up into it if a drain clogs. The air gap is not a
pan of the dishwasher. It is not covered by your
wananty. Not all plumbing codes require air gaps, so
you may not have one.
The air gap is easy to clean.
d Turn off fi_e dishwasher and lift off fi_ec hrome
('oveI'.
I nscrew the plastic and dean with
{}}_a.i....... cap a toothpick.
21
Page 22

Beforeyou call for service...
Troubleshooting Tips
Review the charts on the following pages first and you may not
need to call for service.
Possible Causes What To Do
Controlpanel lightsgo
offwhenyou're settin9
controls
Theword AUTOdoesn't
appearin thedisplay
Dishwasher won't run
Time too long between
touching of selected pads
The sensor is dogged
or faulty
Fuse is blown, or the
circuit breaker tripped
Each pad must be touched
_4thin 30 seconds of the
others. To relight, touch
aW pad again, or unlock
and relatch door.
T_7 using tim below steps
to clear the sensor:
I Remove all metal
utensils flom the
dishwasher.
2 DONOTADDDETERGENT.
3 Select POTSPANS_Tcle
and ENERGYSAVERDRY
OFF.
4 Stml the dishwasher and
allow to run until tim
time remaining in the
cycle appears in the
display.
5 Then open the door and
pour 1/4 cup ofcitric
acid oystals into the
bottwm of the
dishwasher. (Most
drugstores can): citlic
acid oTs/als. If yours
doesn't, call GE Se_qce
and Paris Centers.)
6 Close the door and allow
the dishwasher to
complete the cycle.
If dm problem continues
call tor se_qce.
Replace t;ase or reset
circuit breaker. Remove
aW other appliances flom
the (ir(uit.
T_7 resetting the display
panel.
22
Page 23

What ToDoPossible Causes
Noise
Some of the sounds
you'll hear are normal
Soft tbod disposal
shredding action.
Drain valve opening to
pump wa|er out.
Timer control as wcle
progTesses.
Demrgent cup opening.
The motor stopping during
the &ying period.
Water draining out of the
mb immediately after you
umch RESETpad.
Utensils are not secure
in the rack or something
Make sure evesything is
secured in dishwasher.
small has dropped into
the rack
Motor hums
Dishwasher has not been
used on a reKulm basis. If
you do nol use your
dishwasher often, set it to
fill and pump out once
eveU week. This will help
keep the seal moist and
the garbage disposes clear.
Detergent cup lid
latched accidentally
Close and lalch the door.
Touch the RESETpad
three times _thin three
seconds. Displ Wwill show
dERESET.
When display is blank,
unlatch the door and ()pen
the detesgent cup.
Detergent left in Dishes are blocking the Reposifion fl_e dishes.
dispenser cups detergent cups
_i{{iiiii{i'ii{iiiii/ii[i{ii{ii/iiii
!ilili/iiiiii iiiiJ iliii i
Waterstandingin
the bottomofthetub
This is normal A small amounl of clean
wales mound the outlet on
tim tub bollom al lhe back
of the mb keeps the wales
seal lubricamd.
22
Page 24

Beforeyou call for service...
Troubleshooting Tips
Possible Causes
Waterwon'tpump
outofthetub
Suds in the tub
Steam This is normal
Stainedtubinterior
24
Drain is clogged
Correct detergent
wasn't used
Rinse agent
was spilled
Detergent with
colorant was used
What ToDo
If you have an air gap,
clean it.
Check to see ifyour kitchen
sink is draining well. If not,
you may need aplumber.
If the dishwasher drains
into a disposer, run
disposer clear.
See the About the display
section.
l Jse only automatic
dishwasher detergents to
avoid sudsing.
To remove suds flom the
tub, open the dishwasher
and let suds evaporate.
Add 1gallon of cold water
tothe rob. Close and latch
tl_e dishwasher. Pump out
water. Touch START,then
immediately touch RESET.
Repeat if necessa U.
Always_6pe up rinse agent
spillsimmediamly.
Steam comes through the
vent by tim door latch
during duing and when
wamr is being pumped out.
Some detergents contain
colorant (pigment or dyes)
flint _6ll discolor the tub
interior wifl_extended use.
Check the dem_gent cup
tbr signs of aW
discoloralion. If cup is
discolored, change to
detelgent without any
colorant.
Page 25

Possible Causes What To Do
Dishes don't dry
Dishes and flatware
not clean
Low inlet water
temperature
Rinse agent dispenser
is empty
Inlet water temperature
is below 120°F.
Water pressure is
temporarily low
Make sure inlet water
temperature iscorrect.
Check the rinse agent
dispenser.
Raise the water heater
temperature to 120°F.
Turn on a t_mcet. Iswater
coming out more slowly
titan usual? If so, wait;until
pressure is normal betore
using your dishwasher.
Air gap is clogged
Improper rack loading
Clean the airgap.
Make sure lmge dishware
does not block the
detergent dispenser or tl_e
wash ann.
Spotsand filming Extremely hard water To relncwe stubborn spots
onglassesand
flatware Low inlet water
temperature
flom glassware:
I Rein(we all metal
utensils flom tl_e
dishwasher.
Overloading the
dishwasher
2 Do not add detergent.
3 Select tim longest cycle.
4 Stml the dishwasher and
Improper loading
allow to pan for 18 to 22
minutes. Dishwasher will
Old or damp powder
detergent
now be intl_emain wash.
5 ()pen the door and pour
2 cups (500 ml) of whim
Rinse agent dispenser
empty
xqnegar inu) the bottom of
the dishwasher.
6 Close the door and allow
Too little detergent
to complete the (Tcle.
If vinegar rinse doesn't
work: Repeat as above,
except use 1/4 (:up (6(1ml)
ofcinJc acid c_ystals
instead of vinegar.
_i{{iiiii{)ii{iiiii/iiiii{ii{ii/iiii
!ilili/iiiiii iiiiJ iliii i
25
Page 26

Beforeyou call for service...
Troubleshooting Tips
Possible Causes What To Do
Cloudiness on Combination of soft
glassware water and too much
detergent
Water temperature
entering the dishwasher
exceeds 150°F.
Black orgray Aluminum utensils have Remove tamks _fitl_a mild,
marksondishes rubbed against dishes abrasive cleaner.
Yelloworbrownfilm Tea or coffee stains
oninsidesurfaces
This is called etchingand
is permanent. To prevent
this flom happening, use
less delergent if you have
soft water. Wash glassware
in the shortest cycle that
will get them clean.
Lower the water healer
temperature,
Remo_ the stain by hand,
using a soludon of 1/2 cup
bleach and 3 cups wm_n
water.
A WARNrNa
geiore cleaning inlefior
wail at leasl 20 minutes
after a (Tcle tbr dm
heating element 1oCOO1
do_. Failure lo do so can
resuh in bums.
Whitefilmoninside
surfaces
26
An overall yellow or
brown t'tlm can be caused
by iron deposits in water
Hard water minerals
A special fiher in the water
supply line is the only way
lo conect this problem.
( lent act a water soiiener
c(m_pany.
To clean the inmfior, apply
dishwasher dele_genl lo a
damp spon,ge. Wear
rubber gloves. Donot use
aW type ofclem_ser other
than dishwasher detergent
because fl may cause
teaming or sudsing.
Page 27

GEDishwasher Warranty
All warranty service provided by our Factory Service Centers,
or an authorized Customer Care_ technician. Forservice,
call 800-GE-CARES.
GE Will Replace,At No Charge ToYou:
One Year Anypart of lhe dishwasher which fails clue/o a deice/in
Fromthe dateof the ma/erials or workmanship. During lhis fullone-year
originalpurchase warranty, (;E will also provide, free of charge, all labor
and in-home seFvice/o replace the del(cfive pan.
Second Year Anypart of lhe dishwasher which t_tils due to a deice/in
From the date of the materials or workmanship. During this second-year
originalpurchase limited warranty, you will be responsible for any labor t;,r
Five Years
Fromthe dateof the
originalpurchase
TwentyYears
Fromthe dateof the
originalpurchase
in-home sevvi(e (os/s.
Thedishwasherrack,if it should rust, or the electronic
control module ifit should fail clue to a defect in
materials or workmanship. During this five-yearlimited
warranty, you _11 be responsible for any labor or in-home
se_qce costs.
ThePermaruf®tub ordoorliner,ifil fails Iv)contain
water clue to a detect in materials or workmanship.
During this full twenty-year warranty, GE x_ll also
provide, free of charge, all labor and in-home service
to repla(e the defective part.
_i{{iiiii{i'ii{iiiii/iiiii{ii{ii/iiii
!ilili/iiiiii iiiiJ iliii i
Service _ips to your home to teach you
how to use the product.
Improper installation.
Replacement of house fuses or
resetting of circuit breakers.
Failure of the product if it is
abused, misused, or used for other
than the intended purpose or used
commercially.
Thiswarranty is extended to the oriqinal purchaserand anysucceedingowner for Foducts purchased
for home use within the USA,In Alaska, the warranty excludes the cost ofshipping d service calls to
your home,
Some states donotallow theexclusion of limitation of incidental or consequential damages, This
WarTantyrives you specific legal rights, andyou may alsohave other rights which varyfromstate to
state, Toknow what your legal rfqhts are, consultyour local d state consumeraffairs office d your
state_ Attorney General, 27
Damage to the product caused by
accident, fire, floods or acts of God.
Incidental or consequential damage to
personal property caused by possible
defects with this appfiance.
Cleaning or servicing of the air gap
device in the drain llne.
Page 28

ServiceTelephoneNumbers.
GEAnswer Center_ 800.626.2000
The GE Answer Center ®isopen 24 hours aday 7 days a week.
In-HomeRepaFServiceeOO-GE-CARES(800-432-2737)
Expert GE repai_ sepd(e is only a phone (all away.
SpecialNeedsService8oo.626.zooo
TDD800-TDD-GEAC(800-833-4322)
GE offers, flee of(harge, a brochure to assist in planning a banie>
tiee kitchen tbr pe_sons with limited mobility.
ServiceContracts800-626-2224
Purchase a (;E seevice contract while your wanamy isstill in effect
and you'll receive a substantial discount. GE (]onsume_ Se__qcewill
still be the_e 'atier your wanamy expi_es.
PartsandAccessories800-62&2002
Individuals qualified to seevice their oxm appliances can have pmts
or accessories sent di_ectly to their homes (VISA, Masm_Cmd mad
Discover cards me accepted).
Instructions contained in this manual cover procedures to be performed
byany user.Otherservicing genera/IFshouldbereferredtoqualified
servicepersonnel Caution mustbe exercised,since improperservicing
may causeunsafeoperation.
ServiceSatisfaction
If you me not satisfied with the ser_qce you receive flom GE, tbllow
these three steps. First,contact the people who seeviced your
appliance. Next, if you a_e still not pleased, wrim all the details-
including your phone numbe_=to: Manager, Consumer Relations,
GE Appliances, Appliance Pad(, U)uisville, KY 40225. Finally,if your
problem is still not resolved, wrim:
Major Appliance (]onsumer Action Piogralll
20 North Wacker Drive, Chicago, IL 60606.
Primedintouisvillu,KY la96 c8
 Loading...