

Page 1
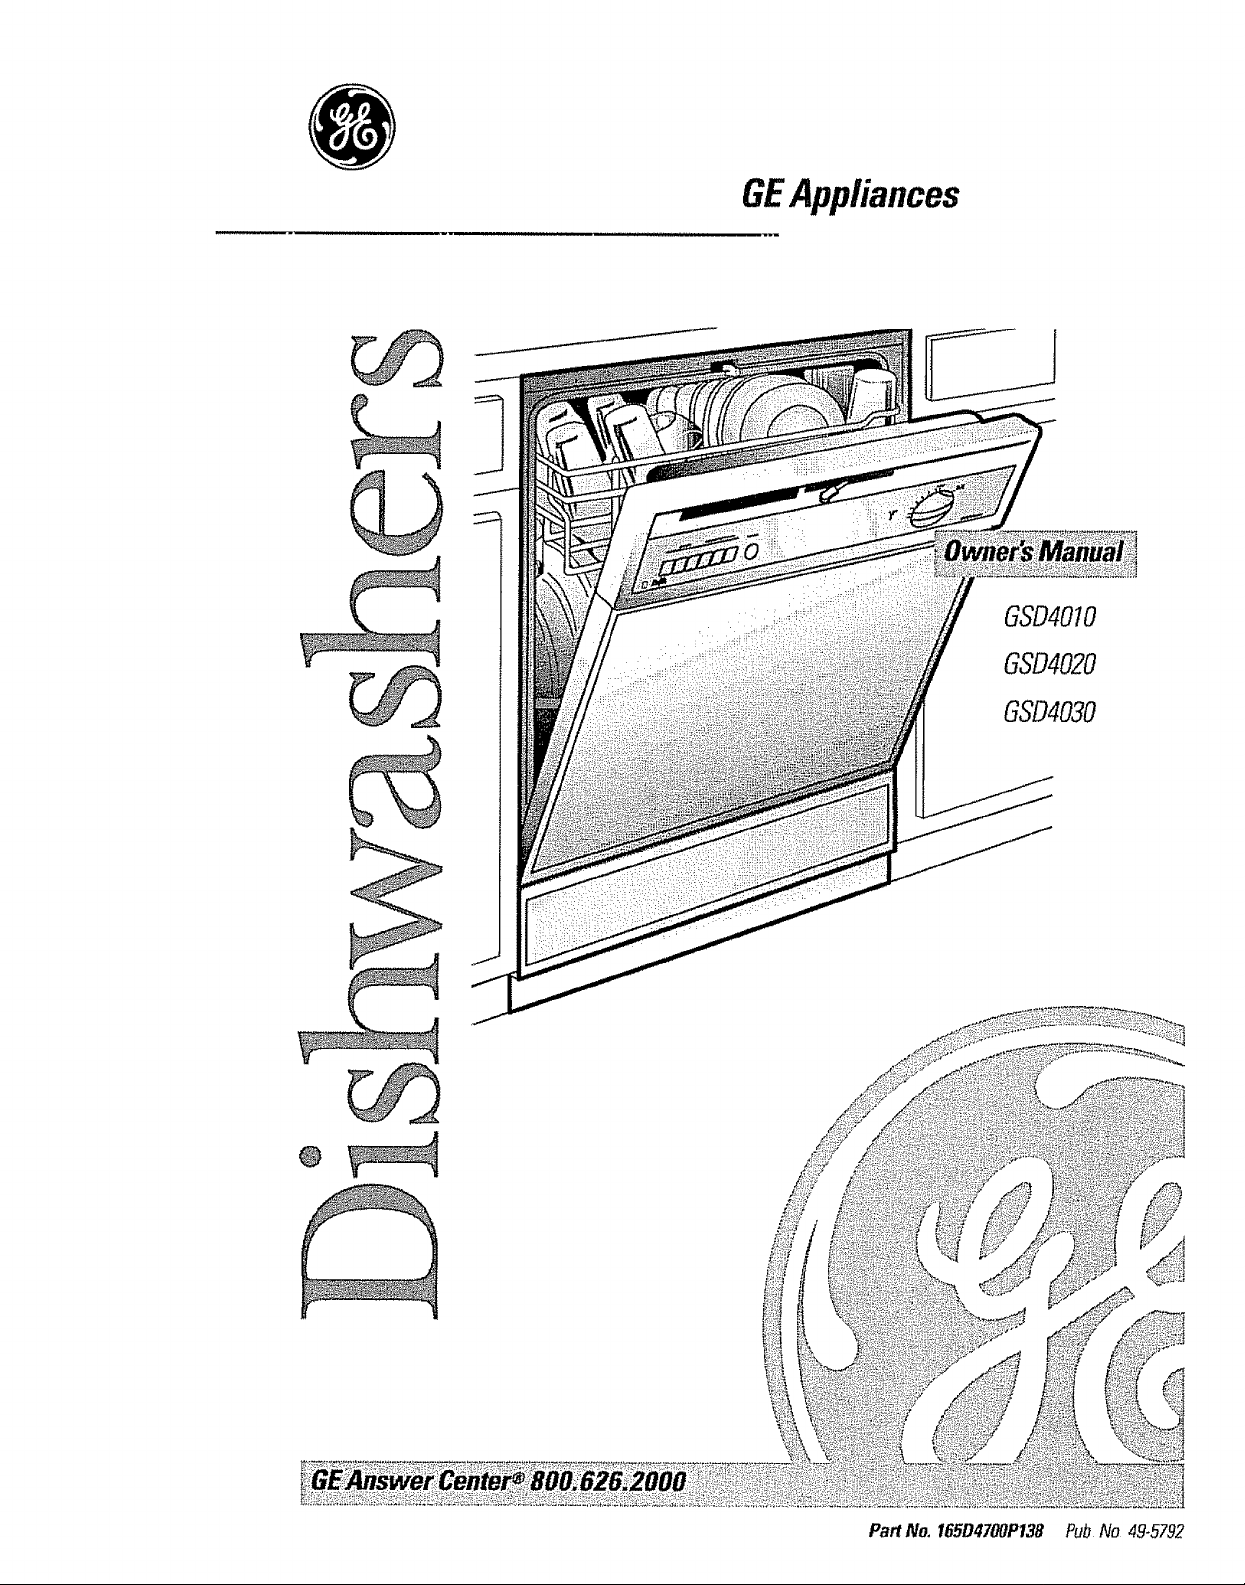
GEAppliances
GSD4010
GSD4020
GSD4030
PartNO.165D4700P138 PubNo 49-5792
Page 2
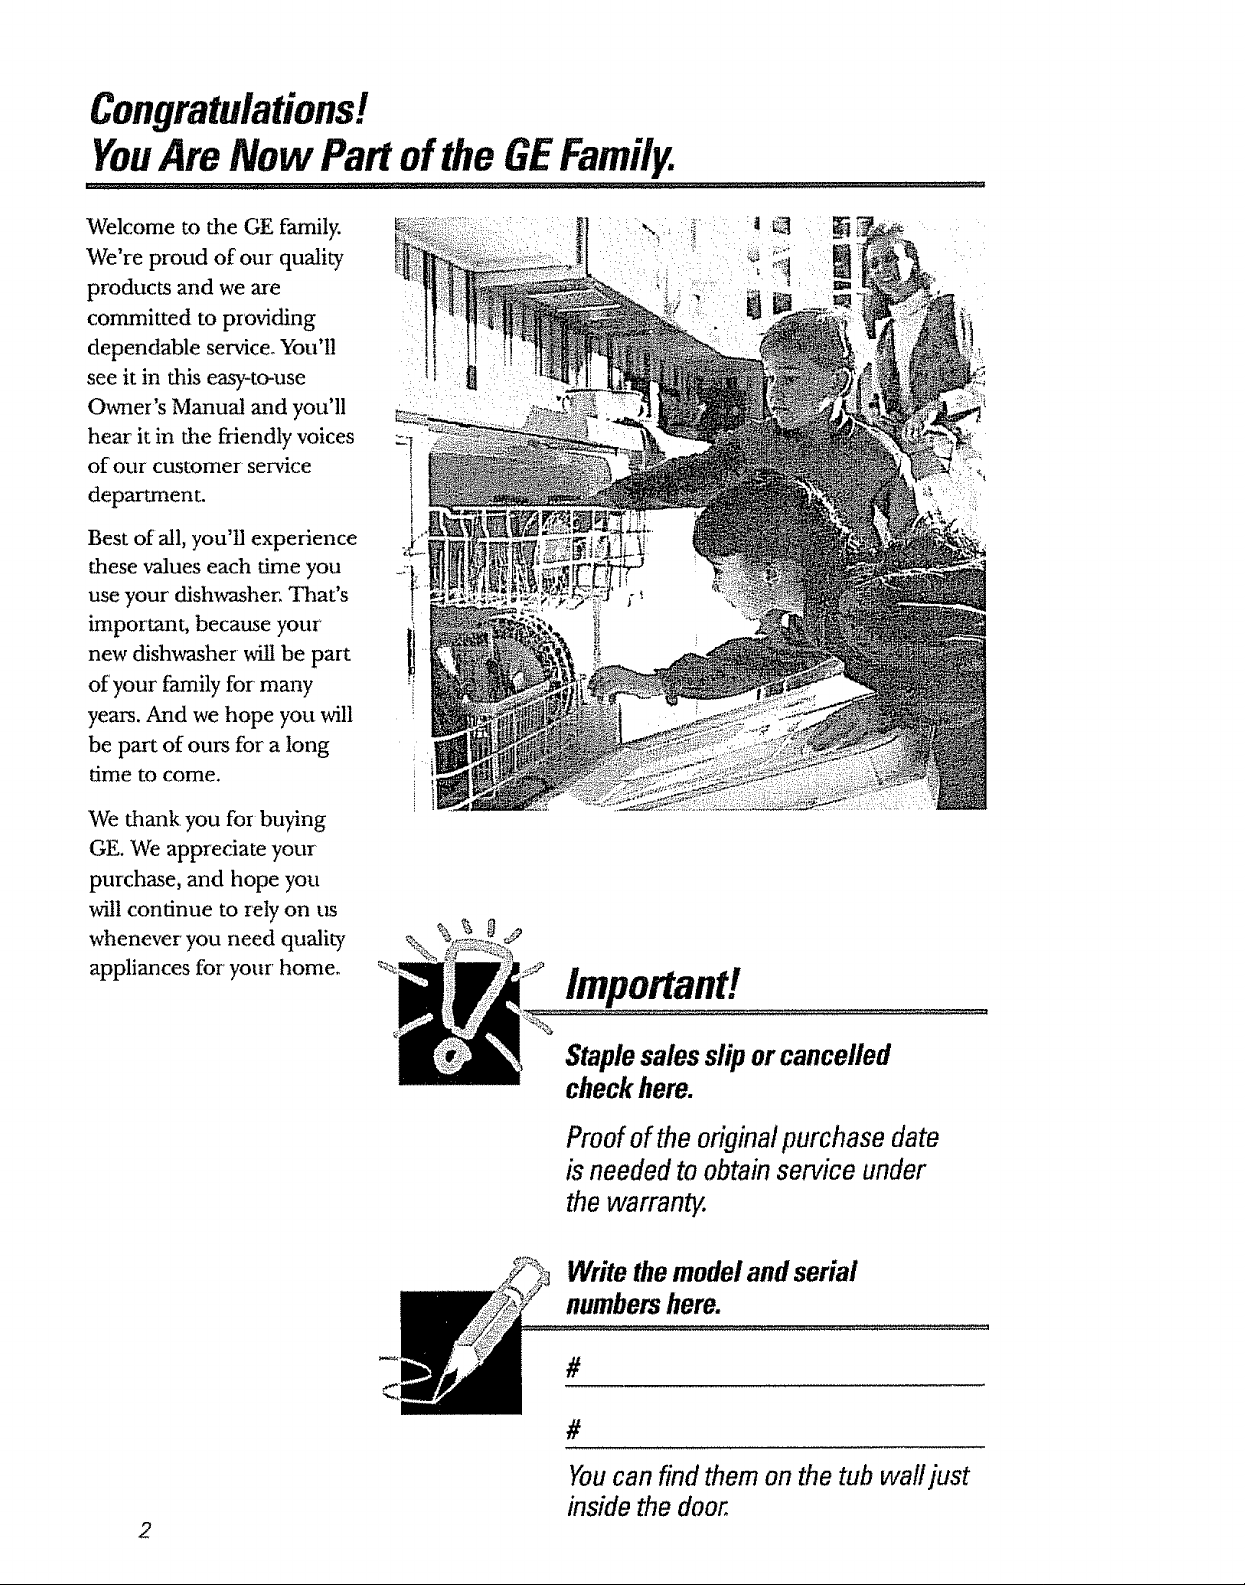
Congratulations!
YouAreNowPartoftheGEFamily.
Welcome to the GE family.
We're proud of our quality
products and we are
corrtmitted to providing
dependable servicer You'll
see it in this eas3,-to-use
Owner's Manual and you'll
hear it in the friendly voices
of our customer service
department.
Best of all, you'll experience
these values each time you
use your dishwasher. That's
important, because your
new dishwasher wi!! be part
of your family for many
years. And we hope you will
be part of ours for a long
time to come.
We thank you for buying
GE. We appreciate your
purchase, and hope you
will continue to rely on us
whenever you need quality
appliances for your' home.
Important!
Staplesales slip orcancelled
checkhere.
Proof of the originalpurchase date
is needed to obtain service under
the warranty.
Writethemodelandserial
numbershere.
#
#
Youcanfindthemonthe tub watljust
insidethedoor
2
Page 3
_& You,
A Semice Partnership.
Ask any GEappliance owner and they wilt
tell you we standbehind our products with
unmatched qualityservice. However, did
you know that most questions result from
simple problems that you can easily fix
yourself in just a few minutes? This
Owner'sManual can tell you how,
ReadthisManual
Inside you will find many
helpful hints on how to use
and maintain your dishwasher
proper])_ Just a litde preventive
care on your part can save you
a great deal of time and money
over the life of your' dishwasher.
SafetyInformation....... 4"7
i 4""
' ::t ,
Operating Instructions
ControlPanel.............. 8
ControlSettings........... 8,9
DialCycles............ :10,11
UsingtheOishwasher.... 12, 13
Loadingthe
DishwasherRacks....... 14,t5
ChangingColorPanels....... 16
CareandCleaning......... .18
ReviewtheSectionon
Troubleshootingtips
You'll find many answers to
common problems here.
If you review our chart of
Troubleshooting Tips first,
you may not need to call for
service at all.
If YouNeedService
If you do need service, you can
relax knowdng help is only a
phone call awa F A list of toll-free
customer service numbers is
included in the back section.
Or you can always call the
GE Answer Center ® at
Troubleshooting77ps
BeforeYou
CallForService........ 19"23 ii_
CustomerService
Warranty ................. 27
ServiceTelephone
Numbers............ BackCover
800,626,2000, 24 hours a day,
7 days a week.
3
Page 4
READALLINSTRUCTIOIVS USING.
WARNING!
Foryour safety, theinformation in this manual must be
followed to minimizethe risk of fire, explosion, electric
shock, or toprevent property damage,personal injury,
orloss of life.
WATERHEATERSAFETY
Under certain conditions hydrogen gas may be produced
in a water heater that has not been used for two weeks
ormore. Hydrogen gas can be explosive under these
circumstances.
If the hot water has not been used for two weeks or more, prevent
the possibility of damage or injury by tunaing on all hot water
faucets and allow them to run for several minutes, Do this before
using any electrical appliance which is connected to the hot water
system,, This simple procedure wil! allow any built-up hydrogen gas
to escape. Since the gas is flammable, do not smoke or use an open
flame or appliance during this process,
4
Page 5
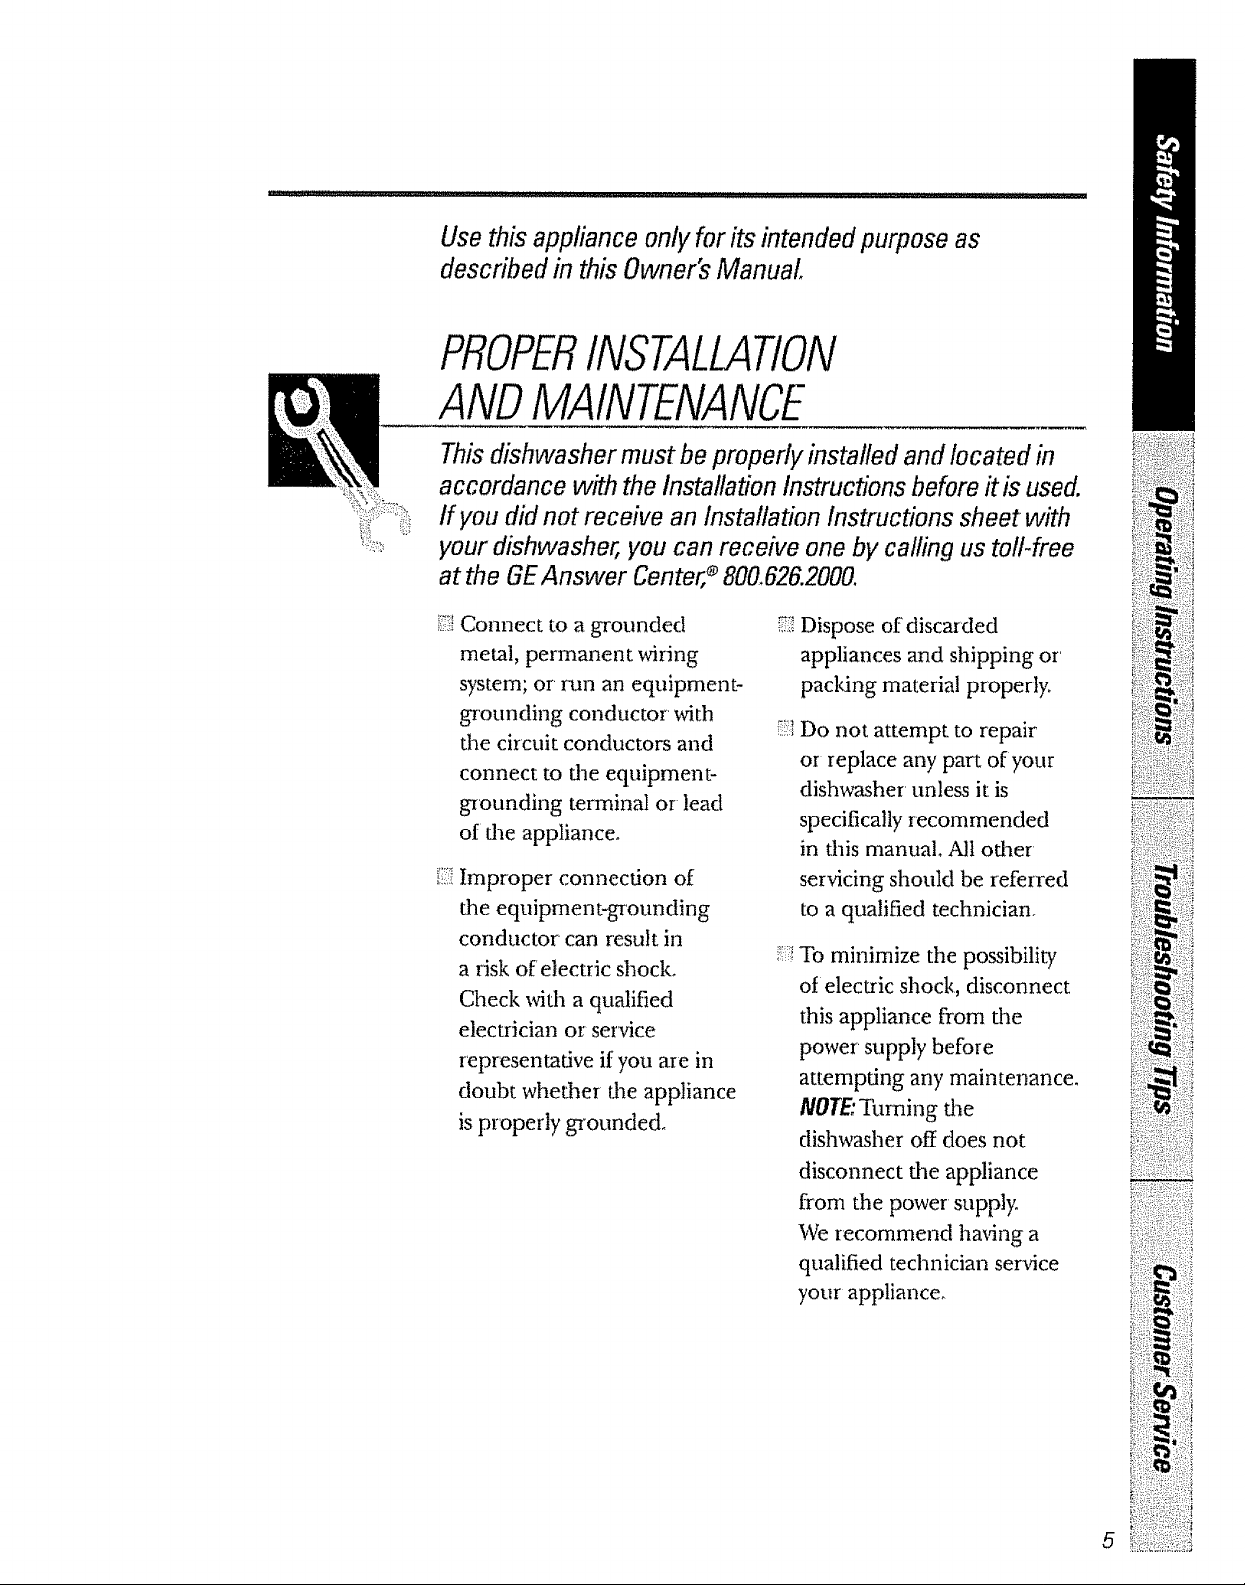
Use this appliance only for its intended purpose as
described in this Owner's Manual
PROPERINSTALLATION
ANDMAINTENANCE
Thisdishwasher must be properly installed and located in
accordance with the InstallationInstructions before #is used.
ff you did not receive an Installation Instructions sheet with
your dishwasher, you can receive one by calling us toll-free
at the GEAnswer Center,_ 800.626.2000.
Connect to a grounded :7.)!
metal, permanent wiring
system; or run an equipment-
grounding conductor with
the circuit conductors and
connect to the equipment-
grounding terminal or lead
of the appliance.
Improper connection of
the equipment-grounding
conductor can result in
a risk of' electric shock.
i"!To minimize the possibility
Check with a qualified
electrician or service
representative if you ale in
doubt whether the appliance
is properly grounde&
Dispose of discarded
appliances and shipping or'
packing material properly,
Do not attempt to repair
or replace any part of your
dishwasher unless it is
specifically recommended
in this manual. All other
servicing should be referred
to a qualified technician.
of electric shock,, disconnect
this appliance from the
power' supply before
attempting any maintenance,
NOTE:Turning the
dishwasher off does not
disconnect the appliance
from the power supply.
We recommend having a
qualified technician sen4ce
your appliance_
5
Page 6
READALLINSTRUCTIONS USING.
A WARNING!
DONOT...
!51!iDo not tamper with controls.
f!iiDo not abuse, sit on, or' stand
on the door or dish rack of
fire dishwasher:
Do not discard a dishwasher'
without first removing the
door or the washing
compartment.
Do not store or use
combustible materials,
gasoline or' odaer flammable
vapors and liquids in fl_e
vicinity o[ this or any other
appliance,
_:::iDo not allow children to
play inside, on or witl_ this
appliance or any discarded
appliance.
Page 7
WHENUSINGYOURDISHWASHER
_::,_Use only powder or liquid i!i;:i
detergents or wetting agents
recommended for use in
a dishwasher:
_;::::::!Do not operate your
Locate sharp items so that
they are not likely to damage
the door seal
,_:._,_:_:iLoad sharp knives with the i;2
handles up to reduce the risk,
of cut-type injuries,
i;! Do not wash plastic items _,5{
unless marked dishwasher
safe or the equiva]ento For
plastic items not so marked,
check the manufacturer's
recommendations.
Do not touch the headng
element during or
immediately after use.
dishwasher unless all
enclosure panels are
properly in place°
Close supevdsion is necessary
if dfis appliance is used by or
near children,
Load light plastic items
so they will not become
dislodged and drop to the
bottom of' the dishwasher--
they might come into contact
with the heating element
and be damaged°
i!iii'ili:,ii_'i_
REMEMBER...
Yourcontinued health and safety are important to us.
Pleaseread and follow this Safety Information carefully.
We want you to remain ahappy and healthy part of our
GEfamilg
ilVSTRUCTIOIVS
_)ii:i:::,)i
h
¸
Page 8
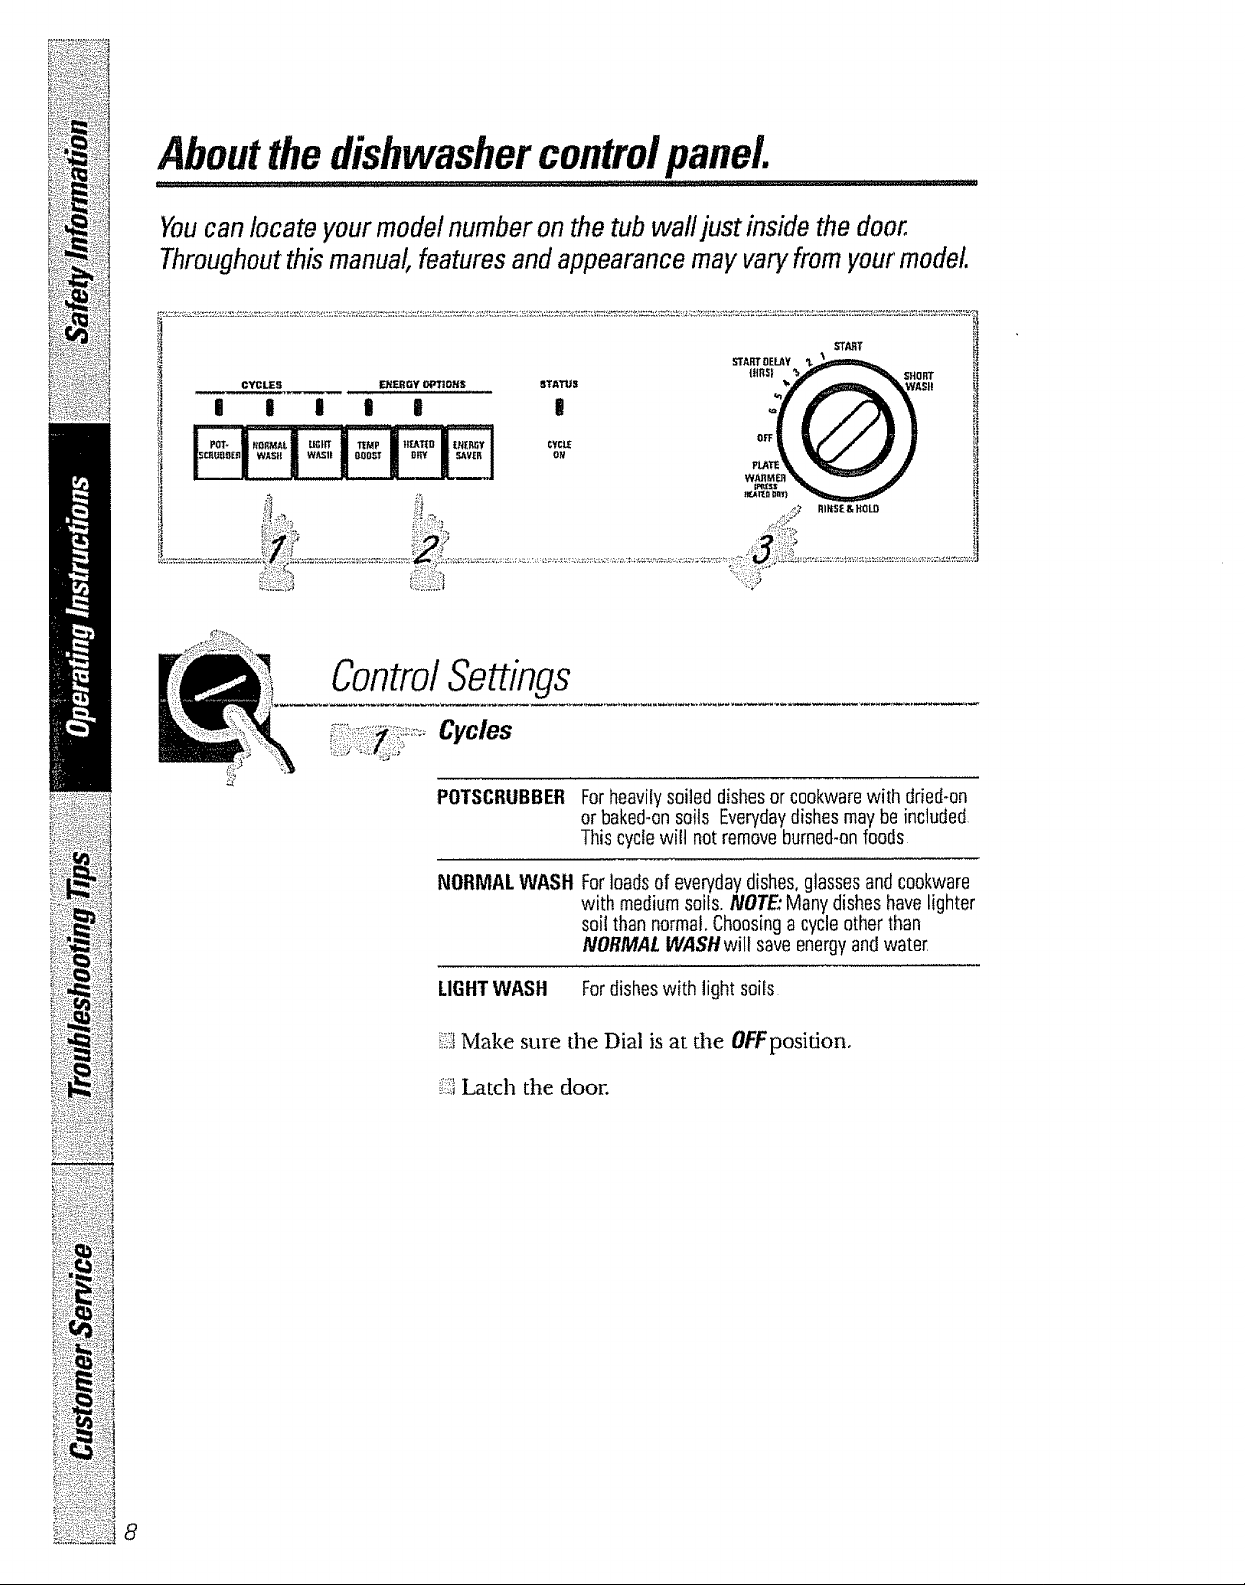
About the dishwasher controlpanel. ....................
Youcan locate your model number on the tub wall just inside the door,
Throughoutthis manual, features and appearance may vary from your model
START
!!?i!:_
ii!:_ii!:{
POTSCRUBBEH Forheavilysoileddishesor cookwarewith dried-on
or baked-onsoils Everydaydishesmaybe included
Thiscyciewilt notremoveburned-onfoods
NORMAL WASH Forloadsof everydaydishes,glassesandcookware
with mediumsoifs.NOTE:ManydisheshaveLighter
soil than normal.Choosinga cycleother than
NORMALWASHwill saveenergyandwater.
LIGHTWASH Fordisheswith light soils
i_,i;JMake sure the Dial is at dae 0FFposidon,
':_:_,_,Latch the door.
8
Page 9

EnergyOptions
TEMP BOOST Providesextraheat forbest performanceIt is used
bestwith heavily-soileddishes
HEATEDDRY Turnsthe dryingheateron for fast drying This
cyclewill extendthe time to yourwash cycle,
ENERGY
SAVER
Shutsoff thedryingheatoptions Dishesairdry
naturallyandenergyis saved
Start
Slowly turn the Dial to the STARTposidon. Don't turn it
past tile STaRTposidon,or you could accidentally miss a
rinse° There is a time del W between start-up and "water
fill so you wil! not hear any wash action right away,
9
Page 10

_!i!_ii__:i_iil
About thedial cycles.
Shoa Wash
:_:_^_D_ :_ For quickly washing loads of everyday dishes with
.: :I !_s): ::!' SRQnT : :
:_:_::_; ' ::: medium soils that have not dried on,
_i Select the NORMALWASHcycle and any options,
iBe sure the door is unlatched_
iiSlowly turn the Dial to SHORTWASH,
_i Latch the door to start the cycle°
Rinse & Hold
For rinsing partial loads that will be washed later, D0 not
use detergent.
i Make sure ENERGYSAVERisselected.
iBe sure the door is unlatched.
_ Slowly turn the Dial to RINSE& HOLD,
_] Latch the door to start the cycle_
Plate Warmer
For warming clean dishes and serving plates. This cycle
wi!l take approximately 32 minutes°
iiLoad clean dishware to be warmed.
iSelect HEATEDDRY.
iBe sure the door is unlatched_
{Slowty turn the Dial to PLATEWARMER.
_i Latch the door to start the cycle,
:_
U_
'_:u:I
Page 11

5TART ]) EL_Y _
_AFIT
•I)'m "f "'" _""M
Start Delay
Ihe STARTDELAF WIll allow you to delay the start rime of
any cycle not on file dlal aummadcally for up to 6 hours°
i PLAT
wp+m'_ ---v +j
RtNSE& tlGED
!ii_}iBe sure the door' is unlatched.
_2;i Select the wash cycle and option you wanL
_?_";Slowly turn the Dial to desired time. The CYCLEON
!)i!i/_light will come on.
,i_!!!!r+{Latch the door to start the cycle.
CycleSequence
POTSCRUBBER 9,9ga! 63rain RinseRinseRinseMainWash RinseRinseRinse
LIGHTWASH 77 gaf 63rain
RINSE& HOLD 30 gal
9rain RinseRinse
RinseRinse MainWash RinseRinse
g!!;i:_
i::_:)+;
;!i?_.'¢
g!!_
=+i;!:!:'4!
DryingOptions:
HEATEDDRY,Available on all wash cycles except RINSE&
HOLD.Add approximately 32 minutes to the cycle.
ENERGYSAVER.Drying heater is turned off2Dishes dr'i
naturally.
11
i!?:i::
++
!:::i722_::{
Page 12

Usingthe dishwasher.
ChecktheWaterTemperature
The entering water must be at least 120°E and not more than
t50°E, for effective cleaning and to prevent dish damage_ Check
the water temperature with a candy or meat thermometer. Turn on
the hot water faucet nearest the dishwasher, place the thermometer
in a glass and let the water run continuously into the glass until the
temperature stops rising. Adjust your water' heater, if needed°
Usinga RinseAgent
A rinse agent, such as JET-DRY, makes water flow off the dishes
quicldy thereby reducing water spotting.
Fill the rinse agent dispenser' ...... . ..... :: . / .
i !ii!!
!i:i:ii
:%5;
iiil
inside the opening. Replace cap.
remove the cap and look into the _
dispenser; On some models, the _--_")_ :_
dispenser can be checked by
pressing the clear center of the _ • .....
fill cap 2 or3 dines. If rinse agent
fills the center of the fill cap, you
have enough.
A full dispensershould last about 3months,
If rinse agent spills, wipe # up immediately. It can keep your detergent
fromworking.
t2
Page 13

ProperUseof Detergent
Use only detergent specifically made for use in dishwashers, Keep
your detergent fresh and dry, Don't put powder detergent into the
dispenser until you're ready to wash dishes.
The anaount of detergent to use depends on whether your water is
hard or soft. With hard water, you need extra detergent,, With soft
water; you need less detergent.
Protect your dishes and dishwasher by contacting your water
department and asking how hard your water is. Twelve or more
grains is extremely hard water, A water softener is recommended.
Without it, lime can build up in the water' valve, which could stick
while open and cause flooding, Too much detergent with soft water
can cause a permanent cloudiness of glassware, called etchin9
You'll find two detergent dispensers on the
inside door of your dishwasher. All wash cycles
require detergent in the main cup, Wash cycles
with two washes will also use the open cup_
OpenCup
Be sure the Dia! is at OFFposidon before
adding detergent° Otherwise, the detergent
cup will not close and latch properly° Add
MainCup
detergent then close the main cup°
NOTE:To open detergent cup aft,er it has
been closed, simply turn the detergent cup :::::
handle counter-clockwise until it releases_ ;
A snapping sound may be heard. :: l :'15:::}
ForgettoAdd a Dish?
A forgotten dish can be added any time before the main wash.
i!_! Push the door latch to the le_L
i_ Once the water calms, open the door. Steam may rise out of
......._=:the dishwasher,,
i_i:i{Add forgotten dishes.
_i Close the door and push the latch to the far right,
h<:_i,{
13
Page 14

Loadingthe dishwasher racks.
Forbest dishwashing results, follow these loading guidelines. Features and
appearance of racks and silverware baskets may vary from your model
Upper Rack
The upper' rack. is for glasses, cups and saucers.
Cups and glasses fit best along the sides, This is
also a secure place for dishwasher-safe plasdcso A
cup shelf (on some models) may be placed in the
up or down position to add flexibility, The upper
rack is good for all kinds o[ odd-shaped utensils,
Saucepans, mixing bowls and other' items should
be placed face down°
Sec,re large?dishwasher-safeplastics ove_-two fingers
h: ossjb e;....................
Make:Suresmall plasti_ ite_s are _ecure sOtheY¢an'i fall:
iO_t5the:_,fieatin9elemefiti:............................................
The Wash Tower
:Keepithecehter a_'eadear in thefower rack.
The wash tower rises through the center of the
lower rack. during the wash and rinse portions of
the cycle,
'tb!Ock iiiOaJtait:thing#: ext:talt,
Also, be careful not to let a
portion of an item such as a pot
or dish handle extend through
the bottom rack, This could block.
the wash arm and cause poor
washing results°
14
Page 15

LowerRack
Whenbading the lower rack, do not load largeplatters or
trays in the front right comer Theymay prevent detergent
from circulating duringthe wash cycle.
The lower rack is best used for plates, saucers,
and cookware. Large items such as broiler pans
and racks should go along the sides. Load
platters, pots and bowls along the sides, in
corners, or in the back. The soiled side of items
should face the center of the rack°
Fold<lown fingers (on some models) provide
flexibility for extra large and hard-to-fit items,
The fingers may be left in the tip posidon or
folded dowaa to customize the lower rack.
Silverware Basket
Put flat, rare in the removable basket Mth fork
item:extend
:throughbottom. '
and knife handles Lip tO protect your hands_
Place spoons in the basket with handles dowaao
Mix knives, forks and spoons so they don't nest
together. Distribute evenly. Small plastic items,
such as measuring spoons and lids from small
containers, should go in the bottom of the
silverware basket with silverware on top.
To increase the flexibility of the lower rack., the
silverware basket may be split. Grasp the basket
at opposite corners and slide apart. The basket
sections should be placed in the lower rack by
hanging them on the top hoop°
A security cell cover (on
some models) hinged in
some handles can be
lowered to either side to
secure ligtmveight items
from the effects of the
vigorous wash action.
15
Page 16

Changingcolorpanels.
if you are redecorating, you can change your dishwasher's front
panel to match or blend with your new colors by flipping it over,
Eachside of each panel is a different color, Youmayalso paint
apanel with a color of your own choice.
A WARNING!
!iii!IWear gtoves when handling door panels. Failure to do so can
cause serious cuts.
!_i5_Do not operate dishwasher while changing panels.
Changing the Door Panel
i!_:_'_i!Take out trim screws on either side of the
i:,_':::_dishwasher door. Remove the side trim,
_21!Slide the door' panel ouL (Careful--edges may
_ii be sharp..)
!!3_iTurn the door panel around and put the color you
_'::::.::_want in front.
i:_i Replace the door panel, side trim and screws.
NOTE:Do not operate dishwasher while changing panels
or when bottom panel is removed.
_ii::_:;iRemove the bottom panel attachment screws,
_21i_Remove the top mounting screws,
_:_::ii7:+'+:iTake. out the top trim screws and remove the top
_"-'-+_trim.
{_ii Slide the color panel(s) up and out and put the
............:"color you want in front.
i:_ Replace the top trim and screws,
;:!!i,i
!;;>:!7_
!i::i:?!6
[_:! Replace the entire ,-assembly by reversing the steps,
Page 17

Adding1/#' WoodInserts
Color insert panels for both the door and the bottom panel can be
replaced by 1/4" thick wood inserts to match your ldtchen cabinets.
Get them from your nearest cabinet or lumber dealer.
Dimensions for 1/4" wood inserts:
Door Panel: 19N" H x 239A6" W.
Bottom Panel: 3"Ad' H x 23-%6" Wo
Opfional Accessories
Color panels are available at an extra cost by calling, toll-
free,800-626-2002.Yourorder will be sent directly to your
home. VISA,MasterCard and Discover cards are accepted.
If you have redecorated and the color panels in your dishwasher do
not blend with your new color scheme you may order an additional
color panel
Specify the co!or panel when ordering,
GPF24White/Almond
GPF26Harvest/Black
GPF27Black/White
_:,::i?: m:?i!:_
17
Page 18

Caringfor the dishwasher.
Toclean the control panel use a lightly dampened cloth then dry
thoroughly. Toclean the exterior use agood appliance polish wax.
Never use sharp objects, scouring pads or harsh cleaners on any
part of the dishwasher.
Protect Against Freezing
If your dishwasher is left in an unheated place during
the winter, ask a service technician to:
!!:_i]Cut off electrical power to the dishwasher. Remove
_"_'_:_!fiases or trip circuit breaker.
_I Turn off' the water supply and disconnect the water
inlet line from the water valve.
_ii Drain water from the inlet line and "water valve.
_:::_;::(Use a pan to catch the water,)
!!'ii!._91!_
'g!ii_I_ii::_);i
i:ii!_N=!_,ii
dishwasherisn'tdrainingwell. :
i!_] Reconnect the water inlet line to the water valve.
:'_5! Remove the plastic sump cover in the tub
........bottom and use a sponge to soak up vcater in the
rubber boot,
Does YourDishwasherHave anAk Gap?
An air gap protects your dishwasher against water
backing up into it ifa drain clogs, The air gap is not
a part of the dishwasher. It is not covered by your
warranty. Not all plumbing codes require air gaps,
so you may not have one.
The air gap is easy to clean.
_;i_:_Tuna off' the dishwasher and lift off the chrome
_:._i_:_cover:
_i Unscrew the plastic cap and clean 'with a toothpick.
:_q:52_a
18
Page 19

Before youcall for service...
Troubleshootingtips
Review the charts on the following pages first and you may not
need to call for service,
Possible Causes What ToDo
Dishwasher won?run Fuse is blown, or the _:,
" circuit breaker tripped
Noise
Some of the sounds
you'll hear are normal
Utensils are not secure
in die rack or something
small has dropped into
the rack
Motor hums
v*Soft food disposal
_':Drain valve opening to
_'Timer control as cycle
_ Detergent cup opening.
,._The motor stopping
._Make sure everything is
Replace fuse or reset
circuit breaker: Remove
any other appliances from
the circuit.
shredding action.
pump water out.
progresses°
during the drying period.
secured in dishwasher.
Dishwasher has not been
used on a regular b_is,
If'you do not use your
dishwasher often, set it to
fill and pump out once
every week. This will help
keep the seal moist and
the garbage disposer clear:
Detergent cup lid
won't latch
Detergent left in
dispenser cups
: 2 . .... , ,
£. : :: - : : : .
Dial is not in the OFF
position
Dishes are blocking the
detergent cups
Turn the Dial to OFF
and slide the door latch
to the left.
_',Reposidon the dishes_
19
Page 20

Before you call forservice...
I II ' i ,., ,,,,,, ,,,,L,,
............ :................... i, , ,, L , L.H
Troubleshootinglips
Possible Causes What To Do
_i!_ii i!!ii!i
iiii : iii
Water standing in
the bottom of the tub
Water won't pump
-:outofthe tub
L ¸ 7 • :• •-•Z • •;"
Sudsin thetub
L _ • /• '•• • Z•:• • • •: ! • Z -
This is normal _
Drain is clogged
Correct detergent
wasn't used
A small amount of clean
water around the outlet on
the tub bottom at the back
of the tub keeps the water
seal lubricated°
If you have an air gap,
clean it,
Check to see if your
ldtchen sink is draining
well. If not, you may need
a plumber,
If the dishwasher drains
into a disposer, mn
disposer clear:
Use only automatic
dishwasher detergents to
avoid sudsing°
To remove suds from the
rob, open the dishwasher
and let suds evaporate.
Add 1 gallon of cold water'
to the tub° Close and latch
the dishwasher. Pump out
water by slowly turning the
Dial until a drain period
is reached, Repeat i[
necessary,
2O
Steam
,•. •• • • •2• ¸
Rinse agent
was spilled
This is normal
Always "wipeup rinse agent
spills immediately.
Steam comes through
the vent by the door
latch during drying and
when water' is being
pumped out,
Page 21

L-:: _>::: ::: i';q;: : _r ; :;; _y?:, :}; :A--_
_Prob/em_i:"_i,:i_:::iJii:ii;_!?¢i!'_?&;_i!_:_ii:iii::' Possible Causes What ToDo
Stained tub interior:" Detergent with
colorant was used
v
Dishes don't dry
Dishes and flatware
L• • • • _ • : , ,-
Low inlet water
temperature
Rinse agent dispenser
is empty
Inlet water temperature
is below 120°E
Water pressure is
temporarily low
Air gap is clogged _:Clean the air gap.
_,Some detergents contain
colorant (pigment or dyes)
that will discolor dae tub
interior with extended
use. Check tim detergent
cup for signs of any
discoloration. If cup is
discolored, change to
detergent widmut any
colorant.
:_,Make sure inlet water
temperature is correct.
_:Check the rinse agent
dispenser'.
_-'Paise the water heater
temperature to 120°E
"_Use the TEMPBOOST
opdon_
Turn on a faucet. Is water
coming out more slowly
than usual? If'so, wait until
pressure is normal before
using your dishwasher.
]:/;;5
:':!ii
_:i:9:ia =:;i{
!_::!i:ii_ i:::?i:::!
_i11:{:qt_:{:i;:':i
Improper rack loading ':_Make sure large dishware
does not block the
detergent dispenser or
the wash arm.
2t
Page 22

Before Vou call for service...
Troubleshootingtips
%,1.
Possible Causes What ToDo
Spots and filming
iii_ii!!iii!_!i!ii_iii_!
on glasses and
flatware !
i?ii:_!!!2_:ilil
:,:iiI
!ii; !i:i i
!: '?:i
Extremely hard water
Low inlet water
temperature
Overloading the
dishwasher
Improper loading
Old or damp powder
detergent
Rinse agent dispenser
empty
Too little detergent
_,,To remove stubborn spots
from glassware:
I Remove all metal
utensils from the
dishwasher.
2 Do not add detergent.
3 Select the !ongest oicle_
4 Start the dishwasher and
allow to ran for 18 to 22
minutes, Dishwasher will
now be in the main wash.
5 Open the door and pour
2 cups (500 ml) ofwhite
vinegar into the bottom
of the dishwasher,
6 Close the door' and allow
to complete the cycle.
If' vinegar rinse doesn't
work: Repeat as above,
except use 1/4 cup
(60 ml) of citric acid
crystals instead of
vinegar.
!i':'_iil
!!?:_:t ::ii_'::
Cloudiness on
glassware
i_!:
marks on dishes
! : : : ! ,
Combination of soft
water and too much
detergent
Water temperature
entering the dishwasher
exceeds 150°E
.AJuminum utensils have
rubbed against dishes
This is called etching and
is permanent. To prevent
this from happening, use
less detergent if you have
soft water, "Wash glassware
in the shortest cycle that
will get them clean.
_*Lower the water heater
temperature,
_"Remove marks with a mild,
abrasive cleaner:
Page 23

Possible Causes What To Do
ili
L;,,!}:
_i:!:ili!;:i:i
_:':ii;iii
Yellow or brown film Tea or coffee stains _,
An overall yellow or
brown film can be caused
by iron deposits in water
White film on inside
suffaces :_:
•5: :•:•• • - • "
Hard water minerals
Remove dae stain by hand,
using a soludon of 1/2 cup
bleach and 3 cups warm
water;
A WARN/NG
Before cleaning interior,
wait at least 20 minutes
after a cycle for the
heating element to cool
down, Failure to do so
can result in burns°
A special filter' in the water
supply line is the only way
to corTect this problem.
Contact a water softener
company.
To clean the interior, apply
dishwasher detergent to
a damp sponge. Wear'
rubber gloves, Donotuse
any type of'cleanser other
than dishwasher detergent
because it may cause
foaming or sudsing.
Cycle and optionindicator
lightsstayon when cycle
is competed _ ..
This is normal Unlatch the door to turn
off dm Cycle and Energy
Option indicator lights.
NOTE'The Cycle On light
will stay on until all cycles
are complete, Wait until
this light goes off to
unlatch the door or a
cycle vdll be interrupted,
23
Page 24

_:__!!i__;_ii_
_i!ii:_ _;ii_i_ii
Notes.
i_,!!_:)i!!)i
24
Page 25

25
Page 26

Notes.
26
Page 27

GEDishwasherWarranty.
,,,,,,,,,
All warranty service provided by our Factory Service Centers,
or an authorized Customer Care®technician. Forservice,
call 800-GE-CARES.
.... :_ _ _.,,,,,,,,,,,,,,, , ,,
GEWill Replace,At No ChargeToYou:
Anypart of the dishwasher which fails due to a defect
From the date of the :
original purchase
Second Year
From the date of the
original purchase
in materials or worl_nanship. During this full one-year
warranty,GE will also provide, free of charge, all labor
and in-home service to replace the defective part.
Anypart of the dishwasher which fails due m a defect
in materials or workmanship,. During this second-year
limitedwarrang you will be responsible for' any labor
or in-home service costs.
n
tl:::!:::!
Five Yeats
Fromthe date of the
original purchase
Twenty Years
From the date of the
original purchase
Service trips to your home to teach
you how to use the product.
......Imp
"_:_ roper installation.
[_iiReplacement of house fuses or
resetting of circuit breakers.
i;;iFailure of the product if it is
abused, misused, or used for other
than the intended propose or used
commercially.
Thedishwasherrack, if it should rust due to a defect
in materials or workmanship. During this five-year
limitedwarranty,you will be responsible for any labor
or indmme service costs.
ThePermaTuf®tub or door liner, if it fails to contain
water due to a defect in materials or workmanship.
During this full twen_-year warranty,GE will also
provide, free of charge, all labor and in-home service
to replace the de[Ective part.
_=_!Damage to the product caused by
accident, fh'e, floods or acts of God.
{';!_iIncidental or consequential damage to
personal property caused by possible
defects with this appliance.
',,_2iiCleaning or servicing of the air gap
device in the drain line.
ii!
==i=;:;:i
l:: ii
_,:
_!i;!!
Thiswarrantyisextendedto theoriginafpurchaserandanysucceedingownerforproductspurchased
forhomeusewithin theUSAInAlaska,thewarrantyexcludesthecostof shippingorservicecallsto
yourhome,,
Somestates donot allow the exclusionor limitation of incidental or consequentialdamages This
warrantygives youspecific legal rights, and youmay also haveother rights which vat'/from state to
state Toknow what your legal rights are, consult yourlocal or state consumeraffairs office or your
state'sAttorney General
27
Page 28

i!ilili;i!!iii!_iii_ill
GEAnswerCenter®800.626.2000
iii!ili!!_iii!i!!
ii_i!_iiiiiiii!!
ii_,i¸i,_i¸ii!!ii_i!,ii!iJi¸i_i
The GE/Xmswer Center _ is open 24 hours a day, 7 clays a week.
In-HomeRepairService800-GE-CARES(800-_32-2737)
Expert GE repair service is only a phone call away.
Specbl Needs Serw2esoo.626.2ooo
TDD800-TDD-GEAC(800-833_22)
GE offers, free of' charge, a brochure to assist in planning a barrier_
free ldtchen for persons with limited mobility.
Serv#eContracts800-626.2224
Purchase a GE service contract while your warranty is still in effect
and you'll receive a substantial discount. GE Consumer Service will
still be there after your warranty expires.
_ii,i!:_i:!iiiiiiI
Par_sandAccessories 800-626-2002
Individuals qualified to service their own appliances can have parts
or accessories sent directly to their homes (VISA, MasterCard and
Discover cards are accepted)°
Instructions contained in thismanual cover procedures to be performed
by any user. Other servicing generally should be referred to qualified
service personneL Caution must be exercised, since improper servicing
may cause unsafe operation.
ServiceSatisfaction
If you are not satisfied with the service you receive from GE., follow
these three steps. Firs_ contact the people who serviced "/our
apptiance_ Next, if you are still not pleased, write all the details--
including your phone number_to: Manager, Consumer Relations,
GE Appliances, Appliance Park., Louisville, I_ 40225. Finally,if your
problem is still not resolved, write:
Major Appliance Consumer Action Program
20 North Wacker Drive, Chicago, IL 60606.
Printedin Louisvi!!&KY _o._ cG_m)
 Loading...