

Page 1
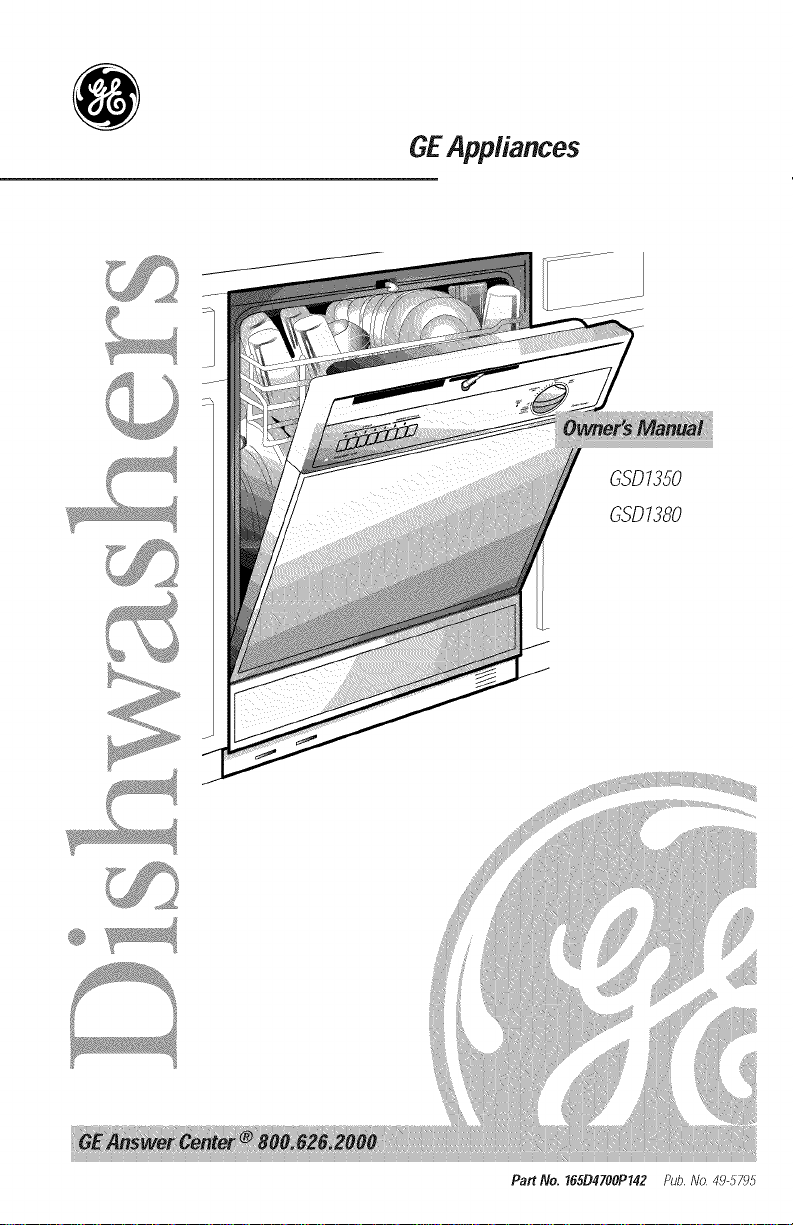
GEAppliances
GSD7350
GSD7380
Part No. 165D4708P142 Pub,No, 49..5795
Page 2
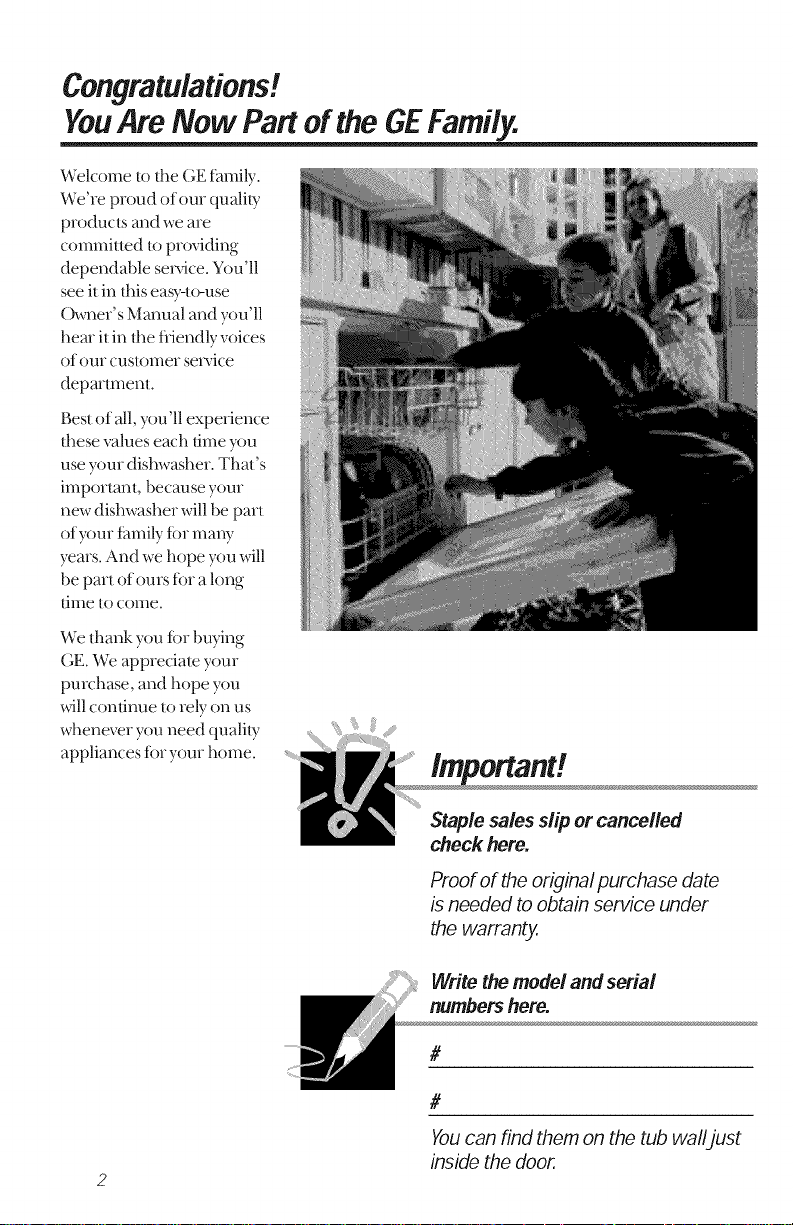
Congratulations!
YouAreNow PartoftheGEFamily.
Welcome/o tim GE f_tmily.
We're proud of our quality
products and we are
commitmd toproviding
dependable se_,ice. You'll
see it in fl_iseasyqo-use
Owner' sMmmal and you'll
hem il in tim fiiendly voices
of our customer se_,ice
departmenl.
Best of all, you'll expe_Jence
fl_ese values each time you
use your dishwasher. That's
important, because your
new dishwasher will be part
of your family for ma W
years. And we hope you will
be part of ours tor a long
time to come.
Weflmnk you tor bwing
GE. We appreciate your
purchase, and hope you
_ll continue to relyon us
whenever you need quality
appliances tor your home.
@
Staple sales dip or cancelled
check here.
Proof of the original purchase date
isneeded to obtain service under
the warranty.
Write the model andserial
numbershere.
#
#
Youcan find them on the tub walljust
inside the door.
Page 3
GE& You,
A ServicePartnership.
Ask any GEappliance owner and they will
tell you we stand behind our products with
unmatched quality service. However, did
you know that most questions result from
simple problems that you can easily fix
yourseff injust a few minutes? This
Owner's Manual can teflyou how.
ReadthisManual
Inside you will find ma W
helpfhl hints on how to use and
maintain your dishwasher
properly..Just a little prevenlive
care on your part Call save you a
great deal of time and money
over the life of your dishwasher.
ReviewtheSectionon
TroubleshootingTips
Safety information ...... 4- 7
Operatinginstructions
ControlPanel ............ 8
ControlSettjnqs........... 8, 9
Dial@des ........... 18 11
UsingtheDishwasher .... 12,73
Loadingthe
DishwasherRacks....... 14.15
ChangingColorPanels.... 16,17
CareandCleaning.......... 18
TroubleshootingTips
Before You
CarlForService......... 79-23
You'll find many answers to
coinInt/n probleuls here.
If you review our chart of
Troubleshooting Tips first,
you may not need to call tar
service at all.
If YouNeedService
If you do need sei_ice, you can
relax know,ring help is only a
phone call away. A list of toll-fiee
customer sei_:ice numbers is
included in the back section.
Or you Call alwws call tile
GE Answer Center ®at
800.626.2000, 24 hours a dW,
7 days a week.
CustomerService
Warranty ................ 27
ServiceTelephone
Numbers .......... BackCover
3
Page 4
IMPORTANTSAFETYINFORMATION.
READALLINSTRUCTIONSBEFOREUSING.
WARNING!
Foryour safety, the information in this manual must be
followed to minimize the risk of fire, explosion, electric
shock, or toprevent property damage, personal injury,
or loss of life.
WATERHEATERSAFETY
Under certain conditions hydrogen gas may be produced in
a water heater that has not been used for two weeks or
more. Hydrogen gas can be explosive under these
circumstances.
If the hot water has not been used tbr t_vo weeks or more, prevent
the possibilily of damage or injm 7 by turning on all hot water
/hucels and allow them to run tbr several minums. Do Ibis betore
using any eIectiica] appliance which is connected to the hot water
system. This simple procedure will allow any buih-up hydrogen gas
to escape. Since the gas is flammable, do not smoke or use an ()pen
flame or appliance du|ing this process.
Page 5
Useyour dishwasher only for its intended purpose as
described in this Owner's Manual.
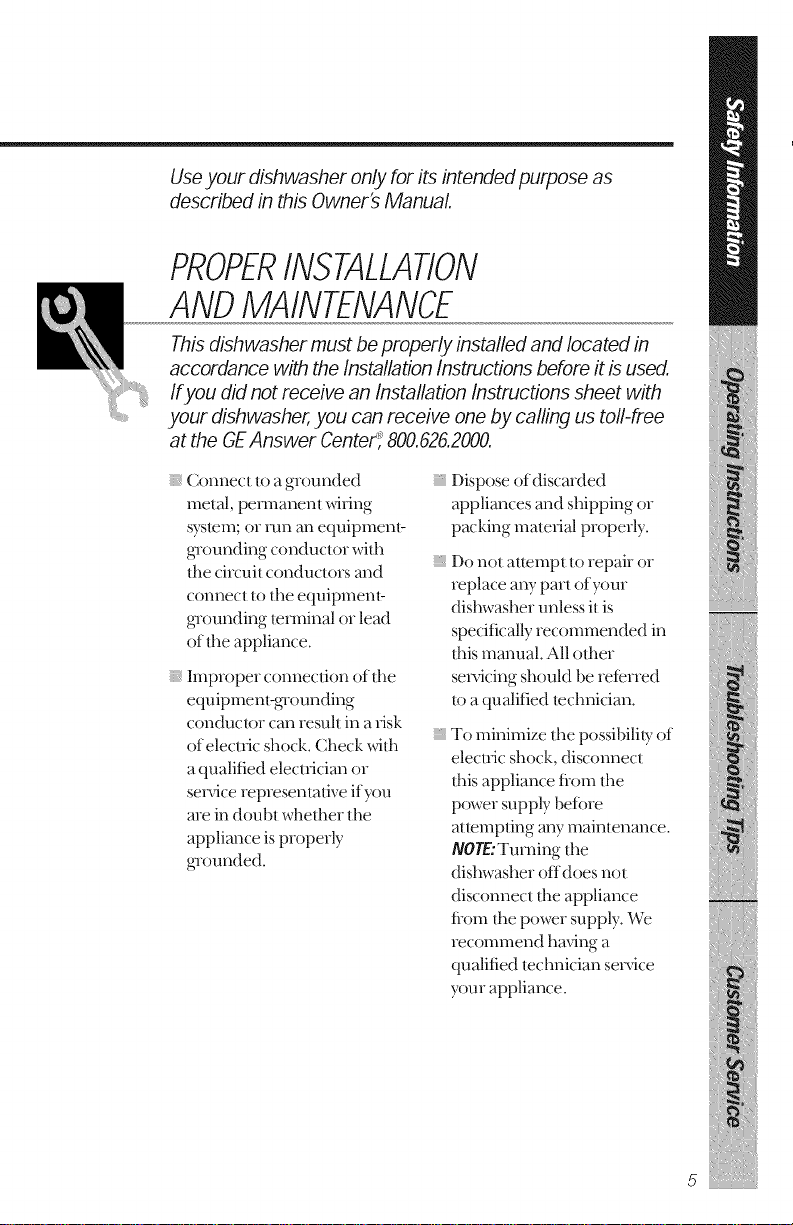
PROPERiNSTALLATION
ANDMAINTENANCE
This dishwasher must be properly installed and located in
accordance with the Installation Instructions before it is used.
Ifyou did not receive an Installation Instructions sheet with
your dishwasher, you can receive one by calling us toll-free
at the GEAnswer Center_'800.626.2000.
Connect to a grounded
metal, permanent _dxing
system; or run an equipment_
gTounding conductox with
tile circuit conduclors and
connect 1o the equipmenI_
gTounding lenninal or lead
of tile appliance.
Improper connection of tile
equipment-gTounding
conductor can resuh in a xisk
of eleclxic shock. Check with
a qualified elecuician or
service representative if you
ae in doubt wheflmr the
appliance is properly
gTounded.
Dispose of discarded
appliances and shipping or
packing matexial properly.
Do not attempt/o repair or
replace a W part of your
dishwasher unless it is
specifically recommended in
fills manual. All odmr
sex,Tieing should be refened
/o a qualified technician.
To minimize tim possibilib: of
elecuic shock, disconnecl
fllis appliance flx)m file
power supply betbre
allempfing any mainlenance.
NOEE:Turning tile
dishwasher offdoes not
disconnect tile appliance
flom tile power supply. We
recommend having a
qualified lechnician sex_ice
your appliance.
5
Page 6
IMPORTANTSAFETYINFORMATION.
READALLINSTRUCTIONSBEFOREUSING.
WARNING!
DONOL..
Do not tamper with controls. Do not allow children to play
} Do not abuse, sit on, or stand
on the door or dish rack of appliance or any discarded
the dishwasher, appliance.
Do not discmd a dishwasher
_qd_out first removing the
door of the washing
compartmenl.
Do noÁstore or use
combustible mamrials,
gasoline or other tlammable
vapors and liquids in fl_e
vicinily of this or aW other
appliance.
inside, on or _th this
Page 7
WHENUSINGYOURDISHWASHER
1Jseonly powder or liquid
dele_genls or welling agenls
recommended tbr use in a
dishwasher.
D_cate sharp ilems so that
they are not likely to damage
the door seal.
Dmd sharp knives _th the
handles up It reduce the _Jsk
of cut-type il_jmJes.
Do not wash plastic items
unless marked dishwasher
safe or the equivalent. For
plastic imms not so marked,
check the manutacmrer's
recommendations.
Do not touch the heating
element during or
immediately atier use.
iiiiiiiiiiiii_iil
Do not operate your
dishwasher unless all
enclosure panels me properly
in place.
iiiiiiiiiiiii_iil
Close supe_,ision is necessm T
if this appliance is used by or
near children.
iiiiiiiiiiiii_iil
Dmd light plastic ilems so
they will not become
dislodged and drop/o lhe
bottom of the dishwashe_
they might come into contact
_4th the heating element and
be damaged.
REMEMBER...
Your continued health and safety are important to us.
Please read and follow this Safety Information carefully,
We want you to remain a happy and healthy part of our
GE family.
SAVETHESEINSTRUCTIONS
Page 8
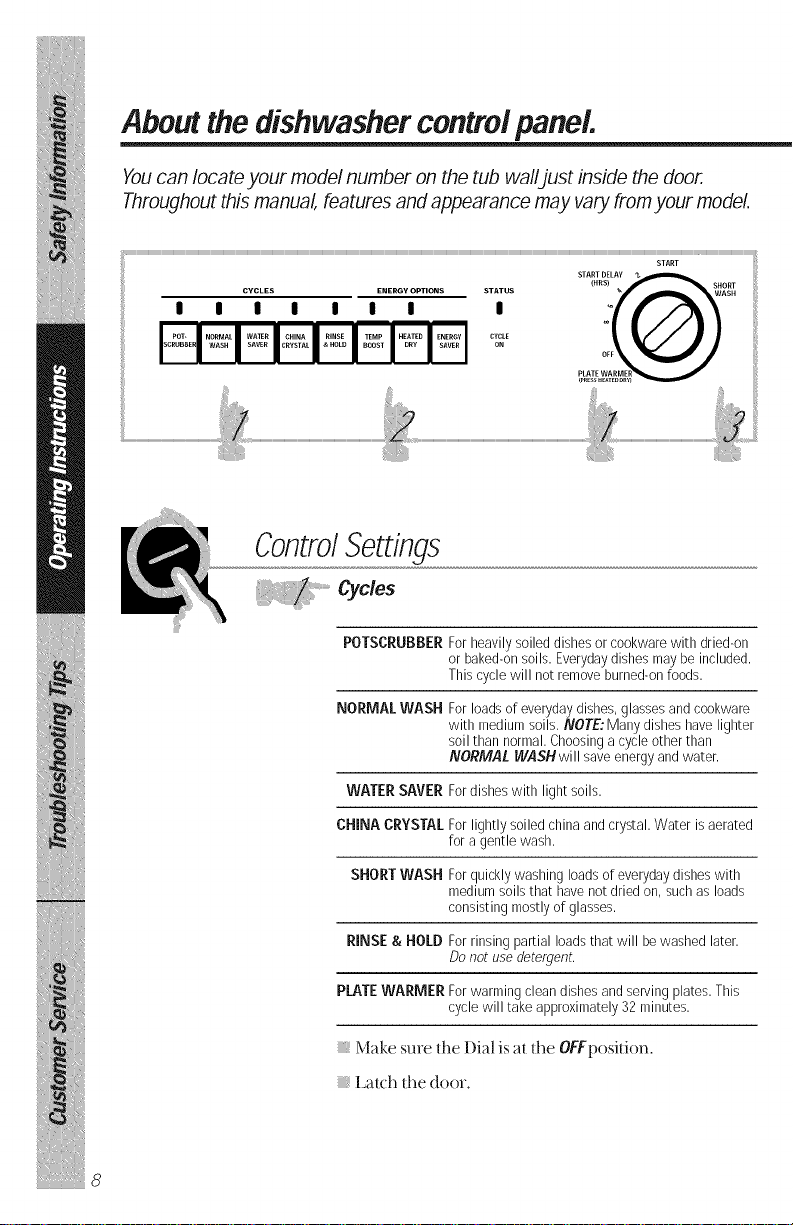
Aboutthe dishwasher centre/panelo
Youcan Iocate your model number on the tub walljust inside the door.
Throughout this manual, features and appearance may vary from your model.
.... START iiil
I I I I I I I I
CYCLES ENERGY OPTIONS STATUS _f_BI_'_.WASH
CYCLE
ON
(HRS) SHORT
STARTDELAYAY__HHEWATAE_'L i
OFF
ControlSettings
cydes
POTSCRUBBER Forheavilysoileddishesor cookwarewithdried-on
NORMAl.WASH Forloadsof everydaydishes,glassesandcookware
WATFRSAVFR Fordisheswith light soils.
CHINA CRVSTALForlightlysoiled chinaandcrystal.Water isaerated
SHORTWASH Forquicklywashingloadsof everydaydisheswith
RINSF& HOLDForrinsingpartial loadsthat will bewashedlater.
PI._TFWARMFR Forwarmingcleandishesandserving plates.This
Make sure lhe Dial is at the OFFposifion.
Lalch the door.
or baked-onsoils.Everydaydishesmaybe included.
Thiscyclewill not removeburned-onfoods.
with mediumsoils.NOTE-Manydisheshavelighter
soil than normal.Choosinga cycleother than
NO,MAt WA$_ will saveenergyand water.
for a gentle wash.
mediumsoilsthat havenotdriedon.suchas loads
consistingmostlyof glasses.
Donot usedetergent.
cyclewill takeapproximately32minutes.
8
Page 9
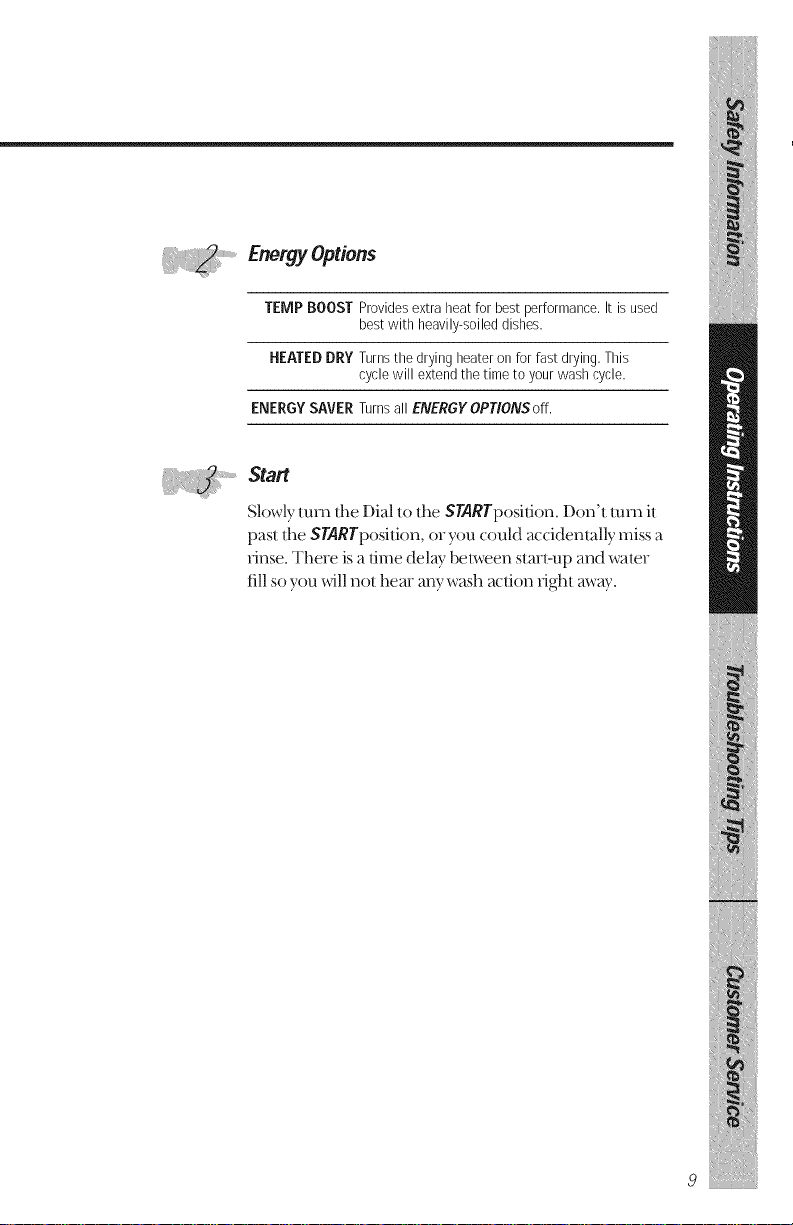
......E, gy@tJo.s
TEMP BOOST Providesextra heatfor best performance.It isused
HEATEDDRY Turnsthe dryingheateronfor fast drying.This
ENER6YSAVERTurnsall ENERGYOPTIONSoff.
Slowly turn the Dial to the STARYposition. Don't mm it
past the STARTposition, or you could accidenlally miss a
_{nse. There is a time del W between stall-up and water
till so you will not hem any wash action right awW.
bestwith heavily-soileddishes.
cyclewill extendthetime to yourwash cycle.
9
Page 10

About the dial cycles.
Short Wash
START DELAY 'l*
START
WASH
For quickly washing loads of eve_Tday dishes with
medium soils that have not dried on.
OFF
(HRS) S_ORT
PeESSHEATmDR
START
_le,,lheNORMALWaSH,_,,lean_antopl_on_
sme the door is unlatched.
{_Slowly turn the Dial to SHORTWASH.
,<{
Plate Warmer
For warming clean dishes and serving plates. This (Tcle
will lake approximately 32 minutes.
Load clean dishware to be winreed.
_ lecl HEATEDDRY..
1_ sme the door is unlatched.
Slowly mm the Dial to PLATEWARMER.
Page 11

START
StartDelay
The STARTDEL4Ywill allow you lo delay llae stall time of
any cycle nol on lhe Dial automalically t6r up to 6 hours,
..........PLATE(HRSilRME_R_ _ AOSRHT
pRESSRFATEDDR
Be sme lhe door is unlatched,
_lect the wash _ycle and option you wanL
!i iiii'_
!_Slowlv turn the Dial to desired time. The CYCLEON
lighl {viii come on.
i .dLatch the door to sire1 tile cycle.
Cycle Sequence
POTSCRUBBER 9.9gal. 63rain. RinseRinse Rinse MainWash RinseRinseRinse
WATERSAVER 7.7gal. 63min.
RINSE& HOLD 3.0gal. 9 rain. RinseRinse
Drying Options:
HEATEDDRY.Available on all wash cycles except
RINSE & HOLD.Add approximately 32 minutes to
the _ycle.
ENERGYSAVER.Duing heater is lumed DiE Dishes
dU nalmally.
RinseRinseMainWash Rinse Rinse
ii
Page 12

Usingthe dishwasher.
Checkthe WaterTemperature
The entering waler must be at least 120°F. and not more than
150 oF., for effective cleaning and to prevent dish damage. Check
the water temperalure with a can@ or meat thermometer. Turn on
the hot water fimcet nearest the dishwasher, place the thermometer
in a glass and let the water run continuously into tl_e glass until tl_e
temperature slops _Jsing. Ac!just your wamr healer, ifneeded.
Usinga RinseAgent
A _inse agent, such as JKT-DRK makes water flow off the dishes
quickly thereby reducing water spotting.
Fill the _inse agent dispenser
until it reaches the bottom of lip
inside tl_e opening. Replace cap.
To check it_Jnse a,g_nt is needed,
remove the cap and look into tim
dispenser. On some models, the
dispenser can be checked by
pressing the clear center of the
fill cap 2 or 3 times. If_inse agent
fills the cenmr of the fill cap, you
have enough.
Afull dispensershould lastabout3months.
Ifrinse agentspills,wipeit up immediately.Itcan keepyour detergent
from working.
72
Page 13

ProperUseof Detergent
Use only detergent specifically made for use in dishwashers. Keep
your detergent ilesh and dU. Don't put powder detergent into the
dispenser until you're ready to wash dishes.
The amount of detergent to use depends on whether your water is
hardor soft. With hard water, you need extra detergent. With soft
water, you need less detergent.
Promct your dishes and dishwasher by contacting your wamr
depmlment and asking how hard your water is. Twelve or more
grains is exuemely hard water. A water softener is recommended.
Without it, lime can build up in the water valve, which could stick
while open and cause flooding. Too much dem_gent with soil waler
cm_cause a permanent cloudiness ofglasswme, called etching.
You'll find two detergent dispensers on the OpenCup
inside door of your dishwasher. All wash o,des
_equi_e detergent in the main cup. Wash q,cles
with two washes will also use the open cup.
Be sure dm Dial is at 0YYposition befbre
adding detergent. Otherwise, the detergent
cup will not close and latch properly. Add
detergent then close the main cup.
NOTE:To open detergent cup after it has
been closed, simply turn the detergent cup
handle counter-clockwise until it releases.
A snapping sound may be heard. !
MainCup
ForgettoAdda Dish?
k tbrgotten dish can be added any tilne before the main wash.
{{_()nce the water calms, open the door. Steam may rise out of the
}i!!!!!dishwasher.
{JAdd tbrgotlen dishes.
It;'the far _ight.
73
Page 14

Loadingthe dishwasher racks.
For best d/shwashing results, fo//ow these loading gu/de/ines. Features and
appearance of racks and silverware baskets may vary from your model.
UpperRack
The upper rack is tbr glasses, cups and saucers.
(]ups and glasses fit best along the sides. This is
also a secure place tbr dishwashe>sate plastics. A
cup shelf (on some models) may be placed in lhe
up or down position to add flexibility. The upper
rack is good fbr all kinds of odd-shaped utensils.
Saucepans, mixing bowls and other imms should
be placed t_tce doxm.
Securelargerdishwasher-safeplasticsovertwofingers
whenpossibfe.
Makesuresmattplasticitemsaresecuresotheycant fail
ontotheheatingelernenL
The Wash Tower
Keepthecenterareaclearinthelowerrock.
The wash lower _ises through fl_ecenter of tl_e
lower rack during the wash and iinse portions of
d_e wcle.
Dont block it or load taft thingsnext to it.
Also, be carefbl not to let a
portion of an i/era such as a pot or
dish handle exmnd d_rougt_ the
bottom rack. This could block tl_e
wash ann and cause poor washing
results.
74
Page 15

item extend
throughbottom,
Lower Rack
WhenIoadingtheiowerrack,donottoaUlarg pta tersor
traysinthefrontrightCornerTheymaypreventdetergent
fromcirculatingduringthewashcycle,
The lower rack is best used fbr plates, saucers,
and cool<ware. Lmge imms such as broiler pans
and racks should go along the sides. Load
platmrs, pots and bowls along tlle sides, in
comers, or in the back. The soiled side of items
should t_tce tile center of the rack.
Silverware Basket
Put flatware in file removable basket _ith tbrk
and knife handles up to p_otect your hands. Place
spoons in tile basket widl handles d(m_l. Mix
knives, fbrks and spoons so dmy don't nest
together. Disuibum evenly. Small plastic imms,
such as measming spoons and lids fiom small
containers, should g_)in tile bottom of the
silve_vme basket _ith silver,rare on lop.
A secmiW cell cover (on some
.... ......... models) hinged in some
_{•_ /_ i} handles_ ca_l be lo,_ered to
...... .... ' )
_lll_/_ lightxveight items fiom the
__) either side to secure
! # ) v_Tash a(l]on.
75
Page 16

Changingcolorpanels.
If.you are redecorating, .youcan change .your dishwasher's front
panel to match or blend withyour new colors by flipping it over.
Each side of each panel is a different color. Youmay also paint a
panel with a color of.your own choice.
WARNING!
Weargloves when handling door panels. Failure to do so can
cause serious cuts.
Donot operate dishwasher while changing panels.
Changingthe Door Panel
Take oul Uim screws on either side of the
dishwasher door. Remove the side uim.
JS|ide the door panel (s) oul. (Careful-edges may
be sharp.)
{{i_Tum the door panel around and put the cok_ryou
_{ want in fiont.
!{_Replace fl_edoor panel, side uim and screws.
NOTE:Do not operate dishwasher while changing panels
or when bottolll panel is removed.
Page 17

F--%_.-Top i
IT°.p _Mountir!g I
!i_iii_ ii
Changing theBottom Panel
Remove the bottom panel attachment screws.
:}
top mounting screws.
{{{_Take out tile top Uim screws and remove tile top
{ {
|iilll.
BottomPanelAttachmentScrews
Adding 1/4"Wood Inserts
Color insert panels fbr both tile door and tile bottom panel can be
replaced by 1/4" thick wood inserts to match your kitchen cabinets.
Get them flom your nearest cabinet or lumber dealer.
Dimensions fbr 1/4" wood inserts:
Door Panel: 19_//' H x 23%J' W.
Bot tOlll Pal_iel: .:)ol lfll<i_'H x 2;)_o {_16t*_/_.7
!{1_Slide tile color panel (s) up and oul and pul the
color vou want in hont.
Replace the top uim and
1,7 screws.
{{dReplace tile entire assembly by reversing tile steps.
/7
Page 18

Caringfor the dishwasher.
Toclean the control panel use a lightly dampened cloth then dry
thoroughly. Toclean the exterior use a good appliance polish wax.
Never use sharp objects, scouring pads or harsh cleaners on any
part of the dishwasher.
Protect Against Freezing
|fyour dishwasher is left in an unheated place dining
tile winter, ask a se_vice technician tc,:
:/_'(_ut offele(ui(al power to tile dishwasher. Remove
f;ases oi tlip €iI€uit breaker.
3umocoverscrews
dishwashaisnt dr_finingwell,
_mn off tile water supply and disconnect tile water
..............inlet line flom the water valve.
_Drain water flom tile inlet line and water valve.
(l[Jsea pan to catch the water.)
i_ffReconnect the water inlet line to the water valve.
dRemove tile plastic sump cover in the tub
bottoln and use a sponge tc, soak up water in the
rubber boot,
Does Your Dishwasher Have an Air Gap?
An air gap promcts your dishwasher against wamr
ba(king up in/o it if a drain clogs. The air gap is not a
part of llle dishwasher. It is not covered by your
wanamy. Not all plumbing codes require air gaps, so
you may not have one.
The air gap is easy to clean.
:J:i{_Turn off the dishwasher and lift off the chrome
cover.
[ nscrew the plastic and clean with
{}}_a._....... cap a toothpick.
78
Page 19

Beforeyou call for service...
Troubleshooting Tips
Review the charts on the following pages first and you may not
need to call for service.
Possible Causes What To De
Dishwasfier won't run Fuse is blown, or the Replace fhse or reset
circuit breaker tripped circuit breaker. Remove
aW other appliances tiom
the circuit.
Noise Some of the sounds
you'll hear are normal
Soft tbod disposal
shredding action.
Drain valve opening to
pump water out.
Timer control as wcle
pro,gvesses.
Demr,gent cup opening.
The UlOtOF stopping during
the duing period.
Utensils are not secure
in the rack or something
small has dropped into
the rack
Motor hums
Make sure everything is
secured in dishwasher.
Dishwasher has not been
used on a re,g_lar basis. If
you do not use your
dishwasher often, set it to
fill and pump out once
eve_y week. This will help
keep the seal moist and
the garbage disposer clear.
Detergentcuplid
won'tlatch
Dial is not in the OFF
position
Turn the Dial to OFF
and slide the door latch to
the left.
_iiiiiiii!)iiiiiiii/ii[iiii/ii/iiii
!ililiNiiiiJ iliii i
Detergent left in
dispenser cups
Dishes are blocking the
detergent cups
Reposifion the dishes.
/9
Page 20

Beforeyou call for service...
Troubleshooting Tips
Possible Causes What ToDe
Water standing m
the bottom of the tub
This is normal
A small amount of clean
water mound the outlet on
tim mb bottom at the back
of the tub keeps tim water
seal lubficamd.
Waterwon'tpump
outofthetub
Sudsinthetub
Steam This is normal
Drain is clogged
Correct detergent
wasn't used
Rinse agent
was spilled
Ifyou have an air gap,
clean it.
Check to see ifyour kitchen
sink is draining well. If not,
you may need aplumber.
If the dishwasher drains
into a disposer, run
disposer clear.
l) se only automatic
dishwasher detergent s to
avoid sudsing.
To remove suds flom the
tnb, open the dishwasher
and let suds evaporate.
Add 1gallon of cold water
to the rob. Close and latch
the dishwasher. Pump out
water by slowly turning the
Dial until a drain period
is reached. Repeat if
necessaU.
Always_4pe up rinse agent
spillsimmediamly.
Steam comes through the
vent by tim door latch
during &Ting and when
wamr is being pumped out.
20
Page 21

Stainedtubinterior
Dishesdon'tdry
Dishesandflatware
notclean
Possible Causes What ToDo
Detergent with
colorant was used
Low inlet water
temperature
Rinse agent dispenser
is empty
Inlet water temperature
is bdow 120°F.
Water pressure is
temporarily low
Air gap is clogged
Improper rack loading
Some detergents contain
colorant (pigment or dyes)
that _41ldiscolor the tub
interior wi/h exmnded use.
Check lhe dem_gent cup
for signs of aW
discoloralion. If cup is
discolored, change to
detelgent _4thout any
colorant.
Make sure inlet water
temperatureiscorrect.
Check the rinse agent
dispenser.
Raise the water heater
temperatureto 120°F.
Turn on a t_mcet. Iswater
coming out more slowly
titan usual? If so, wait;until
pressure is normal before
using your dishwasher.
Clean dm air gap.
Make sure lmge dishware
does not block tim
detergent dispenser or tl_e
wash ann.
_i{{iiiii{)ii{iiiii/iiiii{ii{ii/iiii
!ililiNiiiiJ iliii i
27
Page 22

Beforeyou call for service...
Troubleshooting Tips
Possible Causes What ToDo
Spotsandfilming
onglassesand
flatware
Cloudiness on Combination of soft
glassware water and too much
Black or gray Aluminum utensils have
marks on dishes rubbed against dishes
Extremely hard water
Low inlet water
temperature
Overloading the
dishwasher
Improper loading
Old or damp powder
detergent
Rinse agent dispenser
empty
Too tittle detergent
detergent
Water temperature
entering the dishwasher
exceeds 150°F.
To remove stubborn spots
from glassware:
I Remove all metal
utensils flom the
dishwasher.
2 Do not add detergent.
3 Select the longest cycle.
4 Start the dishwasher and
allow to Pan fbr 18 to 22
minutes. Dishwasher will
now be in the main wash.
5 ()pen the door and pour
2 cups (500 II11) of whim
vinegar into the bottom of
file dishwasher.
8 Close tile door and allow
tocornplete file (ycle.
If vinegar rinse doesn't
work: Repeat as above,
except use 1/4 (:up (60 ml)
ofcinJc acid c_ystals
instead of vinegar.
This is called etchingand
is permanent. To prevent
this tiom happening, use
less detergent ityou have
soft water. Wash glassware
in the shortest wcle that
_qll get them clean.
Lower the water heater
temperature.
Remove marks _4th a mild,
abrasive cleaner.
22
Page 23

Yellowor brownfilm
ontub
Possible Causes What ToDo
Tea or coffee stains
Remove the stain by hand,
using a solution of 1/2 cup
bleach and 3 cups wm_n
water.
wmmN¢
Betbre cleaning intelior,
wait at least 20 minutes
alier a wcle fbr the
heating element to cool
do,_. Failure to do so can
result in bums.
_i{{iiiii{i'i;{iiiii/iiiii{ii{ii/ii;i
!ilili/iiiiii iiiiJ iliii i
Whitefilmoninside
surfaces
Cycleandoptionindicator
lights stayon whencycle
is completed
An overall yellow or
brown film can be caused
by iron deposits in water
Hard water minerals
This is normal
A special filter in the water
supply line is the only way
tocorrect this problem.
( ]t)ntac t a water st)tieneI
company.
To clean the inm_ior, apply
dishwasher dele_genl to a
damp sponge. Wear
rubber gloves. Do notuse
aW type of cleanser other
dmn dishwasher delergent
because it m W cause
foaming or sudsing.
(Jnlatch the door to trim
off the Cycle and Energy
Option indicator lights.
NOTE:The CYCLEONlight
_ill stay on until all (Tcles
are complete. Wait until
this light goes off to
unlatch the door or a wcle
_611be inmn_upted.
23
Page 24

Notes
Page 25

_iiiiiiii!i_iiiiiiiiliiiiiiiiliiliiii
!ilililiiiiii_iiiiJ,_iliii_i
25
Page 26

Notes
Page 27

GEDishwasher Warranty
All warranty service provided by our Factory Service Centers,
or an authorized Customer Care_ technician. Forservice,
call 800-GE-CARES.
GE Will Replace,At No Charge ToYou:
One Year
From the date of the
original purchase
Second Year
From the date of the
original purchase
Five Years
From the date of the
original purchase
TwentyYears
Fromthe dateof Ehe
originalpurchase
Anypart of the dishwasher which tails due to a detect in
materials or workmanship. During this full one-year
warranty, GE will also provide, free of charge, all labor
and in-home sepd(e to replace the dete(five pan.
Anypart of the dishwasher which tails due to a detect in
materials or workmanship. During Ibis second-year
limited warranty, you _11 be responsible for any labor or
in-home service costs.
The dishwasher rack, ifit should rust due to a detect in
materials or workmanship. During this five-yearlimited
warranty,you _411be responsible for aW labor or in-home
service costs.
ThePennaruf®tubor doorliner,if it tails to contain
water due to a detect in mamrials or workmanship.
During this full twenty-year warranty, GE will also
provide, free of charge, all labor and in-home service
to _eplace the defective pan.
_i{{iiiii{i'ii{iiiii/iiiii{ii{ii/iii{
!ilili/iiiiii iiiiJ iliii i
Service Irips to your home to teach you
how to use the product.
Improper installation.
Replacement of house fuses or
resetting of circuit breakers.
Failure of the product if it is
abused, misused, or used for other
Damage to the product caused by
accident, fire, floods or acts of God.
Incidental or consequential damage to
personal property caused by possible
defects with this appliance.
Cleaning or servicing of the air gap
device in the drain llne.
than the intended purpose or used
commercially.
ThiswaEanty is extendedto the original pumhaserand anysucceeding owner for Foducts purchased
for home use within the USA,InAlaska, the waKanty excludes the cost of shipping d service calls to
your home,
Some states do not allow the exclusionof limitation of incidental of consequential damages,This
waEantygivesyou specific legal rights, andyou may also have other rights which varyfromstate to
state, Toknow whatyour legal rfqhts are, consultyour bcal d state consumeraffairs office d your
state_ Attorney (;eneral,
27
Page 28

ServiceTelephoneNumbers.
GEAnswer Center_ 800.626.2000
The GE Answer Center ®is open 24 hours a day 7 days a week.
In-HomeRepaFServiceeOO-GE-CARES(800-432-2737)
Expert GE repai_ sepd(e is only a phone (all away.
SpecialNeedsService8oo.626.zooo
TDD800-TDD-GEAC(800-833-4322)
GE offers, flee of(harge, a brochure to assist in planning a banie>
tiee kitchen tbr pe_sons with limited mobility.
ServiceContracts800-626-2224
Purchase a (;E seevice contract while your wanamy is still in effect
and you'll receive a substantial discount. GE (]onsume_ Se__qcewill
still be the_e 'atier your wanamy expi_es.
PartsandAccessories800-626-2002
Individuals qualified to seevice their oxm appliances can have pmts
or accessories sent di_ectly to their homes (VISA, Maste_Cmd mad
Discover cards me accepted).
instructions contained in this manual cover procedures to be performed
byany user.Otherservicing generallyshouldbereferredtoqualified
service personnel. Caution must be exercised, since improper servicing
may causeunsafeoperation.
ServiceSatisfaction
If you me not satisfied with the ser_qce you receive flom GE, tbllow
these three steps. First, contact the people who seeviced your
appliance. Next, if you a_e still not pleased, wfim all the details-
including your phone numbed=to: Manager, Consumer Relations,
GE Appliances, Appliance Pad(, U)uisville, KY 40225. Finally,if your
problem is still not resolved, wfim:
Major Appliance (]onsumer Action Piogralll
20 North Wacker Drive, Chicago, IL 60606.
Primedintouisvillu,KY 1_96 c8
 Loading...