

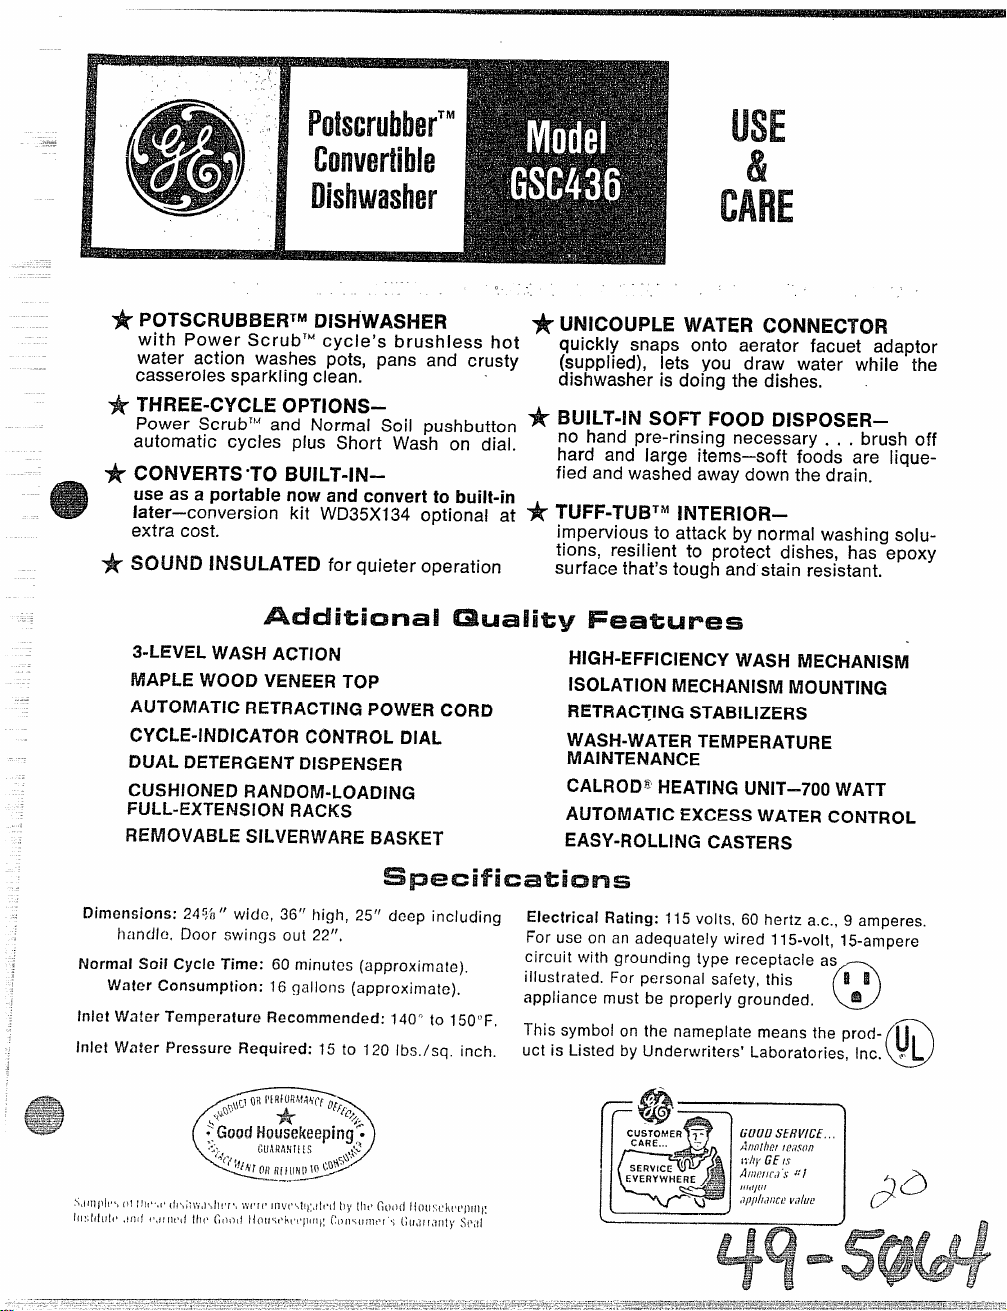
Page 1
“.
-—
~ POTSCRUBBER~MDISHWASHER
with Power Scrub’” cycle’s brushless hot
water action washes pots, pans and crusty
casserolessparklingclean.
~ THREE-CYCLE OPTIONS–
Power ScrubT”and Normal Soil pushbutton
automatic cycles plus Short Wash on dial.
~ CONVERTS.10 BUILT-lN–
use as a portable now and convert to built-in
later–conversion kit WD35X134 optional at ~
extra cost.
SOUND
3-LEVEL WASH ACTION
MAPLE WOOD VENEERTOP
AUTOMATIC RETRACTING POWER CORD
CYCLE-INDICATOR CONTROL DIAL
DUAL DETERGENT DISPENSER
CUSH1ONEDRANDOM-LOADING
FULL-EXTENSION RACKS
REMOVABLE SILVERWARE BASKET
INSULATED for quieter operation
~ UNICOUPLE WATER CONNECTOR
quickly snaps onto aerator facuet adaptor
(supplied), lets you draw water while the
dishwasheris doing the dishes.
BUILT-IN SOFT FOOD DISPOSER–
*
no hand pre-rinsing necessary. . . brush off
hard and large items–soft foods are lique-
fied and washed away downthe drain.
TUFF-TUBT”lNTERIOR–
imperviousto attack by normalwashingsolutions, resilient to protect dishes, has epoxy
surfacethat’stoughandstain resistant.
HIGH-EFFICIENCY WASH MECHANISM
ISOLATION MECHANISM MOUNTING
RETRACTING STABILIZERS
WASH-WATER TEMPERATURE
MAINTENANCE
CALROD~ HEATING UNIT–700 WATT
AUTOMATIC EXCESS WATER CONTROL
EASY-ROLLING CASTERS
~im~n~i~nsl ~d?{J”wide, 36” tligh, 25” deep including
tlandto, Door swings out 22”,
Normal SoiI Cycle
Water Consumption: 16gallons (approximate),
Inlet Wafer Temperature Recommended: 140” to 150[’F,
inlet Water Pressure Required: 15 to 120
Time: 60minutes(approximate).
lbs./sq. inch.
Electrical Rating: 115 volts, 60 hertz a.c., 9 amperes.
For use on an adequately wired 115-volt, 15-arnpere
circuit with grounding type receptacle as
illustrated, For personal safety, this
appliance must be properly grounded, *
This symbol on the nameplate means the prod-
uct is Listed by Underwriters’ Laboratories, Inc. ,,
~B
o
@
Page 2
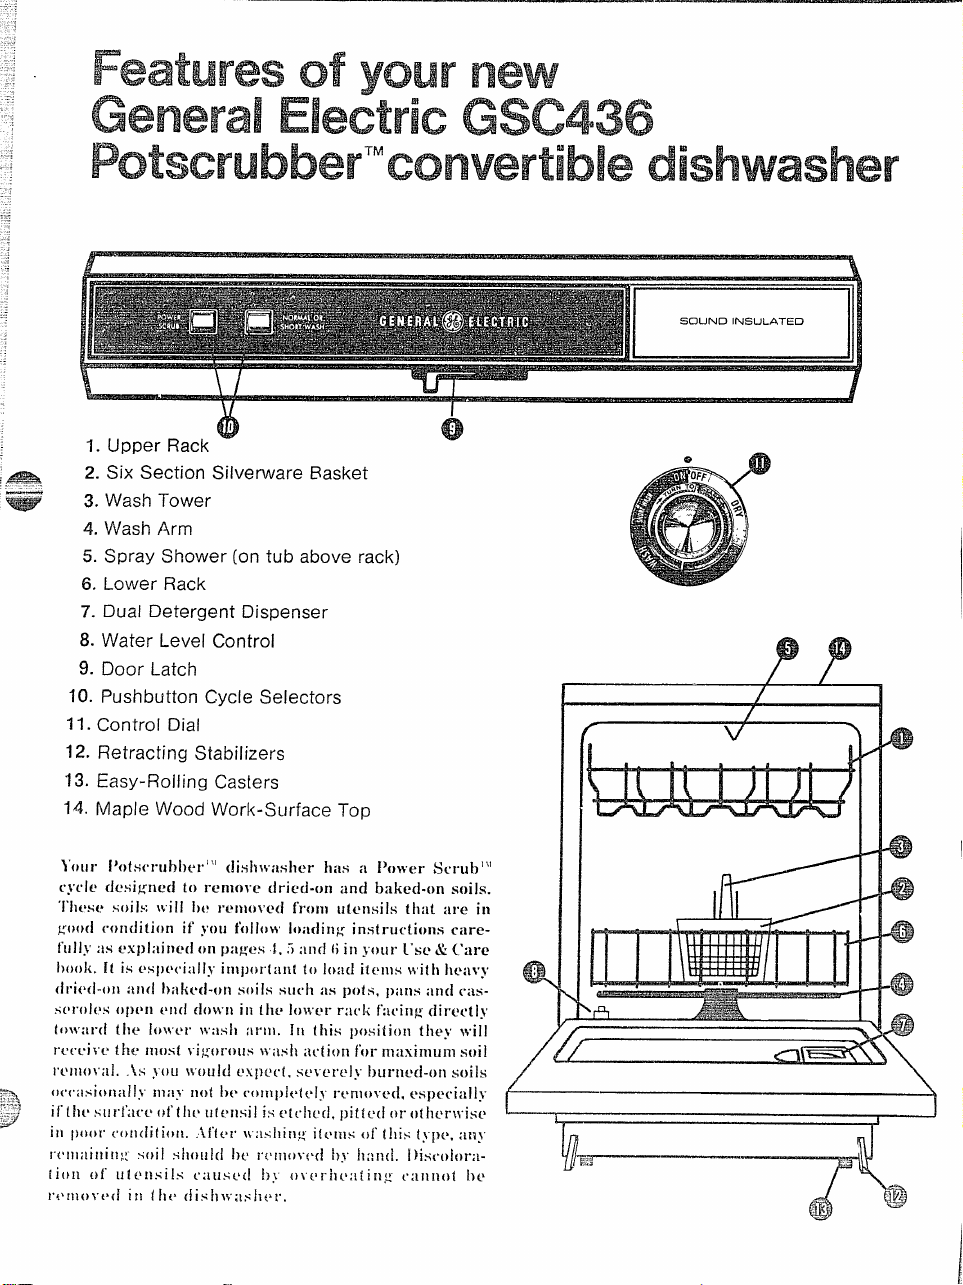
eaturesofyournew
eneralElectricGSC436
PotscrubberTMconvertibledishwasher
I
1.
Upper Rack
Six Section Silverware Basket
2.
Wash Tower
3.
Wash Arm
4.
5.
Spray Shower (on tub above rack)
Lower Rack
6.
7. Dual Detergent Dispenser
8. Water Level Control
9. Door Latch
10. Pushbutton Cycle Selectors
11. Control Dial
12. Retracting stabilizers
13. Easy-Rolling Casters
14. Maple Wood Work-Surface Top
0
PP
Page 3

Before operatingyour dishwasherforthe firsttime,..
ATTACH AERATOR FAUCET ADAPTER
‘1’1~-Js~)[~cialaerat(lr faucc( a(la])ter su])])lie[l with your
(!i.~iiv;lshcrmust he assemt)le{I to the sinl{ faucet spout
l)(Jff)r(J
vOU can use your (lish~~rasher.The faucet
[~{la;)tt’ris [iesi~ne(l to fit stanclar(l faucet spouts havir?~ illterrlal or externa] threa(]s. you ~vi]] fin(] the
a:ia~)ter an(l t\vo tvashers in the “Har(lware for In~t::i!ation.’ ])acfiet in your (lish~~’asher.
“1.(;instatl fauctlt adapter. first remove the OICIaerator
or :rim rirl,g{)n your faucet s])out.
If faucet has extt’rnal threads, insert the thinner of
tt)( t\~o\\astl(*rsinto the faucet a(lapter ancl attach it
to 1}1(>fal~(’f>i+1)011(( Fig. 1).
If faucet has internal threads, insert both washers into
the faucet adapter and attach it to the faucet spout
(Fig.2).
.
-~
“=___
—-.
d
--:-
‘“]J
.
,,
Q
If the faucet arlapter threa(ls (1onot match your faucet
sl)out, your local har(]ware or plumbing supply store
normally has acl(litional fittings to a(lapt your fauce
spout t(>the s])ecial aerator faucet aciapter.
A sink spray attachment hose can burst if it is
installe(l on the same sinfi with your rrishwasher. tire
suggest that you (Disconnectthe sink s])ray attachment
if ~~oursink has one ancl plug the hole.
a
,—
,1
Fig. 1 R
1’
Fig. 2
e
To operate your dishwasher...
Page 4

:- CONNECT THE UNICOUPLE
i. If your dishwasher drains into a f(~()(lwaste dis-
. ...
7
run the
r
.. .
__
starting the clishwasher.
~- Turn on the hot water an(i run water until it is
-‘ FOR BEST RESULTS WATER TEMPERA-
LJKE SHOULD BE BETWEEN 140° AND 150°F.
1
lnsfru~f~Qn~for measuring water temperature
page 1i
3. Turn off water. Pull Unicouple and its hoses from
storage compartment located at rear of dishwasher
and attach to faucet adapter.
——-—
— .-— ,
4. Attach [Jnicouple by pushing thumb tab down as
you lift Unicouple up onto the faucet adapter. When
Unicouple is all the way up onto the adapter, release
the thumh tab and the movable ring snaps into pGsi-
tion to lock the Unicoup]e in place.
The Unicouple’s small hose carries hot water from
faucet to (Dishwasher. Its large hose carries drain
water to sink. Be si[rc
tke sin]; bo[iJldrain opening clnd tke sink bowl is clear
/or (~later tkat loil[ []rain jronl di.skl[~asker.
5. Turn hot wat.~jrfully on.
disposer until it is completely empty
in your Use & Care Book.
-—-.
.’
m
.—.
———-
~:&FAUCET ADAPTER
– J-yHuMB ~AB
drain kose is pointing toward
are on
If yr)udraw cold wat~r, 1)(:sure to turn hot wtiter h~cl(
on !O compl(’t(’ ttlc cycle. N(!~cr (Ira}}’ water
disll}~’astlcr is fittiilg.
4. PLUG IN THE
IMPORTANT (PLEASE READ (IAREFIJI.T,Y)
FOR PERSONAL
SAFETY, T}IIS
APPLIANCE
MUST BE
PROPERLY
GROUNDED.
The power cord on
this appliance is equipped with a three-prong
(grounding) plug which mates with a standard three-
prong (grouncling) wall receptacle (Fig. C).
Where a standard two-prong wall receptacle is en-
countered, it is the personal responsibility and obligation of the customer to have it replaced with a
properly grounded three-prong wall receptacle.
DO NOT UNDER ANY CIRCUMSTANCES CUT
OR REMOVE THE THIRD (GROUND) PRONG
FROM THE POWER CORD PLUG.
TEhfPORARY METHOD
Where local codes
permit, a TEMPO-
RARY CON-NECTION may be made
to a properly grounded two-prong wall
receptacle by the
usc of an adapter
which is available at
most local har(lware stores (Fig. D). The larger slot
in the adapter must be aligned with the larger slot in
the receptacle. NOT PERMITTED IN CANADA.
CAUTION: Attaching the adapter ground terminal
to the wall receptacle cover screw does not ground the
appliance unless the wall receptacle is grounded
through the house wiring.
POWERCORD
whila
If you need water \vhiledishwasher is connected, simply
hook a glass or pan under the
IJnicouple handle and lift up
(Fig. A).
If YOUn{~t’d}vatcr in the sink
whil~~the dish~vasher is connected, raise the smat] tabs on
the’ sicl(~s of the LJnicouple’s
h:lnril(’ (Fig. 13).
,*~.–
_,,, *!&, ~
i,
i! ‘
l,),, ‘=___
‘1
lil
,’
-.
‘Yfij
\
Fig. B J
When flisconnccting the power cord from the adapt-
er, h(~l(l the a(lapter with onc ban{]. If this is not
done, the adapter ground terminal is very likely to
break with repeate(l use. Should this happen, either
REPLACE THE ADAPTER or DO NOT USE the
appliance.
IF THERE IS ANY DOUBT AS TO WHETHER
THE WALL RECEPTACLE IS PROPERLY
GROUNDED, THE CUSTOMER SHOULD HAVE
IT CHEC1{ED I)Y A QUALIFIED ELECTRICIAN.
e Your ~iisllwasher requires a single branch circuit
sup]) l.ying 120 volt, 60 hertz a.c., protected with a
15 an?l) fus(? or circuit breaker.
Page 5

e Yf~ur[dishwasher circuit shoul(l not be USLJ(Jfor any
f)[,r apl)]iances while dishwasl~er is in operation as
ot
th[) (Dishwasher requir(js
cir{:uit.
II Xr~ENSIOhT CORD,S ARE NOr~ RECOM -
~
Ml~;l~DED
for this appliance, but if one is used
the full capacijy of the
.
{t’rn])orarily it must be a heavy-duty cord (15 amp,
16 gauge, ~-wire) with a stan(lard type three-prong
([;r(~un(]ing)plug attached.
If ~vaIloutlet is controlled by a s}vitch, turn on s~vitch.
5. SELECT
THE CYCLE
PO}YER SCRUBT’rcycle is for those items with hard-
to-remove soils such as pots, pans and casseroles with
dried-on or baked-on soils.
NORJIAL
disl?es, glasses and cookware with light to heavy soils.
Lightly-soiled pots, pans and other kitchen utensils
can be washed along with dishes in the Normal Soil
cycle.
SHORT J17ASH cycle is for tableware that is mildly
soilecl with soils that have not (Iried on. NormalIy you
\vi]lnot require t\vodetergent washes with this cycIe.
6. START YOUR
START DISHWASHER:
TO
For I’0}$’EI{ SCRUB’’” or
Close (Ioor anrl move door latch to the right to locked
])osition.” Th(Jn sIOIVI.Vrotate control dial clockwise
until !:OUhear (lish\vasher start.
I~orSliO1tT lV:4SII cycle: Close door but CIOnot latch
it. ,Slo\vlyroi:it(: control (Iia] clockwise to Short J1’ash
~~ositi(J]~o]) (li:]J.
lockLId ~)osition.
SOIL cycle is for most Ioads of everyday
DISHWASHER
NOR1lAL S011. cycles:
‘i’hen move door latch to the right to
e The motor stops durinfl the dryin~ ])crio(l.
e Water
vaporisrelease~lt]]roughthe vent under the
door hancl]e during drying cycle, It may be visible.
Caution: Be careful not to touch the Calrod~ heating
unit at the bottom of the tub during the cycle or immediately after the cycle is completed—it may be hot.
To disconnect after
dishwashing ❑ s .
A. Renlove the pGwercord plug frGnl the receptacle.
B. Turn off hot water.
C. Release water pressure by raising tabs on Uni-
CGLIPIC handle.
D. Release Urticouple by pushing movable thumb tab
dotvn.
E. Shake excess water out of Unicouple and return
it anti its hoses to the storage cGnlpartnlent.
XOTI; : lVhel] motor stops at end of final rinse, the
Unicou])le can lle disconnecterl if desireci and returneci
stol.a~c.
to
DIJRING NORMAL OPERATiON:
e ‘l.]I{I (ii~}ll~’;l$ll[~r \vill (’onll)l(~l(”
CYCI.[;SEQUCNC[ Po\ver
(Illiillllcs)
‘.’!,l!lll
lilll’,l! .3
!{,,i,:,j
‘r’/\l’lh
i{lll’ (’
Iil[l’!r’
,,
l\lll’\!l
11( ’([11[ 11:1
1.—-,–— -.–-
I()!i)l lIIIIC
i ,!,)l,lO:l. \
.__..
i. ... ..
,.11
—.-...——————
Iill!$!: 17
Scrllt}
.>~,
. (,
1;
it
.,----.— .-—.
1)[1
1---
.; 3
:
.,
,,
i
ille S(’1(’ef(’(1Cycl(’
1 ‘1. . . . . ..
Norlnal Shorl
I
Soil Wash
h
.;
1!
/
,3 .;
1
,)
,,
[’(1
1
.1:..1 . ...11
3
11
7
.!
.’!
/
.,!
,:4
~
Page 6

——
e
Pub. No. 49-5064
GENERAL ELECTRIC COMPANY
LOUISVILLE, KENTUCKY 40225
GENERAL
GSC436
ELECTRIC
Part No. 172B7071 P58
I
 Loading...