

GE GSC3500D00BB, GSC3500D00WW, GSC3500D35BB, GSC3500D35WW, GSC3500D45BB Installation Guide
...Page 1
Installation
Instructions
Portable Dishwasher
Ifyou havequestions,call 800.GE.CARES(800.432.2737) orvisit ourwebsiteat:www.GEAppliances.com;
inCanada,call1.800.561.3344orvisit www.GEAppliances.ca.
BEFORE YOU BEGIN
Readthese instructions completely and
carefully.
IM PORTANT-Observeallgoverningcodesand
ordinances.
. Note to Installer - Besure to leave these instructions
for the consumer's and local inspector's use.
. Note to Consumer - Keep these instructions with your
Owner's Manual for future reference.
• Skill Level - Installation of this dishwasher requires
basic mechanical, electrical and plumbing skills. Proper
installation is the responsibility of the installer. Product
failure due to improper installation is not covered under
the GEAppliance Warranty. Seewarranty information.
READ CAREFULLY.
KEEP THESE INSTRUCTIONS.
GLC4000 Series
GSC3500 Series
IMPORTANT-,fyoureceiveda damaged dishwasher,
you shouldimmediatelycontactyourdealeror builder.
FOR YOUR SAFETY
Readand observe all CAUTIONSand WARNINGSshown
throughout these instructions. While performing
installations described in this booklet, gloves and either
safety glasses or goggles should be worn.
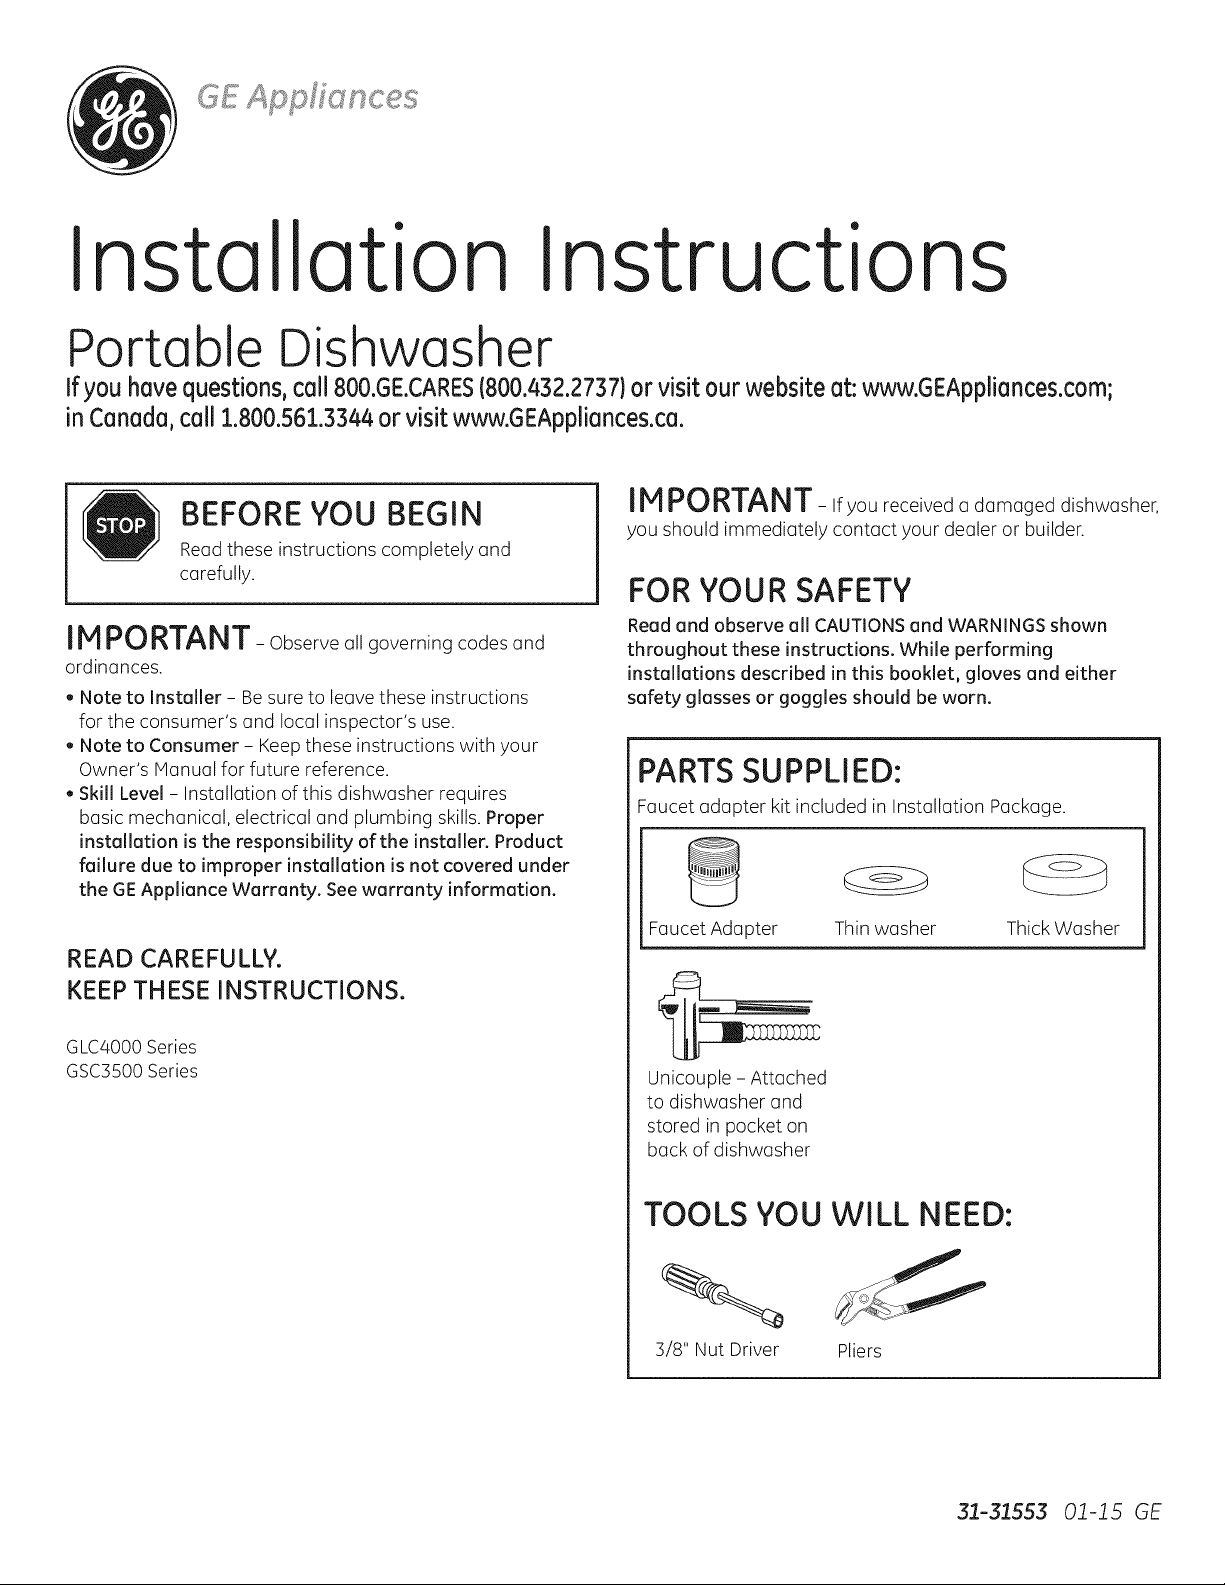
PARTSSUPPLIED:
Faucet adapter kit included in Installation Package.
9
Faucet Adapter Thin washer Thick Washer
Unicouple - Attached
to dishwasher and
stored in pocket on
back of dishwasher
TOOLS YOU WILL NEED:
3/8" Nut Driver Pliers
31-3155301-15 GE
Page 2
Installation Preparation
PREPARE ELECTRICAL WIRING
FOR PERSONAL SAFETY: Remove house
fuse or open circuit breaker before
beginning installation. Do not use an
extension cord or adapter plug with this
appliance.
PARASEGURIDAD PERSONAL: Retire el fusible
de la casa o abra el interruptor de circuitos
antes de empezar la instalaci6n. No use un
cable de extensi6n o enchufe adaptador con
este aparato.
Electrical Requirements
. This appliance must be supplied with 120V,60 Hz.,and
connected to an individual properly grounded branch circuit,
protected by a 15 or 20 ampere circuit breaker or time delay
fuse.
. If the electrical supply does not meet the above requirements,
call a licensed electrician before proceeding.
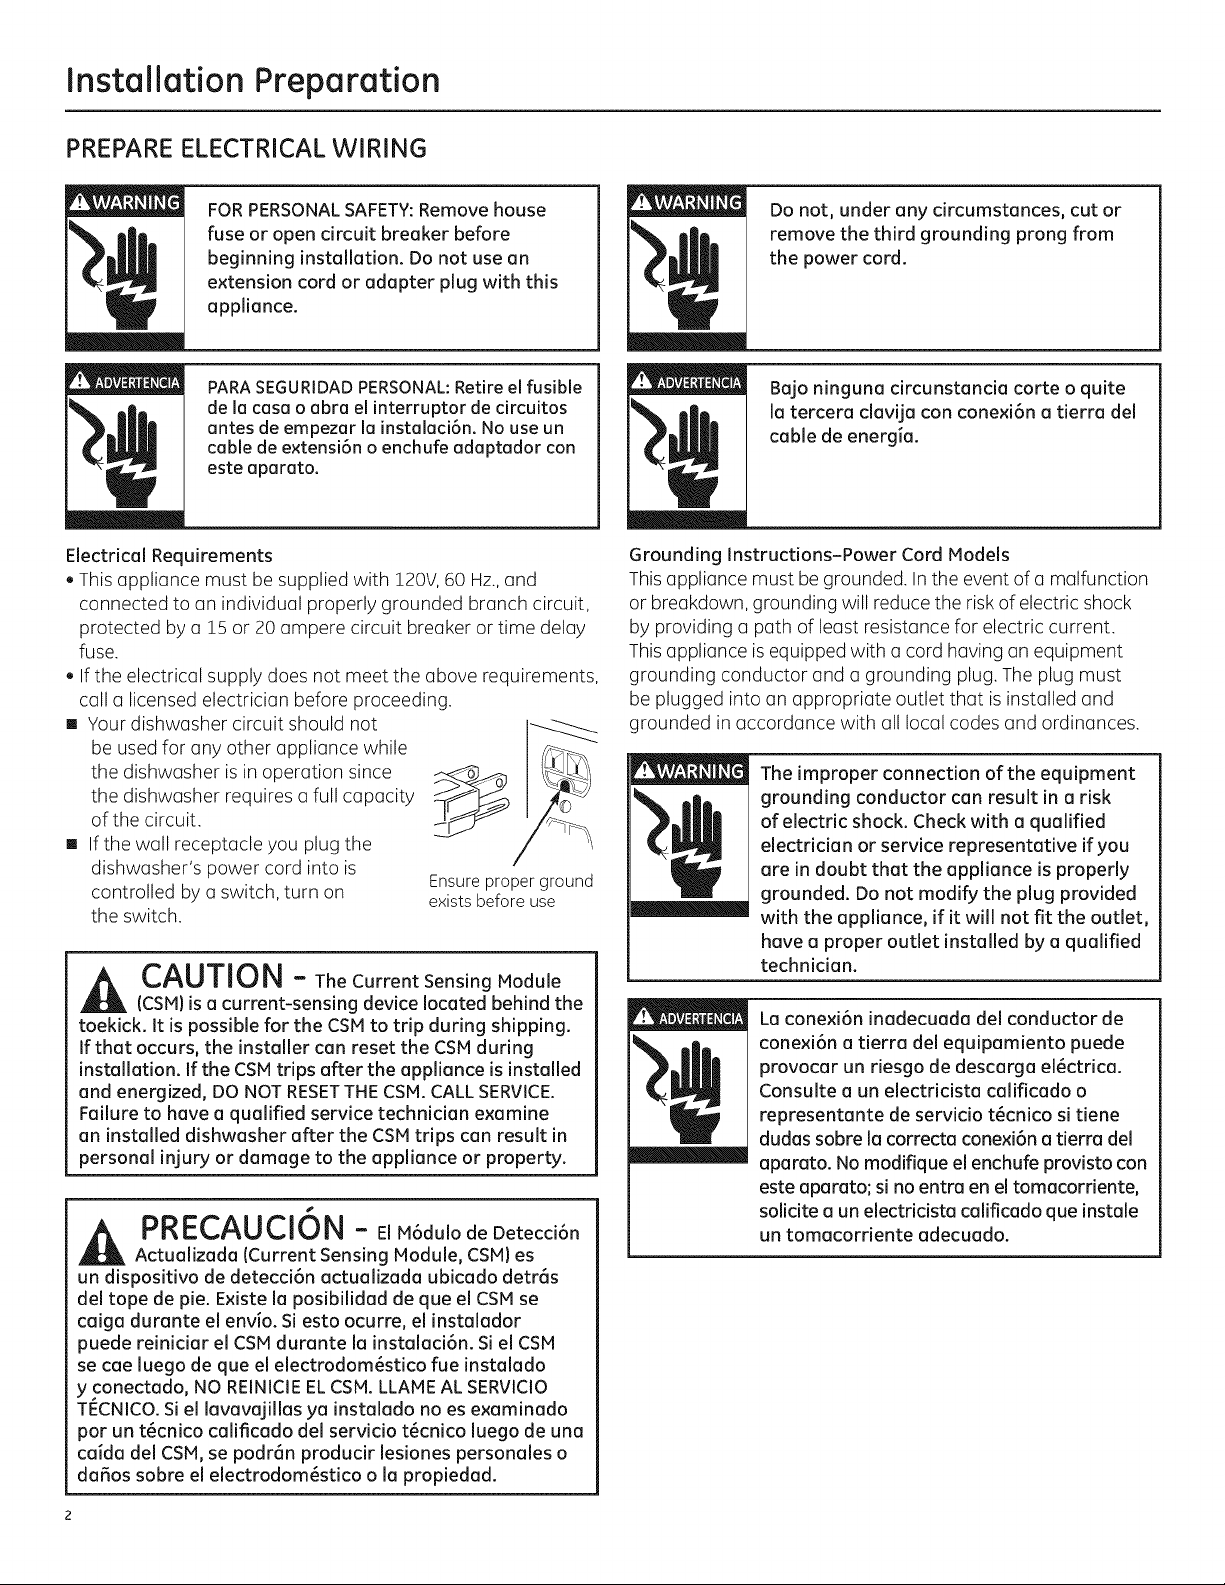
[] Your dishwasher circuit should not
be used for any other appliance while
the dishwasher is in operation since
the dishwasher requires a full capacity
of the circuit.
[] If the wall receptacle you plug the
dishwasher's power cord into is
controlled by a switch, turn on
the switch.
Ensureproperground
existsbeforeuse
CAUTION - The Current Sensing Module
(CSM)is a current-sensing device located behind the
toekick. It is possible for the CSM to trip during shipping.
If that occurs, the installer can reset the CSMduring
installation. Ifthe CSMtrips after the appliance is installed
and energized, DO NOT RESETTHE CSM.CALLSERVICE.
Failure to have a qualified service technician examine
an installed dishwasher after the CSMtrips can result in
personal injury or damage to the appliance or property.
PRECAUCION - ElM6dulodeDetecci6n
Actualizada (Current Sensing Module, CSM)es
un dispositivo de detecci6n actualizada ubicado detr6s
del tope de pie. Existe la posibilidad de que el CSMse
caiga durante el envio. Siesto ocurre, el instalador
puede reiniciar el CSMdurante la instalaci6n. Si el CSM
se cae luego de que el electrodom_stico fue instalado
y conectado, NO REINICIEELCSM.LLAMEAL SERVICIO
TECNICO.Siel lavavajillas ya instalado no es examinado
por un t_cnico calificado del servicio t_cnico luego de una
caida del CSM, se podr6n producir lesiones personales o
daffos sobre el electrodom_stico o la propiedad.
Do not, under any circumstances, cut or
remove the third grounding prong from
the power cord.
Bajo ninguna circunstancia corte o quite
la tercera clavija con conexi6n a tierra del
cable de energia.
Grounding Instructions-Power Cord Models
This appliance must be grounded. Inthe event of u malfunction
or breakdown, grounding will reduce the risk of electric shock
by providing a path of least resistance for electric current.
This appliance isequipped with acord having an equipment
grounding conductor and a grounding plug. The plug must
be plugged into an appropriate outlet that is installed and
grounded in accordance with all local codes and ordinances.
The improper connection of the equipment
grounding conductor can result in a risk
of electric shock. Check with a qualified
electrician or service representative if you
are in doubt that the appliance is properly
grounded. Do not modify the plug provided
with the appliance, if it will not fit the outlet,
have a proper outlet installed by a qualified
technician.
La conexi6n inadecuada del conductor de
conexi6n a tierra del equipamiento puede
provocar un riesgo de descarga el_ctrica.
Consulte a un electricista calificado o
representante de servicio t_cnico si tiene
dudas sobre la correcta conexi6n atierra del
aparato. No modifique elenchufe provisto con
este aparato; si no entra en el tomacorriente,
solicite a un electricista calificado que instale
un tomacorriente adecuado.
Page 3
Installation Instructions
STEP 1 REMOVE WOOD BASE
IMPORTANT - Donotkickoffwoodbase!Damage
will occur.
. Hove the dishwasher close to the installation location and lay
it on its back.
. Remove the four skid bolts on the underside of the wood
base with 3/8" nut driver.
. Discard base and bolts.
. Upright the dishwasher.
STEP 2 INSTALL FAUCET ADAPTER
The special faucet adapter supplied with your dishwasher
must be attached to the sink faucet before you can use your
dishwasher.
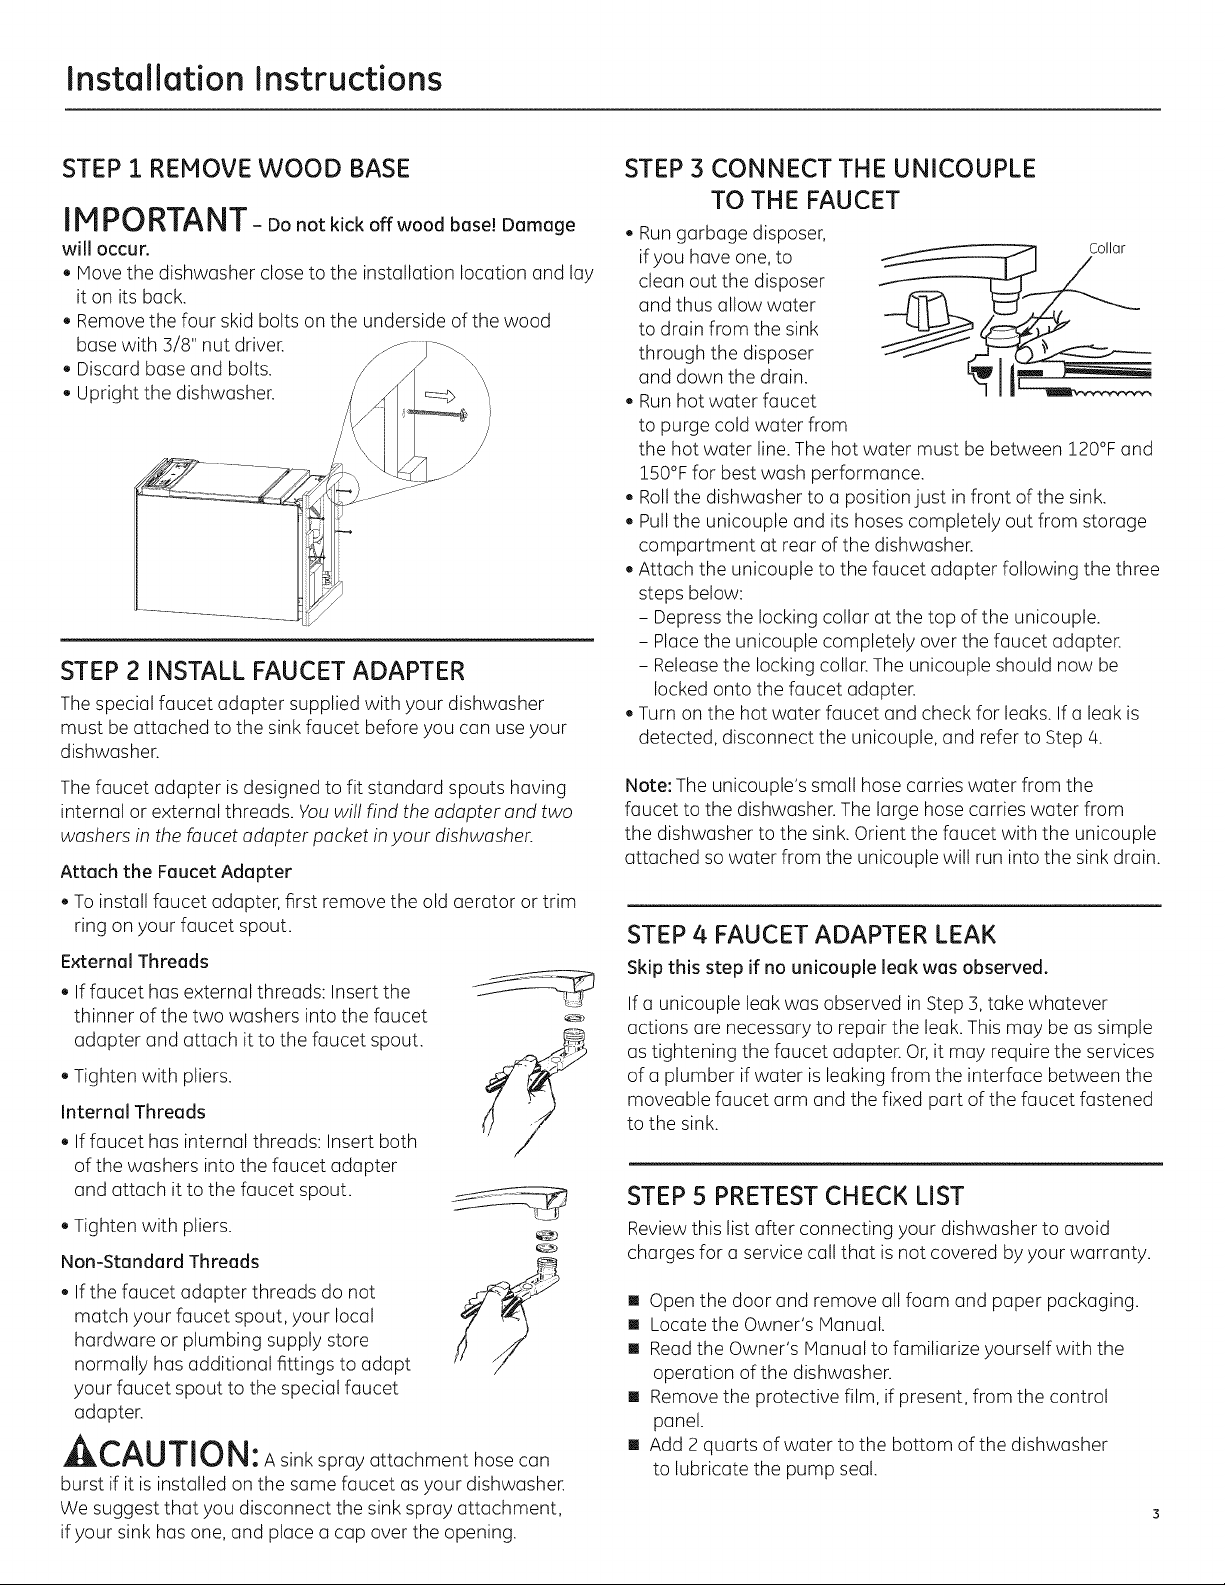
STEP 3 CONNECT THE UNICOUPLE
TO THE FAUCET
. Run garbage disposer,
if you have one, to Collar
clean out the disposer
and thus allow water
to drain from the sink
through the disposer
and down the drain.
. Run hot water faucet
to purge cold water from
the hot water line.The hot water must be between 120°F and
!50% for best wash performance.
. Rollthe dishwasher to a position just in front of the sink.
. Pull the unicouple and its hoses completely out from storage
compartment at rear of the dishwasher.
. Attach the unicouple to the faucet adapter following the three
steps below:
- Depress the locking collar at the top of the unicouple.
- Place the unicouple completely over the faucet adapter.
- Releasethe locking collar. The unicouple should now be
locked onto the faucet adapter.
. Turn on the hot water faucet and check for leaks. If a leak is
detected, disconnect the unicouple, and refer to Step 4.
Thefaucet adapter isdesigned to fit standard spouts having
internal or external threads. You will find the adapter and two
washers in the faucet adapter packet in your dishwasher.
Attach the Faucet Adapter
. Toinstall faucet adapter, first remove the old aerator or trim
ring on your faucet spout.
External Threads
. If faucet has external threads: Insert the
thinner of the two washers into the faucet
adapter and attach it to the faucet spout.
. Tighten with pliers.
Internal Threads
. If faucet has internal threads: Insert both
of the washers into the faucet adapter
and attach it to the faucet spout.
. Tighten with pliers.
Non-Standard Threads
. If the faucet adapter threads do not
match your faucet spout, your local
hardware or plumbing supply store
normally has additional fittings to adapt
your faucet spout to the special faucet
adapter.
/
CAUTION: Asinksprayattachmenthosecan
burst if it is installed on the same faucet asyour dishwasher.
We suggest that you disconnect the sink spray attachment,
if your sink has one, and place a cap over the opening.
Note: The unicouple's small hose carries water from the
faucet to the dishwasher. The large hose carries water from
the dishwasher to the sink. Orient the faucet with the unicouple
attached so water from the unicouple will run into the sink drain.
STEP 4 FAUCET ADAPTER LEAK
Skip this step if no unicouple leak was observed.
@
If a unicouple leak was observed in Step 3,take whatever
actions are necessary to repair the leak. This may be as simple
as tightening the faucet adapter. Or,it may require the services
of a plumber if water is leaking from the interface between the
moveable faucet arm and the fixed part of the faucet fastened
to the sink.
STEP 5 PRETEST CHECK LIST
Reviewthis list after connecting your dishwasher to avoid
charges for a service call that is not covered by your warranty.
[] Open the door and remove all foam and paper packaging.
[] Locate the Owner's Hanual.
[] Readthe Owner's Hanual to familiarize yourself with the
operation of the dishwasher.
[] Remove the protective film, if present, from the control
panel.
[] Add 2 quarts of water to the bottom of the dishwasher
to lubricate the pump seal.
Page 4

Installation Instructions
STEP 6 DISHWASHER WET TEST
• Plugpowercordinto outlet.
Closeand latch dishwasherdoor.
Startdishwasher:
Timer Dial Models
- PresstheNormalpad.
- Turnthedialjust enoughto start the dishwasher.Thedialshould
pointto "Hot Start".Donotturn the dialtoo far.tfyou turn ittoo far,
youwill "bypass"thefill.
ElectronicModels
- Press"RinseOnly."
- Pressthestart padonetime.
Checkto besurethat water entersthe dishwasher.Thiscould take
upto 4 minutesondialmodels.
tfwater doesnot enterthe dishwasher:
- Checkto besurethat the water isturned on.
- Lightlytap the floodfloat coverto dislodgeastuckfloodfloat.
- Ondial models,makesureyoudid not turn the dial pastthe first
fill.tfthis happened,unlatchthedoor and rotatethe dial to "Off."
Relatchthe doorand turn the dial one clickat a time untilthe
dishwasherstarts.
- Onelectronicmodels,makesurethe start padwas pressedone
time only.
HOW TO DISCONNECT THE DISHWASHER
STEP 1 REMOVE POWER FROM
DISHWASHER
, Unplug the dishwasher.
Feed power cord back into its storage location.
STEP 2 REMOVE UNICOUPLE FROM FAUCET
, Turn off hot water.
, Relieve water pressure from the unicouple assembly before
disconnecting it from the faucet by depressing the red
pressure relief button on the unicouple.
Depress the locking collar and remove the unicouple from
the faucet.
Drain excess water from the unicouple by holding it below
sink level and allowing excesswater to run from the hoses
into a pan or similar container to catch the water.
Feed the unicouple and hoses back into their storage pocket.
Float
Cover
Letthe dishwasherrunthroughacompletefill-circulate-pump out
cycle.Thiswilltake approximately5 minutes.
Checkfor leaks.
tfa leakisfound, unplugthe dishwasher,correct asnecessaryand
then plugthedishwasherbackin.
Openthedishwasherdoorand makesuremostof thewater has
drained,if thedishwasherdidnotdrain, checkthedrain hoseto be
sureit isnot kinked.
Letthe dishwasherrunthroughanotherfilland draincycle.Check
againto besurethereareno leaks.
Atthe endofthe seconddrain,setthe controlto the Offposition.
Timer Dial Models:
- Unlatchthedoorand rotatethetimer dialto the Offposition.
ElectronicModels:
- Anelectronicdishwasherrun inthe RinseOnlycycleshouldshut
itselfoff after about 5minutesofruntime.Nofurtheractionis
necessaryifthe dishwasherhasturned itselfoff.tfthe testwas run
inacycleotherthan RinseOnly,pushthe startpad onetimeand
thedishwasherwill resetand shutitselfoffinabout 90seconds.
GEAppliances
General Electric Company
Louisville, Kentucky 40225
GEAppliances.com
Depressredbutton to _e! __
releasewaterpressure
, If the sink is34" or higher from the floor, the excess water
in unicouple hoses cannot be drained directly into the sink.
It will be necessary to drain excess water from hoses into a
bowl or suitable container that is held outside and lower than
the sink.
STEP 3 STORE DISHWASHER
, Latch the dishwasher door closed.
Rollthe dishwasher into its storage location.
SPECIFICATIONS SUBJECT TO CHANGE WITHOUT NOTICE
© 2015 General Electric Company
Page 5

Appareils m@nagers
GE/ pp CI'_,_,,,,,_:__'"_" '_y,_,_............
Instructions d'instailation
Lave-vaisselle
Pourtoutequestion,appelezle1.800.561.3344ouconsulteznotresiteinternet' www.electromenagersge.ca
AVANT DE COMMENCER
Lisezces instructions enti_rement et
attentivement.
IM PORTANT Respecteztouslescodeset
r@glementsen vigueur.
, Remarque pour I'installateur - Assurez-vous de remettre
ces instructions 6 I'utilisateur et 6 I'inspecteur local.
. Remarque pour I'utilisateur - Conservez ces instructions
avec votre notice d'utilisation pour toute r@f@encefuture.
Niveau de comp@tence - L'installation de cet appareil
demande des connaissances de base en m@canique,en
@lectricit@et en plomberie. L'installateur est responsable de
I'installation correcte de I'appareil. La panne de I'appareil
due 6 une mauvaise installation n'est pas couverte par
la garantie GEElectrom@nagers. Veuillez consultez les
informations sur la garantie.
LIRE ATTENTIVEMENT.
CONSERVEZ CES INSTRUCTIONS.
S@ieGLC4000
S@ieGSC3500
IM PORTANT- Sivous recevez un lave-vaisselle
endommag@, contactezimm@diatement votrevendeur
ou votre installateur.
POUR VOTRE SI_CURITE
Lisez et respectez tousles AVERTISSEMENTSet MISESEN
GARDEdonn@sdans cette notice. II est recommand@ de
porter des gants et des lunettes de s@curit@ou des lunettes
@tanches iors de i'installation de cet appareil.
PII_CESFOURNIES :
N#cessaire d'adaptation du robinet fourni dans le paquet
d'installation.
Adaptateur
de robinet
Rondelle mince
Rondelle 6paisse
Unicouple - fix6 au
lave-vaisselle et rang6
dans une pochette
(_I'arri@redu lave-
vaisselle
OUTILLAGE NI_CESSAIRE :
Tournevis (_ Pinces
douille 3/8 po
31-31553 01-15 GE
Page 6

Preparation pour l'installation Instructions d'installation
PRI_PARATIONPOUR
LE BRANCHEMENT I_LECTRIQUE
POUR VOTRE SI_CURITI_ PERSONNELLE:
N'utilisezjamaJs de rallonge ou d'adaptateur
avec cet appareil.
Alimentation _lectrique
. Cet appareil dolt #tre aliment# par du 120V, 60 Hz, et #tre
branch# (_un circuit ind#pendant correctement mis 6 la terre
et prot#g# par un disjoncteur de 15 ou 20 Aou par un fusible
0 action diff#r6e.
. Si I'alimentation #lectrique n'est pas conforme 6 ces
exigences, appelez un 61ectricien qualifi6 avant de
commencer.
[] Le circuit du lave-vaisselle ne dolt pas
6tre utilis# pour un autre appareil
quand le lave-vaisselle est en marche,
car le lave-vaisselle utilise la capacit#
totale du circuit.
[] Si la prise murale dans laquelle le
cordon du lave-vaisselle est branch#
est command#e par un interrupteur,
mettez I'interrupteur en position
de marche.
Assurez-vous que
la mise 5 la terre salt
correcte avant toute
utilisation.
Instructionsdemise_Ioterre - ModUlesavecuncordond'alimentation
Cet appareil dolt 6tre mis 5 la terre. Encas de mauvais
fonctionnement ou de panne, la mise 5 la terre r#duit le risque
de choc #lectrique enfournissant au courant #lectrique un
chemin de moindre r#sistance. Cet appareil est#quip# d'un
cordon, muni d'un conducteur de mise 5 la terre de I'appareil
et d'une fiche de mise 5 la terre. Lafiche dolt 6tre branch6e
dans une prise appropri#e, elle-m6me correctement install#e
et raccord#e 5 la terre, conform#ment 5 tousles codes et
r#glementations locales.
Ne coupez ou n'enlevez jamaJs, sous aucun
pr_texte, la troisi_me broche de mise 6 la
terre du cordon d'alimentation.
Une connexion incorrecte de ce fil de terre pourrait
provoquer un risque de choc _lectrique. V_rifiez
aupr_s d'un _lectricien quolifi_ ou d'un technicien
de maintenance si vous n'_tes pas s0r que votre
appareil salt correctement mis _ la terre. Ne
modifiez pas Io fiche fournie avec I'appareil ;
si ce!le-ci n'est pas odopt_e _ Io prise murale
existante, faites installer une prise appropri_e
par un technicien qualifi_.
A ATTENTION - Le module de d@tection de
AL
courant est un dJspositif d@tectant le courant et
situ@ derrJ@re le panneau Jnf@rieur. II est possible que le
module de d@tection de courant se soit d@clench@ pendant
le transport. Si cela c'est produit, l'installateur doit
r@initialiser le module de d@tection de courant pendant la
proc@dure d'Jnstallation. NE PAS RI_INITIALISER LE MODULE
DE DETECTION DE COURANT si ce dernier s'est d@clench@
apr@s avoir install@ et mis l'appareil sous tension. APPELER
LE SERVICE DES RI_PARATIONS. Ne pas faJre examiner
le lave-vaisselle par un technicien qualifi@ apr@s des
d@clenchements repr@sente un risque de blessures ou de
bris de l'appareil ou 6 la proprietY.
I_TAPEi RETRAIT DE LA BASE EN BOIS
IM P0 RTANT-nefrappezpaslabaseen boispour
laretirer!Vous risquezd'endommager lelave-vaisselle.
. Approchez le lave-vaisselle de son emplacement d6finitif et
posez-le sur I'arri#re.
. Retirez les quatre pieds de mise 5 niveau en dessous de la
base en bois (3I'aide d'un tournevis 6 douille de 3/8 po.
. Mettez la base et les boulons au rebut.
. Remettez le lave-vaisselle (_la verticale. \..
_> ,
/
/
Page 7

Instructions d'installation
I_TAPE2 INSTALLATIONDEL'ADAPTATEURDU ROBINET
L'adaptateur de robinet sp6cial fourni avec le lave-vaisselle
doit @tremont6 sur le robinet de r6vier avant de pouvoir utiliser
le lave-vaisselle.
L'adaptateur de lave-vaisselle est conqu pour installation
sur les becs standards avec des filets internes ou externes.
L'adaptateur et deux rondelles setrouvent dans la pochette
d'adaptateur de robinet dans le lave-vaisselle.
Fixation de I'adaptateur du robinet
, Pour installer I'adaptateur de robinet, il est d'abord n6cessaire
de d6poser rancien a@ateur ou la bague d6corative du bec
du robinet.
Filets externes
, Robinets 6 filets externes :Ins@ez
la rondelle mince dans I'adaptateur
du robinet et installez-le sur le bec
du robinet.
, Serrez avec une pince.
Filets internes
, Robinets 6 filets internes : Ins@rezles deux
rondelles dans I'adaptateur du robinet et
installez-le sur le bec du robinet.
Serrez avec une pince.
Filets non standard
Si lesfilets de I'adaptateur ne
correspondent pas 6 ceux du robinet,
votre quincaillerie ou fournisseur de plomberie local propose
probablement des raccords suppl6mentaires pour adapter
le bec du robinet 6 I'adaptateur sp6cial du robinet.
@
@
ANISE EN GARDE :Unedouchettepeut
exploser si elle est install6e sur le m_me robinet que votre
lave-vaisselle. Nous recommandons de d6brancher
la douchette et de mettre un capuchon sur rouverture.
I_TAPE3 BRANCHEMENT DU RACCORD
UNICOUPLE AU ROBINET
Faitesfonctionner le
broyeur de d6chets, si Collier
install6, pour nettoyer ce
dernier et permettre ainsi 6
I'eau de s'6couler de 1'6vier
dans le broyeur d'ordures
puis vers les 6gouts.
Ouvrez le robinet d'eau
chaude pour purger I'eau froide du tuyau d'eau chaude. L'eau
chaude doit @tre6 une temp@ature entre SOet 80 °C(!20 et
130 °F) pour obtenir le meilleur rendement du lave-vaisselle.
Faites rouler lelave-vaisselle jusqu'6 son emplacement
devant 1'6vier.
Tirez le raccord unicouple et sestuyaux compl@tement hors
du compartiment de rangement 6 I'arri@redu lave-vaisselle.
I_TAPE3 BRANCHEMENT DU RACCORD
UNICOUPLE AU ROBINET (suite)
, FixezI'unicouple 6 I'adaptateur du robinet en suivant lestrois
@apes suivantes :
- Appuyez sur le collier de verrouillage en haut du raccord
unicouple.
- Placez le raccord unicouple compl_tement sur I'adaptateur
du robinet.
- Rel@chezle collier de verrouillage. Le raccord unicouple doit
donc @treverrouill6 sur I'adaptateur du robinet.
Ouvrez les robinets d'eau chaude pour v@ifier I'absencede
fuites. Encas de fuite,d6branchez le raccord unicouple et
consultez I'@ape4.
Note : Lepetit tuyau du raccord unicouple transporte I'eau
du robinet au lave-vaisselle. Le plus gros tuyau transporte I'eau
du lave-vaisselle 6 1'6vier.Orientez le robinet avec le raccord
unicouple en place pour que I'eau du raccord unicouple
s'6coule dans 1'6goutde 1'6vier.
I_TAPE4 FUITE DE L'ADAPTATEUR DU ROBINET
Ignorez cette _tape si le raccordunicouple ne fuit pas.
II est important de corriger toute fuite du raccord unicouple
observ6e 6 I'@ape 3. Ceci peut _tre tr_s simple, comme
simplement resserrer I'adaptateur. Ou il peut _tre n6cessaire
de faire intervenir un plombier si la fuite est 5 I'interface entre
le bec pivotant et la portion fixe du robinet mont6e sur 1'6vier.
I_TAPE5 LISTE DE VITRIFICATION
AVANT LES ESSAIS
Examinezcette listeapr_s I'installation du lave-vaissellepour 6viter
les frais d'intervention qui ne sont pas couverts par la garantie.
[] Ouvrez la porte et retirez tousles emballages en mousse
et en papier.
[] Trouvez le manuel d'utilisation.
[] Lisez le Manuel d'Utilisation pour vous familiariser avec
le fonctionnement de votre lave-vaisselle.
[] Retirez la pellicule protectrice du panneau de commande,
si elle est pr6sente.
[] Ajoutez deux litres d'eau au fond du lave-vaisselle pour
lubrifier lejoint de la pompe.
I_TAPE6 ESSAI D'UTILISATION
DU LAVE-VAISSELLE AVEC DE L'EAU
• Branchezlecordond'alimentationdansla prise.
Fermezet verrouillezla porte du lave-vaisselle.
Lancezle lave-vaisselle:
Plod_lesavecminuterie
- Appuyezsurla touche Normal.
- Tournezlebouton pourquele lave-vaissellesemette en marche.
Leboutondoit @tresur<<Hot Start>>.Nefaites pastourner
leboutontrop loin.Sivousalleztrop loin,le lave-vaissellesautera
lemodederemplissage.
Plod_les61ectroniques
- Appuyezsur<<RinseOnly>>.
- Appuyezunefoissurlatouche Start.
• V@ifiezqueI'eauarrivebiendansle lave-vaisselle.Cecipeut prendre
jusqu'64 minutessur lesmodeles6 bouton, s
Page 8

Instructions d'installation
I_TAPE6 ESSAID'UTILISATION DU LAVE-VAISSELLE
AVEC DE L'EAU (suite)
• SiI'eaun'entrepasdanslelave-vaisselle:
- V@ifiezque le robinetd'eauest bienouvert.
- Tapezdoucementsurlecouvercledu flotteur pour d@logerun
flotteur coinc@.
- Surlesmodules6 bouton,v@ifiezquele boutonn'apas@t@tourn@
au-del6du modederemplissage.Danscecas,d@verrouillezla
porteet faites tournerle boutonjusqu'6 <<OFF>>.Reverrouillezla
porteet faites tournerle boutonun d@clic6 la foisjusqu'6 ceque
le lave-vaissellesemetteen marche.
- Surlesmodeles@lectroniques,prenezsoinde n'appuyerqu'une
seulefoissurla touche demiseenmarche.
du flotteur
COMMENT DI-'-BRANCHER
LE LAVE-VAISSELLE
ETAPE1 MISE HORSTENSION DU LAVE-VAISSELLE
, D@branchezle lave-vaisselle.
, Replacez le cordon dans le compartiment de rangement.
ETAPE 2 RETRAIT DU RACCORD UNICOUPLE
DU ROBINET
. Coupez I'eau chaude.
. Faites tomber la pression dans le raccord unicouple. Pour
cela, d_branchez-le du robinet en appuyant sur le bouton
de d_pressurisation rouge sur le raccord unicouple.
Appuyez sur le collier de verrouillage et d#branchez
le raccord unicouple du robinet.
Videz I'exc_s d'eau du raccord unicouple en le tenant sous
le niveau de I'#vier et en laissant I'eau s'#couler des tuyaux
dans un bac ou un r#cipient similaire pour attraper I'eau.
Replacez le raccord unicouple et lestuyaux dans leur
compartiment de rangement.
f
, Laissezfonctionner le lave-vaisselle pendant un cycle
complet de remplissage-circulation-vidange. Ceci prend
environ 5 minutes.
, V@ifiez qu'il n'y ait pas de fuite.
S'il y a des fuites, dGbranchez le lave-vaisselle, corrigez selon
le besoin et rebranchez le lave-vaisselle.
Ouvrez la porte du lave-vaisselle et v@ifiez que la plus grande
portion de I'eau est vid#e. Sile lave-vaisselle ne s'est pas
vidang#, v@ifiez que le tuyau de vidange ne soit pas pinc#.
Faitesfonctionner votre lave-vaisselle pendant un autre cycle
de remplissage et de vidange. V@ifiez 6 nouveau I'absence
de fuite.
A la fin de la seconde vidange, positionnez les commandes
sur <<OFF>>.
ModUles avec minuterie :
- D#verrouillez la porte et faites tourner le bouton
de la minuterie sur la position <<OFF>>.
ModUles _lectroniques :
- Un lave-vaisselle #lectronique qui a fonctionn# en <<Rinse
Only <<(rinqage seulement) doit s'arr_ter automatiquement
apr_s environ 5 minutes de fonctionnement. Aucune autre
action n'est n#cessaire si le lave-vaisselle s'est arr_t#
automatiquement. SiI'essai a #t_ fait en utilisant un cycle
autre que <<Rinse Only >>(rinqage seulement), appuyez une
fois sur la touche de mise en marche et le lave-vaisselle doit
se r#initialiser et s'arr_ter apr_s environ 90 secondes.
GEAppliances
General Electric Company
Louisville, Kentucky 4022B
www.electromenagersge.ca
Appuyer'surlebouton I IIJr
rougepourfaire
tomber lapression
d'eau.
, Si I'#vier est 6 plus de 86 cm (34 po) du sol, I'eau dans
lestuyaux unicouple ne peut _tre vidang#e directement
dans I'#vier. II sera n_cessaire de vidanger I'eau des tuyaux
dans un bol ou un r#cipient appropri# que vous maintiendrez
6 I'ext@ieur de I'#vier et 6 une hauteur moindre.
Appuyersur
lecollierpour
d@brancherle
raccord unicouple
du robinet.
I_TAPE3 RANGEMENT DU LAVE-VAISSELLE
. Verrouillez la porte du lave-vaisselle en position fermGe.
Faites rouler lelave-vaisselle jusqu'6 son emplacement
de rangement.
LES SPECIFICATIONS PEUVENT ETRE MODIFII_ES SANS PREAVIS
© 2015 General Electric Company
 Loading...