

GE 30, GRSF3301ZWW Use And Care Manual

3 0 ’’ S t o v e
Use and Care
Guide
Consumer Services ..................2, 31
Safety Instructions ..................2, 3, 4
Installation Instructions..............2, 5
Operating Instructions, Tips
Stove Features....................................6
Cooktop Element Information..............7
Selection and Use of Pots and Pans ..8
Home Canning Tips ............................9
Operating Instructions
Stovetop Cooking............................10
Oven Broiling ..................................12
Oven Baking....................................13
Non Self-Clean Oven with
Electronic Time of Day Clock ........13
Non Self-Clean Oven with
Electronic Range Control ..............14
Self-Clean Oven with
Electronic Range Control ..............18
Oven Self-Cleaning ........................21
RECYCLED PAPER
RECYCLABLE
Care and Cleaning ........................23
Cleaning Summary Guide ................28
Problem Solver ........................29, 30
Part No. 350A4545P032 Rev.2
Catalogue No.WB60M914
We care about our environment

HELP US HELP YOU
B e f o r e using your oven, read this
book care f u l l y.
It is intended to help you operate and maintain your new
stove properly. Keep it handy for answers to your
questions.
If you received a damaged stove…
Immediately contact the dealer (or builder) that sold you
the stove.
Write down the model
and serial numbers.
You’ll find them on a label behind
the storage drawer.
These numbers are also on the
Ownership Registration Card that
came with your stove. Before
sending in this card, please write
these numbers here.
Model Number
Save time and money.
B e f o r e you request serv i c e …
Check the Problem Solver in the back of this guide. It
lists causes of minor operating problems that you can
correct yourself.
Serial Number
Use these numbers in any correspondence or service
calls concerning your stove.
I N S TA L L ATION OF ANTI-TIP BRACKET
Retailer’s Name
Date of Purchase
WARNING: SAFETY INSTRUCTIONS
• RANGE MUST BE SECURED BY THE
ANTI-TIP BRACKET SUPPLIED IN THE
BAG.
• UNLESS PROPERLYINSTALLED, THE
RANGE COULD BE TIPPED BY
STEPPING OR SITTING ON THE DOOR.
INJURY MIGHT RESULT FROM SPILLED
HOT LIQUIDS OR FROM THE RANGE
ITSELF.
Installation instructions are provided for wood and concrete floors. Any other type of construction may require special
installation techniques to provide adequate fastening of the ANTI-TIP bracket to the floor.
Note: The installation of the ANTI-TIP bracket must meet all local codes for securing appliance.
The use of this bracket does not preclude tipping of the range when not properly installed.
Be sure that screws do not penetrate electrical wiring or plumbing.
1. Push range into exact position where you intend to install it.
2. Remove storage drawer by pulling it all the way out, then lifting the front of the drawer to allow the wheels to come
out of their tracks. (See Use & Care Guide.)
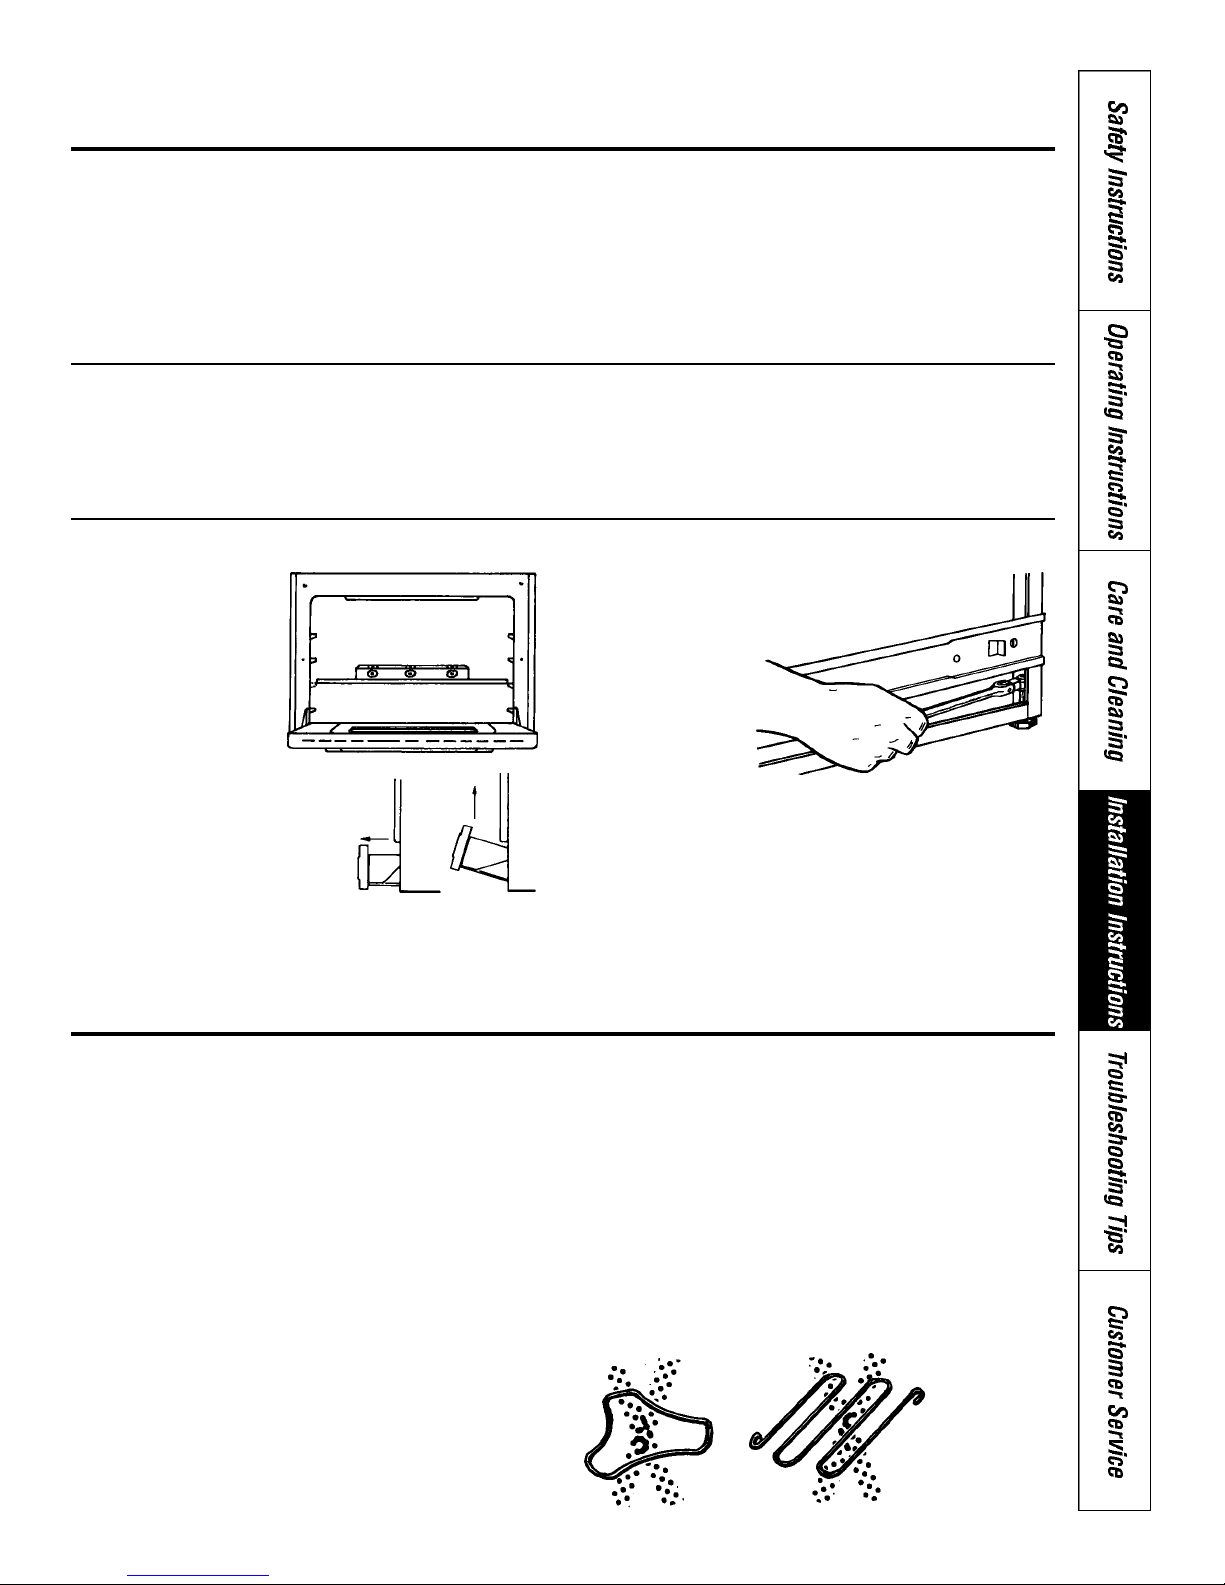
3. Slide the anti-tip bracket over one of the rear leveling feet as shown (Fig. 1).
4. Mark its location on the floor with a pencil.
5. Pull the range out of the way and reposition the bracket using your pencil marks from step 4.
6. Drill 2 holes into the floor (1/8” for “wood floor” or recommended size hole for hardware for “concrete floor”).
Hardware 1/4” x 1-1/2” lag bolt & 1/2” O.D. sleeve anchor not provided.
7. Screw the bracket to the floor using screws provided for “wood floor” or lag bolt & O.D. sleeve anchor (not
provided) for “concrete floor”.
8. Slide the range into position, ensuring that the leveling foot fully engages in the slot in the anti-tip bracket.
9. Test the installation by grasping the top edges of the rear surface and carefully attempt to tilt the range forward.
2

3
4
Installing Your Stove
A stove, like many other household items, is heavy and
can settle into soft floor coverings such as a cushion
vinyl or carpeting. When moving the stove on this type
of flooring, use care. (Asheet of plywood installed under
the stove will protect the flooring.)
Allow minimum of 1/2” clearance on all three sides for
proper stove ventilation.
Electrical Connection
This stove requires a special 240V receptacle for the
factory installed power cord. If your kitchen does not
have a receptacle, have one installed by a licensed
electrician. Failure to do so may void the warranty.
Leveling Your Stove
Ensure that the stove is
level when installed.
Open the oven door and
place a level on the oven
rack as shown.
To gain access to the leveling
screws, remove the bottom
drawer by pulling forward as
far as possible, lifting up and
pulling forward.
If the stove must stand beside a refrigerator, allow at
least 5” between the two appliances. The heat from the
stove may affect refrigerator performance.
Make sure that all the packing materials, including tape
on elements and packing material above and below oven
elements, have been removed and that all controls are in
the OFF position before plugging in the power cord.
If the supply cord of the appliance becomes damaged, it
must only be replaced by an authorized service
representative.
Leveling screws are
located on each
corner of the base of
the stove. The
leveling screws can
be adjusted using a
socket and ratchet or
an adjustable
wrench. Turn the
leveling feet to raise
or lower the corners
of the stove.
B e f o r e Using Your Stove
Money Saving Tips
■Develop the habit of turning the control to OFF before
removing foods from the oven or cooktop elements.
■Allow food to thaw before cooking. Thawed food
requires less cooking.
■Before basting, adding vegetables or checking the
internal temperature of a roast, remove the food from
the oven and close the door. Prepare food as needed,
then return to the oven.
■Preheat the oven only when recommended in the
recipe. Put roasts and casseroles into a cold oven and
then turn the oven ON.
■Glance through the window in the oven door to check
on foods. Opening the oven door frequently to check
on food wastes electricity.
■Use the oven to prepare complete meals. For instance,
start a roast, add vegetables when the meat is halfcooked, and then warm rolls or desserts after the main
dishes are cooked.
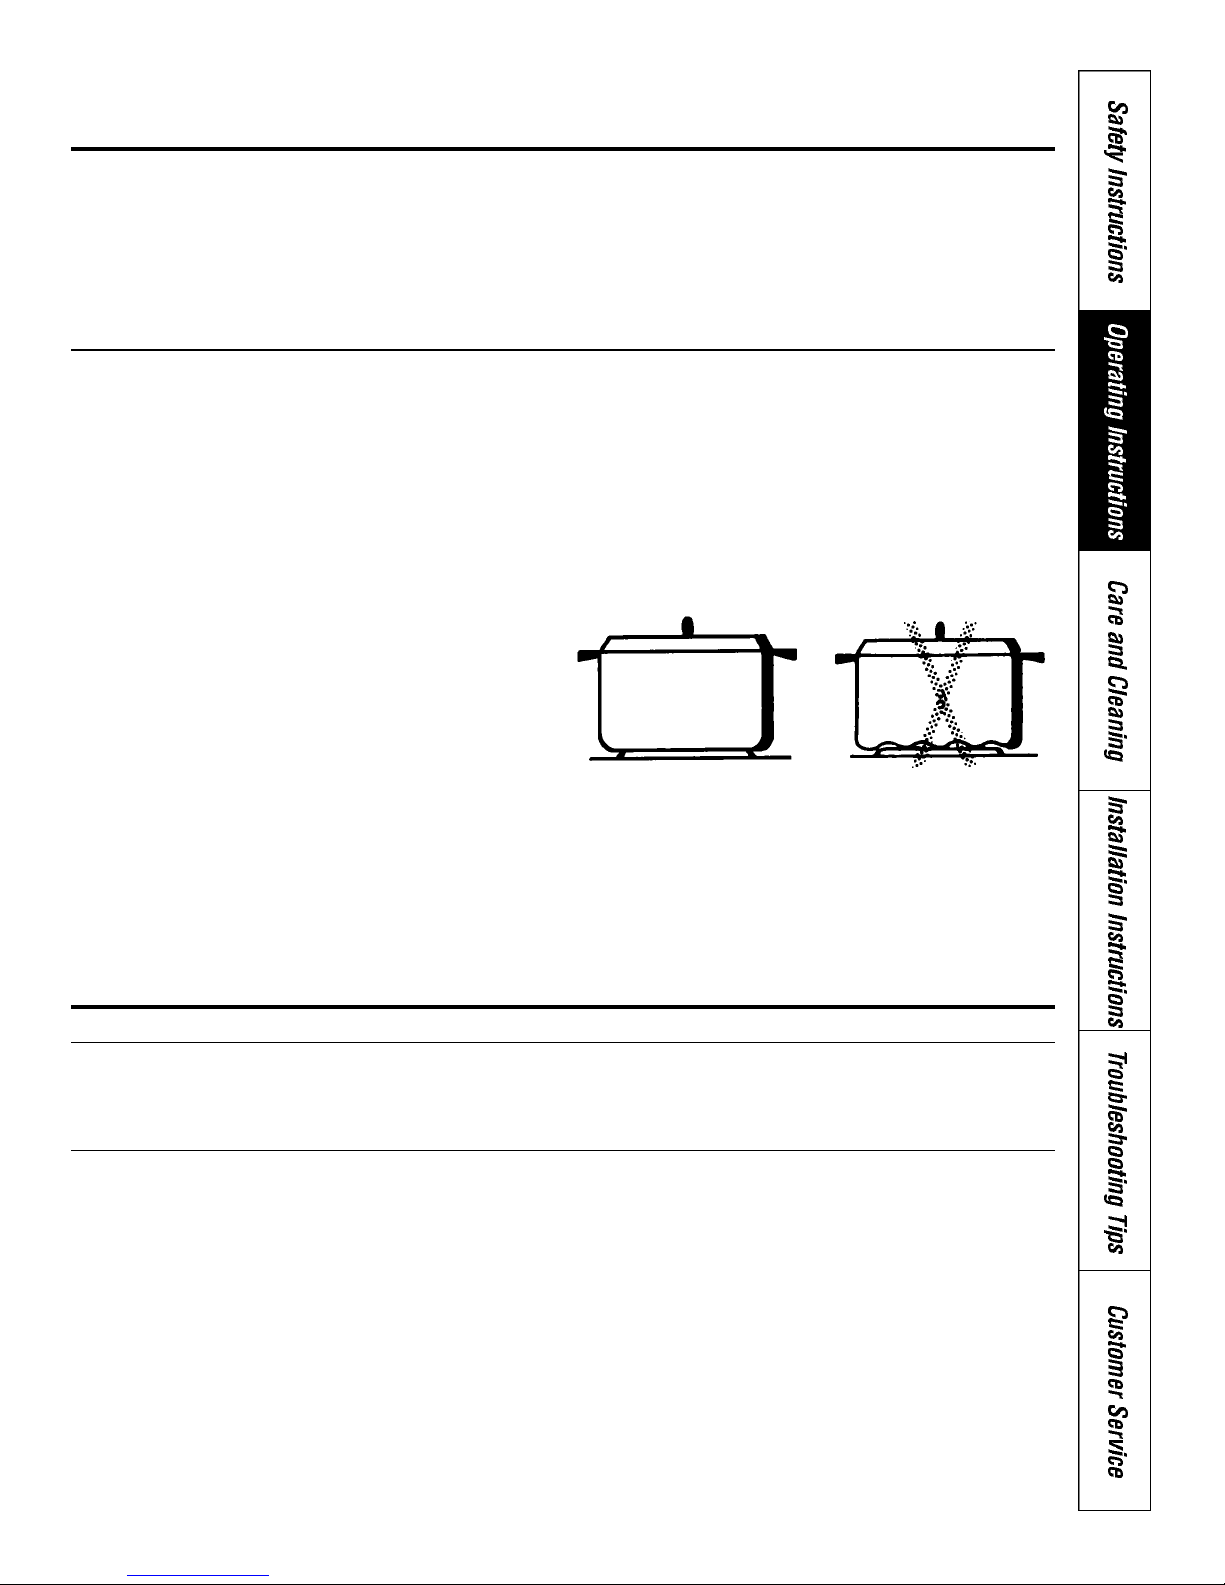
■Use cookware with tight-fitting lids and flat bottoms
which completely cover the heated portion of the
element.
■Watch foods when bringing them to cooking
temperatures at high heat. When foods reach cooking
temperature, reduce heat to the lowest setting that will
keep the food cooking.
■When boiling water for tea or coffee, heat only the
amount needed.
■Do not use a wire trivet or any other kind of heat
retarding pad between the pan and the element.
5

F e a t u r es of Your Stove
(Features will vary with model)
Feature Index
1 Model and Serial Numbers
2 Cooktop Element Controls
3 “ON” Indicator Lights for
Cooktop Elements
4 Oven Selector Control
5 Oven Cycling Light
6 Oven Temperature Control
7 Clock and Minute Timer
8 Door Locked Light
(Some Self Clean Models)
9 Glass-Ceramic Cooktop
10 Oven Light/Fluorescent
Light Switch
11 Broil Element
12 Oven Interior Light
13 Oven Racks
14 Oven Rack Supports
15 Broiler Pan and Grid
16 Oven Liner
17 Bake Element (May be lifted
18 Storage Drawer
19 Door Latch (Self Clean Model)
20 Door Gasket (Self Clean
21 Oven Vent
22 Coil Element
Feature Index
gently for wiping oven floor.)
Model)
Feature Index
23 Electronic Clock, Timer &
Oven Control
24 Fuse Cover
26 Appliance Outlet
27 Fluorescent Light
28 Oven Gasket
(Easy Clean Models)
30 Roastmeter Plug
31 Drip Bowls
6

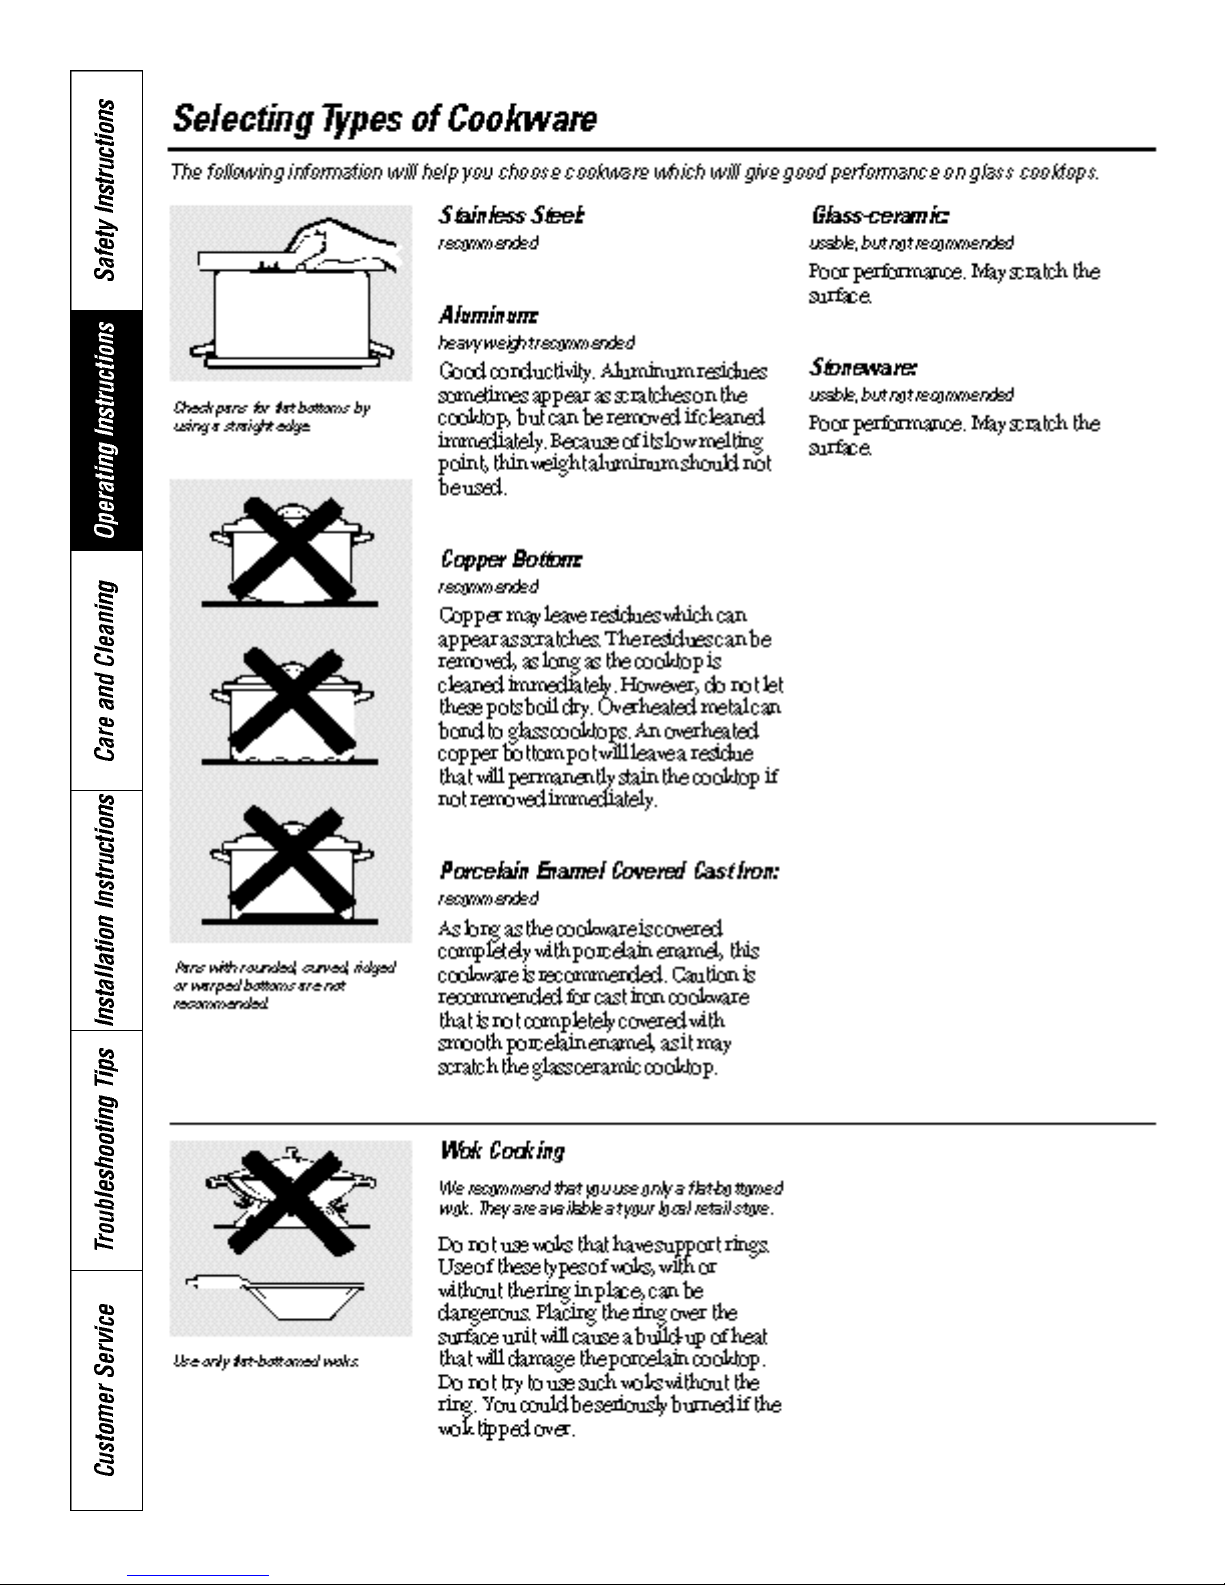
Heating Elements
Cooktop Elements
Coil Elements
Description: Flattened metal tubing containing electric
resistance wire, suspended over a drip pan.
How it Works: Heats by direct contact with the pan and
by heating the air under the pan. For best cooking results,
use good quality pans. Electric coils are more forgiving
of warped pans than other types of cooktop elements.
Heats up quickly but does not change heat settings very
quickly. Electric coils stay hot long enough to continue
cooking for a short time after they are turned off.
Coil Element Removal (on some models)
To remove an element, ensure it is cold, then gently raise
the side opposite the receptacle and pull it out of the
stovetop receptacle. To replace, reverse the procedure.
The drip bowls may be removed for cleaning.
The round centre disc of the element can be replaced.
Caution: Drip bowls should be used at all times.
Caution: Do not immerse elements in water.
These elements are self-cleaning. However, after the
elements have cooled down, removal of large pieces of
food or excess oil is recommended to prevent the element
from smoking.
Simmer Element (on some models)
When set at minimum heat
the simmer element provides
temperatures low enough for
melting butter, heating
delicate sauces, maintaining
coffee at serving
temperature, or anytime food
preparation requires a very
low heat.
CAUTION:
■Do not use aluminum foil to line drip bowls. This
could result in a shock and fire hazard, damage to
the stove and shorten element life.
■If it is absolutely necessary to use aluminum foil, it
is recommended to buy the aluminum foil inserts
from your local grocery store.
■Again, lining of the drip bowls should not be done.
However, if you still decide to line the bowls, make
certain that the foil:
■ Does not block the centre hole on the drip bowl.
■ Does not come near the terminals of the elements.
7
8
Home Canning Ti p s
Canning should be done on the cooktop only.
The use of cookware extending more than one inch
beyond the edge of the element is not recommended.
However, when canning with water-bath or pressure
canner, larger-diameter cookware may be used. This is
because boiling water temperatures (even under pressure)
will not damage cooktop finish.
Canning Tips
Bring water to boil on MAX heat. After boiling has
begun, adjust to lowest setting to maintain boil. This
saves energy.
Be sure the canner fits over the centre of the element. If
your stove or its location does not allow the canner to be
centred on the element, use smaller diameter containers
for good canning results.
When canning, use recipes from reputable sources.
Reliable recipes are available from the manufacturer of
your canner, manufacturers of canning jars and the
Department of Agriculture.
Remember that canning generates large amounts of
steam. Use care to prevent burns.
Note: If your stove is operating on low voltage, canning
may take longer than expected, even though directions
have been carefully followed. The process may be
improved by:
1) using a pressure canner
2) starting with hot tap water for faster heating of large
quantities of water.
WARNING
Do not use large diameter canners or other large
diameter pans for frying or boiling foods other than
water. Most syrups or sauces and all types of frying
require cooking temperatures much higher than the
temperature required to boil water. Such
temperatures will eventually damage cooktop finish.
CAUTION: Safe canning requires that harmful micro-
organisms are destroyed and the jars are
sealed completely.
When canning in a water bath canner, a gentle but steady
boil must be maintained continuously for the required
time.
When canning with a pressure canner, the pressure must
be maintained continuously for the required time.
For best results, use a flat bottom, heavy gauge canner.
Canners with rippled bottoms are not recommended
because the bottom does not make enough contact with
the element. This wastes energy and takes a long time to
boil water.
Te m p e r a t u re Conversions
F a h r e n h e i t ˚ 1 4 0 1 5 0 1 7 0 2 0 0 2 5 0 2 7 5 3 0 0 3 2 5 3 5 0 3 7 5 4 0 0 4 2 5 4 5 0 4 7 5 5 0 0 5 2 5 5 5 0
C e l s i u s ˚ 6 0 6 5 7 5 9 5 1 2 0 1 3 5 1 5 0 1 6 0 1 7 5 1 9 0 2 0 5 2 2 0 2 3 0 2 4 5 2 6 0 2 7 5 2 9 0
9
Operating Instru c t i o n s
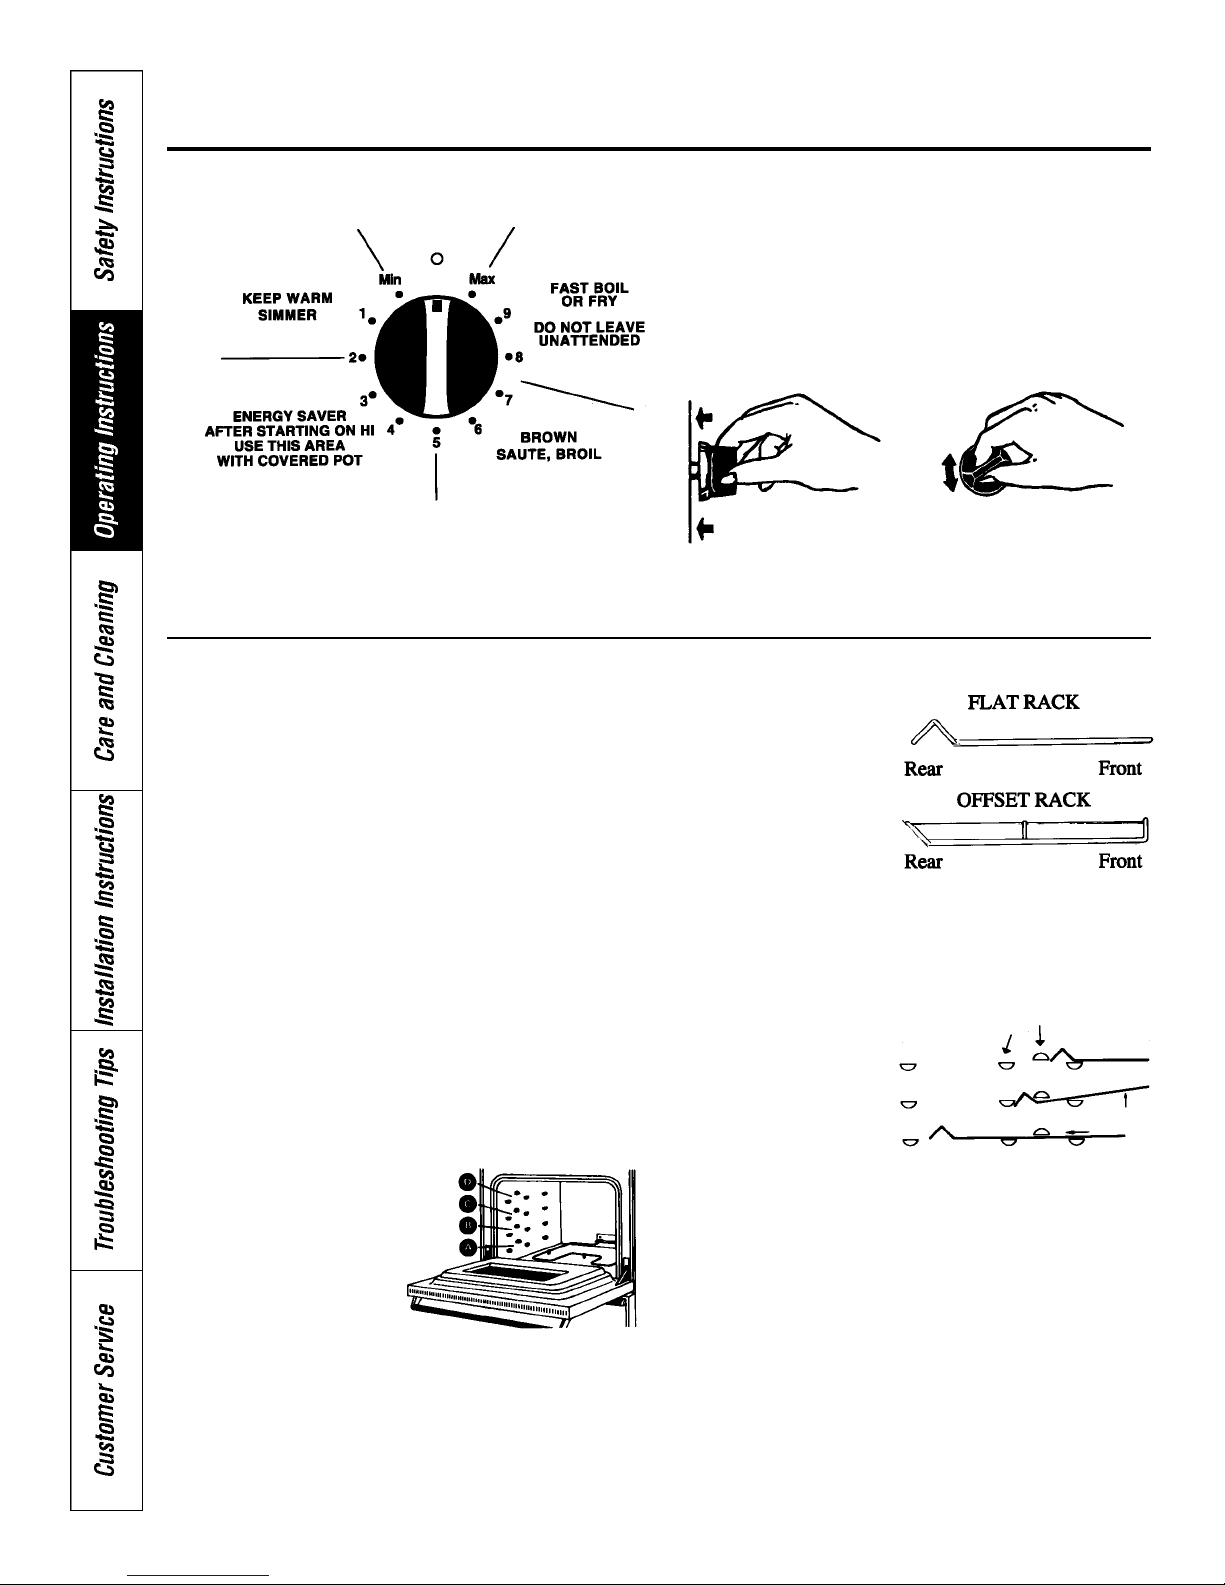
Stovetop Cooking Controls
How to set the controls
When the control is in the OFF position, it must be
pushed in to turn. When control is in any position other
than OFF, it may be rotated without pushing in.
Be sure the control is in the OFF position when finished
cooking. An indicator light will glow whenever a
cooktop element is turned on.
Using Your Oven
Before Using Your Oven
1.Look at the controls. Be sure to understand how to set
them properly. Read over the directions for the Oven
Controls in order to understand how to use them.
2.Check the oven interior. Look at the shelves. Take a
practice run at removing and replacing them properly,
to give sure, sturdy support.
3.Read over information and tips that follow.
4.Keep this guide handy, especially during the first
weeks of use.
NOTE:
■ A “burning” or “oily” smell may be noticed the first
few times the oven is turned on. This is normal in a
new oven and will disappear in a short time. To speed
the process, set a self-clean cycle (for some models)
for a minimum of 3 hours. See Operating the SelfCleaning Oven section.
■ Check the oven interior. Make sure all packaging
material has been removed.
The oven has four rack
positions to allow
adjustment for baking and
broiling.
The shelves are designed
with stop-locks so that
when placed correctly on
the shelf supports, they
will stop before coming
completely out from the
oven.
Grasp control knob and
push in.
When placing cookware
on a shelf, pull the shelf
out to the stop position.
This will eliminate
reaching into the hot
oven. Place the
cookware on the centre
of the shelf, as placing
heavy cookware towards
the back of the rack
could cause the rack to tip when fully extended. Placing
the food in the centre of the rack will also allow better air
circulation for more uniform cooking. When loaded, slide
the shelf to the back of the oven.
To remove the rack
from the oven, pull it
forward and tilt the
front end upward. Be
certain that the rack
is cold before
touching with bare
hands.
To replace rack in oven, place the rack in desired
position so the rear of rack is toward the rear of the oven.
Tilt up the front of the rack and push it toward the back
of the oven until it goes past the ridge on the oven liner.
Lower the front of rack and push it to the back of the
oven.
Turn either clockwise or
counter clockwise to
desired heat setting.
Oven liner ridge
10
 Loading...