

GE GPF375 Installation Instructions
Installation
3/4" Custom Dishwasher
Door and Access Panel Kit
Instructions
Before you begin
STOP
IMPORTANT – Save these instructions
for local inspector’s use.
IMPORTANT – Observe all governing
codes and ordinances.
Note to Installer – Be sure to leave these
instructions with the Consumer.
Note to Consumer – Keep these instructions
with your Owner’s Manual for future
reference.
To prevent electric shock, disconnect electrical
power supply to dishwasher before changing
panels. Do not operate dishwasher while
changing panels or when lower access panel
assembly is removed.
Read these instructions completely
and carefully.
WARNING:
GPF375 Kit
TOOLS AND MATERIALS REQUIRED:
• 1/4" socket driver
• Phillips screwdriver
• Electric drill
• 1/8" and 3/16" drill bits
• Carpenters square
• Safety Glasses
The custom panels should be constructed in
the same manner as cabinet doors. Cut edges
can be seen and must be finished for the best
appearance.
The GPF475 Trim Kit provides for the installation of 3/4" thick custom door and access
panels with a typical 4" high toekick.
KIT INCLUDES:
• Door panel support
• 7, 5/8" phillips flat head screws
• 3 round head screws
• GPF100 spring kit
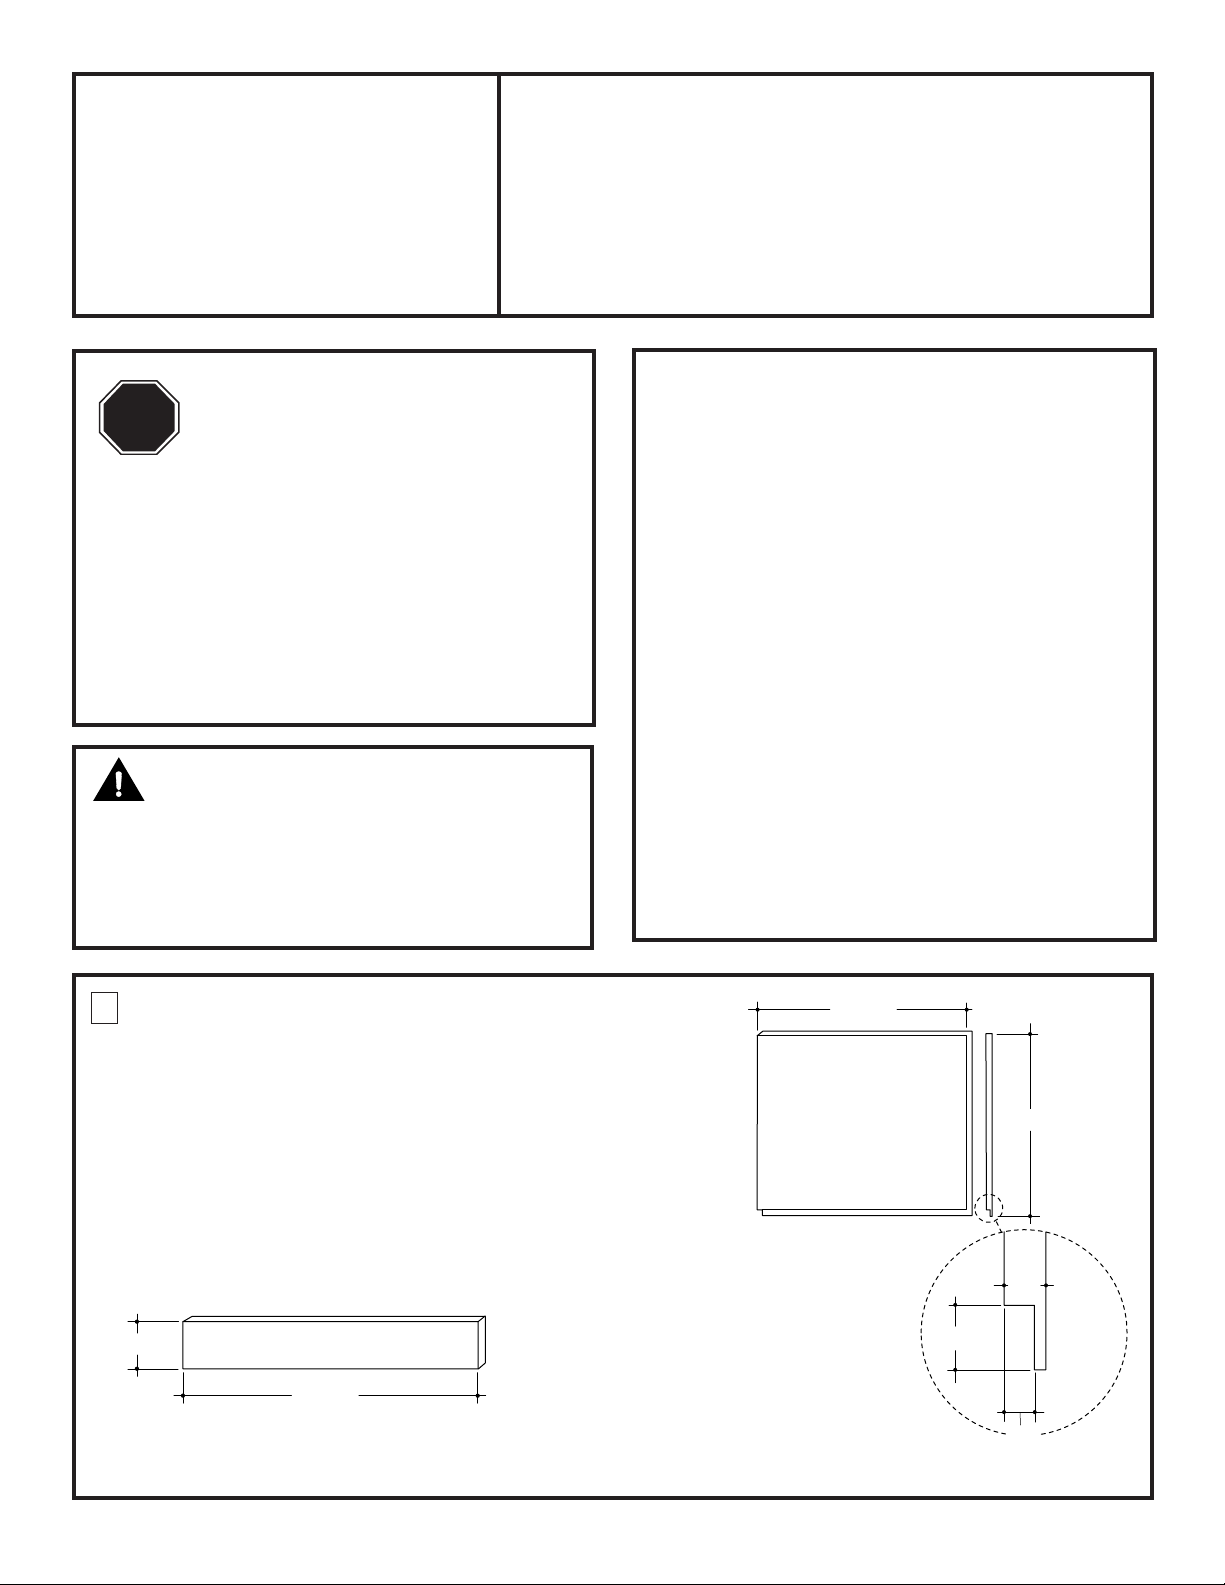
1 CUT 3/4" THICK CUSTOM
PANELS TO SIZE
• Cut the 3/4" thick door panel to the dimensions shown.
• Rout the bottom edge of the door panel on
the appearance side, 1/2" deep and 1-9/16"
high resulting in 1/4" thickness. See
illustration.
• The access panel height may be 3-3/4" to
4-1/4" max. The access panel height can vary
depending upon toekick height and adjustments made to the leveling legs.
A*
*3-3/4" min., 4-1/4" max. for typical 4" toekicks.
Adjustments may be required to match adjacent cabinet
fronts.
3/4" Thick Access Panel
23-5/8"
23-5/8"
3/4" Thick Panel
Appearance Side
Note: The custom wood
access panel should
evenly match the bottom
of adjacent cabinets.
Adjustments made to the
leveling legs to obtain
correct height can affect
the vertical dimension
(height) of the access
panel.
18-15/16"
3/4"
1-9/16"
1/2"

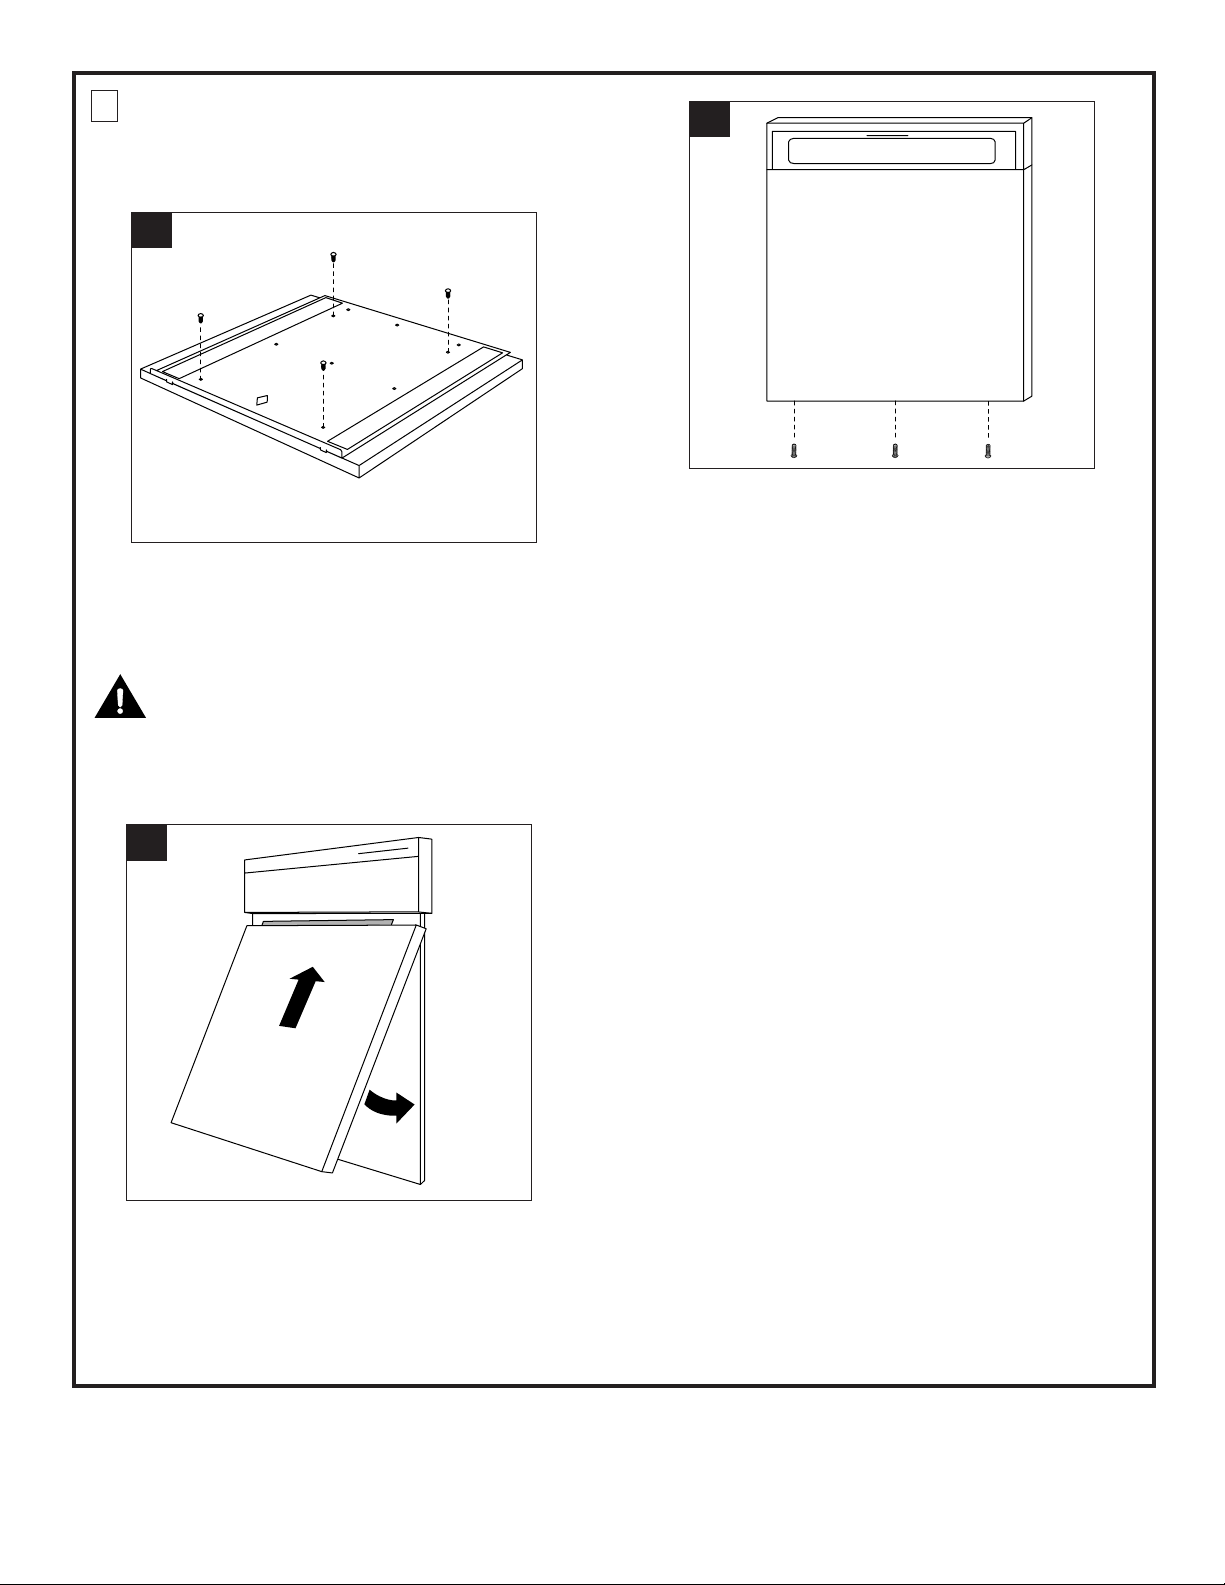
2 REMOVE LOWER ACCESS
PANEL ASSEMBLY
• Remove the two screws below the access
panel. Retain screws.
• Loosen the two screws located between the
door and the access panel. Do not attempt
to remove these screws. They are secured
to the access panel with washers.
• Remove the access panel assembly and
toekick from the dishwasher. Set aside.
NOTE: Do not remove the insulation behind
the access panel or toekick.
3 MOUNT CUSTOM PANEL TO
METAL SUPPORT PANEL
A
Escutcheon
Escutcheon
Door
Door
Panel
Panel
Loosen 2 Screws
Loosen 2 Screws
Access Panel
Access Panel
Toekick
Toekick
• Lay the custom panel on a flat surface with
appearance side down.
• Measure and mark the center line. Use a
carpenters square to draw the center line.
B
Tabs
Overlap
Bottom
Edge
Tab
• Place the metal door panel support on the
custom panel, with the projecting tabs
overlapping and against the bottom edge.
Center the support panel by matching the
center line to the diamond cutout.
NOTE: Do not remove tape from adhesive
strips.
Metal Support
Overlaps
Top
Edge
Foam
Double Sided
Tape
• Mount custom panel to metal support panel
C
Remove
Tape Covering
Adhesive Strips
• Remove the custom panel from the support.
• Remove tape from adhesive strips on the
metal support – on the side that touches the
custom panel.
• Carefully, position the metal support onto the
custom panel with center line showing
through the diamond. Press the metal support against the panel.
2
3 MOUNT CUSTOM PANEL TO
METAL SUPPORT PANEL
CONTINUED
D
Drill 4 Holes,
In Locations Shown
• Drill 1/8" dia. pilot holes, 5/8" deep through
support holes.
• Install 4 flathead screws through the support
and into the panel.
F
Install 3 Round
Head Screws
• Secure the panel to the door by installing
3 round head screws into the bottom of the
metal support and into the dishwasher door.
Install center screw first, then left and right
screws.
• Press the custom panel against the dishwasher door.
CAUTION:
Do not drill pilot holes too deeply to avoid
damaging the appearance side of the panel.
E
Custom Panel
• Remove tape from adhesive strips on the back
side of the metal support.
• Carefully, mount the panel onto the dishwasher by tipping the protruding metal at the
top under and up against the escutcheon.
3
 Loading...