

GE GPF310 Series, GPF410 Series Owner’s Manual & Installation Instructions
DOOR AND ACCESS PANEL
Installation
Instructions
BEFORE YOU BEGIN
STOP
IMPORTANT – Save these instruc-
tions for local inspector’s use.
IMPORTANT – Observe all governing
codes and ordinances.
Note to Installer – Be sure to leave these
instructions with the Consumer.
Note to Consumer – Keep these instructions
with your Owner’s Manual for future
reference.
To prevent electric shock, disconnect electrical power supply to dishwasher before
changing panels. Do not operate dishwasher
while changing panels or when lower access
panel assembly is removed.
Read these instructions completely
and carefully.
WARNING:
COLOR CHANGE KIT
GPF310 and GPF410 Series Kits
GPF310A, GPF410A – Almond panels
GPF310B, GPF410B – Black panels
GPF310C, GPF410C – Bisque panels
GPF310W, GPF410W – White panels
GPF410S – Stainless Steel
TOOLS AND MATERIALS
REQUIRED:
• 1/4" socket driver
• Phillips screwdriver
• Safety Glasses
• Gloves to protect against sharp edges
The GPF310 and GPF410 series trim kit is
designed to provide a color change or to
conceal minor damage to original dishwasher
door and access panels.
The new door panel cover provided in this kit
is designed to completely cover the existing
dishwasher door. Do not remove the original
door panel. 2 screws are provided for easy
installation.
This kit also provides a replacement access
panel assembly. The original access panel
assembly should be removed, discarded and
replaced with this piece.
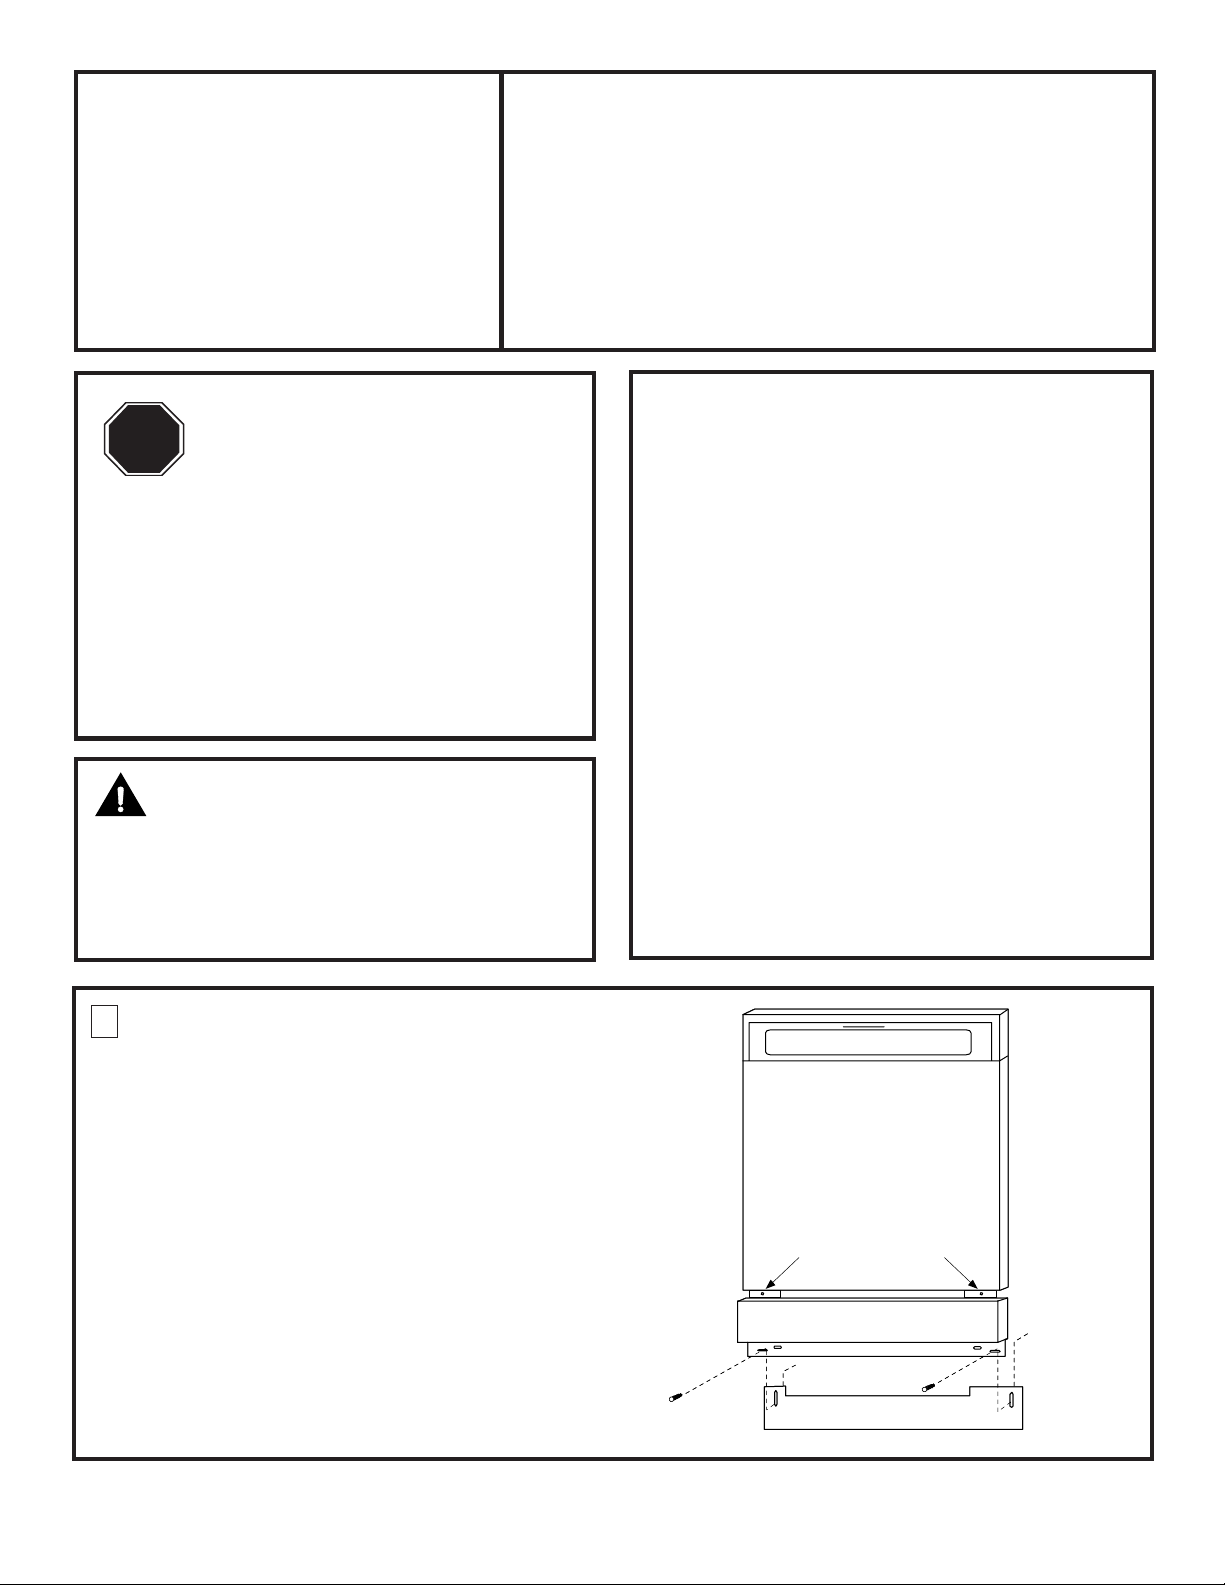
1 REMOVE LOWER ACCESS PANEL
ASSEMBLY
• Remove the two screws below the access
panel. Retain screws.
• Loosen the two screws located between the
door and the access panel.
• Remove the access panel assembly from the
dishwasher and discard.
• Remove the toekick and set aside.
Note: Do not remove the insulation behind the
toekick.
Escutcheon
Escutcheon
Door
Door
Panel
Panel
Loosen 2 Screws
Loosen 2 Screws
Access Panel
Access Panel
Toekick
Toekick
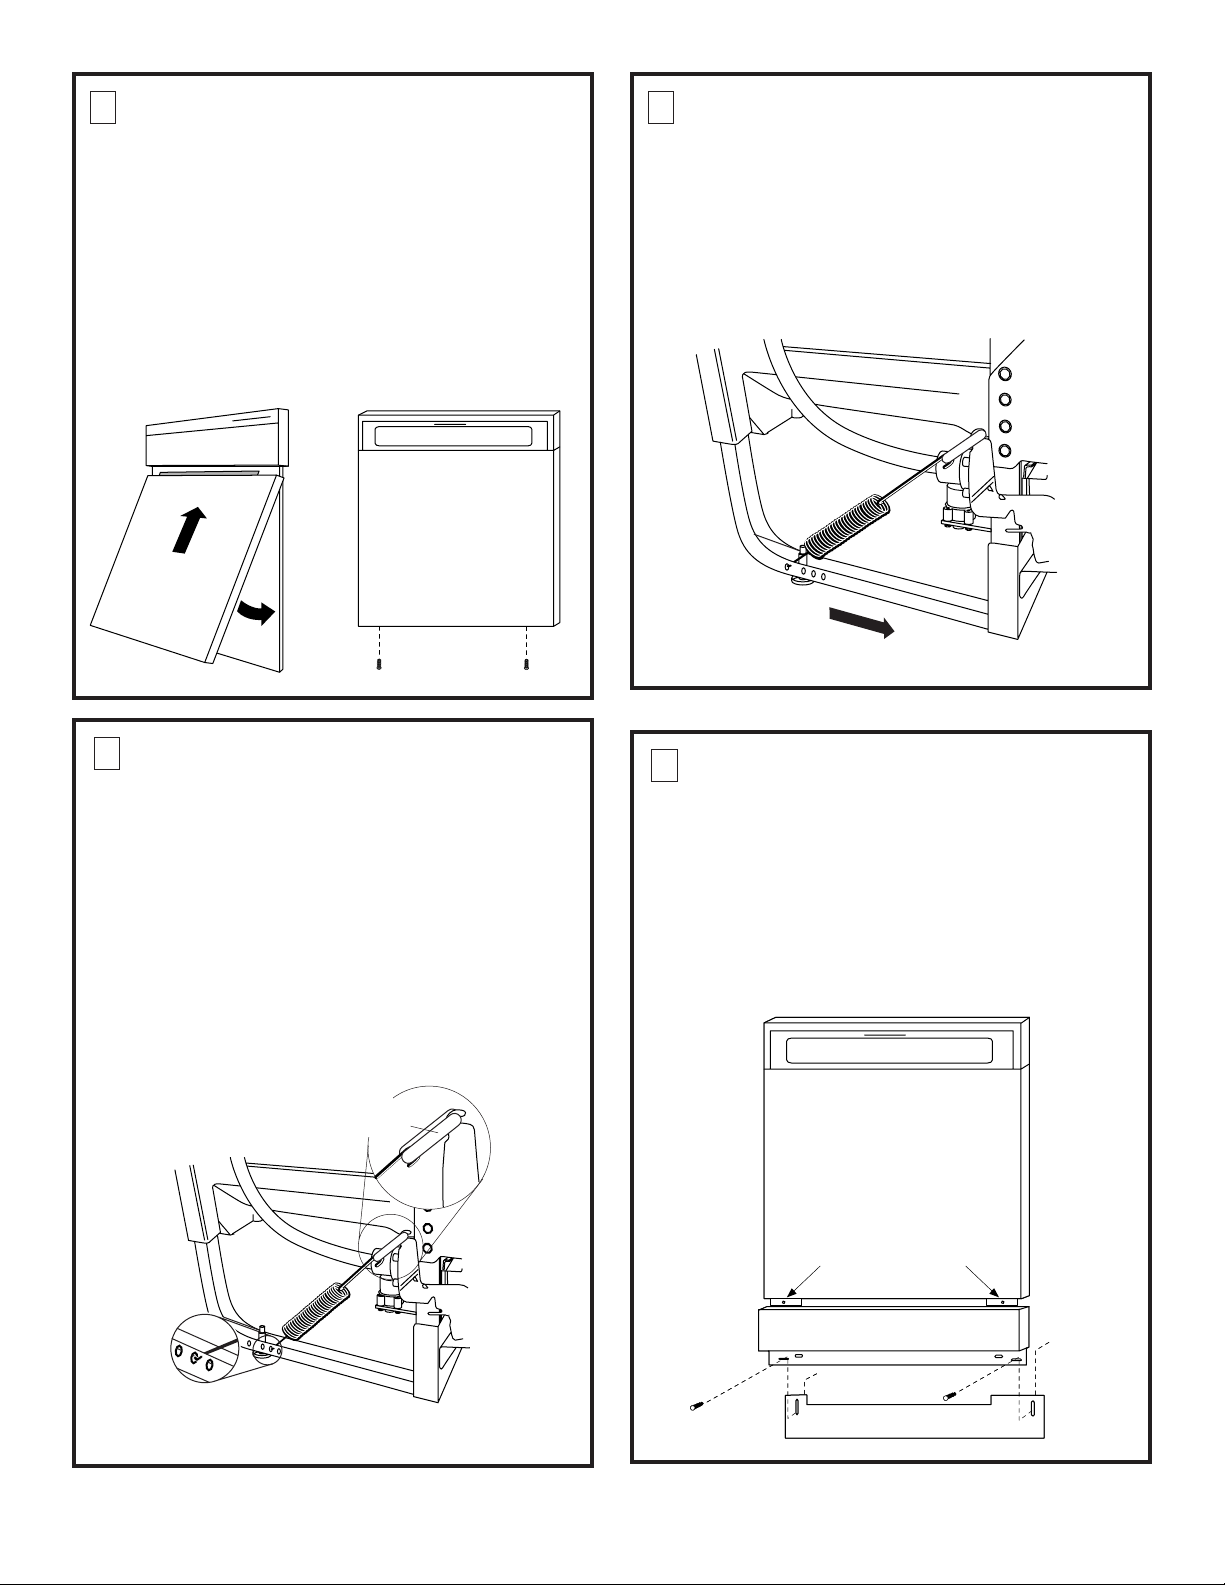
2 INSTALL NEW DOOR PANEL
COVER
Note: The new door panel cover will com-
pletely cover the existing door. Do not
remove the original door panel.
• Tip door panel and slide up and under the
bottom and sides of escutcheon.
• Snap door panel over the door and slide
upwards, under the escutcheon.
• Drive 2 screws into the bottom of the panel
using a Phillips head screwdriver.
New Door
Panel Cover
4 CHECK DOOR BALANCE
• Open and close the door to check for proper
balance. Correct spring tension should
prevent the door from rising by itself from a
full open position and prevent the door
from falling heavily.
• If the door rises on its own, from a full open
position, decrease tension by moving one
or both springs forward.
Less Tension
3 ADJUST DOOR SPRINGS
• Grasp the end of the spring at the rear of
the dishwasher and release the hook.
• Release opposite end of the spring and
remove.
• Place the long end of the spring hook into
the link and place plastic link onto the
hinge arm hook.
• Stretch the short end of the spring and
hook into the 4
channel.
• Repeat the same procedure for the
opposite side.
th
hole from the front of the
Plastic
Link
5 INSTALL NEW ACCESS PANEL
ASSEMBLY AND TOEKICK
• Place the toekick against the bottom of the
dishwasher.
• Place the new access panel assembly
against the dishwasher and tighten the
attached screws.
• Re-install two original bottom screws
loosely. Adjust the toekick up or down and
tighten screws.
Tighten 2 Screws
Insert Spring Hook
Through Inside of Frame
Pub. No. 31-30541 SPECIFICATIONS SUBJECT TO CHANGE WITHOUT NOTICE DWG. NO. 206C1559P081
N.D. 923-13 2/04
 Loading...