

Page 1
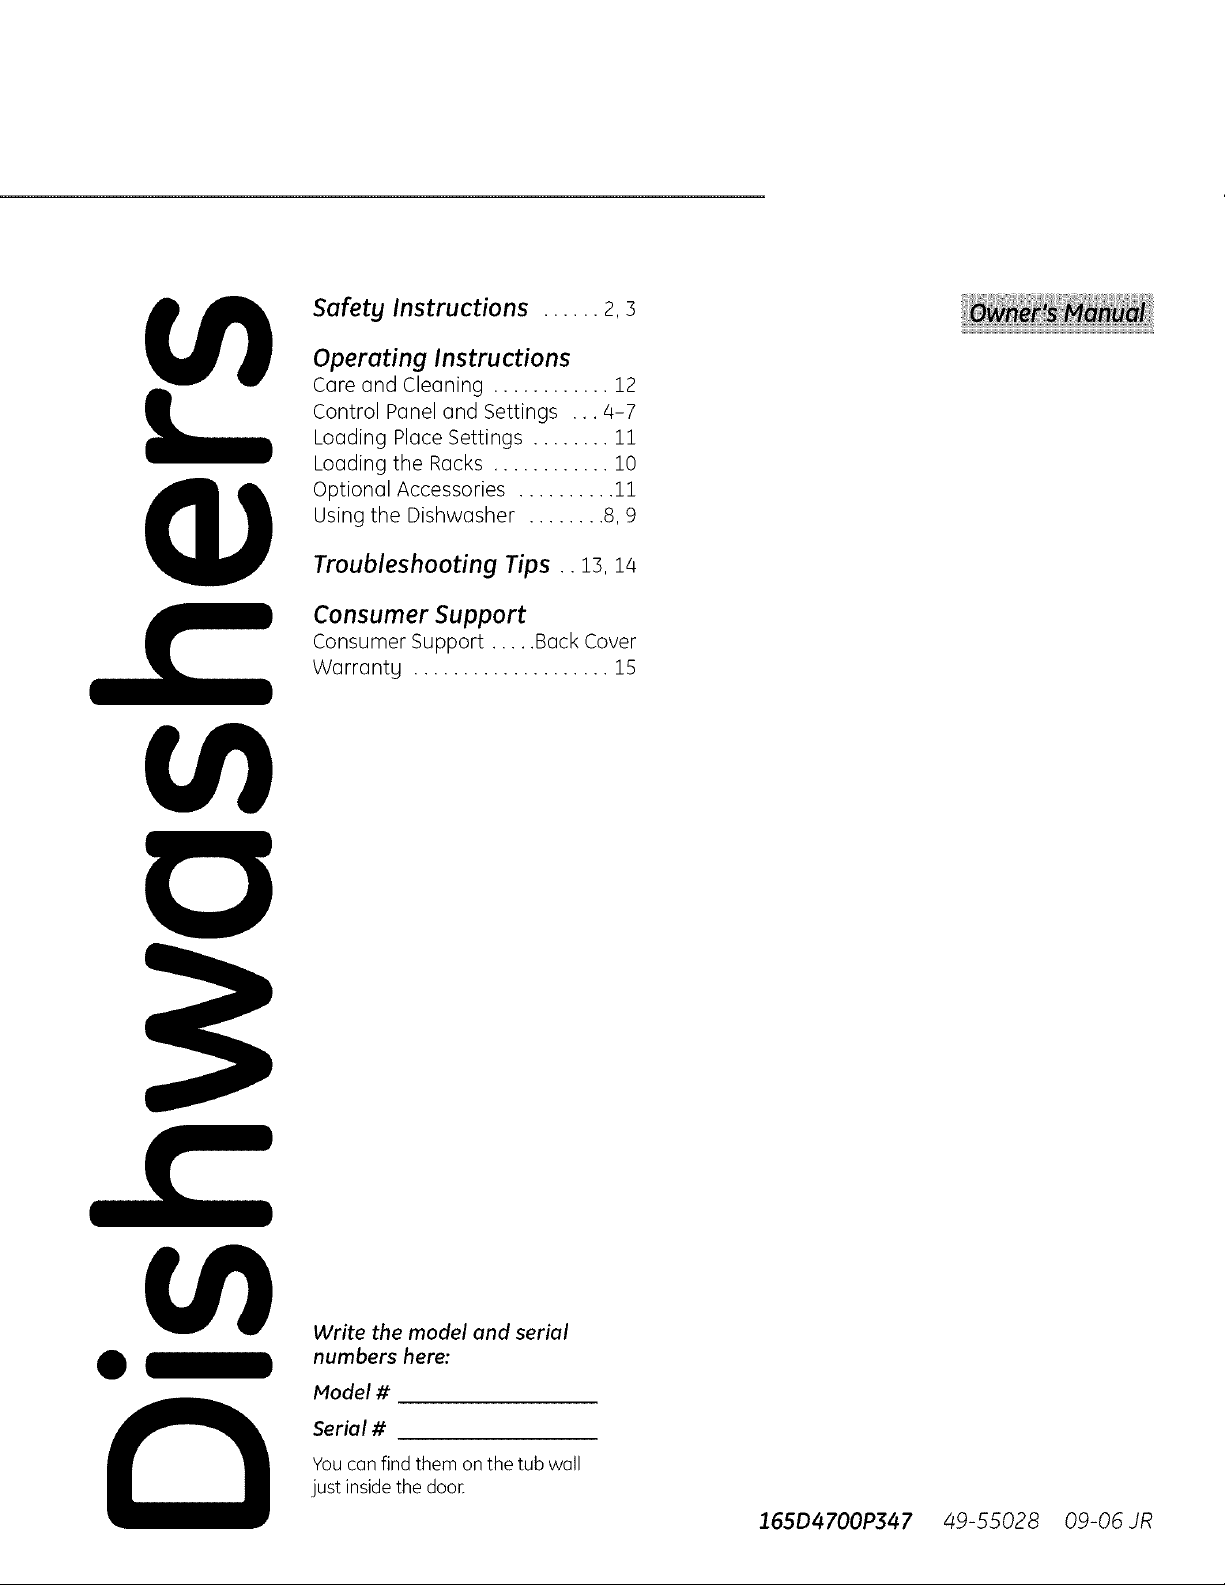
Safety Instructions ...... 2,s
Operating Instructions
Care and Cleaning ............ 12
Control Panel and Settings ... 4-7
Loading Place Settings ........ 11
Loading the Racks ............ 10
Optional Accessories .......... 11
Using the Dishwasher ........ 8, 9
Troubleshooting Tips .. 13, 14
Consumer Support
Consumer Support ..... Back Cover
Warrants .................... 1S
Write the model and serial
numbers here:
Model #
Serial #
Youcan find them on the tub wall
just insidethe door
165D4 700P34 7
49-55028 09-06JR
Page 2
IMPORTANT SAFETYINFORMATION.
READ ALL INSTRUCTIONS BEFORE USING --
SAVE THESE INSTRUCTIONS
WARNING!
For your safety, the information in this manual must be followed to minimize the risk of fire
or explosion, electric shock, and to prevent property damage, personal in]ur 9, or death,
_tls
A WARNING! WATERHEATERSAFETY
f _..J'._ "_ Under certain conditions, hydrogen gas may be produced in o water heater that has not been used
for two weeks or more. HYDROGEN GAS IS EXPLOSIVE.
Ifthe hot water has not been usedfor two weeksor more, prevent the possibility of damage or injury
bgturning on all hot water faucets and allow them to run for several minutes. Do this before using ang
electrical appliance which is connected to the hot water sgstem. Thissimple procedure will allow ang built-
up hgdrogen gas to escape.Sincethe gas isflammable, do not smoke or use an open flame or appliance
during this process.
PROPERINSTALLATIONAND MAINTENANCE
This dishwasher must be properly installed and located in accordance with the Installation
%
Instructions before it is used. If you did not receive on Installation Instructions sheet with
your dishwasher, you can receive one by visiting our website at www.geappliances.ca or
www.moffatappliances.ca.
• Connect to a grounded metal, permanent wiring
• Improperconnection of the equipment-grounding
• Disposeof discarded appliances and shipping
A CAUTION: To prevent minor injurg or propertg damage
• Contentswashed in Anti-bacterial mode, if
• Usinga detergent that is
• If your dishwasher is connected to a
• Ondishwashers with electronic controls,
sgstem;or run an equipment-grounding
conductor with the circuit conductors and
connect to the equipment-grounding terminal
or lead of the appliance.
conductor can result in a risk of electric shock.
Checkwith a qualified electrician or service
representative if you are in doubt whether the
appliance is properly grounded.
or packing material properly.
available,may be hot to the touch. Usecare
before handling.
not specifically designed
for dishwashers will cause
the dishwasherto fill with
suds.
wall switch, ensure that the switch is
on prior to use.
if you choose to turn the switch off
between wash cycles, allow 5-10
secondsafter tuming the switch on before
touching START/RESETto allow the control
to reboot.
• Donot attempt to repairor replaceany part
of your dishwasher unlessit is specifically
recommended in this manual. All other servicing
should be referredto a qualifiedtechnician.
• To minimize the possibility of electric shock,
disconnect this appliance from the power supply
beforeattempting any maintenance.
NOTE:Turningthe dishwasheroff doesnot
disconnect theappliance from the power supply.
Werecommendhaving o qualified technician
servicegout appliance.
• Non-DishwareItems: Donot wash items such
aselectronic air cleaner filters, furnace filters and
paint brushes in your dishwasher.Damage to
dishwasher and discoloration or staining of
dishwasher may result.
• Closesupervision is necessary if this appliance
isusedby or nearchildren.
• Load light, plastic items so they will not
become dislodged and drop to the bottom
of the dishwasher-they might come into
contact with the heating element and be
damaged.
Page 3
A WARNING! RISK OF CHILD ENTRAPMENT
PROPERDISPOSAL OF THEDISHWASHER
Junked or abandoned dishwashers are
dangerous...even if they will sit for '_justa
few days." If you are getting rid of your old
dishwasher, please follow the instructions
below to help prevent accidents.
Before You Throw Awau Your Old
Dishwasher:
• Take off the door of the washing compartment
or remove the door latch keeper (as shown).
Door latch keeper
WARNING!
• Usethisappliance only for its intended purpose • Donot operate your dishwasher unless all
asdescribedinthis Owner's Manual. enclosure panelsare properly in place.
• Useonly powder,tabs, liquid detergents or rinse • Donot tamper with controls.
agents recommended for useina dishwasher and • Donot abuse,sit on or stand on the door ordish
keepthem out of the reachof children.
• Locate sharp items so that they are not likely
to damage the door seal.
• Load sharp knives with the handles upto reduce
the risk of cut-type injuries.
• Do not wash plastic items unless marked
dishwasher safe or the equivalent. Forplastic
items not so marked, checkthe manufacturer's
recommendations.
• Do not touch the heating element during or
immediately after use.
When using uour dishwasher, follow basic precautions,
including the following:
rack of the dishwasheE
• Donot allow children to play around dishwasher
when opening or closing door due to the possibility
of small fingers being pinched in door,
• Donot discard a dishwasherwithout first removing
the door ofthe washing compartment.
• Donot store or usecombustible materials, gasoline
or other flammable vapors and liquids in the
vicinity of this or any other appliance.
• Donot allow children to play with, onor insidethis
appliance or any discarded appliance.
READAND FOLLOWTHISSAFETYINFORMATION
CAREFULLY.
SAVETHESE INSTRUCTIONS
Page 4
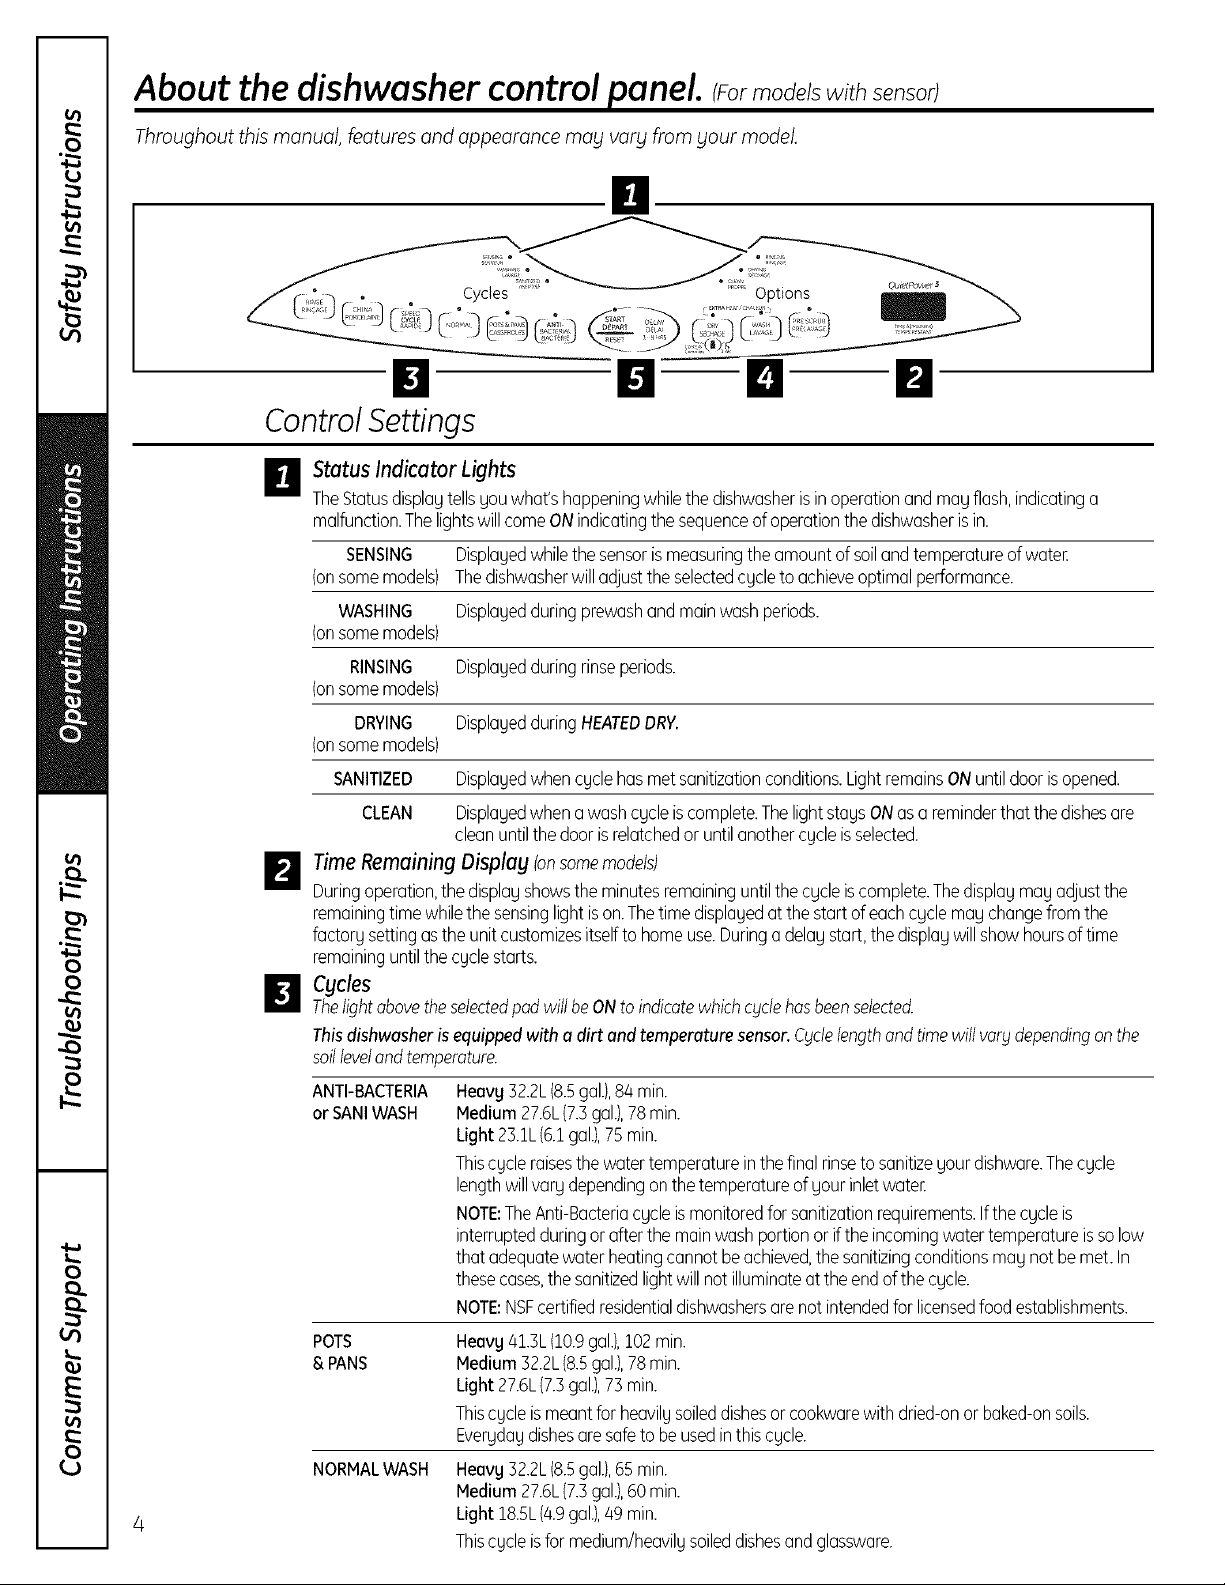
About the dishwasher control panel. CFormo e sw/thsensor)
Throughoutthismanual,featuresand appearancemay vary from your model.
ii
I1 El
n
Control Settings
H StatusIndicator Lights
TheStatusdisplaytellsyouwhat'shappeningwhilethedishwasherisin operationand mayflash,indicatinga
malfunction.ThelightswillcomeONindicatingthesequenceofoperationthedishwasherisin.
SENSING Displayedwhilethesensorismeasuringtheamountofsoilandtemperatureofwate_
(onsomemodels) Thedishwasherwilladjusttheselectedcycleto achieveoptimalperformance.
WASHING Displayedduringprewashandmainwashperiods.
(onsomemodels)
RINSING Displayedduringrinseperiods.
(onsomemodels)
DRYING DisplayedduringHEATEDDRY.
(onsomemodels)
SANITIZED Displayedwhencyclehasmetsanitizationconditions.LightremainsONuntildoorisopened.
CLEAN Displayedwhen awashcycleiscomplete.ThelightstaysONasa reminderthat thedishesare
cleanuntilthedoorisrelatchedor untilanothercycleisselected.
_ TimeRemaining Display Ionsomemodels)
Duringoperation,the displayshowsthe minutesremaininguntilthecycleiscomplete.Thedisplaymayadjustthe
remainingtimewhilethe sensinglightison.Thetime displayedatthestart ofeachcyclemaychangefromthe
factorysettingasthe unitcustomizesitselfto homeuse.Duringadelaystart,the displaywillshowhoursoftime
remaininguntilthecyclestarts.
D Cycles
ThelightabovetheselectedpadwillbeONto indicatewhichcyclehasbeenselected.
Thisdishwasherisequippedwith a dirt andtemperaturesensor.Cyclelengthandtimewill varydependingonthe
soillevelandtemperature.
ANTI-BACTERIA
or SANIWASH
POTS
& PANS
NORMALWASH
4
Heavy32.2L(8.5gal.),84min.
Medium27.6L(7.3gal.),78min.
Light23.1L(6.1gal.),75min.
Thiscycleraisesthewatertemperatureinthefinalrinseto sanitizeyourdishware.Thecycle
lengthwillvary dependingonthetemperatureofyourinletware[
NOTE:TheAnti-Bacteriacycleismonitoredforsanitizationrequirements.Ifthe cycleis
interruptedduringorafterthemainwashportionor ifthe incomingwatertemperatureisso low
that adequatewaterheatingcannotbeachieved,thesanitizingconditionsmaynotbemet.In
thesecases,thesanitizedlightwillnotilluminateatthe endofthecycle.
NOTE:NBFcertifiedresidentialdishwashersarenotintendedforlicensedfoodestablishments.
Heavy41.3L(10.9gal.),102min.
Medium32.2L(8.5gal.),78min.
Light27.6L(7.3gal.),73min.
Thiscycleismeantfor heavilysoileddishesorcookwarewithdried-onor baked-onsoils.
Everydaydishesaresafeto beusedinthiscycle.
Heavy32.2L(8.5gal.),65min.
Medium27.6L(7.3gal.),60min.
Light18.5L(4.9gal.),49min.
Thiscycleisformedium/heavilysoileddishesandglassware.
Page 5
SPEEDCYCLE
or
SPEEDWASH
27.6L(7.3gal.),35min.
Thiscycleisforeverydaydishesandglassware.
(onsomemodels)
CHINACRYSTAL 27.6L(7.3gal.),48 min.
(onsome models) Thiscycle isfor lightly soiled china and crystal.
RINSEONLY 9.5L(2.5gal.), 12min.
Forrinsing partial loads that willbe washed latenDonot usedetergent with this cycle.
NOTE:Only the Anti-Bacteria cycle has been designed to meet the requirements of Section 6,NSF184for
soil removal and sanitization efficacy.
_ Options
ThelightabovetheselectedpadwillbeONto indicatewhichoptionhasbeenselected.
PRESCRUB Forusewithheavilysoiledand/ordried-on,baked-onsoils.ThisoptionMUSTbeselectedPRIORto
(onsomemodels) startingthecycle.Thisoptionodds16minutesto thecycletime.NOTE:Cannotbeselectedwith
RINSEONLYcycle.
HEATEDDRY Shutsoffthedryingheatoption.Dishesairdry naturallyandenergyissaved.Forfasterairdry,
LightOFF youcan propthedooropenaftertheCLEANlightilluminates.
HEATEDDRY Turnsthe heateronforfast drying.Thiswillextendthetotal runtimeby8 minutesfortheSPEED
LightON CYCLE,38minutesfor NORMALand POTS/PANSand30minutesfor allothercycles.
NOTE:CannotbeselectedwithRINSEONLYcycle.
LOCK
Youcanlockthecontrolsto preventanyselectionsfrombeingmade.Oryoucanlockthecontrols
afteryouhavestartedac_tcle.
Childrencannotaccidentallgstartdishwasherbgtouchingpadswiththisoptionselected.
ToLOCKthe dishwashercontrol,touchandholdthe HEATEDDRYpadfor 3seconds.Thelight
belowtheHEATEDDRYpadwillturnon.ToUNLOCKthe dishwashercontrol,touchandholdthe
HEATEDDRYpadfor3 seconds.TheLOCKlightwillturn off.
ADDED Whenselected,thecyclewillrun longerwiththeheatingelementonto improvebothwashand
HEAT dry performance.NOTE:Cannotbeselectedwith RINSEONLYcycle.
DELAYHOURS Youcandelaythe startofa washcyclefor upto 9 hours.Touchthe DELAYHOURSpadto choose
thenumberofhoursyouwantto delaythestartofthe cycle;thentouchSTART/RESETonetime.
Thedishwasherwillcountdownandstart automaticallyat thecorrecttime.Touching
START/RESET a secondtimewill canceltheDELAYSTARTselection.
RESET Tochangea cycleafterwashingstarts,touchtheSTART/RESETpadto cancelthecycle.The
START/RESETlightwillflashwhilethewateris pumpedoutifneeded.Thistakesapproximately
90 seconds.Whenthelightstopsflashing,thedishwashercanbereprogrammedandrestarted.
_t Start
Closeandlatchthedishwasherdoorandselectthecycleanddesiredenhancements.TouchtheSTART/RESETpad
onceto beginthecycle.Waterbeginstofillthe dishwasher,andapproximately60secondslaterthewashaction
begins.TouchingtheSTART/RESETpada secondtimewillcancelthe cycleandcausethewaterto drainout.Thiswill
takeapproximately2 minutes.
NOTE:Thedishwasherremembersyourlastcyclesoyoudon'thaveto reprogrameachtime.Whenthe dishwasher
doorisfullyclosed,the controlpanellightswilldisplaythelastsettingsyouselected.
If you don't want to change any of the settings,simply touch the START/RESETpad once to begin the cycle.
Ifthedoorisclosed,the indicatorlightswillturnoffiftheSTART/RESETpadisnotpressedwithintwo minutes.
Toactivatethedisplay,openandclosethe doorortouchanypad.
Also,if a power failure occurs, NORMALand HEATEDDRYwillautomatically be programmed.
Page 6

About the dishwasher control panel. C ormode swithouta sensor)
Throughoutthismanual,featuresand appearancemag varg fromgourmodel.
II
.Cyc'es\
Options
_OT
--_ _,_SS_O _ I B/,CT RIAq DEPAR O_/_V
n El
Control Settings
H Status Indicator Lights
The Status displag tells gou what's happening while the dishwasher is in operation and mag flash,
indicating a malfunction. The lights will come ON indicating the sequence of operation the
dishwasher is in.
SANITIZED
(onsome
models)
CLEAN
(onsome
models)
Cycles
m
Thelight abovetheselectedpad will beON to indicatewhich cycle hasbeen selected.
SANI WASH 27.6L(7.3gal.),97 min,
(on some This cgcle raises the water temperature in the final rinse to sanitize gour dishware.
models) The cgcle length will varg depending on the temperature of gour inlet water.
POTS & PANS 32.2L(8.5 gal.), 89 min.
or HEAVY This cgcle is meant for heavilg soiled dishes or cookware with dried-on or baked-
WASH on soils. Evergdag dishes are safe to be used in this cgcle.
NORMALWASH 22.3L(5.9 gal.), 56 min.
Displaged when cgcle has met sanitization conditions. Light remains ON until
door is opened.
Displaged when a wash cgcle is complete. The light stags ON as a reminder that
the dishes are clean until the door is opened or until another cgcle is selected.
NOTE:The SANI-WASI-Icgcle is monitored for sanitization requirements, If the
cgcle is interrupted during or after the main wash portion or if the incoming water
temperature is so low that adequate water heating cannot be achieved, the
sanitizing conditions mag not be met, In these cases, the sanitized light will not
illuminate at the end of the cgcle.
NOTE:NSFcertified residential dishwashers are not intended for licensed food
establishments.
This cgcle is for medium/heavilg soiled dishes and glassware.
LIGHT WASH 23.1L(6.1 gal.}, 36 min.
(on some This cgcle is for evergdag dishes and glassware.
models)
CHINA CRYSTAL 23.1L(6.1 gal.}, 39 min.
(on some This cgcle is for lightlg soiled china and crgstal.
models)
RINSE ONLY 4.5L(1.2 gal.), 6 min.
For rinsing partial loads that will be washed later. Do not use detergent with
this cgcle.
6
NOTE: Onlg the SANI-WASH cgcle has been designed to meet the requirements of Section 6,
NSF 184 for soil removal and sanitization efficacg.
Page 7

_l Options
Thelight above the selected pad will be ON to indicate which OPTIONhas been selected.
HOT START For use with heavily soiled and/or dried-on, baked-on soils. This option MUST be
(on some selected PRIORto starting the cycle. This option will improve both wash and dry
models) performance. This option adds 20 minutes to the cbtcletime.
NOTE:Cannot be selected with RINSEONLYcycle.
HEATEDDRY Shuts off the drying heat option. Dishes air dry naturally and energy is saved.
Light OFF Forfaster air dry you can prop the door open after the CLEAN light illuminates.
HEATEDDRY Turns the heater on for fast drying. This will extend the total run time by 38 minutes.
Light ON NOTE:Cannot be selected with RINSEONLY cycle.
LOCK
Youcon lock the controls to prevent ong selections from being mode. Or gou con lock
the controls after blOUhove started o cgcle.
(on some
models)
Children cannot occidentollbl start dishwasher bg touching pods with this option
selected.
ToLOCKthedishwashercontrol,touchandholdtheHEATEDDRYpadfor3 seconds.Thelightbelow
theHEATEDDRYpadwillturnon.ToUNLOCKthe dishwashercontrol,touchand holdtheHEATED
DRYpadfor 3seconds.TheLOCKlightwillturnoff.
HOT WASH When selected, the cycle will run longer with the heating element on to improve both
wash and dry performance. NOTE: Cannot be selected with RINSE ONLY cycle.
DELAY HOURS You can delay the start of a wash cycle for 2, 4 or 8 hours (delay time options may
vary by model). Touch the DELAY HOURS pad to choose the number of hours you want
to delay the start of the cycle; then touch START/RESET one time. The dishwasher will
count down and start automatically at the correct time. Touching START/RESETa
second time will cancel the DELAY STARTselection.
RESET
To change a cycle after washing starts, touch the START/RESETpad to cancel the
cycle. The START/RESETlight will flash while the water is pumped out if needed. This
takes approximately 90 seconds. When the light stops flashing, the dishwasher can be
reprogrammed and restarted.
_ Start
Close and latch the dishwasher door and select the cycle and desired enhancements. Touch the
START/RESETpad once to begin the cycle. Water begins to fill the dishwasher, and approximately 60
seconds later the wash action begins. Touching the START/RESETpad a second time will cancel the
cycle and cause the water to drain out. This will take approximately 2 minutes.
NOTE:The dishwasher remembers your last cycle so you don't have to reprogram each time. When
the dishwasher door is fully closed, the control panel lights will display the last settings you selected.
If you don't want to change any of the settings, simply touch the START/RESETpad once to begin
the cycle.
If the door is closed, the indicator lights will turn off if the START/RESETpad is not pressed within two
minutes. To activate the display, open and close the door or touch any pad.
Also, if a power failure occurs, NORMAL and HEATEDDRYwill automatically be programmed.
Page 8

Using the dishwasher.
Check the Water Temperature
Theentering water shouldbe at least 49°C(120°F) thermometeE Turn on the hot water faucet nearest
and not more than 65°C(1SO°F),for effective the dishwasher,place the thermometer in a glass
cleaning and to prevent dishdamage. Check and let thewater run continuouslg into the glass
the water temperature with a candg or meat until the temperature stops rising.
Use Rinse ent
Rinse agents remove spots and prevent new film buildup on gour dishes, glasses, flatware, cookware
and plastic.
Filling the Dispenser
The rinse agent dispenser holds lOOml (3.5fl. oz.) of rinse agent. Under
normal conditions, this will last approximatelg one month. Refill when
rinse agent is not visible in the indicaton Do not overfill.
IT] Make sure the dishwasher door is fullg open.
r-2] Turn the dispenser cap to the left and lift it out.
r_ Add rinse agent until the indicator window looks full. Do not overfill.
F] Clean up ang spilled rinse agent with a damp cloth to prevent foam.
r_ Replace the dispenser cap.
Indicator
Dispenser cap
Rinse Aid Setting
The amount of rinse agent released into the final wash can be
adjusted. The factorg setting is at the midpoint. If there are rings of
calcium (hard water) spots on dishes, trg a higher setting. If gou
observe foam in the final rinse, trg a lower setting.
Toadjust the setting
Remove the dispenser cap, then turn the adjustable setting dial
counterclockwise to increase the amount of rinse agent or clockwise
to reduce the amount of rinse agent dispensed.
Dish Preparation Prior to Loading
• No pre-rinsing of normal food soil is required.
• Scrape off hard soils, including bones,
toothpicks, skins and seeds.
• Remove large quantities of any remaining
food.
• Remove leafg vegetables, meat trimmings
and excessive amounts of grease or oil,
• Remove acidic food soils that can discolor
stainless steel.
Page 9

Proper Use of Detergent
Use onl Udetergent specificall U made for use in
dishwashers. Keep uour detergent fresh and dr U.
Don't put powder detergent into the dispenser
until Uou're read U to wash dishes.
The amount of detergent to use depends on
whether uour water is hard or soft. With hard
water, you need extra detergent. With soft water,
Uou need less detergent.
Protect uour dishes and dishwasher bU
contacting uour water department and asking
how hard uour water is. Twelve or more grains
is extremel U hard waten A water softener is
recommended. Without it, lime can build up
in the water valve, which could stick while open
and cause flooding. Too much detergent with
soft water can cause a permanent cloudiness
of glassware, called etching.
Use the information in the table below as a
guideline to determine the amount of automatic
dishwasher detergent to place in the dispensen
Number
of Grains Detergent Cups to Fill
Less than 4 15 cup or fill cup to first line
4 to 8 25 cup or fill cup to second line
8 to 12 15 and 25 cups or fill main wash cup
Greater 15, 25 cups and the open cup or fill
than 12 both lain Wash and PreWash cup
(on some models)
Hedium Hedium
Soft Soft Hard
Extremely
Hard
Open f/
cup_ Y_ II
(onsomemodels)
For heovilg-soiled loads, use the Pots and Pans or
Heov_ Wash cycle and odd o little extra detergent.
DO NOT USE HAND DISH DETERGENT
m
m
NOTE:Usinga detergent that is not specificall_l
designedfor dishwashers will causethe dishwasher
to fill with suds.During operation, these sudswill spill
out of the dishwasher vents,coveringthe kitchen
floor and making the floor wet.
Becauseso mang detergent containers lookalike,
store the dishwasher detergent in a separate space
from oil other cleaners.Showangone who may use
the dishwasher the correct detergent and where
it isstored.
Whilethere will be no lasting damage to the
dishwasher,gour disheswill not get clean using a
dishwashing detergent that is notformulated to
work with dishwashers.
(on some models)
Forget to Add o Dish?
A forgotten dish can be added ang time before
the main wash.
r_ Squeeze the door latch to release the door.
r-_l Do not open the door until the water sprag
action stops. Steam mag rise out of the
dishwasher.
FOR DEEP CLEANING POWER
[] Add forgotten dishes.
[] Close the door.
Page 10

Loading the dishwasher racks.
For best dishwashing results, follow these loading guidelines. Features
baskets may vary from gout model.
Upper Rack
Although the upper rack isfor glasses,cups
and saucers,pots and pans can be placed
in this rack for effective cleaning. Cupsand
glassesfit best along the sides.Thisis also
a secure place for dishwasher-safe plastics.
Theupper rack isadjustable (onsome
models)to add flexibility in loading your
dishwasher To lower, push tabs in and lower
.__. ,,, ,, ,, ,, ,, rack.To raise,just pull up on rack until it
snaps.
Theutility shelf(on some models)may be
placedin the up or down position to add
t ti I! II n II tt II II tt II
flexibility.Awine gloss holder (onsome
models)secureswine glasses for best
washability. Becausewine glassescome
in various sizes,after loading,slowly push
in the rack to make sure they will clear
the top of the dishwasher
Lower Rack
Thelower rack isbest used for plates,saucers
and cookware. Large items such as broiler
pansand baking racks should go along the
left-hand side.Load platters, pots and bowls
along the sides,in corners or in the back.The
soiledside of items shouldface the center of
the rack. If necessary, oversizedglassesand
mugs can be placed in the lower rack to
maximize loading flexibilitg.
and appearance of racks and silverware
Theupper rack isgood for all kindsof
odd-shaped utensils.Saucepans,mixing
bowls and other items should be placed
face down. Fold-down tines (on some models)
provide flexibility for extra-large and hard-
to-fit items.
Securelargerdishwasher-safe plasticsover
2 tines when possible.
lake sure smallplastic items ore secureso
theg can't fall onto the heoten
Besurethat items do not protrude through the
bottom of the rack and block rotation of the
middle spray arm. Thiscould result in poor
wash performance for itemsin theupper rock.
Checkto make sure that no items will block
rotation of the wash arms.
Also,be careful not to let a portion of an item
such asa pot or dish handle extend through
the bottom rack. Thiscould block the wash
arm and cause poor washing results.
Fold-down tines (on some models)provide
flexibility for extra-large and hard-to-fit items.
Thetinesmay be left in the up position or
folded down to customize the lower rack.
Single basket Ion some models)
One-piece basket Ion some models)
.....J_======v_
Three-piece basket ton some models)
Don't let any
item extend
through
bottom.
To remove end baskets, grasp the basket
at opposite corners and slide apart.
10
Silverware Basket
Toloadflatware, simply push the adjustable
handleto either side(on some models).Put
flatware in the removable basket with fork
and knife handles up to protect your hands.
Placespoons in the basket with handles
down. Mix knives,forks and spoonssothey
don't nest together Distribute evenly.Small
plasticitems,suchas measuring spoons and
lidsfrom small containers should go in the
bottom ofthe silverware basket with the
silverware ontop.
Theone-piece silverwarebasket (on some
models)can be placed in the front, right side
or back of the lower rack.
Avariety of options isavailable regarding
the three-piece silverware basket(on some
models)in your dishwasher Thecomplete
basketis designedto fit on the right side
of the lower rack. Additionally, each end of
the basket is removable to add loading
flexibility to accommodate flatware and
lower rack capacity needs.
Thelidsof both end and middle baskets (on
some models)can be closedto contain small
items. Long items can be placed on the utility
shelf in the upper rack.
basket(onsome
models)can hold
small itemssuch
as: baby bottle
nipples,plastic lids,
The accessory
corn cob holders, etc.
Page 11

Loading place settings...
Follow these guidelines for loading 10 place settings. Features and appearance of racks and silverware baskets
mag varg from gour model.
Upper Rack--lO place settings Lower Rack--lO place settings Lower Rack--lO place settings
Follow these guidelines for loading 12 place settings. Features and appearance of racks and silverware baskets
mag vorg from gour model.
V
Optional
Upper Rack--12 place settings Lower Rack--12 place settings
accessories.
You can change the appearance of gour
dishwasher bg adding a custom panel trim kit.
Wood panel trim kit--This accessorg contains
trim and instructions for gou to supplg and install
a 1/4" (6.4mm) thick decorative wood door:
• GPF525B (Black)
• GPF525W (White)
• GPF525C (Bisque)
Trimless wood panel kit--This accessorg
contains ports and instructions for gou to supplg
and install a 3/4" (19.1mm)thick decorative
wood door:
• GPF575
Non-wood countertop bracket kit--This is for
installations which have non-wood countertops
and includes side-mounting brackets and
instructions for securing the dishwasher.
• GPF65
11
Page 12

Caring for the dishwasher.
Cleaning the Door Panel
Before cleaning the front panel, make sure
Uouknow what tupe of panel Uou have.
Referto the last two letters of uour model
number. You can locate uour model
number on the left-hand tub wall just
inside the door. If uour model number ends
with BB,WW, CC,SAor BG,then Uou have
a Painted Door panel. If uour model
number ends with SS,then Uou have a
Stainless Steel Door panel. If uour model
number ends with CS,then Uou have a
CleanSteel Door panel.
Follow the instructions below for cleaning
the door panel for uour specific model.
Painted Door Panel (model numbers
ending in BB-black, WW-white, CC-bisque,
SA-silver metallic or BG-graphite metallic)
Use a clean, soft, lightlu dampened cloth,
then dru thoroughlu. You mau also use a
good appliance wax or polish.
Stainless Steel Door Panel (model
numbers ending in SS)
The stainless steel panels can be cleaned
with Stainless Steel Hagic or a similar
product using a clean, soft cloth. Do not
use appliance wax, polish, bleach or
products containing chlorine on Stainless
Steel doors.
CleanSteel Door Panel (model numbers
ending in CS)
Use a clean, soft, lightlu dampened cloth,
then dru thoroughlu. Do not useappliance
wax, polish or anu chemical agent on
CleanSteel doors.
Do not wipe the dishwasher with a soiled
dish cloth or wet towel. Thesemay leave
a residue. Do not use scouring pads or
powdered cleaners because these
products can scratch the finish.
Cleaning the Control Panel
To clean the control panel, use a lightly
dampened cloth. Then dry thoroughly.
Protect Against Freezing
If your dishwasher is left in an unheated
place during the winter, ask a service
technician to:
F1cut off electrical power to the
dishwasher. Remove fuses or trip
circuit breaker.
J_l Turn off the water supply and
disconnect the water inlet line from
the water valve.
r31 Drain water from the water inlet line
[_ Reconnect the water inlet line to the
Does Your Dishwasher Have an Air Gap?
An air gap protects your dishwasher
against water backing up into it if a drain
clogs. The air gap is not a part of the
dishwasher. It is not covered bg gour
warrantg. Not all plumbing codes require
air gaps, so you may not have one.
The air gap is easy to clean.
m Turn off the dishwasher and lift off the
[-2]a toothpick.
and water valve. (Use a pan to catch
the water.)
water valve.
cover.
Remove the plastic cap and clean with
Checkthe airgap anb_time
_!ourdishwasher isn't draining
well.
12
Page 13

Before you call for service...
Save time and money! Review the charts on the following pages.
_,_ roubleshooting Tips
Error Messages Possible Causes What To Do
START/RESETstatus Youhave pressedthe
indicator light flashing START/RESETpad while the
Dishwasher BEEPS This is o reminder that gout • Closeandlatchthedoorafteropeningitmid-cgcle.
onceevery 30 secondsdishwasher door hasbeen Jeff
Problem Possible Causes What To Do
Dishesandflatware Lowinletwatertemperature * Hakesureinletwatertemperatureiscorrect(seepage8).Turnon
notclean thehot waterfaucetnearestthedishwasher,let rununtilthewater
You may not need to call for service.
• PresstheSTART/RESETpodonlgwhengouwantto restartthe
dishwasher.
dishwasher isrunning. This will
cancel the cycle. Thelight will stop
fleshing after the dishwasher drains
(about 90 seconds).
open during operation. It will
continue beeping until gou close
the door.
temperaturestopsrising.Thenstartthedishwasherandturnoff
thefaucet.Thisinsuresthe enteringwaterishot.
Water pressureistemporarilglow • Turnonafaucet.Iswatercomingout moreslowlgthan usual?
Ifso,waituntilpressureisnormalbeforeusinggourdishwasher
Airgap or disposerisclogged • Cleantheairgaporflushthedisposer.
Improperrackloading • Makesurelargedishwaredoesnotblockthedetergentdispenser
orthewasharms.Seethe Loadingthedishwasherrackssection.
Noairgapor highdrain loop • Verifgthat gouhaveanair gaporahighdrainloop.Referto
theInstallationInstructions.
Spotsandfilming
onglassesand
flatware
Cloudinesson Combinationof softwater and • Thisiscalledetchingandis permanent.Topreventthisfrom happening,
glassware too muchdetergent uselessdetergentif gouhavesoftwater.Washglasswareinthe shortest
Sudsinthe tub Correctdetergent • Useonlgautomaticdishwasherdetergentstoavoidsudsing.
Extremelghardwater
Lowinletwater temperature
Overloadingthedishwasher
Improperloading
Oldor damppowderdetergent
Rinseagentdispenseremptg
Toolittle detergent
Water temperatureentering the • Thiscouldbeetching.Lowerthewaterheatertemperature.
dishwasherexceeds65°C1150°F)
=_ ,, Toremovesudsfromthetub,openthedishwasherandlet
Rinseagentwasspilled • Alwagswipeup rinseagentspillsimmediatelg.
Userinseagentsto removespotsandpreventnewfilmbuildup.
Toremovestubbornspotsandpre-existingfilmfromglassware:
1 Removeall metalutensilsfromthe dishwasher
2 Donotadddetergent.
3 SelectthePOTS&PANSor HEAWWASHcgcle.
4 Startthe dishwasherandallowtorunfor 18to 22minutes.Dishwasher
willnowbeinthemainwash.
5 Openthedoorandpour500ml(2cups)ofwhitevinegarintothe
bottomof thedishwasher.
6 Closethedoorandallowto completethecgcle.Ifvinegarrinsedoesn't
work:Repeatasabove,exceptuse6Oral(1/4cup)ofcitricacidcrgstals
insteadofvinegar.
cgclethatwillgetthemclean.
sudsdissipate.Closeandlatchthedishwasher.Pumpoutwater
bgtouchingtheSTART/RESETpadonce;then30secondslater,
touchtheSTART/RESETpadagain.Repeatif necessarg.
13
Page 14

Beforeyou callfor service...
Problem Possible Causes What To Do
Detergent left in
dispensercups
Blackor gray
marksondishes
Dishesdon'tdry
Dishesare blocking the
detergent cup
Aluminumutensilshave
rubbedagainstdishes
Lowinlet water temperature
Rinseagentdispenseris emptg
ControlpanelrespondedDoorlatch magnot beproperlg
toinputsbutdishwasher seated
neverfilledwithwater
Stained tub interior
Water valvemagbeturnedoff •
Sometomato-basedfoodscan •
causereddishstains
Teaor coffeestains
Anoverallgellowor brownfilm can •
becausedbg irondepositsinwater
White film oninsidesurface- •
hardwater minerals
Dishwasher won't run
Fuseisblownor circuit breaker •
istripped
Power is turned off
Controlpanelislocked • Unlockcontrolpanel.Seepage5or 7.
Reboot gour control
Control panel lights
go off when you're
Time too long between
touching of selected pads
setting controls
Water standing in
This isnormal
the bottom of the tub
Water won't pump
Drainis clogged
out of the tub
Steam
Sanitized light does
not illuminate at the
end of the cyde
(Anti-Bacteria
cycle only)
Noise
Thisisnormal
Thedoorwasopenedandthe
cgclewasinterrupted during
or after the mainwashportion
Theincomingwater
temperaturewastoo low
Normal operating sounds
Rattling disheswhen the sprag •
arm rotates
14
• Repositionthedishes,sothe water from the lowersprag arm can
flush the detergentcup. Seethe Loadingthedishwashersection.
• Removemarkswithamild,abrasivecleaner.
• Hake sure inlet water temperature isat least 49oc (120OF).
• SelectHEATEDDRY.
• UseHOTSTART,HOTWASHorADDEDHEAToptions.
• Selecta higher cgcle,such asANTI-BACTERIA,SANI WASH,POTS& PANS
or HEAVYWASH.
• Checktherinseagentdispenserandfillasrequired.
• Hakesurethedoorisfirmlgclosed.
Hakesurewatervalve(usuallglocatedunderthesink)isturnedon.
Useofthe RINSEONLYcgcleafteraddingthedishtothe load
candecreasethelevelofstaining.
Removethe stainbghand,usingasolutionof 120ml(1/2cup)bleach
and710ml(3cups)warmwaten
WARNING
Beforecleaninginterior,waitatleast20 minutesaftero cgcleforthe
heatingelementstocooldown.Failuretodo socanresultin burns.
Aspecialflter inthe watersupplglineisthe onlgwagto correct
this problem.Contacta watersoftenercompang.
HabeCanadarecommendsusingarinseagentto helppreventhardwater
mineraldepositsfromforming.
Rundishwasherwith citricacidto removemineraldeposits.Citricacid
(Partnumber:WD3SX151)canbeorderedthroughgourpartsdealer.Bee
backcoverfororderinginformation.
Replacefuseorresetcircuitbreaker.Removeangotherappliancesfrom
the circuit.
• Insomeinstallations,thepowertothedishwasherisprovidedthrougha
wallswitch,oftenlocatednextto thedisposerswitch.Hakesureit ison.
• Turnoff powertothedishwasher(circuitbreakerorwall switch)for
30seconds;thenturn backon.
• Eachpad must betouched within 30 secondsof the others.
Torelight,touchang pad again,or unlockand relatch door.
• Asmallamount of cleanwater aroundthe outlet on the tub
bottom at the backof thetub keepsthe water seallubricated.
• If gouhaveanair gap,cleanit.Seepage12.
• Ifthedishwasherdrainsintoadisposer,rundisposerclear.
• Checktoseeifgourkitchensinkisdrainingwell.If not,gou
magneedaplumben
• Warm,moistaircomesthroughthevent bgthe doorlatchduringdrging
andwhenwaterisbeingpumpedout.Thisisnecessargfordrging.
• Donotinterruptthecgcleangtimeduringoraftermainwash.
• Raisethe waterheatertemperatureto between49°Cand60°C(120°Fand
140°F).
• Detergentcup opening.
• Waterenteringdishwasher.
• Themotor stopsandstarts at varioustimesduringthecgcle.
Drainpumpsoundsdurinqthe pump out.
Hake suredishesareproperlgloaded.Seethe Loadingthe
dishwasherrackssection.
Page 15

Dishwasher Warranty.
_t_ All warranty service provided by our Factory Service Centers,
For The Period Of:
OneVeor
Fromthe date of the
originalpurchase
or an authorized Customer Care®technician. Toschedule service
on-line, 24 hours o dog, visit us at www.geappliances.ca or
www.moffotappliances.ca, or call 1.800.361.3400. Please have
serial number and model number available when calling for service.
We Will Replace:
Any part of the dishwasher which fails due to a defect in materials or workmanship. During
this limited one-year warranty, we will also provide, freeof charge, all labor and in-home service
to replacethe defective part..
Staple your receipt here.
Proof of the original purchase
date is needed to obtain service
under the warrants.
What Is Not Covered:
• Servicetrips to your home to teach you how to use
the product.
• Improper installation.
If Sou have an installation problem, contact sour dealer
or installer. You are responsible for providing adequate
electrical, exhausting and other connecting facilities.
• Failureof the product if it isabused, misused, or used for
other than the intended purpose or used commercially.
EXCLUSION OF IMPLIED WARRANTIES--Vour sole and exclusive remedy is product repair as provided in this Limited
Warranty. Any implied warranties, including the implied warranties of merchantability or fitness for a particular
purpose, are limited to one year or the shortest period allowed by law.
• Replacement of house fuses or resetting of circuit breakers.
• Damage to the product caused bg accident, fire, floods
or acts of God.
• Damage caused after delivery.
Thiswarranty isextendedtothe original purchaserandany succeedingowner forproductspurchasedfor home usewithin Canada.
tn home warrants servicewill beprovided in areaswhere it isavailableand deemedreasonablebg Mobe toprovide.
I
I
WARRANTOR IS NOT RESPONSIBLE FOR CONSEQUENTIAL DAMAGES. I
Warrantor: iVlABECANADA INC.
15
Page 16

Consumer Support.
Appliance Websites www.moffatappliances.ca
Have a question or need assistancewith gout appliance?Trg the Appliance Websites 24 hours a dag,
ang dag of the gear! Forgreater convenience and faster service,gou can now download Owner's Manuals,
order parts oreven schedule serviceon-line.
ScheduleService
Expertrepairserviceisonlgone step awagfrom gourdooEGeton-line and schedulegour serviceat
gour convenience24 hoursang dag ofthe gear!Or call 1.800.361.3400during normal businesshours.
RealLifeDesignStudio www.geappliances.ca
We support the Universal Design concept-products, services and environments that can be used bg
people of all ages, sizes and capabilities. We recognize the need to design for a wide range of phgsical and
mental abilities and impairments. For details of Universal Design applications, including kitchen design ideas
for people with disabilities, please contact: Director, Consumer Relations, Mabe Canada Inc.
www.geappliances.ca
Suite 310, ! Factorg Lane
Moncton, N.B.EIC 9M3
Extended Warranties www.geappliances.ca
Purchasean extended warrantg and learn about special discounts that are available while gour warrantg
isstillineffect. You can purchase iton-line angtime, or call 1.888.261.2133during normal businesshours.
Consumer Home Serviceswill still be there after gout warrantg expires.
...........! Orderon-line, 24 hours everg dog, orbg phone at 1.800.661.1616during normal business hours.
Instructions contained in this manual cover procedures to be performed bg ong user. Other servicing
generallg should be referred to qualified service personnel. Caution must be exercised,since improper
servicing mag cause unsafe operation.
Contact Us
If gou are not satisfied with the service gou received:
FIRST,contact the people who serviced gour appliance.
NEXT,if gou are still not pleased, write all the details (including gour phone number) to:
Director, Consumer Relations, Mabe Canada Inc.
Suite 310, ! Factorg Lane
Moncton, N.B.EIC 9M3
www.geappliances.ca
ces.ca
[
Register YourAppliance www.geappliances.ca
]
Register gout new appliance on-line--at gout convenience! Timelg product registration will allow for
enhanced communication and prompt service under the terms of gout warrantg, should the need arise.
J
Youmag also mail inthe pre-printed registration card included in the packing material, or detach and
usethe form in this Owner's Manual.
_*_ Printed in the United States
_ Printed on Recycled Paper
 Loading...