

Page 1
GE
Security
Genesis Ceiling Horn-Strobe
Installation Sheet
Description
The Genesis Ceiling Horn-Strobe is a fire alarm notification
appliance designed for indoor ceilings and walls. See Table 1 for a
list of model numbers.
Table 1: Models
Description Number
Horn-strobe,
15 to 95 multi-cd, white
Horn-strobe,
15 to 95 multi-cd, white, with
FIRE marking
Horn-strobe,
15 to 95 multi-cd, red, with
FIRE marking
Field configurable jumper options are available for selecting the
desired dB output, temporal or steady horn output, and strobe
signal output.
The horn-strobe includes a field configurable switch for selecting
the desired candela output. The candela output setting is locked in
place and remains visible after final installation.
This strobe features an enhanced synchronization circuit to
comply with the latest requirements of UL 1971 Signaling Devices
for the Hearing Impaired and the latest Canadian standard
CAN/ULC-S526. Synchronized operation requires a separately
installed synchronization control module. See Table 2 for a list of
compatible synchronization modules.
Install this device in accordance with applicable requirements in
the latest editions of the NFPA codes and standards and Canadian
Electrical Code, Part 1, Section 32 and CAN/ULC-S524, Standard for
the Installation of Fire Alarm Systems, and in accordance with the
local authorities having jurisdiction.
ADTGC-HDVM MGC-HDVM
EGC-HDVM XLSGC-HDVM
GC-HDVM ZGC-HDVM
ADTGCF-HDVM MGCF-HDVM
EGCF-HDVM XLSGCF-HDVM
GCF-HDVM ZGCF-HDVM
EGCFR-HDVM
GCFR-HDVM
MGCFR-HDVM
Installation
WARNING: To reduce the risk of shock, disconnect all power and
allow 10 minutes for stored energy to dissipate before handling.
Caution: Electrical supervision requires the wire run to be broken
at each terminal. Do not loop the signaling circuit field wires
around the terminals.
To install the horn-strobe:
1. Remove the cover by depressing the tab on the side of the
unit with a small screwdriver. Turn the cover
counterclockwise to release.
2. Set the horn signal, sound output level, and strobe signal to
the desired settings. See Figure 2.
3. Connect the strobe terminals to the signal circuit field wiring.
You must observe polarity for the unit to function properly.
See Figure 4.
4. Slide the candela switch to the desired candela output (95,
115, 150, or 177 cd) by aligning it with the indicator below the
switch. See Figure 1.
5. Mount the unit onto a compatible electrical box. See Figure 5.
6. Replace the cover by positioning the alignment arrows
together and rotating the cover clockwise.
7. Test the unit for proper operation.
Figure 1: Candela switch
Table 2: Compatible synchronization module models
Description Number
Auto-sync output module SIGA-CC1S SIGA-MCC1S
GSA-CC1S GSA-MCC1S
Genesis signal master remote mount
ADTG1M-RM MG1M-RM
EG1M-RM XLSG1M-RM
G1M-RM ZG1M-RM
© 2009 GE Security, Inc.
1. Candela switch 2. Indicator
1 of 4
P/N 3100616 • REV 4.0 • ISS 30SEP09
Page 2
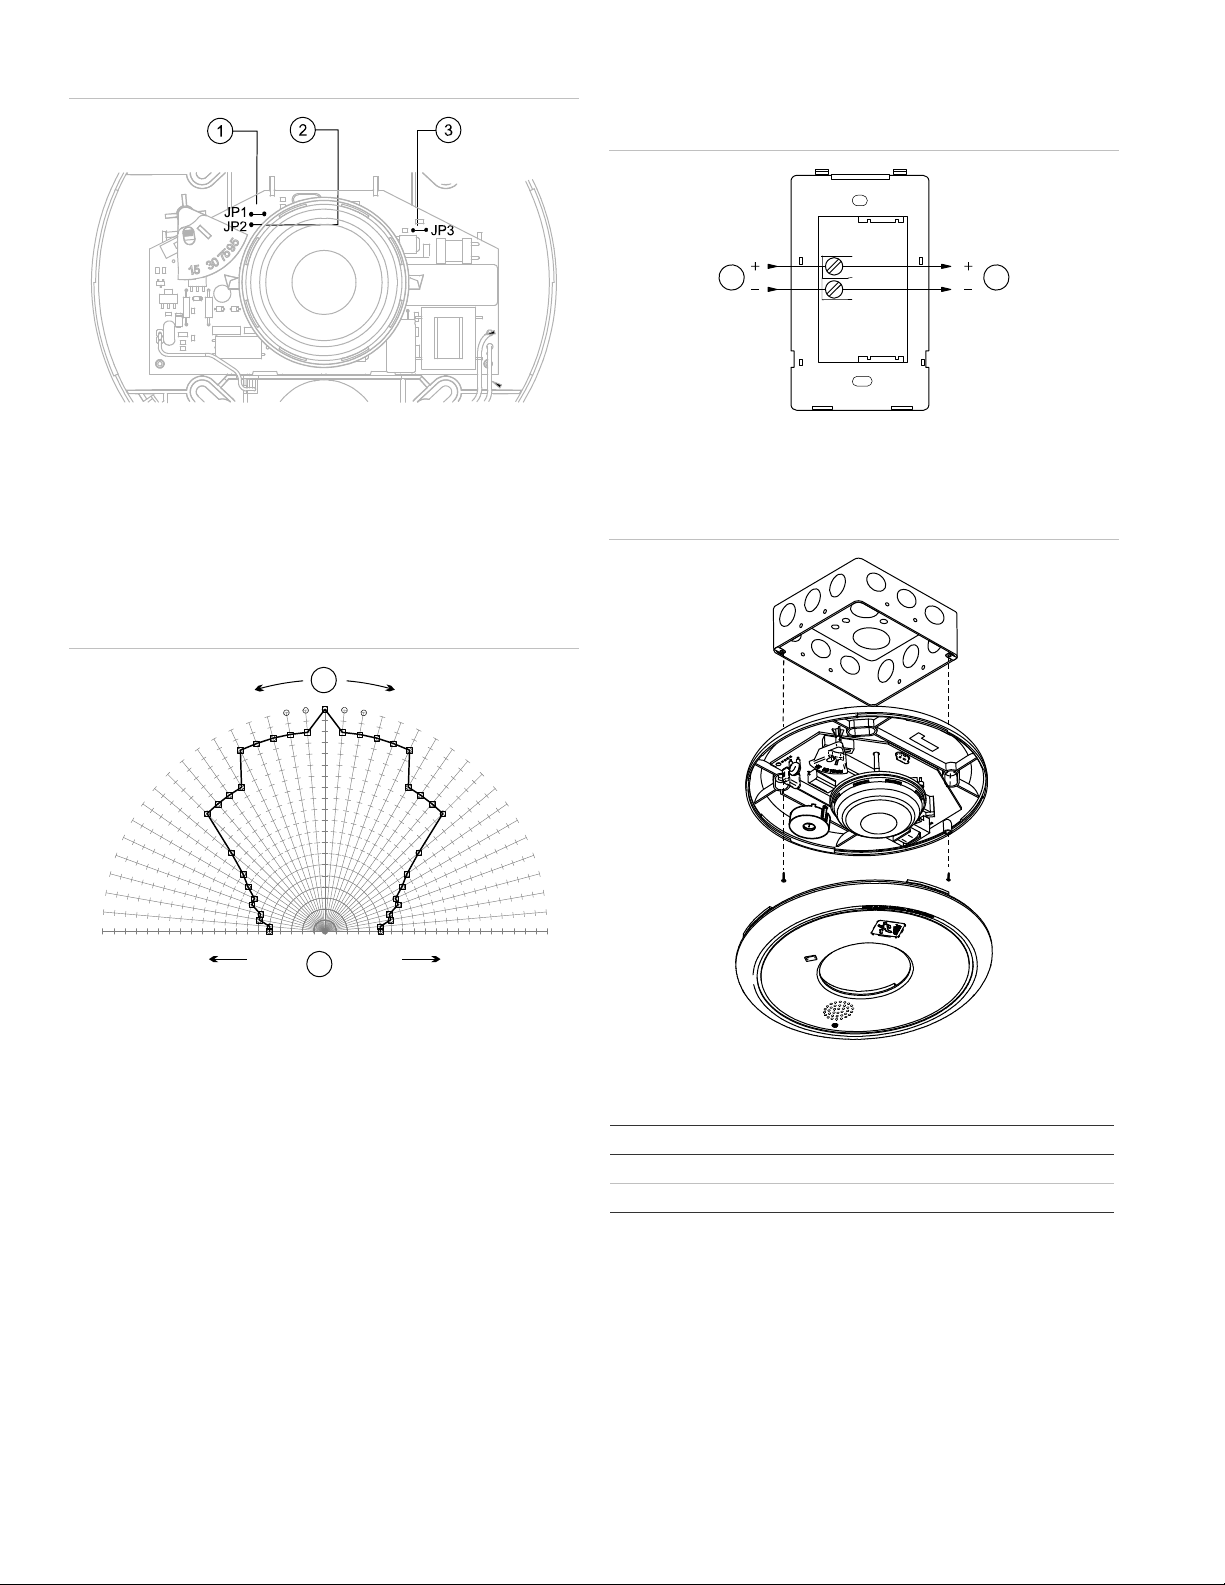
Figure 2: Horn and strobe settings
1. JP1: Horn signal jumper: Cut to change from temporal to steady
2. JP2: Strobe signal output: Cut to change from 1 flash per second
(public mode) to temporal (private mode)
3. JP3: Horn sound output: Cut to change from high dB to low dB
Note: If the strobe is set to temporal (private mode), this device is
no longer UL 1971 or ULC-S526 Listed or FM Approved but is
UL 1638 Listed.
Figure 3: UL 1971 minimum light output (% of rating vs. angle)
Wiring
Figure 4: Wiring Diagram
+
1 2
-
1. From NAC output
2. To next NAC output
Note: Signal polarity is shown in the alarm condition.
Figure 5: Mounting diagram
1
0
5
-5
-25
-30
-35
-40
-45
-50
-55
-60
-65
-70
-75
-80
-85
-90
9590858075706560555045403530252015
100
-10
-15
-20
10
15
20
25
30
505
10
1015202530354045505560657075808590
2
35
40
1. Angle
2. Percentage of rated output
Note: Horizontal and vertical outputs have the same pattern
45
50
55
60
65
70
75
80
85
90
95
100
Table 3: Strobe operating current in RMS (A)
15 cd 30 cd 75 cd 95 cd
VDC 0.147 0.190 0.316 0.372
VFWR 0.189 0.253 0.417 0.451
VDC = Volts direct current, regulated and filtered
VFWR = Volts full wave rectified
Operating currents shown above were measured by UL at 16 VDC and 16
VFWR.
2 of 4 P/N 3100616 • REV 4.0 • ISS 30SEP09
Page 3
0
Table 4: Sound level output (dBA)
Signal VDC High db Low db
Temporal 16 79.8 75.0
24 83.3 78.0
33 85.0 80.9
Steady 16 83.2 79.3
24 85.4 83.0
33 87.8 85.9
UL464: Sound level output at 10 ft. (3.05 m) measured in a reverberant
room
Table 5: Minimum sound level output per ULC-S525 (dBA, peak)
Signal Voltage High db Low db
Temporal Reg. 24 VDC 91 89
Reg. 24 VFWR 96 93
Steady Reg. 24 VDC 93 89
Reg. 24 VFWR 96 93
ULC-S525: Meets or exceeds 85 dBA in an anechoic chamber at 10 ft.
(3.05 m).
Table 6: Audible directional characteristics (horizontal pattern)
Angle (°) [1] Sound output (dBA) [2]
90 (Ref) 0 (Ref)
75 and 115 −3
70 and 120 −6
[1] Angles are measured from a perpendicular axis; positive angles to the
right.
[2] Peak output at regulated 24 VDC, set for temporal tone.
Table 7: Audible directional characteristics (vertical pattern)
Angle (°) [1] Sound output (dBA) [2]
90 (Ref) 0 (Ref)
65 and 135 −3
55 and 140 −6
[1] Angles are measured from a perpendicular axis; positive angles are up.
[2] Peak output at regulated 24 VDC, set for temporal tone.
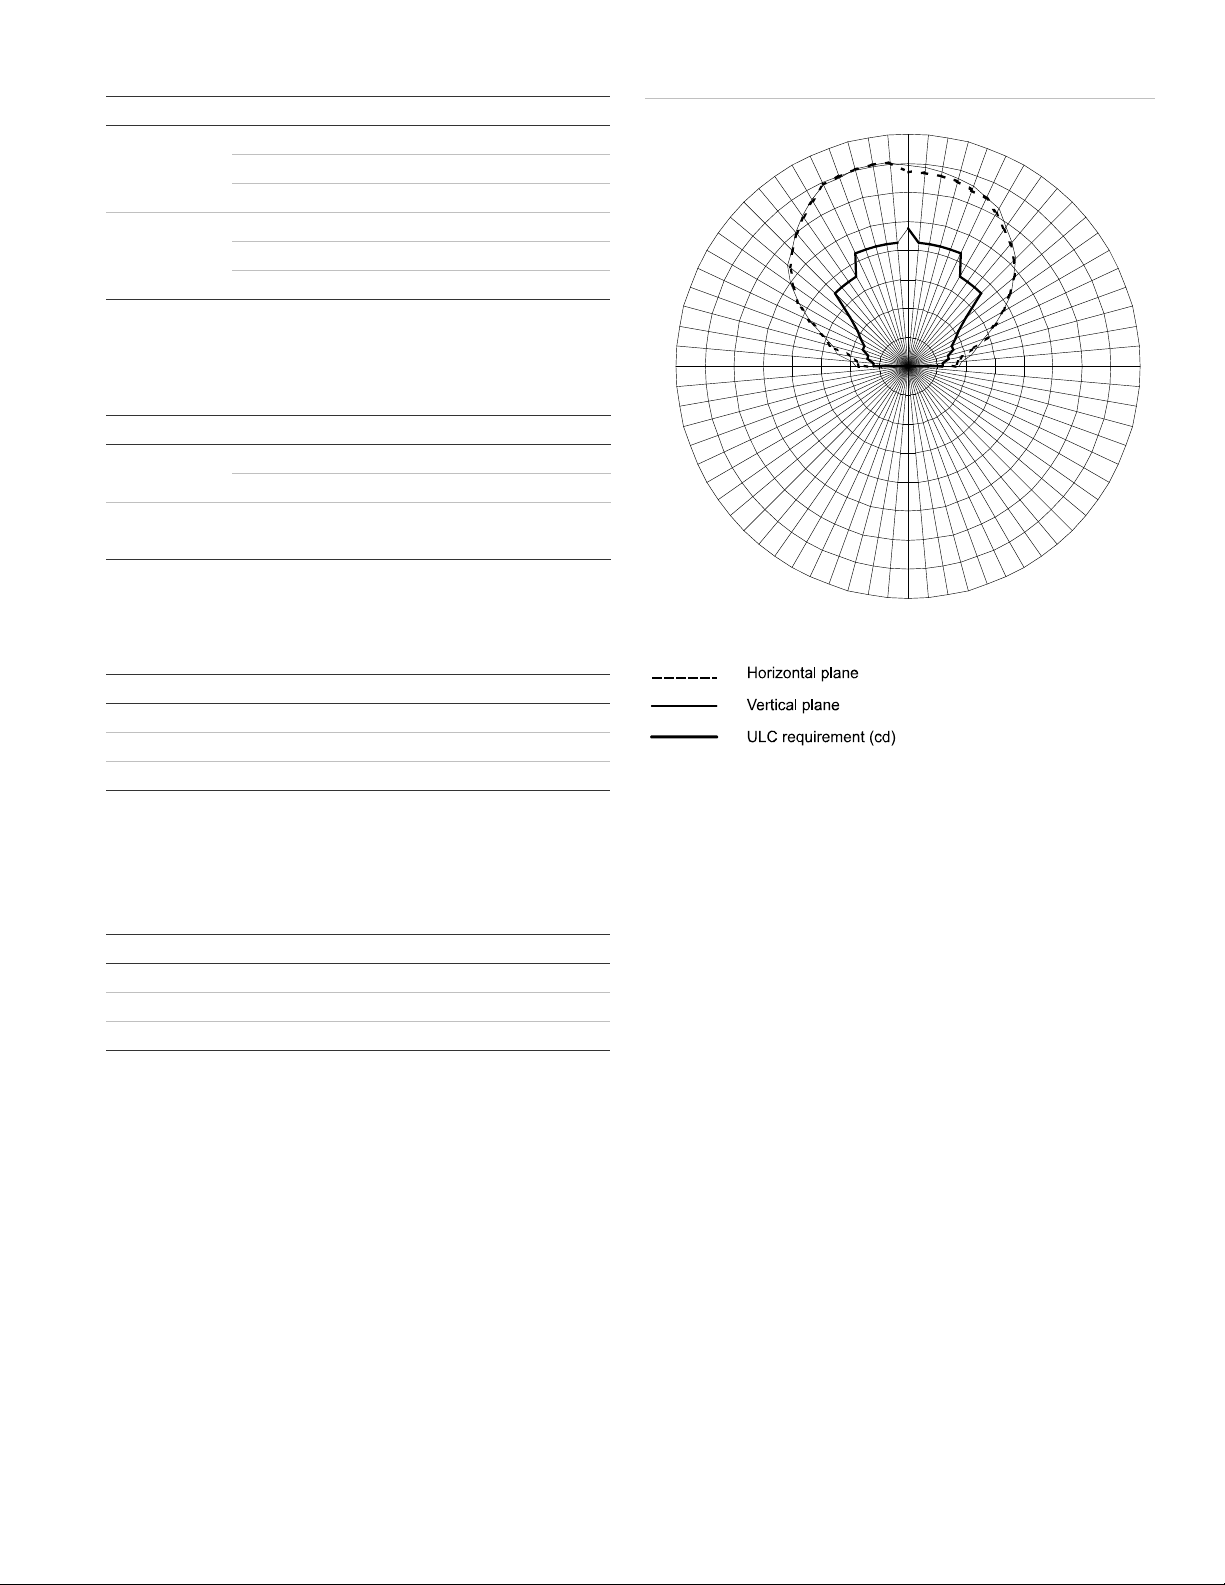
Figure 6: Light output profile
0
355
350
345
340
335
330
325
320
315
310
305
300
295
290
285
280
275
270
265
260
255
250
245
240
235
230
225
220
215
210
205
200
195
190
185
5
160
140
120
100
80
60
40
20
10
15
20
25
30
35
40
45
50
55
60
65
70
75
0
100
105
110
115
120
125
130
135
140
145
150
155
160
165
170
175
180
Maintenance
This unit is not serviceable or repairable. Should the unit fail to
operate, contact the supplier for replacement.
Perform a visual inspection and an operational test twice a year or
as directed by the local authority having jurisdiction.
Do no change the factory-applied finish.
80
85
9
95
P/N 3100616 • REV 4.0 • ISS 30SEP09 3 of 4
Page 4

Specifications
Voltage Regulated 24 VDC, 24 VFWR
Strobe operating
current
Light output Selectable at 15, 30, 75, and 95 cd
Sound level output See
Default settings
Signal
Sound level output
Strobe signal
output
Wire size 12 to 18 AWG (0.75 TO 2.50 mm²)
Compatible electrical
boxes
Operating environment
Temperature
Relative humidity
See Table 3
Temporal
High dB
1 flash per second (fps)
North American 4 in. square electrical box,
2-1/8 in. deep (no extension ring)
32 to 120°F (0 to 49°C)
0 to 93% noncondensing
Regulatory information
Manufacturer GE Security, Inc., 8985 Town Center Parkway,
Bradenton, FL 34202, USA
Year of
manufacture
UL/ULC rating Regulated 24 DC and 24 FWR
Environmental class UL: Indoor
Synchronization Meets UL 1971 requirements. Maximum allowed
Agency listings Meets ULC-S525, ULC-S526
The first two digits of the DATE MFG number (located
on the product identification label) are the year of
manufacture
This device was tested to the regulated 24 DC/FWR
operating voltage limits of 16 V and 33 V. Do not
apply 80% and 110% of these values for system
operation.
resistance between any two devices is 20 Ω. Refer
to specifications for the synchronization control
module, this strobe, and the control panel to
determine allowed wire resistance.
UL 464. UL 1638 and UL 1971
4 of 4 P/N 3100616 • REV 4.0 • ISS 30SEP09
 Loading...