

GE FUM12, FUM14, FUM17, FUM21, FUF17 Owner's Manual
...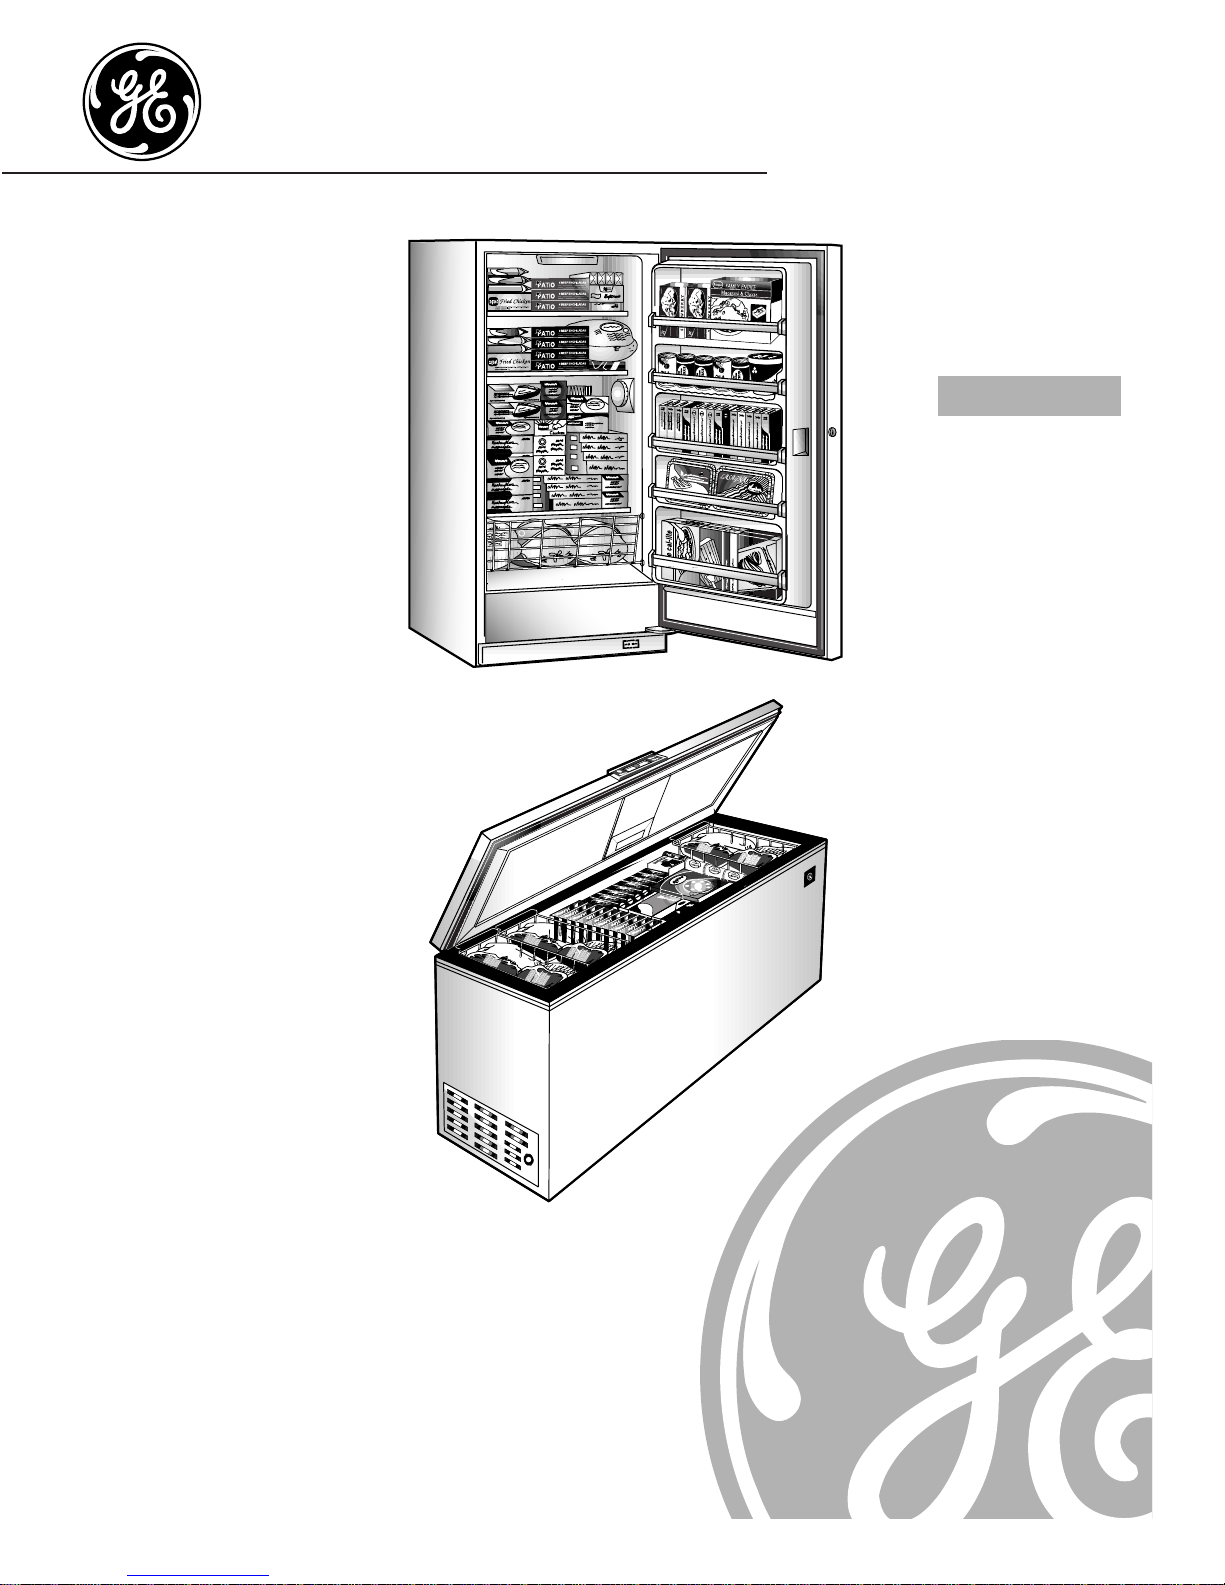
Food Freezers
Part No. 162D9627P001 Pub. No. 49-6952 216572700 CG 11/97
Upright—Manual
Defrost Models:
FUM12
FUM14
FUM17
FUM21
Upright—No-Frost
Models:
FUF14
FUF17
FUF20
Chest—Manual
Defrost Models:
FCM5
FCM7
FCM9
FCM15
FCM20
FCM25
Owner’s Manual
GE Appliances

Customer Service Troubleshooting Tips
Operating Instructions
Safety Instructions
Installation Instructions
Congratulations!
You Are Now Part of the GE Family
Welcome to the GE family. We’re proud of our
quality products and we are committed to providing
dependable service. You’ll see it in this easy-to-use
Owner’s Manual and you’ll hear it in the friendly
voices of our customer service department.
Best of all, you’ll experience these values each time
you use your freezer. That’s important, because
your new freezer will be part of your family for
many years. And we hope you will be part of ours
for a long time to come.
We thank you for buying GE. We appreciate your
purchase, and hope you will continue to rely on us
whenever you need quality appliances for your home.
GE & You, AService Partnership.
Safety Information
Safety Precautions . . . . . . . . . .3
Use of Extension Cords . . . . . .3
How to Connect Electricity . . . .4
Use of Adapter Plugs . . . . . . . .4
Operating Instructions
Starting the Freezer . . . . . . . . .5
Features . . . . . . . . . . . . . . . .5, 6
Defrosting Instructions . . . . .6, 7
Care and Cleaning . . . . . . . .8, 9
Installation Instructions
Preparing to
Install the Freezer . . . . . . . . . .10
Troubleshooting Tips
Normal Operating
Characteristics . . . . . . . . . . . .10
Before You
Call For Service . . . . . . . . .11, 12
Customer Service
Product Registration For
Customers in the U.S. . . . . . . .13
Warranty . . . . . . . . . . . . . . . . .15
Service Telephone
Numbers . . . . . . . . . . . . . . . . .16
Product Registration For
Customers in Canada . . . . . . .17
FOR YOUR RECORDS
Write the model and serial numbers here:
#
#
You can find them on a plate either on the upper left wall inside the
freezer (Upright models) or on the left exterior wall (Chest models).
Staple sales slip or cancelled check here.
Proof of the original purchase date is needed to obtain service
under the warranty.
Inside you will find many helpful hints on how to use and maintain
your freezer properly. Just a little preventive care on your part can
save you a great deal of time and money over the life of your freezer.
You’ll find many answers to common problems in the
Before You
Call For Service
section. If you review our chart of
Troubleshooting Tips
first, you may not need to call for service at all.
READ THIS MANUAL
IF YOU NEED SERVICE
If you do need service, you can relax knowing help is only a phone
call away. A list of toll-free customer service numbers is included in
the back section. Or,
in the U.S.,
you can always call the GE Answer
Center® at 800.626.2000, 24 hours a day, 7 days a week.
In Canada,
call 1-800-361-3400.
2
IMPORT ANT!
Fill out and return the Consumer Product Registration Card that
is packed with this product. If you cannot find it, please send in the
duplicate card printed in the back of this manual.

3
Customer ServiceTroubleshooting Tips
Operating Instructions
Safety Instructions
Installation Instructions
IMPORTANT SAFETY INFORMATION.
READ ALL INSTRUCTIONS BEFORE USING.
WARNING!
Use this appliance only for its intended purpose as described in this Owner’s Manual.
SAFETY PRECAUTIONS
When using electrical appliances, basic safety precautions should be followed, including the following:
■
■This freezer must be properly installed and
located in accordance with the Installation
Instructions before it is used.
■
■Do not allow children to climb, stand or hang
on the shelves in the freezer. They could damage
the freezer and seriously injure themselves.
■
■After your freezer is in operation, do not touch
the cold surfaces, particularly when hands are
damp or wet. Skin may stick to these extremely
cold surfaces.
■
■Do not store or use gasoline or other flammable
vapors and liquids in the vicinity of this or any
other appliance.
■
■Unplug the freezer before cleaning, making
repairs or changing the light bulb.
NOTE: We strongly recommend that any servicing be performed
by a qualified individual.
■
■Turning the control to the
OFF
position does
not remove power to the light circuit on models
with interior light.
■
■Do not refreeze frozen foods which have
thawed completely.
■
■The maximum amount of food your freezer is
designed to freeze at one time is approximately
3 pounds (1.5 kg) per cubic foot of freezer
capacity. In normal position, your freezer’s
temperature control will maintain sufficiently
low temperatures in the freezer to freeze
recommended quantities of food.
■
■Caution should be used when removing the door
of a freezer. Particular caution should be used
when removing the lid of a Chest freezer, as most
Chest freezer lids are under spring tension.
Contact the manufacturer’s representative for a
method of safe removal.
IMPORTANT: PROPER DISPOSAL OF THE FREEZER
Child entrapment and suffocation are not problems
of the past. Junked or abandoned refrigerators and
freezers are still dangerous…even if they will sit for
“just a few days.” If you are getting rid of your old
refrigerator or freezer, please follow the instructions
below to help prevent accidents.
Before You Throw Away Your Old Refrigerator
or Freezer:
■Take off the doors.
■Leave the shelves in place so that children may
not easily climb inside.
CFC Disposal
Your old freezer has a cooling system that used
CFCs (chlorofluorocarbons). CFCs are believed to
harm stratospheric ozone.
If you are throwing away your old freezer, make sure
the CFC refrigerant is removed for proper disposal
by a qualified servicer. If you intentionally release
this CFC refrigerant you can be subject to fines and
imprisonment under provisions of the Federal
Clean Air Act.
USE OF EXTENSION CORDS
Because of potential safety hazards under certain conditions, we strongly recommend
against the use of an extension cord.
However, if you must use an extension cord, it is absolutely necessary that it be a UL-listed (in the United
States) or a CSA-listed (in Canada), 3-wire grounding type appliance extension cord having a grounding
type plug and outlet and that the electrical rating of the cord be 15 amperes (minimum) and 120 volts.
4
Customer Service Troubleshooting Tips
Operating Instructions
Safety Instructions
Installation Instructions
Customer Service Troubleshooting Tips
Installation Instructions
Safety Instructions
Operating Instructions
Customer Service Troubleshooting Tips
Installation Instructions
Safety Instructions
Operating Instructions
IMPORTANT SAFETY INFORMATION.
READ ALL INSTRUCTIONS BEFORE USING.
WARNING!
HOW TO CONNECT ELECTRICITY
Do not, under any circumstances, cut or remove the third (ground) prong from the power cord. For
personal safety, this appliance must be properly grounded.
The power cord of this appliance is equipped with a
3-prong (grounding) plug which mates with a
standard 3-prong (grounding) wall outlet to
minimize the possibility of electric shock hazard
from this appliance.
Have the wall outlet and circuit checked by a
qualified electrician to make sure the outlet is
properly grounded.
If the outlet is a standard 2-prong wall outlet, it
is your personal responsibility and obligation to
have it replaced with a properly grounded 3-prong
wall outlet.
The freezer should always be plugged into its own
individual electrical outlet which has a voltage rating
that matches the rating plate.
This provides the best performance and also
prevents overloading house wiring circuits which
could cause a fire hazard from overheated wires.
Never unplug your freezer by pulling on the power
cord. Always grip plug firmly and pull straight out
from the outlet.
Repair or replace immediately all power cords that
have become frayed or otherwise damaged. Do not
use a cord that shows cracks or abrasion damage
along its length or at either end.
When moving the freezer away from the wall, be
careful not to roll over or damage the power cord.
USE OF ADAPTER PLUGS
(Adapter plugs not permitted in Canada)
Because of potential safety hazards under certain conditions, we strongly recommend against
the use of an adapter plug.
However, if you must use an adapter, where local
codes permit, a
temporary connection
may be made
to a properly grounded 2-prong wall outlet by use
of a UL-listed adapter available at most local
hardware stores.
The larger slot in the adapter must be aligned with
the larger slot in the wall outlet to provide proper
polarity in the connection of the power cord.
When disconnecting the power cord from the
adapter, always hold the adapter in place with one
hand while pulling the power cord plug with the
other hand. If this is not done, the adapter ground
terminal is very likely to break with repeated use.
If the adapter ground terminal breaks,
DO NOT USE
the freezer until a proper ground has been
established.
Attaching the adapter ground terminal to a wall outlet
cover screw does not ground the appliance unless the
cover screw is metal, and not insulated, and the wall
outlet is grounded through the house wiring. You should
have the circuit checked by a qualified electrician to make
sure the outlet is properly grounded.
Read and follow this Safety Information carefully.
SA VE THESE INSTRUCTIONS
reS
r
e
m
ot
s
u
C
e
ci
v
T
r
T
g
n
it
o
o
h
s
el
buo s
pi
r
t
s
n
I gn
ita
r
e
p
O
s
n
oi
t
cu
rt
sn
I
ytefa
S s
n
o
itcu
rt
sn
I noit
a
ll
at
s
n
I
s
n
o
itcu
About the operation of your freezer.
Sta
rting the Freezer
Clean the inside of the freezer with a mild solution of baking soda and water
(see
Care and Cleaning
).
Connect cord to power outlet.
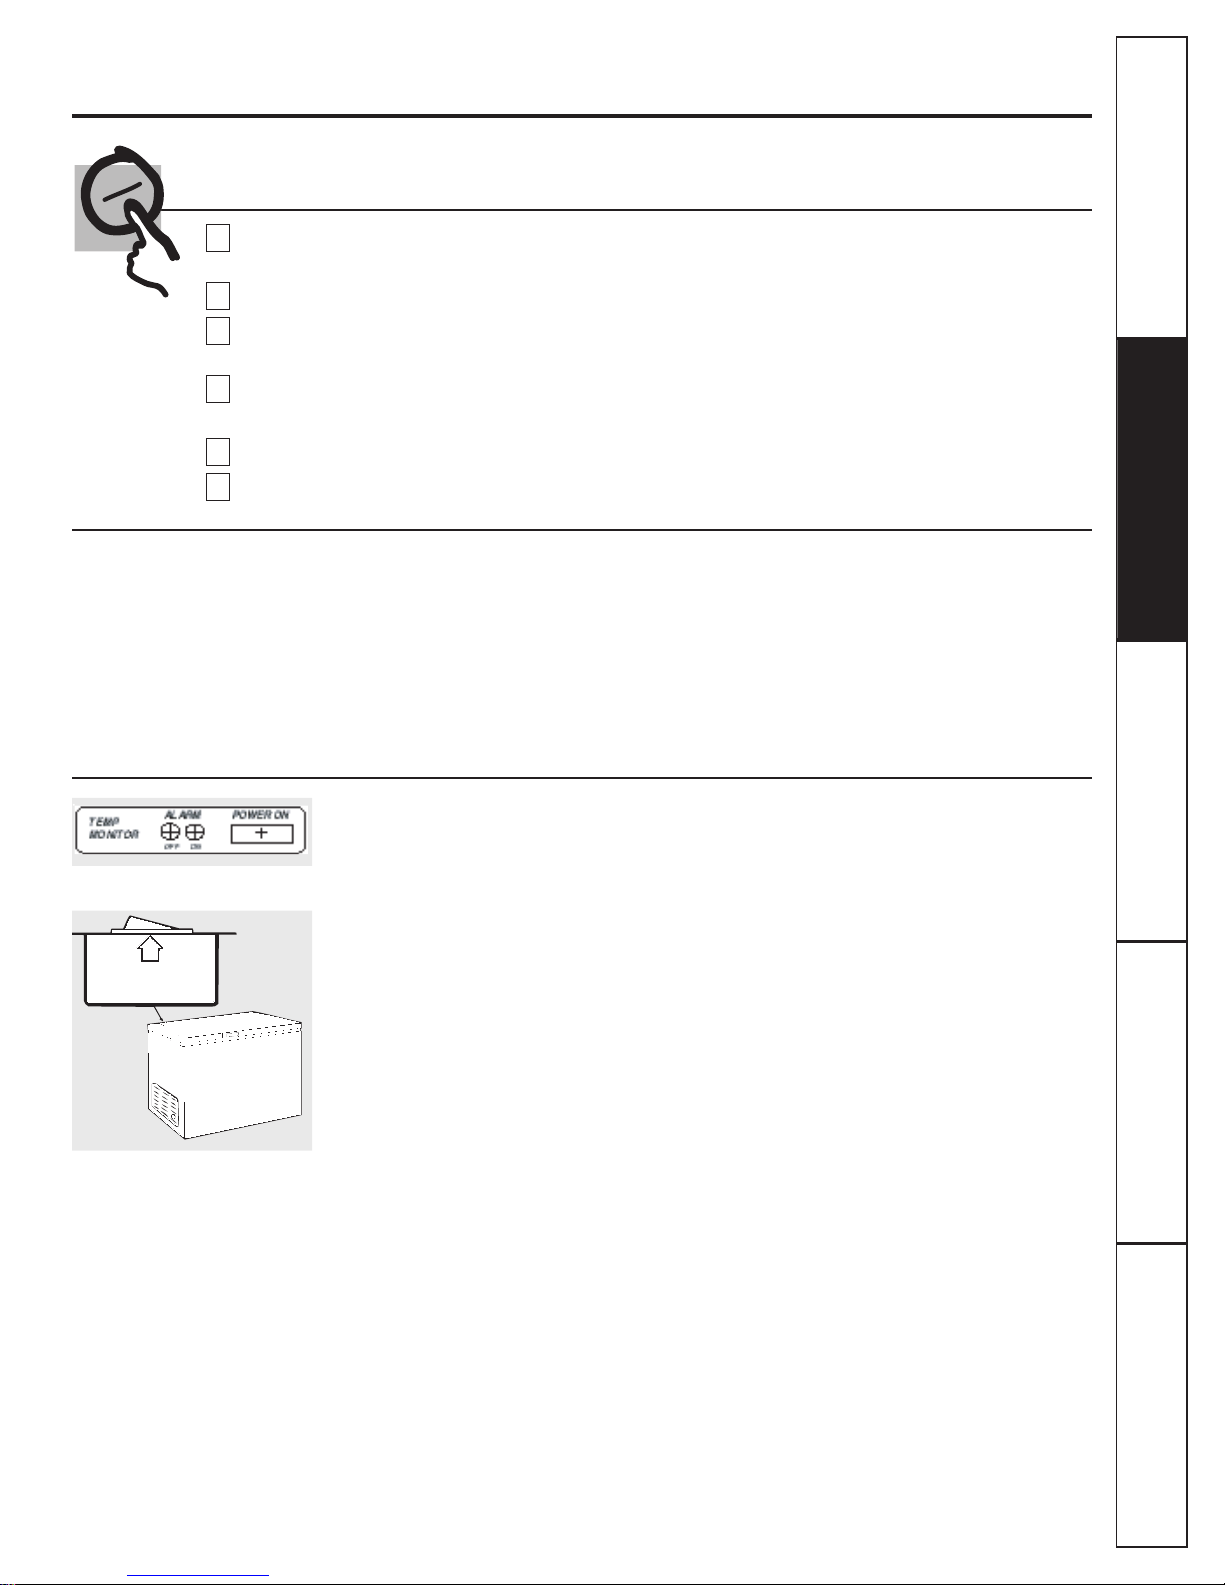
On models with a Temperature Monitor or High-Temp Alarm Switch, set the
switch
to the
OFF
position.
Make sure the temperature control is set at mid-range,
4.
Allow freezer to operate for at least four hours before placing food inside.
On models with a Temperature Monitor or High-Temp Alarm Switch, set the
switch
to the ONposition.
6
5
4
3
2
1
5
(on some models)
An alarm will sound if the freezer
temperature
reaches unsafe levels. The
alarm
operates on household electricity. If
the
power fails, the alarm will not perform.
An
ON/OFF
switch allows the temperature
alarm
to be deactivated if desired. The
freezer
is shipped with the switch in the
OFF
position. After the freezer has run long
enough
to lower the temperature, you
may
set the switch to the ONposition.
CAUTION: Adding more than 3 pounds
of
warm food per cubic foot
eezer
capacity
can
trigger the alarm.
To activate the alarm,
set the switch to the
ON
position.
To deactivate the alarm,
set the switch to
OFF
position.
Temperature Control
Freezing temperature selection is made by
setting
the control from 1to 7(coldest).
If you want colder or warmer temperatures,
adjust
the control one step at a time.
Allow
several hours after each one-step
adjustment
for the freezer temperature to
stabilize
.
Turning the control to
OFF
stops the cooling
process
but does not shut off power to the
freezer
.
ON OFF
HIGH-TEMP
ALARM SWITCH
Located on front of freezer.
Located on back of lid.
(For some models, the mid-range setting is “II”).
For some models, temperature selection
is made by setting the control
from “I” to “III” (coldest).
Temperature Monitor/High-Temp Alarm Switch
the
(1.5 kg)
of
fr
 Loading...