

Page 1

Food Freezers
Chest
Part No. 162D1522P005 Pub. No. 49-6945 1-34485-002 CG 11/97
Models:
FH5
FH7
FH10
FH15
FH22
Owner’s Manual
GE Quality Product
Page 2
Customer Service Troubleshooting Tips
Operating Instructions
Safety Instructions
Installation Instructions
Congratulations!
You Are Now Part of the GE Family
Welcome to the GE family. We’re proud of our
quality products and we are committed to providing
dependable service. You’ll see it in this easy-to-use
Owner’s Manual and you’ll hear it in the friendly
voices of our customer service department.
Best of all, you’ll experience these values each time
you use your freezer. That’s important, because
your new freezer will be part of your family for
many years. And we hope you will be part of ours
for a long time to come.
We thank you for buying GE. We appreciate your
purchase, and hope you will continue to rely on us
whenever you need quality appliances for your home.
GE & You, AService Partnership.
Safety Information
Safety Precautions . . . . . . . . . .3
Use of Extension Cords . . . . . .3
How to Connect Electricity . . . .4
Use of Adapter Plugs . . . . . . . .4
Operating Instructions
Starting the Freezer . . . . . . . . .5
Features . . . . . . . . . . . . . . . .5, 6
Defrosting Instructions . . . . . . .7
Care and Cleaning . . . . . . . .8, 9
Installation Instructions
Preparing to
Install the Freezer . . . . . . . . . .10
Troubleshooting Tips
Before You
Call For Service . . . . . . . . .10, 11
Customer Service
Product Registration . . . . . . . .13
Warranty . . . . . . . . . . . . . . . .15
Service Telephone
Numbers . . . . . . . . . . . . . . . . .16
FOR YOUR RECORDS
Write the model and serial numbers here:
#
#
You can find them on a plate located at the top outside rear center
of the freezer.
Staple sales slip or cancelled check here.
Proof of the original purchase date is needed to obtain service
under the warranty.
Inside you will find many helpful hints on how to use and maintain
your freezer properly. Just a little preventive care on your part can
save you a great deal of time and money over the life of your freezer.
You’ll find many answers to common problems in the
Before You
Call For Service
section. If you review our chart of
Troubleshooting Tips
first, you may not need to call for service at all.
READ THIS MANUAL
IF YOU NEED SERVICE
If you do need service, you can relax knowing help is only a phone
call away. A list of toll-free customer service numbers is included in
the back section. Or,
in the U.S.,
you can always call the GE Answer
Center® at 800.626.2000, 24 hours a day, 7 days a week.
In Canada,
call 1-800-361-3400.
2
IMPORT ANT!
Fill out and return the Consumer Product Registration Card that
is packed with this product. If you cannot find it, please send in the
duplicate card printed in the back of this manual.
Page 3
Customer ServiceTroubleshooting Tips
Operating Instructions
Safety Instructions
Installation Instructions
IMPORTANT SAFETY INFORMATION.
READ ALL INSTRUCTIONS BEFORE USING.
WARNING!
Use this appliance only for its intended purpose as described in this Owner’s Manual.
SAFETY PRECAUTIONS
When using electrical appliances, basic safety precautions should be followed, including the following:
■
■This freezer must be properly installed and
located in accordance with the Installation
Instructions before it is used.
■
■The freezer should not be recessed or built-in—
it is designed for free-standing installation only.
■
■Do not allow children to climb, stand or hang
on the shelves in the freezer. They could damage
the freezer and seriously injure themselves.
■
■After your freezer is in operation, do not touch
the cold surfaces, particularly when hands are
damp or wet. Skin may stick to these extremely
cold surfaces.
■
■Do not store or use gasoline or other flammable
vapors and liquids in the vicinity of this or any
other appliance.
■
■Unplug the freezer before cleaning, making
repairs or changing the light bulb.
NOTE: We strongly recommend that any servicing be performed
by a qualified individual.
■
■Turning the control to the 0 position does
not remove power to the light circuit on models
with interior light.
■
■Do not use any electrical device or any sharp
instrument in defrosting your freezer.
■
■Do not refreeze frozen foods which have
thawed completely.
■
■Caution should be used when removing the door
of a freezer. Particular caution should be used
when removing the lid of a chest freezer, as most
chest freezer lids are under spring tension.
Instructions for removing the lid of your freezer
are located on the back of the freezer.
Contact the manufacturer’s representative for a
method of safe removal.
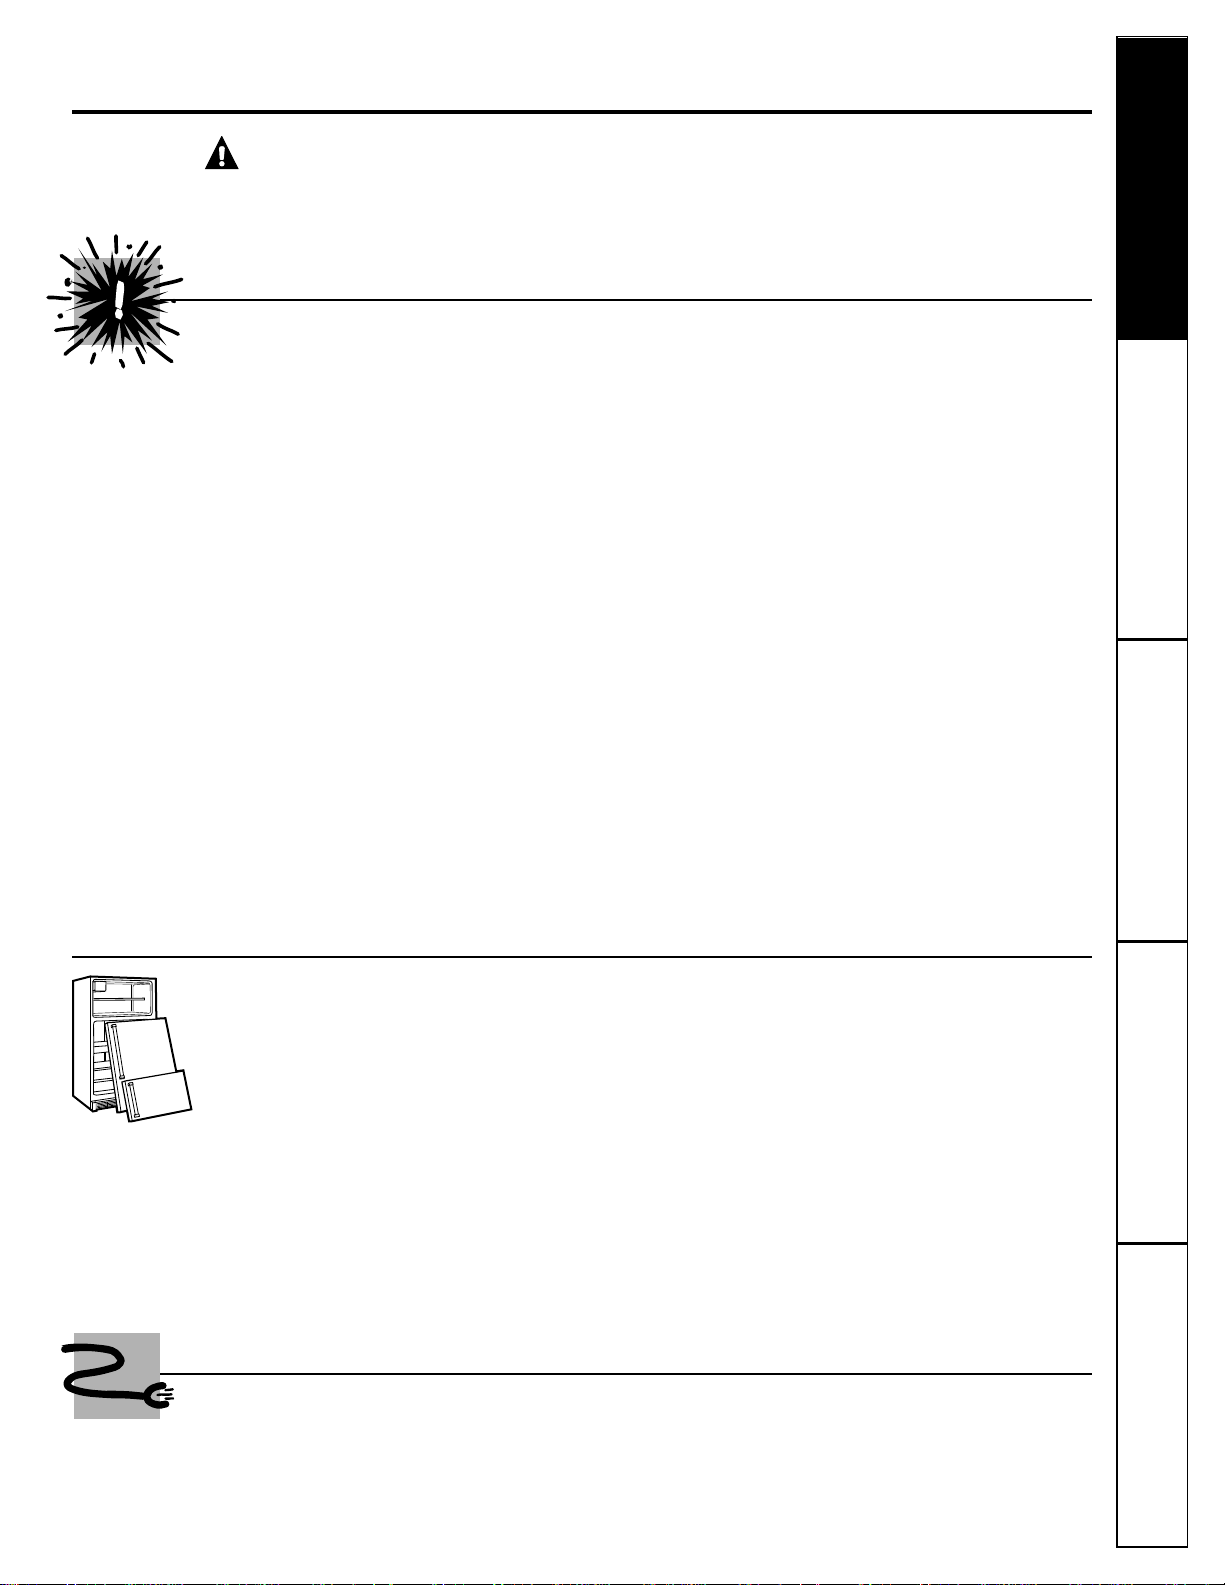
IMPORTANT: PROPER DISPOSAL OF THE FREEZER
Child entrapment and suffocation are not problems
of the past. Junked or abandoned refrigerators and
freezers are still dangerous…even if they will sit for
“just a few days.” If you are getting rid of your old
refrigerator or freezer, please follow the instructions
below to help prevent accidents.
Before You Throw Away Your Old Refrigerator
or Freezer:
■Take off the doors.
■Leave the shelves in place so that children may
not easily climb inside.
CFC Disposal
Your old freezer has a cooling system that used
CFCs (chlorofluorocarbons). CFCs are believed to
harm stratospheric ozone.
If you are throwing away your old freezer, make sure
the CFC refrigerant is removed for proper disposal
by a qualified servicer. If you intentionally release
this CFC refrigerant you can be subject to fines and
imprisonment under provisions of the Federal
Clean Air Act.
USE OF EXTENSION CORDS
Because of potential safety hazards under certain conditions, we strongly recommend
against the use of an extension cord.
However, if you must use an extension cord, it is absolutely necessary that it be a UL-listed (in the United
States) or a CSA-listed (in Canada), 3-wire grounding type appliance extension cord having a grounding
type plug and outlet and that the electrical rating of the cord be 15 amperes (minimum) and 120 volts.
3
Page 4
4
Customer Service Troubleshooting Tips
Operating Instructions
Safety Instructions
Installation Instructions
Customer Service Troubleshooting Tips
Installation Instructions
Safety Instructions
Operating Instructions
Customer Service Troubleshooting Tips
Installation Instructions
Safety Instructions
Operating Instructions
IMPORTANT SAFETY INFORMATION.
READ ALL INSTRUCTIONS BEFORE USING.
WARNING!
HOW TO CONNECT ELECTRICITY
Do not, under any circumstances, cut or remove the third (ground) prong from the power cord. For
personal safety, this appliance must be properly grounded.
The power cord of this appliance is equipped with a
3-prong (grounding) plug which mates with a
standard 3-prong (grounding) wall outlet to
minimize the possibility of electric shock hazard
from this appliance.
Have the wall outlet and circuit checked by a
qualified electrician to make sure the outlet is
properly grounded.
If the outlet is a standard 2-prong wall outlet, it
is your personal responsibility and obligation to
have it replaced with a properly grounded 3-prong
wall outlet.
The freezer should always be plugged into its own
individual electrical outlet which has a voltage rating
that matches the rating plate.
This provides the best performance and also
prevents overloading house wiring circuits which
could cause a fire hazard from overheated wires.
Never unplug your freezer by pulling on the power
cord. Always grip plug firmly and pull straight out
from the outlet.
Repair or replace immediately all power cords that
have become frayed or otherwise damaged. Do not
use a cord that shows cracks or abrasion damage
along its length or at either end.
When moving the freezer away from the wall, be
careful not to roll over or damage the power cord.
USE OF ADAPTER PLUGS
(Adapter plugs not permitted in Canada)
Because of potential safety hazards under certain conditions, we strongly recommend against
the use of an adapter plug.
However, if you must use an adapter, where local
codes permit, a
temporary connection
may be made
to a properly grounded 2-prong wall outlet by use
of a UL-listed adapter available at most local
hardware stores.
The larger slot in the adapter must be aligned with
the larger slot in the wall outlet to provide proper
polarity in the connection of the power cord.
When disconnecting the power cord from the
adapter, always hold the adapter in place with one
hand while pulling the power cord plug with the
other hand. If this is not done, the adapter ground
terminal is very likely to break with repeated use.
If the adapter ground terminal breaks,
DO NOT USE
the freezer until a proper ground has been
established.
Attaching the adapter ground terminal to a wall outlet
cover screw does not ground the appliance unless the
cover screw is metal and not insulated, and the wall
outlet is grounded through the house wiring. You should
have the circuit checked by a qualified electrician to make
sure the outlet is properly grounded.
Read and follow this Safety Information carefully.
SA VE THESE INSTRUCTIONS
Page 5
Customer ServiceTroubleshooting Tips
Operating Instructions
Safety Instructions
Installation Instructions
About the operation of your freezer.
Starting the Freezer
Clean the inside of the freezer with a mild solution of baking soda and water
(see
Care and Cleaning
).
If the lid was removed, make sure all wires are reconnected.
Connect cord to power outlet.
Set the temperature monitor (on some models) to “ ” (off).
Move the temperature control to
4.
This is the normal setting for safe, long-term
freezing. For colder temperatures turn to a higher number.
Allow freezer to operate for at least two hours before placing food inside.
Set the temperature monitor (on some models) to “11” (on).
7
6
5
4
3
2
1
5
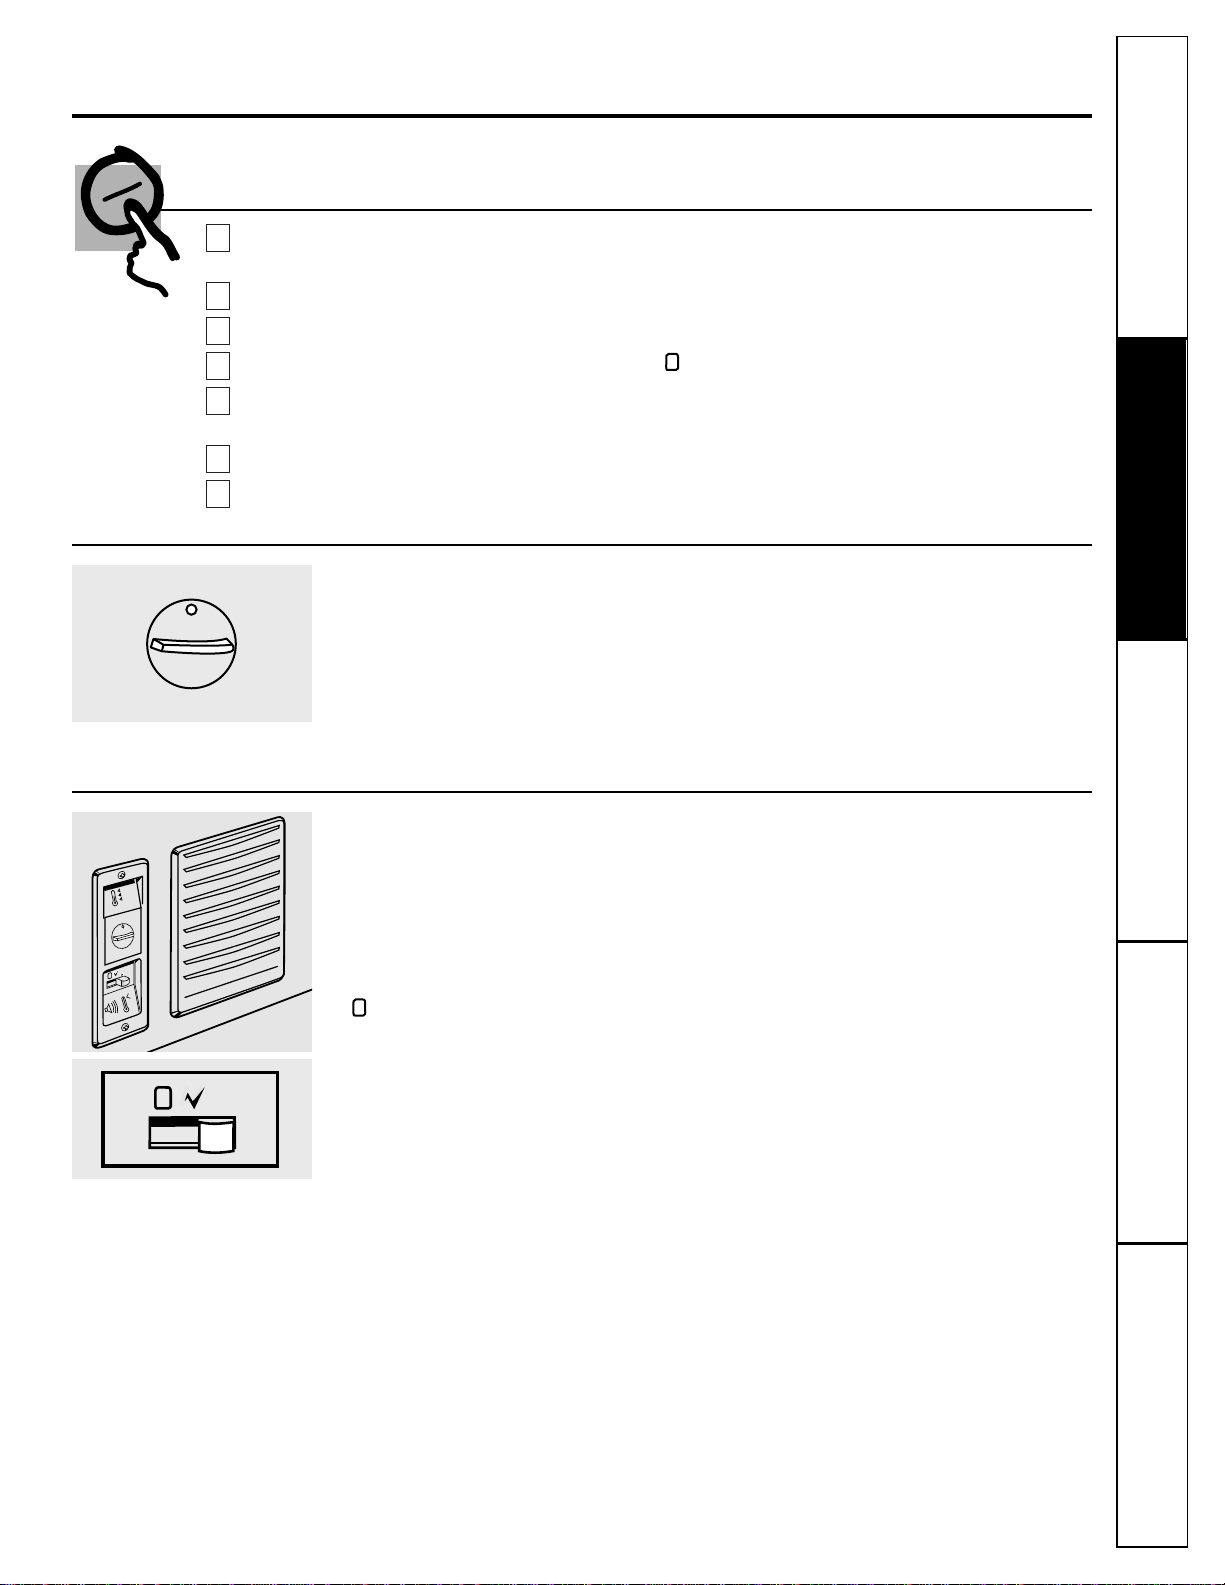
Temperature Monitor
(on some models)
An alarm sounds if the temperature in the
freezer rises 12°F. (-11°C.) or is higher than
normal for the selected setting. The alarm,
on the lower right side of the freezer next to
the temperature control, is controlled by a
3-position switch.
“ ” prevents the alarm from sounding
when the freezer is warm (during cooldown, when defrosting, or during initial
start-up).
“√” causes the alarm to sound regardless
of temperature. Test the alarm system
regularly—at least once a month.
“11” is the setting for normal freezer use. Be
sure to return the switch to “11” when the
freezer has cooled down after defrosting.
The alarm may sound if the temperature
control is turned to a much colder setting,
as from 2 to
5.
It may also sound if a large
amount of unfrozen food is added at one
time, causing the freezer temperature to rise.
4
5
6
7
0
1
2
3
1
1
4
7
1
Temperature Control
Freezing temperature selection is made by
setting the control from 1 to 7 (coldest).
Normal safe freezing level is obtained by
setting the control at
4.
Turning the temperature control all the way
to the left or past 0 until it clicks stops the
cooling process but does not shut off power
to the freezer.
Some models have a preset temperature and
no control knob.
4
3
2
1
5
6
7
0
Page 6

Customer Service Troubleshooting Tips
Operating Instructions
Safety Instructions
Installation Instructions
Customer Service Troubleshooting Tips
Installation Instructions
Safety Instructions
Operating Instructions
Customer Service Troubleshooting Tips
Installation Instructions
Safety Instructions
Operating Instructions
About the operation of your freezer.
6
Built-In Lock
(on some models)
Keeps your frozen food supply secure.
Keep the key out of reach of children and away
from the freezer.
Sliding Basket
(on some models)
Keeps frequently-wanted foods within easy
reach; can be moved aside to make foods
below more readily accessible.
Some models have two or three baskets.
Defrost Water Drain
Up-front drain with hose adapter speeds
emptying of defrost water.
Interior Light
(on some models)
Turns on when the lid is opened; turns off
when the lid is closed.
Page 7

Customer ServiceTroubleshooting Tips
Operating Instructions
Safety Instructions
Installation Instructions
7
Defrosting instructions.
Do not use any electrical device in
defrosting your freezer.
Depending on the climate you live in,
humidity and usage, your freezer may need
defrosting only once or twice a year. If
possible, choose a time to defrost when
food supply is lowest.
The Fastest Way to Defrost
Defrosting can be done quickly and easily
by scraping freezer surfaces with a plastic
scraper or wooden spatula when frost is
more than 1/4″(6 mm) thick.
DO NOT use an ice pick or sharp edged
instrument as it may damage or scratch the
freezer.
For Periodic Complete Cleaning and Frost Removal
If frost is too thick or too hard to be
scraped, we suggest you do the following:
Remove power cord from outlet.
Remove all food from freezer. Food
may be temporarily stored in large
corrugated paper boxes, insulated
bags, towels or wrapped in newspapers
to preserve coldness.
Your freezer has a defrost water drain at
the front and a hose adapter
(connector) that is packaged in a plastic
bag with this Owner’s Manual. Attach
this hose connector to any common
garden hose. Remove the drain cap on
the front of the freezer and slip the
other end of the hose connector into
the drain plug.
After attaching the hose, remove the drain plug
inside the cabinet. Sponge remaining moisture
from the bottom of the freezer.
Defrosting will take less time if you have
the freezer lid open and remove large,
loose pieces of frost before they melt, or
add pans of hot water.
NOTE:
Water may drip from the back
flange of the lid cover during defrosting.
This is normal. Ice builds up in the lid
insulation when the lid is open for
adding or removing food and melts
during the defrosting operation.
After frost is completely removed, rinse
the inside of the freezer with a solution
of warm water and baking soda [about
one tablespoon (15 ml) of soda to each
quart (liter) of water]. Rinse with clean
water and wipe dry.
DO NOT
use harsh or
gritty cleaners in the interior.
WARNING: When cleaning in the vicinity of
electrical parts (lamps, switches, controls, etc.)
wring excess moisture out of sponge or cloth so
that it will be barely damp to prevent water or
liquid from getting into any electrical part and
causing a possible shock hazard.
Replace the drain plug inside the
cabinet and the cap on the defrost drain.
Fold over and dry the gasket on the
hinge side of the lid.
Plug in the freezer at the electrical
outlet. Turn the temperature control to
its regular position and return food to
the freezer.
8
7
6
5
4
3
2
1
Page 8

Customer Service Troubleshooting Tips
Operating Instructions
Safety Instructions
Installation Instructions
Customer Service Troubleshooting Tips
Installation Instructions
Safety Instructions
Operating Instructions
Customer Service Troubleshooting Tips
Installation Instructions
Safety Instructions
Operating Instructions
Care and cleaning of the freezer.
8
In Case of Extended Power Failure
■Keep freezer lid closed. Your freezer will
keep food frozen for 24 hours provided
warm air is not admitted.
■If freezer is out of operation for 24 hours
or more, add dry ice. Leave ice in large
pieces. Add more ice as required.
WARNING: Handling of dry ice can cause
freezing of the hands—gloves or other protection
is recommended.
■If dry ice is not available, move food to a
frozen food locker temporarily—until
power is restored.
Cleaning Your Freezer
■
Outside.
Protect the paint finish. The
finish on the outside of the freezer is a
high quality, baked-on paint finish. With
proper care, it will stay new-looking and
rust-free for years. Apply a coat of
appliance polish wax when the freezer is
new and then at least twice a year.
Appliance polish wax also works well to
remove tape residue from freezer
surfaces.
Keep the finish clean.
Wipe with a clean
cloth lightly dampened with appliance
polish wax or mild liquid dishwashing
detergent. Dry and polish with a clean,
soft cloth. Do not wipe the freezer with a
soiled dishwashing cloth or wet towel. Do
not use scouring pads, powdered cleaners,
bleach, or cleaners containing bleach.
CAUTION: Care should be taken in moving the
freezer away from the wall. All types of floor
coverings can be damaged, particularly cushioned
coverings and those with embossed surfaces.
■
Inside.
Clean the inside of your freezer at
least once a year. We recommend that the
freezer be unplugged before cleaning. If
this is not practical, wring excess moisture
out of sponge or cloth when cleaning in
the vicinity of switches, lights or controls.
Use warm water and baking soda
solution—about a tablespoon (15 ml)
of baking soda to a quart (liter) of water.
Rinse thoroughly with water and wipe dry.
Do not use cleaning powders or other
abrasive cleaners.
An open box of baking soda in the freezer
will absorb stale freezer odors. Change
the box every three months.
Page 9

Customer ServiceTroubleshooting Tips
Operating Instructions
Safety Instructions
Installation Instructions
Preparing for Vacation
To maintain freezer in operation during
vacations, be sure your house power is not
turned off. For sure protection of freezer
contents, you may want to ask a neighbor to
check the power supply and freezer
operation every 48 hours.
For extended vacations or absences, you
may prefer to move your frozen foods to a
storage locker temporarily. If your freezer is
to be left empty, disconnect power cord
plug from wall outlet. To prevent formation
of odors, place open box of baking soda in
freezer and leave freezer lid open.
When the freezer is not operating, it can be
left in an unheated house or room without
damage to cabinet or mechanism.
Preparing to Move
Disconnect the power cord plug from the
wall outlet. Remove foods, defrost and
clean the freezer.
Secure all loose items such as grille and
shelves by taping them securely in place to
prevent damage.
Be sure freezer stays in upright position
during actual moving and in van. The
freezer must be secured in van to prevent
movement. Protect outside of freezer with
blanket.
9
Page 10
Customer Service Troubleshooting Tips
Operating Instructions
Safety Instructions
Installation Instructions
Customer Service Troubleshooting Tips
Installation Instructions
Safety Instructions
Operating Instructions
Customer Service Troubleshooting Tips
Installation Instructions
Safety Instructions
Operating Instructions
Preparing to install the freezer.
Read these instructions completely and carefully.
Freezer Location
Your freezer should be conveniently located for
day-to-day use in a dry, well-ventilated room.
For most efficient operation, it should not be
located where the air temperature around the
freezer is higher than 110°F. (43°C.) or colder
than 32°F. (0°C.).
Be sure to install your freezer on a floor strong
enough to support it when it is fully loaded.
The freezer must be solidly positioned on the floor if
it is to function at its best. Shims may be used to
accomplish this wherever the floor is too uneven. If
the place selected for the freezer is damp or moist,
place 2 X 4’s (51 mm X 102 mm) under its entire
length to assure adequate support.
Clearances
Allow 3″(76 mm) on all sides for proper air
circulation.
Before you call for service…
Troubleshooting Tips
Save time and money! Review the charts on the following
pages first and you may not need to call for service.
Problem Possible Causes What To Do
Freezer does not
Freezer is unplugged. •Push the plug completely into the outlet.
operate
The fuse is blown/circuit • Replace fuse or reset the breaker.
breaker is tripped.
Freezer starts
Lid left open. •Check to see if package is holding lid open.
too frequently
Too frequent or too long
lid openings.
Temperature control • See
About the operation of your freezer.
set too cold.
Freezer operates
Lid left open. •Check to see if package is holding lid open.
too long
Too frequent or too long
lid openings.
Temperature control •See
About the operation of your freezer.
set too cold.
Inadequate air circulation •See
Preparing to install the freezer.
space around cabinet.
Noisy operation
Floor may be weak, causing •Placing 2 X 4’s (51 mm X 102 mm) under the length of
or cabinet vibrates
freezer to vibrate when the freezer will help support it and may reduce vibration.
compressor is on.
Cabinet is not positioned •Adjust legs. See
Preparing to install the freezer.
Or use
solidly on floor. shims for uneven floor.
10
Page 11

11
Problem Possible Causes What To Do
Freezer temperature
Lid left open. •Check to see if package is holding lid open.
too warm
Too frequent or too long
lid openings.
Temperature control not • See
About the operation of your freezer.
set at cold enough setting.
Foods defrosting
Freezer is unplugged. •Push the plug completely into the outlet.
The fuse is blown/circuit •Replace fuse or reset the breaker.
breaker is tripped.
Lid left open. •Check to see if package is holding lid open.
Too frequent or too long
lid openings.
Freezer temperature
Temperature control • See
About the operation of your freezer.
too cold
set too cold.
Moisture forms on
Not unusual during •Wipe surface dry.
outside of cabinet
periods of high humidity.
Interior light does
No power at outlet. •Replace fuse or reset the breaker.
not work
Freezer is unplugged. •Push the plug completely into the outlet.
(on some models)
Light bulb burned out. • Replace bulb.
Lid won’t fully
Package holding lid open.
close by itself
Slow starting time
Built-in overload protection.
after being off
Excessive frost
Lid left open. •Check to see if package is holding lid open.
build-up
Too frequent or too long
lid openings.
Not unusual during
periods of high humidity.
Alarm sounds
Freezer has not yet cooled •Set the temperature monitor to “ ” (off) temporarily
(on some models)
down after temperature control until new cold level is reached.
is turned to a colder setting.
A lot of frozen food added at •Set the temperature monitor to “ ” (off) temporarily
one time will raise freezer until temperature returns to normal for the selected
temperature. setting.
Customer ServiceTroubleshooting Tips
Operating Instructions
Safety Instructions
Installation Instructions
Page 12

12
Customer Service Troubleshooting Tips
Operating Instructions
Safety Instructions
Installation Instructions
Customer Service Troubleshooting Tips
Installation Instructions
Safety Instructions
Operating Instructions
Customer Service Troubleshooting Tips
Installation Instructions
Safety Instructions
Operating Instructions
Notes.
Page 13

13
General Electric Company
Warranty Registration Department
P.O. Box 34070
Louisville, KY 40232-4070
GE Service Protection Plus
™
GE, a name recognized worldwide for quality and dependability, offers you Service
Protection Plus
™
—comprehensive protection on all your appliances—No Matter
What Brand!
Benefits Include:
• Backed by GE
• All brands covered
• Unlimited service calls
• All parts and labor costs included
• No out-of-pocket expenses
• No hidden deductibles
• One 800 number to call
You will be completely satisfied with our service protection or you may request your money back
on the remaining value of your contract. No questions asked. It’s that simple.
Protect your refrigerator, dishwasher, washer and dryer, range, TV, VCR and much more—any brand!
Plus there’s no extra charge for emergency service and low monthly financing is available. Even icemaker
coverage and food spoilage protection is offered. You can rest easy knowing that all your valuable
household products are protected against expensive repairs.
Place your confidence in GE and call us in the U.S. toll-free at 800-626-2224
for more information.
*All brands covered, up to 20 years old, in the continental U.S.
We’ll Cover Any Appliance.
Anywhere. Anytime.*
Please place in envelope and mail to:
✁
Cut here
Page 14

Consumer Product Ownership Registration
Model Number Serial Number
Important
Mail
Today!
GE Appliances
General Electric Company
Louisville, Kentucky 40225
First
Name
Mr. ■■ Ms. ■■ Mrs. ■■ Miss ■■
Street
Address
City
State
Date Placed
In Use
Month
Day Year
Zip
Code
Apt. #
Last
Name
Phone
Number
_ _
Consumer Product Ownership Registration
Dear Customer:
Thank you for purchasing our product and thank you for placing your
confidence in us. We are proud to have you as a customer!
Follow these three steps to protect your new appliance investment:
Complete and
mail your Consumer
Product Ownership
Registration today.
Have the peace of
mind of knowing we
can contact you in
the unlikely event of
a safety modification.
After mailing
the registration
below, store this
document in a safe
place. It contains
information you
will need should
you require service.
Our service number
is 800-GE-CARES
(800-452-2737).
Read your Owner’s
Manual carefully.
It will help you
operate your new
appliance properly.
If you have questions,
or need more
information call the
GE Answer Center
®
800.626.2000.
Important: If you did not get a registration card with your product,
detach and return the form below to ensure that your
product is registered.
1
2 3
Model Number Serial Number
✁
Cut here
14
Page 15

Freezer Warranty
(For customers in the United States)
All warranty service provided by our Factory Service Centers,
or an authorized Customer Care
®
technician. For service,
call 800-GE-CARES.
Warranty may vary in Canada. See your approved GE dealer
for details.
For The Period Of: GE Will Replace, At No Charge To You:
One Year Any part
of the freezer which fails due to a defect in materials or workmanship.
From the date of the
During this
full one-year warranty,
GE will also provide,
free of charge,
all labor
original purchase
and in-home service to replace the defective part.
Five Years Any part of the sealed refrigerating system
(the compressor, condenser, evaporator
From the date of the
and all connecting tubing) which fails due to a defect in materials or workmanship.
original purchase
During this
five-year warranty,
GE will also provide,
free of charge,
all labor and
in-home service to replace the defective part.
One or Five Years Food which has spoiled because of a manufacturing defect
either in: a) any part of the
From the date of the
freezer within one year from the date of original purchase, or b) any part of the sealed
original purchase
refrigerating system within five years from the date of original purchase.
Not to exceed
(Limited warranty) the cumulative limit specified below.
Freezer Capacity Cumulative Limit
14.9 cu. ft. and smaller $100.00
15.0 cu. ft. and larger $150.00
Within 30 days after food spoilage occurs, you must provide satisfactory proof of the
spoilage
to a Factory Service Center, an authorized Customer Care® servicer or the
dealer from whom the freezer was purchased.
■Service trips to your home to teach you how to use the
product.
■Improper installation.
■Failure of the product if it is abused, misused, or used for
other than the intended purpose or used commercially.
■Food spoilage caused by:
a) Power interruption from the utility.
b)Blown fuse, open circuit breaker or other power
disconnection on the owner’s premises.
c) Freezer not operating because of abnormally low
electric power voltage or inadequate house wiring.
■Replacement of house fuses or resetting of circuit
breakers.
■Damage to the product caused by accident, fire, floods or
acts of God.
■Incidental or consequential damage to personal property
caused by possible defects with this appliance.
What GE Will Not Cover:
This warranty is extended to the original purchaser and any succeeding owner for products purchased for home
use within the USA. In Alaska, the warranty excludes the cost of shipping or service calls to your home.
Some states do not allow the exclusion or limitation of incidental or consequential damages. This warranty gives
you specific legal rights, and you may also have other rights which vary from state to state. To know what your
legal rights are, consult your local or state consumer affairs office or your state’s Attorney General.
Warrantor: General Electric Company. Louisville, KY 40225
Customer ServiceTroubleshooting Tips
Operating Instructions
Safety Instructions
Installation Instructions
15
Page 16

Customer Service Troubleshooting Tips
Operating Instructions
Safety Instructions
Installation Instructions
Customer Service Troubleshooting Tips
Installation Instructions
Safety Instructions
Operating Instructions
Customer Service Troubleshooting Tips
Installation Instructions
Safety Instructions
Operating Instructions
Printed in the United States
16
Service Telephone Numbers
GE Answer Center
®
In the U.S.: 800.626.2000
The GE Answer Center® is open 24 hours a day, 7 days a week.
In Canada,
contact: Manager, Consumer Relations, Camco Inc., Suite 310, 1 Factory Lane,
Moncton, N.B. E1C 9M3.
In-Home Repair Service
In the U.S.: 800-432-2737
Expert GE repair service is only a phone call away.
In Canada,
call 1-800-361-3400.
Special Needs Service
In the U.S.: 800.626.2000
GE offers, free of charge, a brochure to assist in planning a barrier-free kitchen for persons
with limited mobility.
In the U.S., call 800-TDD-GEAC (800-833-4322).
In Canada,
contact: Manager, Consumer Relations, Camco Inc., Suite 310, 1 Factory Lane,
Moncton, N.B. E1C 9M3.
Service Contracts
In the U.S.: 800-626-2224
Purchase a GE service contract while your warranty is still in effect and you’ll receive a
substantial discount. GE Consumer Service will still be there after your warranty expires.
In Canada,
call 1-800-461-3636.
Parts and Accessories
In the U.S.: 800-626-2002
Individuals qualified to service their own appliances can have parts or accessories sent directly
to their homes (VISA, MasterCard and Discover cards are accepted).
Instructions contained in this manual cover procedures to be performed by any user. Other servicing
generally should be referred to qualified service personnel. Caution must be exercised, since
improper servicing may cause unsafe operation.
Customers
in Canada
should consult the yellow pages for the nearest Camco service center.
Service Satisfaction
If you are not satisfied with the service you receive from GE:
First,
contact the people who serviced your appliance.
Next,
if you are still not pleased,
in the U.S.,
write all the details—including your phone number—
to: Manager, Consumer Relations, GE Appliances, Appliance Park, Louisville, KY 40225; or,
in Canada,
to Director, Consumer Relations, Camco Inc., Suite 310, 1 Factory Lane, Moncton,
N.B. E1C 9M3.
Finally,
if your problem is still not resolved, write Major Appliance Consumer Action Program,
20 North Wacker Drive, Chicago, IL 60606 (U.S. only).
Page 17

Congélateurs
Coffres
Pièce NO162D1522P005 Pub. NO49-6945 1-34485-002
Modèles:
FH5
FH7
FH10
FH15
FH22
Manuel d’utilisation
Électroménagers GE
Page 18

Félicitations!
Désormais vous faites partie de la famille GE.
Bienvenue dans la famille GE. Nous sommes fiers de
la qualité de nos produits et de la fiabilité de notre
service après-vente. Vous le constaterez dans le
présent manuel, facile à utiliser, et dans la voix
amicale de notre personnel du service à la clientèle.
Mais, surtout, vous le constaterez chaque fois que
vous vous servirez de votre congélateur. C’est
important, car votre nouveau congélateur fera partie
de votre famille pendant des années. Et nous
espérons que vous ferez partie de la nôtre pendant
longtemps aussi.
Nous vous remercions de votre achat GE, et espérons
qu’à l’avenir vous penserez à nous chaque fois que
vous aurez besoin d’un électroménager de qualité.
GE et vous, un partenariat de service.
Mesures de sécurité
Mesures de sécurité . . . . . . . . .3
Cordons prolongateurs . . . . . . .3
Raccordement électrique . . . . .4
Fiche d’adaptation . . . . . . . . . .4
Fonctionnement
Mise en marche
du congélateur . . . . . . . . . . . . .5
Caractéristiques . . . . . . . . . .5, 6
Directives de dégivrage . . . . . .7
Entretien et nettoyage . . . . .8, 9
Installation
Préparatifs pour l’installation
du congélateur . . . . . . . . . . . .10
Conseils de dépannage
Avant d’appeler
un réparateur . . . . . . . . . .10, 11
Service à la clientèle
Garantie . . . . . . . . . . . . . . . . .15
Numéros de service . . . . . . . .16
À CONSERVER SOIGNEUSEMENT
Transcrivez les numéros de modèle et de série ici.
#
#
Ils sont inscrits sur une plaque située à l’extérieur, au centre de
l’arrière du congélateur.
Agrafez ici votre facture ou une copie de votre chèque.
Pour bénéficier de réparations sous garantie, il faut fournir une
preuve de la date d’achat d’origine.
Vous y trouverez de nombreux conseils pour l’utilisation et
l’entretien de votre congélateur. Ces quelques mesures préventives
vous permettront d’économiser du temps et de l’argent, et, ainsi, de
prolonger la vie de votre congélateur.
Vous trouverez des solutions aux problèmes courants que vous
pourriez rencontrer dans la section
Avant d’appeler un réparateur.
Et, en consultant d’abord nos
Conseils de dépannage,
vous pourrez
peut-être éviter de faire appel à un réparateur.
LISEZ VOTRE MANUEL
SI VOUS AVEZ BESOIN DE SERVICE
Si vous avez besoin de service, vous savez que vous n’avez qu’à
nous téléphoner. Vous trouverez à la fin du présent manuel les
numéros sans frais du service à la clientèle.
Aux États-Unis,
vous
pouvez appeler 24 heures par jour, 7 jours par semaine au GE
Answer Center®, 800.626.2000.
Au Canada,
appelez le
1-800-361-3400.
2
Service à la clientèle Conseils de dépannage
Fonctionnement
Mesures de sécurité
Installation
Page 19

MESURES DE SÉCURITÉ IMPORTANTES.
LISEZ D’ABORD TOUTES LES DIRECTIVES.
AVERTISSEMENT!
N’utilisez cet électroménager que pour l’usage auquel il est destiné, comme expliqué dans le présent manuel.
MESURES DE SÉCURITÉ
Lorsque vous utilisez un appareil électrique, observez toujours les mesures de sécurité de base,
y compris les suivantes.
■
■Installez le congélateur conformément aux
directives d’installation avant de l’utiliser.
■
■Le congélateur le devrait pas être mis dans un
renfoncement ni encastré. Il est conçu seulement
pour une installation non-encastré.
■
■Ne laissez pas les enfants grimper, s’asseoir, se
tenir debout ni se pendre aux clayettes du
congélateur. Ils pourraient endommager le
congélateur et se blesser gravement.
■
■Après la mise en route du congélateur, ne
touchez pas les surfaces froides de celui-ci, surtout
si vous avez les mains humides ou mouillées. La
peau risque d’adhérer à ces surfaces très froides.
■
■N’entreposez et n’utilisez pas d’essence ou autres
vapeurs et liquides inflammables à proximité de cet
appareil ou de tout autre appareil électroménager.
■
■Débranchez votre congélateur avant de le nettoyer
ou de le réparer, et avant de remplacer l’ampoule.
REMARQUE : Nous vous recommandons vivement de confier
toute réparation à un technicien qualifié.
■
■Lorsque vous réglez la commande sur 0 (éteint),
le courant alimentant le circuit électrique de
l’ampoule n’est pas coupé sur les modèles avec
une lampe intérieure.
■
■N’utilisez jamais un dispositif électrique ni un
ustensile tranchant pour dégivrer votre congélateur.
■
■Ne recongelez pas les aliments surgelés qui ont
complètement dégelé.
■
■Soyez prudent lorsque vous enlevez la porte d’un
congélateur. Soyez particulièrement prudent
lorsque vous enlevez le couvercle d’un
congélateur coffre puisque la plupart de ceux-ci
sont à ressort.
Vous trouverez des directives pour enlever le
couvercle de votre congélateur à l’arrière de
l’appareil.
Communiquez avec un représentant du fabricant
pour connaître la meilleure méthode permettant
d’enlever le couvercle.
IMPORTANT : COMMENT VOUS DÉBARRASSER
CONVENABLEMENT DE VOTRE CONGÉLATEUR
Les enfants pris au piège ou morts d’asphyxie sont
toujours d’actualité. Les réfrigérateurs et congélateurs
abandonnés sont toujours aussi dangereux, même si
on n’attend que «quelques jours» pour s’en
débarrasser. Si vous ne gardez pas votre ancien
réfrigérateur ou congélateur, veuillez suivre les
directives ci-dessous afin de prévenir les accidents.
Avant de vous débarrasser de votre ancien
réfrigérateur ou congélateur :
■Démontez les portes.
■Laissez les clayettes en place afin d’empêcher les
enfants de grimper à l’intérieur.
Se débarrasser du CFC
Votre ancien congélateur a un système de
refroidissement qui a utilisé les CFC
(chlorofluorocarbones). Les CFC sont jugés
nocifs pour l’ozone stratosphérique.
Si vous vous débarrassez de votre ancien
congélateur, assurez-vous que le frigorigène avec
CFC soit enlevé correctement par un technicien
qualifié. Si vous libérez intentionnellement ce
frigorigène avec CFC vous pouvez être soumis aux
contraventions et à l’emprisonnement sous
provisions du Clean Air Act fédéral.
CORDONS PROLONGATEURS
Nous vous recommandons fortement de ne pas utiliser de cordons prolongateurs à cause des risques
potentiels qu’ils présentent dans certaines conditions.
Toutefois si vous décidez d’utiliser tout de même un cordon prolongateur, il est absolument nécessaire
qu’il s’agisse d’un cordon à 3 fils avec mise à la terre pour appareils électroménagers homologué UL
(aux États-Unis) ou homologué CSA (au Canada), pourvu d’une fiche et d’une prise mises à la terre
de 15 ampères (minimum) et de 120 volts.
Service à la clientèleConseils de dépannage
Fonctionnement
Mesures de sécurité
Installation
3
Page 20

4
MESURES DE SÉCURITÉ IMPORTANTES.
LISEZ D’ABORD TOUTES LES DIRECTIVES.
AVERTISSEMENT!
RACCORDEMENT ÉLECTRIQUE
Ne coupez ni retirez en aucun cas la troisième broche (mise à la terre) de la fiche du cordon
d’alimentation. Pour votre sécurité, cet appareil doit être correctement mis à la terre.
Le cordon d’alimentation de cet appareil est muni
d’une fiche à 3 broches (mise à la terre) qui se
branche dans une prise murale ordinaire à 3
alvéoles (mise à la terre) pour réduire au minimum
les risques de chocs électriques.
Faites examiner la prise de courant et le circuit par
un électricien qualifié pour vous assurer que la prise
est correctement mise à la terre.
Si la prise murale est du type standard à 2 alvéoles, il
vous incombe de la faire remplacer par une prise à 3
alvéoles correctement mise à la terre.
Le congélateur doit toujours être branché dans sa
propre prise de courant, dont la tension nominale est
identique à celle indiquée sur la plaque signalétique.
Cette précaution est recommandée pour garantir
un rendement optimum et éviter une surcharge des
circuits électriques de la résidence, ce qui pourrait
créer un risque d’incendie par surchauffe des fils.
Ne débranchez jamais le congélateur en tirant sur le
cordon d’alimentation. Saisissez fermement la fiche
du cordon et tirez droit pour la retirer de la prise.
Réparez ou remplacez immédiatement tout cordon
effiloché ou endommagé. N’utilisez pas un cordon
fendillé ou présentant des signes d’usure.
Lorsque vous déplacez votre congélateur du mur,
faites attention de ne pas le faire rouler sur le cordon
d’alimentation afin de ne pas l’endommager.
FICHE D’ADAPTATION
(Fiches d’adaptation non permises au Canada)
Nous vous recommandons fortement de ne pas utiliser une fiche d’adaptation à cause des risques
potentiels qu’elle présente dans certaines circonstances.
Toutefois, si vous décidez d’utiliser tout de même
une fiche d’adaptation, vous pouvez effectuer un
raccordement temporaire,
si les codes locaux le
permettent, dans une prise de courant à 2 alvéoles
adéquatement mise à la terre en utilisant une fiche
d’adaptation homologuée UL, en vente dans la
plupart des quincailleries.
La fente la plus longue de la fiche doit être alignée
avec la fente la plus longue de la prise murale afin
d’assurer la polarité appropriée pour le
branchement du cordon d’alimentation.
Lorsque vous débranchez le cordon d’alimentation
de la fiche d’adaptation, saisissez toujours la fiche
d’une main pendant que vous tirez sur la fiche du
cordon d’alimentation de l’autre. Sinon,
la borne de mise à la terre de la fiche d’adaptation
risque de casser avec le temps.
Si la borne de mise à la terre de la fiche casse,
N’UTILISEZPAS
l’appareil tant qu’une mise à la terre
adéquate n’aura pas été rétablie.
Le fait de fixer la borne de mise à la terre de la fiche
d’adaptation à la plaque de la prise de courant n’assure
pas automatiquement la mise à la terre de l’appareil. Il
faut que la vis soit en métal, non isolée, et que la prise de
courant soit mise à la terre par l’entremise du câblage de
la résidence. Faites vérifier le circuit par un électricien
qualifié pour vous assurer que la prise est adéquatement
mise à la terre.
Veuillez lire et suivre attentivement ces mesures de sécurité.
CONSERVEZ CES DIRECTIVES
Service à la clientèle Conseils de dépannage
Fonctionnement
Mesures de sécurité
Installation
Page 21

Fonctionnement de votre congélateur.
Mise en marche du congélateur
Nettoyez l’intérieur du congélateur avec une solution de bicarbonate de soude et d’eau
(voir la section
Entretien et nettoyage
).
Si le couvercle a été enlevé, assurez-vous que tous les fils ont été rebranchés.
Branchez le cordon d’alimentation dans une prise de courant.
Réglez le moniteur de température (sur certains modèles) à “ ” (éteint).
Réglez la commande de température à
4.
C’est le réglage normal pour assurer une
congélation sécuritaire à long terme. Pour obtenir une température plus basse,
réglez la commande à un chiffre plus élevé.
Laissez fonctionner le congélateur pendant au moins deux heures avant d’y ranger des aliments.
Réglez le moniteur de température (sur certains modèles) à “1” (marche).
7
6
5
4
3
2
1
5
Moniteur de température
(sur certains modèles)
Un signal sonore se fait entendre lorsque la
température à l’intérieur du congélateur
augmente de 12 °F (-11 °C.) ou est
supérieur à la température normale du
réglage choisi. Ce signal d’alarme, qui se
trouve du côté inférieur droit du
congélateur, à proximité de la commande
de température, est commandé par un
interrupteur à 3 positions.
Le réglage “ ” empêche le signal sonore
de se faire entendre lorsque la température
est élevée dans le congélateur (pendant le
refroidissement, lors du dégivrage ou
pendant la mise en marche initiale).
Le réglage “√” permet au signal sonore de
se faire entendre, peu importe la
température. Vérifiez le système d’alarme
régulièrement—au moins une fois par mois.
Le réglage “1” est le réglage normal lorsque
vous utilisez le congélateur. Assurez-vous de
ramener l’interrupteur à “1” lorsque le
congélateur a refroidi après le dégivrage.
Le signal sonore peut se faire entendre
lorsque vous réglez la commande à une
température beaucoup plus basse, par
exemple lorsque vous passez de la position
2 à 5.
Il peut aussi se faire entendre lorsque
vous rajoutez d’un seul coup une grande
quantité d’aliments non congelés, ce qui
provoque l’augmentation de la
température dans le congélateur.
4
5
6
7
0
1
2
3
1
1
4
7
1
Commande de température
Le réglage de la température de
congélation s’effectue en plaçant la
commande à une position variant entre
1
et 7 (température la plus basse).
Normalement, vous obtenez une
température de congélation sécuritaire
en réglant la commande à
4.
Lorsque vous réglez la commande de
température complètement vers la gauche
ou après le réglage 0 jusqu’à ce que vous
entendiez un déclic, vous coupez
l’alimentation électrique du congélateur.
Sur certains modèles, la température est
préréglée et il n’y a pas de commande de
température.
Service à la clientèleConseils de dépannage
Fonctionnement
Mesures de sécurité
Installation
4
3
2
1
5
6
7
0
Page 22

Fonctionnement de votre congélateur.
6
Serrure intégrée
(sur certains modèles)
Pour conserver en toute sécurité votre
provision d’aliments congelés.
Gardez la clé hors de portée des enfants et loin
du congélateur.
Panier coulissant
(sur certains modèles)
Conservez à portée de la main les aliments
que vous consommez fréquemment; peut
être déplacé sur les côtés pour avoir
facilement accès aux aliments qui se
trouvent au-dessous.
Certains modèles possèdent deux ou trois
paniers.
Raccord pour l’eau de dégivrage
Le raccord installé à l’avant de l’appareil est
doté d’un adaptateur pour boyau qui
accélère la vidange de l’eau de dégivrage.
Lampe intérieure
(sur certains modèles)
S’allume lorsque vous ouvrez le couvercle;
s’éteint lorsque vous refermez le couvercle.
Service à la clientèle Conseils de dépannage
Fonctionnement
Mesures de sécurité
Installation
Page 23

Directives de dégivrage.
N’utilisez pas de dispositifs électriques
pour dégivrer votre congélateur.
Selon le climat dans lequel vous vivez,
l’humidité de l’air et l’utilisation de
l’appareil, il peut être nécessaire de
dégivrer votre congélateur seulement une
ou deux fois par année. Si possible,
choisissez un moment où votre provision
d’aliments est à son niveau le plus bas.
La méthode de dégivrage la plus rapide
Le dégivrage peut s’effectuer rapidement et
facilement en grattant les surfaces du
congélateur à l’aide d’un grattoir en
plastique ou d’une spatule en bois, lorsque
le givre atteint plus de 1/4 po (6 mm)
d’épaisseur.
N’utilisez PAS un pic à glace ou un objet
tranchant car vous risquez d’endommager ou
d’égratigner le congélateur.
Pour un dégivrage et un nettoyage périodiques et complets
Lorsque le givre est trop épais ou trop
difficile à enlever, voici la marche à suivre :
Débranchez le cordon d’alimentation
de la prise de courant.
Retirez tous les aliments du congélateur.
Placez-les temporairement dans de
grandes boîtes en carton ondulé ou des
sacs isolés, ou enveloppez-les dans des
journaux ou des serviettes pour qu’ils
demeurent froids.
Votre congélateur est doté à l’avant
d’un raccord pour l’eau de dégivrage,
et vous trouverez dans un sac de
plastique fourni avec le présent manuel
d’utilisation un adaptateur pour boyau
(connecteur). Installez ce connecteur
sur un boyau d’arrosage. Enlevez le
capuchon du raccord à l’avant du
congélateur et insérez l’autre extrémité
du connecteur dans le raccord du
congélateur.
Après avoir installé le boyau, enlevez le
capuchon à l’intérieur de l’appareil. Épongez
l’eau qui reste dans le fond du congélateur.
Le dégivrage sera moins long si vous
laissez le couvercle de l’appareil ouvert
et si vous enlevez les gros morceaux de
givre avant qu’ils fondent, ou si vous
placez dans l’appareil des récipients
d’eau bouillante.
REMARQUE :
De l’eau peut dégoutter du
rebord arrière du couvercle pendant le
dégivrage. Ce phénomène est normal.
De la glace se forme dans l’isolant du
couvercle lorsque celui-ci est ouvert
pour placer ou enlever des aliments
dans le congélateur, et cette glace fond
pendant le processus de dégivrage.
Après avoir complètement enlevé le
givre, rincez l’intérieur du congélateur
avec une solution d’eau chaude et de
bicarbonate de soude (environ 1
cuillère à soupe de bicarbonate par
pinte d’eau). Rincez à l’eau claire et
essuyez. N’utilisez
PAS
de produits
nettoyants abrasifs ou granuleux à
l’intérieur du congélateur.
MISE EN GARDE : Lorsque vous nettoyez à
proximité de composants électriques (lampes,
interrupteurs, commandes, etc.), essorez bien
votre éponge ou votre chiffon pour qu’il soit
simplement humide afin d’empêcher l’infiltration
d’eau ou de liquide dans ces composants
électriques et éviter tout choc électrique.
Remettez en place le capuchon à
l’intérieur de l’appareil, ainsi que le
capuchon du raccord pour l’eau de
dégivrage.
Repliez et séchez le joint du côté des
charnières du couvercle.
Branchez le cordon d’alimentation du
congélateur dans une prise de courant.
Réglez la commande de température à
son réglage habituel et remettez les
aliments dans le congélateur.
8
7
6
5
4
3
2
1
Service à la clientèleConseils de dépannage
Fonctionnement
Mesures de sécurité
Installation
7
Page 24

8
Service à la clientèle Conseils de dépannage
Fonctionnement
Mesures de sécurité
Installation
Entretien et nettoyage du congélateur.
Nettoyage de votre congélateur
■
Extérieur .
Protégez le fini de l’appareil. La
carrosserie du congélateur est recouverte
d’une peinture de haute qualité, cuite au
four. Si vous l’entretenez de la façon
appropriée, le fini ne rouillera pas et
conservera son aspect neuf pendant des
années. Appliquez une couche de cire
pour électroménagers lorsque vous
recevez votre appareil et, par la suite, au
moins deux fois par année. La cire pour
électroménagers se révèle également
efficace pour enlever les résidus de ruban
gommé sur les surfaces du congélateur.
Gardez le fini propre.
Essuyez-le avec un
linge propre légèrement humecté de cire
pour électroménagers ou de détergent
liquide doux pour la vaisselle. Essuyez et
polissez avec un linge doux et propre.
N’essuyez pas le congélateur avec un
linge à vaisselle sale ou une serviette
humide. N’utilisez pas de tampons à
récurer, de produits nettoyants en
poudre, de javellisants ou de produits
nettoyants contenant du javellisant.
ATTENTION : Faites attention lorsque vous
éloignez le congélateur du mur, car vous risquez
d’endommager le revêtement de sol, plus
particulièrement ceux qui sont coussinés ou dont
la surface est gaufrée.
■
Intérieur.
Nettoyez l’intérieur de votre
congélateur au moins une fois par année.
Nous vous recommandons de débrancher
l’appareil avant le nettoyage. Si cela est trop
difficile, tordez bien votre linge ou votre
éponge pour enlever l’excès d’eau lorsque
vous nettoyez autour des interrupteurs, des
lampes et des commandes.
Nettoyez à l’aide d’une solution d’eau
chaude et de bicarbonate de soude—
environ 1 cuillère à soupe (15 ml) de
bicarbonate par pinte (litre) d’eau.
Rincez à fond avec de l’eau et essuyez.
N’utilisez pas de poudres à récurer ni de
produits nettoyants abrasifs.
Laissez une boîte ouverte de bicarbonate
de soude dans le congélateur pour
absorber les odeurs. Remplacez la boîte
tous les trois mois.
Lors d’une panne de courant prolongée
■Gardez le couvercle du congélateur
fermé. Votre congélateur peut garder les
aliments congelés pendant 24 heures
lorsque le couvercle n’est pas ouvert.
■Si le congélateur ne fonctionne pas
pendant plus de 24 heures, ajoutez de la
glace sèche. Placez de gros morceaux de
glace dans l’appareil. Ajoutez-en
davantage au besoin.
MISE EN GARDE : La manipulation de glace
sèche peut causer des gelures aux mains—il est
recommandé de porter des gants ou autre
équipement de protection.
■Si vous ne disposez pas de glace sèche,
enlevez les aliments et placez-les
temporairement dans une armoire pour
produits congelés jusqu’à ce que le
courant soit rétabli.
Page 25

9
Service à la clientèleConseils de dépannage
Fonctionnement
Mesures de sécurité
Installation
Lorsque vous partez en vacances
Pour assurer le bon fonctionnement de
votre congélateur pendant vos vacances,
assurez-vous que l’alimentation secteur de
votre résidence n’est pas coupée. Pour
assurer la protection des denrées dans votre
congélateur, vous pouvez demander à un
voisin de vérifier toutes les 48 heures
l’alimentation électrique et le
fonctionnement de votre congélateur.
Lorsque vous vous absentez pendant une
période prolongée, il peut être préférable
de ranger temporairement vos aliments
congelés dans une armoire de rangement
pour produits congelés. Si vous laissez votre
congélateur vide, débranchez le cordon
d’alimentation de la prise de courant. Pour
prévenir la formation d’odeurs, placez une
boîte ouverte de bicarbonate de soude dans
le congélateur et laissez le couvercle de
l’appareil ouvert.
Lorsque le congélateur ne fonctionne pas,
il peut être laissé dans une pièce non
chauffée sans que l’appareil ou son
mécanisme ne subissent de dommages.
Déménagement
Débranchez le cordon d’alimentation.
Retirez tous les aliments, faites dégivrer
puis nettoyez le congélateur.
Fixez toutes les pièces mobiles, comme la
grille et les clayettes, en les immobilisant à
l’aide de ruban gommé afin d’éviter de les
endommager.
Assurez-vous que le congélateur demeure
en position verticale pendant le
déménagement et dans le camion.
L’appareil doit être immobilisé dans le
camion. Protégez l’appareil à l’aide d’une
couverture.
Page 26

Préparatifs pour l’installation du congélateur.
Veuillez lire toutes les directives attentivement.
Emplacement du congélateur
Votre congélateur doit être installé à un endroit
pratique, en vue d’une utilisation quotidienne, dans
une pièce bien aérée où l’air est sec.
Pour qu’il fonctionne efficacement, il ne doit
pas être installé dans une pièce où la température
sera supérieure à 110 °F (43 °C.)ou inférieure à
32 °F. (0 °C.).
Assurez-vous que le plancher sur lequel sera installé
votre congélateur est suffisamment solide pour le
supporter lorsqu’il est plein.
Pour qu’il puisse offrir un rendement optimum, le
congélateur doit reposer solidement sur le sol. Vous
pouvez installer des cales lorsque le sol est inégal. Si
l’endroit choisi pour l’installation du congélateur
est humide ou mouillé, installez des morceaux de
bois de 2 po x 4 po (51 mm X 102 mm) sous
l’appareil, sur toute la longueur, pour assurer un
support adéquat.
Dégagements
Pour une circulation d’air adéquate, prévoyez
un dégagement de 3 po (76 mm) tout autour
de l’appareil.
Avant d’appeler un réparateur…
Conseils de dépannage—Économisez du temps et de l’argent!
Consultez d’abord les tableaux qui suivent et vous pourrez peutêtre éviter de faire appel à un réparateur.
Problème Causes possibles Correctifs
Le congélateur ne
Le congélateur n’est pas branché. •Enfoncez bien la fiche dans la prise murale.
fonctionne pas
Le fusible est grillé/le •Remplacez le fusible ou réenclenchez le disjoncteur.
disjoncteur est déclenché.
Le congélateur se met en
Couvercle laissé ouvert. •Vérifiez qu’il n’y a pas un paquet qui empêche le
marche trop fréquemment
couvercle de se fermer.
Ouverture trop fréquente ou
trop prolongée du couvercle.
Commande réglée à une •Consultez
Fonctionnement de votre congélateur.
température trop basse.
Le congélateur
Couvercle laissé ouvert. •Vérifiez qu’il n’y a pas un paquet qui empêche le
fonctionne
couvercle de se fermer.
trop longtemps
Ouverture trop fréquente ou
trop prolongée du couvercle.
Commande réglée à une •Consultez
Fonctionnement de votre congélateur.
température trop basse.
Circulation d’air inadéquate •Consultez
Préparatifs pour l’installation du congélateur.
autour de l’appareil.
T empératur e trop basse
Commande réglée à une •Consultez
Fonctionnement de votre congélateur.
dans le congélateur
température trop basse.
10
Service à la clientèle Conseils de dépannage
Fonctionnement
Mesures de sécurité
Installation
Page 27

Problème Causes possibles Correctifs
Fonctionnement bruyant
Le plancher peut manquer de •Placez des morceaux de 2 po X 4 po (51 mm X 102 mm)
ou vibration de l’appareil
solidité, ce qui fait vibrer le sur la longueur, sous le congélateur, afin de mieux le
congélateur lorsque le soutenir et peut-être réduire les vibrations.
compresseur fonctionne.
L’appareil ne repose pas •Réglez les pieds de nivellement. Consultez
Préparatifs
solidement sur le sol.
pour l’installation du congélateur
ou installez des cales
pour compenser les inégalités du sol.
T empérature trop élevée
Couvercle laissé ouvert. •Vérifiez qu’il n’y a pas un paquet qui empêche le
dans le congélateur
couvercle de se fermer.
Ouverture trop fréquente ou
trop prolongée du couvercle.
La commande n’est pas réglé •Consultez
Fonctionnement de votre congélateur.
à une température assez basse.
Les aliments dégèlent
Le congélateur n’est pas branché. •Enfoncez bien la fiche dans la prise murale.
Le fusible est grillé/le •Remplacez le fusible ou réenclenchez le disjoncteur.
disjoncteur est déclenché.
Couvercle laissé ouvert. •Vérifiez qu’il n’y a pas un paquet qui empêche le
couvercle de se fermer.
Ouverture trop fréquente ou
trop prolongée du couvercle.
De la condensation se
Phénomène normal par •Essuyez bien l’extérieur.
forme sur l’extérieur
temps très humide.
de l’appareil
La lampe intérieure
Pas de courant à la prise. •Remplacez le fusible ou réenclenchez le disjoncteur.
ne s’allume pas
Le congélateur n’est pas branché. •Branchez la fiche comme il faut dans la prise de courant.
(sur certains modèles)
L’ampoule est grillée. • Remplacez l’ampoule.
Le couvercle ne se ferme
Il faut régler les pieds •Consultez
Préparatifs pour l’installation du congélateur.
pas complètement
de nivellement.
de lui-même
Un paquet empêche le couvercle
de se fermer.
Remise en marche lente
Dispositif intégré de
après une période de
protection contre
non-fonctionnement
les surcharges.
Accumulation excessive
Couvercle laissé ouvert. •Vérifiez qu’il n’y a pas un paquet qui empêche le
de givre
couvercle de se fermer.
Ouverture trop fréquente ou
trop prolongée du couvercle.
Phénomène normal par
temps très humide.
Le signal sonore se
La température n’a pas •Réglez temporairement le moniteur de température à
fait entendre
suffisamment baissé après “ ” (éteint) jusqu’à ce que la température
(sur certains modèles)
réglage de la commande correspondant au nouveau réglage soit atteinte.
à une température plus basse.
L’ajout d’un seul coup d’une •Réglez temporairement le moniteur de température à
grande quantité d’aliments fera “ ” (éteint) jusqu’à ce que la température revienne à la
monter la température dans normale selon le réglage choisi.
le congélateur.
Service à la clientèleConseils de dépannage
Fonctionnement
Mesures de sécurité
Installation
11
Page 28

12
Notes.
Service à la clientèle Conseils de dépannage
Fonctionnement
Mesures de sécurité
Installation
Page 29

13
Notes.
Service à la clientèleConseils de dépannage
Fonctionnement
Mesures de sécurité
Installation
Page 30

14
Notes
Service à la clientèle Conseils de dépannage
Fonctionnement
Mesures de sécurité
Installation
Page 31

Pour une période de : GE remplacera gratuitement :
Un an Toute pièce
du congélateur qui se révèle défectueuse en raison d’un vice de matières ou de
À compter de la date
fabrication. Pendant cette
garantie complète d’un an,
GE fournira également,
gratuitement,
tous
d’achat d’origine
les frais de main d’œuvre et du déplacement du réparateur à votre domicile pour remplacer
la pièce défectueuse.
Cinq ans Toute pièce du système scellé de réfrigération
(le compresseur, le condenseur, l’évaporateur
À compter de la date
et la tuyauterie d’interconnexion) qui se révèle défectueuse en raison d’un vice de matières
d’achat d’origine
ou de fabrication. Pendant cette
garantie de cinq ans,
GE fournira également,
gratuitement,
tous les frais de main d’œuvre et du déplacement du réparateur à votre domicile pour
remplacer la pièce défectueuse.
Un ou cinq ans Les aliments qui se sont abîmés suite à un défaut de fabrication
de soit : a)toute pièce du
À compter de la date
congélateur pendant un an à compter de la date d’achat d’origine, soit b) toute pièce du
d’achat d’origine
système scellé de réfrigération pendant cinq ans à compter de la date d’achat d’origine.
(Garantie limitée) Les sommes remboursées ne dépasseront pas les limites cumulatives indiquées ci-dessous.
Capacité du congélateur Limite cumulative
14,9 pi2et moins 100,00 $ US
15,0 pi2et plus 150,00 $ US
Dans le 30 jours qui suivent une perte alimentaire, vous devez présenter une preuve satisfaisante
de cette perte
à l’un des nos centres de réparation, à l’un de nos réparateurs Customer Care®
autorisés ou au marchand qui vous a vendu le congélateur.
Garantie du congélateur
(Pour la clientèle aux États-Unis)
Toutes les réparations sous garantie seront effectuées par
nos centres de réparation ou nos réparateurs Customer Care
®
autorisés. Appelez le 800-GE-CARES.
La présente garantie peut varier au Canada. Renseignez-vous
auprès de votre marchand GE agrée.
■Toute visite à votre domicile pour vous expliquer le
fonctionnement de l’appareil.
■Une installation inadéquate.
■Toute défectuosité du produit lorsqu’il est utilisé de façon
abusive, ou à des fins commerciales ou à toute autre fin
que celle pour laquelle il a été conçu.
■Le remplacement des fusibles ou le réenclenchement des
disjoncteurs.
■Tout dommage au produit attribuable à un accident, un
incendie, une inondation ou un cas de force majeure.
■Toute perte alimentaire provoquée par :
a) Une interruption de l’alimentation électrique de la
maison par la compagnie d’électricité .
b)Un fusible grillé, un disjoncteur qui s’est déclenchée,
ou toute autre coupure d’électricité sur le lieu
d’habitation.
c) Une panne du congélateur déclenchée par une tension
nominale en-dessous de la normale ou une insuffisance
des circuits électriques de l’habitation.
■Tout dommage direct ou indirect à la propriété
personnelle attribuable à une défectuosité éventuelle
de l’appareil.
Ce que GE ne couvrira pas :
La présente garantie est offerte à l’acheteur initial ainsi qu’à tout acheteur subséquent d’un produit acheté à
des fins domestiques à l’intérieur des États-Unis. En Alaska, la garantie ne comprend pas les frais d’expédition
du produit à l’atelier ni les frais de déplacement du réparateur à votre domicile.
Dans certains états, il est interdit d’exclure ou de limiter les dommages directs ou indirects. La présente garantie
vous confère des droits juridiques spécifiques. Vous pouvez bénéficier d’autres droits qui varient d’un état à
l’autre. Pour connaître vos droits juridiques, prenez contact avec le bureau des relations avec les consommateurs
de votre région ou votre état, ou avec le procureur général de votre état.
Garant : General Electric Company. Louisville, KY 40225
Service à la clientèleConseils de dépannage
Fonctionnement
Mesures de sécurité
Installation
15
Page 32

Imprimé aux États-Unis
16
Service à la clientèle Conseils de dépannage
Fonctionnement
Mesures de sécurité
Installation
Numéros de service.
GE Answer Center
®
Aux États-Unis : 800.626.2000
Notre service d’information est ouvert 24 heures par jour, 7 jours par semaine.
Au Canada,
écrivez au Directeur, Relations avec les consommateurs, Camco Inc., Bureau 310,
1 Factory Lane, Moncton, N.B. E1C 9M3.
Réparations à domicile
Aux États-Unis : 800-432-2737
Pour faire réparer votre électroménager GE, il suffit de nous téléphoner.
Au Canada,
appelez le 1-800-361-3400.
Pour les besoins particuliers
Aux États-Unis : 800.626.2000
Sur demande, GE peut fournir une brochure sur l’aménagement d’une cuisine pour les
personnes à mobilité réduite.
Aux États-Unis, appelez le 800-TDD-GEAC (800-833-4322).
Au Canada,
écrivez au Directeur, Relations avec les consommateurs, Camco Inc., Bureau 310,
1 Factory Lane, Moncton, N.B. E1C 9M3.
Contrats d’entretien
Aux États-Unis : 800-626-2224
Achetez un contrat d’entretien GE avant que votre garantie n’expire et bénéficiez d’un rabais
substantiel. Ainsi le service après-vente GE sera toujours là après expiration de la garantie.
Au Canada,
appelez le 1-800-461-3636.
Pièces et accessoires
Aux États-Unis : 800-626-2002
Ceux qui désirent réparer eux-mêmes leurs électroménagers peuvent recevoir pièces et
accessoires directement à la maison (cartes VISA, MasterCard et Discover acceptées).
Les directives stipulées dans le présent manuel peuvent être effectuées par n’importe quel utilisateur.
Les autres réparations doivent généralement être effectuées par un technicien qualifié. Soyez prudent,
car une réparation inadéquate peut affecter le fonctionnement sécuritaire de l’appareil.
Les clients
au Canada
devraient consulter les pages jaunes pour connaître la succursale Camco la
plus près.
Un service satisfaisant
Si vous n’êtes pas satisfait du service après-vente dont vous avez bénéficié :
Premièrement,
communiquez avec les gens qui ont réparé votre appareil.
Ensuite,
si vous n’êtes toujours pas satisfait,
aux États-Unis,
envoyez tous les détails—numéro de
téléphone compris—au Manager, Consumer Relations, GE Appliances, Appliance Park,
Louisville, KY 40225; ou,
au Canada,
au Directeur, Relations avec les consommateurs, Camco
Inc., Bureau 310, 1 Factory Lane, Moncton, N.B. E1C 9M3.
Enfin,
si votre problème n’est toujours pas résolu, écrivez au : Major Appliance Consumer Action
Program, 20 North Wacker Drive, Chicago, IL 60606 (États-Unis uniquement).
 Loading...