

Page 1
M DDSR475ET DWXR473ET
Dryer
Impoflant Safety Information
DDSR475GT DWXR473GT
Ownerk Manual
Operating Instructions
The Controls on Your Dryer
Other Dryer Features
Helpful Information
Specialized Fabric Guide
Loading Suggestions
Care of Product
If Something Goes Wrong
Before You Call For Service
Venting the Dryer
GE Service Numbers
Warranty Back Cover
GE Answer Center@
800.626.2000
GEAppliances
Page 2
Welcome to the GE family. We’re
proud of our quality products and
we believe in dependable sefice.
You’ll see it in thiseasy-to-use
manual and you’ll hear it in the
friendly voices of our customer
setice department.
Bestof all, you’ll experience
these values each time you do
the laundq. That’s important,
because your new d~er willbe
part of your family for a long time.
Before
using
your
d~er
Staple your receipt to the inside back
cover of this manual.
Find your mode/. Put a check mark
in the box identi@ing your model
in the section titled, “Operating
Instructions.” This will protide
easy access for your operating
instructions.
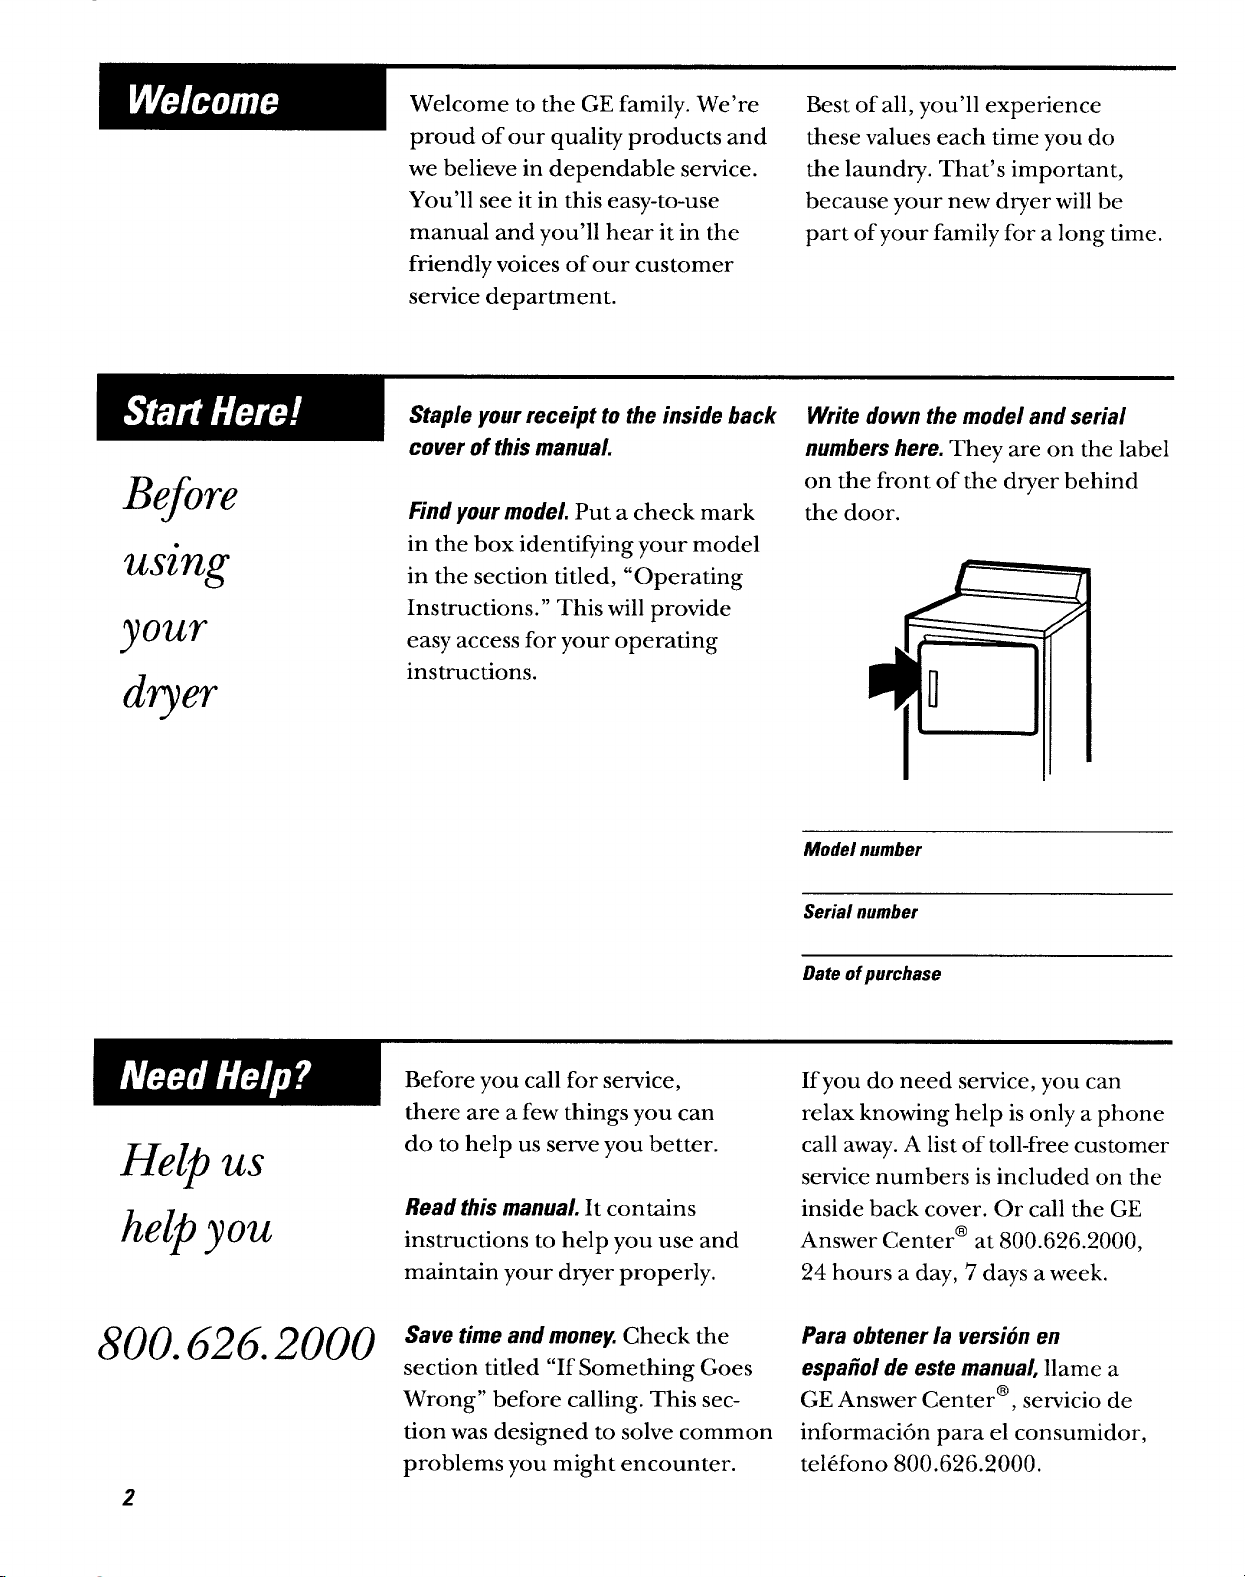
Write down the model and serial
numbers here. They are on the label
on the front of the dryer behind
the door.
Model number
Serial number
Date ofpurchase
Helpus
helpyou
800.626.2000
Before you call for semice,
there are afew things you can
do to help usserve you better.
Read this manual. It contains
instructions to help you use and
maintain your d~er properly,
Save time and money Check the
section tided “If Something Goes
Wrong” before calling. This section was designed to solve common
problems you might encounter.
If you do need service, you can
relax knowing help is only a phone
call away.A listof toll-free customer
setice numbers isincluded on the
inside back cover. Or call the GE
Answer Center@ at800.626.2000,
24 hours a day, 7 daysa week.
Para obtener la version en
espafiol de este manual, name a
GE Answer Center”, servicio de
informaci6n para el consumidor,
tel~fono 800.626.2000.
Page 3
A WARNING: For your safetythe information in this manual must be
followed to minimize the riskof fire or explosion or to prevent property
damage, personal inju~ or loss of life.
Do not store or use gasoline
or other flammable vapors
and liquids in the vicinity of
this or any other appliance.
Instigation and service must
be performed by a qualified
installer, service agency or
the gas supplier.
IF YOU SMELL GAS
1
Do not tryto light any appliance.
Do not touch any electrical
2
switch; do not use any phone
in your building.
3
Clear the room, building or
area of alloccupanfi.
Immediately call your gas
4
supplier from a neighbor’s
phone. Follow the gas
supplier’s instructions.
Ifyou cannot reach your gas
5
supplier, cdl tie fire deparfient.
A
fiis act requires the governor
of California to publish a listof
substances known to the state
to cause cancer, birth defects
or other reproductive harm
and requires businesses to warn
customers of potential exposure
to such substances.
CaliforniaSafeDrinkingWaterandToxicEnforcementAct
Gas appliances can cause
minor exposure to four of these
substances, namely benzene,
carbon monoxide, formaldehyde
and soot, caused primarily by the
incomplete combustion of natural
gas or U fuels.
Properly adjusted dryerswill
minimize incomplete combustion.
Exposure to these substances can
be minimized further by properly
venting the dryer to the outdoors.
3
Page 4
Readallsafetyinformationbeforeusing
To reducetheriskof fire, electricshock,orkjury topersons
whenustig yourappfiance,foflowbasicprecautions,includiug
thefo~owingsections.
● Use this appliance only for its
intended pu~ose as described
in this Owner’s Manual.
● This dryer must be properly
installed and located in
accordance with the Installation
Instructions before itis used.
If you did not receive an
Installation Instructions sheet
withyour dryer, you can obtain
one by calling, toll free, the GE
Answer Center@, 800.626.2000.
– Properly ground to conform
with all governing codes and
ordinances. Follow details in
Installation Instructions.
– Installor storewhere the tempera-
tureisabove 50°F. (lO°C.). Do
not installthe dryerwhere itwill
be exposed to theweather.
– Connect to a properly rated,
protected and sizedpower supply
circuitto avoid electrical overload.
– Gas dryers MUST be exhausted
to the outside. Carefully follow
the Exhausting details in the
Installation Instructions.
– Exhausting electric dryers to
the outside isSTRONGLY
RECOMMENDED to prevent
large amounts of moisture and
lint from being blown into the
room. Carefully follow the
Exhausting details in the
Installation Instructions.
●
Do not repair or replace
any part of the appliance or
attempt any servicing unless
specifically recommended in this
Owner’s Manual or in published
user-repair instructions thatyou
understand and have the skills
to carry out.
●
men disconnecting this
appliance pull by the plug rather
than the cord to avoid damage to
the cord orjunction of cord and
plug. Make sure that the cord
islocated so that it will not be
stepped on, tripped over or
otherwise subjected to damage
or stress.
Page 5
s Exhaust Duct—See Installation
Instructions. Use only rigid metal
or flexible metal 4“ diameter
ductwork inside the dryer cabinet
or for exhausting to the outside.
USE OF PLASTIC OR OTHER
COMBUSTIBLE DUCWORK
CAN CAUSE A FIRE.
PUNCTURED DUCWORK
CAN CAUSE A FIRE IF IT COLLAPSES OR BECOMES OTHERWSE RESTRICTED IN USE OR
DURING INSTALLATION.
● Do not dry articles containing
rubber, plastic, or similar
materials (such as padded bras,
tennis shoes, galoshes, bath
mats, rugs, bibs, baby pants,
plastic bags, pillows, etc.) as
these materials may melt or
burn. Also, some rubber
materials, when heated, can
under certain circumstances
produce fire by spontaneous
combustion.
s Do not store items that may
burn or melt (such as clothing,
paper matefial, plastics or
plastic containers, etc.) on top
of the d~er during operation.
● Garments labeled “Dry Away
from Heat” or “Do not Tumble
Dry” (such aslife jackets containing Kapok) must not be put in
your dryer.
●
Do not wash or dry articles that
have been cleaned in, washed
in, soaked in, or spotted with
combustible or explosive
substances (such as wax, paint,
oil, gasoline, degreasers, drycleaning solvents, kerosene, etc.)
which may ignite or explode. Do
not add these substances to the
washwater. Do not use these
substances around your washer
and/or dryer during operation.
●
Any article on which you have
used a cleaning solvent, or
which contains flammable
materials (such ascleaning
cloths, mops, towels used in
beauty salons, restaurants,
or barber shops, etc.) must
not be placed in or near the
d~er until all traces of these
flammable liquids or solids
and their fumes have been
removed. There are many
highly flammable items used
in homes such as acetone,
denatured alcohol, gasoline,
kerosene, some household
cleaners, some spot removers,
turpentines, waxes, wax
removers and products
containing petroleum distillates.
5
Page 6
Readallsafetyinformationbeforeusing
● Clean the lint filter before
each load to prevent lint
accumulation inside the
dryer or in the room. DO
NOT OPEWTE THE DR~R
WTHOUT THE LINT FILTER
IN PMCE.
● Keep the area around and
underneath your appliances
free from the accumulation
of combustible materials,
such aslint, paper, rags,
chemicals, etc.
● The interior of the machine
and the exhaust duct
connection inside the d~er
should be cleaned periodically
by a qualtiled individual.
● Never reach into the dryer
while the drum is moving.
Before loading, unloading or
adding clothes, wait until the
drum has completely stopped.
● Do not dq fiberglass articles
in your dryer. Skin irritation
could result from the remaining
glass particles that may be picked
up by clothing during subsequent dryer uses.
● The laundry process can
reduce the flame retardancy
of fabrics, To avoid such a
result,the garment manufacturer’s
care instructions should be
followed very carefully.
● Close supervision isnecessa~
if thisappliance is used by or
near children, Do not allow
children to play inside, on,
or with this appliance or any
discarded appliance. Dispose
of discarded appliances and
shipping or packing materials
properly. Before discarding a
d~er, or removing from service,
remove the door of the dryer
compartment.
● Keep all laundry aids (such
asdetergents, bleaches, fabric
softeners, etc.) out of the reach
of children, preferably in a
locked cabinet. Observe all
warnings on container labels
to avoid personal injury.
● Keep the floor around your
appliances clean and dry to
reduce the possibility of slipping.
● To minimize the possibility
of electric shock, unplug this
appliance from the power supply
or disconnect the dryer at the
household distribution panel by
removing the fuse or switching
off the circuit breaker before
attempting any maintenance or
cleaning (except the removal and
cleaning of the lint filter).
s NOTE: Turning the Cycle
Selector knob to an OFF
position does NOT
disconnect the appliance
from the power supply.
6
Page 7
v
●
u
● Do not tamper with the controls.
● Do not operate this appliance
if it isdamaged, malfunctioning,
partially disassembled, or
has missing or broken parts,
including a damaged cord
or plug.
● Never climb on or stand on the
dryer top.
● If yours is a gas dryer, itis
equipped with an automatic
electric ignition and does not
have a pilot light. DO NOT
ATTEMPT TO LIGHT WTH
A MATCH. Burns may result
from having your hand in the
vicinity of the burner when the
automatic ignition may turn on.
● You maywish to soften your
laundered fabrics or reduce
the staticelectricity in them
by using dryer-applied fabric
softeners or an anti-static
conditioner. We recommend
you use either a fabric softener
in the wash cycle, according to
the manufacturer’s instructions
for those products, or trya
dryer-added product for which
the manufacturer gives written
assurance on the package that
their product can be safelyused
in your dryer.
Semite or performance problems caused by the use of these
products are the responsibility
of the manufacturers of those
products and are not covered
under the warrantyof this
appliance.
SAVET~SE INSTRUCTIONS
7
Page 8
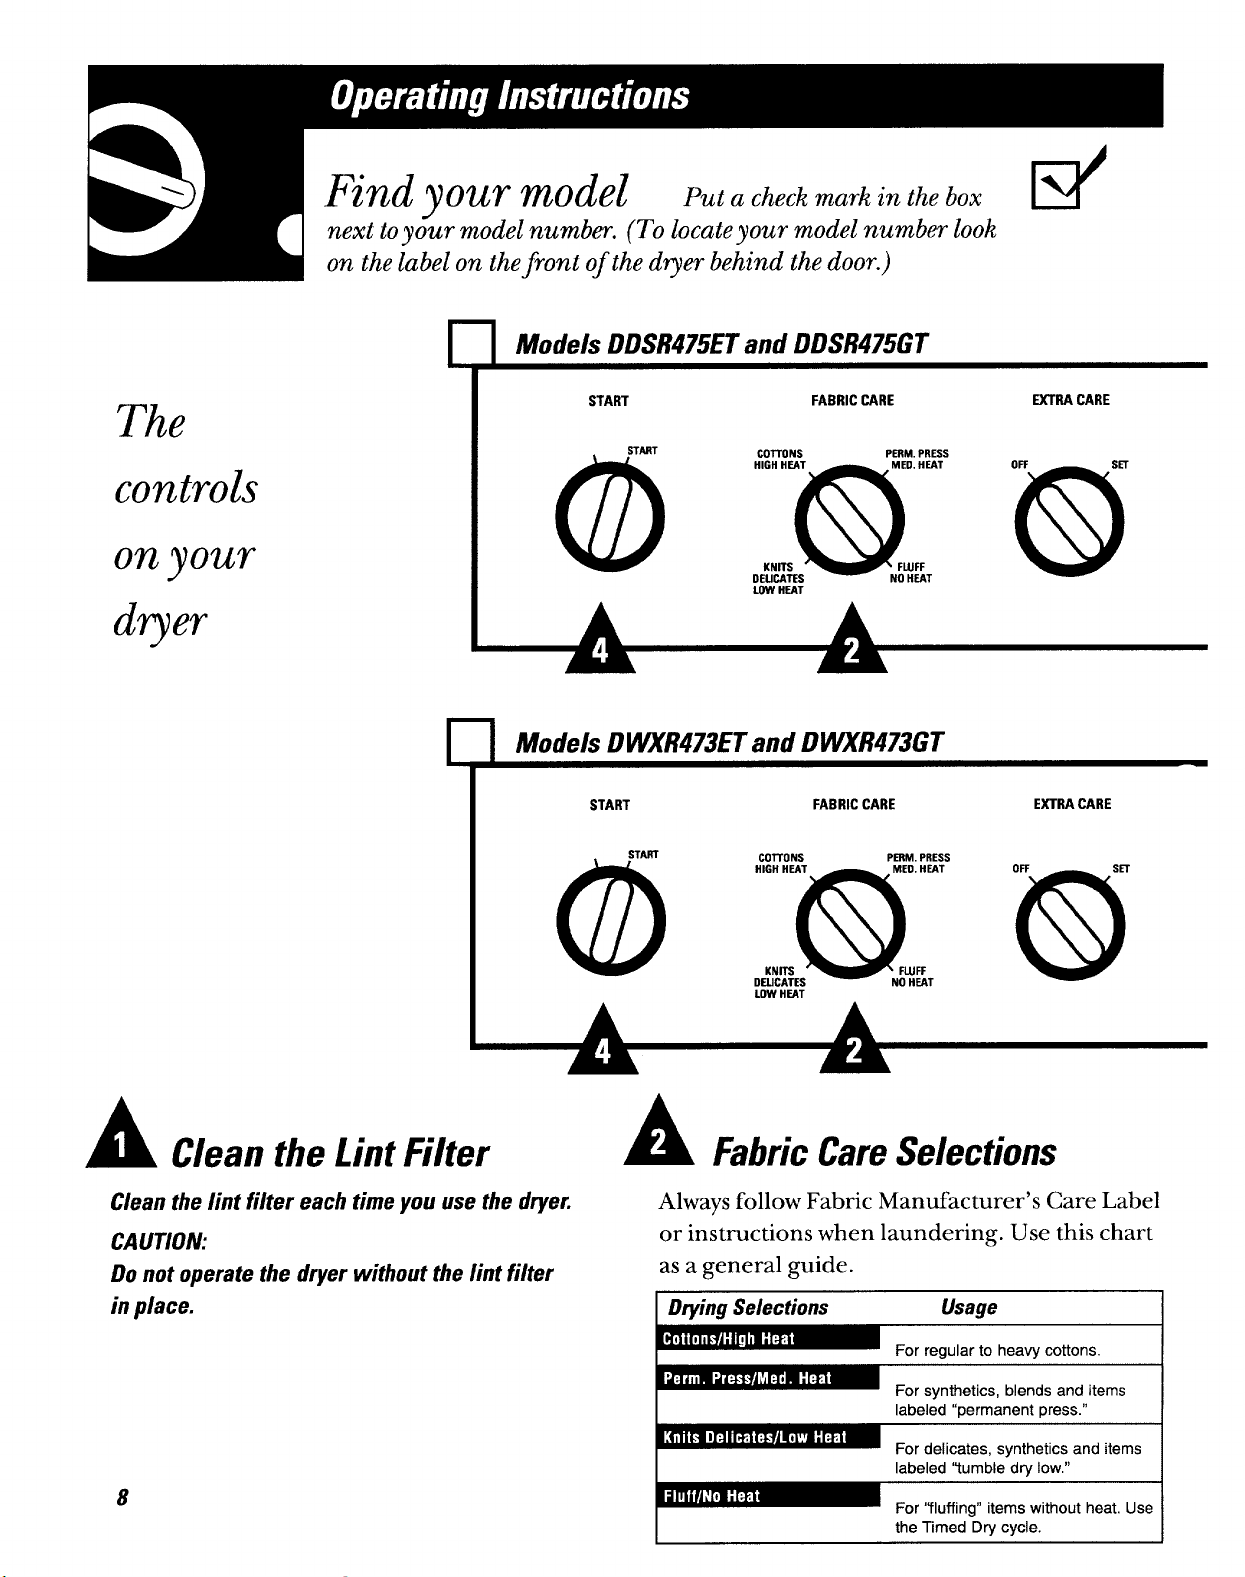
Findyourmodel
next toyour modelnumbm. (To locateyour modelnumbw look
on thelabelon thefront of thedqw behindthedoor.)
ModelsDDSR475ETandDDSR475GT
P.t. ,h..k ~..k i. th,b..
d
The
controls
onyou~
START
FABRICCARE
I
ModelsDMR473ETand DWR473GT
I
START
FABRICCARE
I
~RA CARE
E~RA CARE
A Clean the Lint Filter
Clean the lint filter each time you use the drye~
CAUTION:
Do not operate the dryer without the lint filter
in place.
8
A
Fabric Care Selections
Always follow Fabric Manufacturer’s Care Label
or instructions when laundering. Use this chart
asa general guide.
For regular to hea~ cottons.
I labeled “permanent press.”
I
For synthetics, blends and items
For delicates, synthetics and items
labeled ‘tumble dw low.”
For ‘Ylufing” items without heat. Use
the Treed Dry cycle.
I
I
Page 9

Cycle Descriptions
AutomaticDryingCycles
Cyclesautomaticallysense dryness
AutomaticPermanentPress
Forsyntheticblendsanddelicates.Select
More D~ forheavierloads,LessD~for
lighterloads.
SIGNAL
MEDIUM
OE
Q
Louo
AUTOMATIC
CO~ONS
LESSDSV
MORE DRV
DEWSINW
M
Treed Dry Cycles
Cyclesrunfor aselectedtime
AutomaticCottons
Forcottonsandmostlinens.Formost
normalloadsselectthePreferredRegLdar
Setting*.Settowards
andwetterfabrics,
. m ORY
-
~E
*
●
@
~S DRV
COOLDOWN PRESS
w “N
m
More Dqforheavier
LessD~ forlighterfabrics.
AUTOMATIC
PERMANENT
MA CARE
●
TIMEO ORY
I
~med Dry
SettheCycleSelectorat
thedesireddryingtime.
Damp Dry
To leaveitemspartially
dq setCycleSelectoron
DampDrysetting.
Dewrinkle
Forremovingwrinkles
fromitemsthatareclean
anddq or thatarevery
lightlydamp.Setthe
CycleSelectoron the
Dewrinklesetting.
SIGNAL
MEDIUM
off Louo
@
A
Selecting Dryjng Cycle
AUTOMATIC
CO~ONS
MORE ORV
LESSDRV
OSWSINKLE
Select an automatic or timed cycle. See the
above Cycle Descriptions.
NOTE:
D~ing times will vay
accordingto the &pe
of heatused(Electric,
. MOSE ORV
LSSS
WE
-
*
●
@
ORV AUTOMATIC
PERMANENT
~LOOWN PRESS
- CARE
●
m “N
30
TIMED DRY
A
‘
s Close the dryer
● Select START.
StaHing
Dryer
.
door.
Natural or LPgas),size
of load,ypes of fabrics,
wetnessof clothesand
conditionof exhaustducti.
Opening the door during the operation till
stop the d~er. To restartthe dryer, close the
door and select START to complete tie cycle.
Seenextpagefor othwdqwfeatures
9
Page 10

Otherdqerfeaturesyou~modelmayhave
OFF
OFF
@
@
MEDIUM
Sn
LOUD
Use this option to minimize the
wrinkles in clothes. The option
provides approximately 15
minutes of no-heat tumbling
after the clothes are d~.
This option can only be used with
tie Automatic cycles.
The signal control can be setat
OFF, MEDIUM or LOUD.
This signal will sound just before
the end of the cycle to remind you
to remove the clothes.
Eyou selected the ExtraCare option
the signalwill sound atthe end of
the drying time and will sound severaltimesduring the ExtraCare cycle.
This willremind you thatthe cycle is
almost complete.
HINT
If the Signal option is selected, the
Signal will sound at fhe end of the
drying fime and will sound several
fimes during fhe Etira Care cycle.
This will remind you fhaf the cycle
is almosf complefe.
NOTE:
●
Remove garmenfs prompfly af fhe
sound of fhe signal. Place clofhes
on hangers so wrinkles wonrf sef in.
●
Use fhe Signal especially when
drying fabrics like poiyesfer knifs
and permanenf press. These fabrics
should be removed prompfly so
wrinkles won? sef in.
10
Page 11

Before replacing the light bulb,
be sure to unplug the dryer power
cord or disconnect the dryer at the
household distribution panel by
removing the fuse or switching
off at the circuit breaker. Reach
above d~er opening from inside
the drum. Remove the bulb and
replace with the same size bulb.
1 1
A handy d+ng rack maybe used
for drying articles such asstuffed
toys,pillows or washable sweaters.
Hook the rack over the lint filter so .
the rack extends into the d~er
drum.
NOTE:
. The drying rack must be used with
the fimed Cycle.
Do not use this drying rack when
there are other clothes in the drye~
11
Page 12

Tools Needed:
● Standard # 2 Phillips screwdriver
● Tape-tipped pu~ knife
● Needle-nosed pliers
1 Open the door and remove the
filler plugs opposite the hinges.
2 With the door completely open,
remove the bottom screwfrom
each hinge on the dryer face.
Rotate the door 180°. Insert it
6
on the opposite side of the opening by moving the door IN and
DOW until the top hinge and
the bottom hinge are resting on
the top screwsinserted in step 3.
12
3 Insert these screwsabout half
way into the TOP holes, for
each hinge, on the opposite side.
(Where you removed tie filler
plugs.) Apply firm pressure to
get the screw started in untapped
holes.
4 Loosen the top screw from each
hinge on the dryer face halfway.
5 With one hand holding the top
of the door and the other hand
holding the bottom, remove the
door from the dryer by lifting it
UP and OLTT.
Remove the remaining screws
7
from tie side of the opening
from which the door was
removed. With these screws
secure each hinge at the bottom.
Tighten the two top screwsof
8
each hinge.
Reinsert the plastic plugs on
9
the side from which the door
wasremoved.
Page 13

Always follow Fabric Manufacturer Care Label or instructions when laundering.
Otherwise use the information below as a general guide.
mow
Bl*e&
Cotton
Sptietic
Don
&ha -e Item
(Includes
comforters,
blankets and
mattresspads.)
Mend any holes or weak seamswhere feather or filling could
escape. D~ only one pillow atatime. Stop dryer occasionally and
shake pillow, redistributing filling for even drying. Check pillow
atthe end of d~ing time. If it is not completely dry, reset dryer
for more d@ng time.
Dryon low heat only.
CAUTION: Do not dry pillows containing foam rubber.
Add 2–4drytowelsand one blanketand settimerfor 20–25 minutes.
Dryonly one blanket atatime.Do not setcontrol for more than25
minutes. At the end of drying cycle block the blanket back to its
original shape. Allow blanket todry thoroughly before storing.
Use a medium heat d+ng setting.
Use a low heat drying setting.
Use a low heat drying setting.
Use a low heat drying setting.
Setdryer for 20 minutes. men time isup, check and redistribute
load. Reset dryer for 15 minutes. men time isup, check and
redistribute load. Reset timerfor 5 minute intervals.Check after
each 5 minutes to ensure articlesdo not fill d~er drum. Large, wet
articles should have ample room in the dryer, but asthey dry and
fluff up they may not have room to tumble.
CAUTION: Itemswithout room to tumble mayblock airflow and
could resultin scorched items.Dry mattresspads separately. Use
alowheat drying setting.
13
Page 14

Loading
As general rule, if clothes are
sorted properly for the washer, they
are sorted properly for the dryer.
Sofl by color Separate lint producers from
(Separate colorfast from
non-colorfast fabrics*)
● Whites chenille
● Ligh~
lint collectom
● Lint producers: terry cloth and
. Lint collectors: velveteen and
c Darks corduroy
Separate by fabric type Sort by weight
c Cottons and linens
● Permanent press cottons
and blends
● Synthetic and poly knifi
● Delicates
c Heavy Items
● Light Items
N
Non-colorfastfatics may bleedorfade, Sort@
individual color.
14
● Avoid drying very small loads.
● Sort clothes by weight so you
won’t have to run an extra cycle
for one or two heavier, slower
d@ng items.
● Do not add fabric softener sheets
once the load has become warm.
This may cause fabric softener
stains.
● Do not overload. This causes
inefficient operation and
unnecessary wrinkling. Clothes
need to tumble freely.
● Do not dry the following items:
● Fiberglass items
● Woolens
● Rubber coated items
● Plastics
● Itemswith plastic trim
● Foam-filled items
Page 15

Care@ Cleaning
i
u
The drum isrust-resistant.However,
colored fabrics which lose color or abrasive, such as Soft ScrubTM.
bleed in the washer may cause dis- Rinse thoroughly. Then tumblecoloration of the dryer drum. We dry severalwet rags or old towels
recommend that the d~er drum
be cleaned with a cloth using a
Wipe off any spills or washing Apply these pretreatment products
compounds. Wipe or dust with awayfrom the dryer. The fabric
a damp cloth. Try not to strike
the surface with sharp objects. normally. Damage to your dryer
Dryer control panel and finishes
may be damaged by some laundry is not covered by your warranty.
pretreatment soiland stainremover
products if such products are
sprayed on or have direct contact
with the dryer.
detergent and water paste or a mild
for 20 to 30 minutes before using
the dryer normally.
may then be washed and dried
caused by pretreatment products
II
1 ,1
b
&
.-~
/-’
Before every dryer use, clean the
lint filter. Itis easier to remove
\
/
the lint when your fingers are
moistened.
To keep your dryer operating at
peak performance, be sure to have
a technician vacuum the lint from
the machine eve~ three years.
To store your dryer for a short
period of time, disconnect the
power supply and clean the lint
filter.
15
Page 16

Care& Cleaning
Inspect and clean the dryer
exhaust ducting at least once
k
a year to prevent clogging. A
partially clogged exhaust can
lengthen the drying time.
To clean the exhaust duct follow
these steps:
Turn off electrical supply by
1
disconnecting the plug from
the wall socket.
2
Disconnect exhaust duct from
the dryer.
3
Vacuum the exhaust duct with
the hose attachment or attacha
rag to a pole or drain cleaning
wire and clean duct.
. Make sure the inside flaps of
the
exhaust hood move freely (you
maywant to check with a mirror).
● Make sure inside flaps are fully
open when dryer isoperating.
16
●
Make sure there isnot wild life
(birds, insec~, etc.) nesting
inside the exhaust duct or hood.
Page 17

Problem
PossibleCauses WhattoDo
Dryerisunplugged ● Makesurethedryerplug ispushed
completelyinto theoutlet.
,“””
Fuseisblown/circuit
breakeristripped
Fuseis blom/circuit breaker
istripped,thedryermay
● Check thehouse fuse/circuit breaker
box and replacefuseor resetbreaker.
NOTE Mostelectricdryersusetwobreakers.
● Check the house fuse/circuit breakerbox
andreplace fuse or resetbreaker.
tumblebutnotheat
Gassetice isoff
● Makesuregasshutoffatdryerand main
shutoffarefullyopen.
Someshaking/noiseisnorrnd.
Dryermaybe sittingunemdy
hproper useof fabricsoftener ● Followdirectionson fabricsoftenerpacka,ge.
Dryingdirtyitemswith
cleanones
Clotheswerenot completely ● Sometimesstainswhichcannotbe seenwhen
clean
● Movedryerto anevenfloorspace, or adjust
asnecessaryuntileven.
● Useyourdryertodryonlycleanitems.Dirty
itemscansmincleanitemsandthedryer.
thecloties arewet“appear”afterdrying.Use
properwashingproceduresbeforedrying.
tit fiiterisfd
hproper sorting
● Cleanlintscreenbefore eachload.
● Sortlintproducers (likechenille) from
lintcollectors (likecorduroy).
Static electrici~canattractbt
&rloading ● Separatelargeloadsinto smallerones.
Paper,tissue,etc.leftinpockets ● Emptyallpocketsbefore launderingclothes.
● See suggestionsinthissectionunderSTATIC.
17
Page 18

Problem PossibleCauses
No
fabricsoftenerwasused ● Tq afabricsoftener.
WhattoDo
● Tq afabricsoftener.
● Adjustcontrolsforlessdrying.
Sptheti=, permanentpress
● Tryafabricsoftener.
andblendsm causestitic
hproper sortig ● Separateheavyitemsfrom lightweightitems
(generally,awell-sortedwasherload isa
well-sorteddryerload).
Largeloadsof hea~ items ● Large,heavyloads contain more moisture
(We beach toweb) and takelonger to dry.Separatelarge,heavy
itemsintosmallerloadstospeeddryingtime.
Controkimproperlyset
. Matchcontrol settingsto the loadyou
ared~ing.
LintFalterisf~
hproper orobstructed
ducting ducting/venting.
● Cleanlintfilterbefore everyload.
● Check installationinstructionsfor proper
● Makesureductingisclean, free of kinks
and unobstructed.
● Check to seeif outsidewalldamper
operateseasily.
. See theVenting the Dryingsection.
18
Blownfusesor tripped
● Replacefusesorresetcircuitbreakers.Since
circuitbre&ers mostdryersuse2fuses/breakers,makesure
both areoperating.
hrloading/
combiningloads
Underloading
● Do not putmore thanone washerload in
thedryer
● Ifyou aredryingonlyone or twoitems,
atatime.
add afewitemsto ensureproper tumbling.
Page 19

Problem PossibleCauses WhattoDo
● Selectashorterdryingtime.
QRemove itemswhiletheystillhold aslight
amountof moisture.
btting itemssitk dryer
● Remove itemswhencycle ends andfold or
aftercycleends hangimmediately.
Somefabricsti natur~y
shrinkwhenwashed.Others
can
besafelywashed,butW
shrinkin the
dryer.
● To avoidshrinkage,follow garmentcare
labelsexactly.
● Someitemsmaybepressedbackintoshape
afterdrying.
● Ifyou areconcerned about shrinkagein
aparticularitem,do notmachinewashor
tumbledryit.
19
Page 20

For the best drying performance
the dryer needs to be properly
vented. Carefully follow the details
on Exhausting in the Installation
Instructions.
● Use only rigid metil or flexible
metal 4“ diameter ducmork
inside the d~er cabinet or for
exhausting to the ou~ide.
● Do not use plastic or other com-
bustible ducmork.
●
Use the shortest length possible.
●
Do not crush or collapse,
●
Avoid resting the duct on sharp
objects.
●
Venting must conform to local
building codes.
20
s
Page 21

Notes
21
Page 22

~,
m
We’11bethere!
800.626.2000
‘. 1..”
800-GE-CARES
(800-432-2737)
~atever your question about any
GE major appliance, GE Answer
Center@ information service is 24 hours a day, 7 days aweek.
available to help. Your call—and
your question-will be answered
promptly and courteously.
AGE consumer service professional Our factory-trained technicians
will provide expert repair service,
scheduled ata time that’s convenient for you. Many GE Consumer
Service company-operated locations offer you service today or
tomorrow, or atyour convenience
(7:00 a.m. to 7:00 p.m. weekdays,
9:00 a.m. to 2:00 p.m. Saturdays).
And you can call any time. GE
Answer Centerv service is open
know your appliance inside and
out—so most repairs can be handied injust one visit.
800.626,2000
z
Upon request, GE will provide
Braille controls for a varietyof or speech who have access to a
GE appliances, and a brochure
to assistin planning a barrier-free
kitchen for persons with limited
mobility. To obtain these items,
free of charge, call 800.626.2000.
Consumers with impaired hearing
TDD or a conventional teletype-
writer may call 800-TDD-GEAC
(800-833-4322) to request informa-
tion or service.
Page 23

800.626.2000
800-626-=4
Paraobtener la versi6n en espafiol de este manual, name a
GE Answer Center”,
tel~fono 800.626.2000.
You can have the secure feeling that GE Consumer Service will still
be there afteryour warrantyexpires.Purchase a GE contract while your
warrantyis still in effect and you’ll receive a substantial discount. With a
multiple-year contract, you’re assured of future service at today’s prices.
servicio de informaci6n para el consumidor,
800-626-2002
Individualsqualified to service
their own appliances can have
partsor accessories sentdirectly
to their home. The GE parfi system
provides access to over 47,000
parfi...and allGE Genuine Renewal
Partsare fully warranted. VISA,
MasterCard and Discover cards
are accepted.
We’re proud of our service and
want you to be pleased. If for some
reason you are not happy with the
service you receive, here are three
steps to follow for further help.
Fimt,contact tie people who serviced your appliance. Explain why
you are not pleased. In most cases,
thiswill solve the problem.
Care and cleanfig instruction con-
tainedin thismanualcorerprocedurestobeperformedbyanyuser.
Otherseficing gener~y shouldbe
referredtoqufified servicepersonnel.Cautionmustbe exercised,
since improper seficing maycause
unsafe operation.
Finallyif your problem is still
not resolved, write:
Major Appliance Consumer
Action Program
20 North Wacker Drive
Chicago, IL 60606
Neti, if you are still not pleased,
write all the details-including
your phone number–to:
Manager, Consumer Relations
GE Appliances, Appliance Park
Louisville, KY 40225
23
Page 24

#
Staph salessliporcancelledcheckhwe,Proofofotig.nalpurchase
dateisneededtoobtain swice undo wawanp.
~LL ONBWR WARRAN~
Forone yearfrom dateof original
purchase,wewillprovide, free of charge,
partsandservicelabor in your home to
repairor replace anypan ofthed~erthat
failsbecause of amanufacturingdefect.
~ED
FOUR-~R WARRANTY
ADD~ONAL
Fromthe second through fifthyear
from date of originalpurchase,wewill
replace,free of charge, an extralarge
orsupercapacitydryerdrum thatfails
becauseof amanufacturingdefect.You
payfor theservicetripto your home and
semicelabor charges.
***** *******************************
Thiswarrantyisextended to the original
purchaserandanysucceedingownerfor
productspurchasedfor ordina~ home
usein the 48mainlandstates,Hawaiiand
Washington,D.C.InAlaskathewarranty
isthe sameexcept thatitisLIMITED
becauseyou mustpayto shiptheproduct
to thesemiceshop or for theservice
technician’stravelcosts to your home.
All warrantyservicewillbe provided by
our FactoryServiceCentersor byour
authorizedCustomerCare@semicers
duringnormalworkinghours.
Shouldyour applianceneed semice,
duringwarrantyperiod or beyond, call
800GE-CARES (800432-2737).
● Setice tripstoyour home to teachyou
how to use the product.
ReadyourOwner’sManuaLIfyou then
have;ny questionsaboutoperatingthe
product,pleasecontactyourdealeror our
ConsumerAffairsoffice attheaddress
below,or call, tollfree:
GEAnswerCenter@
800.626.2000
consumerinformation service
● Improper installation.
Ifyou haveaninstallationproblem,
contactyour dealeror installer.You are
responsibleforprovidingadequate
electrical,exhaustingand other
connecting facilities.
●
Replacementof housefusesorresetting
of circuitbreakers.
●
Failureof theproduct if itismisused,
or usedfor other thantheintended
purpose or usedcommercially.
●
Damagetoproductcausedbyaccident,
fire,floods or actsof God.
WARRANTOR ISNOT RESPONSIBLEFOR CONSEQUENTIALDAMAGES.
Some statesdo notallowtheexclusion orlimitationof incidentalor consequentialdamages,so the above
limitationor exclusion maynot applytoyou. Thiswarrantygivesyou specfilc legalrights,andyou may
alsohaveother righwwhichvaryfrom statetostate.To knowwhatyourlegalrightsarein your state,
consultyour local or stateconsumer affairsoffice or your state’sAttorneyGeneral.
Warrantor:GeneralElectricCompany If furtherhelpisneededconceting thiswarranty,write:
Manager<onsumer Affairs, GEAppliances,Lo-e, H 40225
I
Printed inthe UnitedStates
DDSR475ET DWXR473ET
DDSR475GT DWXR473GT
 Loading...