

Page 1
GEAppliances
Part Install Instructions
Dryer DeKalb Motor Replacement To NIDEC Motor Kit:
WE17X22216, WE17X22217, WE17X23355, WE17X23463,
WE17X23464, WE17X23465, *WE17X10002 or *WE17X23618
To avoid a risk of electrical shock, disconnect power prior to servicing.
Follow all steps and safety information in these instructions to avoid a risk of personal injury, [death], or property damage. This part should only
be installed by persons with adequate backgrounds of electrical and mechanical experience. Any attempt to repair a major appliance can result
in personal injury and property damage. The manufacturer or seller cannot be responsible for the interpretation of this information, nor can it
assume any liability in connection with its use.
Parts Included
• NIDEC Motor and Pulley Assembly
• Harness Jumper • Label
• Wire Tie • Instruction Sheet
Overview
Installation of the new motor requires the use of a harness jumper included in this kit. The new
motor will mount in the motor bracket as the previous motor. These instructions show how to
correctly complete the installation of the new motor and jumper.
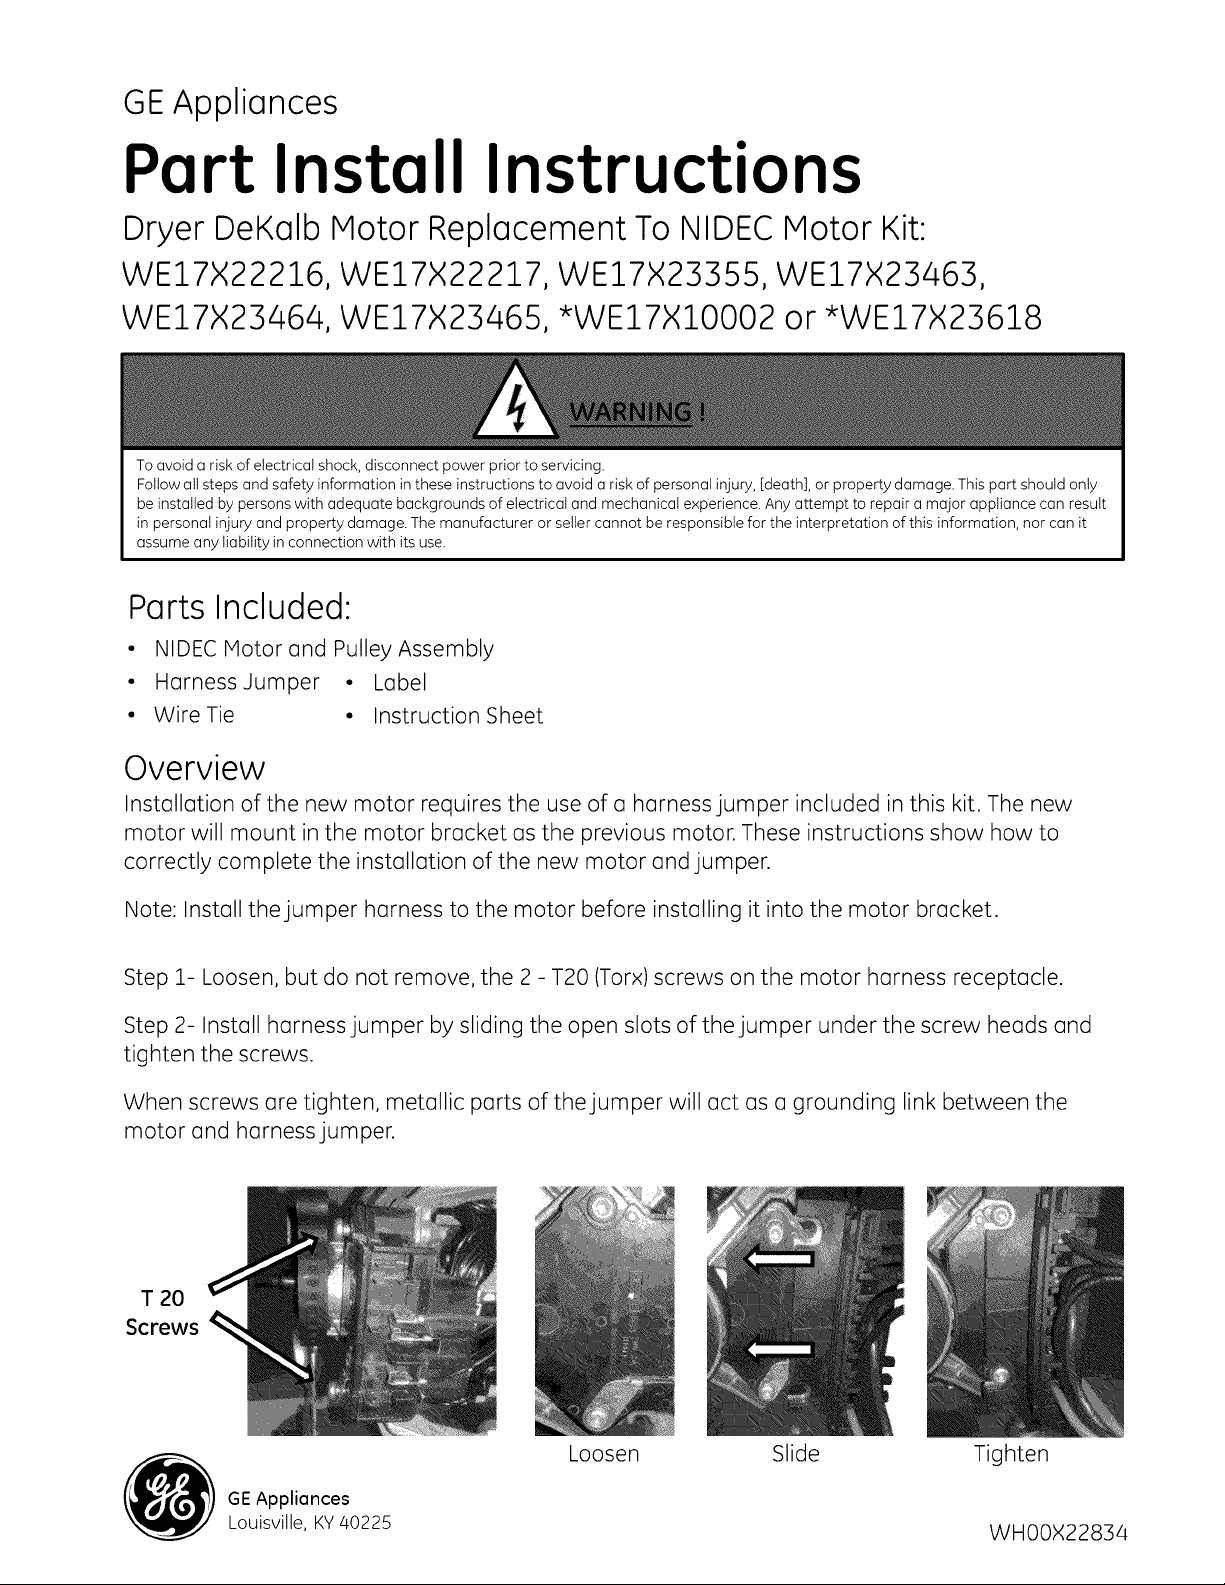
Note: Install the jumper harness to the motor before installing it into the motor bracket.
Step Z- Loosen, but do not remove, the 2- T20 (Torx) screws on the motor harness receptacle.
Step 2- Install harness jumper by sliding the open slots of the jumper under the screw heads and
tighten the screws.
When screws are tighten, metallic parts of the jumper will act as a grounding link between the
motor and harness jumper.
T 20
Screws
GEAppliances
Louisville, KY40225
Loosen Slide Tighten
WHOOX22834
Page 2
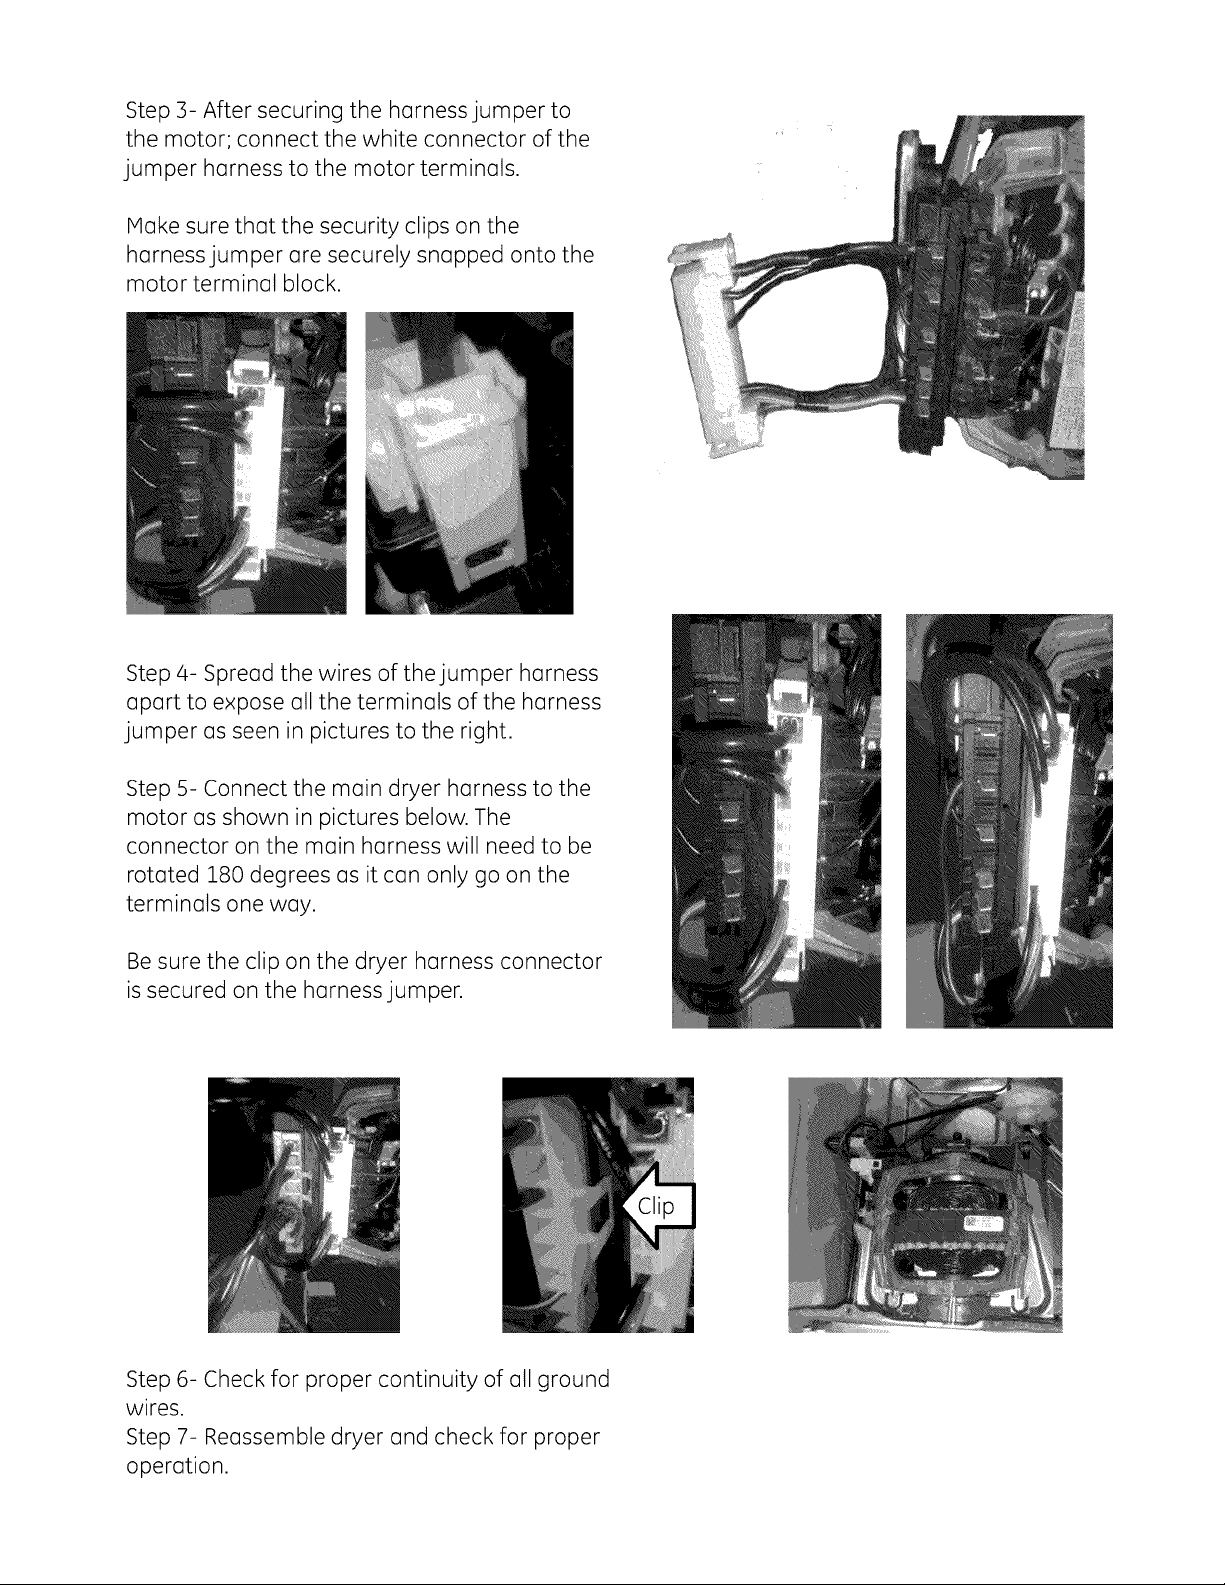
Step 5- After securing the harness jumper to
the motor; connect the white connector of the
jumper harness to the motor terminals.
Hake sure that the security clips on the
harness jumper are securely snapped onto the
motor terminal block.
Step 4- Spread the wires of the jumper harness
apart to expose all the terminals of the harness
jumper as seen in pictures to the right.
Step 5- Connect the main dryer harness to the
motor as shown in pictures below. The
connector on the main harness will need to be
rotated 180 degrees as it can only go on the
terminals one way.
Besure the clip on the dryer harness connector
is secured on the harness jumper.
Step 6- Check for proper continuity of all ground
wires.
Step 7- Reassemble dryer and check for proper
operation.
Page 3

* Fordryersrequiringmotor kitWE17X10002,themotor needsto beinstolledot on opproximote
45°ongtetoword the right cobinetponel. Thisisrequiredsothe hornessdoesnot rub onthe
drum.
Ifinstollingincommerciolstockeddryers,the
existingwiretie willneedto be removedthot
securesthe hornessto themountingbrocket.Use
o newwiretie whenreinstollingthe newmotor.
* Wheninstollingmotor kitWE17X23618in models,DSKP333EC3WW,DSKS333EC3WW,
DSKS433EB4WW,PCKS443EB4WW,PSKP333EB3WWond PSKS333EB3WW,themotorwill needto
berototedso the hornessconnectorfocesthe right sidelookingot the motorfrom the front of the
dryer.
Alsothe hornessgroundwirewill needto be movedfrom the motor brocketto the cobinetbose.
Oncethe motor ond hornessjumperore instolledon thesemodels,the hookon the motor brocket
connot beusedto holdthe idlerorm. tnstotlthe Iobelprovidedonthe blower housingto notify
futuretechsthot o servicemotor hosbeeninstotled.
Brocket Hook
New Ground Screw Locotion
doesn't allow the idler arm to be secured to the
I ATTENTION: Service motor installed on this unit |
motor bracket during drum removal
Label
J
Page 4

GEAppliances
Part Install Instructions
Dryer DeKalb Motor Replacement To NIDEC Motor Kit:
WE17X22216, WE17X22217, WE17X23355, WE17X23463,
WE17X23464, WE17X23465, *WE17X10002 or *WE17X23618
To avoid a risk of electrical shock, disconnect power prior to servicing.
Follow all steps and safety information in these instructions to avoid a risk of personal injury, [death], or property damage. This part should only
be installed by persons with adequate backgrounds of electrical and mechanical experience. Any attempt to repair a major appliance can result
in personal injury and property damage. The manufacturer or seller cannot be responsible for the interpretation of this information, nor can it
assume any liability in connection with its use.
Parts Included
• NIDEC Motor and Pulley Assembly
• Harness Jumper • Label
• Wire Tie • Instruction Sheet
Overview
Installation of the new motor requires the use of a harness jumper included in this kit. The new
motor will mount in the motor bracket as the previous motor. These instructions show how to
correctly complete the installation of the new motor and jumper.
Note: Install the jumper harness to the motor before installing it into the motor bracket.
Step Z- Loosen, but do not remove, the 2- T20 (Torx) screws on the motor harness receptacle.
Step 2- Install harness jumper by sliding the open slots of the jumper under the screw heads and
tighten the screws.
When screws are tighten, metallic parts of the jumper will act as a grounding link between the
motor and harness jumper.
T 20
Screws
GEAppliances
Louisville, KY40225
Loosen Slide Tighten
WHOOX22834
Page 5

Step 5- After securing the harness jumper to
the motor; connect the white connector of the
jumper harness to the motor terminals.
Hake sure that the security clips on the
harness jumper are securely snapped onto the
motor terminal block.
Step 4- Spread the wires of the jumper harness
apart to expose all the terminals of the harness
jumper as seen in pictures to the right.
Step 5- Connect the main dryer harness to the
motor as shown in pictures below. The
connector on the main harness will need to be
rotated 180 degrees as it can only go on the
terminals one way.
Besure the clip on the dryer harness connector
is secured on the harness jumper.
Step 6- Check for proper continuity of all ground
wires.
Step 7- Reassemble dryer and check for proper
operation.
Page 6

* Fordryersrequiringmotor kitWE17X10002,themotor needsto beinstolledot on opproximote
45°ongtetoword the right cobinetponel. Thisisrequiredsothe hornessdoesnot rub onthe
drum.
Ifinstollingin commerciolstockeddryers,the
existingwiretie willneedto be removedthot
securesthe hornessto themountingbrocket.Use
o newwiretie whenreinstollingthe newmotor.
* Wheninstollingmotor kitWE17X23618in models,DSKP333EC3WW,DSKS333EC3WW,
DSKS433EB4WW,PCKS443EB4WW,PSKP333EB3WWond PSKS333EB3WW,themotorwill needto
berototedso the hornessconnectorfocesthe right sidelookingot the motorfrom the front of the
dryer.
Alsothe hornessgroundwirewill needto be movedfrom the motor brocketto the cobinetbose.
Oncethe motor ond hornessjumperore instolledon thesemodels,the hookon the motor brocket
connot beusedto holdthe idlerorm. tnstotlthe Iobelprovidedonthe blower housingto notify
futuretechsthot o servicemotor hosbeeninstotled.
Brocket Hook
New Ground Screw Locotion
doesn't allow the idler arm to be secured to the
I ATTENTION: Service motor installed on this unit |
motor bracket during drum removal
Label
J
 Loading...