

Page 1
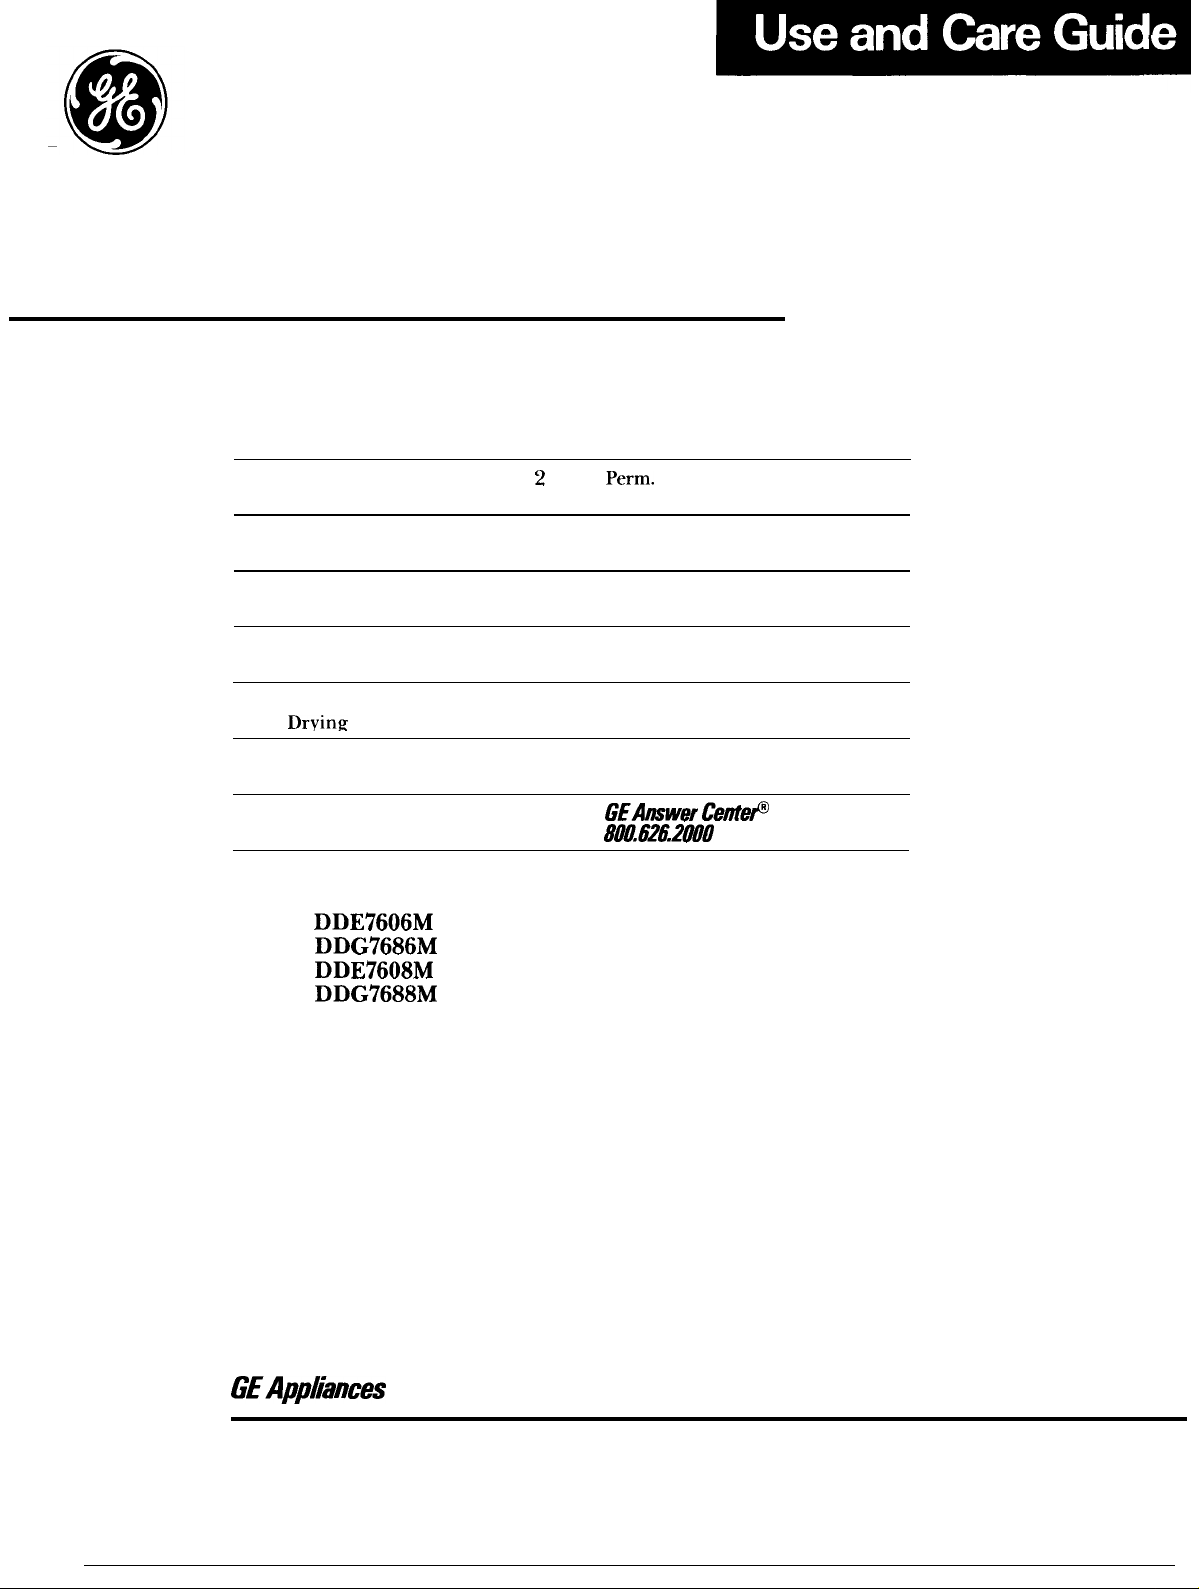
Contents
Dryer
Appliance Registration
Automatic Drying
Care and Cleaning
Consumer Services
Controls Setting Guide
Dryer Exhaust
End-of-Cycle Signal
Energy-Saving Tips
Extra Care Feature
Knits
Lint Filter
Loading
Model and Serial Numbers
Operating Your Dryer
Tips
Models
13
15
6,7
13
5-7, 11
4,9, 13
4,9
4,5
Press Drying Tips 5-7, 11, 12
5
5
9
5
2
Problem Solver
Safety Instructions
Sorting
Storing Dryer
Timed Drying
User Maintenance Instructions 13
Warranty Back Cover
10-12
3,4
4,8
13
5
Page 2
Help us help you...
If You Need Service
Before using your dryer,
read this book carefully.
It is
intended to help you operate and
maintain
Keep
questions.
If you don’t understand something
or need more help, write (include
your phone number):
Consumer Affairs
GE Appliances
Appliance Park
Louisville,
your new dryer properly.
handy for answers
to your
If you received a
damaged dryer...
Immediately contact the dealer
(or builder) that sold you the
dryer.
Save time and money.
Before you request service...
check the Problem Solver on
pages 10-12. It lists causes of
minor operating problems that
you can correct yourself.
To obtain a Spanish language
version of this book, call
GE Answer
800.626.2000
consumer information service.
name a
GE Answer
la
de
800.626.2000.
manual,
de
en
FOR YOUR
If you smell gas:
Open windows.
2. Don’t touch
electrical
3. Extinguish any
open flame.
4. Immediately call
your gas supplier.
To obtain service, see the
Consumer Services page in the
back of this book.
We’re proud of our service and
want you to be pleased. If for some
reason you are not happy with the
service you receive, here are three
steps to follow for further help.
FIRST, contact the people who
serviced your appliance. Explain
why you are not pleased. In most
cases, this will solve the problem.
NEXT, if you are still not pleased,
write all the detiils-including
your phone number—to:
Manager, Consumer Relations
GE Appliances
Appliance Park
Louisville, Kentucky 40225
FINALLY, if your problem is still
not resolved, write:
Major Appliance
Consumer Action Panel
20 North
Chicago, Illinois 60606
Drive
Write down the model
and serial numbers.
You’ll find them on a label on the
front of the dryer behind the door.
These numbers are also on the
Consumer Product Ownership
Registration Card that came with
your dryer. Before sending in this
card, please write these numbers
here:
●
Don’t turn electric switches
on or off because
ignite the gas.
may
FOR YOUR
Do not store or use
gasoline or other
flammable vapors and
liquids in the vicinity
Model Number
Serial Number
Use these numbers in any
correspondence or service calls
concerning your dryer.
All drying instruction terms in this book conform to the Care Labeling
Rule established by the Federal Trade Commission, January 1984.
of this or any other
appliance.
2
Page 3
IMPORTANT SAFETY
Read all instructions before
The California Safe Drinking
Water and Toxic Enforcement Act
requires the Governor of California
to publish a list of substances
known to the state to cause cancer,
birth defects or other reproductive
harm and requires businesses to
warn customers of potential
exposure to such substances.
Gas appliances can cause minor
exposure to four of these substances,
namely benzene, carbon monoxide,
formaldehyde and soot, caused
primarily by the incomplete
combustion of natural gas or
fuels. Properly adjusted dryers will
minimize incomplete combustion.
Exposure to these substances can
be minimized further by properly
venting the dryers to the outdoors.
–
of fire, electric shock, or
to persons when using your
including the following:
Use this appliance only for its
intended purpose
this Use and Care Book.
●
This dryer must be properly
installed and located in
accordance with the Installation
Instructions before it is used.
you did not receive an Instigation
Instructions sheet with your dryer,
you can obtain one by contacting
the service location nearest you.
—Properly ground to conform
with all governing codes and
ordinances. FO11
Installation Instructions.
—Locate where the temperature
is above
satisfactory operation of the
dryer control system. Do not
install or store the dryer where it
be exposed to the weather.
—Connect to a properly rated,
protected and sized power-supply
circuit to avoid electrical overload.
—Exhausting to the outside is
STRONGLY RECOMMENDED
reduce the risk
basic precautions,
as described in
OW
details in
for
this appliance.
to prevent large amounts of
moisture and lint from being blown
into the room.
Exhausting
follow the
in the
Instructions.
●
When disconnecting this
appliance pull by the plug rather
than the cord to avoid damage to
the cord or junction of cord and
plug. Make sure that the cord is
located so that it will not be stepped
on, tripped over or otherwise
subjected to damage or stress.
●
not repair or replace any
part of the appliance or attempt
any servicing
recommended in this Use and
Care Book or in published
repair instructions that you
understand and have the
carry out.
of a
.
Do not use heat
the
dry
containing rubber, plastic, or
(such as padded
bras, tennis shoes, galosh=, bath
ma@
bags, etc.) as these
melt or burn.
baby pan&
some robber
when heated,
may
under
certain circumstances produce
If
fire by spontaneous combustion.
●
Garments labeled “Dry Away
From Heat” (such as life jackets
containing
must not be put
in your dryer.
not wash or dry articles
that have been cleaned in,
in, soaked in, or spotted with
combustible or explosive substances
(such as wax, paint, gasoline,
solvents, kerosene, etc.) which
may ignite or explode.
not use
or store such substances on/or
around your washer and/or dryer
during operation.
●
Any article on which you have
used a cleaning solvent, or which
contains flammable materials
(such as cleaning cloths, mops,
towels used in beauty salons,
restaurants or barber shops, etc.)
must not be placed in or near the
dryer
traces of these
flammable liquids or solids and
their times have been removed.
There are many highly flammable
items used in homes such as:
acetone, denatured alcohol,
gasoline, kerosene, some
household cleaners, some spot
removers, turpentines, waxes, wax
removers and products containing
petroleum distillates.
Clean the lint filter before each
load
prevent lint
inside the dryer or in the room.
DO
OPERATE THE
WITHOUT
LINT
FILTER IN PLACE.
●
area around and
underneath your appliance free
from the accumulation of
combustible
such as
lint, paper, rags, chemicals, etc.
●
Do not store items that may bum
or melt (such as clothing, paper
material, plastics or plastic
containers, etc.) on top of the dryer
during operation.
●
The interior of the machine
and the exhaust duct connection
inside the dryer should be
cleaned periodically by a
qualified individual.
●
Exhaust duct (see
instructions). Use only metal
duct inside dryer or for
exhausting dryer to the outside.
minimk the possibility
of
●
Never reach into the dryer
the drum is
unloading or adding
until the drum has completely
stopped.
●
Close supervision is
if this
children. Do not allow children to
Wore loading,
is used by or near
3
Page 4
Important
Instruction
(continued)
play inside, on or with this
appliance or any discarded
appliance. Dispose of discarded
and shipping or packing
materials properly. Before
discarding a dryer, or removing
from service, remove the door
of the drying compartment.
Keep all laundry aids (such
as detergents, bleaches, fabric
softeners, etc.) out of the reach of
children, preferably in a locked
cabinet. Observe all warnings on
container labels to avoid personal
injury.
●
Keep the floor around your
appliances clean and dry to reduce
the possibility of slipping.
●
Do not dry fiberglass articles in
your dryer. Skin irritation could
result from the remaining glass
particles that may be picked up
by clothing during subsequent
dryer uses.
. The laundry process can reduce
the flame
avoid such a result, the garment
of fabrics. To
manufacturer’s care instructions
should be followed very carefully.
●
Never
dryer top or door.
Do not tamper with controls.
To minimize the possibility
of electric shock, unplug this
appliance from the power supply
before attempting any maintenance
or cleaning (except the removal and
cleaning of the lint filter).
Turning the Cycle Selector knob
to an OFF position does NOT
disconnect the appliance from
the power supply.
Do not operate this appliance
if it is damaged, malfunctioning,
partially disassembled, or has
missing or broken parts, including
a damaged cord or plug.
●
If yours is a gas dryer, it is
equipped with an automatic electric
ignition and does not have a pilot
light. DO NOT ATTEMPT
LIGHT WITH A MATCH. Burns
may result from having your hand
in the vicinity of the burner when
the
on or stand on the
ignition may turn on.
Dryer-applied fabric
softeners or anti-static
conditioners
You may wish to soften your
laundered fabrics or reduce the
static electricity in them.
recommend you use either a
fabric softener in the wash cycle,
according to the manufacturer’s
instructions for those products, or
try a dryer-added product for
which the manufacturer gives
written assurance on the package
that their product can be safely
used in
Service or performance problems
caused by the use of these products
are the responsibility of the
manufacturers of those products
and are not covered under the
warranty of this appliance.
your dryer.
We
SAVE THESE
INSTRUCTIONS
How to operate your dryer
reduce the risk of fire. electric
read the IMPORTANT SAFETY INSTRUCTIONS before o~erating this appliance.
Your Dryer Properly
●
Clean the lint filter each time the
dryer is used. Always be sure the
lint filter is in place. Don’t use the
dryer without it.
●
Good sorting for the dryer begins
at the washer. Generally, if clothes
are sorted right for washing, they’re
sorted right for drying. See page 8
for sorting help. (If you do mix
various types of fabrics in your
load, set the controls for the
lighter-weight fabrics and remove
when dry. Reset controls for the
remaining heavier fabrics. )
shock. or iniurv to ~ersons,
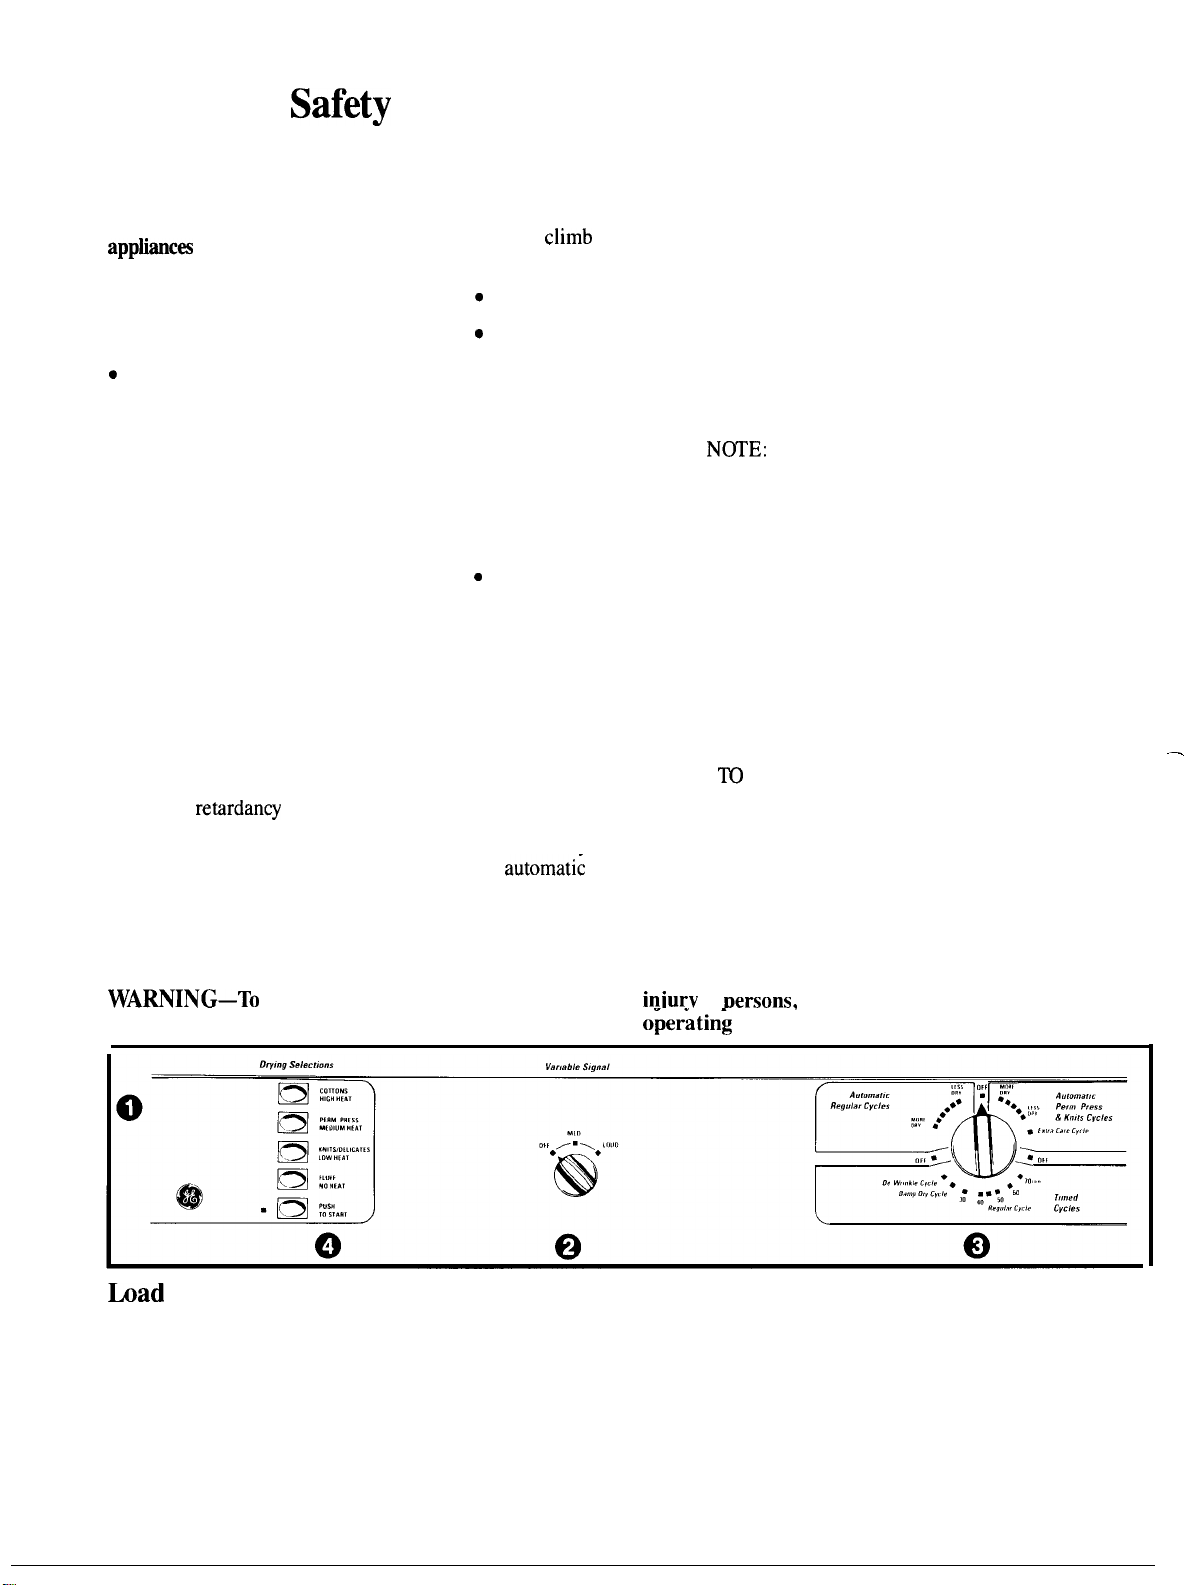
Set the Controls
See the Controls Setting Guide
on pages 6 and 7.
4
Page 5
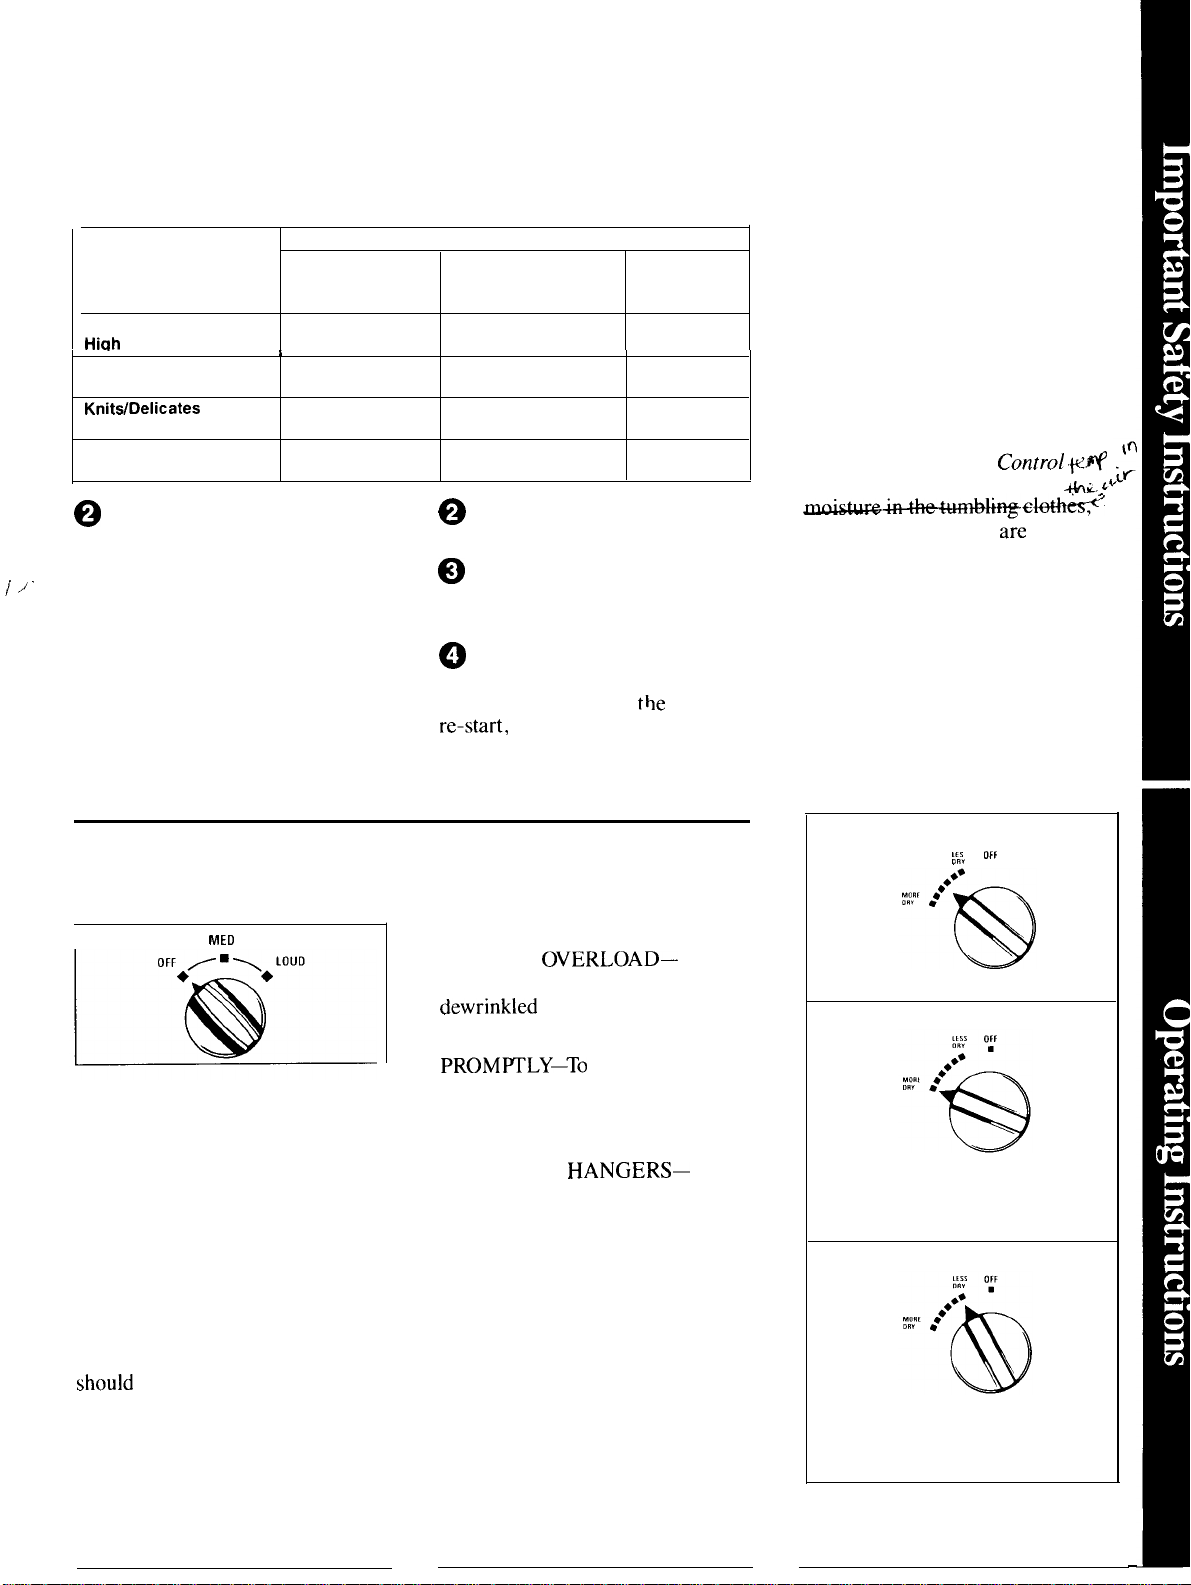
~F.brie Care Selections
Push a button to select the proper heat for
Should be used with cycles indicated ●
Fabric Care
Selections
Cottons
Heat
Perm Press
Medium Heat
Low Heat
Fluff
No Heat
Extra Care Cycle
(Operates only with Automatic,
Perm Press& Knits Cycles. )
Turn to ON if desired. To minimize
wrinkles set in the clothes, the Extra
Care cycle provides approximately
15 minutes of no-heat tumbling
after the clothes are dry.
Use End-of-Cycle Signal. Signal
will sound at five-minute intervals
to remind you to remove the clothes.
Automatic
Regular Cycle
●
your load.
desired. (See below. )
cycle setting. The selector may be
turned in either direction.
to start dryer. (Opening the door
during operation stops
the START button. )
Automatic,
Perm Press and
Knits Cycles
●
●
Timed
Cycles
●
●
●
●
Select End of Cycle Signal, if
Turn Cycle Selector to desired
Press PUSH TO START button
What is the difference
between Mined &
Automatic drying?
Timed Drying
When using the TIMED CYCLES,
you select the number of minutes
you wish the dryer to run and it
turns off at the end of this time
period.
Automatic Drying
When using the Automatic Cycles,
the Electronic Sensor
system
continually senses the
determines when they a;e dried to
your pre-selected setting, and
terminates the cycle automatically.
Refer to the CONTROLS SETTING
GUIDE for recommended settings.
The Cycle Selector will not advance
until clothes have reached a certain
degree of dryness.
Dryness selections guide for
the automatic cycles
.p:~
End-of-Cycle Signal
(Operates with any cycle.)
I
The Signal control can be set
anywhere between OFF and
LOUD, depending on desired
sound level. The signal will sound
just before the end of the cycle to
remind you to remove the clothes.
To stop signal while sounding, turn
Signal control to OFF or advance
Cycle Selector to OFF.
The Signal should always be used
when drying Polyester Knits or
Permanent Press items which
be removed as soon as the
dryer stops to help prevent setting
of wrinkles.
The signal should also be used with
the Extra Care Cycle.
Polyester Knits &
Permanent Press
drying tips
● DO NOT
Garments being dried or
● REMOVE CLOTHES
wrinkling, remove from the dryer
promptly at the end of the drying
cycles.
● PLACE ON
Permanent Press and Polyester
Knit garments look best if placed
on hangers after drying.
Set to Middle Position
● For most normal loads
Set toward MORE DRY
● For loads that include heavy-
weight fabrics.
● If you desire to remove more
moisture.
Set toward LESS DRY
● For lightweight fabric loads.
● If you desire to remove less
moisture.
● For very small loads.
s
.
5
Page 6
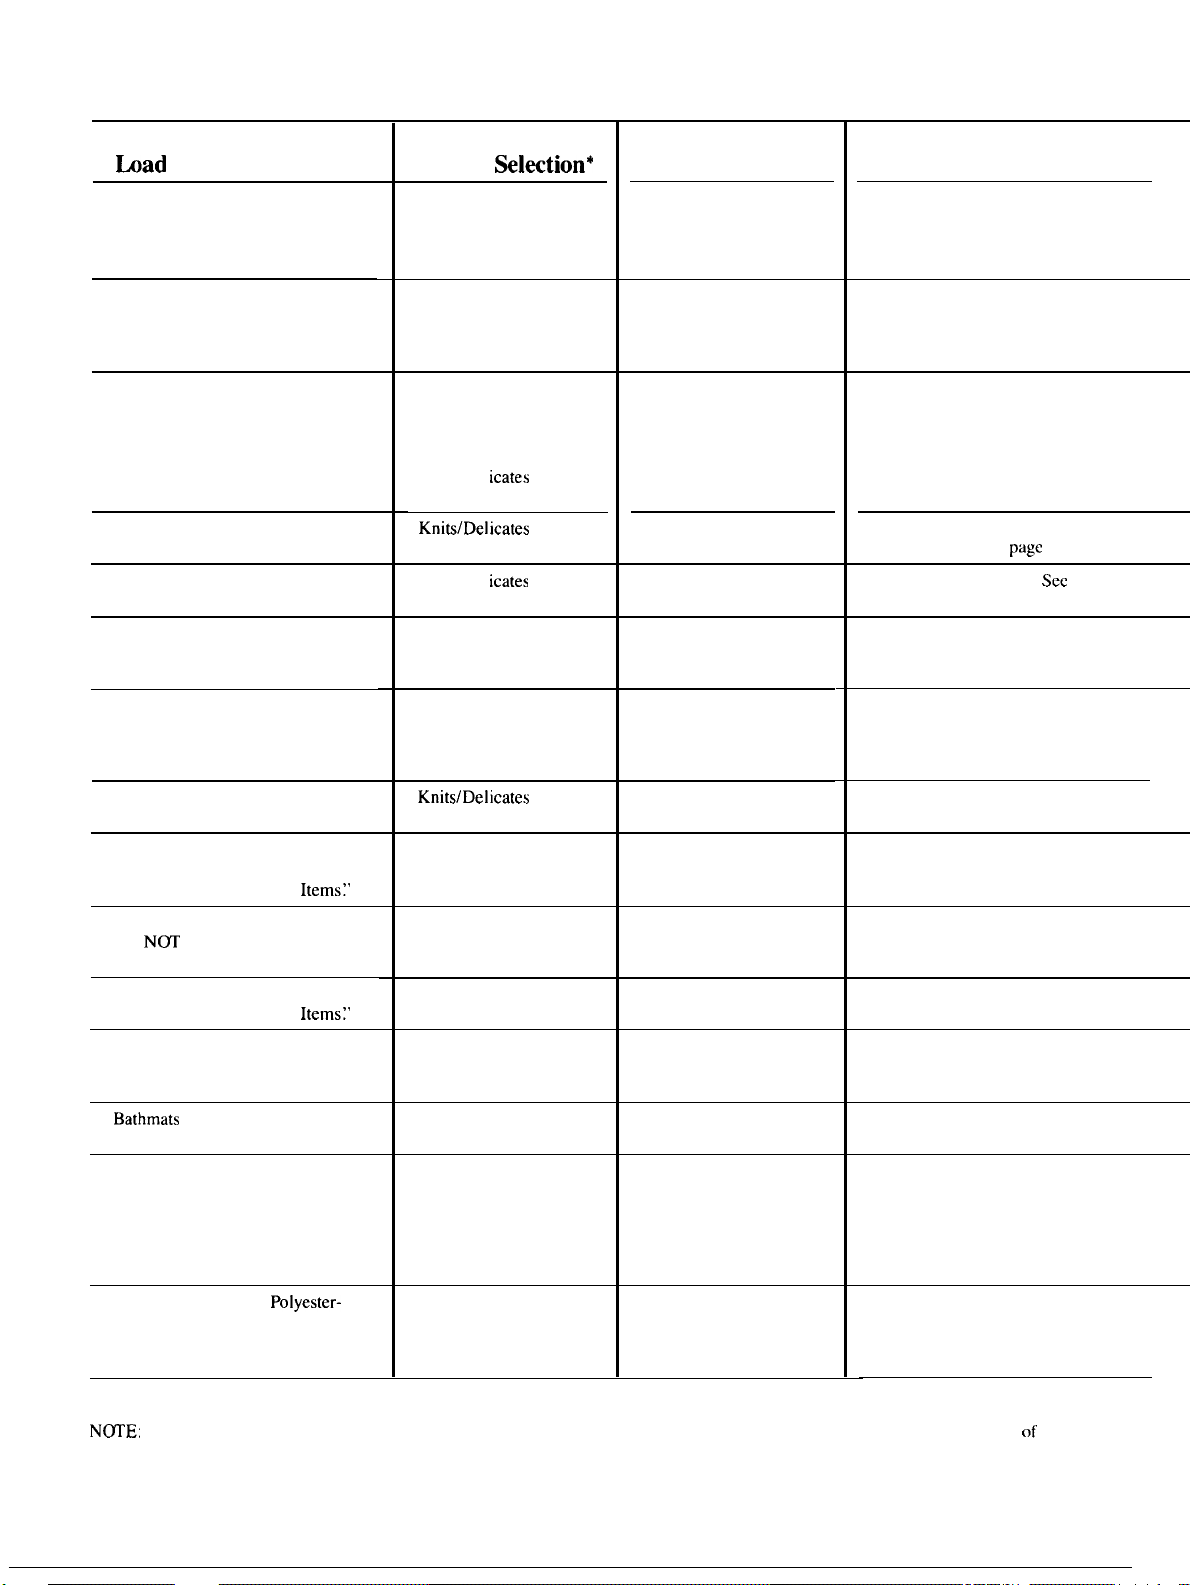
Controls Setting Guide for different fabrics and loads
Fabric Care/
Drying
Cycle
Cycle Setting
Cottons & Linens Cottons
High Heat
Permanent Press, Treated Cottons,
Blends with Cotton
Synthetics—Polyester, Nylon,
Acrylic Knits and Woven Fabrics
Sturdy
Delicate
Silks and Wools, Blends including
Silks and Wools
Rayon and Acetate
Down-filled garments, if machine
washing and drying are
recommended.
Baby Clothes—Sturdy: Diapers,
Nightgowns, Shirts, Pads, Sheets,
Receiving Blankets, Coveralls. See
Special Instructions.
Baby Clothes—Delicate
Blankets—Wool, Part Wool,
Cotton, Electric, Synthetic. See
below under “Extra-large
Curtains, Slipcovers, Draperies.
DO
FIBERGLASS.
Chenille Bedspreads, Robes. See
below under “Extra-large
Fabrics, Vinyl, Plastics and
Articles with Plastic Trim.
Extra-large Items—Queen or King
Size Sheets, Blankets or Spreads,
Sleeping Bags, Insulated Jackets or
Suits, Mattress Covers (Pads),
Quilted Bedspreads.
MACHINE DRY
Perm Press
Medium Heat
Perm Press
Medium Heat
Knits/Del icates
Low Heat
Low Heat
Knits/Del
Low Heat
Cottons
High Heat
Cottons
High Heat
Low Heat
Cottons
High Heat
Cottons
High Heat
Cottons
High Heat
Fluff
No Heat
Cottons
High Heat
Permanent Press
Medium Heat
Automatic Regular Cycle
or
Timed Cycle
Automatic Perm Press
and Knits Cycle
Timed Cycle
Automatic Perm Press
and Knits Cycle
Automatic Perm Press
and Knits Cycle
Automatic Perm Press
and Knits Cycle
Automatic Regular Cycle
Automatic Regular Cycle
Automatic Perm Press
and Knits Cycle
Timed Cycle Set at 20 to 25 minutes
Timed Cycle
Timed Cycle
Timed Cycle
Timed Cycle
Timed Cycle
See Dryness Selection Guide on
page 5.
Set at REGULAR for dry; at
DAMP-DRY for ironing,
See Dryness Selection Guide on
page 5.
DE-WRINKLE setting to de-wrinkle
garments that have not been washed.
See Dryness Selection Guide on
page 5.
Set toward LESS DRY. See Dryness
Selection Guide on
Set toward LESS DRY.
Selection Guide on page 5.
Set toward LESS DRY
For first setting, set at 20 minutes;
for second setting, set at 15 minutes
First setting— 20 minutes;
additional settings—5 minutes.
Set for time desired.Rubber-coated Items, Laminated
First setting—20 minutes;
additional settings—5 minutes.
First setting—20 minutes;
second setting—15 minutes;
additional settings—5 minutes.
5.
Dryness
Pillows—Feather and
filled (if manufacturer recommends
they be dried in a dryer). See
Special Instructions.
*The terms High, Medium and Low Heat are those usually found on fabric care labels. For best results, follow your fabric care labels.
The Cycle Selector settings indicated above are to be used as a guide. You may find that best results are obtained for certain
by setting the Cycle Selector to either side of the recommended settings.
Cottons
High Heat
Timed Cycle Set at 70 minutes.
6
your fabrics
Page 7
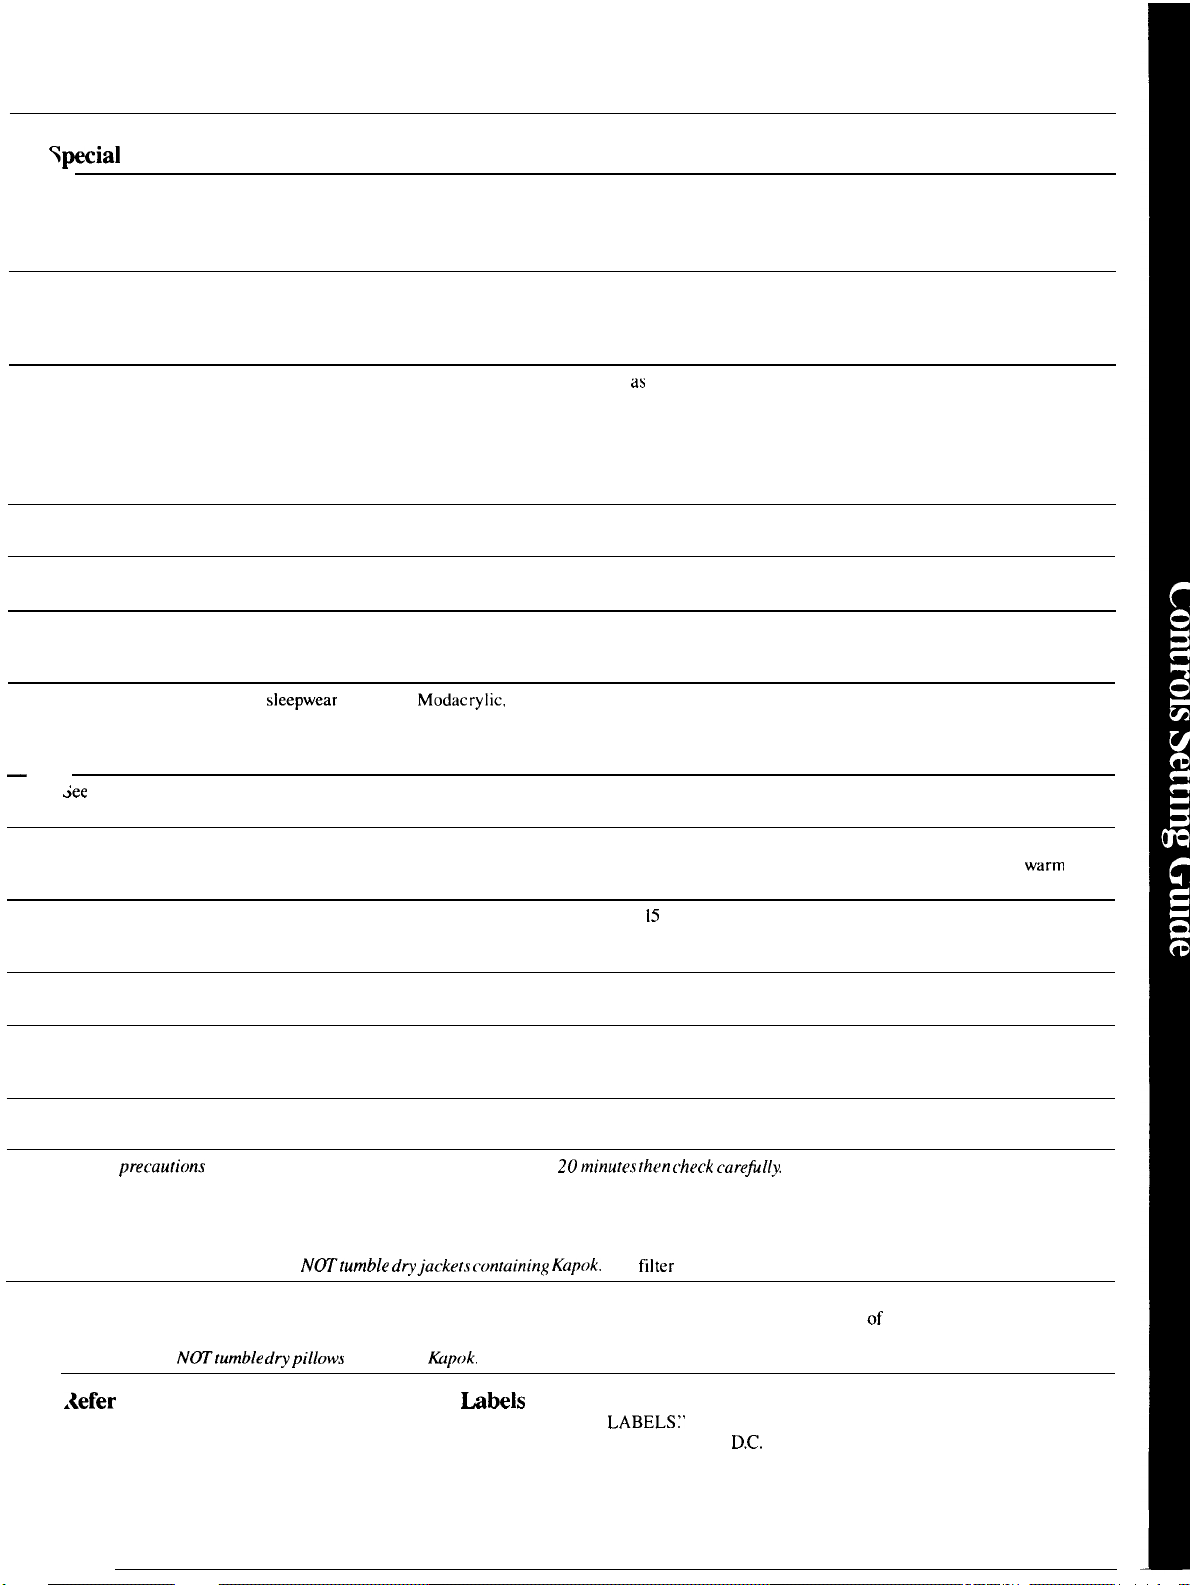
—
Instructions
Do not dry non-colorfast items with whites or light-colored items.
Do not overload dryer; clothes should tumble freely. Remove promptly as soon as dryer stops; place clothes on hangers to
minimize wrinkling.
Do not overload dryer; clothes should tumble freely. Remove promptly as soon
minimize wrinkling.
Dry silks and wools in your dryer
Tumble drying is mandatory. Down must be thoroughly dried to remove odor and prevent mildewing. Place two large, dry towels in the
dryer to improve tumbling and shorten drying time. Be sure to dry thoroughly.
IMPORTANT. If children’s
Check manufacturer’s drying instructions.
above instructions.
Place in dryer with 3 or 4 dry towels which have been heated for 5 minutes. Set timer for 20 to 25 minutes. Do not set control for more than
25 minutes. Do only one blanket at a time. Remove blanket at end of cycle and block blanket back to original shape. Press binding with
iron. Allow to dry before storing.
Use dry towels as buffers. Set timer for 20 minutes. If items are still wet, reset for
still damp. Place slipcovers on furniture immediately. Hang draperies and curtains so that creases will fall out. Stop dryer periodically and check
filter for excess lint. Remove and restart dryer.
[m/)1
if recommended by the garment manufacturer. Follow instructions carefully.
tumble dry only on Low/Knits. Normal Heat can damage these fabrics.
dryer stops, place clothes on hangers to
minutes and check again. Items should be removed while
Tumble on FLUFF (No Heat) setting as heat may cause alteration in shape, color and appearance of such articles
Stop dryer periodically and check filter for excess lint. Remove and restart dryer.
Special
again; and 5 minutes for each additional setting. Make sure that article does not fill drum. Many large articles, when wet, have ample room in
dryer, but as they dry and fluff up may not have room to tumble. Check carefully every few minutes and if article is still wet or damp and fills
dryer, finish drying on line. Do not, under any circumstances operate dryer for longer times without checking. CAUTION: If large items do not
have room to tumble, the air flow maybe blocked which could result in scorching your valuable items. Many large items, like shag rugs, cannot
be dried in home size dryers. DO
Check ticking for holes or weak seams where feathers or filling could escape. Dry no more than one pillow at a time and set dryer for maximum
time. Stop dryer occasionally and shake pillows to redistribute filling for more even drying. Check pillows at end
completely dry, return them to dryer and reset for more drying time. Feather pillows dry very slowly and must be dried completely to prevent
—
mildewing.
DO
drypillow.v containing
dry;ackefs
(See filter cleaning instructions above. )
Set 15 minutes for second setting, check
drying time. If they are not
to Garment Manufacturers’ Care
For more information on care labeling, send for “What’s New About CARE
For sale by the Superintendent of Documents, U.S. Government Printing Office, Washington,
7
20402.
Page 8
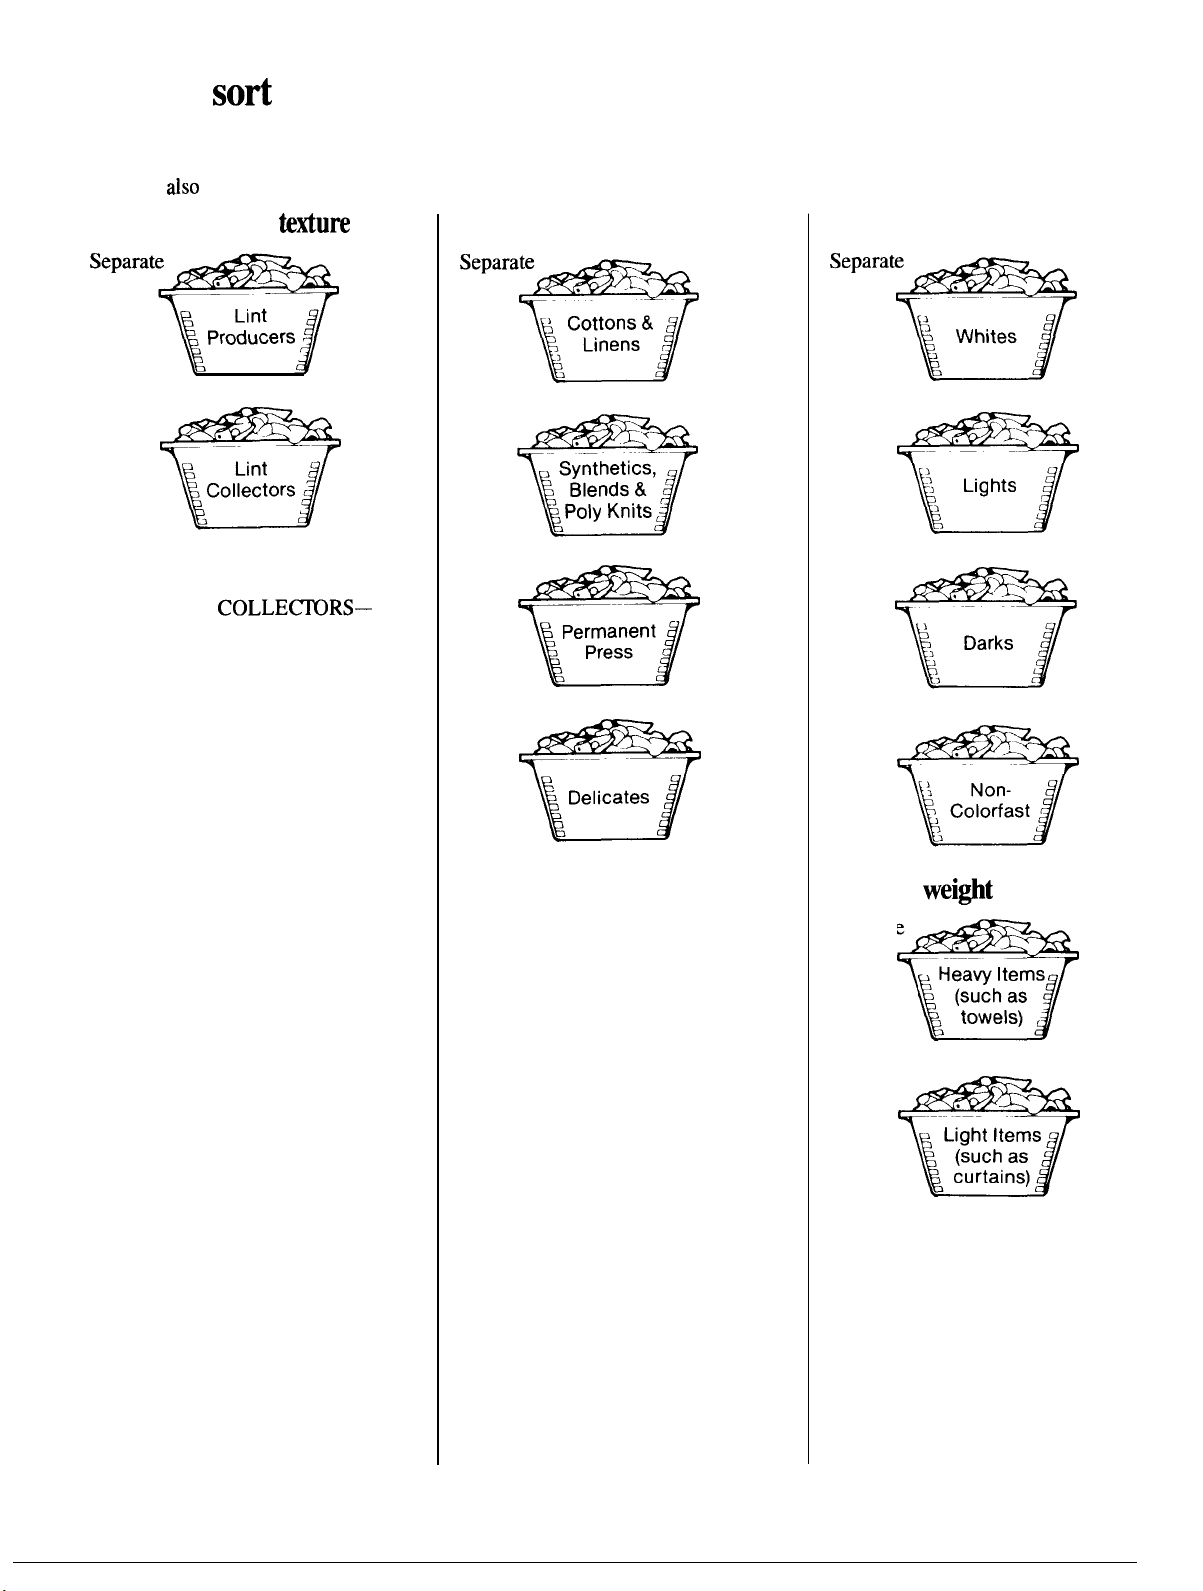
How to
Normally, if you have sorted clothes correctly for washing,
you will
have properly sorted drying loads.
the clothes
Sort by surface
from
LINT PRODUCERS—such as
terry toweling and chenille—give
up lint. LINT
such as man-made fibers and
napped fabrics like velveteen and
corduroy—attract lint, and must be
dried separately.
Sort
by
fabric
from
from
from
Sort by color
from
from
from
In addition to sorting to reduce lint
collection, it is recommended that
fabrics of similar construction be
dried together whenever possible.
Sort by
Separate
Items
(such as
towels)
from
For information on tumble drying
extra-large items and different
fabrics and loads, see pages 6 and 7.
8
Page 9
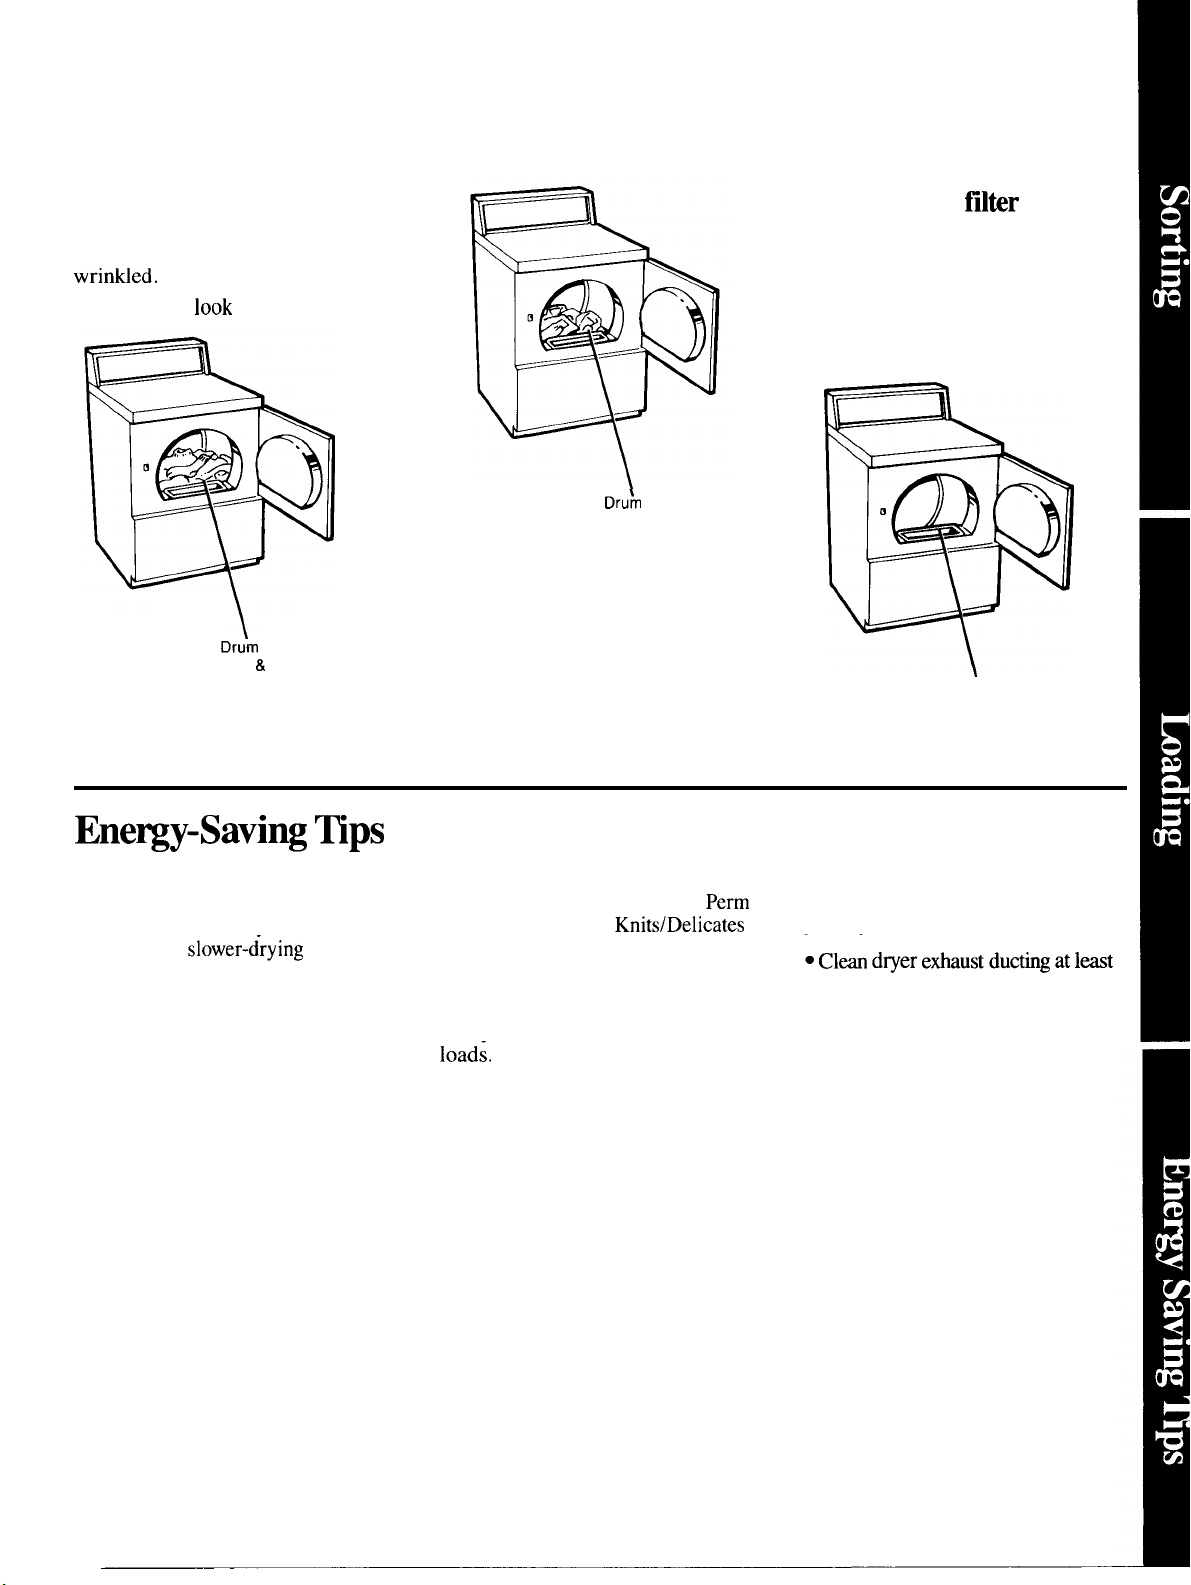
How to load the
clothes
Don’t overload
your dryer.
Crowded loads don’t dry efficiently
and clothes may be unnecessarily
Loads should
like this:
Cottons
with
Linens
Permanent Press Load
with
Clean the lint
before
drying every load.
Clean lint filter (see shaded area)
by putting
at the corner of filter and wiping in
a downward motion all the way
across to the other corner.
For additional information on lint
filter, see page 13.
your moistened fingers
Lint Filter
●
Sort clothes by weight so you won’t
have to run an extra cycle for one or
two
heavier,
items.
See page 8.
● Do not overload dryer. For
efficient drying, clothes need to
tumble freely.
●
Use Automatic Drying Cycles
whenever possible to help prevent
overdying and to save energy.
●
To help prevent ironing, use
Press (Medium) or
(Low). Remove garments promptly
at end of drying cycle and place on
hangers.
. Dry
your clothes in consecutive
‘Using a “warm” dryer will
save energy.
●
Clean dryer lint filter each time
you dry.
efiaustductig
once a year. A partially clogged
exhaust can lengthen drying time.
9
Page 10
Solver
PROBLEM
POSSIBLE CAUSE AND REMEDY
DRYER WON’T . Dryer unplugged. Make sure power cord is plugged in.
START
. No power to dryer. Check fuses and circuit breakers to make sure dryer is getting
current. Most electric dryers use two.
●
Controls improperly set. Make sure controls are set and START switch is pushed.
Opening the door during operation stops the dryer. Tore-start, close the door and push
the START switch.
. Dryer door is open. Close door securely—dryer will not run with door open.
. Circuit is overloaded. Do not operate other appliances on the same electrical outlet
or circuit while the dryer is operating.
TAKE
LONG TO DRY
●
Controls improperly set. Check all controls to make sure they are correctly set for
the load you want to dry. See pages 4-7.
●
under lint filter with vacuum cleaner. See page 13.
●
Improper ducting. Make sure dryer is
in accordance with Installation
Instructions.
GENERAL
. Obstruction in exhaust ducting. Make sure ducting is clean and free of obstruction;
make sure damper in outside
sure it is not kinked and is properly installed according to Installation Instructions.
. Blown fises or tripped circuit breakers. Check household fises or circuit breakers.
Most electric dryers use two. It is possible for one to be blown or tripped and the dryer
still tumble without heat.
●
Improper sorting. Do not mix heavy, hard-to-dry items with lightweight articles.
●
Large loads of moisture-holding fabrics, such as beach towels, take a long time to
remove moisture.
. Too many items in dryer. Dry only one washer load at a time. Do not combine loads.
●
Too few items in dryer. If drying only one article, add two more similar articles, even
if dry, to insure proper tumbling.
●
Some fabrics
shrink whether machine washed and tumble
or washed by hand
and drip dried; others may be safely washed but will shrink in a dryer. Follow Garment
Manufacturers’ Care Labels exactly. If in doubt, do not machine wash or tumble dry.
10
Page 11
PROBLEM
POSSIBLE CAUSE AND REMEDY
●
Relaxation shrinkage can
KNITS and
shape after each wash and dry cycle.
occur in knit fabrics that have been improperly stretched
PERMANENT PRESS
AND “NO-IRON”
●
gradually removed by laundering. Maybe
Shrinkage
or delayed shrinkage
by overheating
is caused when starch or sizing (in some fabrics) is
occurs in certain knit fabrics that have been
in older garments that have been
for Rel~tion
shaped. When washing, drying or ironing temperatures exceed the temperatures used to
shape set, shrinkage may occur. This cannot be corrected, but it can be prevented by
washing in cold or warm water; drying on low heat.
●
Leaving clothes in dryer after tumbling stops. Remove clothes promptly and hang
them immediately.
●
Too many items in dryer. Dry only one washer load at a time. Do not combine loads.
●
few items in dryer. If drying only one article, add two or more similar articles, even
if dry, to insure proper tumbling.
. Improper loads. Avoid laundering heavy Permanent Press items, such as work clothes,
with lighter Permanent Press items, such as shirts or blouses. Do not wash or dry
Permanent Press with regular laundry.
Too many clothes in washer. Items must have room to move freely. Permanent Press
loads should always be smaller than regular loads..
●
Use of incorrect wash and dry cycles. Use Permanent Press Wash Cycle which provides
a cool-down rinse to minimize
Also, use Permanent Press Dry Cycle.
more than medium loads.
●
Incorrect water level. Use large water level for medium load;
for small load.
●
Washing
in too hot water. Wash in cool or
11
water with plenty of detergent.
half full
Page 12
The
(continued)
PROBLEM
IN
PERMANENT PRESS
AND “NO-IRON”
ITEMS (continued)
If you need more help.. call, toll free:
GE
Center”
POSSIBLE CAUSE AND REMEDY
●
Accumulation of lime scale due to use of carbonate detergents. If you must use a
non-phosphate detergent, avoid the use of a high-carbonate detergent.
Failure to use fabric softener. Proper use of fabric softener will minimize wrinkling.
To
remove
●
.
●
. Iron carefully.
. Send to dry cleaners for pressing.
●
Some
out
cotton blends, the cotton portion of the fabric can eventually wear away leaving only the
synthetic. Since it’s the cotton portion which
decrease of Permanent Press performance will result.
on “Permanent Press” setting.
and dry on “Permanent Press” setting.
If yo
may remain which cannot be
u
the
on
good laundry procedures and Permanent
may not be good quality. Also, in permanent press synthetic/
treated for Permanent Press, a loss or
and hang immediately.
Press clothes
come
consumer information service
12
Page 13
Care and Cleaning
USER MAINTENANCE
INSTRUCTIONS
dryer care
The Drum. Porcelain enamel
drum is rust-resistant and requires
no special care.
The Exterior.
washing compounds. Wipe or dust
with damp cloth. Try not to strike
the surface with sharp objects.
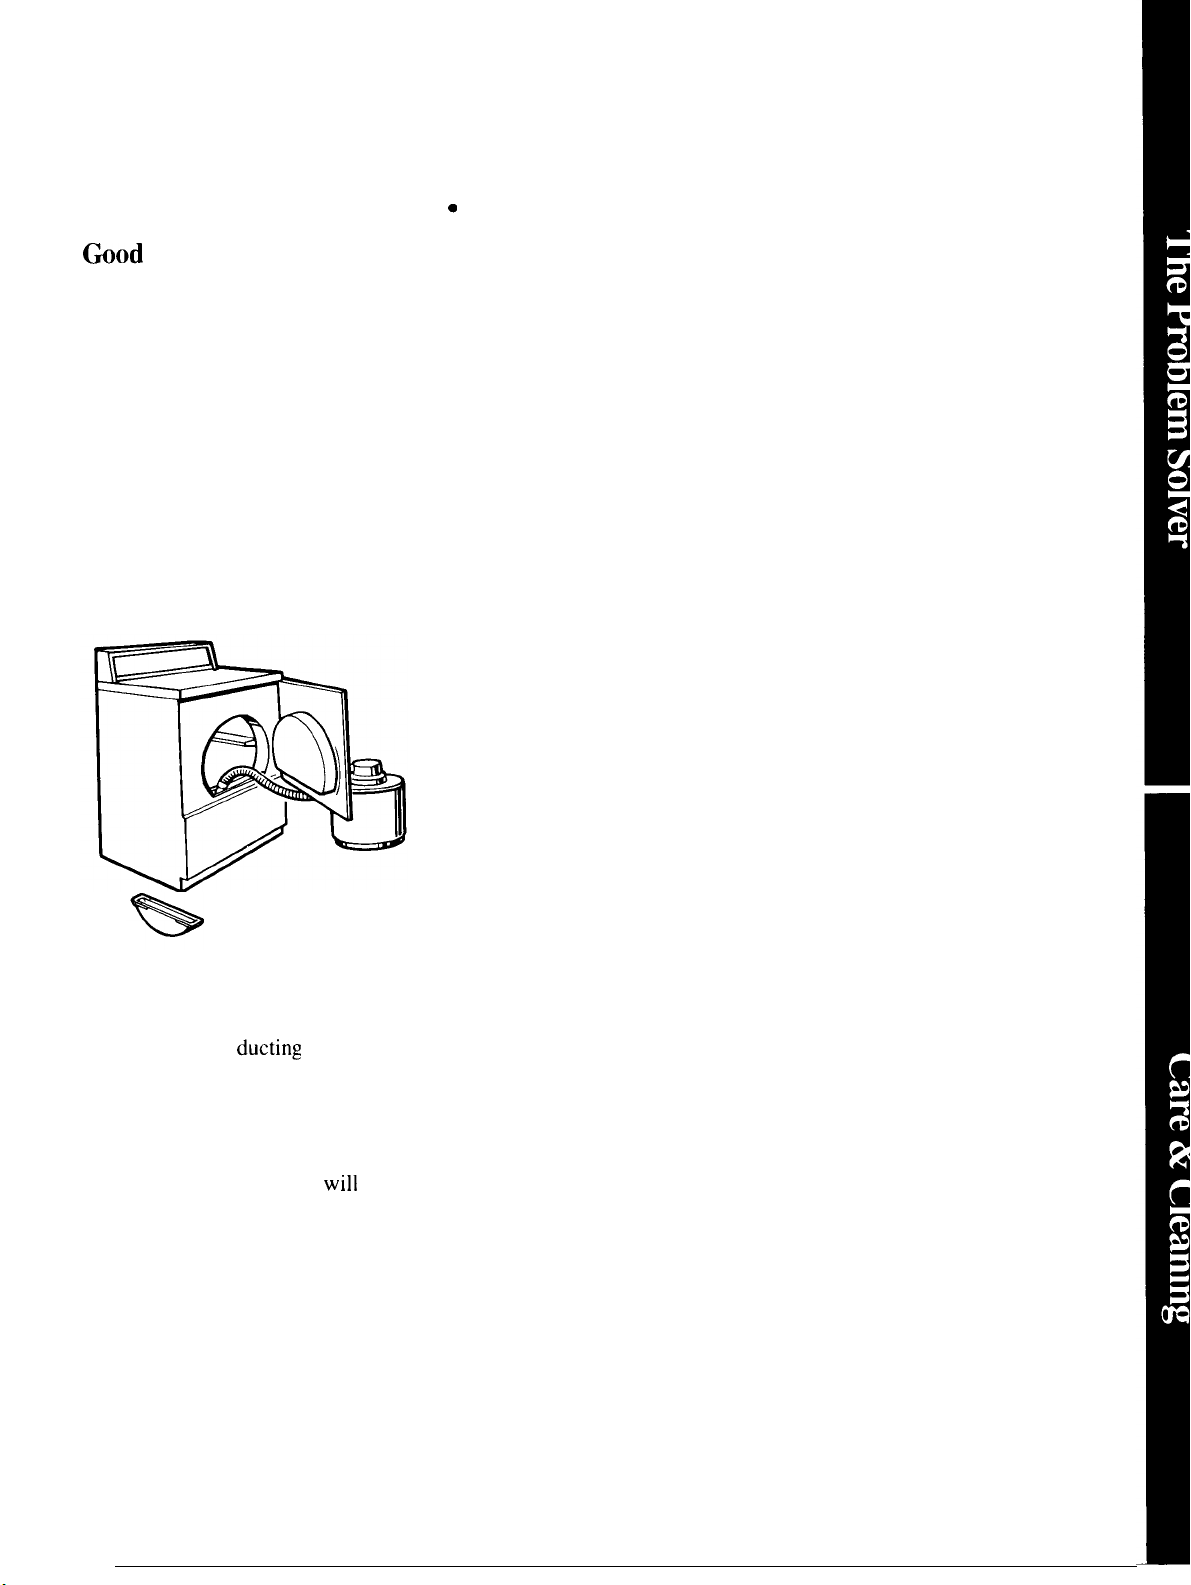
The Lint Filter.
before every use as described on
page 9. Periodically lint filter
should be removed and suction
hose from vacuum cleaner should
be inserted into the opening.
See below.
Wipe off any spills or
Wipe lint filter
CAUTIONS:
Before having your electric dryer
connected in your new residence,
be sure your licensed electrician
confirms that the supply voltage
matches the voltage specified on
the rating plate.
● Dryer control panel and finishes
may be damaged by some laundry
pretreatment soil and stain remover
products if such products are
sprayed on or have direct contact
with the dryer.
Apply these pretreatment products
away from the dryer. The fabric
may then be washed and dried
normally. Damage to your dryer
caused by pretreatment products is
not covered by your warranty.
Do not obstruct the flow of
combustion and ventilating air.
Dryer Exhaust:
the dryer exhaust
once a year.
To store dryer:
time, disconnect power supply and
clean lint filter.
Do not store dryer where it
exposed to the weather.
Inspect and clean
For short period of
be
13
Page 14

14
Page 15
Be There
With ‘the purchase of your new GE appliance, receive the
assurance that if you ever need information or
from GE, we’ll be there.
you have to do is cdl—toll-free!
In-Home
Service
800-GE-CARES
AGE Consumer Service professional
provide expert repair service,
scheduled at a time that’s convenient
for you. Many GE Consumer Service
company-operated locations offer you
service today or tomorrow, or at your
convenience
days). Our factory-trained technicians
know your
so most repairs can be handed in just
one visit.
a.m. to
a.m. to
inside and
p.m.
p.m. Satur-
Service Contracts
You can have the secure feeling that
GE Consumer Service
there after your warranty expires. Purchase a GE contract while your warranty is
a substantial discount. With a
year contract, you’re assured of future
service at today’s prices.
in effect and you’ll receive
stall be
Center
a
800.6262000
Whatever your question about any GE
major appliance, GE Answer
information service is available to
help. Your cdl—and your
will be answered
courteously And you can
time. GE Answer
open 24 hours a
Telecommunication Detice for the Deaf
and
service is
7 da~ a week.
800-626-2002
own appliances can
parts or accessories sent
their home, free of shipping charge!
The GE parts
to over 47,000 parts.. and
Genuine
Discover cards are accepted.
User maintenance instructions
contained in this
intended to be performed by
any user. Other servicing
referred to
vice
exercised, since improper servicing
may
unsafe operation.
to service
have needed
to
provides access
Parts are fully
Maste~ard and
ser-
Caution must be
For Customers
Special Needs...
800.626.2000
Upon request, GE
controls for a variety of GE appliances,
and a brochure to assist in planning a
barrier-free kitchen for persons with
limited
free of charge, cdl 800.626.2000.
Consumers with impaired hearing
or
or a conventional teletypewriter may
to
who have access to a
request information or service.
provide Braille
To
these
‘
Page 16
YOUR GE AUTOMATIC CLOTHES DRYER
WARRANTY
Save
proof of original purchase date such as your sales slip or
check to establish warranty period.
WHAT IS COVERED
WHAT IS
COVERED
FULL ONE-YEAR WARRANTY
For one year from date of original
purchase, we will provide, free of
charge, parts and service labor
in your home to repair or replace
of
dryer
that fails
because of a manufacturing
defect.
● Service trips to your home to
teach you how to use the product.
Read your Use and Care material.
If you then have any questions
about operating the product,
please contact your dealer or our
Consumer Affairs office at the
address below, or call, toll free:
GE Answer
800.626.2000
consumer information service
. Improper installation.
If you have an installation problem,
contact your dealer or installer.
You are responsible for providing
adequate electrical, exhausting
and other connecting facilities.
This warranty is extended to
the original purchaser and any
succeeding owner for products
purchased for ordinary home use
in the 48 mainland states, Hawaii
and Washington,
warranty is the same except that it
is LIMITED because you must pay to
ship the product to the service shop
or for the service technician’s travel
costs to your home.
All warranty service will be provided
by our Factory Service Centers or
by our authorized Customer Care”
servicers during normal working
hours.
Look in the White or Yellow Pages
of your telephone directory for
GENERAL ELECTRIC COMPANY,
GENERAL ELECTRIC FACTORY
SERVICE, GENERAL
FACTORY SERVICE or
GENERAL ELECTRIC CUSTOMER
CARE” SERVICE.
● Replacement of house fuses or
resetting of circuit breakers.
. Failure of the product if it is used
for other than its intended purpose
or used commercially.
● Damage to product caused
by accident, fire, floods or acts
of God.
WARRANTOR IS
FOR CONSEQUENTIAL DAMAGES.
In Alaska the
RESPONSIBLE
Some
may not apply to you, This warranty gives you specific legal rights, and you may also have other rights which vary from state to state.
To know what your legal rights are in your state, consult your local or state consumer affairs office or your state’s Attorney General.
Pub. No. 49-9666
6-90 CG
states do not allow
Manager—Consumer Affairs, GE Appliances, Louisville, KY 40225
the exclusion or limitation of incidental or consequential damages, so the above limitation or exclusion
Warrantor: General Electric Company
If further help is needed concerning this warranty, write:
 Loading...