

Page 1

ge.com
Safetg instructions ........ 2-5
Operating Instructions
Control Panels ................ 6-8
Cycle Options ................ 9, !0
Dryer Features ................. !0
Loading and Using
the Dryer .................... 16, 17
Reversing the Door Swing .... 11-15
Stacking ................... 19-22
Venting the Dryer .............. 18
Troubleshooting Tips .... 23-25
Consumer Support
Consumer Support ............. 28
Warranty ..................... 27
DBVH510
DBVH512
DCVH515
DCVHg60
DHDVH52
DHDVH66
Write the model and serial
numbers here:
Model #
Serial #
They are on the label on
the front of the drger behind
the door.
175D1807P584 49-90316 12-06JR
Page 2
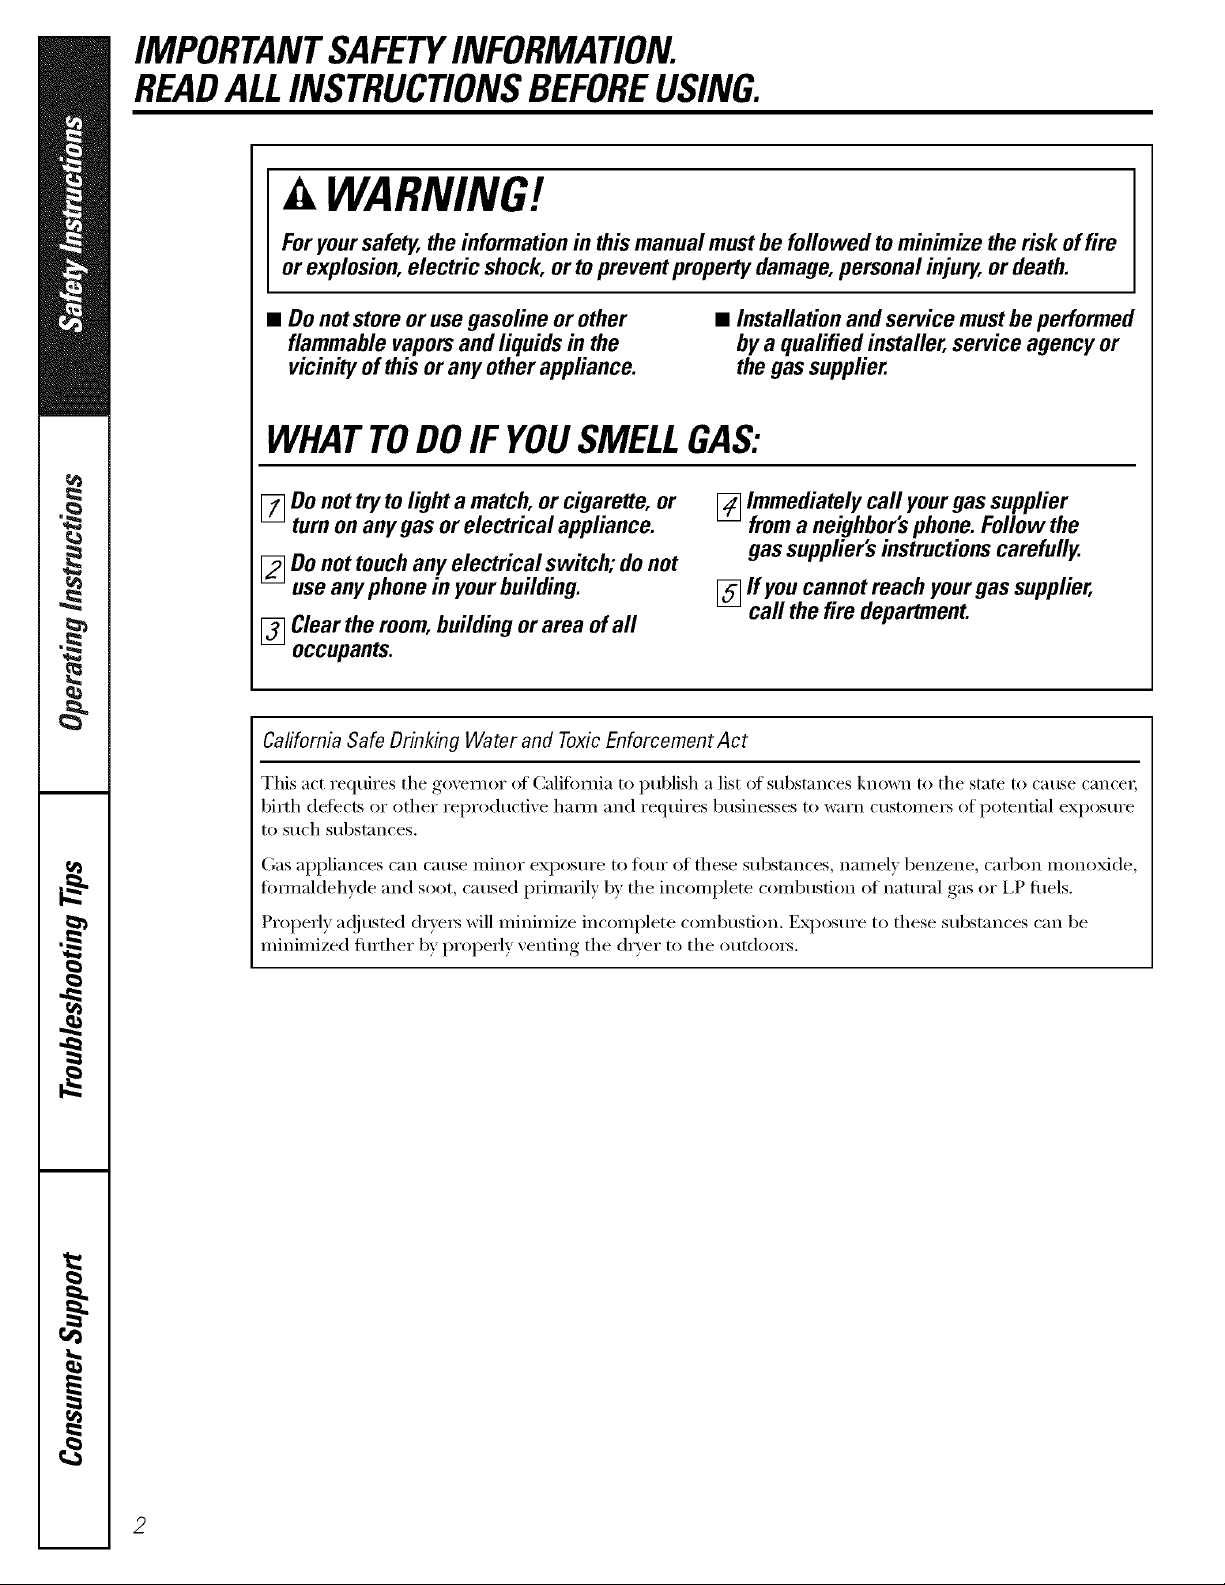
IMPORTANTSAFETYINFORMATION.
READALLINSTRUCTIONSBEFOREUSING.
WARNING!
Foryoursafety,theinformationin this manualmustbe followed tominimize the risk of fire
or explosion,electric shock, or topreventproperty damage,personalinjury,or death.
• Do notstoreor use gasoline or other
flammable vaporsand liquids in the
vicinityof thisoranyother appliance.
• Installationand service mustbeperformed
bya qualified installer,service agency or
the gassupplier.
WHATTODOIF YOUSMELLGAS:
[] Do nottry tolighta match,or cigarette, or
turnonanygas orelectrical appliance.
[] Do nottouchanyelectrical switch; do not
useanyphone in yourbuilding.
[] Clear the room,buildingor area ofall
occupants.
Caflfomia Safe Drinking Water and ToxicEnforcement Act
This act requires tile goxemor of Califimfia to publish a list of substances kno_n to tile state to catLse cance_,
birth defects or other reproductive ham_ and reqtfires businesses to warn customei_ of potential exl)osure
to Stlch stlbst_lnces.
Gas al)l)liances C_lil C_ltlSe iilinoi" exl)OStli'e to J[()/li" of these s/ibst;inces_ nai/lelv benzene, C_li'bon illonoxide,
fimnaldehyde and soot, caused primarily by the incomplete combustion of natural gas or I,P fllels.
Propedy a(!jusmd (h'ye_s will minimize incomplete combustion. EN)osure to these substances can be
minimized fln'ther by propedy venting tile dryer to tile out(loo_.
[]Immediately call,yourgassupplier
froma neighborsphone. Follow the
gassupplier'sinstructionscarefully.
[] If youcannot reach yourgassupplier,
call thefire department.
2
Page 3
PROPERINSTALLAtiON
This dryer must be properly installed and located in accordance with the Installation Instructions
%
before it is used. If you did not receive an Installation Instructions sheet, you can receive one by
visiting ge.cem, or by calling 800.GE.CARE$ (800.432.2737).
ge.com
[] Properly ground dryer to confi}nn with all
governing codes and ordinances. Follow details
in Installation Instructions.
[] Install or store where it will not be exposed to
temperatures below fi'eezing or exposed to
the weather:
[] Collnect to a properly rated, protected and sized
power supply circuit to a_dd electrical overload.
[] Remove the colored protective film i/"om both
the control panel and the doo,:
[] Remo\v all shaq) packing items and dispose
ot all shipping materials properly.
[] Do not *emove the vent protector fi'om the
back of the d,yet (on some models).
[] Pull the p_otector out and down to its lowest
position and connect the exhaust duct to the
drvel; The lower ed protector will prevent the
duct ii'om getting crushed (on some models).
Exhaus_/Ducting:
[_] Dryers MUSTbe exhausted to the outside to
prevent l'u'oe,_ amounts of moisture and lint
fl'om being blown into the room.
[_Lse onl) ngld metal or flexable metal 4
diameter ducr_ork inside the dr_er cabinet or
fi:,r exha usting to the (re,side. USE OF PLASTIC
OROTHERCOMBUSTIBLEBUCTWORKCAN
CAUSE,4FIRE.PUNCTUREDBUCTWORKCAN
CAUSEA FIREIFITCOLLAPSESORBECOMES
OTHERWISERESTRICTEDIN USEORDURING
INSTALLATION.
For complete details, fbllow the Installation
Insmmtions.
Page 4
iMPORTANTSAFETYiNFORMATiON.
READALLiNSTRUCTIONSBEFOREUSING.
k, WARNING!
YOURIAUNDflYAflEA
• Keep the area underneath and around ",'our
appliances fl'ee of combustible materials
(lint, paper; rags, etc.), gasoline, chemicals
and other flammable wq)o_ and liquids.
• Keep the floor around your appliances clean
and dry to reduce the possibility of slipping.
• Close supervision is necessm T if this appliance
is used bv or near children. Do not allow children
to play on, with or inside this or any other
appliance.
WHENUSINGYOURDRYER
• Never reach into the dt_'er while the drum is
moving. Before loading, mfloading or adding
clothes, wait until the drum has completely
stopped.
• Clean the lint filter befin'e each load to prevent
lint accumulation inside the dryer or in the
room. DO NOT OPERATETHE DRYERWITHOUT
THELINT FILTERIN PLACE.
• Do not wash or dr)" articles that have been
cleaned in, washed in, soaked in or spotted
with combustible or explosive substances (such as
wax, oil, paint, gasoline, degreasers, dry-cleaning
solvents, kerosene, etc.) which may ignite or
explode. Do not add these substances to the
wash water Do not use or place these substances
around your washer or dryer during operation.
• Do not place items eN)osed to cooking oils in
wmr (hTe_: Items contaminated with cooking oils
may contribute to a chemical reaction that could
cause a clothes load to catch fire.
•Anv article on which wm have used a cleaning
solvent or that contains flammable materials
(such as cleaning cloths, mops, towels used in
beaut)' salons, restaurants or barber shops, etc.)
must not be placed in or near the d_wer until
solvents or flammable materials have been
removed. There are many highly flammable
items used in homes such as acetone, denatured
alcohol, gasoline, kerosene, some household
cleanei_, SOllle spot i'ell/overs, ttli])entines,
WaXes, WaX i'eillovers and pi'o(hlctS containing
petroleum distillates.
• Keep all lmlnd_w aids (such as detergents,
bleaches, etc.) out (ff the reach of chikh'en,
preli_rably in a locked cabinet. Observe all
warnings on container labels to avoid injury.
• Never climb on or stand on the dryer top.
• The laundry process can reduce the flame
retardanc_ of rid)tics. To axoid such a result,
careflllE fi)llow the gmment manufacturer's
eai'e instlllctions.
• Do not dry articles containing rubbe_; plastic,
foam or si_nilar materials such as padded bras,
temfis shoes, galoshes, bath mats, rugs, bibs, baby
pants, plastic bags, pillows, etc., that may melt or
burn. Some rubber materials, when heated, can
under certain drcumstances produce fire by
spont;i neo/is COil/b/istion.
• Do not store plastic, paper or clothing that may
bm_ or melt on top (ff tile dryer during
opei_ltion.
• (;mments labeled OryAway from Heat or Do Not
Tumble Dry (such as life jackets containing kapok)
lit liSt not be put in your (h'vet:
• Do not (h T fiberglass articles in your dryer:
Skin irritation could result fl'om the remaining
particles that may be picked up by clothing
dulJng subsequent dryer rises.
• To minimize the possibility of electric shock,
unphlg this appliance fl'om the power supply
or disccmnect the dryer at the building's
distribution panel b)' removing the fllse or
switching off the circuit breaker befi)re
attempting any maintenance or cleaning
(except the removal and cleaning of the lint
filter). NOTE: Pressing START, STOP or POWER
does NOTdisconnect the appliance fi'om the
power supply.
4
Page 5
C
WHENUSINGYOURDRYER(cont.)
• Never attempt to operate this appliance if it is
damaged, nmlflmcdoning, partially disassembled,
or has missing or broken parts, including a
damaged cord or plug.
• The interior of the machine and the exhaust
duct connection inside the (hyer should be
cleaned at least once a year by a qualified
technidan. See the Loadingand Using the Dryer
section.
• If vom_ is a gas (hTe_, it is equipped with an
automatic electric ignition and does not have
a pilot light. DONOTATTEMPT TOLIGHT WITHA
MATCH. Burns may result fr(>m having your hand
in the vicinity of the burner when the atltoi/latic
ignition ttlrnS {)n.
WHENNOTUSINGYOURDRYER
• Grasp the plug firefly when disconnecting this
appliance to avoid damage to the cord while
pulling. Place the cord away from traffic areas
so it will not be stepped on, tripped over or
subjecmd to damage.
ge.com
• Ybu may wish to soften your laundered lid)tics
or reduce the static electridtv in them by using
a (hTe_=ai)i)lied thl)_ic softener or an anti-static
condifione_; We recommend you use either a
tid)_ic softener in the wash cycle, according to
the manufi_cturer's instructions for those
products, or t_?' a drye>added product fin.
which the manuemmrer gives written assurance
on the package that their product can be saflqv
used in your (h_'e_: Service or perfimnance
problems caused by use of these products are
the responsibili D' of the manuthcture_ of those
products and are not covered under the warranty
to this appliance.
• Before discarding a (hTe_; or removing it fl'om
se_Mce, remove the (hTer door to prevent
children fl'om hiding inside.
• Do not tamper with controls.
• Do not attempt to repair or replace any part of
this appliance or attempt any se_Mcing unless
specifically recommended in this Owner's Manual
or in published use>repair instructions that you
understand and have the skills to car_ T out.
READANDFOLLOWTHISSAFETYINFORMATIONCAREFULLY.
SAVETHESEINSTRUCTIONS
Page 6
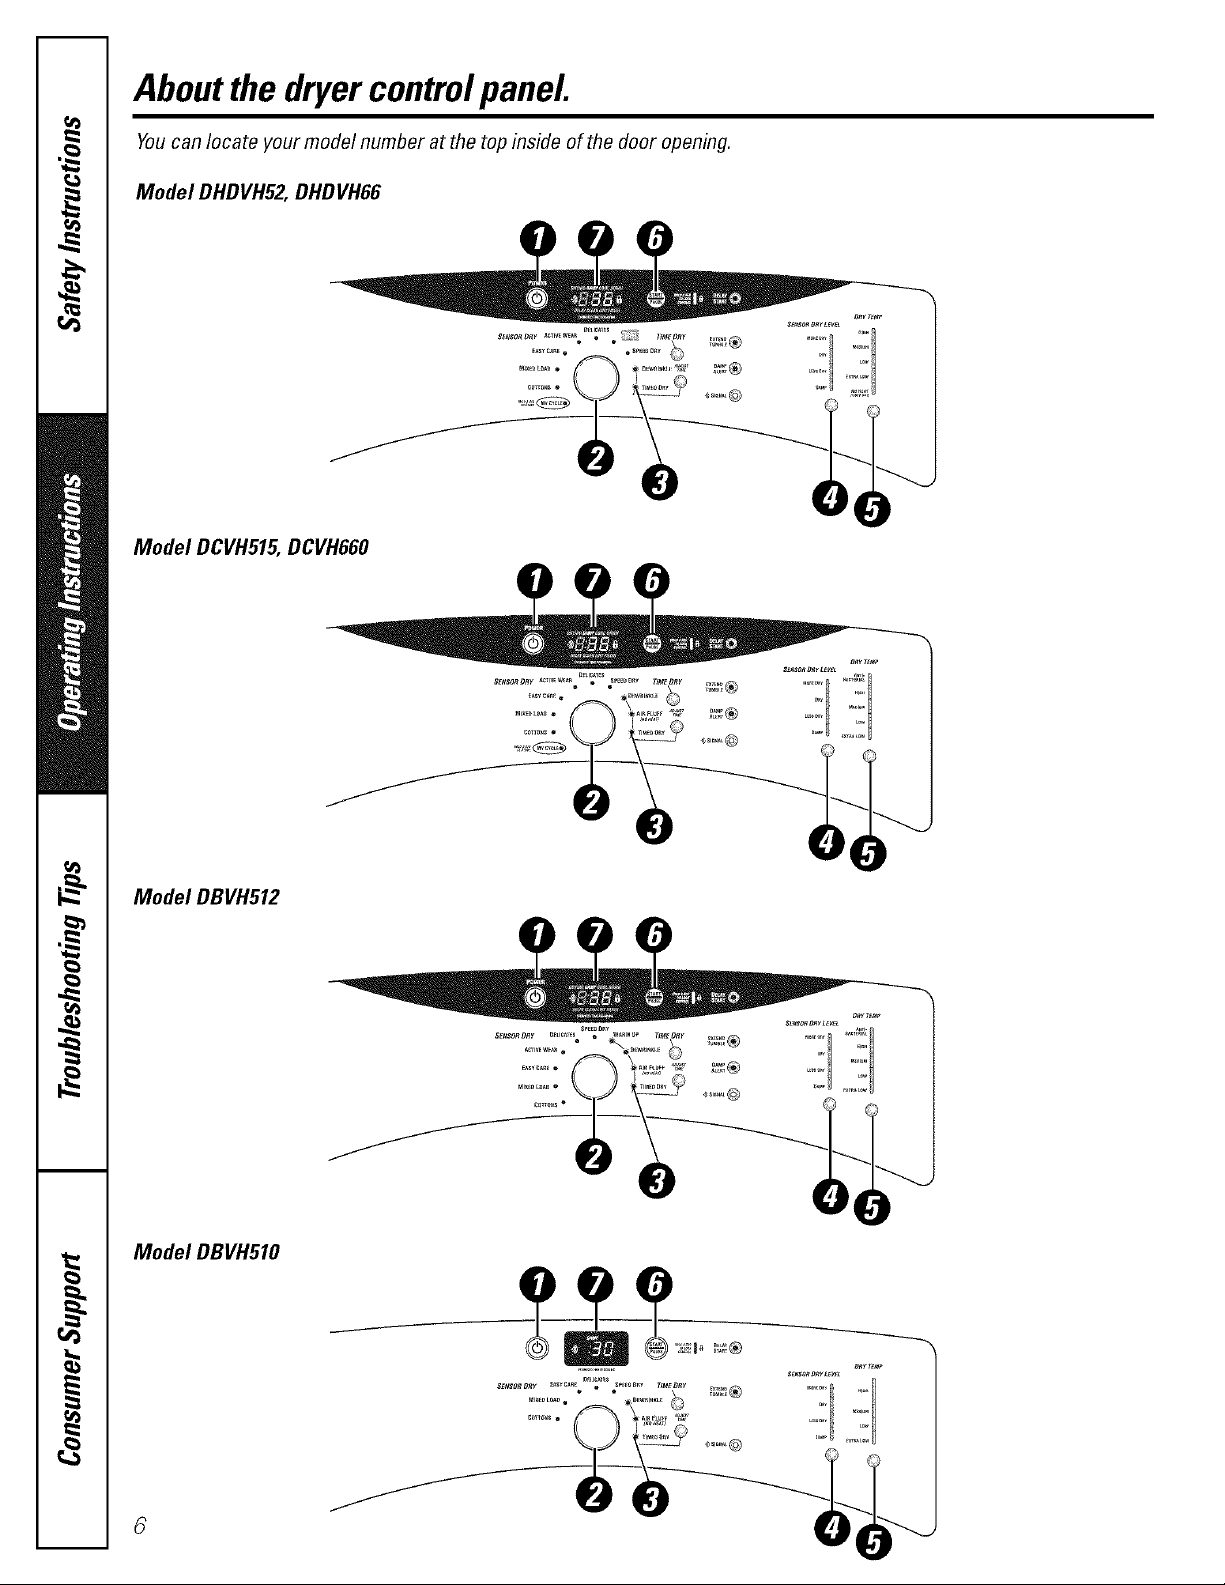
Aboutthe dryercontrolpanel
Youcan locate your model number at the top inside of the door opening.
Model DHDVH52, DHDVH66
Model DCVH515, DCVH660
Model DBVH512
Model DBVH510
Page 7

Power
O
Press to "wake up" the displa). If the displa) is actixe, press to put the drxer in the standby mode.
/VOTE: Pressing POWER does not disconnect the appliance from the power supply
O Dry Cycles
The dr_ cwle controls the length and tumble speed of the drying process. The chart below will
help )ou match the dr_ setting with the loads.
Sensor Cycles
co'r]'oNs For cottons and most linens.
MIXED LOAD Forloads consisting of cottons and poly-blends.
EASY CARE Forwrinkle-free and permanent press items.
ACTIVE WEAR Clothing worn for active sports exercise and some casual wear. Fabrics include new technology finishes
and stretch fibers such as Spandex.
DELICATES For lingerie and special-care fabrics.
DRYELTM Designed for use with the DRYEL_ "dry clean only" fabric care system. See product package for directions.
For questions or issues related to use and performance of DRYEL_, see the Website at: www.dryel.com.
SPEED DRY For small loads that are needed in a hurry, such as sports or school uniforms. Can also be used if the
previous cycle left some items damp, such as collars or waistbands.
ge.com
Timed Dry Cycles
DEWRINKLE For removing wrinkles from items that are dry or slightly damp. This cycle is not recommended for
WARM UP Provides 10 minutes of warming time to warm up clothes.
AIR FLUFF Use this feature to tumble items without heat.
delicate fabrics.
My Cycle(on some models)
MY CYCLE Press to use, create or modify custom dry cycles.
Timed Dry
0
Use to set your own dry time. TIMED DRYis also recoininended for small loads.
To use TIMED DRY."
I. Turn dry cycle dial t(> TIMED DRY..
2. Select the drying time by pressing the ÷and -buttons,
3. Select the DRY.TEMP,
4. Close the door,
5. Press START
Sensor Dry Level
0
The sensor contintu)usl)' monitors the amount of moisture in the load, When the moisture in your
clothes reaches your selected dry level, the dryer will stop.
MORE DRY Use for heavy or mixed type of fabrics.
DRY Use for normal dryness level suitable for most loads. This is the preferred cycle
for energy saving.
LESS DRY Use for lighter fabric (ideal for ironing).
DAMP For leaving items partially damp.
7
Page 8
Aboutthe dryercontrolpanel
O Dry Temp
You can chanoe_ the temperature ot your dry cycle.
ANTI-BACTERIAL
(onsome models)
HIGH Forregularto heavycottons.
MEDIUM Forsynthetics,blendsanditems labeledpermanentpress.
LOW Fordelicates,syntheticsanditems labeledTumb/eDryLow.
EXTRALOW Forlingerieandspecial-carefabrics.
NO HEAT Canonlybeusedwith TIMED DRY.
(onsomemodels)
Thisoptionmayonlybeusedwith COTTONSorMIXED LOADcycles.Thisoptionreducescertain
typesof bacteriaby99.9%,including:Staphy/ococcusaureus,PseuflomonasaeruginosaandK/ebsie//a
pneumoniae*.Theanti-bacterialprocessoccurswhenhigh heatis usedduringa portionofthis
dryingcycle.
NOTE:Donot usethiscycleondelicatefabrics.
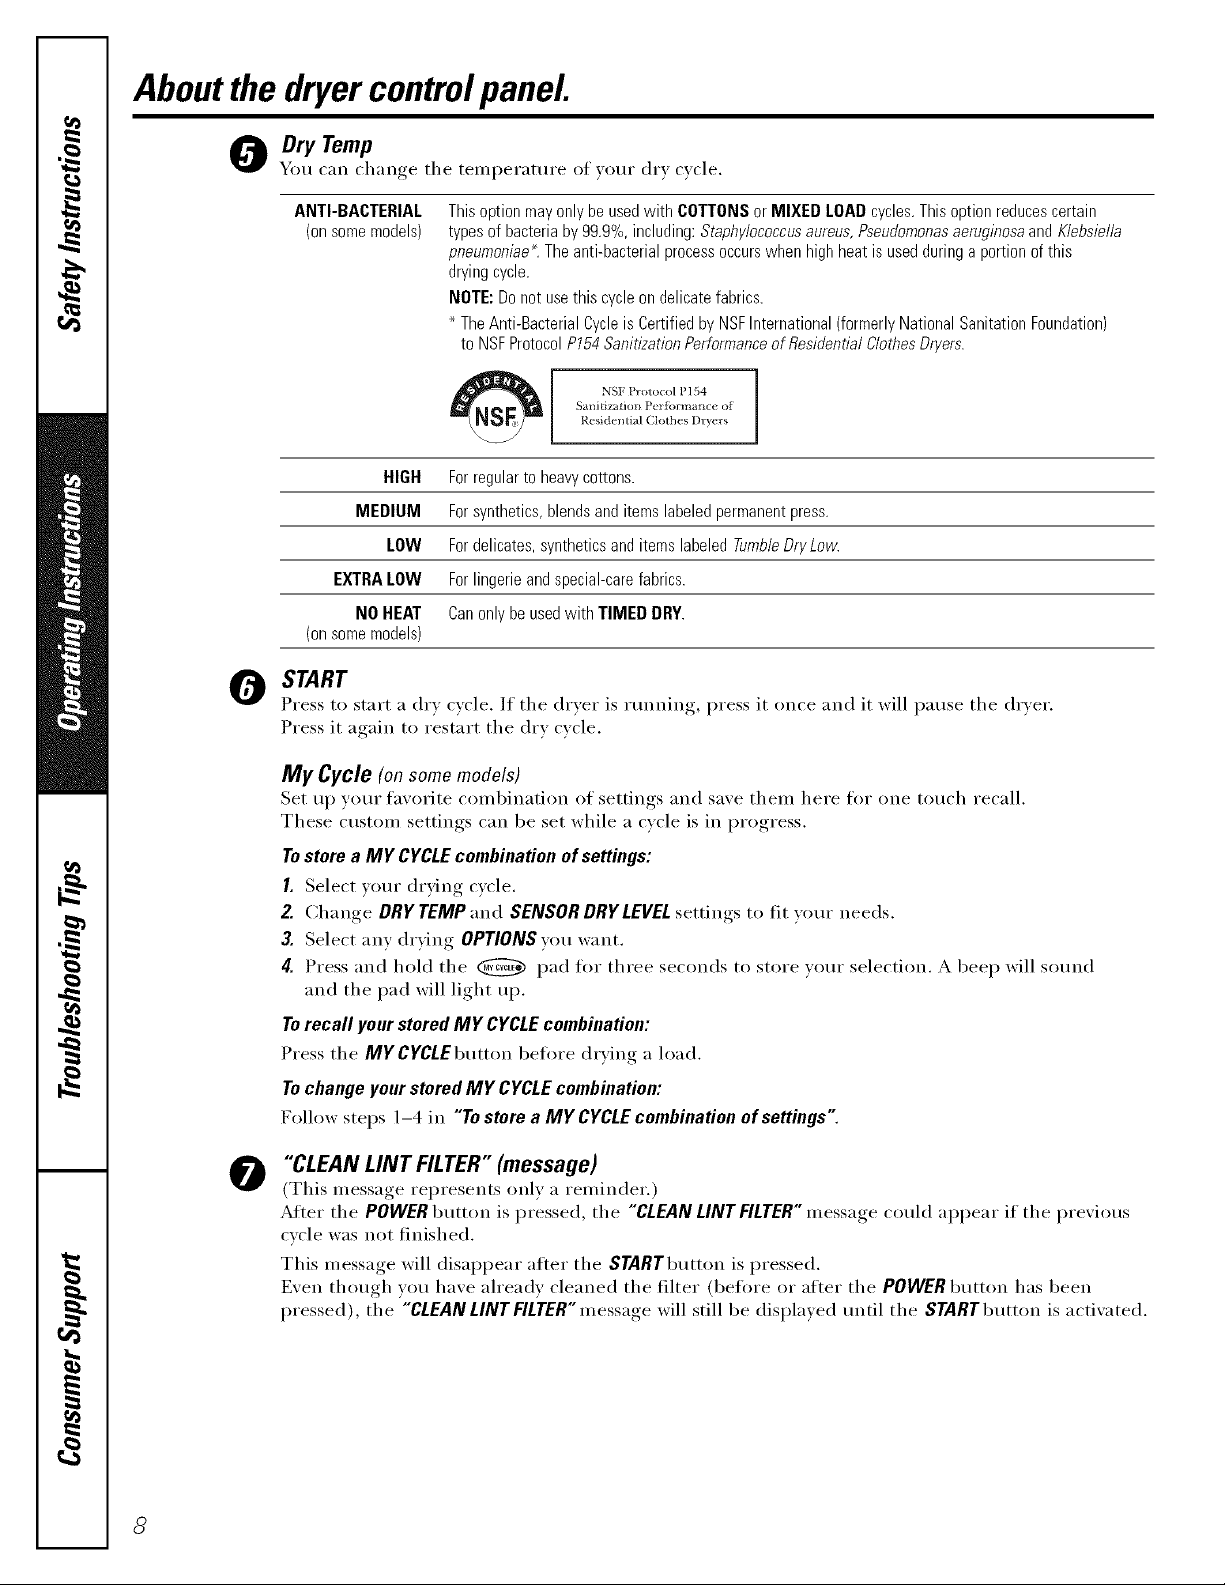
TheAnti-BacterialCycleis Certifiedby NSFInternational(formerlyNationalSanitationFoundation)
to NSFProtocolP154SanitizationPerformanceof ResidentialClothesDryers.
S midzatio_l Perfbrmailce of
Residential (_]othes Dryers
NSF Protocol P 154 ]
O START
Press to start a (h'_ cycle. If the (h'_er is Hmning press it once and it will pause the dr_er.
Press it again to restart the dry c_cle.
My Cycle (on some models)
Set up your fh\'orite combination of settings and save them here for one touch recall.
These custom settings can be set while a cycle is in progress.
Tostore a MY CYCLEcombination of settings:
I. Select your drying cycle.
2. Change DRY TEMP _nd SENSOR DRYLEVEL settings to fit your needs.
3. Select any drying OPTIONSw)u want.
4. Press and hold the _ pad for three seconds to store your selection. A beep will sound
and the pad will light up.
Torecall your stored MY CYCLEcombination:
Press the MYCYCLEbutton belore drying a load.
Tochange your stored MY CYCLEcombination:
Follow steps 1-4 in "To store a MY CYCLEcombination of settings"
"CLEAN LINT FILTER"(message)
@
(This message represents only a reminder.)
After the POWER button is pressed, the "CLEAN LINT FILTER"message could appear if the prexious
c_cle was not finished.
This messaoe,,_ will disappear after the STARTbutton is pressed.
Exert thouoh you have already cleaned the filter (befi_re or after the POWER button has been
pressed), the "CLEAN LINT RLTER'message will still be displa)ed until the SYARYbutton is actixated.
8
Page 9
Aboutcycle options.
NOTE"Not all features are available on all dryer models.
Extend Tumble
Minimizes wrinkles by adding
approximately 60 minutes (ff no-heat
tmnbling after clothes are dry. The beeper
will sound e\'eI_' 2 minutes to remind you
to remove the clothes. The ES_MATED
TIME REMAINING display will show 00.
Damp Alert (on some models)
This option causes the dryer to beep when
clothes have dried to a damp level. Remove
items that you wish to hang (ha': The DAMP
ALERTwill only beep when this option
is selected.
ge.com
Removino clothes and hanging them when
they are damp can reduce the need to iron
soi//e items.
Signal
_Merts you that the cycle is complete. The
beeper will continue to sotmd e\'e_' two
minutes fi)r the next 6 minutes, until the
clothes have been removed. The clothes
should be removed when the beeper goes
off so wrinkles don't set in.
Delay Start
Use to delay the start ot yore" (h've_;
I. (_hoose vom" (h T cycle and any options.
iiii
2. Press DELAYSTART You can change the
delay time in 1 hot]}" increments using
the + or - arrow pads.
3. Press the STARTpad to start the
COtlntdown.
The cotmtdown time will be shown in the
ESTIMATEDTIMEREMAININGdisplay:
Press SIGNALto select low, medimn or high
xohune, or to turn the beeper off.
NOTES:
• If thedoorisopenedwhilethedryeris
in OEL4y thecountdowntime wifl not restart
unlessthedooris dosedandSTARThasbeen
pressedagain.
• Youcan delaythestart ofadrycycleupto
18hoursfor modelsDCVH515,DHDVH52,
DBVH51ZDCVH660,DHOVH66andup to
10hoursfor modelDBVH510.
Page 10

Aboutcycleoptions.NOTE."Not all features are available on all dryer models.
Lock
51
You can lock tile controls to prevent any
il)i
selections from being made. Or you can
lock tile controls after reel have started
a cycle.
Childrencannotaccidentallystart thedryer
by touchingpads with this optionselected.
Estimated Time Remaining
[)isI_lms, tile IIa _ )roximate time remaining,
tmti] the end of the cycle.
_s tile cycle begins, you will see an initial
approximate total cycle time in the display.
Then lights will "race" in the display: This
means tile (h_'er is continuously monitoring
My Cycle (on some models)
To save a fi_\'orite cycle, set tile desired
settings and hold down tile MY CYCLE
button for 3 seconds. A beep will sotmd
to indicate tile cycle has been saved.
To use xotu" custom cxcle press tile MY
CYCLEbumm before drying a load.
To lock the chye_; press and hold tile lock
icon fin" 3 seconds. To mflock the dryeI,
press and hold tile lock icon fin" 3 seconds.
The icon of the lock next to the timer will
light up when tile controls are locked.
tile amotmt of moistm'e in tile load. Tile
lights will continue tmtil tile d_er senses
a low level of moisture in tile load. At that
point, tile dryer will calculate and display
tile approximate time remaining.
To chanoe tile saxed cxcle, set tile desired
settings and hold down tile MY CYCLE
button fin" 3 seconds.
See I)age, 8 fin" more details.
Aboutdryerfeatures.
Drum Lamp
geflwe replacing tile light bull), be sure to tmplug tile dryer power cord or
disconnect tile dryer at tile household distribution panel by removing tile
fllse or switching off tile circuit breaker. Reach above dryer opening fl'om
inside the drmn. Remove the bulb and replace with tile same size bulb.
Drying Rack (onsomemodels)
A handy drying rack ma_ be used for drying delicate items such as
washable sweaters. Place items fiat on the dr) ing rack and block such
items as wool sweaters and delicate tabrics. Dr_ with low heat.
To install tile drvim,,_ rack, pull up tile lint filter slightly. Insert tile drvim,,
rack into tile slots, then push tile filter back down.
NOTE:
• Tile drying rack must be used with tile TIMED DRYer RACKDRY
(on some models) cycles.
70 • Do not use this drying rack when there are other clothes in tile drxer.
Page 11

Reversingthe doorswing, gecom
IMPORTANT NOTES:
• Read the instructions all the way
through befi_re starting,
• Handle parts carefllllv to avoid
scratching paint.
• Set screws down by their related parts
to avoid using them in the wrong
places,
• Provide a non-scratching work sm'lace
tin" the doors.
• Normal completion time to reverse the
door swing is 30-60 minutes.
TOOLSYOUWILLNEED
AdjustableCrescentWrench
IMPORTANT."Once wm begin, do not
move the cabinet tmtil dom_swing
revex_al is completed.
These inst_ uctions are Ira" changing
the hinges from the right side to the
lett side--if you ever want to switch them
back to the right side, ti)llow these same
instructions and reverse all references
to the left and right.
PuttyKnifeor
PhillipsHeadScrewdriver
Thin-BladeScrewdriver
DOORPARTS
PlasticCover
HingeAssernbly
LargeTappingScrew
© ©
Nut(#8} 2 Washer 2
STEP-BY-STEPINSTRUCTIONS
Before You Start
I. Lrnphtg the dryer from its electrical
outlet.
TappingScrew(#8) 2 MachineScrew(#8/6
1#10)6
//
Page 12

Reversingthe doorswing.
STEP-BY-STEPINSTRUCTIONS(cont.)
Remove Door Assembly
2. Open the door to approxinmtely 90 degrees. Remove the 4 screws starting
flx)m the bottom to the top, Make stlre the door is supported while
removing the screws.
3. i,oosen the top screw as shown, Unhook the door b) lifting and I)ulling, as
shown b'_ the }li'i'()_vs,
4[ I,ay the door down on a soft protected fiat surface so that the inner part
thces upward (door restim, on the handle side)
2#8MachineScrews 6#10
__Screws
Large
5. Remove the 6 lar{*e_tapping screws (#10) located arotmd the perimeter
of the door outlining the gasket, and the 2 machine screws (#8) on the
hinge side.
6. _'_ith the screws removed, tm'n the door over and separate the silver cover
part of the door from the door frame and set aside.
Z Unlock the 4 tabs on the plastic cover and separate the plastic cover fl'oin
the fl'am e,
NOTE: Disregard the "DO NOT REMOVE" label on the plastic cover.
/2
Page 13

STEP-BY-STEPINSTRUCTIONS(cont.)
Remove Hinge
IMPORTANT" Note the location ot the hinge (lett or right) before removing.
8.With the door fl'ame part of the door laid down on a protected soft surt,_ce,
renlove tile hinge cover by removing tile 2 tapping screws (#8) that tasten it
to the fl'ame. The hinge cover is located at the opposite side of the hinge
assembly.
9, Remoxe tile 9 nuts, washers and tile 9 machine screws (#8).
10.Remoxe tile hinge assembly by remoxing tile 2 machine screws (#8) that
tasten it to the fl'ame. Pull the hiiwe assembly out and set it aside.
ge.com
7
Reinstall Hinge Assembly
11.Place tile hinoe_ assembly in tile opposite side of tile door. Align tile hinoe
holes with the door holes.
12. I,ooselx fasten tile hinge assembly to tile edge using 2 machine screws (#8).
13. Hold tile door on its side with one hand and tasten tile remaining 2 screws
as shown. Then tighten tile 2 screws (#8) holding tile hinge assembl_.
13
Page 14

Reversingthe doorswing.
STEP-BY-STEPINSTRUCTIONS(cont)
Reinstall Nuts and Hinge Cover
14. Place tile door on its edge. Assemble tile 2 machine screws (#8), washers
and nuts. Tighten usim,, _ a wrench and screwdrixer.
15. Place tile hinge, cover in position. Align tile him,e_ cover holes with tile
holes in the door.
I
16. Secure tile hinoe_ cover with tile 2 taI)t)ino,_ screws (#8).
Reassemble DoorAssembly
IMPORTANT'.Make sure there is no dirt or any other tm'eign material in
between tile window panes.
17. Place tile plastic cover onto tile inner door and lock in place with
tile 4 tabs.
18.Place tile otltei" dooi" onto tile innei" dooi;
14
Tooof Door
_Door
00 0r
Page 15

STEP-BY-STEPINSTRUCTIONS(cont.)
Reassemble Door Assembly (cont.)
19.Afier reversing door, there will be a misnmtch between the outer door and
the innei" doox'.
Make sure that the handle part of the outer door is opposite the hinge,
as shown.
20. Turn the door oxer and tasten the outer door to the inner door using the
6 laroe ta )Dim, (# 10).
l • _ scYews
ge.com
PartiallyInserte
Tighten
All
Strews
Move Strike Bracket
21. Using a putty knifl _ or any other fiat tool, remove the 5 plastic screw caps
located on the dryer where the door will be installed and install them on
the opposite side.
_. Switch the strike bracket and its coxer on the opposite side by remoxing the
screws; then reinstall both on the opposite side.
Reinstall Door Assembly
23. The door is now ready to be installed on the dryer. To ease this step,
®
the hinge has keyholes that allow a partially fastened screw to be used
as a hook.
Partially tasten a screw to the uppermost screw hole. Hook the door on the
partially tastened screw.
Fasten the hinge by installing the other 4 screws and tightening the
partially tastened screw above.
15
Page 16

Loadingand usingthe dryer.
Always follow the fabric manufacturer's care label when laundering.
FabricCareLabels
Below are fhbric care label "svng)ols" that affect the clothing you will be laundering.
WASH LABELS
wash __ __
cycle Normal p.......... t Press/ Gentle'_/ Do not wastl Do notwring
Front load Category Water Teloperatere TemperatureControl
target water TapCold Inlet Water Temperature Not used
temperature Warm 40°C/105°F Used
DRYLABELS
wrinkle resistant delicate Hand wash
Target Automatic
Cold 27°C/80°F Used
Hot 50°C/120°F Used
Sanitize 70°C/160°F Used
dry Donotdry
Dry Normal Permanent Press/ Gentle/ Do not tumble dry (used with
wrinkle resistam delicate do not wash)
.00, e ® ® •
setting
High Medium Low No heat/air
f:::rSo, N Pq
Line dry/ Drip dry Dryfiat In the shade
hang to dry
BLEACHLABELS
SylllUOIS Any bleactl Dn]y ....... Norine bleach Do not bleach
SortingandLoadingHints
As a ,,eneral rtfle, if' clothes are sorted )to )erlx
tt)r ti_e washe,; the, are sorted prtrperl I folr the
dryer. Try also to sort items according to size.
For example, do not (lr_ a sheet with socks or
other small items.
Donot addfabricsoftenersheetsoncetheloadhas
becomewarm.Theymaycausefabricsoftenerstains.
Bounce_FabricConditionerDryerSheetshavebeen
approvedforusein aftGEDryerswhenusedinaccordance
with themanufacturer#instructions.
(when needed) (when needed)
Do not overload. Thiswastes energyandcauses wrinkling.
Donotdrythe followingitems:h#erg/assitems,woolens,
rubber-coateditem&plastic&itemswithplastictrimand
foam-rifleditems.
16
Page 17

Always follow the fabric manufacturer's care label when laundering.
CareandCleaningof theDryer
ge.com
The Exterior:_,_ipe or dust any spills or washing
comi)ounds with a damp cloth. Dr_er control
panel and finishes inav be danm(,ed_ by, some
laundt? i)retreatment soil and stain rell_oxer
products. Appl) these products away from tile
(haer. Tile tid)ric InaV then be washed and dried
noi_nallv. Danlage to }otlr (lr_er caused bx these
I)roduets is not co_,ered b)your warranl_.
The Lint Filter: Clean tile
lint filter before each use.
Pull ()/It tile lint filter,
Moisten veto" fingeI_ and
remove tile (ai)tured lint.
Once clean, slide tile filter
back into position. Have
a qualified teclmidan
vactmll_ tile lint from tile dryer once a _eai;
NEVEROPERATETHEDRYERWITHOUTITSFILTER
IN PLACE.
The Exhaust Duct:]nspect and clean tile exhaust
ducting at least once a year to prevent clogging.
A i)artially clogged exhaust can lengthen tile
drying time.
Follow those steps:
_] Turn off electrical SUl)pl_ by disconnecting
tile phlg fi'oln tile wall soclcet.
[]Disconnect tile duct froll_ tile (lr_ ei:
_] Vae/itlill tile duct with tile hose attachn_ent
and recolmect tile duct.
The Exhaust Hood:Check with a inirror that
the inside flai)s of the hood move ti'eely when
oi)elating. Make sure that there is no wildlife
(birds, insects, etc.) nesting inside the duct
or hood.
77
Page 18

Ventingthe dryer.
For the best drying perfl_rnmnce, the dryer needs to be properly vented. The dryer will use
more energy and run longer if it is not vented to the below specifications. Carefully follow the
details on Exhausting in the Installation Instructions.
• Use only rigid metal or flexible metal 4" diameter du('twork inside the dryer cabinet
or for exhausting to the outside.
• Do not use plastic or other combustible ductwork.
• Use the shortest length possible.
• Do not crash, kink or collapse the duct.
• Avoid resting the duct on sharp objects.
• Venting must conform to local building codes.
• Do not remove the vent protector from the back oI the dryer (on some models).
• Flip the protector down to its lowest position and connect the exhaust duct
to the dryer. The lowered protector will prevent the duct from getting crushed
(on some models).
Correct
Venting
Incorrect
Venting
(onsomemodels)
/oo
Page 19

Stacking. re.corn
BEFOREYOUBEGIN
Read these instructions completely and carefully.
[] IMPORTANT"Save these instructions fi)r local
electrical inspector's use.
• Note to Consumer- Kee I) these instructions for
future reference.
[] IMPORTANT" ObseF_'e all governing codes and
ordinances.
• Note to installer- Be sure to leave these
instructions with the Consmner.
• Installation must be performed b} a qualified
installer.
• Proper installation is the responsibilit} of the
installer.
FORYOURSAFETY
A
• Electric Shock Hazard. Discolmect power
bet)re installing. Failure to do so could result
in serious i_jm'y or death.
• Potential Personal injury. More than two people
are recommended to lift the dryer into position
because of its weight and size. Failure to do so
could result in personal injury or death.
,!
m
• A_ old Tipping and Rupture of Utility Services.
Dryer must be securely attached to the washer.
DO NOT place the washer on top of the &Ter.
Failm'e to do so could result in personal
iI_juu/death or propert_ damage.
• Mobile Home or Manufhctured Home
Installation - Stacking of a gas dryer is not
pemfitted in a mobile home or manufhctured
h oi//e.
MINIMUMCLEARANCEOTHERTHANALCOVEORCLOSET
INSTALLATION
Milfinmm clearance to Colnbustible surfaces
aim for air oI)elfing are: 0" both sides aim l"
rear. (_oi_sideration inust be given to provide
adequate clearance tor installation aim service.
ALCOVEORCLOSETINSTALLATION
• If _our dryer is approved for installation in an
alcoxe or closet, it will be stated on a label on
the dr_er back.
• The dryer MUST be vented to the outdoors.
Refer to dryer ]i_stallation ]i_structions for
details.
• Milfinmm clearance between dryer cabinet
aim a(!iacent walls or other surlhces is:
0" either side
3" front and rear
• Milfinmm vertical space fl'Oln floor to
overhead cabinets, ceiling, etc. is 43" without
pedestal, 55" with pedestal aim 84" stacked.
• Closet doors InUSt be hmvered or otherwise
ventilated and must contain a minimmn of 60
square inches of open area equally distributed.
If the closet contains both a washer aim a
dryer, dora5 must contain a minimmn of 120
square inches of open area equally distributed.
79
Page 20

Stacking.
KITCONTENTS
I #o# L=_
I
RightHandBracket
/ i
4 RubberPads
4#12 x 1" Screws
LeftHandBracket
TOOLSYOUWILLNEED
PhillipsScrewdriver
Open-EndedWrench
INSTALLATIONPREPARATION
Remove the packaging.
Flatten the product carton to use as a pad to lay
the drver down on its side. Continue using the
carton to protect the finished floor in fl'ont of
the installation location.
Pliers
4#8x 1/2" Screws
Gloves
Level
20
Page 21

INSTALLINGTHESTACKBRACKETKIT
I. Remove the Dryer
Leveling Legs
P. Carehdlx la_ the (h'xer on its side.
Use the packing matel-ial so }ou
don't scratch the finish (m the
dY_ ell
B.
Use an open-end ",_rench or pliel's
to remo_e the dr*er levelino legs.
ge.com
0 @
Z Install RubberPads
to Dryer Base
i,ocate the 4 xubber pads in the
parts package. Remove the adhesive
backing and firefly place over on the
bracket where wm removed the
leveling legs.
3. Install Bracket
to Dryer
A. Align the holes in the left bracket
with the holes in the bottom lett
corner of the dryer. Use a Phillips
screwdriver to install the 2 #12 x 1"
tapping screws.
B. Repeat the above step with the
right bracket on the bottom right
corner of the drver.
NOTE:Make sm'e to set the dryer
on a piece of packing material so
the brackets that are attached to the
bottom of the dryer do not damage
the floor.
C. Set the drxer, Ul)right, .
21
Page 22

Stacking.
INSTALLINGTHESTACKBRACKETKIT(cont.)
4. Prepare the Washer and Dryer
P. Place the washer in the
approximate location.
B. Make sm'e the washer is level.
Refer to washer Installation
Instructions for details.
C. Remoxe the back portion of
the control panel b} removing
the 3 scre_s.
5. Install Dryer and Bracket
on Washer
A. I,ift the drver on top of the
washer, Be careflfl not to scratch
the top of the washer with the
brackets, Protect the washer
control panel with cardboard or
other protection, Be sure to lift
the dlTer high enough to clear
the washer control panel,
D. P,ex el'se drx el" door s_,_ino if
desired. See dr_er Installation
Instructions for details.
NOTE:The washer door s*dng is not
rex ersible.
B. Align the holes in the bracket
with the holes in the back of the
washer. Using a Phillips screwdriver
attach the 2 #8 x 1/2" tapping
screws. Repeat on both sides
of the washer.
Place
hands 1
here
k, WARNING!
PotentialPersonalInjury.More than
two people are recommended to lift the
dryer into position because of its weight
and size. Failure to do so could result in
personalinjury or death.
6. Finalize the Installation
A. Refer to the washer h_stallati(m
Instructions to COlnplete the
washer ii_stallation.
/
Place
1131105
qere
B. Refer to the dr_er Installation
Instructions to complete the dryer
ii_stallation,
Careflflly slide or walk the stacked
washer and dryer into place, Use
telt pads or other sliding device
to assist nmving and to protect
flooring.
WARNING!!
PotentialPersonalInjury.Donot push
on the dryer once installed to top of the
washer. Pushing on the dryer may result
in pinched fingers.
22
Page 23

Beforeyoucall forservice.., gecom
Save time and money! Review the charts on the following pages,
_ roubleshooting -tips
PROBLEM Possible Causes What To Do
Dryer shakes or Some shaldng/noise is normal. * Mo_e dr_er to an even floor space, or a(!iust lmeling legs
makes noise Dryer may be sitting maevenly as necessary until even.
Clothes take too long huproper or obstructed ducthag * Check the Installation Instructions to make sure the
to dry dryer venting is correct.
or visit ge.eom. Youmay not need to call for service.
• Make sure ducfing is clean, fl'ee ot kinks and
unobstructed.
• Check to see if outside wall dauq)er operates easily,
hnproper sorting • Separate heavy items fl'om lightweight items (generally,
a well-sorted washer load is a well-sorted dryer load).
Large loads of heavy fabrics • I_Ige, heavy fabrics contain more moisture and take
(like beach towels) longer to (liT: Separate lmge, heavv lid)tics into smaller
loads to speed (hTing dine.
Controls improperly set • Match control settings to the load you are drvin ,
Lint filter is full • Clean lint filmr befi)re e\'ei'v load.
Blown fuses or tripped circuit • Replace fllses or reset circuit breakei_. Since nlost
breaker (hTei_ use 2 filses/breakeI_, make sure both are
operating.
OverloadJng/combh_hag loads • Do not put more than one washer load in the dryer at
a [iII/e.
UnderloadJng • If xou are (hying onl} one or two items, add a tew items
to ensure i)roper tumbling.
The ORgdryness level Load consists of a mixture • X._q_encombining heavy and light tid)rics in a load,
was chosen but load is of heavy mad light fabrics choose MORE DRY.
still damp
Exhaust system is blocked • ]nsl)ect and clean exhaust s_:stem.
Controlpads not Controls accidentally put in • Press STOP.
responding service mode
Controls accidentally put in • Hold the LOCKbutton tot 3 seconds to unlock the (lrveL
lock mode
Controls performed an • Reset the in-house breaker.
incorrect operation
Dryer doesn'tstart Control pmael is "asleep" • This is nolmal. Press POWERto acti\ate the control panel.
Dryer is unplugged • Make sure the dryer plug is i)ushed completely into
the outlet.
Nonumbersdisplayed
duringcycle,onlylights
Fuse is blown/circuit breaker • Check the building's filse/drcuit breaker box and
is tripped replace fllse or reset breakei: NOTE:Electric (lrvei_
Dryer was accidentally paused • If the light oi5 the DEDIY START pad is flashing, the
when smrthag Delay Start dryer is paused. Press STARTto restart the countdown.
Dryer is continuously
monitoring the muomat of
moisture ha the clothes
use _wofl]ses or bi'eakei_.
• This is nomml. X,\]_en the dryer senses a low level of
moisture in the load, the dryer will display the diy time
remaining.
23
Page 24

Beforeyoucall forservice...
PROBLEM Possible Causes What ToBe
17me Remaining The estimated time may chazage * This is n(mn_d.
jumped to a when a smaller load than usual
lower number is drying
Cannotmake a The DRYNESSLEVEL,TEMP = This is normal.
selection and the or OPTION that you are
dryer beeps twice trying to select is incompatible
with the chosen dry cycle
Oqer is running but The EXTENDTUMBLE * This is norm_d. Dining extended rambling, the time
O0is displayed in option was chosen rein:ruing is not displ_l} ed. The extended tumbling
Time Remaining option lasts approximatel} 20 minutes.
CleantintFilterOnessage) POWERbutton was activated * Press STARTt,, begin a chT cycle and the message will
disappea l:
O_er doesn't heat Fuse is blown/circuit breaker * Check the btfilding's fuse/circuit breaker box and
is tripped; the dryer may t_ble replace both fuses or reset both b_eake_. Y0m" (h) er
bat not heat may tumble if onl} one fuse is blown or one bre_lker
tripped.
Gas service is off * Make sine _as shutoff at chs'er and m_lin shutoff are
full} open.
LP gas supply tank is empty * Refill or replace t_mk. Dr}er should heat _hen utilit}
or there has been a utility sel'vice is restored.
interruption of natural gas
(gas models)
Inconsistent drying times Type of heat * Di)'ing time will _r_) aCcoIding to the t)]:)e of heat used.
If}on recent? changed fl'om an electric to _ g_s
(natural or I,P) dr,, e_; or "dce vel_a, the drvin,, time
could be different.
Type of load and * The load size, types of e_bfic, _,_etness of clothes and the
drying conditions length and condition of the exhmlst s?stem will affect
Glow at the rear Heaters behind the drmn ®This is normal. Under certain cluing conditions and
of the drum room _m_bient lighting, the glow of the heate_ m_} be
Clothes are still wet The door was opened mid-cycle. * A oh). c) cle must be reselected each tim e a ne',,_ load
and dryer shut off The load was then removed from is put in.
after a short time the dryer and a new load put in
without selecting a new cycle
Small load * _Ahen drvin,, 3 items or less, choose SPEEDDRYo_
Load was aJready dry except * (_hoose SPEED DRYor TIMED DRY to dr} damp collm_
for collars and waistbands and waistlxmds. In the futme, when dt)'ing a load with
Dryer is not level ®Move (haer to an even floor space or a(!iust le'_elin,,., legs
Clothes are wrinMed Overdrying * Select a sho_ter (h)'ing time.
Letting items sit in dryer after * Remox e items _d_en c_cle ends and ibm or hang
cycle ends immedi:ltely, or use the EXTEND TUMDLEoption.
drvin,, times.
"dsible at the rear of the dram.
TIMED DRY.
collm_ and waistbands, choose MORE DRY.
as necessm) tmtil even.
• Remove items while the} still hold a slight amotmt of
moisture. Select a LESSDRY o_ DAMP setting.
24 Overloading *Sepm'ate large loads into sm_dler ones.
Page 25

ge.com
PROBLEM Possible Causes What ToDo.
Clothes shrink Some fabrics will naturally shrink o To avoid shrinkage, f_llow gam_ent (are labels exactly.
when washed. Others can be * Some items ma* be pressed back into shape after drvin ,
safely washed, but will shank
in the dryer o If*()u al'e concerned about shrinkage in a partictdal"
Oreasyspots on clothes Improper use of fabric softener * Follo,_ directions on fid)*_icsoftener l)ackage, .
Drying dirty items * Use }our dI) el" to d D onl} clean items. Dirt} items can
with clean ones stain clean items and tile d*_)el;
Clothes were not * Sometimes stains *d_ich camlot be seen *_hen tile
completely clean clothes m'e **vetappear after (h) ing. Use proper *<_shing
tint on clothes Lint filter is fuU ® Clean lint scl'een betore each load.
Improper sorting * So_ lint producel_ (like chenille) fl'om lint collecto_
Static elecWidty can attract lint * See suggestions in this section till(let" STATIC.
Overloading * Separate large loads into smaller ones.
Paper, tissue, etc., left in pockets * Erupt} all pockets betbre laundel_ing clothes.
item, do not machine wash or tumble (h'} it.
pl'ocedm'es before drvin *
(like c(wdm'o} ).
Static occurs No fabric softener was used ®TI_ a fitl)*_icsoitenel:
• B( talce ]_abllc Conditioner Dl'_el" Sheets have been
appi'oved for use in all GE Dr} ers when used in
accordance with tile manuthcttu'el"s instructions.
Overdrying * Tla a iid)ric softene_;
®A({} ust setting to tESS DRY o*"DAMP.
Synthetics, permanent press * TD a ihbl_ic softener.
and blends can cause static
Collarsandwaistbands
still wet at endofcycle
The dryness monitor senses
that the body of the clothes
is dry
* Ch(_ose SPEEDORYo_"TIMED ORYto dr5 damp colkus
and *_aistbands. In the turin'e, *_hen drain,, "_load with
collal_ and *<_istbands, choose MORE DRY.
25
Page 26

€_
IVetes.
26
Page 27

GEDryer Warranty.
All warranty service provided by our Factory Service Centers,
or an authorized Customer Care® technician. Toschedule service,
on-line, 24 hours a day, vis# us at ge.com, or calI SOO.GE.CARES
(800.432.2737).
Staple your receipt here.
Proof of the original purchase
date is needed to obtain service
under the warrantg
Please have serial number and model number available when
calling for service.
For The Period Of." We Will Replace:
One Year Anypatt ot the dryer which fifils due to a defect in materials or workmanship. During this
From the date of the limited one-year warranty, GE will also provide, free of charge, all labor and related seiMce costs
onginalpurchase to replace the defective part.
What is Not Covered:
[] Service trips to your home to teach you how to use [] Dmnage to the product caused by accident, tire, floods
the product, or acts of God.
[] Improper installation, delivery or maintenance.
[] Failure of the product if it is abused, misused or used for
other than the intended pm'puse or used commerciadly.
[] Replacement of house fuses or resetting of circuit
breakers.
[] Inddental or consequentiaJ daxnage caused by possible
defects with this appliance.
[] Dmnage caused after delivery.
[] Product not accessible to provide required service.
EXCLUSION OF IMPLIED WARRANTIES--Your sole and exclusive remedy is product repa# asprovided in this
Limited Warranty. Any implied warranties, including the implied warranties of merchantability or fitness for a
particular purpose, are limited to one year or the shortest period allowed bylaw.
This warranty is extended to the original purchaser and any succeeding owner for products purchased for home
use within the USA. If the product is located in an area where service by a GEAuthorized Servicer is not available,
you may be responsible for a trip charge or you may be required to bring the product to an Authorized GEService
location for service. In Alaska, the warranty excludes the cost of shipping or service calls to your home.
Some states do not allow the exclusion or limitation of incidental or consequential damages. This warranty gives
you specific legal rights, and you may also have other rights which vary from state to state. Toknow what your
legal rights are, consult your local or state consumer affairs office or your state's Attorney General
Warrantor: General Electric Company.Louisville, KY 40225
27
Page 28

ConsumerSupport.
Ha_e a question or need assistance with )our appliance? Try the GE Appliances _ ebsite 24 hom_ a day,
!
"J GEAppliancesWebsite ge.com
any da)of the year'. For greater comenience and tipster service, you can now download Owner's Manuals,
_, order parts {)r exert schedule serxice on-line.
ScheduleService
Expert (;E repair service is onl) one step away fl'om your cloot; Get on-line and schedule your service at
your, comenience 24 hotu_ am {la_ of the _ear! Or call 800.GE.(_AI_ES (800.432.2737) during hernial
business h{}u_.
ge.com
RealLifeDesignStudio ge.com
GE SUl)l)orts the Uni\'e_al Design con{'ept_pr{}du{'ts, se_M{'es and environments that can be used b)"
i)eople of all ages, sizes and capabilities. We recognize the need to design fi)r a wide range of physical and
mental abilities and impaim_ents. For details of GE's Universal Design applications, including kitchen
design ideas for people with disabilities, check otlt Otlt" _*Vebsite toda> For the hea_ing impaired, please call
800.TDD.GEAC (800.833.4322).
ExtendedWarranties ge.com
Purchase a (;E extended warranB and learn al)out special dis{'ounts that are a_ailable while _otu', warranB
is still in effect. You can i)urchase it on-line an)time, or call 800.626.2224 during nom_al business h{}tu_.
GE (_onsulner Home Serxices will still be there alter )'{}tit" warrant' expires.
PartsandAccessories
ge.com
Individuals qualified to se_Mce their own appliances can have parts or accessocies sent directly to their
homes (VISA, MasterCard and Discover cards are accepted). Order on-line today, 24 hom_ every day or
by phone at 800.626.2002 during nom]al business h{}u_.
Instructions contained in this manual coverprocedures to be performed byany user. Other servicing generally
should be referred to qualified service personnel Cautionmust be exercised, since improper servicing may cause
unsafe operation.
ContactUs
If you are not satisfied with the service you receive fl'om GE, contact us on our X.Vebsite with all the details
including your phone nt]IllbeI'_ oi" wI_ite to: General Manage_; (]tlStOlllei" Relations
GE Appliances, Appliance Park
I,ouisville, K¥ 40225
ge.com
ge.com
Register your new applim_ce on-line---at your convenience! Timely, I)r°du{'t registration, Mll allow for
!
"] RegisterYourAppliance
enhanced communication and i)rompt serxice under the terms of your warranB', should the need acise.
1, You max also mail in the pre-pfinted registration card included in the packing material.
28 Printed in Canada
 Loading...