

Page 1
digitaistiilcameradigitalstili
cameradigitaistiiicameradig
italstilicameradigitalstiilcam
eradigitalstillcameradigitals
tii icame radigitalstilicame ra
digitalstillcameradigitalstill
cameradigitalstil Icameradig
italstil Icameradigitalstil Icam
eradigitalstillcameradigitals
tilicameradigitalstillcamera
digitalstl Itcameradigitalstill
cameradigitaistiUcameradig
italstillcameradigitalstU loam
eradigitalstilicameradigitals
tilicameradigitalstil Icamera
digitalstill cameradigitalstiil
cam eradigitalstilicameradig
itaistil Icameradigitalstillcam
eradigitalstillcameradigitals
til Icameradigitalstillcamera
digitaistil loam eradigitalstil i
cameradigitalstil Icam eradig
italstU Icameradigitalstillcam
eradigitalstilicameradigitals
tillcamera-': -:"
digitals
came
_tilicamera
, ligitalstill
ameradig
eradi i %,ta|s
tiilcar_ -hera
car +
_m
CDS4100
_am
Isti¿l
adig
Page 2
Important Safety Information
* Be sure to read all the safety information on this page and inside the
manual before you begin to use this product.
To reduce riskof injury, chargeonly rechargeablebatteries recoramendedby the
manufacturer for this camcorder. Other types of batteries may burst causing damage and
personal injury.
FCC Regulations state that unauthorizedchanges or modifications to this equipment may
void the user's authority to operate it.
Radio Interference
This equipment has been type tested and found to comply with the limits for a class B Digital Device in
accordancewith specifications in Part 15 of FCCRules. These rules are designed toprovide reasonable
protection against radio and television interference in a residential installation. The equipment generates,
uses, and can radiate radio frequency energy and, if not instaled and used in accordance with the instruc-
tions, may cause harmful interference to radio communications. However, there is no guarantee that
interference will notoccur in a particular installation.
If this equipment does cause interference toradio or television reception (which you can determine by
turning theequipment off and on), try to correct the interference by one ormore of the following measures:
• Reorient or relocate the recoiving antenna (that is, the antterma for radio or television that is
"receiving" the interference).
• Change the positoin of the receiver with resp-ect to the radio or television equipment that is
receiving interference.
• Move the receiver away from equipment receiving interference.
• Plug the receiver into a different wall outlet so the receiver and equipent receiving interference
are on different branch circuits.
If these measures do not eliminate interference, please consult yourdealer or an experienced radio/
television technician for additional suggestions. Also, the Federal Oommunications Commission has
prepared a helpful booklet, "How to Identify and Resolve Radio/TV Interference Problems." This booklet is
available from the U.S. Government Printing Office, Washington, D.C. 20402. Please specify the stock
number 004-000-00345-4 when orderingcopies.
Product Registration
Please fill out the product registration cardand returnit immediately. Retuming this card allows u_to centant"
you if needed.
Keep your sales receipt for proofof purchaseto obtainwarrantypartsand service-and attaeh'ffllef_. R_c-ofd-
the serial number and model numbers located on the bottom of the cameorder.
Model No: DCS4100
Serial No:
Purchase Date:
Purchased From:
Page 3
We want to make sure you enjoy your new digital still camera. If you have any
questions, call:
Digital Camera Exchange Warranty. 877-833-3491
Customer Service .................................. 877-833-3491
Accessories ............................................ 800-338-0376
Product Registration .................... i
Important Safety Information ..... i
Assistance ..................................... 1
Unpack the Camera .................... 3
Camera Details ........................ 4
Attach the Strap .................... 5
Power Supply ............. ........... 5
Inserting Batteries ............. 5
Using AC Adapter ............. 6
Auto Power Off ................ 7
Install the Storage Card ........ 7
Recording Pictures ...................... 8
Record (REC) Mode ................ 8
Turn on the Camera ................. 8
Frame Your Picture .................. 9
Changing settings .................. 14
REC mode ............................. 14
Setting capture mode .......... 14
Setting the pre-flash mode .. 14
Setting white balance .......... 15
Adjusting exposure controls. 15
Adjusting focus ................... 16
Setting image sharpness ..... 16
Adjusting color ................... 16
Date and time display ......... 17
Play mode ........................... 17
Erase all images .................. 17
Erase single images ............ 18
Protecting images ............... 18
Formatting storage card ...... 19
Displaying the date ............. 20
Setting date options ............ 20
Capturing Images ..................... 9
Viewing Stored Images .......... 10
LCD Picture Viewing .......... 10
Images on a Computer ........ 11
On-screen menus ........................ 13
Recording mode ..................... 13
Playback mode ....................... 13
Formatting storage card ...... 20
Setting date and time .......... 20
Camera Features ........................ 21
Flash Photography ................. 22
Using Auto Flash ................ 22
Flash ON Mode .................. 22
Flash OFF Mode ................. 22
1
Page 4
Camera Features (Cont.)
Erase Image(s) .................... 32
Using the Self-Timer Mode... 23
LCD Brightness Control Dial 23
Control Buttons ..................... 24
Macro Mode
(ENTER/MACRO button) 24
QUALITY/INDEX button ..24
ZOOM button ..................... 25
DISPLAY button ................. 26
MENU button ..................... 26
LCD button ......................... 26
Monitor status ..................... 27
Tripod Mount ...................... 27
LCD Icons ............................. 28
Camera/Software Details .......... 27
Introductionto the camera's
TWAIN Driver ..................... 29
Selecting the TWAIN driver. 29
Rotate Image(s) .................. 32
Selecting Images ................. 32
Camera Status ..................... 33
Camera Setting ................... 33
Help for the user(s) ................ 33
Exit from TWAIN .................. 33
Displaying images on a TV ... 33
Camera User Interface ........... 34
Camera Top View (TBD) .... 34
Camera Front View ............. 34
Camera Back View ............. 34
Bottom of the Camera ........ 34
Sides of the Camera ............ 34
Basic Button Functionality .... 34
Specifications .............................. 35
Taking care of your camera ...... 36
Connect the camera to the
computer .............................. 30
TWAIN Driver Functions ...... 31
Connect the Camera to a
Computer .......................... 31
Scroll One Row Up ............. 31
Scroll One Screen Up ......... 31
Scroll One Row Down ........ 31
Scroll One Screen Down .... 31
Select All of the Images ...... 31
Select None of the Images .. 32
Take a Picture ..................... 32
Get Image(s) ....................... 32
Upload Image(s) ................. 32
Download Image(s) ............ 32
2
Warranty .................................... 36
Troubleshooting ......................... 37
Order Form for Digital Camera
Model CDS4100 ........................ 43
Page 5
This section describes the steps necessary to set up your digital camera to record and
save pictures. For detailed feature options and operation instructions, refer to the
specific portion of this manual.
Assistance
The toil-free numbers are provided to help with any problem you may encounter:
Digital Camera Exchange Warranty .......................... 800-283-6503
Customer Service ...................................................... 800-336-1900
Accessories ................................................................ 800-338-0376
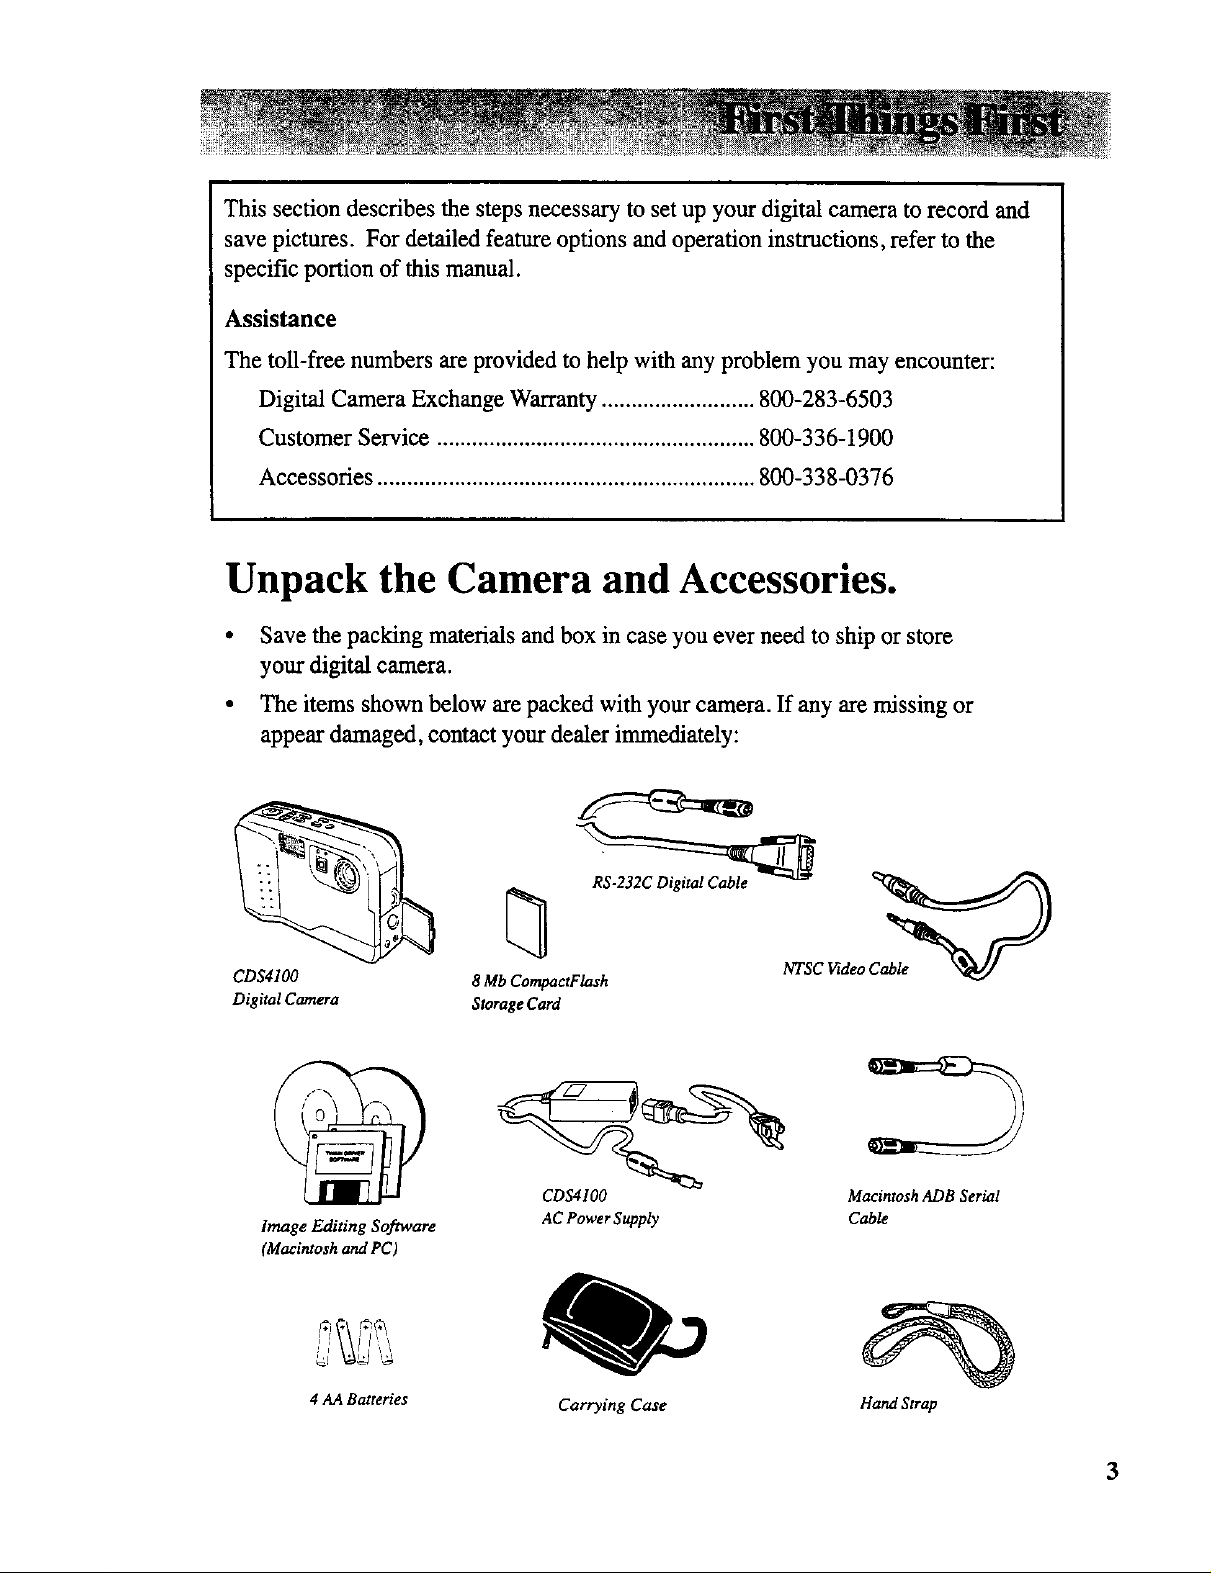
Unpack the Camera and Accessories•
• Save the packing materials and box in case you ever need to ship or store
your digital camera.
• The items shown below are packed with your camera. If any are missing or
appear damaged, contact your dealer immediately:
CDS4100
Digital Camera
Image Editing Software
(Macintosh and PC)
4 AA Batteries
8 Mb_C_rnpac_ C Video
Storage Card
CDS4100 Macintosh ADB Serial
AC Power Supply Cable
Carrying Case
Hand Strap
Page 6
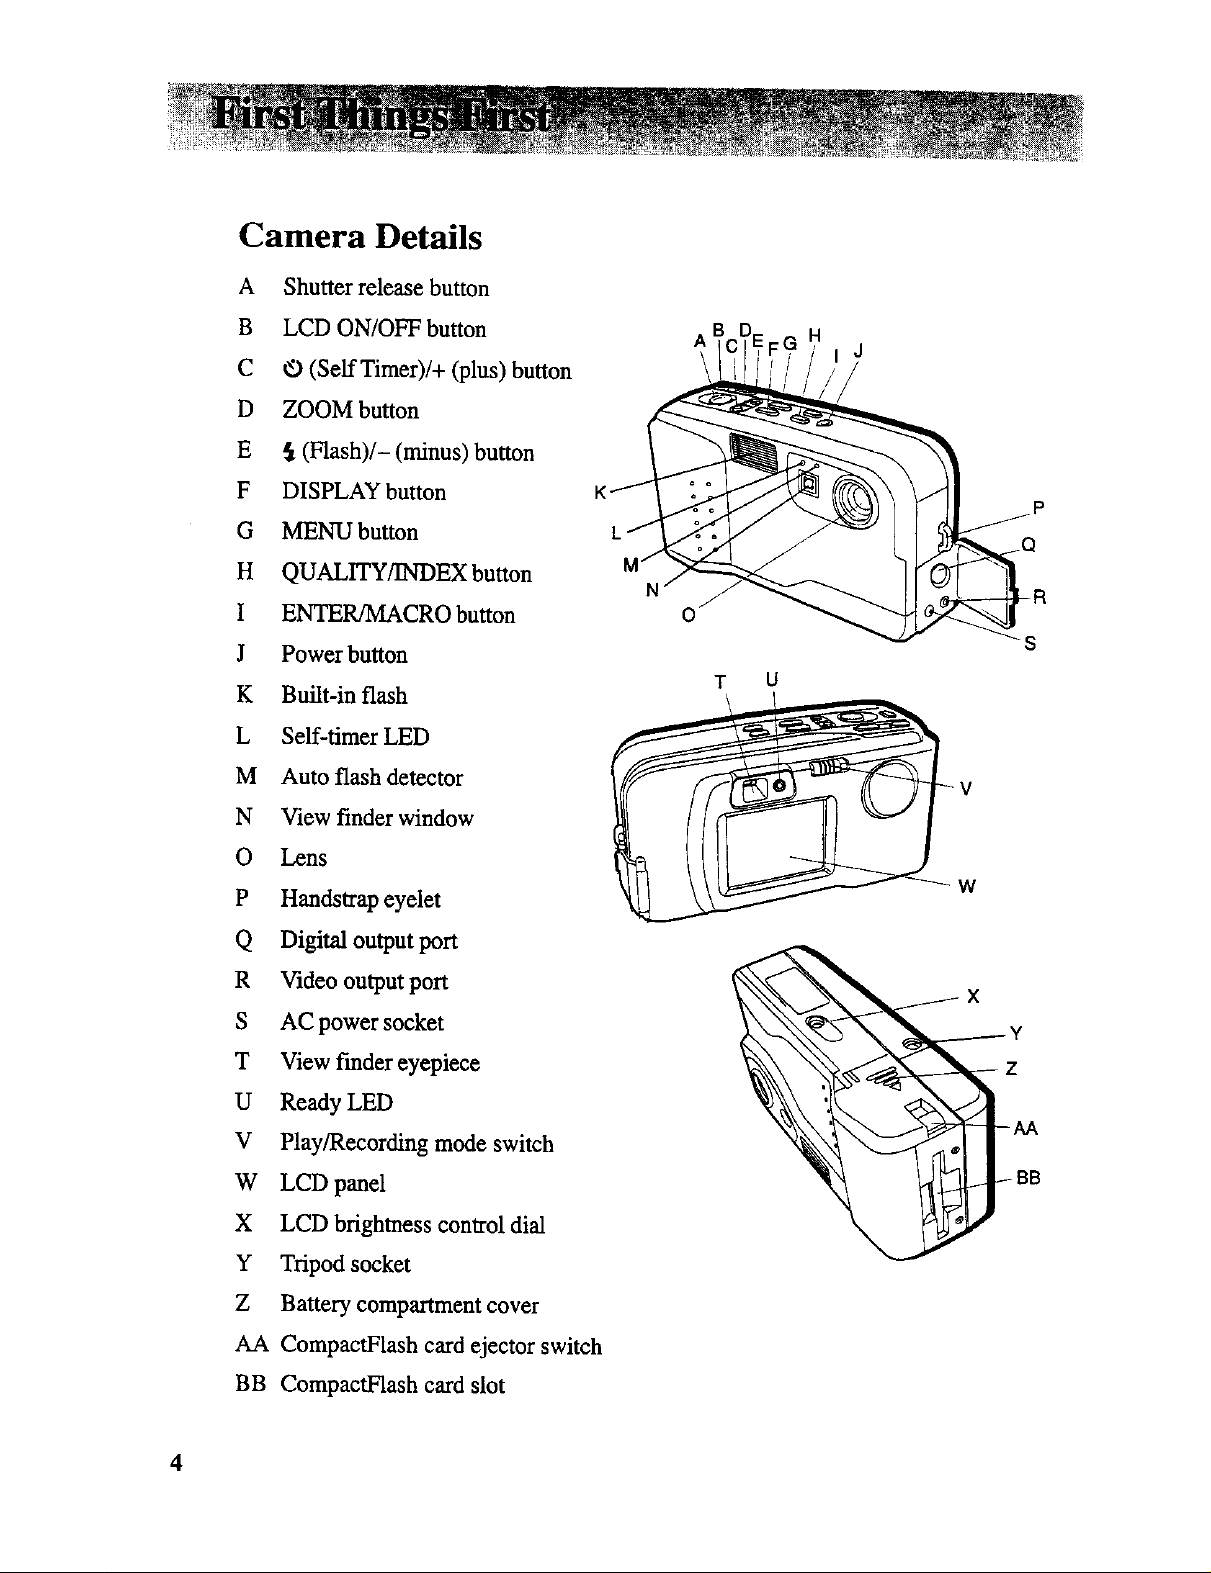
Camera Details
A Shutter release button
B LCD ON/OFF button
C O (Self Timer)/+ (plus) button
D ZOOM button
E _ (Flash)/- (minus) button
F DISPLAY button
G MENU button
H QUALITY/INDEX button
I ENTER/MACRO button
J Power button
K Built-in flash
L Self-timer LED
M Auto flash detector
N View finder window
O Lens
P Handstrap eyelet
H
J
o
T U
Q Digital output port
R Video output port
S AC power socket
T View finder eyepiece
U Ready LED
V Play/Recording mode switch
W LCD panel
X LCD brightness control dial
Y Tripod socket
Z Battery compartment cover
AA CompactFlash card ejector switch
BB CompactFlash card slot
4
X
Y
L
BB
Page 7
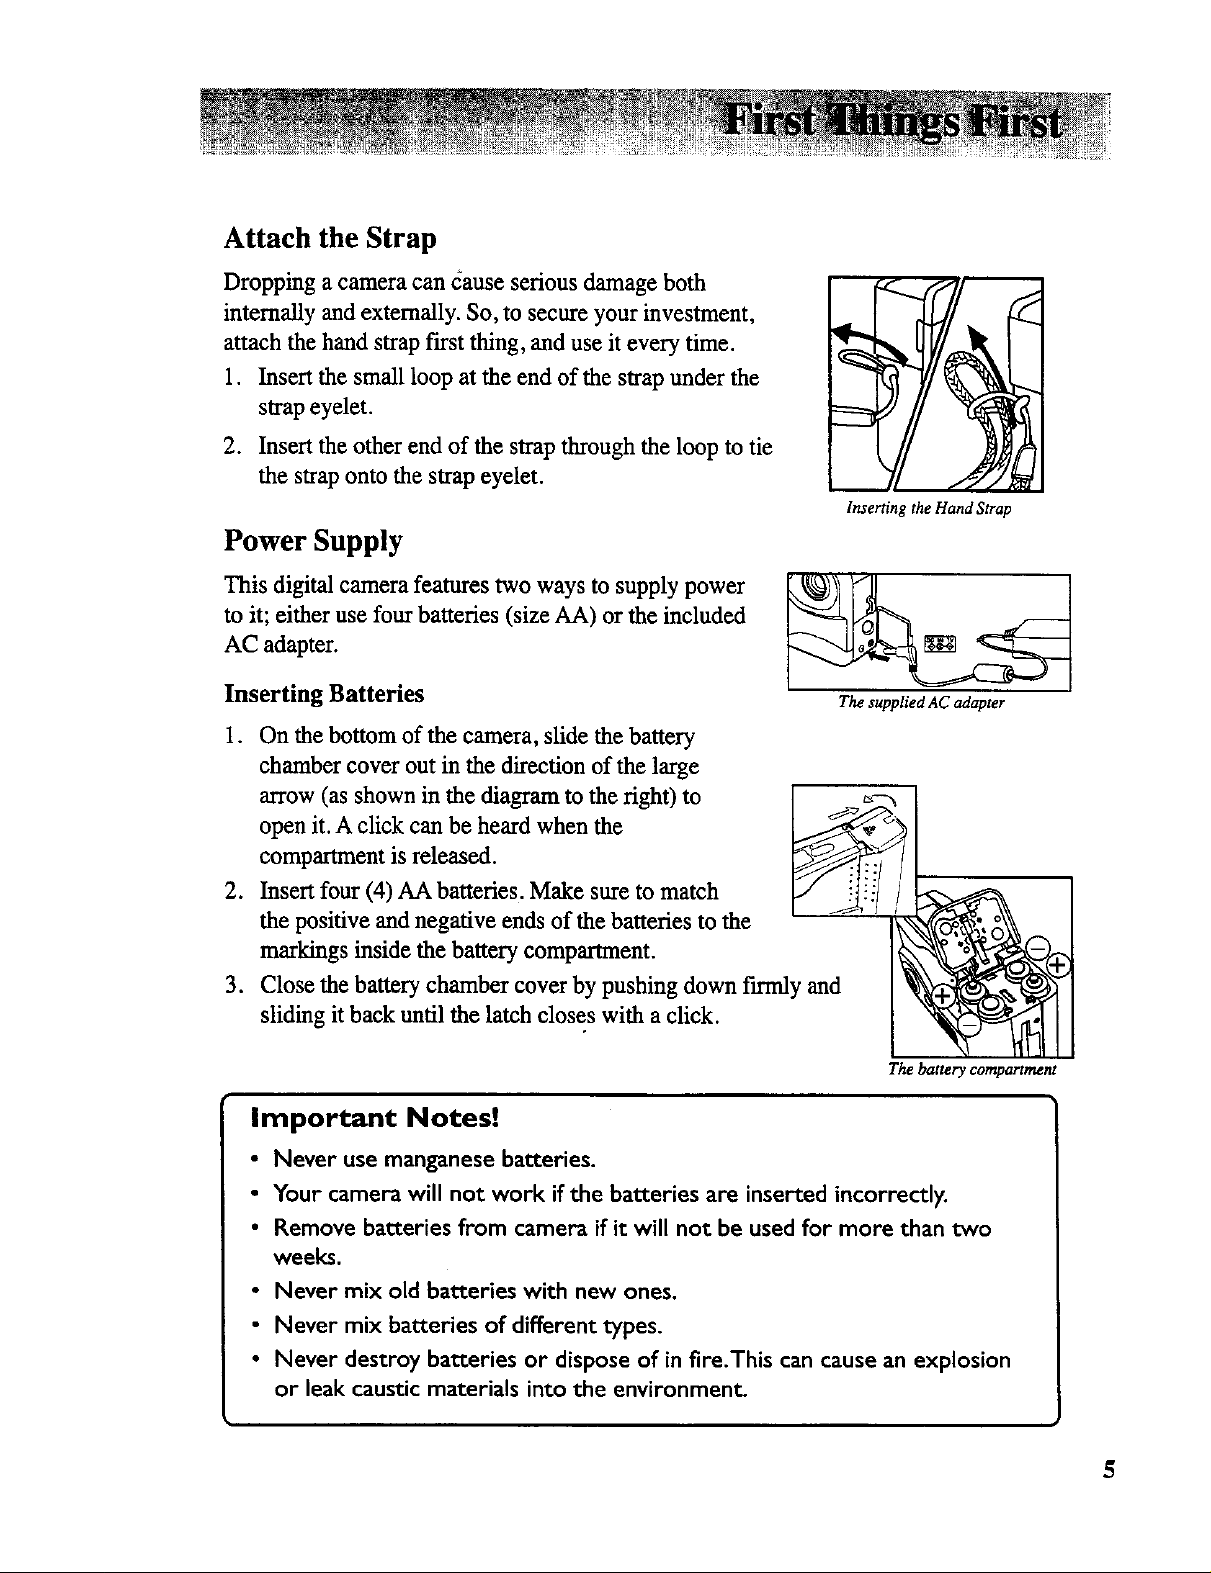
Attach the Strap
Dropping a camera can _ause serious damage both
internally and externally. So, to secure your investment,
attach the hand strap first thing, and use it every time.
1. Insert the small loop at the end of the strap under the
strap eyelet.
2. Insert the other end of the strap through the loop to tie
the strap onto the strap eyelet.
Power Supply
This digital camera features two ways to supply power
to it; either use four batteries (size AA) or the included
AC adapter.
Inserting the Hand Strap
Inserting Batteries
The supplied AC adapter
1. On the bottom of the camera, slide the battery
chamber cover out in the direction of the large
arrow (as shown in the diagram to the right) to
open it. A click can be heard when the
compartment is released.
2. Insert four (4) AA batteries. Make sure to match
the positive and negative ends of the batteries to the
markings inside the battery compartment.
3. Close the battery chamber cover by pushing down flrrrdy and
sliding it back until the latch closes with a click.
The battery compartment
Important Notes!
• Never use manganese batteries.
• Your camera will not work if the batteries are inserted incorrectly.
• Remove batteries from camera if it will not be used for more than two
weeks.
• Never mix old batteries with new ones.
• Never mix batteries of different types.
• Never destroy batteries or dispose of in fire.This can cause an explosion
or leak causticmaterials into the environment_
5
Page 8
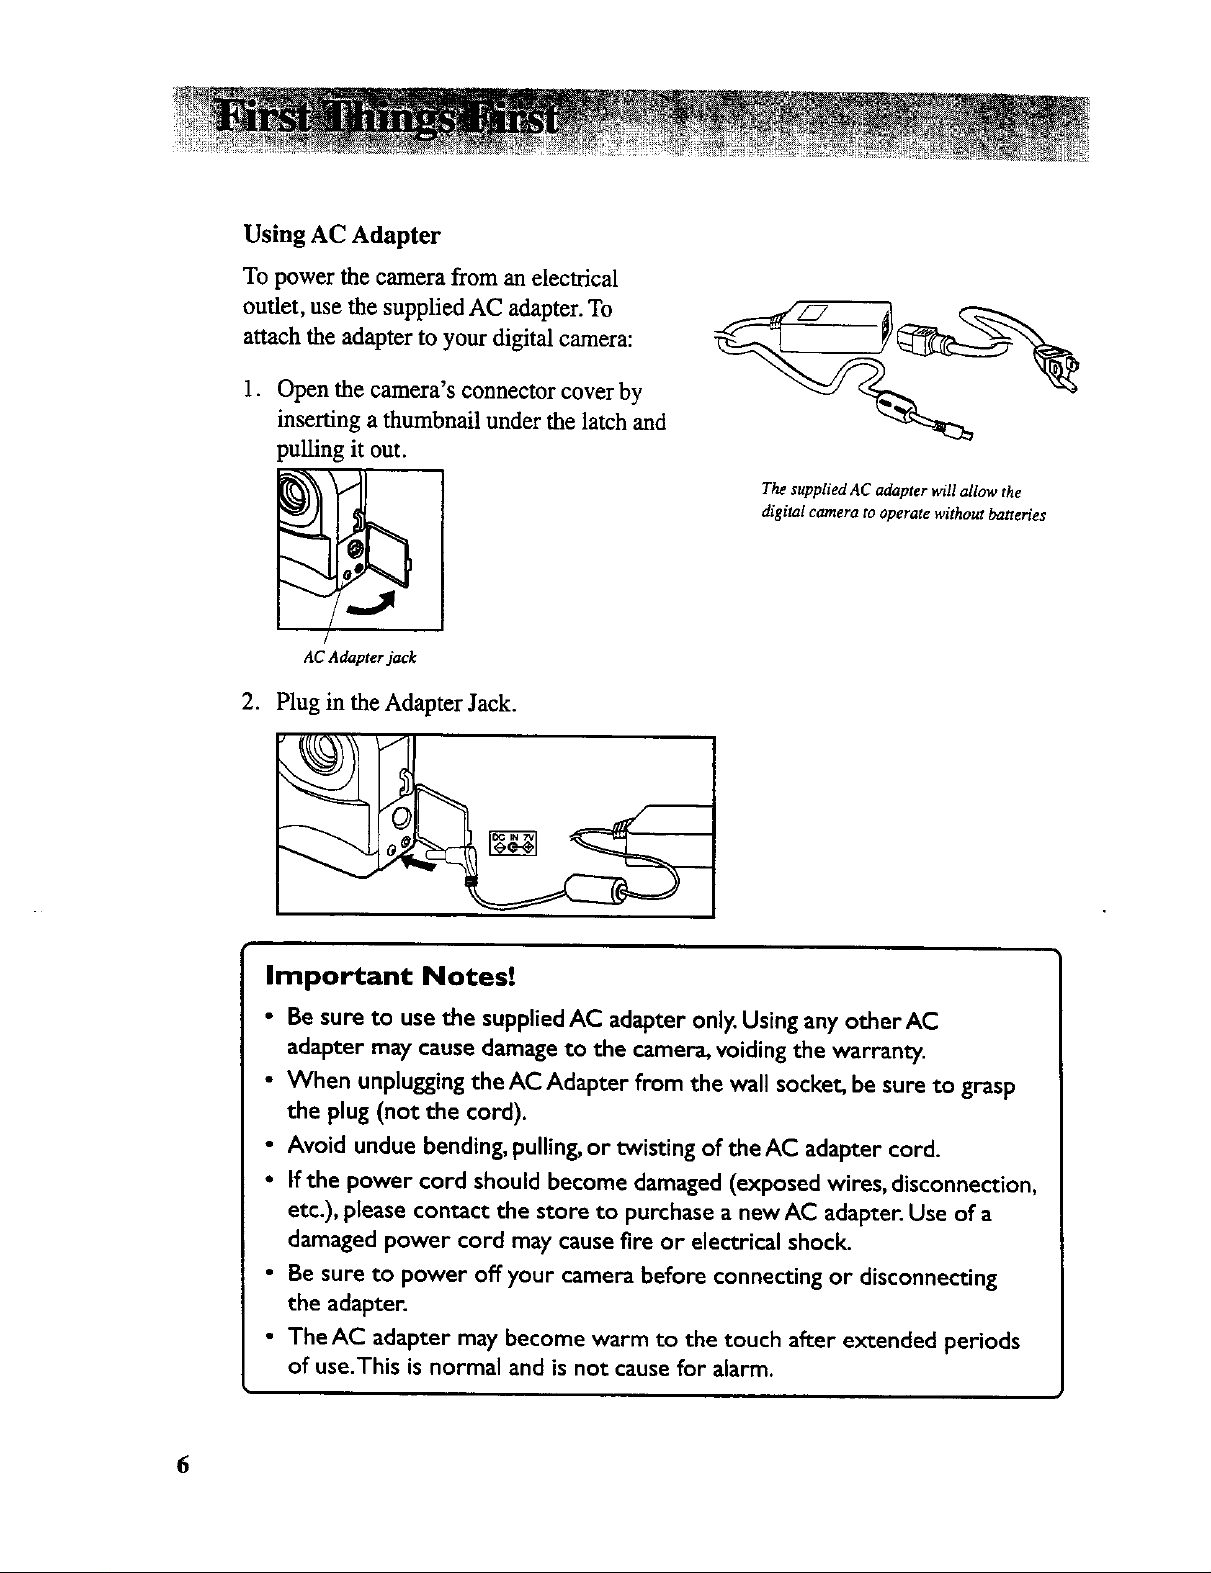
Using AC Adapter
To power the camera from an electrical
outlet, use the supplied AC adapter. To
attach the adapter to your digital camera:
1. Open the camera's connector cover by
inserting a thumbnail under the latch and
pulling it out.
AC Adapter jack
.
Plug in the Adapter Jack.
The supplied AC adapter will allow the
digital camera to operate without batteries
Important Notes!
• Be sure to use the supplied AC adapter only. Using any other AC
adapter may cause damage to the camera, voiding the warranty.
• When unplugging the AC Adapter from the wall socket, be sure to grasp
the plug (not the cord).
• Avoid undue bending, pulling, or twisting of the AC adapter cord.
• If the power cord should become damaged (exposed wires, disconnection,
etc.), please contact the store to purchase a new AC adapter. Use of a
damaged power cord may cause fire or electrical shock.
• Be sure to power off your camera before connecting or disconnecting
the adapter.
• The AC adapter may become warm to the touch after extended periods
of use.This is normal and is not cause for alarm.
6
Page 9

Auto Power Off
To prolong battery life, if no buttons or switches are pressed for a certain amount of
time, the camera turns off automatically. Press the POWER button on top of the
camera to turn it on again.
Power source inactivity period: Battery- 2 min.; AC adapter- 30 min.
Install the Camera's Storage Card
Your digital camera stores the pictures that it takes on
removable storage media called compact flash cards. Your
camera can use removable flash cards in 2, 4, 8, 16, or 48
megabyte (Mb) sizes. Contact your nearest RCA brand reseller
for more information about obtaining additional flash memory.
To install the CompactFlash memory card:
Inserting a Compact Flash
1. Make sure the camera power is OFF.
removable media storage
card.
2. Line up the arrow on the CompactFlash with the arrow
on the camera body. Push the card f'mnly until it stops.
3. To remove the CompactFlash Card, push the ejector
switch on the battery compartment cover.
4. If the camera is powered on without the card, "NO
CARD" appears on the camera's LCD monitor.
5. If the card is not prepared for use with the camera, a
prompt to format it will display on the LCD. See the
next section, "Setting Preferences," for formatting
instructions.
Remove the CompactFlash card
by depressing the switch on the
camera's battery door
Notes:
• Always keep the power off while installing or removing the compact flash
card to avoid damagingthe memory card.
• Captured images are saved in JPEG format (under various compressions
schemes as set by the user), in compliance with Internet standards. Images are
stored on a CompactFlash card inserted in the camera (up to a 48 Mb card is
supported).The camera does not haveany built-in memory for storage.
• With most removable media, the following number of images can be stored:
*Image Quality 2Mb 4Mb 8Mb 16Mb 32Mb 48Mb
FINE 5 10 20 41 83 124
NORMAL 10 20 40 81 162 243
ECONOMY 20 40 81 163 327 490
*These are minimum numbers. Numbers are different depending on the subjects captured.
7
Page 10
Recording Pictures
Since there needs to be pictures taken before the camera
will display stored t'des, let's walk through the steps to
capture images.
The switch on the back of the camera determines if
PLAY or REC mode is used. Play is how you view
stored pictures and REC is how they are taken (for more
information about the specific aspects of PLAY and
REC modes, see the next section, "Setting Preferences").
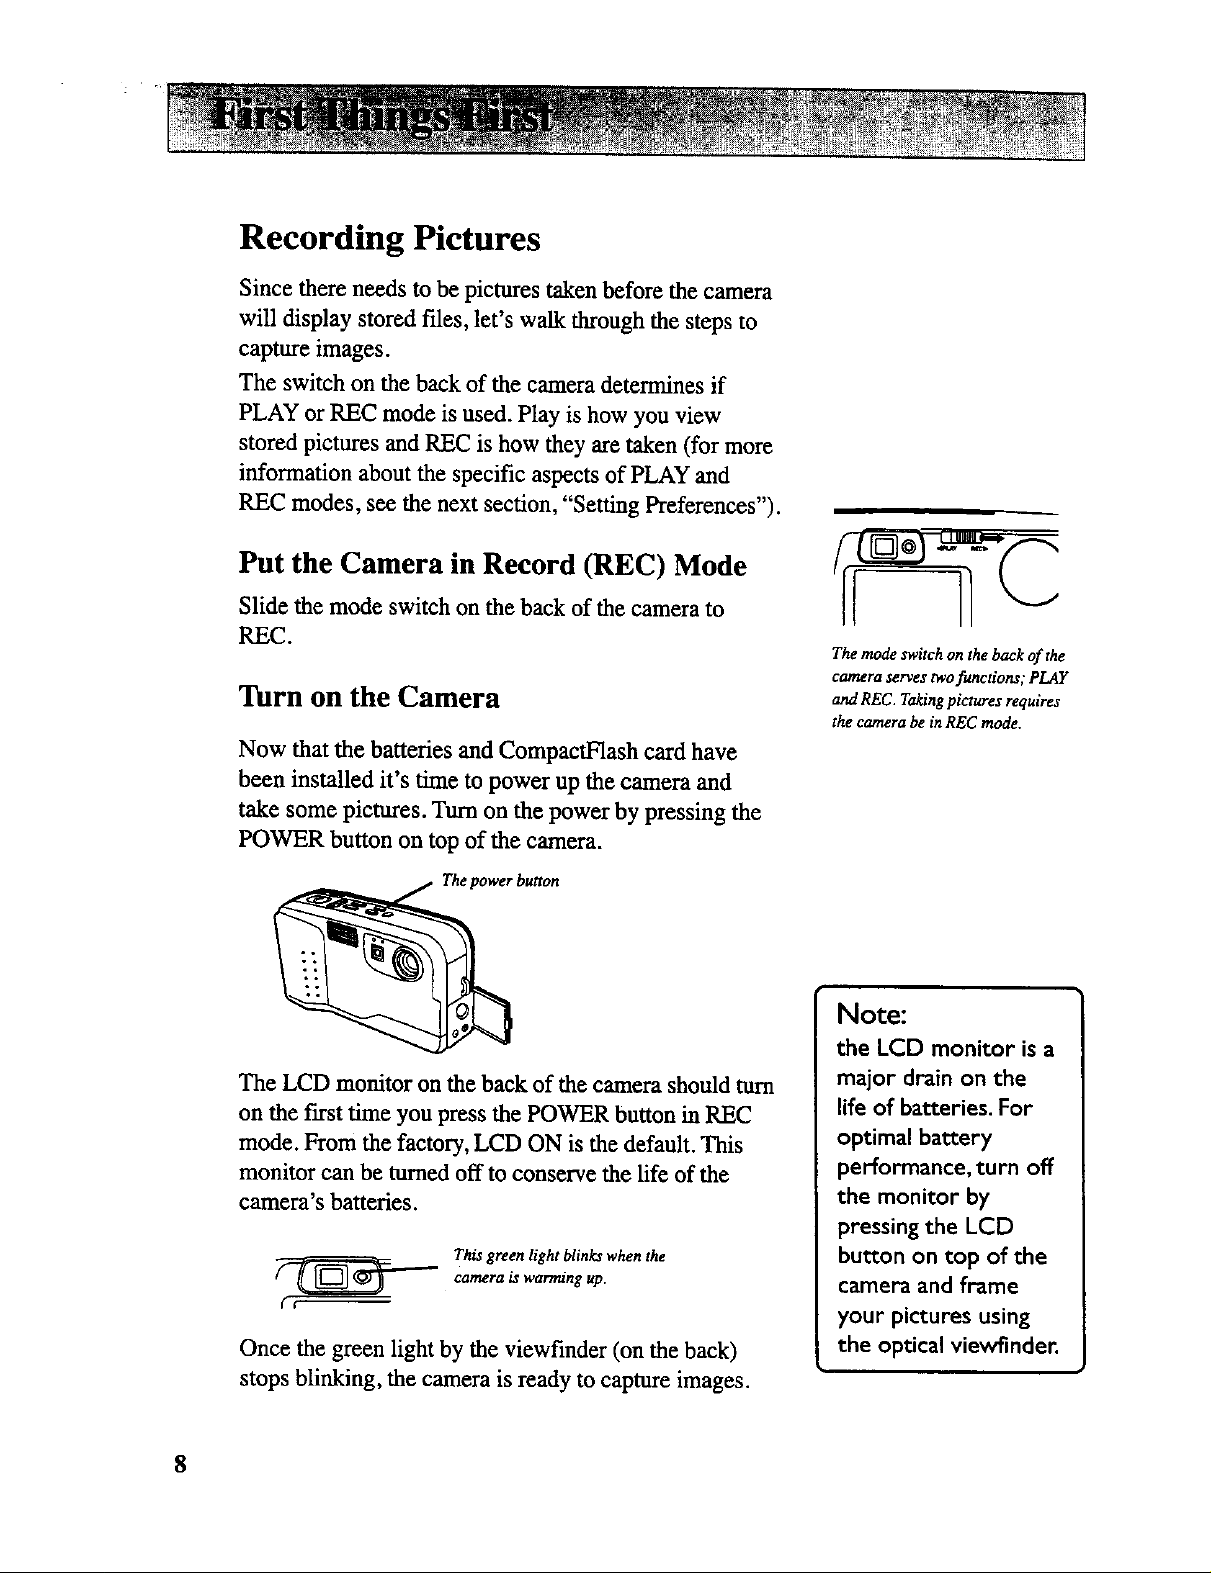
Put the Camera in Record (REC) Mode
Slide the mode switch on the back of the camera to
REC.
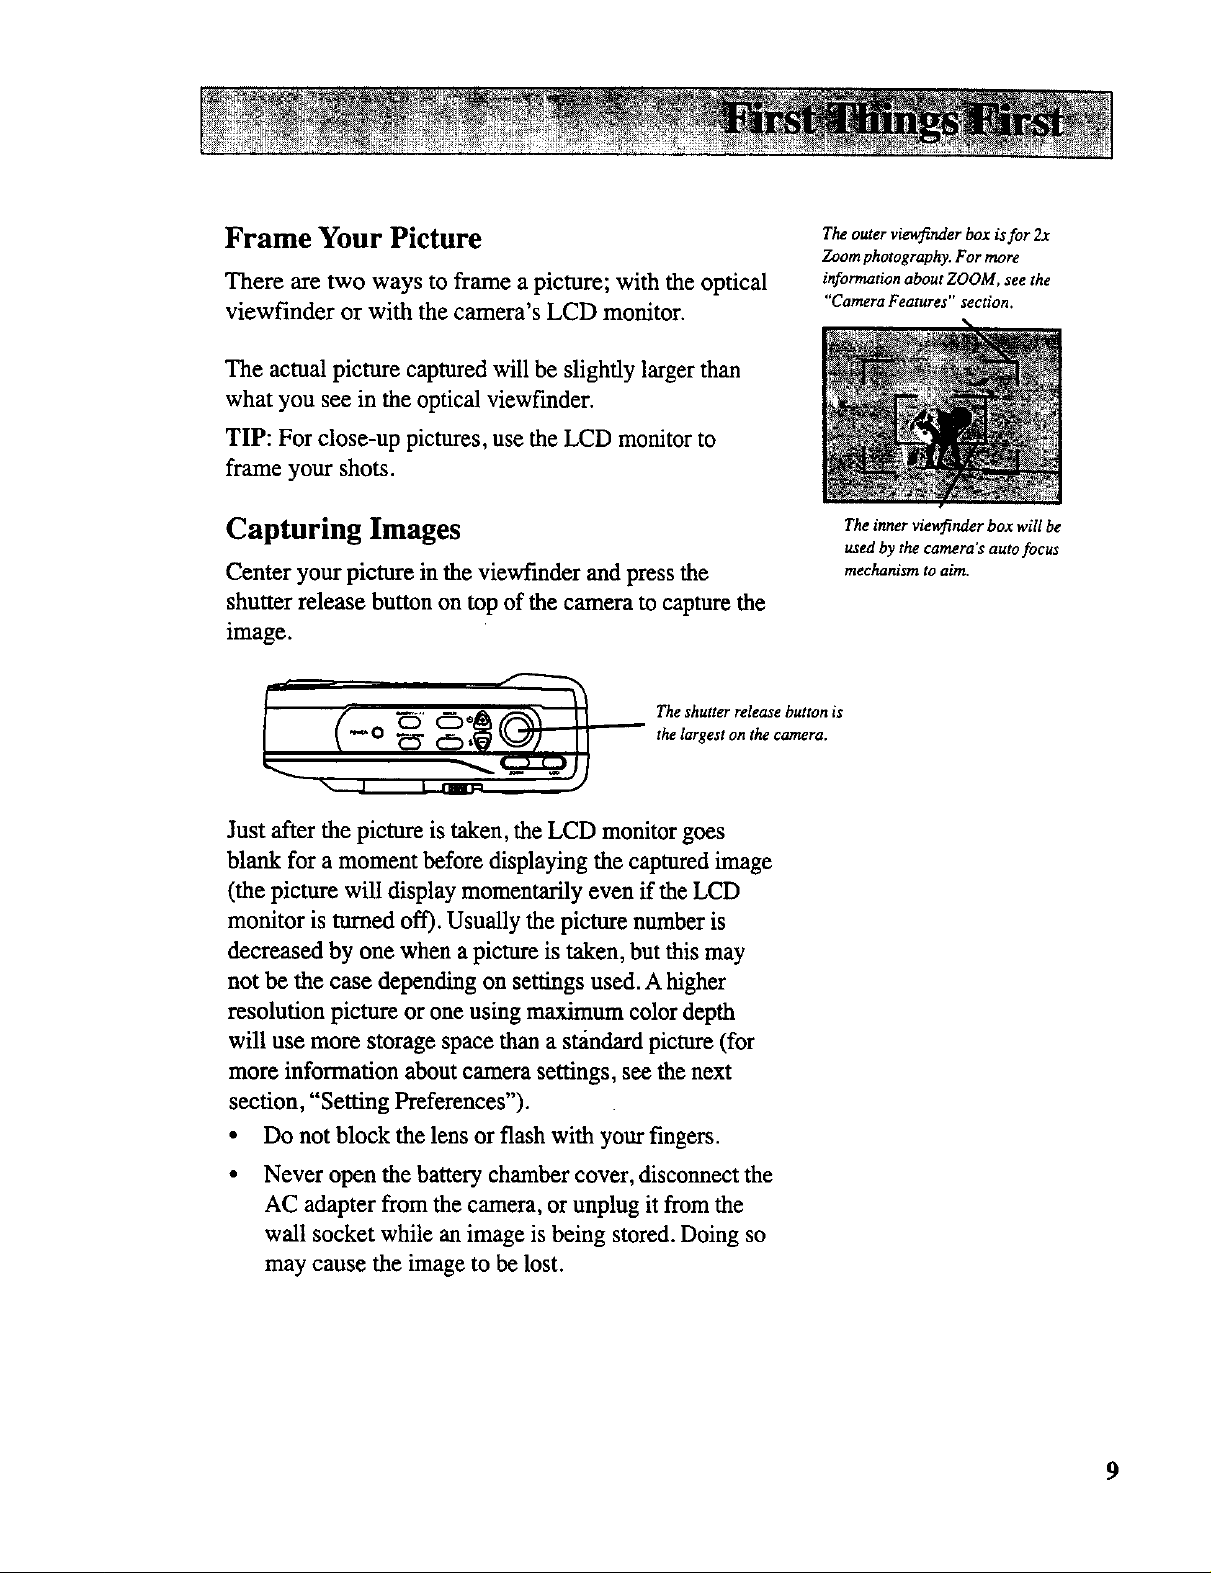
Turn on the Camera
Now that the batteries and CompactFlash card have
been installed it's time to power up the camera and
take some pictures. Turn on the power by pressing the
POWER button on top of the camera.
The mode switch on the back of the
camera serves two functions; PLAY
and REC. Taking pictures requires
the camera be in REC mode.
Note:
the LCD monitor is a
The LCD monitor on the back of the camera should turn
on the first time you press the POWER button in REC
mode. From the factory, LCD ON is the default. This
monitor can be turned off to conserve the life of the
camera's batteries.
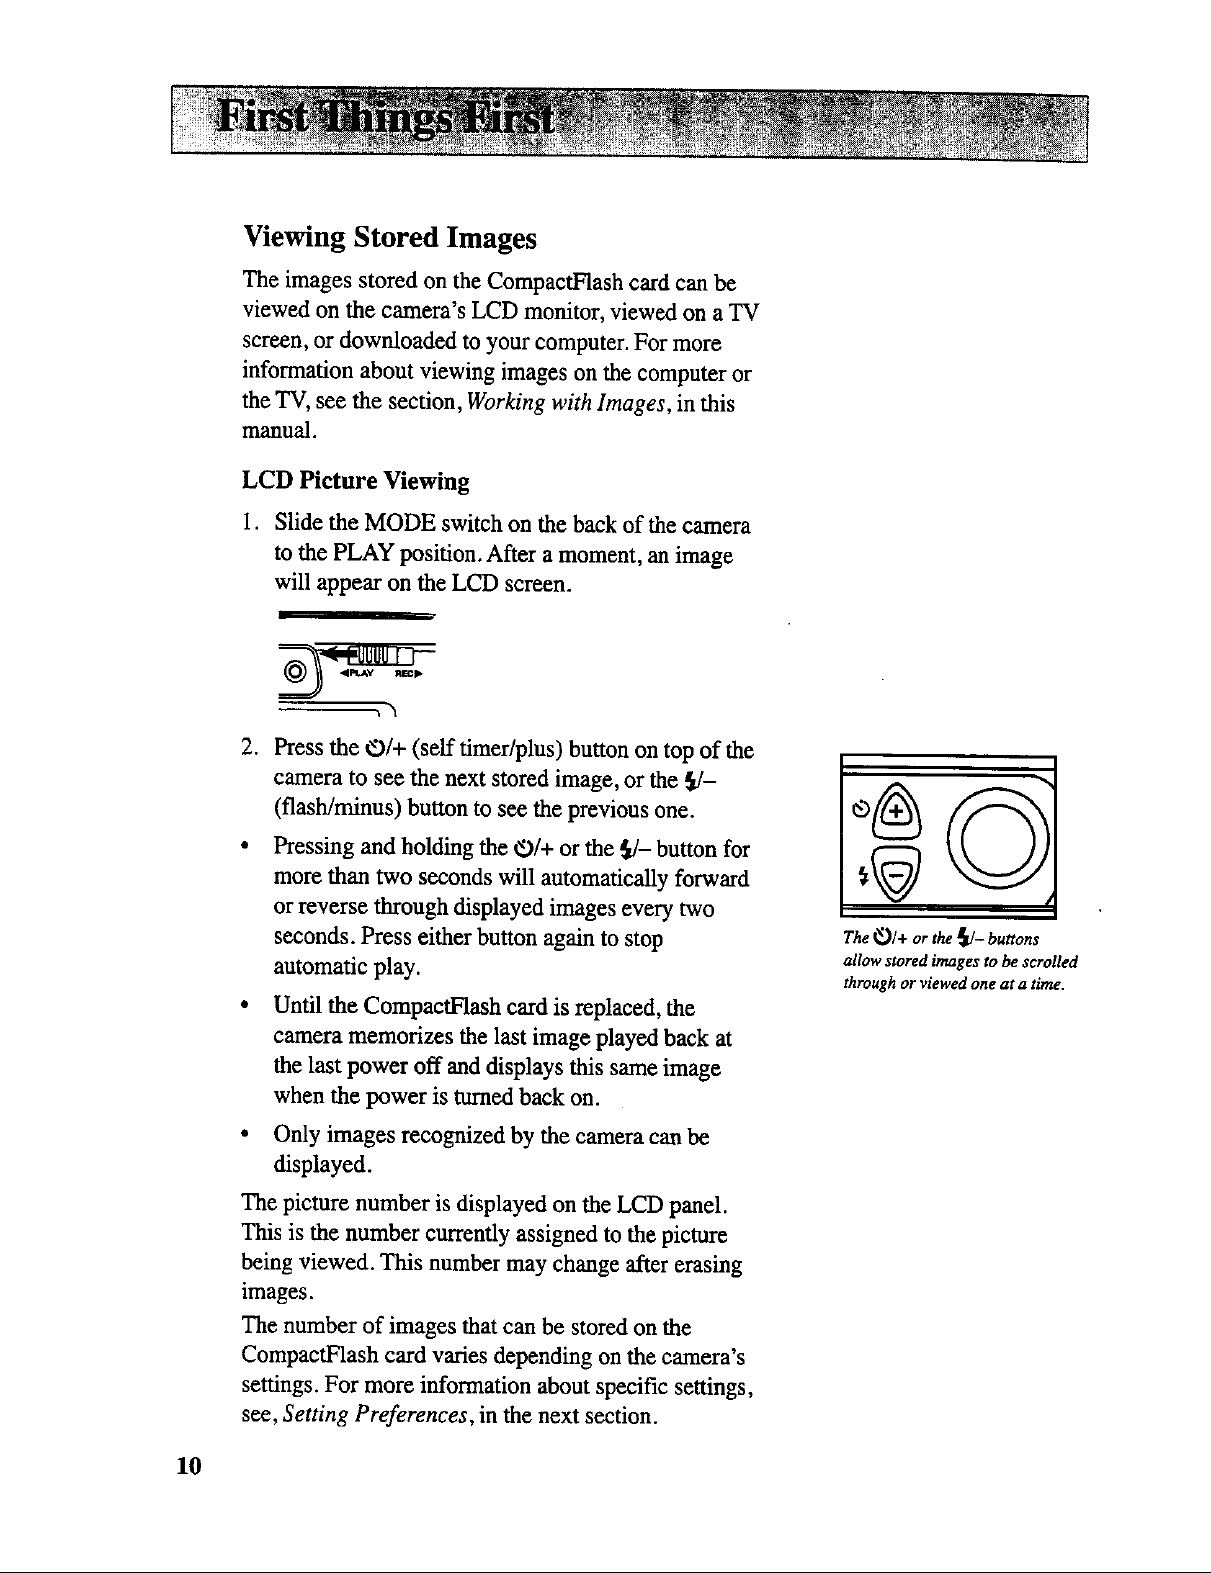
This green light blinks when the
camera is warming up.
Once the green light by the viewfinder (on the back)
stops blinking, the camera is ready to capture images.
8
major drain on the
life of batteries. For
optimal battery
performance, turn off
the monitor by
pressing the LCD
button on top of the
camera and frame
your pictures using
the optical viewfinder.
Page 11
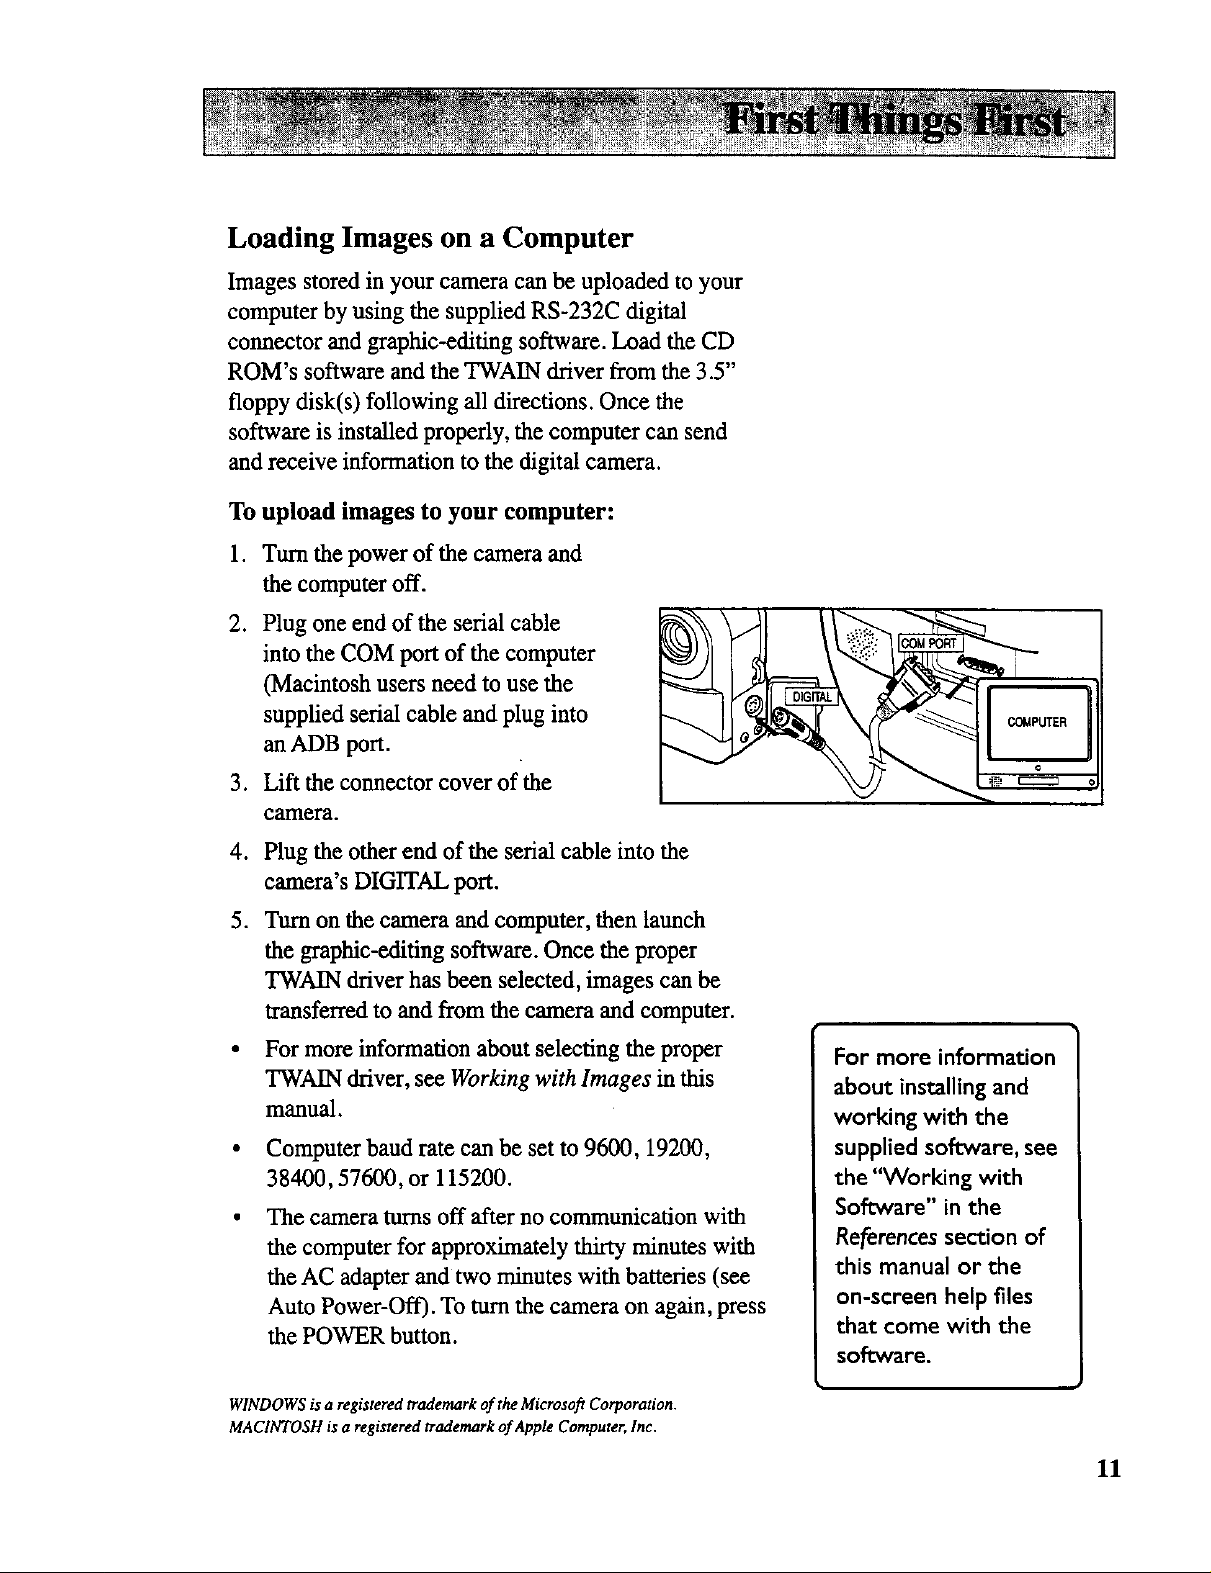
Frame Your Picture
There are two ways to frame a picture; with the optical
viewfinder or with the camera's LCD monitor.
The actual picture captured will be slightly larger than
what you see in the optical viewfinder.
TIP: For close-up pictures, use the LCD monitor to
frame your shots.
Theouter viewfinder box is for 2x
Zoomphotography. For more
information about ZOOM, see the
"Camera Features" section.
Capturing Images
Center your picture in the viewfinder and press the
shutter release button on top of the camera to capture the
image.
The shutter release button is
the largest on the camera.
Just after the picture is taken, the LCD monitor goes
blank for a moment before displaying the captured image
(the picture will display momentarily even if the LCD
monitor is turned off). Usually the picture number is
decreased by one when a picture is taken, but this may
not be the case depending on settings used. A higher
resolution picture or one using maximum color depth
will use more storage space than a s_ndard picture (for
more information about camera settings, see the next
section, "Setting Preferences").
The inner viewfinder box will be
used by the camera's auto focus
mechanism to aim.
• Do not block the lens or flash with your fingers.
• Never open the battery chamber cover, disconnect the
AC adapter from the camera, or unplug it from the
wall socket while an image is being stored. Doing so
may cause the image to be lost.
Page 12
Viewing Stored Images
The images stored on the CompactFlash card can be
viewed on the camera's LCD monitor, viewed on a TV
screen, or downloaded to your computer. For more
information about viewing images on the computer or
the TV, see the section, Working with Images, in this
manual.
LCD Picture Viewing
1. Slide the MODE switch on the back of the camera
to the PLAY position. After a moment, an image
will appear on the LCD screen.
2. Press the O/+ (self timer/plus) button on top of the
camera to see the next stored image, or the _/-
(flash/minus) button to see the previous one.
• Pressing and holding the O/+ or the _/- button for
more than two seconds will automatically forward
orreverse through displayed images every two
seconds. Press either button again to stop
automatic play.
• Until the CompactFlash card is replaced, the
camera memorizes the last image played back at
the last power off and displays this same image
when the power is turned back on.
• Only images recognized by the camera can be
displayed.
The picture number is displayed on the LCD panel.
This is the number currentty assigned to the picture
being viewed. This number may change after erasing
images.
The number of images that can be stored on the
CompactFlash card varies depending on the camera's
settings. For more information about specific settings,
see, Setting Preferences, in the next section.
The _/ + or the _lJ- buttons
allow stored images to be scrolled
through or viewed one at a time.
10
Page 13
Loading Images on a Computer
Images stored in your camera can be uploaded to your
computer by using the supplied RS-232C digital
connector and graphic-editing software. Load the CD
ROM's software and the TWAIN driver from the 3.5"
floppy disk(s) following all directions. Once the
software is installed properly, the computer can send
and receive information to the digital camera.
To upload images to your computer:
1. Turn the power of the camera and
the computer off.
2. Plug one end of the serial cable
into the COM port of the computer
(Macintosh users need to use the
supplied serial cable and plug into
an ADB port.
3. Lift the connector cover of the
camera.
4. Plug the other end of the serial cable into the
camera's DIGITAL port.
5. Turn on the camera and computer, then launch
the graphic-editing software. Once the proper
TWAIN driver has been selected, images can be
transferred to and from the camera and computer.
• For more information about selecting the proper
TWAIN driver, see Working with Images in this
manual.
• Computer baud rate can be set to 9600, 19200,
38400, 57600, or 115200.
The camera turns off after no communication with
the computer for approximately thirty minutes with
the AC adapter and two minutes with batteries (see
Auto Power-Off). To turn the camera on again, press
the POWER button.
WINDOWS is a registered trademark of the Microsoft Corporation.
MACINTOSH is a registered trademark of Apple Computer, Inc.
For more information
about installing and
working with the
supplied software, see
the "Working with
Software" in the
References section of
this manual or the
on-screen help files
that come with the
software.
11
Page 14

Page 15
On=screen menus
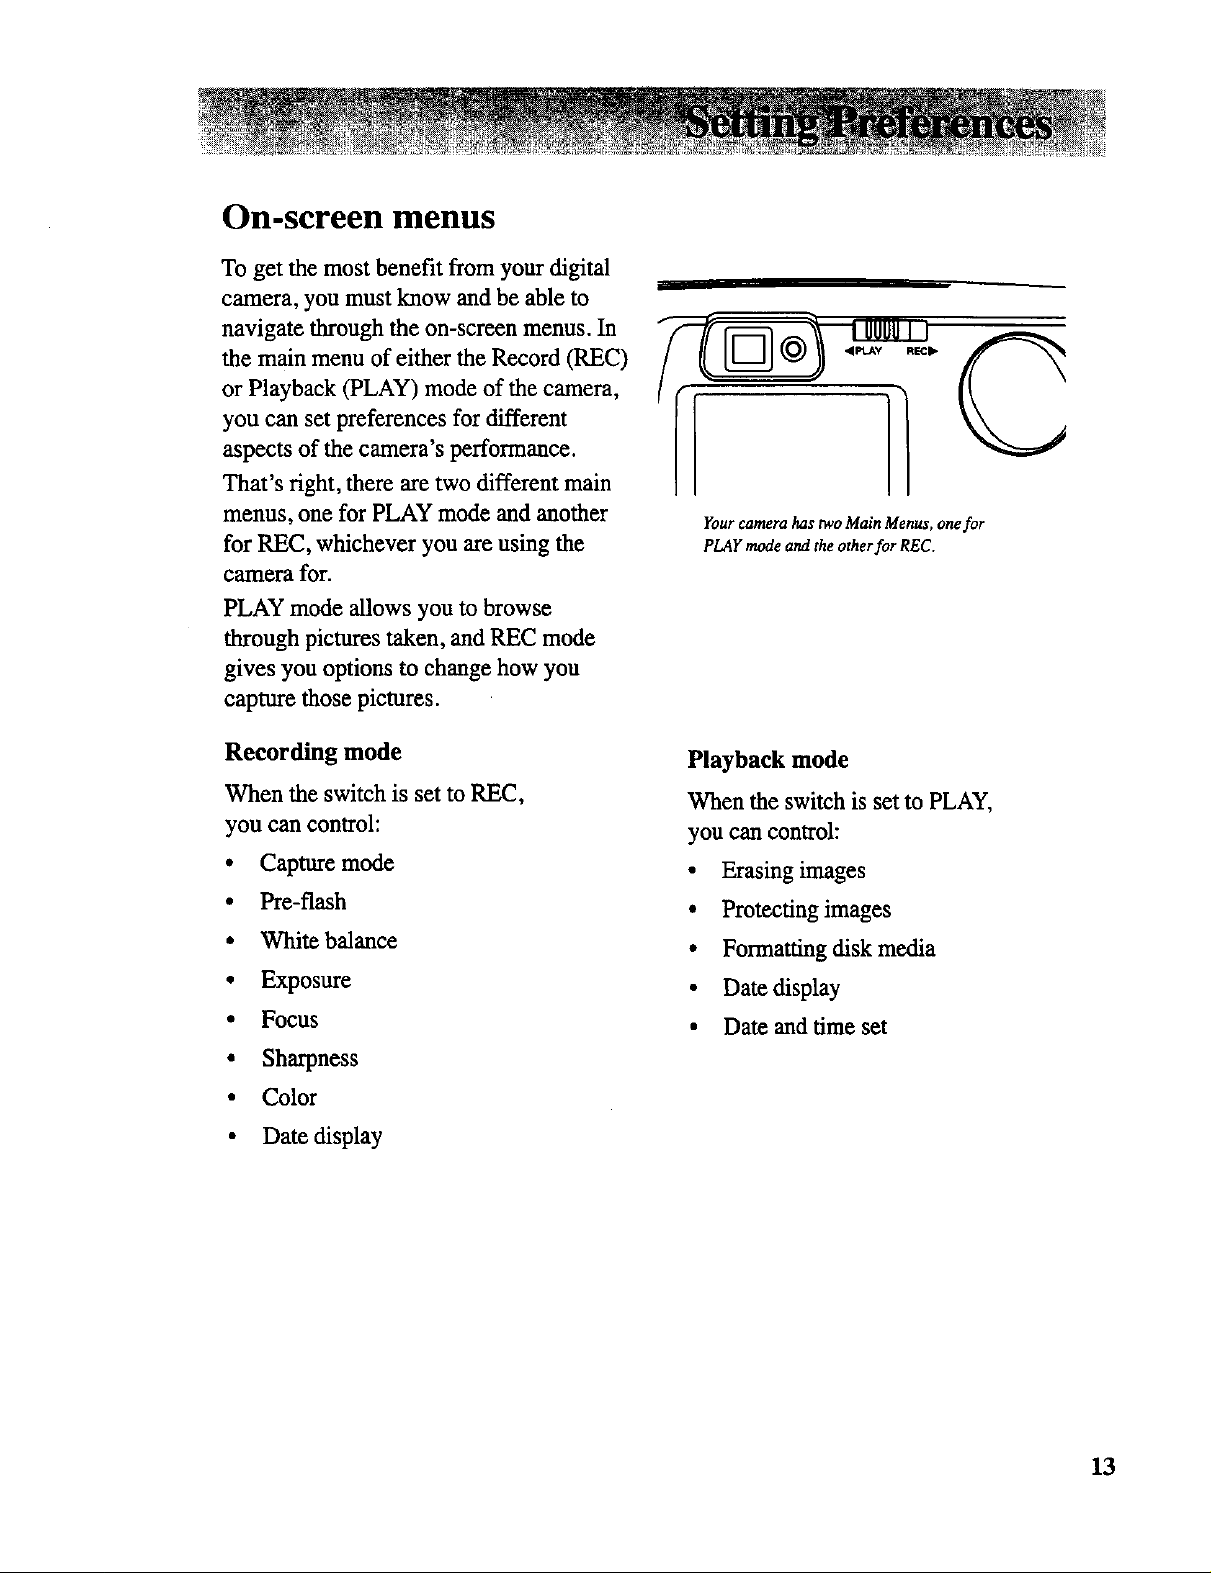
To get the most benefit from your digital
camera, you must know and be able to
navigate through the on-screen menus. In
the main menu of either the Record (REC)
or Playback (PLAY) mode of the camera,
you can set preferences for different
aspects of the camera's performance.
That's right, there are two different main
menus, one for PLAY mode and another
for REC, whichever you are using the
camera for.
PLAY mode allows you to browse
through pictures taken, and REC mode
gives you options to change how you
capture those pictures.
C
Your camera has two Main Menus, one for
PLAY mode and the otherfor REC.
Recording mode
When the switch is set to REC,
you can control:
• Capture mode
• Pre-flash
• White balance
• Exposure
• Focus
• Sharpness
• Color
• Date display
Playback mode
When the switch is set to PLAY,
you can control:
• Erasing images
• Protecting images
• Formatting disk media
• Date display
• Date and time set
13
Page 16

Changing settings
The menus are manipulated the same in
PLAY or REC modes by using the
buttons on top of the camera.
• To enter or exit the menu system,
press the MENU button.
• To scroll through menu choices, use
the up (+/O) or down (-/t) button to
highlight choices.
• To select a highlighted menu item,
use the ENTER/MACRObutton.
Before you can use the Playbackmenus,
you have to record some pictures first.
So, for now, let's concentrate on the
Main Menu in REC mode.
REC mode
Setting capture mode
When you push the MENU button in
REC mode, your first option is
CAPTURE.
Your digital camera can capture one
picture at a time, or it can capture up to
nine consecutive images in a short
duration (SEQ.9).
Make sure the highlight arrow is by
CAPTURE in the Main Menu. If not,
use the up (+/O) or down (-/$) button to
select it. Once your menu choice is
displayed, press the ENTER/MACR0
button.
The arrow icon now highlights the right
hand column of CAPTURE. Using the
up (+/O) or down (-/_) button, chose
between SINGLE picture capture or
SEQ.9 modes.
MAIN MENU
I_CAPTURE: SINGLE
PRE FLASH: OFF
WHITE BAL.: AUTO
EXPOSURE: 0.0
FOCUS: AUTO
SHARPNESS: NORMAL
COLOR: NORMAL
DATE DISP.: OFF
The record mode Main Menu allows changes to
photographic settings. This is the first screen you
will see when you press the MENU button in REC
mode.
MAINMENU
CAI_'URE; bSINGLE
PRE _H: ON
WHI'I_ aAL.: AUTO
EXPOSURE: o.0
FOCUS: AU10
SHARPNESS: NORMAL
COLOR: NORMAL
DATE DISR: OFF
When the right selection is highlighted,
press the ENTER/MACR0button.
You are now ready to access other
settings in your camera, or, to exit the
menus altogether, press the MENU
button.
Setting the pre-flash mode
Pre flash is an option used to reduce the
occurrence of red-eye in pictures. When
pre-flash is activated, there are a series
of two flashes; an initial flash to offset
red eye, and a second flash used for the
picture.
Note: In order for Pre Flash to work, the camera must be
set to AUTO flash or FLASH ON mode.
I
14
Page 17

To turn pre-flash on, display the Main
Menu screen in REC mode by pressing
the MENU button on top of the camera.
Use the up (+/O) or down (-/3) button
to select PRE FLASH. Press the ENTERJ
MACRObutton to change options.
MAINMENU
CAPTURE; SINGLE
PRE FLASH: bON
WHITE BAL: AUTO
EXPOSURE: O.O
FOCUS: AUTO
SHARPNESS: NORMAL
COLOR: NORMAL
DATE DISR: OFF
Use the up (+/O) or down (-/3) button
to toggle between ON and OFF. When
the right choice is highlighted, press the
ENTER/MACRObutton to activate.
Remember, to exit the Main Menu
at any time, just press the MENU
I NOTE: 1
button on top of the camera.
Adjusting exposure controls
Manual adjustment of exposure
controls allows the camera to
compensate for lighting conditions that
cause underor overexposed images.
Overexposed settings can be reduced by
using a negative (-) exposure value.
Underexposed images can be adjusted
with a positive (+) value.
To manually set exposure controls:
Setting white balance
Manual adjustment of white balance
aUows the camera to compensate for
various lighting conditions. Whether
you are in natural or artificial light, you
can chose a white balance to get the
best picture quality.
To set white balance to Daylight,
Huorescent Light (Office), or Automatic:
Bring up the Main Menu screen in REC
mode. Use the up (+/O) or down (-/3)
button to move the highlight arrow to
WHITE BAL. Press the ENTER/MACRO
button to change this options.
MAINMENU
CAPTURE: SINGLE
PRE FLASH: OFF
WHITIE BAL: J' DAY-LT
EXPOSURE: 0,0
FOCUS: ALr'ro
SHARpNeSS: NORMAL
COLOR: NORMAL
DATE DISF_: OFF
Ise the up (+/O) or down (-/3) button
to toggle between DAY-LT, OFFICE,
or AUTO. When the right choice is
highlighted, press the ENTER/MACRO
button to activate.
bring upthe Main Menu screen in REC
mode and use the up (+/O) or down
(-/3) button to highlight EXPOSURE.
Press the ENTER/MACRObutton to
change settings.
MAINMENU
CAPTURE: SINGLE
PRE FLASH:
WHFrE BAL: AUTO
EXPOSURE: b÷1,3
FOCUS: AUTO
SHARPNESS: NORMAL
COLOR: NORMAL
OATE DISR: OFF
Selections shown arefor
demonstration purposes only.)
Use the up (+/O) or down (-/3) button
to toggle between positive and negative
values. While 0.0 is the camera's
default, you can also choose plus or
minus (+) 0.3,0.5,0.8, 1.0, 1.3, 1.5,
1.8, and 2.0.
Once set to desired value, press the
ENTER/MACRObutton to activate.
15
Page 18

Adjusting focus
Manual adjustmentof focus allows you
to determine where the camera's lens
will concentrate. While you can allow
the camera to focus automatically,
specific distances can also be set.
To chose between Auto, 2.0, 0.5, or 0.1
meters (m), bring the Main Menu screen
up in REC mode and use the up (+/O)
or down (-/$) button to move the
highlight arrow to FOCUS. Press the
ENTER/MACRObutton to change options.
Use the up (+/O) or down (-/_) button
again to select between the various
settings.
Bring the Main Menu up in Record
mode by pressing the MENU button.
MNN MENU
CAPTUI¢_: SINGLE
PRE FLASH: OFF
9VHRE BAL: AUTO
EXPOSURE: 0,0
FOCUS: AUTO
SHARPNESS: I, NORMAL
COLOR: NORMAL
DATE DtSR: OFF
Use the up (+/O) or down (-/t) button to
highlight SHARPNESS. Press the ENTER/
MACRObutton to activate the choice.
Use the up (+/O) or down (-/_) button to
change between NORMAL, SHARP, or
SOFT modes. Press ENqER/MACROto
activate your selection.
16
MAIN MENU
CAPTURE: SINGLE
PRE FLASH: OFF
WHINE BAL: AUTO
EXPOSURE: O.O
FCCUS: I.AUTO
SHARPNESS: NORMAL
COLOR: NORMAL
DATE DISR: OFF
When the right value is selected, press
the ENTER/MACRObutton to activate the
setting.
You can go on to change other settings
or exit the Main Menu to take pictures.
Setting image sharpness
The sharpness of an image directly
relates to how much memory the image
takes up. The sharper an image, the
more pixels (or picture elements) are
used. The more pixels used in images,
the fewer fries can be stored on a
CompactFlash memory card.
In other words, you can set the
sharpness to maximum for all pictures
taken, but it will significantly reduce the
number of images you can store.
To chose between NORMAL, SHARP,
or SOFT image sharpness:
Adjusting color
You can alter color depth settings, or the
amount of colors absorbed in images,
which affects the number of images you
can store.
The more colors your camera is set to
capture, the larger the file of the picture
will be on the CompactFlash storage card.
Better quality means fewer pictures.
In the Main Menu, use the up (+/O) or
down (-/t) button to highlight COLOR.
Press the ENTER/MACRObutton to change
settings.
MAINMENU
CAPTURE: SINGLE
PRE FLASH: OFF
WHITE BAI-; AUTO
EXPOSURE: O.0
FOCUS: AUTO
SHARPNESS: _'NORMA I.
COLOR: NORMAL
DATE DI_: OFF
Use the up (+/O) or down (-/t) button to
select from Normal (suitable for print),
Light (suitable for web viewing), Deep
(suitable for magazine work), Black and
white, or Sepia (a reddish-brown tint).
Press the EKIER/MACRObutton to activate
settings.
Page 19

Adjusting date and time display
One setting you may definitely want to
adjustbefore your first photo shoot is
date and time display.
Although it is not required totake and
save pictures, date and time information
may be useful for archiving purposes
later. The information is stored as
hidden computer information.
• Note: TimeDisplayonthiscameraisbasedonthe
24-hour clock where 0 through 12 represent a.m. times,
and 13 through 24 are pan. (to get p.m. 24-hour time, just
add 12 to the corresponding clock time.
In REC mode, press the MENU button.
Use the up (+/O) or down (-/_) button
to highlight DATE DISP. Pressthe
ENTER/MACRObutton to change settings.
MAIN MENU
_"ERASE ALL: >>
ERASE SINGLE: >>
PROTECT IMAGE: >>
FORMAT CARD: >>
DATE DISP.: OFF
DATE OPTION: M/D/Y
SET DATE >>
The Main Menu displayed in Playback mode allows
changes to camera settings. This is thefirst screen you
will see when you press the MENU button in pLAY modt
MAIN MENU
CAPTURE: SINGLE
PRE FLASH: OFF
WHITE BAL.: AUTO
EXPOSURE: O,0
FOCUS: AUTO
SHARPNESS: NORMAL
COLOR: NORMAL
DAllE DISR: _.OFF
Use the up (+/0) or down (-/_) button
to change between OFF and ON. Press
ENTER/MACROactivate selection.
Note that you have not set the time yet.
We will handle that in the next section
dealing with Main Menu items in PLAY
mode.
Play mode
Playback mode (PLAY) offers a Main
Menu that allows the camera to erase
and save images, format the
CompactFlash storage card, change how
the date displays, and to set the date.
Erase all images
The f'trst option you can change in the
PLAY mode Main Menu is to erase all
images. This is a good command if you
have already downloaded all image fries
to your computer and want to free the
camera's storage disk up for a new
picture shoot.
Bring up the Main Menu in PLAY mode
by pressing the MENU button on top of
the camera.
Use the up (+/'O) or down (-/_) button
to highlight ERASE ALL. Press the
ENTER/MACR0button to activate the first
step of the Erase All command.
17
Page 20

MAINMENU
)' ERASE ALL: >>
ERASE SINGLE: >>
PROTECT IMAGE: >>
FORMAT CARD: >>
DATE DISR: OFF
OATE OPTION: fVVD/Y
SET DATE >>
Don't worry- you can still get out of this
step in case you do not want to erase all
images from the camera.
ERASEALLIMAGES
_s
• NO
WARNING:
THIS WILL ERASE
ALL IMAGES
* Note: The default for ERASEALL PICTURES is "NO" to
keep the camera for accidentally completing the process.
To be able to erase, the "YES" selection must be
highlighted with the arrow before activating the
command.
Use the up (+/O) or down (-/_) button
to highlight the choice you want. Press
the ENTER/MACR0button to activate your
choice.
When erasing begins, there will be a
period when the LCD screen is blank as
it finishes the command.
Press the MENU button on top of the
camera to exit the Main Menu or go on
to make further changes to Main Menu
items in PLAY mode.
Erase single images
The digital camera can also erase one
image at a time. This allows the user a
chance to see individual pictures before
deciding to remove them from storage.
Use the up (+/O) or down (-/$) button
to highlight ERASE SINGLE. Press the
ENTER/MACR0button to activate this
command.
Erasing single images allows the chance to view each
picture before making the decision to remove itfor good.
When an individual image is shown on
the LCD screen, you must decide if you
want to remove the image. Once an
image is erased, it can never be
retrieved.
To erase an image displayed, press the
ENTER/MACRObutton on top of the
camera. To move to another image
stored in the camera's memory, use the
up (+/O) or down (-/_) button to move
to the next (or previous) picture number.
To exit out of Erase Image mode, press
the MENU button.
When finished erasing images, press the
MENU button to return to the Main
Menu. Press MENU again to exit the
Main Menu and return to image
viewing, or you can go on to change
other settings.
Protecting images
To avoid accidentally erasing images,
the digital camera allows for pictures to
be locked. When a picture is protected
in this way, it cannot be erased with
ERASE ALL or ERASE SINGLE
commands.
Note: Image protection will not keep the file from being
deleted if you use the FORMAT CARD command. This
command always wipes all information off the disk.
18
Page 21

In the PLAY mode Main Menu, select
PROTECT IMAGE using the up (+/O)
or down (-/_) button to move the
highlight arrow. Press the ENTER/MACRO
button to change settings.
When you have an image displayed,
you can choose to protect it by pressing
the ENTER/MACRO button.
An image that has been locked has a
small key appear next to the picture
number.
Your CompactFlash storage card can
have all data on it removed in one step
with the FORMAT CARD command.
This is an important step to preparing a
new data card for use in your camera.
Note. The FORMAT CARD command WILL erase all
images, even pictures locked with the PROTECT IMAGE
command.
To format the CompactFlash data card,
bring up the Main Menu in PLAY
mode. Use the up (+/O) or down (-/_)
button to highlight the FORMAT
CARD command.
Press the ENTER/MACRObutton to
activate this command.
ERASEALLIMAGES
YES
• NO
To remove protection, press the ENTER/
MACRObutton again while in PROTECT
IMAGE mode.
To choose another image, use the up (+/
O) or down (-/_) button to move to the
next (or previous) picture number.
Repeat steps above to alter the image
protection mode for each individual
image.
Once finished protecting images, press
the MENU button to exit PROTECT
IMAGE mode and return
to the PLAY mode Main Menu.
Press the MENU button again to exit
the Main Menu and return to normal
PLAY mode image viewing.
Formatting storage card
WARNING:
T141SWILL ERASE
ALL IMAGES
You can still exit this menu by hitting
the ENTER/MACRObutton with NO
selected. To format the data card
though, use the up (+/O) or down (-/_)
button to highlight YES. Press the
ENTEP4MACRObutton to start formatting.
When a data card is finished being
formatted, the camera returns to the
main menu in PLAY mode.
Press the MENU button to exit the Main
Menu, or continue to change settings.
19
Page 22

Displaying the date
Date display affects on-screen viewing
only. Captured images that are captured
will not show the date and time as they
appear on screen, nor wil! images
downloaded to the computer.
To display the date and time on the
camera's LCD, bring up the Main Menu
in PLAY mode. Use the up (+/',,9)or
down
(-/$) button to highlight DATE DISP.
Press the ENTER/MACRObutton to change
settings.
MAINMENU
ERASE ALL: >>
ERASE SINGLE: >>
PROTECT IMAGE: >>
FORMAT CARD: >>
DATE DISR: • OFF
DATE OPTION: M/D/Y
SET DATE >>
Use the up (+/0) or down (-/$) button
to toggle between ON and OFF.When
the right choice is highlighted, press the
ENTER/MACRObutton to activate
selection.
MAINMENU
ERASE ALL: >>
ERASE SINGLE: >>
PRO'i'_CT IMAGE: >>
FORMAT CARD:
DATE DISR: O_'_
DATE OPTION: * MID/Y
SET DATE >>
To toggle between M/D/Y, D/M/Y, or
Y/M/D, use the up (+/_) or down (-/6)
button to toggle between choices. When
the right selection is highlighted, press
the ENTER/MACRObutton to activate.
Youcan press the MENU button to exit the
Main Menus and return to normal picture
viewing, or go on to change other settings.
Setting date and time
To change the date and/or time, bring
up the Main Menu in PLAY mode.
Use the up (+/O) or down (-1_) button
to highlight SET DATE. Press the
ENTER/MACRObutton to make changes.
SET DATE
• yr_dz.R: 2000
MONTH: 01
DATE: 01
HOUR: 14
MINUTe; 42
2O
You can press the MENU button to exit
the Main Menu, or you can go on to
make other changes to the camera's
settings.
Setting date options
Your camera can display the date on the
LCD in a number of different ways.
The camera can show month-day-year
(M/D/Y), or day-month-year (D/M/Y),
or year-month-day (Y/M/D).
To change the way the date displays,
bring up the Main Menu in PLAY
mode. Use the up (+/O) or down (-/_)
button to highlight DATE OPTION.
Press the ENTER/MACRO button to
change settings.
Note: This digital camera operates only on the 24-hour
clock where a.m. times are represented by digits O0
through 11 and p.m. times are represented by the
numbers 12 through 23 (for example- 9 a.m. is 09:00,
and I p.m. is 13:00). To get p.m. 24-hour times, simply
add 12 to the corresponding clock hour
When finished setting the time and date,
press the MENU button to return to the
Main Menu in PLAY mode. Press
MENU again to exit the menus and
return to PLAY mode.
Page 23

Camera Features
Digital cameras have a variety of features to
help capture the best possible picture. From
different methods of flash photography to
taking black and white images, your digital
camera's settings can all be customized and
allow for a fun experience when capturing
images.
This section of the manual explains specific
details of camera controls. Here you will find
details about:
• Flash settings
• Self timer settings
• LCD brightness control
• Control Buttons (QUALITY/INDEX, DISPLAY,
ENTER/MACRO, MENU,.ZOOM, and LCD)
• Tripod mounting
f
/
21
Page 24

Flash Photography
Using Auto Flash
Your camera has three flash modes; ON, OFF, and
AUTO. If set to AUTO, the camera uses a sensor to
determine if enough light is available to take a good
picture, ff a sufficient light value is measured through
the CCD sensor, the built-in flash will not fire. If
additional light is required, the built-in flash will fire
automatically.
• To turn on the flash to AUTO, press the i (Flash)/-
(minus) button on top of the camera until the iAicon
is displayed on the LCD.
Flash ON Mode
Daylight flash photography is effective for backlit
subjects, when strong shadows are present, or on cloudy
days. In these conditions, flash photography allows more
natural-looking pictures to be taken by softening harsh
shadows. When the flash is used, an effective shutter
speed from 1/3 to 1/1000 of a second is used.
22
• Press the (FLASH)/- button on top of the camera
until the _ symbol is displayed on the back panel
LCD. When activated, the flash will fire with every
picture taken.
Hash OFF Mode
This mode forcibly prevents any fLring of the flash and
extends exposure time upto
1/3 of a second, thus allowing sufficient exposure in
museums, churches, or anywhere flash photography is
prohibited.
• Press the (FLASH)/- button on top of the camera
until the FLASH OFF icon ((_)) is displayed on the
back panel LCD to turn the flash off. When turned
off, the flash will not fire no matter what the lighting
conditions are.
Page 25

Using the Self-Timer Mode
This mode is used not only for close-up pictures, but also
for distant scenic shots. When taking a scenic picture or a
low-light evening scene, using a slow shutter speed and
the self timer can give a sharp, vibration-free photograph,
if the camera is mounted on a tripod.
1. Select recording mode by sliding the Mode switch on
the back of the camera to the REC position.
2. Select the self-timer mode by pressing the (O)/+ button
on top of the digital camera. The self-timer symbol (_)
will show on the back LCD panel. This mode will be
canceled by pressing the (SELF)/+ button again,
POWER button, or sliding the mode switch to Play
mode.
3. Compose the picture through optical viewfinder orLCD
panel on a steady support or fixed on a tripod attached
to the tripod socket.
4. Press the shutter release button and the self-timer will
start working. A red LED light on the front of the
camera willbe visible for approximately seven seconds,
and then blink for about three seconds to indicate that
the shutter is to be released automatically.
5. After releasing shutter, the Self-Timer mode will be
canceled.
• Ifyou want to cancel the self-timer once it started, press
the (SELF)/+ button again or press the power button.
This red light will flash three times
before flring a self-timer picture.
• The self-timer can work together with auto flash, flash
on, or flash off modes.
LCD Brightness Control Dial
The brightness of the LCD monitor can be adjusted
by rotating the bright dial (o_) on the bottom of the
digital camera. To adjust the setting, make sure that
the LCD is turned on (use the LCD button on the top
of the camera) and turn the dial using a finger.
BRIGHT
The BRIGHT control on the bottom
of the camera adjusts the LCD
display for maximum visibility.
23
Page 26

Control Buttons
Macro Mode (ENTER/MACRO button)
To capture subjects in the range of 0.1 m to 0.5 m, the camera
provides a macro auto focus feature. Make sure the camera is
in recording (REC) mode, then press the ENTER/MACRO
button on top of the camera. If the LCD panel is turned on,
you will see the menu bar near the bottom. Pressing the
ENTER/MACRO button toggles between standard autofocus
([IF) and close up, also called standard macro ($).
QUALITY/INDEX button
The buttons on top of the digital camera do different things
depending on whether the camera is in RECORD or PLAY
mode. For the QUALITY/INDEX button, this is no
different.
Recording mode
The image quality on your camera can be set to Fine
(identified as F on the LCD's icon display), Normal (no
icon), or Economy (E on the LCD display). To change the
quality of the images, press the QUALITY/MULTI button
on top of the camera to toggle between the selections. The
selection made remains the image quality until changed by
the user. Image quality icons appear next to the image
number on the LCD screen. The number of pictures that can
be taken may vary according to the image quality and
CompactFlash memory size.
Image Quality Resolution
Fine 1360 x 1024 pixels (low compression)
Normal 1360 x 1024 pixels (higher compression)
Economy 640 x 480 pixels (highest compression)
24
Playback mode
In PLAY mode, the camera can display nine thumbnail
images at a time on the LCD monitor by pressing the
QUALITY/INDEX button. To select an image within
thumbnail view, use the (_)/+ or (_)/- buttons to move the
highlighting arrow until it is beside the image you want to
Page 27

see full size. Once the image you want is selected,
display it in full size by pressing the ENTER/MACRO
button. Pressing the QUALITY/INDEX button again
will return the display to thumbnail view. In thumbnail
view, when there are more than nine images stored in
memory, you can scroll to the next set of images by
moving the highlighting arrow past the bottom fight or
top left image using the + or - buttons on top of the
camera.
ZOOM button
Recording mode
The ZOOM button makes each captured image twice as
big as normal (2x zoom mode). The camera stays in 2x
mode until the ZOOM button is pressed again. If the
LCD is on, the preview image is doubled in the display.
After the shutter releases, images captured with 2x
zooming are briefly displayed on the LCD. Even if the
LCD is turned off, images are captured in zoom mode
until the ZOOM button is pressed again returning the
camera to its normal state.
The ZOOM feature is optimized for use with the
supplied TWAIN driver. The 2x zoomed image will be
presented correctly when downloaded from the camera
to your computer. If you are using a third-party
accessory CompactFlash reader or PCMCIA adapter, the
image will be presented at 1:1.
Note: zoom mode will not function in sequential image
capture mode.
Playback mode
The outer viewfinder box is the
frame 2x ZOOM photography.
Stored images can also be visually enlarged by pressing
the ZOOM button on the top of the camera. 2x zooming
also works in image search mode. To stop zoom mode,
press the ZOOM button again.
• Note: Visually enlarging a stored image will not
affect the final stored version.
Using the ZOOM button in PLAY mode is strictly
used as a sort-of magnifying glass.
25
Page 28

DISPLAY button
In both record and play modes, the DISPLAY button on
top of the digital camera makes most icons/indicators
appear or disappear on the LCD monitor. The camera
retains this status until the DISPLAY button is pressed
again. For details of icons displayed on the LCD
monitor, please refer to Appendix B in the Reference
section of this manual.
• The DISPLAY button will not remove the low-
battery icon or the self-timer icon (when activated).
• Pressing the DISPLAY button toggles the display of
the icons and indicators on the LCD. Even if icons
are hidden though, a corresponding icon is displayed
for the shortperiod of time when certain actions are
initiated.
MENU button
Various camera configurations in can be set in the
Menu screens which are displayed when the MENU
button is pressed. The camera has different menu
options depending on if the camera is in recording
(REC) or playback (PLAY) mode. The Menu screen
appears on the monitor even if the LCD is turned off.
For the details of the various menu selections, see,
Setting Preferences, in this manual.
26
LCD button
In recording mode, the LCD button turns on and off the
camera's monitor. Since the monitor must be on in order to
view pictures in playback mode pressing LCD does nothing
when viewing stored pictures. If the LCD is turned off in
record mode, no preview image will appear when taking
pictures. However, even if the LCD is turned off, the camera
shows icons/indicators on the monitor for the short period to
indicate a change in settings.
The camera will hold the last used LCD display status when
turned Off and use these settings when tamed back on.
Note:
the LCD monitor is a
major drain on the
lifeof batteries.For
optimal battery
performance,turn off
the monitor by
pressing the LCD
button on top of the
camera and frame
your pictures using
the viewfinder.
Page 29

• For more information about switches, buttons and
camera interface, see, First Things First, in this
manual.
Monitor on-status
Pressing the DISPLAY button toggles the display of the
icons and indicators on the LCD. Even if icons are
hidden, a corresponding icon is displayed for the short
period of time when certain actions are initiated.
Monitor off-status
The DISPLAY button can make the icons and indicators
appear on the black-back screen for a short period of
time. Pressing the DISPLAY button again while icons
are displayed removes the images.
Tripod Mount
For steady, vibration-free images, it is
recommended that you attach the digital
camera to a tripod using the tripod mount on
the bottom of the camera. Be sure not to
confuse the tripod mount with the BRIGHT
control dial as this could seriously damage
your camera. Also, make sure that the length of
the tripod's mounting screw does not exceed
the depth of the digital camera mount. Inserting
the screw too far will seriously damage yotg_
camera voiding the warranty.
The tripod mount for the digital camera
should not be confused with BRIGHT control
dial, also on the bottom of the camera
27
Page 30

LCD Icons
I Date and Time Display I
2x Zoom
indicator
Self timer
indicator
Natural LightWhite Balance setting.
Could also be Automatic White Balance
(_), or Offlce/Flourescent Light (_,._).
Picture
number
Economy Picture quality. I
Could also be Normal
I(no icon), or Fine (F)
Standard macro setting.
Could also be
Autofocus (ItF).
28
Page 31

Introduction to the camera's
TWAIN Driver
Using the provided TWAIN application allows the transfer
of photos from the digital camera to a computer. Following
is a discussion of key software points to make the process of
image transfer easier.
TWAIN is defined by a standard software protocol and API
for communication between software applications and
image acquisition devices (digital cameras and scanners).
The TWAIN driver is the software that transfers photos
from the digital camera into graphic-editing software.
When downloading images with the TWAIN driver, the
images appear as a series of thumbnails in the window.
The TWAIN interface shows all the images from the
camera. Images can be saved on the computer, moved to an
image-editing program, one or more images can be selected
or deselected, and rotated. Through the TWAIN driver, you
can even control the camera; taking pictures from the
computer, setting camera status, or viewing specific camera
information.
With the TWAIN software, there's an on-line help section
that can assist if any problems are encountered. Just press
the HELP button inside of the image-editing software and
select your topic.
Selecting the TWAIN driver
From within your image-editing software, you will need to
tell the computer what driver to use to get images from your
digital camera. Select FILE->SELECT SOURCE and
choose the TWAIN driver for the camera
29
Page 32

Connect the camera to the computer
Now that there are images on the camera, you can connect it
to the computer and "upload" the data to the TWAIN driver
software.
Make sure that the proper serial cable is used to connect the
camera to the proper COM port (Macintosh users connect to
an ADB serial port such as that used for extema! modems or
printers).
Once the camera is correctly attached to the computer and the
supplied software is properly installed, launch the image-
editing'application first. Then, select "GET Pictures" from the
editing software.
30
Once you have selected GET PICTURES, you will be offered
a variety of choices. Choose DIGITAL CAMERA.
Page 33

Onceyouhaveselectedthedigital
camera as your source for images, the
TWAIN driver interface will take over.
The software will automatically connect
to your computer and begin to download
all of the images stored on the
CompactFlash card. Once the transfer
process is finished, you will be able to
move individual images or entire sets of
images to your image-editing software.
From there, you can save the pictures
however you would like and keep the
files indefinitely, using them in emails,
web pages, documents, or whatever
software will accept jpeg images.
TWAIN Driver Functions
Scroll One Row Up
Use this button to scroll one row of
photos up (four photos).
Note: If the first thumbnail is viewable,
no operation will occur.
Scroll One Screen Up
Use this button to scroll one full screen
up (twelve photos).
Note: If the first thumbnail is viewable,
nothing will happen.
Even though the TWAIN driver will
automatically download camera images,
there are several other options within
the software. The following is a list of
the buttons in the TWAIN driver and the
functions that can be done.
Connect Camera to Computer
Using this button connects the TWAIN
interface to Camera.
The TWAIN driver will auto-detect and
connect to the camera when you have
selected it. However, connection may
fail if the camera is not connected
correctly. If your computer fails to
communicate with your camera, click
this button to connect them.
Note: If the camera is connected
correctly, clicking this button will
refresh the thumbnails from the camera.
Scroll One Row Down
Use this button to scroll one row down
(four photos).
Note: If the last thumbnail was reached,
no operation will occur.
Scroll One Screen Down
Use this button to scroll one full screen
down (twelve photos).
Note: If the last thumbnail is viewable,
no operation will occur.
Select All of the Images
Use this button to select all images.
31
Page 34

SelectNone of the Images
Using this button to select none of the
images.
supported, the TWAIN driver will
display a warning message. When the
image has been sent, the TWAIN driver
will download the new photo from the
camera and display it on TWAIN driver
window.
Take a Picture
Use this button to take a picture with
your camera from the computer.
Note: If Self-timer is activated, the
camera will use this timing before
taking a picture. The TWAIN driver will
get a new photo from camera and
display it in the interface window.
Get Image(s)
Use this buttonto getan imagefromthe
TWAINinterfaceto the graphic-editing
application.
Note: You must select one or more
image fries from the TWAIN interface.
The photos will then display on the
graphic-editing application.
Download Image(s)
Use this button to download an image
from the TWAIN interface to a disk.
Note: One or more image fde(s) from
must be selected from the TWAIN
driver. A fde dialog will appear asking
where images should be saved. Enter
the fde name (only three-prefix-letters)
and the initial number in the fde dialog.
Finally, click the "Save" button.
Erase Image(s)
Use this button to erase selected images.
Note: If all images inthe TWAIN
interface are selected, they will all be
deleted at the same time.
32
Upload Image(s)
Use this button to upload an image from
the computer to the TWAIN interface.
Note: Click the "Upload" button, then a
file open dialog box will appear. Select
one or more files. The TWAIN driver
will then send the image(s) to the
camera. If the file format is not
Rotate Image(s)
Use this button to rotate selected images
90 ° clockwise.
Selecting Images
Select images one by on
Press Control Key (Command key on
the Macintosh) and click thumbnails to
toggle the selection.
Page 35

Camera Status
Use this button to display camera status
information.
Record mode: Previews the picture to
be taken and displays it on the camera's
LCD monitor.
Play mode: Views the photos taken and
displays them on the camera's LCD.
Auto Power Off Time: Allows setting of
the time interval before auto shut off.
(PC user's note: Left Mouse Button
increases numbers. Right mouse button
decreases numbers.)
Camera Setting
Use this button to display camera
setting dialog.
Displaying images on a
TV screen
Using the provided video cable to
connect the camera to a television, you
can view stored images on the TV
screen.
• Use only a TV equipped with
"VIDEO INPUT" function.
1. Using the supplied video cable,
connect the digital camera to a TV
using the VIDEO OUT jack of the
camera to the VIDEO IN jack of the
"IV.
Baud Rate Speeding includes three
levels; slow (38400 bits per second),
normal (57600 bits per second), and fast
(115200 bits per second).
Help for the user(s)
Use this button to display the on-line
help window.
Exit from TWAIN
Use this button to exit the TWAIN
driver.
2. Switch the input source of the TV to
Video In. Typically, you can find the
TV's video input by changing the
channel or pressing a VIDEO button
on the TV's remote control. For more
information about finding the Video
Input Channel, refer to the User's
Manual that came with the TV.
3. Make sure that the power of both the
camera and the TV are on, then you
can see the image on the TV screen.
33
Page 36

Camera User Interface
Camera Top View
! / II
Camera Front View
• o
e o
o o
• •
o o
A r t
Camera Back View
Basic Button Functionality
Button PLAYM_ RgCMod_
Power Poweron/off Power on/off
Quality/Index ThumbnailView Quality E/N/F
Select
Enter/Macro Menu selection Macro (Close up)/
Standard Mode
Display Show/Hide Show/Hide
PictureNumber Menu Icons
Menu RECmain PLAY main
menudisplay menudisplay
Command: * Capture (singlekmulti) • Erase All
•Pre-Flash(ooiofO • EraseSingle
• White Balance • Protect Image
(auto/manual) • Format Card
• Exposure(-2 to-:-2) • Date Display
• Focus(auto/manual) • DateOption
• Sharpness (mm/dd/yy,dd/nuu!yy,
(normal,sharp,soft) yy/mm/dd)
• Color (normal, light, • Set Date
d_p, b/w,sepia)
• Date display(on/off)
Bottom of the Camera
Sides of the Camera
O/+ Next picture Self-timerset
(standardview)
Forward
(thumbnailview)
$.A/_ Previouspicture Flash set
(standardview) (auto, on, off)
Backward
(thumbnailview)
Shutterrelease Hcturecapture none
Zoom 2xplayback 2x capture
/
I..CD none Monitor on/off
34
Page 37

Specifications
Product Type: Digital Still Camera
Imaging Device: 1/2-inch CCD, 1.5M pixels, progressive scanning
Image Quality: Fine/Normal/Economy
Image Resolution: 1360 x 1024 pixels (Fine / Normal); 640 x 480 pixels (Economy)
Recording System: Digital (YPEGbased)/Field recording
Recording Medium: Removable CompactFlash (up to 48Mb).
Image Capturing: Single ornine sequential images, saved as one image file.
Playback Modes: Single or nine thumbnails, image search function available.
Digital Zoom: 2x, both in REC/PLAY
Shooting Options: Sharpness/color
Erase Functions: Single image or all images. Erase protection available
Video System: NTSC or PAL optional digital output: RS-232C or USB, serial cable for
each interface is required
Focal Length: 7.0ram
Aperture: f=5.6
Focus Range (TTL): Auto: 0.1m - infinity
AF Macro: 0.1m - 0.5m
Fixed: 0.1m, 0.5m and 2.0m are available
Exposure Metering: Aperture priority AE
Exposure Range: LV 6 to LV 16 at ISO 170
Flash Modes: Auto/Fill/Off. Red-eye reduction available
Flash Range: Built-in Flash, 0.5 - 2.3 m (ISO 170) Exposure Compensation: Max. +/-
2.0EV, 0.25EV step
Shutter System: Electronic programmable shutter
Shutter Speed: 1/3 to 1/3500 second White Balance: Auto/Fixed (Daylight and Office-
Light) Self-Timer: Electronic self-timer about 10-sec. delay.
Optical Viewfinder: Real image type with 2x zoom and AF markings
LCD Monitor: 2-inch Full-color TFI"LCD
Date Format: mm/dd/yy, dd/mm/yy, yy/mm/dd
Terminals: DIGITAL (RS232), VIDEO OUT, DC (7V)
Power Source: 4 AA-size batteries (Alkaline, NiCd, Lithium) /AC Adaptor (DC 7V,
2.5A)
Dimensions: 133(W) x 71 (H) x 49 (D) mm Weight: 254g (batteries excluded)
* Design and specifications are subject to change without notice.
35
Page 38

Taking care of your camera
Your camera is a precision instrument designed and manufactured to give you reliable
service. Handled and cared for properly, the camera should give years of trouble-free
imaging.
In order to avoid damaging the unit:
Do Not:
Drop or bang the camera. Always transport the unit in a carrying case;
Drop into water or expose the camera to rain or splashing. Your camera is not
waterproof and is particularly susceptible to damage from salt water. The camera must
be protected from salty breezes or sprays to prevent damage. If your camera does get
wet, wipe it dry immediately and have it examined at an authorized service center;
Subject the camera to extreme high or low temperature and/or humidity. Your
camera's batteries will not function properly in extreme conditions. Excessive
temperature and humidity may cause serious damage;
Subject the camera to excessive vibrations. When you travel, always make sure to use
the carrying case, and pack the camera where it will not be subjected to a lot of jarring
movement. This could loosen screws or damage internal camera components;
Disassemble the camera. This will void your warranty and potentially damage
precision internal parts.
Do-"
• Make sure any tripod used has a screw that fits the camera's tripod mount properly. A
longer tripod screw could puncture and damage the camera's casing and internal
structure.
36
Page 39

Troubleshooting
Q: The camera doesn't turn on when I press the power button.
A: The batteries are missing, dead, or are not loaded correctly. Correctly load new
batteries in the battery chamber. If you are using an AC adapter, make sure you
are only using the recommended AC adapter for this digital camera.
Q: The power suddenly turned off.
A: Most likely, the batteries you have are getting too weak to sustain operation of
the camera. Check the LCD display to see if the weak battery icon is displayed. If
so, replace old batteries with new. Also, make sure that manganese batteries are
not in use. Replace manganese batteries with alkaline batteries immediately.
Q: There's a half-battery icon on the LCD.
A: This is the low battery icon indicating that the batteries in use are getting too
weak to operate the camera. Replace old batteries with new.
Q: The camera doesn't record when I press the shutter release button.
A: The mode of the camera is set to PLAY. Slide the mode indicator on back of
the camera to REC to capture images.
Q: Why does the "MEMORY FULL" message appear on the LCD?
A: The camera's removable CompactFlash card is full. You can replace this disk
with a new card, or erase some images.
Q: Why does the "DATA OVERFLOW" message appear on the LCD after
taking a picture?
A: The information absorbed in this picture was more than the camera could
process. Erase this picture and try another shot.
Q: Why did the "WRITE ERROR" message appear on the LCD after taking a
picture?
A: The CompactFlash card used in your camera may be damaged. Try the
FORMAT CARD command in the PLAY main menu. If formatting fails, replace
the with a new card.
Q: Why does a "DATA ERROR" message appear on the LCD when I am
previewing a picture?
A: The CompactFlash card used in your camera may be damaged. Try the
FORMAT CARD command in the PLAY main menu. If formatting fails, replace
the with a new card.
37
Page 40

Q: Why does an "ERASE ERROR" message appear on the LCD when erasing
a picture?
A: A power interruption occurred before the erasing of a picture was complete.
Use the ERASE ALL or FORMAT CARD command (under the MENU button in
play mode) and make sure that no power interruption occurs. If the error still
persists, send the camera to an authorized service center.
Q: Why does a "CHARGE ERROR" message appear on the LCD screen?
A: The flash charging unit may be damaged. Send the camera to an authorized
service center for repair.
Q: Why is the image display on the LCD screen so light or so dark?
A: The BRIGHT setting needs to be adjusted. Slowly rotate the BRIGHT dial on
the bottom of the camera clockwise or counterclockwise until a preferred level is
displayed on the LCD.
Q: Why is there no picture on the TV monitor when the camera is connected to
the VIDEO IN jack?
A: The connection between the camera and the TV is loose. Make sure that all
fittings are snug. If this does not work, verify that your TV is set to its video input
"channel." For more information about finding your TV's video input line, see
the User's Manual that came with it.
Q: Why can't the camera communicate with a computer?
A: There could be a disconnected wire between the camera and the computer.
Make sure that all fittings are snug and correct and that the camera is turned on. If
this does not work, verify that you have installed the software correctly and that
the port used by your serial cable is turned on.
For more information about software installation, see the documentation that
came with the disks.
For more information about turning on your computer's port, see your computer's
documentation.
38
Page 41

Limited Warranty
What your warranty covers:
• Anydefectinmaterialsorworkmanship
For how long after your purchase:
• One year - Unit exchange, which includes parts and labor.
• The warranty for rental units begins with the fwst rental or 45 days from date of shipment to the
rental firm, whichever comes first.
What we will do:
• Exchange a defective Digital Still Camera with a new or, at our option, refurbished unit.
How you get service:
• Call 1-877-833-3491 and have your unit's date of purchaseand model/serial numberready. The
model/serial number information is on the back of your camera.
• A representative will troubleshoot your problem over the phone.
• If the representative determines that you should receive areplacement camerayou will be provided
with a Return Authorization (RA) number and the location of a nearby exchange point if one exists.
No returns will be accepted without the RA number.
Option I:
1. Provide your Discover, MasterCurdor Visa account number and expiration date to your phone
representative. This is for security purposes only and your account will not be charged at this time.
2. We will send you a replacement unit.
3. If you return the unit to us within 14 days from the date you were provided a RA number, only items
not covered by warranty will be charged to your account. If your unit is not received within 14 days,
the suggested retail value of the camera will be charged to your credit card. This amount will be
credited, less a $10 handling fee, if the unit is subsequently received.
4. Ship your defective unit back to us using the replacement unit's carton. Shipping instructions will be
included on the caxton along with your RA number which will allow you to easily ship the unit back
to us. Make sure you insure your shipment in case of damage or loss. Include with the shipment:
• Evidence of purchase date such as a bill of sale.
• A brief note describing your camera's problem.
• Your name, address and phone number.
Option H:
1. We will send a replacement unit to our exchange point.
2. The exchange location will notify you of its arrival.
3. Take your unit and evidence of purchase date, such as a bill of sale, to the exchange location and you
will be provided the new or refurbished unit. Please retain all accessories.
4. If the repairs are covered by your warranty, you will not be billed.
* Th_ms_nassuraesn_resp_nsibili_yf_rwarrantyshipmentsfr_rathecust_mert_thefa_t_ryifn_tshippedin
the manner prescribed by Thomson.
39
Page 42

To receive a replacement camera after we have received your unit:
• Write the RA numberon the outside ofthe caxtonused to return the unit. Make sure you insure your
shipment in case of damage or loss.
• Carefully pack the unit using the original box and packing material if possible. Please retain all
accessories that were included with your unit.
• Include with the shipment:
!. Evidence of purchase date such as a bill of sale.
2. A brief notedescribing your camera's problem.
3. Your name, address and phone number.
• The representative will advise the address to mail a cashier's check or money order for payment if
there are any out of warranty labor or parts charges, and you elect not to use your credit card.
• After we receive your product, a new or refurbished unit will be shipped to you.
What your warranty does not cover:
• Acts of God, such as but not limited to lightning damage.
• Adjustmentof customer controls.
• Damage from misuse or neglect.
• A unit that has been modified or incorporated into other products or is used for institutional ur other
commercial purposes.
• Batteries.
• Units purchased, serviced or operated outside the U.S.A.
• Loss of images.
• Shipping damage if the unit was not packedand shipped in the manner prescribedbyThomson.
* Th_ms_nassumesn_resp_nsibilityf_rwarrantyshipmentsfr_mthecust_mert_thefact_ryifn_t
shipped in the manner prescribed by Thomson.
Product Registration:
• Please complete and mall the Product Regislration Card packed with your camera. It will make it
easier to contact you should it ever be necessary. The return of the card is not required for a warranty
coverage.
How state law relates to warranty:
• This warranty gives you specific legal fights and you may have other rights that vary from state to
state.
If you purchased your product outside the United States:
• This warranty does not apply. See yourdealerforwarranty information.
40
Page 43

A
ACAdaptor6
ACpowersocket4
ACPowerSupply3
Accessories3
included3
orderform 43
Assistance1, 3
AutoFlashdetector4
Autoflashdetector4
AutoPowerOff 7
B
BasicButtonFunctionality
33
Batteries3, 5
Batterycompartment
cover4
Card 3
Computer
CD ROM 11
Loading Images 11
Connect Camera to
Computer 30
Connect the camera to the
computer 29
Control Buttons 24
DISPLAY button 26
ENTER/MACRO
button 24
LCD button 26
Macro Mode 24
MENU button 26
ZOOM button 25
Customer Service 3
I)
flash 4
Flash Photography 22
auto flash 22
Flash OFF mode 22
Flash ON mode 22
Flash/- (minus) button 4
Focus 16
Formatting storage card
19
G
Get Image(s) 31
14
Hand Strap 3
Handstrap eyelet 4
Help for the user(s) 32
C
Camera
turning on 8
Camera Features 21
Camera Parts 4
Camera Setting 32
Camera Status 32
Camera User Interface 33
Capture Mode 14
Cautions i
CDS4100 Digital Camera
3
Changing settings 14
Color 16
CompactFlash 3
CompactFlash card ejector
4
CompactFlash card slot 4
CompactFlash memory 7
installing 7
CompactFlash Storage 3
CompactFlash Storage
date
displaying 20
setting options 20
date and time
setting 20
date andtimedisplay 17
Digital output port 4
DISPLAYbutton 4, 26
Displaying Images on a
TV Screen 32
Download Image(s) 31
I:
ENTER/MACRO button
4,24
Erase All Images 17
Erase Image(s) 31
Erase single images 18
Exit from TWAIN 32
Exposure Controls 15
F
First time operation 3
Image Editing 3
Image Quality
Economy 7
Fine 7
Normal 7
Image quality 7
Image Sharpness 16
images
erasing all 17
erasing single 18
protecting 18
inactivity period 7
I_
LCD Brightness Control
23
LCD brightness control
dial 4
LCD button 26
Monitor off-status 27
LCD Icons 28
2x Zoom 28
41
Page 44

LCD Icons (Cont.)
AC adapter indicator
28
date and time display
28
flash setting 28
flash settings 28
picture number 28
picture quality indicator
28
white balance settings
28
LCD monitor
draining batteries 8, 26
LCD ON/OFF button 4
LCD panel 4
Lens 4
Macintosh ADB Converter
Cable 3
Main Menu
PLAY mode 17
REC mode 15
Manual White Balance 15
MENU button 4, 26
Monitor on-status 27
N
Play/Recording mode
switch 4
POWER button 8
Power button 4
Power Supply 5
ACAdaptor 6
Auto Power Off 7
Batteries 5
Pre-Flash Mode 14
Product registration i
Protecting images 18
Q
QUALITY/INDEX button
4
Playback mode 24
Recording Mode 24
R
ReadyLED 4
REC 8
REC Mode 8
REC mode 14
Registration i
Rotate Image(s) 31
RS-232C Cable 11
RS-232C Digital Cable 3
S
Shutter Release button 4
Shutter release button 4
Software 3
software 11
Specifications 34
Storage Card 3, 7
storage card
formatting 19
T
Take a Picture 31
Taking care of your
camera 35
Tripod Mount 27
Tripod socket 4
Troubleshooting 36
TWAIN Driver 28
TWAIN driver 11
TWAIN Driver Functions
30
U
UploadImage(s) 31
V
Video output port 4
Viewfmder eyepiece 4
Viewfinder window 4
42
NTSC Video Cable 3
O
On-screen menus 13
PLAY mode 13
REC mode 13
Order form, accessories
43
P
Picture taking 9
PLAY mode 17
Safety information i
Scroll One Row Down 30
Scroll One Row Up 30
Scroll One Screen Down
30
Scroll One Screen Up 30
Select All of the Images
30
Select None of the Images
31
Selecting Images 31
Self-timer LED 4
Self-Timer Mode 23
W
Warranty 38
White Balance 15
Wrist strap 5
Z
ZOOM button 4, 25
Playback mode 25
playback mode 25
Recording mode 25
recording mode 25
Page 45

Order Form for Digital Camera Model CDS4100
Description
CompactFlash Cards
16Mb
32Mb
48Mb
CompactFlash External Drive
Parallel Port
USB
PCMCIA Adapter
Battery Char[;er
Rechargeable Batteries (AA)
2-pack Alkaline Batteries
4-pack Alkaline Batteries
2-pack Nickel Metal Hydride
4-pack Nickel Metal Hydride
Part No.
PC16CF
PC32CF
PV48CF
PC200P $99.95
PC2200U $129.95
PC490 $39.95
PC224 $29.95
PC 102AK
PC104AK
PC202MH
PC204MH
Price
$99.95
$149.95
$199.95
$3.95
$4.95
$9.95
$19.95
Qty.
Prices are subject to change without notice.
Total Merchandise ........................................................................................... $
Total
Sales Tax .......................................................................................................... $
We are required by law to collect the appropriate
sales tax for each individual state, county, and
locality to which the merchandise is being sent.
Shipping and Handling .................................................................................... $5.00
Total Amount Enclosed ................................................................................. $
Use VISA, MasterCard, or Discover.
Money order or check must be in U.S.
currency only. No COD or cash.
43
Page 46

USE YOUR CREDIT CARD
Charge your order on your VISA,MasterCard,
or Discover Card by filling in below
IMPORTANT: Copy completeaccount number from yourVISA card
VISA"
7-7-[-[-ql I I IIII I[-V-f-qExpirationdate:[---[--'][--l'_
IMPORTANT: Copy completeaccount numberfromyourMasterCard
_T-rq 7X-T-rq7q-T-_ 7_-_-q
copyNumberaboveyo_°meonM_te_ _ _xp_oo_te[:U]77-q
IMPORTANT: Copy completeaccount number from yourDiscover Card
7-77 l-q7Y-r-Yq7-7r-_ 7-7-r-r-q
_xp_,_un_te: 77q [-_
44
AUTHORIZED SIGNATURE
Print or type your name and
address clearly.
m
Name:
Street:
Apt:
City:
State;
Daytime Phone No.:
Please make sure that both sides of this form have been filled out completely.
• Allow 4 weeks for delivery.
• All accessories are subject to availability.
• Prices are subject to change without notice
Zip:
A complete and correct order will
save you days of waiting.
m
e-
4.W
Page 47

To order accessories, contact your local Dealer.
If a dealer is not nearby, you can also follow the directions below to order by
telephone or direct-by-mail.
United States and Canada Orders
To place your order by phone, have your Visa, MasterCard, or Discover card ready
and call the toil-free number listed below between 8 AM and 10 PM (EST)
Monday through Friday or between 9 a.m. and 5 p.m. (EST) Saturday.
Use this number only to place an order for accessory items listed on
this order form.
1-800-338-0376
To place your order by mail, detach and mail the completed order form with credit
card information, money order, or check in U.S. currency (made payable to
Thomson Consumer Electronics, Inc.) to the following address:
Digital Camera Accessories
PO Box 8419
Ronks, PA 17573
45
Page 48

_ THOMSON CONSUMER ELECTRONICS
10330 N Meridian Street
Indianapolis, IN 46290
©1999 Thomson Consumer Electronics, Inc.
Trademark(s) @ Registered
Pfin_d m the U.S.A.
TOCOM 15511640
 Loading...