

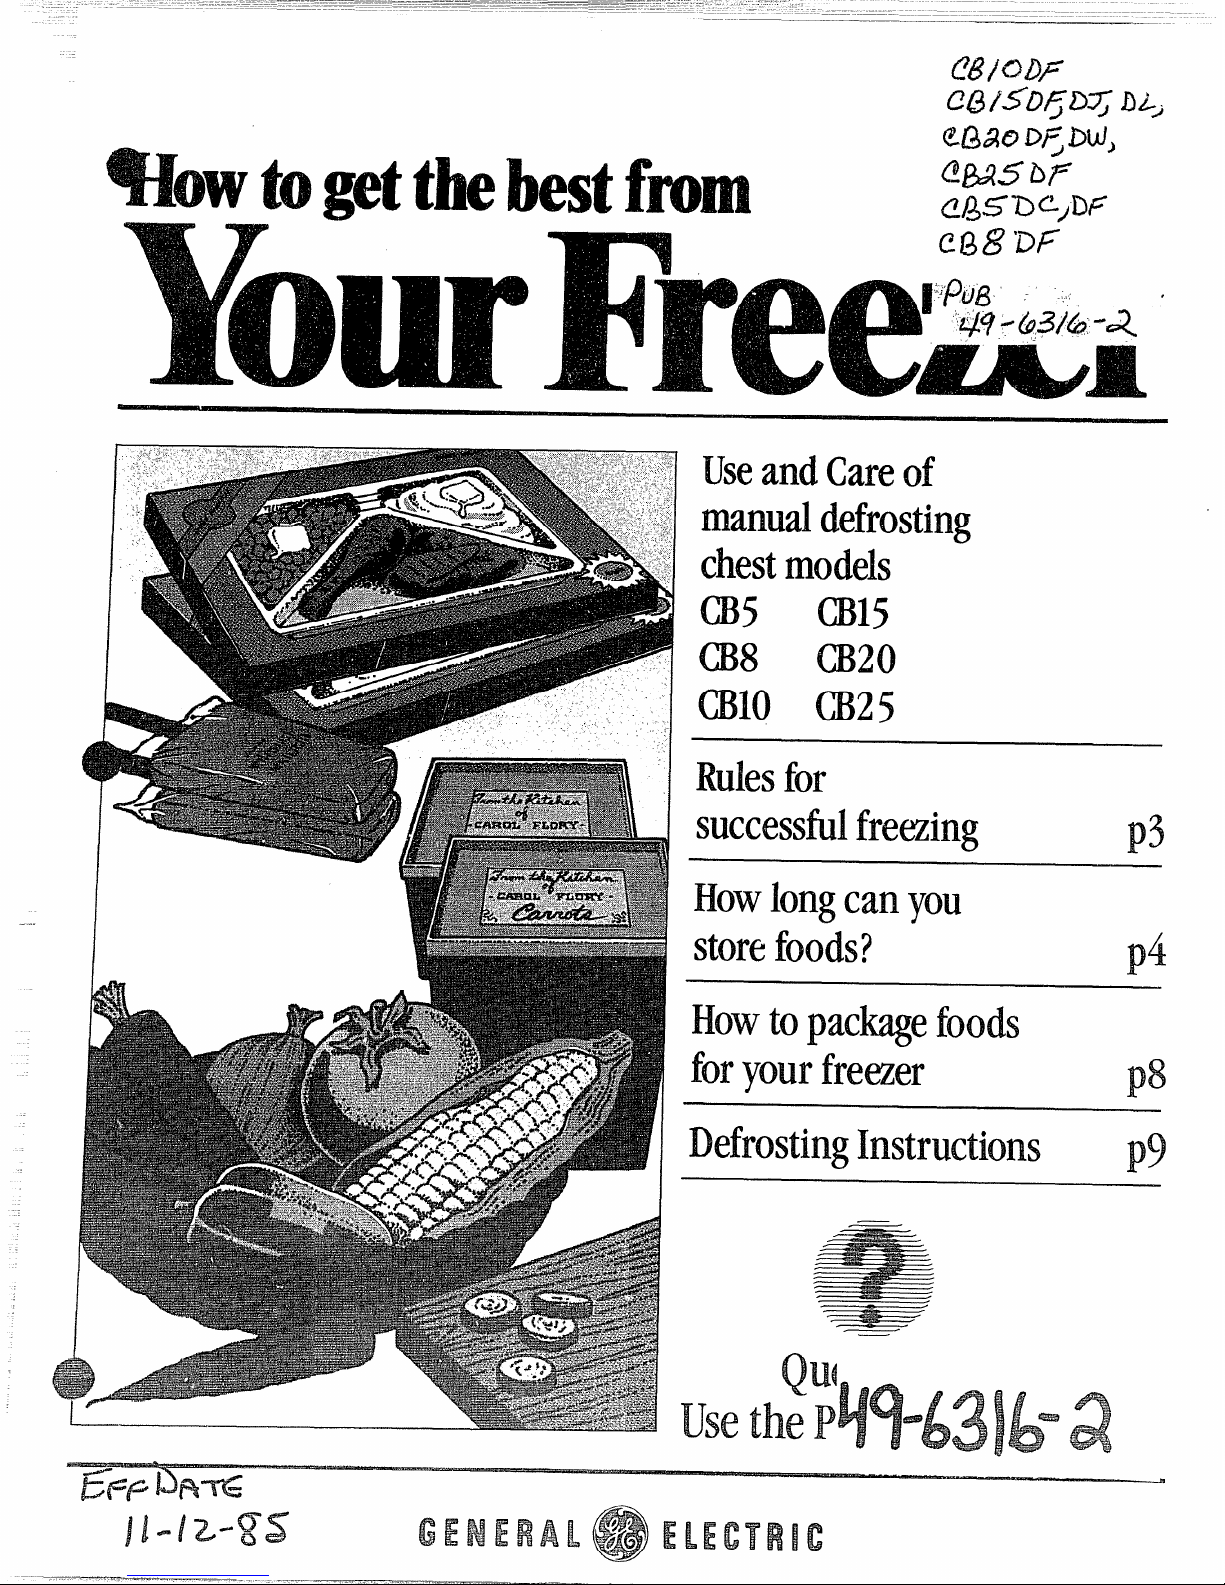
Page 1
tk
UseandCareof
manualdefrosting
chestmodels
a5 B15
CB8 B20
~10 CB25
Rulesfor
successfulfreezing
p3
Howlongcanyou
storefoods?
p4
Howtopackagefoods
foryourfreaer
p8
DefrostingInstructions p~
-
use
Page 2
klp us
helpyou.,❑
Readthis bookcarefully.
Page
Energy-SavingTips. . . . . . .Inside
Front Cover
ImportantCautions . . . . . . . . ...1
Writedownthe model
andserialnumbers.
It is intendedto helpyou operate
and maintain yournewfreezer
properly.
You’llfind them on a plate on
the sideof thecabinet. (Onsome
models,it’s behindthe small panel
on the sideof the cabinet.)
HowtoConnect Electricity. . ..1.2
Keepit handyfor answers to your
questions.
InstallationRequirements , , , . ..2
OperatingYourFreezer . . . . . ...2
These numbersarealso on the
ConsumerProduct Ownership
RegistrationCardthat came with
your freezer.Beforesending inthis
card, pleasewrite these numbers
here:
Ifyou don’t understandsomething
or need morehelp,write (include
yourphone number):
FreezerFeatures . . . . . . . . . . ...3
Food-Freezing
Suggestions. . . . . . . . . . . . . . ...3
ConsumerAffairs
GeneralElectric Company
Appliance Park
Louisville,KY 40225
SuggestedStorage Times . . . ...4
Model Number
FreezingMeat, Fish,
Poultry&Game, . . . . . . . . . . ...4
Keepproof of original purchase
date(such as yoursales slip or
cancelled check) with this bookto
establishthe warrantyperiod.
Serial Number
Usethese numbersin any
correspondenceor service calls
concerning your freezer.
FreezingVegetables , , , .. . . . . .5
FreezingFruits, . . . . . . . . . . . ...6
FreezingDairy Products . . . . ...7
Ifyou receivedadamagedfreezer,
immediately contact the dealer (or
builder)that soldyou the freezer.
FreezingPrepared Foods ., . ...7
FreezerPackaging. . . . . . . . . . ..8
Savetime andmoney.
Beforeyou callfor service, chec
the Problem Solveron pages 11
and 12.It lists minorcauses of
operating problemsthat youcan
correct yourself. Itcould saveyou
an unnecessaryservice call.
Defrosting . . . . . . . . . . . . . . . ...9
UserMaintenance
instructions, . . . . . . . . . . . . . ..l0
in Case of Extended
PowerFailure .,, ., . . . . . . . . ..l O
The Problem Solver. . . . . . ,11,12
lfYou Need Service . . . . . . . . ..l3
Warranty, . . . . . . . . . .Back
COver
Energy~SavingTips
* Location of yourfreezeris
important. Don ‘tlocateit ina warm,
unventilated Iaundryarea or storage
room. Avoid putting it next to your
range, a heating vent or where sun
will shine directly on it.
~ Try to arrange your frozen foods
systematically so YOUcan find what
yOLIwant in the freezer quick]y.
@Don’t open the freezer lid /more
often than necessary and close it
assoan as possible, particularly in
hot, humid weather,
* Whenusingyour freezer,be
careful not to ieavethe lid open.
Alwayscheckto makesurethe
freezerlid isproperly closed
beforeleavingthe
house or retiring
for the night.
* If you turn the temperature
control to the coldest position for
quick freezing, don’t forget to turn
it backto theregularsetting.
Page 3
poor or questionable, get rid of it:
Thefood maybe dangerous to eat.
Even partial thawing and refreezing
reduce the eating quality of foods,
particularly fruits, vegetables, and
preparedfoods. Theeating quality of
red meats isaffected lessthan that
of many other foods. Userefrozen
foodsassoon as possible–they
won’t keep aslong as foods frozen
only once, and the sooner they’re
used,the better their eating will be.
l!
* If youroldfreezer isstillaround
the housebutnot in use,be sure
to removethe lid or dmr. This will
reduce the possibility of danger to
children.
*
ector end.
Afteryourfreezer is in operation,
donottouchthecoldsurfaces,parti-
cularlywhenhandsaredamporwet.
Skin mayadhere to these extremely
cold surfaces.
~ M notoperateyourfreezer inthe
presenceofexplosivefumes.
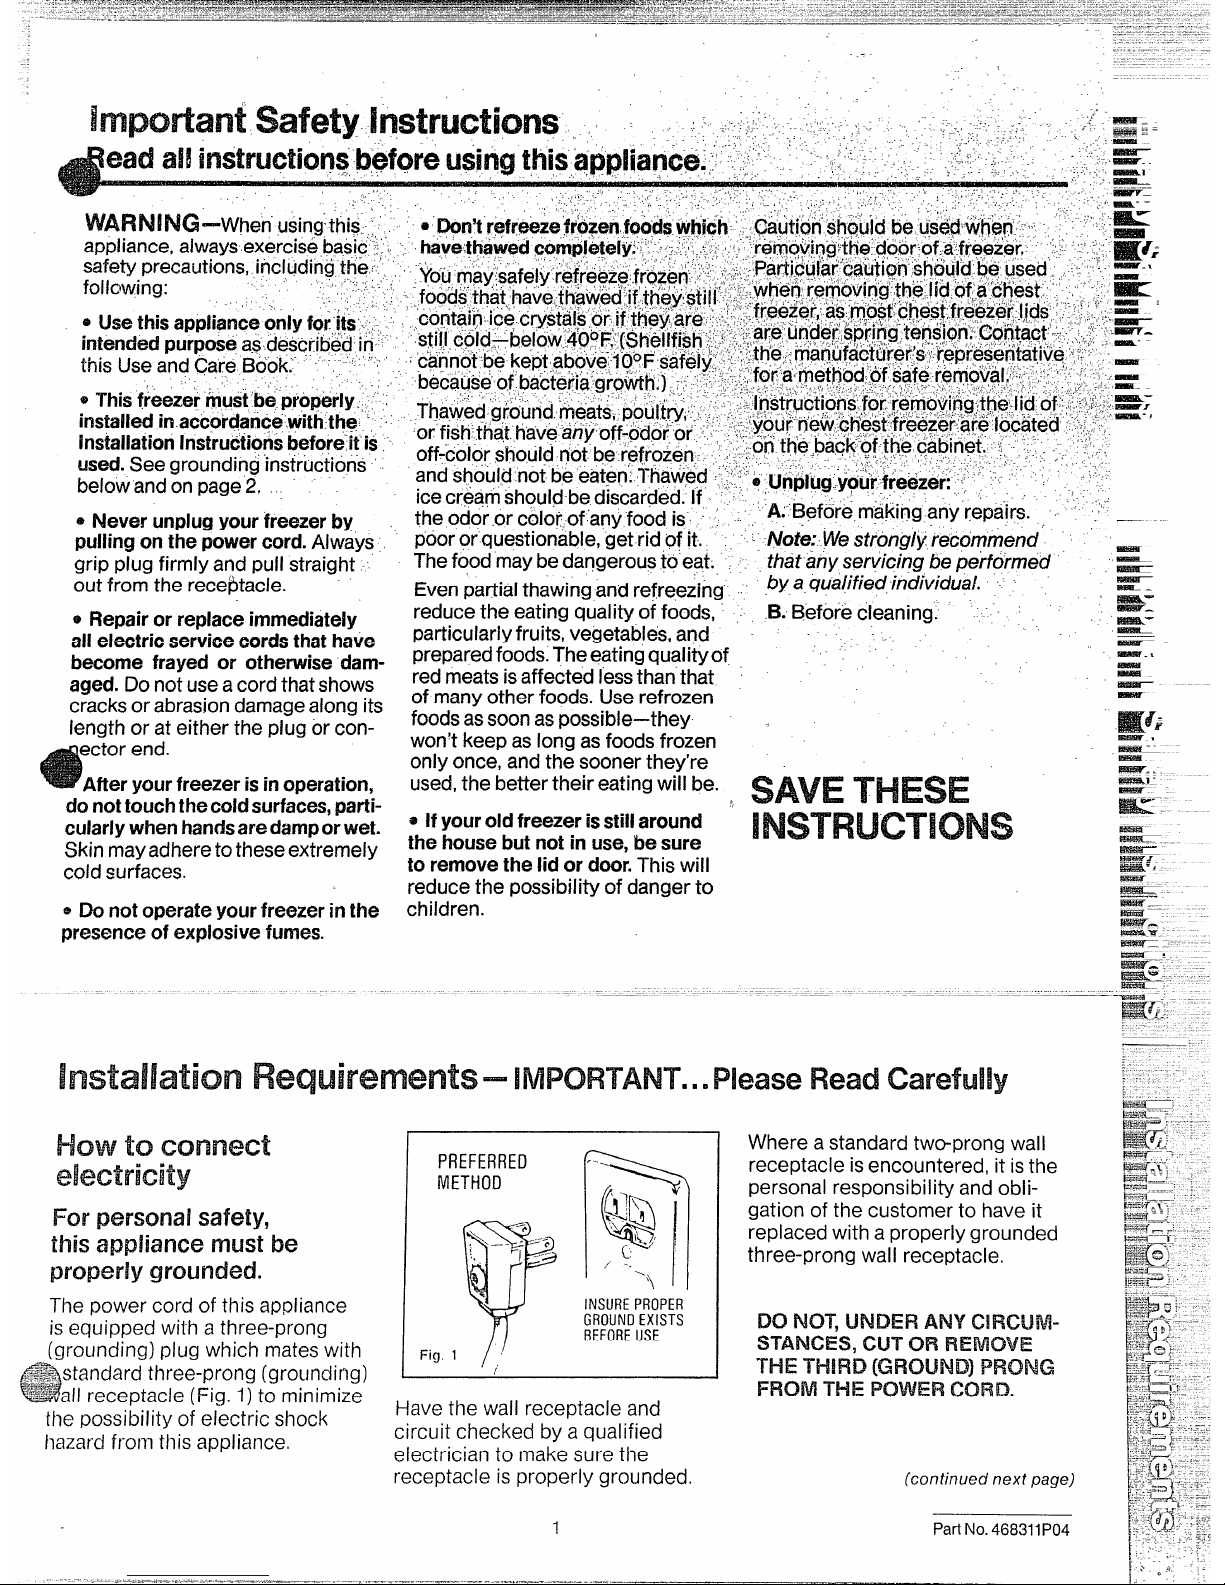
Installation Requirements– I
How
toconnect
electricity
For personalsafety,
thisappliance must be
properly grounded.
The power cord of this appliance
is equipped with a three-prong
(grounding) plug which mates with
PREFERRED
METHOD
Fig, 1
INSURE PROPER
GROUND EXISTS
BEFOREUSE
&S{standardthree-prong (grounding) ]
=~all receptacle (Fig. 1)to minimize Have the wall receptacle and
the possibility of eiectric shock
hazard from this appliance.
circuit checked by a qualified
electrician to make sure the
receptacle is properly grounded.
1
by a qualified individual.
~
‘ g:
B. Before cleaning.
mink-:
-.1
SAVETHESE
lNSTRUCT!ONS
PleaseRead
Where a standard two-prong wall
receptacle is encountered, it isthe
personal responsibility and obligation of the customer to have it
replaced with a properly grounded
three-prong wall receptacle.
Do
NOT,UNDER ANY circum-
stances,
CUT OR REMOVE
THE THIRD
(GROUND]PRONG
F50M THE POWER
CORD.
(continued next page)
Part No. 468311P04
1“
Page 4
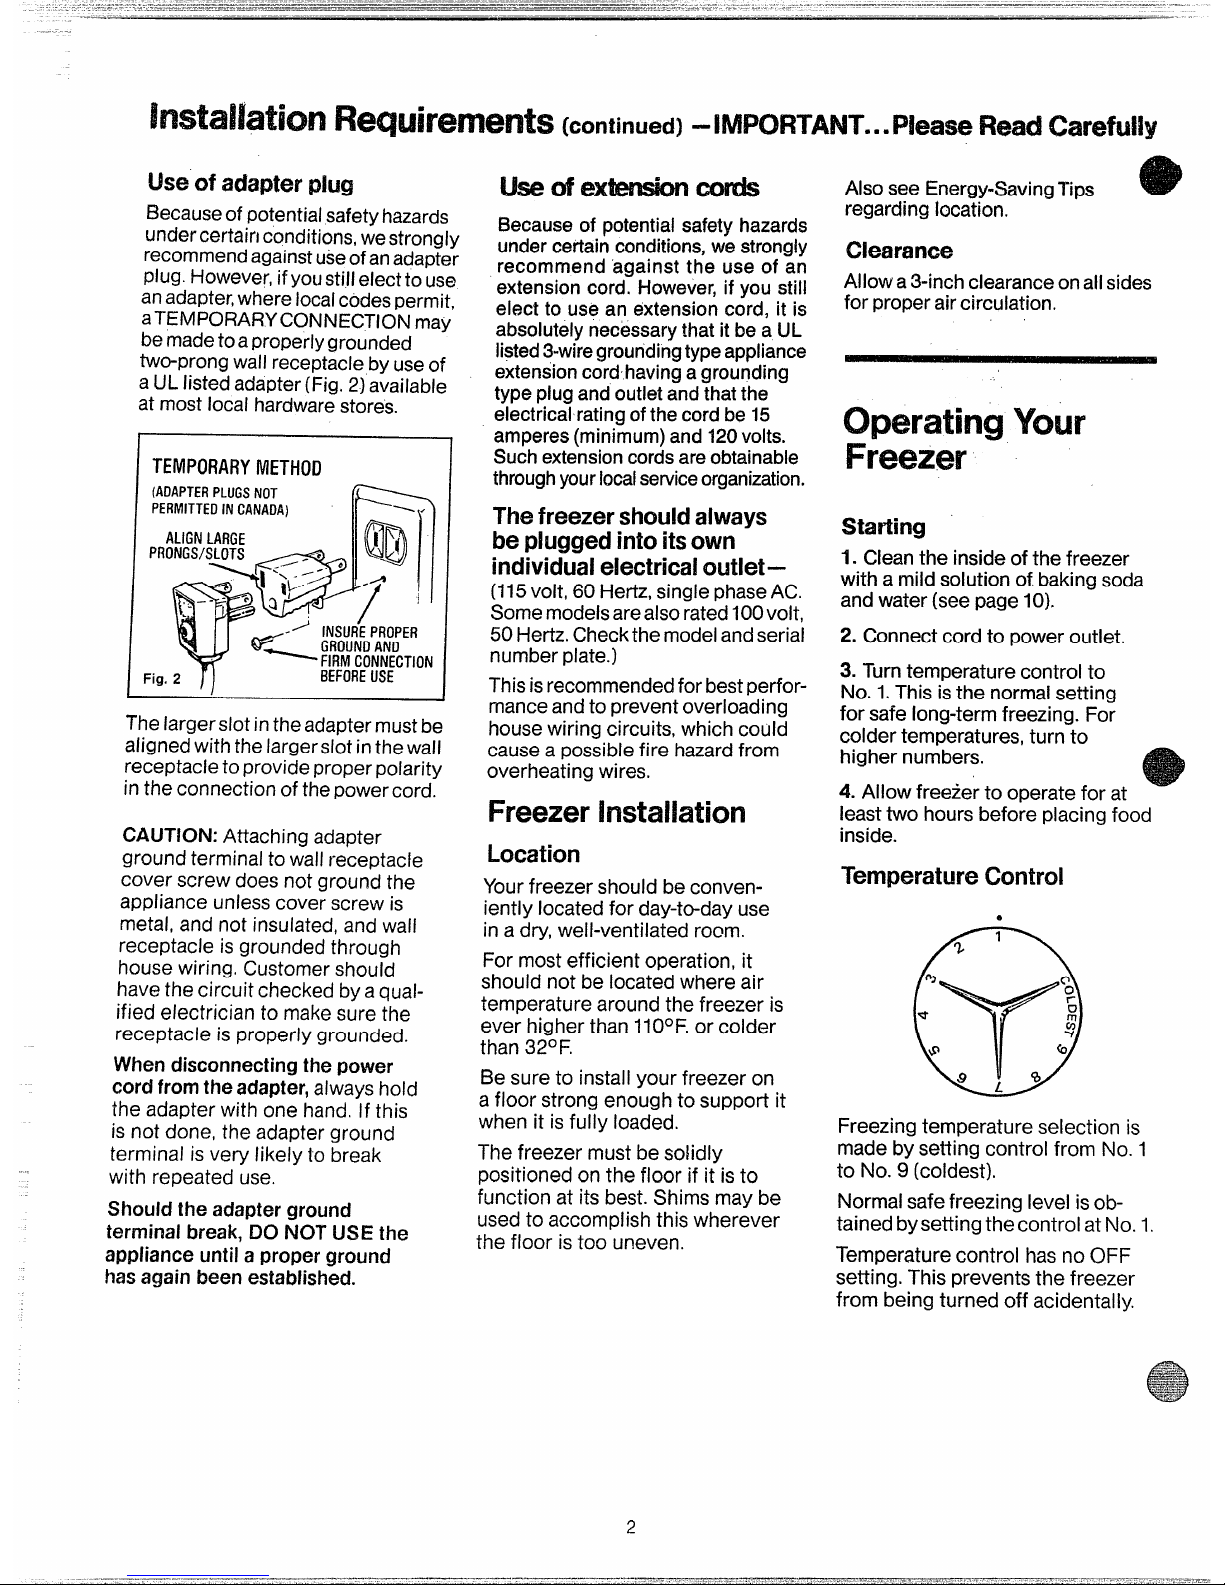
use ofadapterplug
Becauseof potentialsafetyhazards
undercertairi conditions,westrongly
recommendagainstuseof anadapter
plug. However,ifyoustill elect to use
anadapter,where localcodespermit,
aTEMPORARYCONNECTIONmay
bemadeto aproperly grounded
two-prong wall receptacle by useof
aUL listed adapter(Fig. 2)available
at most local hardwarestores.
I TEMPORARYMETHOD
I
(ADAPTERPLUGS NOT
PERMITTED IN CANADA)
~
1,
ALIGN LARGE
@
i[
PRONGS/SLOTS
T-
, ;$:;. “
~>
\:. -.: ~ Q ‘
/
-> INSUREPROPER
w~ ;;g~g;::cT,oN
Fig. 2
BEFOREUSE
The larger slot inthe adapter must be
aligned with the larger slot in the wall
receptacle to provide properpolarity
in the connection of the power cord.
CAUTION:Attaching adapter
ground terminal to wall receptacle
cover screw does not ground the
appliance unless cover screw is
metal, and not insulated, and wall
receptacle is grounded through
house wiring. Customer should
have the circuit checked by a qual-
ifiedelectricianto makesure the
receptacle is properly grounded.
When disconnectingthe power
cordfromthe adapter,
alwayshold
the adapter with one hand. If this
is not done, the adapter ground
terminal is very likely to break
with repeated use.
Should the adapterground
terminal break,
DONOTUSEthe
appliance untila properground
hasagain been established.
~dex~e
Because of potential safetyhazards
undercertain conditions,we strongly
recommend against the use of an
extension cord. Howeverjif you still
elect to use an extension cord, it is
absolutely necessarythat it be a l.JL
listed3-wiregroundingtypeappliance
extension
cordhavingagrounding
type plug and outlet andthat the
electrical rating ofthe cord be 15
amperes(minimum)and 120volts.
Suchextensioncordsareobtainable
throughyourlocalserviceorganization.
~~e
freezer shouldalways
be pluggedintoitsown
individualelectricaloutlet—
(115volt, 60 Hertz, single phaseAC.
Some modelsarealsorated 100voit,
50 Hertz. Checkthe modelandserial
number plate.)
Thisisrecommended forbest performanceand to prevent overloading
house wiring circuits, which could
cause a possible fire hazardfrom
overheating wires.
Freezerinstallation
Location
Yourfreezer should be conven-
iently located for day-to-day use
in a dry,well-ventilated room.
For most efficient operation, it
should not be located where air
temperature around the freezer is
ever higher than llO°F. or colder
than 32°F.
Be sure to install your freezer on
a floor strong enough to support it
when it is
fully loaded.
The freezer must be solidly
positioned
onthe floor if it isto
function at its best. Shims maybe
used to accomplish this wherever
the floor is too uneven.
Also see Energy-SavingTips
e
regarding location.
Clearance
Allowa3-inch clearance onallsides
for properair circulation,
OperatingYour
Freezer
Statiing
1. Cleanthe inside of the freezer
with a mild solution of baking soda
and water (seepage 10).
2. Connect cord to power outlet.
3. Turntemperature control to
No. 1.This isthe normal setting
for safe long-term freezing. For
colder temperatures, turn-to
higher numbers.
m
4. Allow freezer to operate for at —
least two hours before placing food
inside.
TemperatureControl
Freezing temperature selection is
made bysetting control from No. 1
to No. 9 (coldest).
Normal safefreezing level is ob-
tained bysetting the control at No. 1.
Temperature control has no OFF
setting. This prevents the freezer
from being turned off accidentally.
2
Page 5
Freezer Features
m
Iidirtgbasket
(OnmodelsSO equipped)
Keeps frequently-wanted foods
within easyreach; can be moved aside
to make foods below more readily
accessible. (Some GE Food Freezers
have two baskets).
Verticaldivider
(onmodelsso equipped)
Helps you organize the contents of
your freezer by kind.
Key-ejeotinglock
[onmodelssoequipped)
Keeps your frozen food supply
secure, discourages unauthorized
“exploring.” The spring-loaded
lock is designed so that the key is
automatically ejected—key will
not remain in lock in either the
open or locked position.
Keep key outof reach of children
andaway from food freeze~
10Rules
forsuccessful
Food Freezing
1. Freeze the best. Freeze only topquality foods. Freezing retains quality
and flavor; it cannot improve quality.
2. Keep workarea clean.
3. Workquickly.The quicker fruits and
vegetables are frozen after picking,
the better the frozen product will be,
You’ll save time, too, because less
culling and sorting will be necessary.
4. Choosecorrectpackagingmaterials.
Frozen foods will dry out if not properly wrapped or packaged. Both rigid
containers and flexible bags or wrappers can be used. Make sure they are
especially designed for freezing.
5. Follow reliable instructionsfor
freezing different types of food.
6. Freeze foodsin practical mealsized packages.
7. Fill containerproperly.When placing
liquid orsemi-liquid food in containers,
leave about %“at top (Ifi” for glass
containers)to allow for expansion during freezing.
8. Freeze correct quantities.There is
an established maximum of food your
freezer is designed to freeze at one
time—approximately 3 pounds per
cubic foot of freezer capacity. In
normal position, your freezer’s con-
trol dial will maintain sufficiently low
temperatures in the freezer to freeze
recommended quantities of food.
If you have a large quantity of food
you wish to freeze, store part of it in
the fresh food compartment of your
refrigerator until the first quantity
is frozen.
9. Freeze foods quickly.Continually
rotate frozen foods to the top of the
freezer so the longest-frozen foods
are used first+
10. Store frozen foods immediately.
Commercially frozen food can be
stored any place in the freezer. These
foods should not be allowed to thaw
before being placed in the freezer.
3
HelpfulMaterials
You’ll find these materials helpful in
preparing foods for the freezer:
~ Large kettle with close-fitting lid
for blanching vegetables and fruits
@Fine sieve or small colander to put
vegetables in for blanching
~ Assortment of knives for cutting up
meat, fruits and vegetables.
@Rolls of absorbent paper towels or
soft cloth towels for draining foods
* Proper freezer packaging materials
for various types of food (see page 8).
@Small loading funnel for fruit and
Vegeldble containers, to keep sealing
edge clean.
e Glass marking pencil for labeling
packages.
~ Roll of freezer tape
Quick-freezing
For quick-freezing large amountsof
food, turn control to No. 9 two hours
before loading.
Return the temperature control to
No. 1after freezing is completed.
Never freeze more thanthree pounds
of food per cubicfoot of freezer
capacityat one time.
Part No. 468311P04
Page 6

Freezing Vegetables
reparationforfreezing
1. Only vegetables at their peak of
maturity should be chosen for freezing. Some varieties of vegetables
are better adapted for freezing than
others. For complete information,
contact your County Extension
Service,
2. Sort, clean ,and wash vegetables
in cold water. Keep those of the same
size all together. Large pieces take
longer blanching.
3. Work with small amounts, about
one pound, that can be packaged in
a short time,
4. Blanch all vegetables except
tomatoes, green peppers and herbs
before packaging. Proper blanching
stops the ripening process so vegetables are held at their peak of
freshness.
Boiling-water method
(a) Select large utensil of 4- or5-quart
capacity and fill with one gallon of
water for each pound of vegetables
to be blanched at one time. Use two
gallons for each pound of leafy vegetables. Bring water to boiling.
(b) Blanch one pound of vegetables
t a time. Place vegetables in awire
basket or colander. Immerse in boiling
water and cover. Count time immediatelyafter boiling begins (seechart at
right), For high altitudes, add 1minute
to blanching and chilling times.
(c) Chill vegetables quickly the same
length of time asfor blanching by plunging them into ice water. or under cold
running water. Remove from water
anddrain on towels.
Steam
method
Usepressurecooke~ vegetable
blanchec or other
large utensil.
(a),Fill utensil with 2 inches of water.
Br~ngto boiling point.
(b)
Placevegetables in a wire basket
or rack above the boiiing water. Cover
and begin timing immediately (referto
chart at right for steaming times). Keep
heat on HIGH while vegetables are
steaming. If using a pressure cooker,
the petcock should be left open.
(c) Chill vegetables quickly the same
length of time as for steaming by plung-
ing them into ice water, or under cold
running water. Remove from water
and drain on towels,
egetables in moisture/vapor-
proof containers. Leave ~,f-inchhe~d
space in package (1X-inch for glass
containers). Freeze quickly.
I
I
VEGETABLE
PREPARATION
BLANCHING PACKAGING
Boiling
Steam
Water
ASPARAGUS
Wash in cold water,
Small stalks Chill immediately. Drain.
remove tough part of stalk, 2 min.
3 rein?’
Pack whole stalks ~arallel
sort according to size of
with heads in alternate
stalk. Cut spears to fit con-
Medium stalks
directions, leaving no
tainers, or cut in 2-inch 3 min. 4 rein*
head space, Seal.
lengths. Scald according
to size of stalk.
BEANS
Cut snap beans in 1 or
Green
3 miny
4Y2min.
Chill and drain, Pack in
2-inch pieces. Leave
freezer carton leaving
“French” beans whole or
Yz-inch head space,
slice.
BEANS
Wash and sort pods incold
Lima
Small
Cooi promptly in cold
water. Scald, cool in ice
1 rein? 4 min.
water. Drain. Pack in
water and sqeeze beans
Medium to large
cartons, bags or boxes,
out of pods. 2t03 4t05
leaving h-inch head
min. min.
space. Seal.
BROCCOLI
Select tender uniform 3 min. 5 rein?
Chill immediately. Drain.
heads of dark green color.
Package in cartons in
Let stand %-hour in salted
alternate directions,
water (4 teaspoonfuls salt
leaving no head space.
in 1 gallon water) to re-
Seal.
move insects. Wash and
remove woody stems.
Split lengthwise into
pieces so buds are not
more than 1YZinches
across. Scald.
BRUSSELS
Clean and cut sprouts 4 rein*
5Y2min.
Chill and drain. Pack in
SPROUTS
from main stem, sort ac-
freezer containers, leav-
cording to size and scald.
ing no head space.
CAR ROTS
Clean, wash and peel.
3 rein? 4fi min.
Chill, drain and pack into
Leave small carrots whole.
containers, leaving Yz-inch
Cut others into slices
head space.
or cubes.
CAULIFLOWER
Trim and wash. Break into
3 rein** 4% min.
Chill immediately. Drain.
flowerets 1 inch wide and
Package compactly, leavabout lYz to 2 inches long.
Soak in salted water for
ing no head space. Seal.
30 minutes. Drain.
CORN on COB
Select young corn with
Small ears
thin, sweet milk. Husk and
Chill twice as long as you
7 rein* 9 min.
scald. Wrap several ears
remove silk. Wash ears
Medium ears
together in freezer paper.
carefully. Sort according 9 min3 10 min.
Place in polyethylene
to size.
Large ears
bag. Seal.
11 rein* 12 min.
CORN
Scald corn on cob and
5t06 6 min.
Whole Kernel
Package. Leave Yz-inch
chill. Cut off whole kernels.
min F
head space.
GREENS
Beet greens, collards,
Beet greens, kale,
kale, mustard greens,
Chijl in cold water and
chard, mustard and
drain thoroughly be-
spinach, Swiss chard,
turnip greens
tween absorbent towels.
turnip greens. Wash and
2 rein*
lift
OUt of water to drain.
Pack in freezer cartons or
Collards
bags and seal.
Remove tough stems and
3 min.
imperfect leaves. Cut in
Spinach
pieces, if desired. Scald.
lYzto2min?
PEAS
Shell and discard over- 2 rein**
2 min.
Chill and drain. Package
mature peas.
compactly, leaving Yz-inch
head space.
POTATOES
P@el and slice lengthwise
Cool to room temperature.
French Fried
for frying. Fry in deep fat
Package in freezer bags or
heated to 360°F for 4
cartons and seal, To serve,
minutes until tender, but
thaw and cook in 375° F
not browned. Drain well.
fat until brown. Or cook,
unthaw-ed, in 500° F oven.
POTATOES
Select smooth new pota-
3t05
Chili, drain, package in
‘ristl
toes directly from garden.
min.
cartons, bags or boxes.
Wash, peel or scrape, and
Leave Yz-inch head space,
scald.
Seal.
‘OTATOES
Wash. Cook until almost
Pack in freezer containers,
;weot
tender and cool. Peel; cut
aliowing Yz-inch head
in halves, slice or mash.
space. Seal.
;OUASH
Select tender squash with
3 min F
4Y2 min.
Chill immediately, drain
soft rind Cut in !j-inch
and package. Leave
slices.
Yz-inch head space, Seal.
*Preferred method
**Use 4 teaspoons
salt to a gallon
5
Part No. 468311P04
Page 7

FreezingFruits
Preparationforfreezing
1. Sortfruits for uniform ripeness,
quality and size.
2. Wash fruits thoroughly in cold water
and drain thoroughly.
3. Work with small quantities and
freeze quickly.
4. Pack in cartons, cutting or slicing
larger fruits. Add sugar or syrup.
5. To avoid discoloration of apples,
apricots, peaches and pears, (1) add
ascorbic acid mixture to syrup (1tea-
spoon to 1cup of syrup) following
directions on label, or (2) dip slices of
fruit for 1 minute in solution of 3table-
spoons lemon juice to 1gallon water,
rinse in cold water, drain, and pack in
sugar or syrup. Place crumpled piece
of cello or waxed wrap on top of fruit
before closing to keep fruit in syrup.
Packing
Alwaysallowheadspace.Allow %-inch
head space in pint containers (1 inch
for glass), l-inch head space in quart
containers (2 inches for glass).
Sweetening fruitshelps retain flavor,
color and texture. The method of
sweetening depends on fruit used.
See chart at right for recommended
method.
(a)Dry sugar pack. Suitable for fruits
that make their own juice when sugar
is added. Add dry sugar (see chart at
right) and stir gently until most of the
sugar has dissolved in the juice drawn
from the fruit, then pour into containers.
(b) Syrup pack.Suitable for fruits
which have comparatively little juice,
and those which darken readily. Add
syrup to cover fruit.
Allow %-inch head
space (172inch for glass containers).
(c) Unsweetened pack. Suitable for
special diets.
Guideformakingsyrup
Cupsofsugar
P0rc8fltag0 tobeaddedper Approximate
of
3076
(light)k 1
lb
40?6(light)* I@ IN
50%(medium)
25
l%
60%(medium) 3ti
2
65%(heavy)
4% 2U
FRfJIT
PREPARATION
PACKAGING
APPLES
Wash, peel and slice apples to about
Syrup pack: Slice into container,
Y?-inchthickness, If apples are to be cover with 4(.)7. syrup, Add 1 teaspoon
packed in sugar, prevent discoloration ascorbic acid to each cup of syrup,
by (1) steaming for Ifi to 2 minutes, or
Sugar pack: Sprinkle Y?cup of sugar
(2) dipping in solution of 3 tablespoons
over each quart of apples. Stir to cover
lemon juice to 1 gallon water for 1
all surfaces with sugar. Seal. Adding
minute, rinsing in cold water, and
1 teaspoon ascorbic acid to sugar is an
draining. Solution may be reused.
extra precaution.
APRICOTS
Select firm, fully ripe fruit of bright,
Syrup pack: Pack in container; cover
uniform color. Wash and sort as to size.
with 4070 syrup to which ascorbic acid
Halve and remove pits. Peel and slice,
has been added (1 teaspoon ascorbic
if desired. Heat unpeeled fruit in boiling
acid
to 1cup syrup).
water YZminute.
Sugar pack: Mix 1 teaspoon crystalline
ascorbic acid with YZcup of sugar and
sprinkle over 1 quart of fruit. Stir.
BERRIES
Proper maturity is important. Immature
(1) May be packed dry, or [2) packed
berries should not be used. Wash in
whole in a 40to 50~0sugarsyrup. (3) For
cold or iced water and drain thoroughly
crushed or pureed berries, pack 4 parts
on absorbent paper towels.
of berries to 1 part of sugar. Stir until
sugar is dissolved. Seal.
CHERRIES
Wash, sort and stem. Chill in refrigerator
Sour
Mix 1 part sugar to 4 or 5 parts fruit
until firm enough to remove pits.
by weight until sugar is dissolved.
Pack. Seal.
CHERRIES Prepare quickly in same way as sour
Sweet
Cover with 407. sugar syrup which con-
cherries. However, sweet cherries may
tains 1 teaspoon ascorbic acid per
cup.
be frozen whole, with or without pits.
CRANBERRIES Wash in iced water, stem and eliminate Cranberries may be packed whole,
poor berries. Drain well.
without sugar, or in a 5070 sugar syrup.
MELONS Select firm, well ripened fruit. Cut in
Cantaloupes
Cover with orange juice or 3070 sugar
half and remove seeds (remove water-
Honeydews
syrup. Seal and freeze.
melon seeds as you cut balls). Scoop
Watermelons out melon balls or cut in %-inch cubes.
These fruits may be frozen alone or in
combination.
ORANGE and
Select firm fruit, free of soft spots. Peel
GRAPEFRUIT
Pack sections in layers. Cover grape-
with sharp knife just below white
fruit with 307’ syrup containing 1
SECTIONS
membrane. Remove all membrane. teaspoon ascorbic acid per quart.
Cut sections
fioin divider-membranes.
Oranges do not need syrup. Stir in
Drain.
YZteaspoon ascorbic acid per quart.
PEACHES
Promptness in handling is important.
Pack immediately into cold
407. syrup
Sort, peel (skins may be loosened by
with 1 teaspoon ascorbic acid per cup
scalding whole peach 30 seconds in
in container; cover with more syrup.
boiling water) and pit. Peel and slice 1
Seal.
quart of peaches at a time.
PEARS
Select pears which are fully tree-
Pack immediately in freezer carton.
ripened. Wash, peel and core. Cut in
Add 407. syrup to which ascorbic acid
halves or quarters. Heat in boiling 4070
has been added (1 teaspoon ascorbic
syrup for 1 to 2 minutes. Cool in syrup,
acid to 1 cup syrup). Seal
then drain.
PINEAPPLE
Peel. core, slice or cube. Pack slices with two circles of cello-
phane paper between each slice. Pack
without sugar or cover with 30 Y.syrup.
Or, Pineapple juice could be used
PLUMS and Sort, wash In iced water. Halve and pit.
PRUNES
Pack in carton and cover with 4070
or leave whole
syrup to which 1 teaspoon ascorbic
acid has been added per cup. Seal.
RHUBARB Wash, trim and cut stalks into l-inch
Pack without sugar or cover with 4070
pieces or In lengths to fit package
syrup. Allow head space Seal
+Recol]701etltiedforfl]os[fruits
Metl~od:Dissolve sugar in boiling
water or mix thoroughly with cold water
until dissolved. Chill before using,
Place unopened containersin refriger-
ator. Serve while fruit is still slightly icy.
6
Page 8

Freezing Dairy Products
e
utter andMargarine
—
Overwrap original carton in moisture/
vapor-proof material or enclose in
moisture/vapor-proof containers.
Cheese
Freeze cheese in %-to l-pound
pieces. Wrap in moisture/vapor-proof
material, Uncreamed cottage and
Camembert cheese may be kept in
the freezer though there may be some
water separation on thawing. Cream
and processed cheese do not freeze
well as freezing affects their smooth
texture.
Cream
Ordinary household cream for table
use does not freeze well, but will be
suitable for cooking. Pasteurized heavy
cream containing not less than 40 per
cent butterfat may be frozen. Heavy
cream which hasbeen whipped freezes
well, too. Drop mounds of whipped
cream on baking sheets. Freeze. Transfer frozen mounds quickly to a rigid
container and seal, separating layers
with paper.
IceCream
Commercial ice creams can be
stored in the freezer in their original
carton, Home-made ice cream should
be packed in moisture/vapor-proof
cartons.
Fine-quality ice cream,with high cream
content, will normally require slightly
lower temperatures than“airy” aireadypackaged brands with low cream con-
tent. It will be necessaryto experiment
to determine the iocation inthe freezer
and the temperature controi setting to
keep your favorite ice cream at the
right serving temperature.
FreezingPreparedFoods
readandRolls
Bake, cooi, wrap and freeze. Toserve:
thaw in wrappings at room temperature. Or, heat or toast frozen. If desired,
wrap in foii and warm for 15minutes in
250° to 300° F oven, Note; most com-
mercially baked products should be
rewrapped in moisture/vapor-proof
materiai before freezing.
Biscuits
May be frozen baked or unbaked. To
serve baked biscuits: defrost in wrappings at room temperature for one
hour. Reheat for 5 minutes in 425°F
oven. Or piace frozen biscuits in 375° F
oven for 15 minutes. Unbaked biscuits
shouid be thawed, then baked as usuai.
Cake
Bake and cooi. if frosted, freeze before
wrapping to avoid sticking, To serve:
unwrap frosted cakes; thaw at room
temperature, Thaw unfrosted cakes in
wrappings at room temperature. Ailow
about two hours to thaw a iarge cake.
Icings made with egg white do not
freeze satisfactoriiv. Those made with
powdered sugar, butter, fudge or
hipped cream freeze well.
—
Cookies
If baked before freezing, cooi and
package them carefuiiy in moisture/
vapor-proof materiai. They wiii thaw in
about 15minutes at room temperature
in wrappings. Refrigerator cookie
dough may be wrapped and frozen in
bars.Siice asneeded, without defrosting, and bake.
Pies
Most pies except cream, custard or
meringue-topped pies freeze weii,
baked or unbaked. Baked pies store
for a ionger time. Omit steam vents
from pies to be frozen unbaked.
To serve unbaked pies: Cut steam
vents in top crust and piace frozen pie
in oven at usuaitemperature. increase
baking time 10 to 15 minutes. Thaw
frozen baked pies, wrapped, for 1 to
1YZhours at room temperature. To
serve warm, unwrap without thawing
and heat in 300*F oven for 30 to 40
minutes.
QuickBr~a~s andMuffins
Bake, cooi and wrap at once, For
serving, thaw, unwrapped, at room
temperature or warm, unwrapped, in
300° F oven.
Main Dishes
Such foods as chili, spaghetti sauce,
casseroles, etc., are prepared in the
same rnannerasfor immediate serving
with the exception of seasoning. During
Use oniy fresh eggs for freezing. Chiii
before freezing. Whole eggs may be
frozen or the whites and yoiks frozen
separately as foiiows:
Whole Eggs- Mix yoiks and whi!es
thoroughly with a fork, Do not beat in
air. Add 1teaspoon sait to each 2 cups
of eggs,
EggWhites– Separate and freeze in
recipe-sized amounts.
EggYolks–Separate and add 1tea-
spoon of sait or 1tablespoon of corn
syrup or sugar per cupfui of yoiks.
Biend with fork.
Packeggs in freezer carton aiiowing
Yz-inchhead space (l Yz-inchfor giass
containers). Thaw eggs in unopened
container in refrigerator or at room
temperature. -
storage, onion fiavor becomes iess
noticeable and ceiery fiavor more
pronounced. Spices aiso iose their
strength during iong periods of storage. Omit potatoes from stews and
soups as they become mushy.
Cooi main dishes after cooking; package in moisture/vapor-proof materiai
and freeze. To serve these foods, thaw
gradualiy over iow heat adding a iittie
iiquid if necessary to prevent foods
from sticking to the pan. Or heat in a
300°F oven for about 1 hour or untii
heated thoroughly.
SandwichTips
Aii varieties of breads can be frozen.
Spread softened butter on each slice,
then spread fiiiing. it is not advisable
to use salad dressings for spreading
asthey separate andsoak into the bread.
Meat, fish, some cheeses, poultry and
peanut butter are recommended fiiiings
for freezing. Cooked eggs become
tough when frozen. Other fillings can
be moistened with miik, cream, pickie
reiish, chiii sauce, catsup, fruit juice,
a Iittie mayonnaise or saiad dressing.
Lettuce or other salad greens and raw
vegetables do not freeze well and
shouid be added just before serving.
Wrap sandwiches in moisture/vaporproof material and freeze.
Part No. 468311P04
————— ——
Eggs
Page 9

Proper packaging is essential for
successful freezing. Because solidly
frozen foods lose moisture in the dry
0° to 5°F temperature
of afreezer,
they mustbeproperly protected by
top quality packagingmaterialsthat
aremoisture/vapor-proof.Freezer
tape is
used to seal wrappings and
for labeling,
Freezerpackaging
materials
Materials
Uses
Cartons with Fruits,
moisture/vapor-
vegetables,
proof liners
some meats
Foil containers
Cooked foods
Polyethylene
Baked foods,
bags
meats
Glass freezer jars Juices, fruits,
vegetables,
cookedfoods
Plastic containers Sauces, fruits,
and boil-in bags
vegetables,
cooked foods
Laminated paper
Meats
Heavy-duty
foil
Meats, baked
goods, leftovers
Cellophane
Baked goods,
sandwiches,
small meat cuts
Packaginginstructions
DrugstoreWrap
1, Place food in center of wrapping
paper.
111111~ --- I
2. Bring two parallel edges together.
Fold in lock seam, repeat until the
last fold rests firmly on food.
~----——————— I
_. _.._
_——_._— -
3. Fold ends, excluding as much air
as possible. Seal with tape or tie firmly
with hea~/ystring.
Butchers’Wrap
Place food diagonally on one come@
of paper. Roll paper and food together
diagonally, folding in extra material
as you roil. Seal with freezer tape.
Cartonsand containers– Fruits,
vegetables and cooked foods may
be packaged in freezer cartons,
containers and jars.
1
-.—
—.—
----
I
Aluminum foil– Place food on heavyduty foil and mold foil to shape of the
food. Only one thickness is required.
No heat sealing or taping is necessary.
—
I
Labeling containers– Be sure to
label
all-containersandpackageswith
contents anddate that it wasplaced
in the freezer.
8
Page 10

Defrosting InstructIons
o notuseanyelectricaldevice
indefrostingyourfreezer.
Depending on the climate you
live in, humidity and usage,your
freezer mayneed defrosting only
once or twice ayear. If possible,
choose a time to defrost when
food supply is lowest.
The FastestWayto Defrost
Defrosting canbe done quickly
and easily byscraping freezing
surfaceswith a plastic scraper
or wooden spatula when frost is
approximately 1/2 inch thick.
DO NOT usean ice pickor sharp
edgedinstrumentasitmaydamage
orscratchthefreezer.
For PeriodicComplete
Cleaningand FrostRemoval
If frost istoo thick or too hard to
be scraped,we suggestyou do the
following:
1.Removepower cord plug from
outlet.
2. Remove all food from freezer,
Food may be temporarily stored in
large corrugated paper boxes, insulated bags,towels or wrapped in
newspapersto preserve coldness.
3. Some models have adefrost
water drain at the front and a hose
adapter that is packaged in bag in
the bottom of freezer.Ifyour freezer
isso equipped, remove drain cap
on front of freezer, insert hose
connector and attach hose.
After attachinghose,removedrain
pluginsidecabinet.Sponge remain-
ing moisture from of freezer
4. Youmay hasten defrosting by
leaving the freezer lid open and
removing large, loose pieces of
frost before they melt, or byadding
pansof hot water.
5. After frost iscompletely
removed, rinse freezer interior
with asolution of warm water and
baking soda(aboutone tablespoon
of sodato eachquart of water),
Mild soapandwarm water maybe
used,but follow with a bakingsoda
solution. Rinsewith clean water
and wipe dry. DO NOT use harsh
or gritty cleaners in the interior.
Warning:Whencleaningin the
vicinityof-electricalparts(lamps,
switches,controls,etc.)wring
excessmoistureoutof spongeor
clothsothatitwill be barelydamp
to preventwateror liquidfrom
gettingintoanyelectricalpartand
causinga possibleshockhazard.
6. Replace drain plug inside
cabinet and cap on defrost drain
(onmodels so equipped),
7. Plug in freezer at electrical
outlet. Turntemperature control to
its regular position and return food
to freezer.
Pati No. 468311P04
m-
-..
-
w.
_= .
-_. -
Page 11

userMaintenanceInstructions
cleaningyour
freezer
Protectthepaintfinish.The finish
on the outside of the freezer isa
high quality, baked-on paint finish.
With proper care, it will stay new-
iookingandrust-free for years.Apply
acoatof appliance polishwax when
the freezer isnew andthen at least
twice ayear.
Appliance PolishWax&Cleaner
(Cat.No.WR97X216)isavailable
from GEAppliance PartsMarts.
Keepthefinishclean.Wipe with a
clean cloth lightly dampenedwith
appliance polish wax or mild liquid
dishwashing detergent. Dry and
polishwithaclean,softcloth. Donot
wipe the freezer with asoiled
dishwashing cloth or wet towel. Do
notusescouring pads, powdered
cleaners, bleach, or cleaners containing bleach.
Caution–Care should betaken in
moving the freezer awayfrom the
wall. All types of floor coverings
canbedamaged,particularly
cushionedcoveringsandthose
withembossedsurfaces.
Inside
whenyougoon
vacation
Tomaintainfreezerinoperation
duringvacations,besureyo6rrhouse
powerisnotturnedoff.Forsure
protection of freezer contents, you
maywant to askaneighbor to check
the power supply and freezer operation every 48 hours,
~rextencfedvacationsorabsences,
youmayprefer to moveyour frozen
foodsto a storagelockertemporarily.
Ifyour freezeris to be left empty,
disconnectpower cord plug from wall
receptacle.Topreventformation of
odors,placeopen boxof baking soda
in freezerand leavefreezer lid open.
Whenfreezerisnotoperating,it
can be left in an unheated house or
room without damageto cabinet or
mechanism.
Whenyoumove
Disconnect power cord plug from
wall receptacle. Remove foods,
defrost and clean freezer.
Be sure freezer stays in upright
position on/y during actual moving
and invan. Freezer must be secured
invanto prevent movement. Protect
outside of freezer with blanket.
Incase of extended
powerfailure:
1.
Keepfreezerlid closed. Your
freezerwill keepfoodfrozen for
24hours providedwarm air is not
admitted.
2. If freezer isout ofoperation for
24 hours ormore,adddry ice. Leave
ice inlarge piecesand place it on
top of food on each shelf so cold air
will flow downover ailthe food. Add
more ice as required,
WARNBNG:Handling of dry icecan
cause freezing ofthe hands—gloves
orother protection isrecommended,
3. If dry ice is not available, move
food to afrozen food locker temporariI y—until power is restored.
Clean your freezer at least once a
year. Before cJeaning the inside of
the freezer, be sure to remove the
power cord from the electrical
outlet.
Toclean the insideof the freezer,
followDefrostingInstruction#5 on
page9.
Page 12

I
PROBLEM
FREEZER OPERATES
TOO LONG
NOISY OPERATION
CABINET V!BRATES
FRE=ER
TEMPERATURE
TOO WARM
POSSIBLECAUSE AND REMEDY
,,
,,
~ Packageholding lid open. “~
,,
. .
,.
@Lid
opened too frequently or too ~ong,
. .
i“,
o
Temperature control set on too high a numbe~ .
*
Inadequate air circulation space around cabinet. Needs proper, ~[earance’
at sides and back—seepage 2. ,.
@Weaknessin room flooK
‘,
~ Cabinet not positioned solidly on flooc
e weaknessinroomfloor.
e Cabinet not positioned solidly on floor.
~ Lid opened too frequently or too’long.
@Package holding lid open.
(continuedflext page)
11
Part No. 468311P04
Page 13

PROBLEM
FOODS DEFROSTING
FREEZER
TEMPERATURE
TOO COLD
FOODSDRYINGOUT
MOISTURE
COLLECTING
ONOUTSIDE
OFCABINET
LIDWON’T
FULLYCLOSE
SLOWSTARTING
riMEAFTERBEING
rURNEDOFFFOR
\ PERIOD OFTIME
XCESSIVEFROST
IUILD-UP
POSSIBLECAUSEAND REMEDY
e Blown f~s~ Or ~ripp~d circuit br~ake~
e Not plugged in,
*
open.
e Temperature control set On ~oa high ~ numbe~
o Packagesnot properly wrapped or sealed.
o &tended hot, humid weather.
~ Packageholding lid open.
@Built-in overload protection.
@Lidopenedtoo frequentlyor too long.
@Packageholdinglid open,
@Extendedhot,humidweather.
Ifyouneedmorehelp...call,tollfree:
TheGEAnswerCenter”
800.626.2000
consumerinformationsewice
.
12
Page 14

obtainservice,seeyourwarranty
onthe page of t~s book.
We’reproud of our serviceand
wantyouto be pleased. If for some
reasonyou arenot happywith the
serviceyou receive,herearethree
stepsto follow for further help.
FIRSTcontact the people-who
servicedyourappliance. Explain
whyyouare not pleased. In most
cases,this will solvethe problem.
NEXT ifyou arestill not pleased,
write all the details—including your
phone number—to:
Manager,Consumer Relations
GeneralElectric
Appliance Park
Louisvillej Kentucky40225
FINALLY,ifyour problem isstill not
resolved,write:
--
—1
MajorAppliance
ConsumerAction Panel
20 North WackerDrive
Chicago, Illinois 60606
13
PafiNo.468311P04
 Loading...