

GE AVE22DBG1, AVE18DBX1, AVE15DBW1 Owner’s Manual
©
www.GEAppliances.com
Safety lnfo_vnation
Adapter Plugs .................... 3
Connect Electricity ............... 2
E×tension Cords ................. 3
Satety Precautions ................ 2
Op_"ating lnstructions ........ 4, 5
Care and Cleaning
Air Fiber . ....................... 6
( 4 file and (ease ................... 6
Outdoor (kills ................... 6
Installation Instructions
Through the Wall Installation-
Optional ....................... 15
Window Installation ........... 7-14
Troubleshooting Tips .......... 16
Normal Operating Sounds ....... 16
AVE12
AVE15
AVEIS
A VE22
©
Consumer Support
Consumer Support ..... Back Cover
Product Registration ......... 17, 18
Warranty ....................... 10
Writethemodelandserial numbershere:
Model #
Serial #
Find tllese numbers on a label on tile
side of the air _on_fitioner and/or on a
label near tlle air disdlarge area.
23-11-2130N-003 49-7411 01-01JR
iMPORTANTSAFETYiNFORMATiON.
READALLiNSTRUCTiONSBEFOREUSING.
For your safe_ the information in _his manual must be followed to minim)o the risk of fire, electric shock
or personal injury.
SAFETYPRECAUTIONS
ij_::_Use this appliance only for its intended
purpose as described in this Owner's
Manual.
ij_::_This air conditioner must be properly
installed in accordance wiflr tim Installation
Insm|ctions before it is used.
ij_::;Never unph|g _mr air conditioner by pulling
ijh::_Turn tim mode control OFFmld unplug
ij_::;For x_)ur safety...@) not store or use
on the power coM. Alwa_:sgTipplug firmly
and pull straight out flxm_the receptacle.
_ Repair or replace immediately all elecuic
service toms flint have become frayed or
otlmmise damaged. Do not use a tom that
shows cracks or abrasion damage along its
length or at either the ph|g or connector end.
HOWTOCONNECTELECTRICITY
Do not, under any circumstances, cut orremove
the third (ground) prong from the power cord. For
personal safety, this appliance must be properly
grounded.
Tim air conditioner shouM always be
ph|gged into its own indivi(hml elecuical
outlet which has a voltage rating that mat(:hes
tim rating plate.
your air conditioner belore making rely
repairs or cleaning.
NOTE:Wesmmgly recommend flint any
serxicing be perlbmmd by a qualified
individual.
combustible materials, gasoline or other
flammable vapors or liquids in the vicinity
of this or any other appliance.
The power tom of fllis appliance is equipped
with a 3-prong (gTounding) plug which mates
with a standaM 3-prong (g_mnding) wall
outlet u_minimize tim possibility of electric
shock hazaM from this appliance.
Have the wall outlet and circuit checked by a
qualified electrician m make st|re the outlet is
properly g_mnded.
V_qmre a 2-prong wall outlet is encountered,
it is _xmr personal responsibility and obligation
to have it replaced with a properly g_mnded
3-prying wall outlet.
This provides tim best pe_tbrmance and also
prevents overloading house wiring circuits
wllich could cause a fire h_aM tiara1
overheated wires.
See tim hlstallation Instructions, Electrical
Requirements section fbr spedfic electrical
connection re(luiremenLs.
2
-&WARNING!
USEOFEXTENSIONCORDS-115-Voltmodelsonly
vvww.GEAppliances.com
Because of potential safety hazards under certain
conditions, we strongly recommend against the
use of an extension cord.
However, ifyou must use all extension col,l,
it is absolutely necessa U that it be a UL-listed,
14 gauge, 3-wi,e g_)unding bpe appliance
extension co**lhaving a g_)unding t)qoeplug
and outlet and that the elecuical rating of tile
coi,l be 15 amperes (minimum) and 125 volts.
_IL CAUTION:
DO NOT use an extension cord with any of the
230/208 volt models.
USEOFADAPTERPLUGS-115-Voltmodelsonly
Because of potential safety hazards under certain
conditions, we strongly recommend against the use
of an adapter plug.
However, if_x)u must use an adapter, where
local codes pemfit, a temporary connection mW
be made to a properly gTounded 2-prong wall
outlet by use of a UIAisted adapter available at
most local hai,lwa,e stores.
Tile laEger slot ill tile adapter must be aligned
with tile larger slot in the wall outlet to provide
proper polarity in the connection of tile power
(:old.
V_qmndisconnecting tile power co**lfi_)m tile
adapter, aMays hoM the adapter in place with
one hand while pulling tile power co**lplug
with the other band. If this is not done, the
adapter gTound temfinal is veU likely m break
with repeated use.
If file adapter gTound terminal breaks,
DONOT USEtile air conditioner until a
proper gTound has been established.
Attachingthe adaptergroundterminalto a waft outlet
coverscrewdoes notgroundthe applianceunlessthe
coverscrewis metal,andnot bsulated, andthe wall
outlet is groundedthrough thehouse wiring. Youshould
havethe circuitcheckedbya qualified electricianto
makesurethe outlet isproperlygrounded.
READANDFOLLOWTHISSAFETYINFORMATIONCAREFULLY.
SAVETHESEINSTRUCTIONS
Aboutthe controlsontheair conditioner.
Features and appearance will vary.
OFF
LOW
COOL
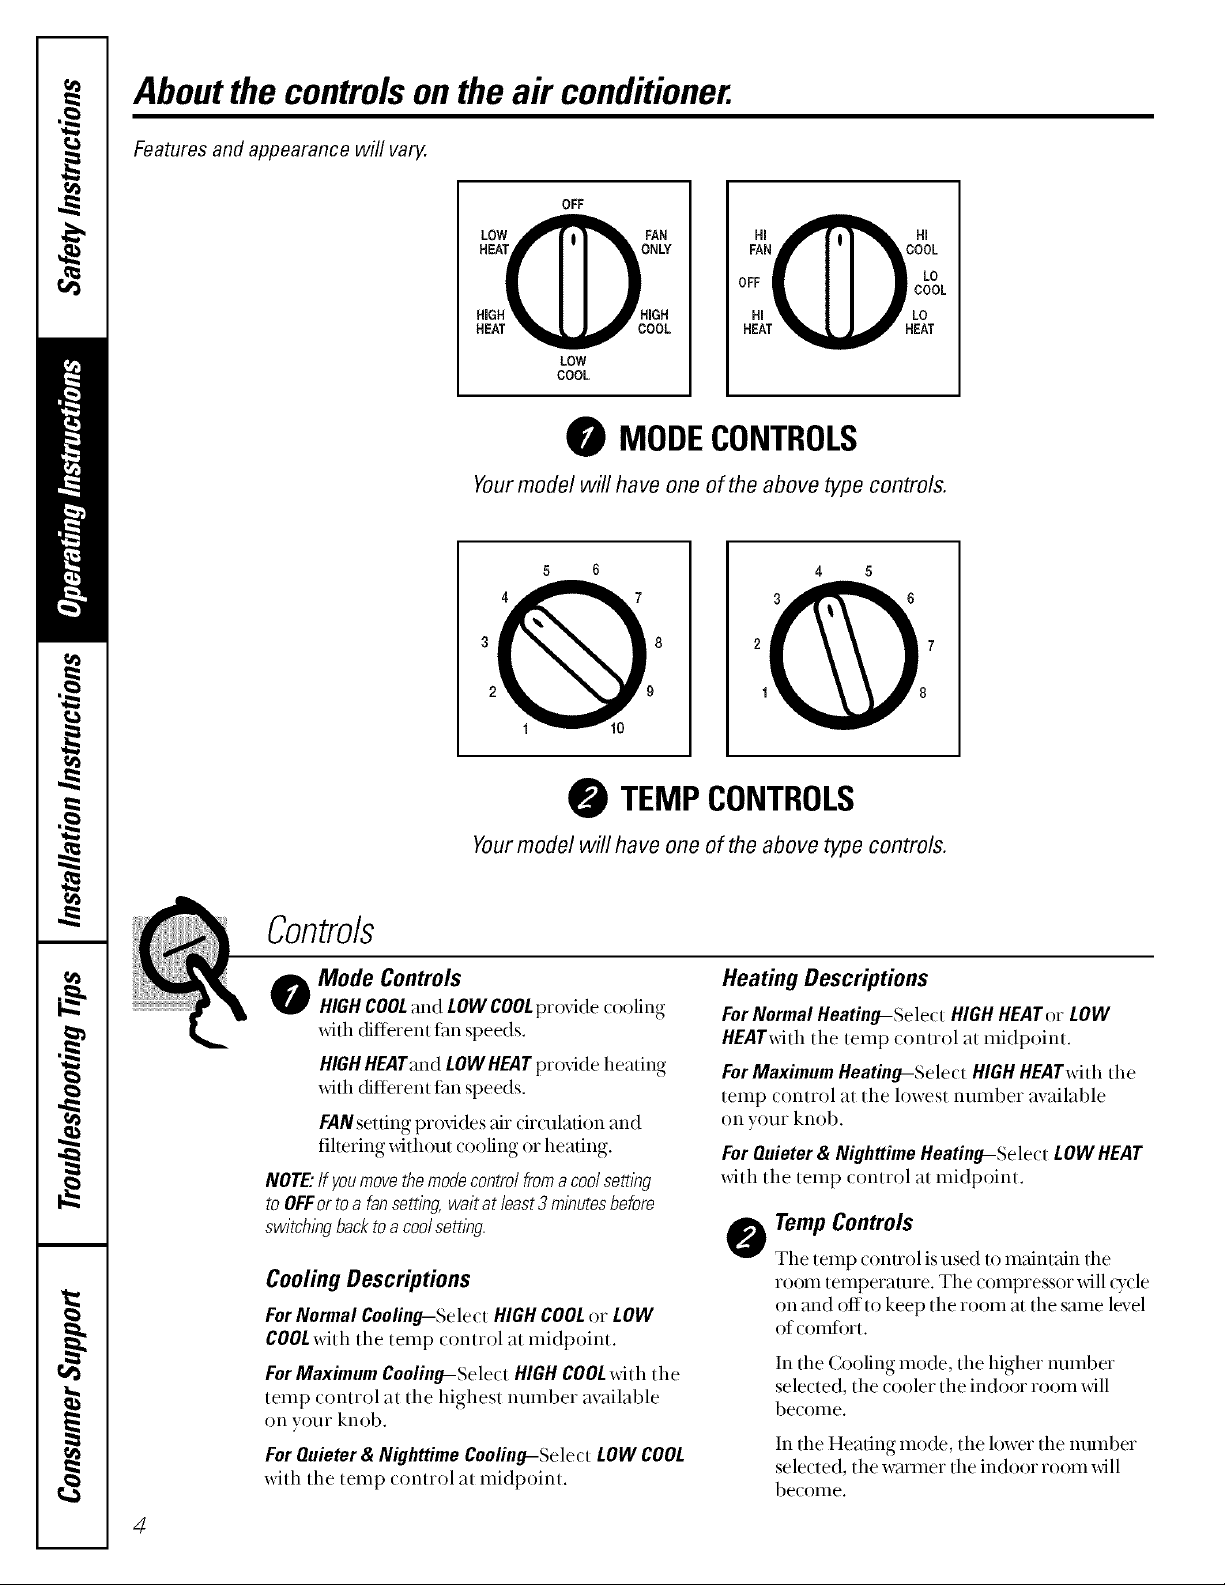
MODECONTROLS
Yourmodel will have one ofthe above type controls.
4 7 3 6
_'_co',
:,&ll i : OL
HEAT _ HEAT
3 8
2 9 1 8
IQII01
TEMPCONTROLS
Yourmodel will have one of the above type controls.
Controls
o ode Controls
HIGH COOLand LOW COOLprovide ( ooling
with (hilt'rent fhn speeds.
HIGHHEATandLOWHEATprovide heating
with different fhn speeds.
FANsetfing pr(Mdes air circulation and
fihefing _dthout (ooling or heating.
NOTE."If youmovethemodecontrolfroma coolsettlbg
toOFFortoa fansetting waitat least3 m/butesbefore
switchingbacktoa coolsettlbg.
Cooling Descriptions
For Normal Cooling-Select HIGH COOLor LOW
COOLwith the temp control at midpoint.
For Maximum Cooling-Select HIGH COOL with the
temp control at the highest number available
on your knob.
For Quieter & Nighttime Cooling-Select LOW COOL
with the temp control at midpoint.
2 7
Heating Descriptions
For Normal Heating-Select HIGH HEATor LOW
HEAT_dth the temp control at midpoint.
For Maximum Heating-Select HIGH HEATwith the
temp control at the lowest number available
on your knob.
For Quieter & Nighttime Heating-Select LOW HEAT
_dth the temp control at midpoint.
TempControls
The temp connol is used to maintain the
room temperature. The compressor will _ycle
on and offto keep the room at the same level
of comti)rt.
In tile Cooling mode, tile higher number
sele(ted, the _ooler the indoor room _dll
be(ome.
In tile Heating mode, tile lower tile number
selected, the warmer the indoor room will
be(ome.
4
Additional controls and important information.
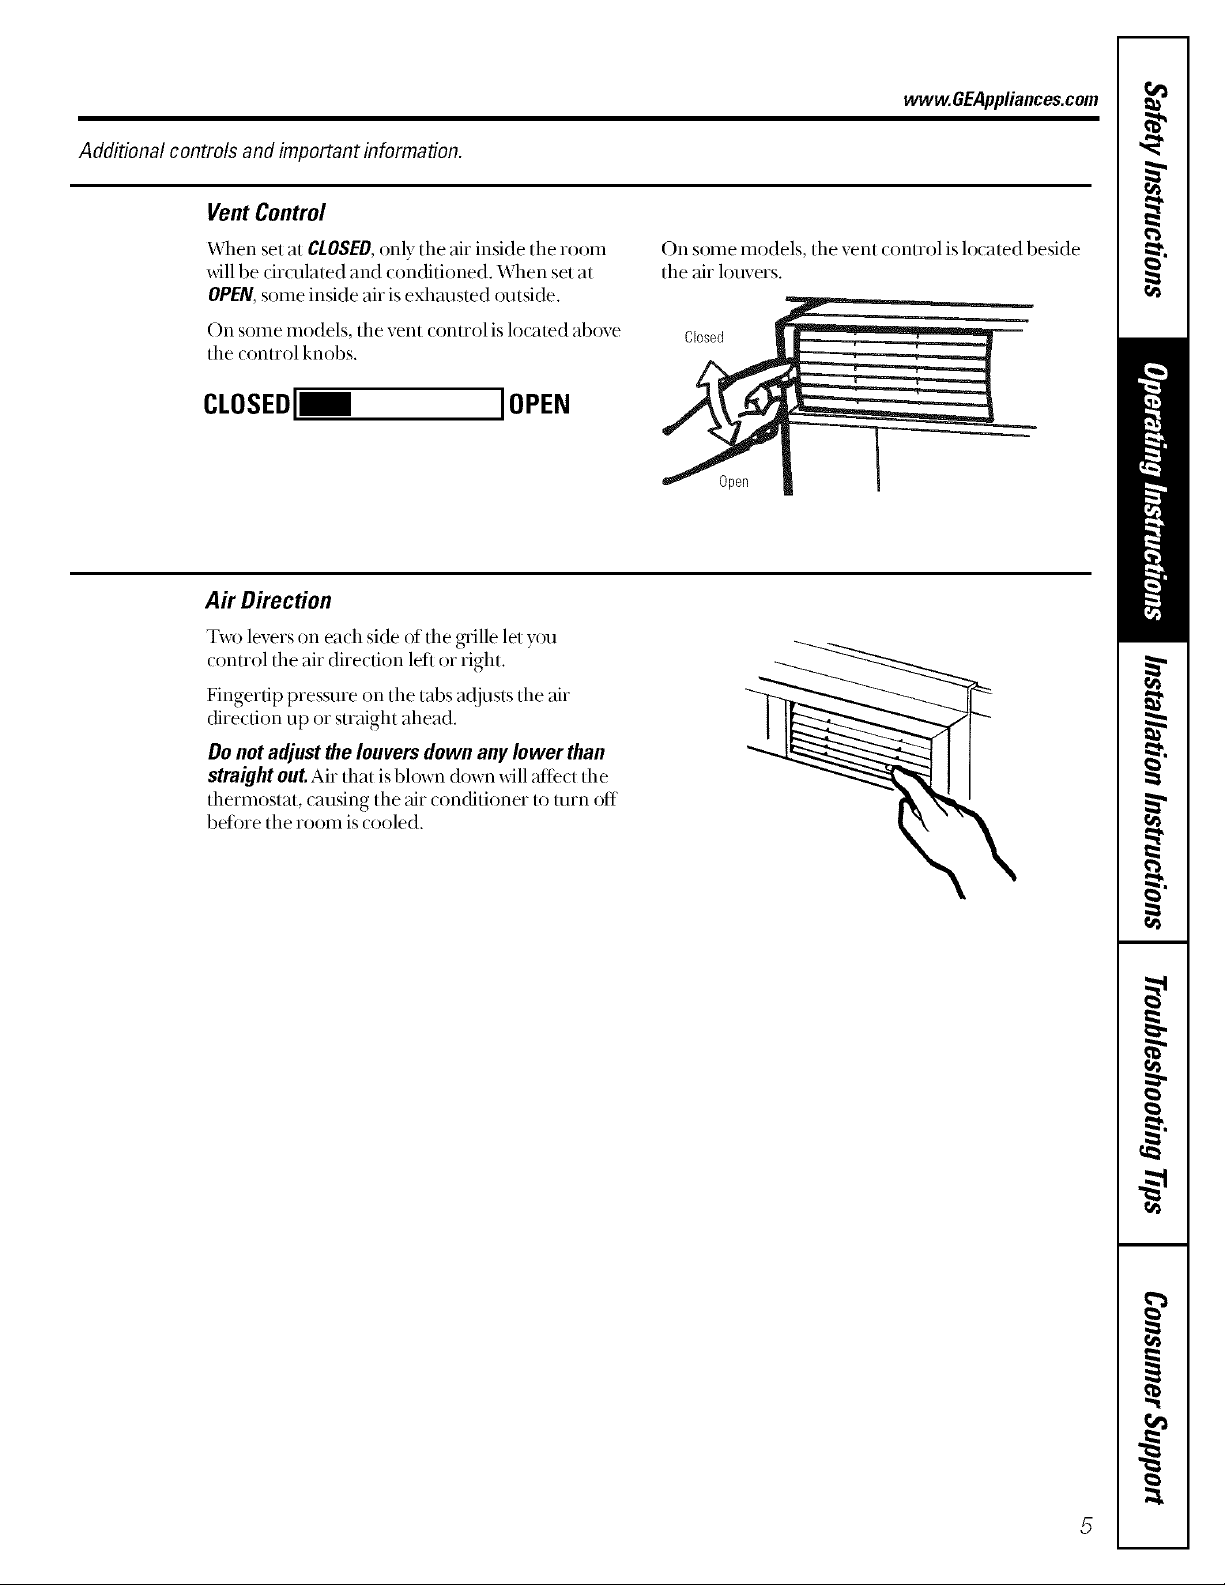
Vent Control
vvww.GEAppliances.com
When set at CLOSED,only the air inside the room
_fillbe circulated and con(fitioned, When set at
OPEN,some inside air is exhm|sted outside,
On some models, the vent control is located above
the control knobs.
CLOSEDI IOPEN
Air Direction
Two levers on each side of tim grille let you
(ontrol tile air direction left or right.
Fingertip pressure on tim tabs ac!jusls tile air
cfirecfion lap or straight ahead,
Do not adjust the louvers down any lower than
straight out.Air that isblown down will affect tile
thermostat, causing tim air concfitioner to mrn off
befi ne the room is cooled.
On some models, tim vent control is located beside
tim air louvers.
Closed
Careand cleaningof theair conditioner.
Grille and Case
Turn the air (onditi(mer off and remove the To (lean, use water and a mild detergent.
plug fl'om tile wall outlet before cleaning. Do not use bleach or abrasives.
Outdoor Coils
The coils on the outdoor side of the air conditioner
sh_mld be checked regularly. If they are clogged
with dirt or soot tile)" may be proti_ssionally slemn
cleaned, a sevvice available tlm)ugh y{)ur GE
service outlet.
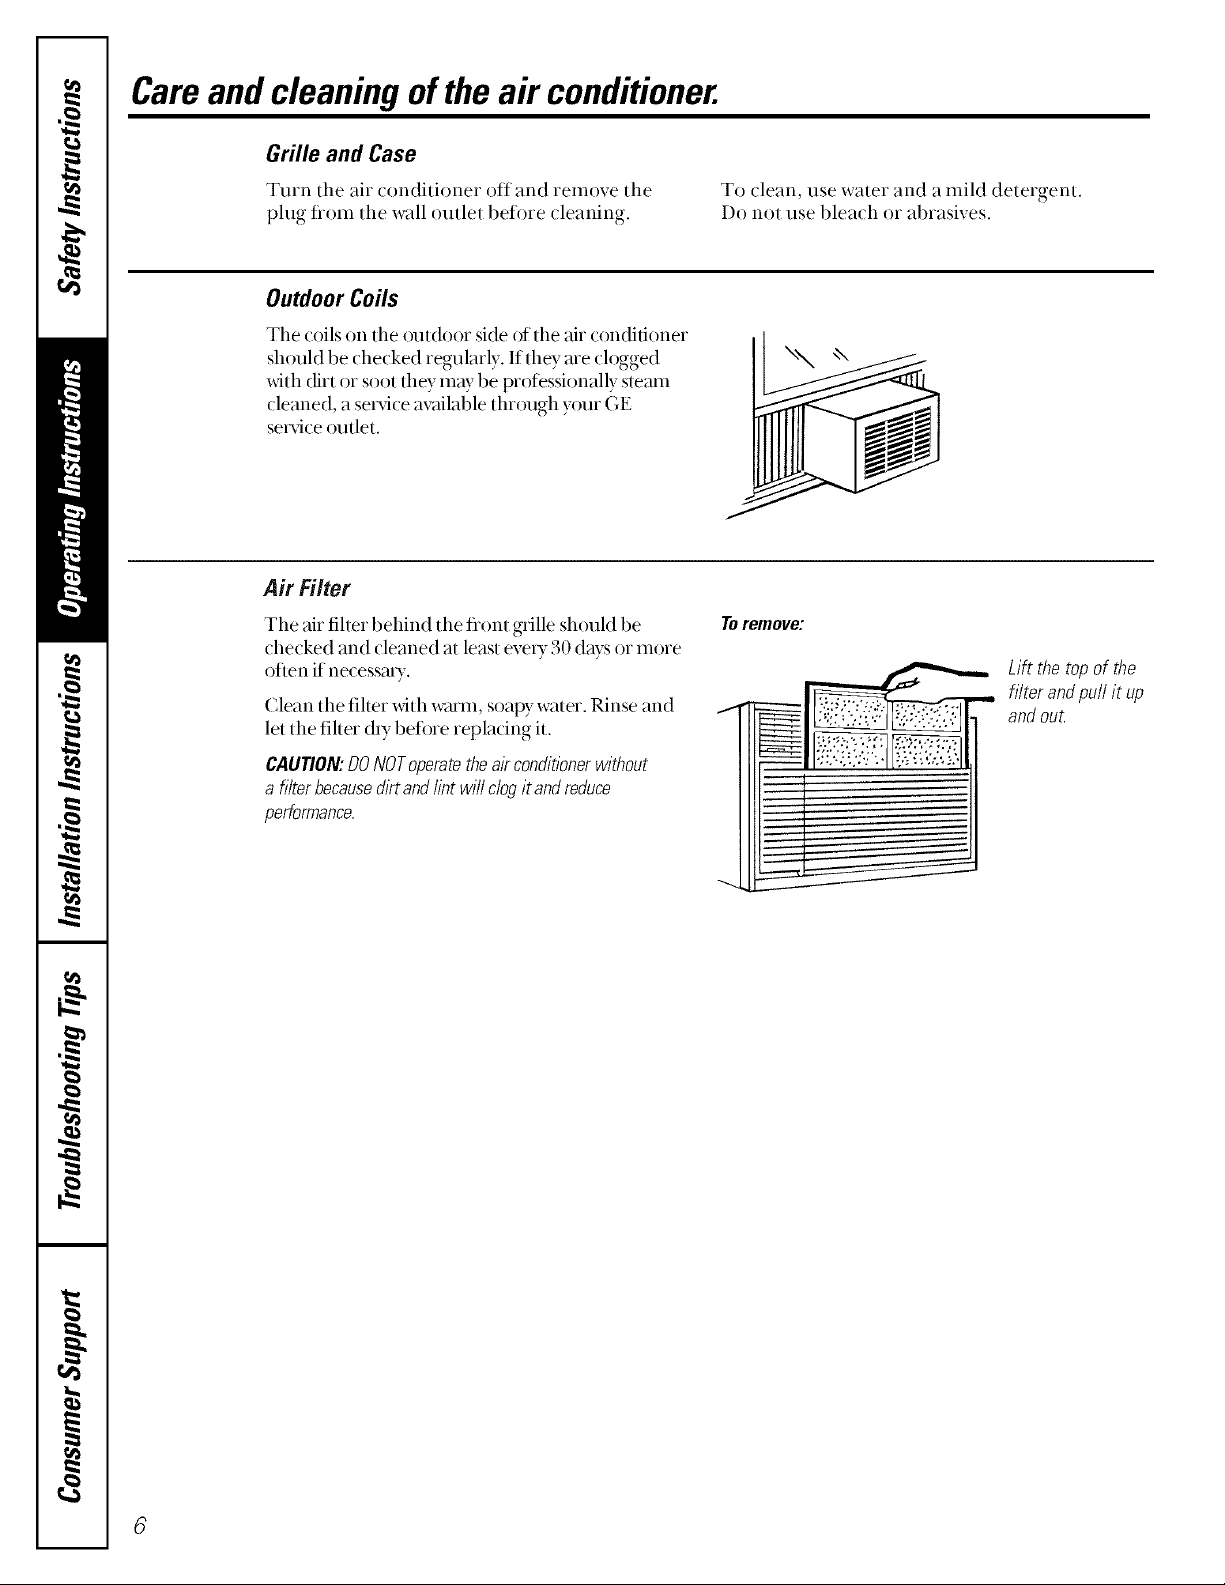
AirFilter
The air fiher behind the flont grille should be
checked and cleaned at least eve U 30 days or more
otien if necessm T.
Clean tile fiher with winm, soap} water. Rinse and
let the fiher dU betore replacing it.
CAUTION:DONOToperatetheairconditionerwithout
a filterbecausedirtandlint wi//clogitandreduce
performance.
ToremoveJ
Lift the top of the
..., filter andpull it up
and ouL
 Loading...