

Page 1
YomD~er
,-...
.—-.—...
-----—
—...-——
Use and Care of
Stindard
Automatic
Proper sorting
and loading
-_-———
Spedd
instru~ions
——
Energy-sav:
Que;ion;
Use the Problem Solver
and hrge
~othes
—
——-
drying
-———-
ng
tips
Capadty
Dryers
———
—
p2
p3
p7
p4
GENERAL
@
——...
=..
———
=. ..=
—,———..
=——
-– .
. . . . . .
=.
}I)ur I)irect I-.ine
‘1’he {;E ,inswer CenteF800
E
lECTRIC
to
.
(;eneral
Electric
.626.2000
Page 2
Help us
Safety instructions
How to sort clothes
Clean the lint filter
Careful loading means better 2
drying
Drying Guide
The Problem Solver 4,5,6
Care of your dryer
Energy-saving tips
If You Need Service
Warranty
Back Cover
1
2
2
3
7
7
9
help you. . .
Read this book carefully.
It is intended to help you operate
and maintain your new dryer
properly.
Keep it handy for answers to your
questions.
If you don’t understand something
or need more help, write (include
your phone number):
Consumer Affairs
General Electric Company
Appliance Park
Louisville,
KY40225
Write down the model and
serial numbers.
You’ll find them on a label located
on the front side of the dryer
behind the door.
These numbers are also on the
Consumer Product Ownership
Registration card that came with
your dryer. Before sending in this
card, please write these numbers
here:
Serial No.
Use these numbers in any
correspondence or service calls
concerning your dryer.
If you receive a damaged dryer,
immediately contact the dealer (or
builder) that sold you the dryer.
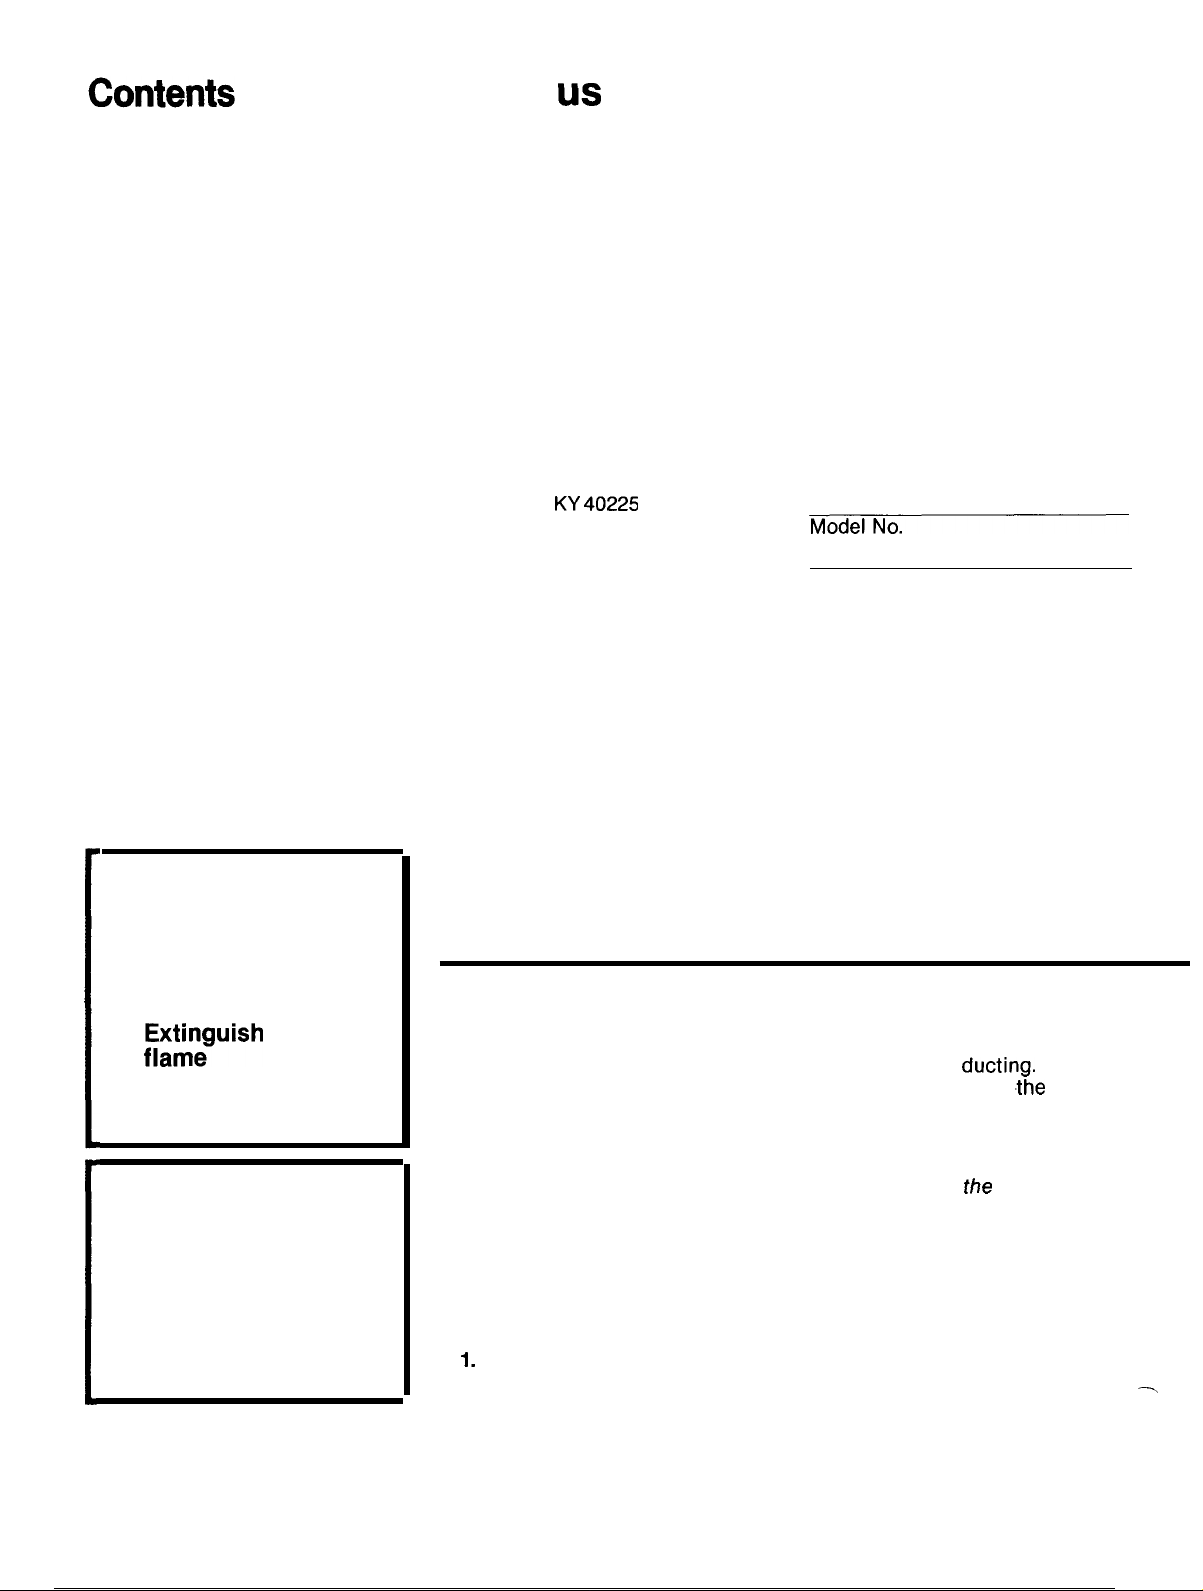
FOR YOUR SAFETY
If you smell gas:
1. Open windows
2. Don’t touch
electrical switches
fi;~~guish any open
3.
4. Immediately call
your gas supplier
FOR YOUR SAFETY
Do not store or use
gasoline or other
flammable vapors and
liquids in the vicinity of
this or any other
appliance.
Save time and money...
before you call for service
Check the Problem Solver (pages
4, 5 and 6). It lists minor causes of
operating problems that you can
correct yourself. It could save you
an unnecessary service call.
Dryer-Applied Fabric Softeners or Antistatic Conditioners
You may wish to soften your
laundered fabrics or reduce the
static electricity in them. We
recommend you use either a fabric
softener in the wash cycle,
according to the manufacturer’s
instructions for those products, or
try a dryer-added product for
which the manufacturer gives
written assurance on the package
that their product can be safely
used in your dryer. Some of these
dryer-added softeners/conditioners
have been found to cause:
1.
Clogging of lint filter, restricting
air flow necessary for the proper
functioning of the dryer.
2. Coating of dryness sensors (on
dryers so equipped) which may
result in prolonged or erratic
drying cycles.
3. Excessive lint build-up inside the
dryer and in the
build-up in the area of
heat source can possibly result in
ignition of the lint.
4. Corrosion and residue deposits
on fabric. Any of
problems, shortened dryer life, or
other unidentified problems which
directly or indirectly result from the
use of such conditioners are not
defects in material and workmanship under the terms of the
warranty accompanying this
appliance and accordingly are not
covered thereby. Service or
performance problems caused by
the use of these products are the
responsibility of the manufacturers
of those products.
ducting. Such lint
the dryer
the
above-noted
“
Page 3

IMPORTANT SAFETY lNSTRU~lONS–Save
I
These Instructions
Read all instructions betire using this
WARNING–when using this
appliance, always exercise basic
safety precautions, including the
following:
. Use this appliance only for its
intended purpose as described in
the Operating Instructions and this
Use and Care Book.
.
This dryer must be properly
installed and located in
accordance with the Installation
Instructions before it is used.
you did not receive an Installation
Instructions sheet with your dryer,
you can obtain one by contacting
the service location nearest you.
- Properly ground to conform
with all governing codes
and ordinances.
- Locate where the temperature is
50°F
(lO°C)
above
for satisfactory
operation of the dryer control
system. Install where it will not
be exposed to the weather.
- Connect to a properly rated,
protected and sized
power-
supply circuit to avoid
electrical overload.
- Exhausting to the outside is
STRONGLY RECOMMENDED to
prevent large amounts of
moisture and lint from being
blown into the room. Carefully
follow the Exhausting Details in
the Installation Instructions.
. When disconnecting this
appliance pull by the plug rather
than the cord to avoid damage to
the cord or junction of cord and
plug. Make sure that the cord is
located so that it will not be
stepped on, tripped over or
otherwise subjected to damage
or stress.
. We strongly recommend that
any servicing be performed by a
qualified individual.
. The wiring diagram for this
machine is located inside the
control panel.
To minimize the possibility
of a fire hazard.
-
70 not use heat to dry articles
Containing rubber, plastic, or
similar materials (such as padded
If
bras, tennis shoes, galoshes, bath
mats, rugs, bibs, baby pants,
plastic bags, etc.) as these
materials may melt or burn. Also,
some rubber materials, when
heated, can under certain
circumstances produce fire by
spontaneous combustion.
● Garments labeled “Dry Away
From Heat” (such as life jackets
containing Kapok) must not be put
in your dryer.
. Do not wash or dry articles that
have been cleaned in, washed in,
soaked in, or spotted with
combustible or explosive
substances (such as gasoline,
degreasers,
kerosene, etc.) which may give off
vapors that could ignite or
explode. Do not use such
substances around your washer
and/or dryer during operation.
● Any article on which you have
used a cleaning solvent, or which
contains flammable materials
(such as cleaning cloths, mops,
towels used in beauty salons,
restaurants or barber shops, etc.)
must not be placed in or near the
dryer until all traces of these
flammable liquids or solids and
their fumes have been removed.
There are many highly flammable
items used in homes such as:
acetone, denatured alcohol,
gasoline, kerosene, some
household cleaners, some spot
removers, turpentines, waxes, wax
removers and products containing
petroleum distillates.
● Clean the lint filter each time
the dryer is used to prevent lint
accumulation inside the dryer or in
the room. DO NOT OPERATE THE
DRYER WITHOUT THE LINT
FILTER IN PLACE.
. Keep area around and
underneath your appliance free
from the accumulation of
combustible materials, such as
lint, paper, rags, chemicals, etc.
To minimize the possibility of
injury.
● Never reach into the dryer while
the drum is moving. Before
loading, unloading or adding
clothes, wait until the drum ‘has
completely stopped.
appfiance.
dry-cleaning solvents,
● Close supervision is necessary if
this appliance is used by or near
children. Do not allow children to
play inside, on or with this
appliance or any discarded
appliance. Dispose of discarded
appliances and shipping or
packing materials properly. Before
discarding a dryer, remove the
door of the drying compartment.
● Keep all laundry aids (such as
detergents, bleaches, fabric
softeners, etc.) out of the reach
of children, preferably in a locked
cabinet. Observe all warnings
on container labels to avoid
personal injury.
● Keep the floor around your
appliances clean and dry to reduce
the possibility of slipping.
● Do not dry fiberglass articles in
your dryer. Skin irritation could
result from the remaining glass
particles that may be picked up
by clothing during subsequent
dryer uses.
● The laundry process can reduce
the flame
retardancy of fabrics. To
avoid such a result, the garment
manufacturer’s care instructions
should be followed very carefully.
● Never climb on or stand on the
dryer top or door.
● To minimize the possibility of
electric shock, unplug this appliance from the power-supply before
attempting any maintenance or
cleaning (except the removal and
cleaning of the lint filter).’
NOTE: Turning the Cycle Selector
Knob to an OFF position does
NOT disconnect the appliance
from the power-supply.
● Do not operate this appliance if
it is damaged, malfunctioning,
partially disassembled, or has
missing or broken parts, including
a damaged cord or plug.
● If yours is a gas dryer, it is
equipped with an automatic
electric ignition and does not have
a pilot light. DO NOT ATTEMPT TO
LIGHT WITH A MATCH. Burns may
result from having your hand in the
vicinity of the burner when the
automatic ignition may turn on.
1
Page 4
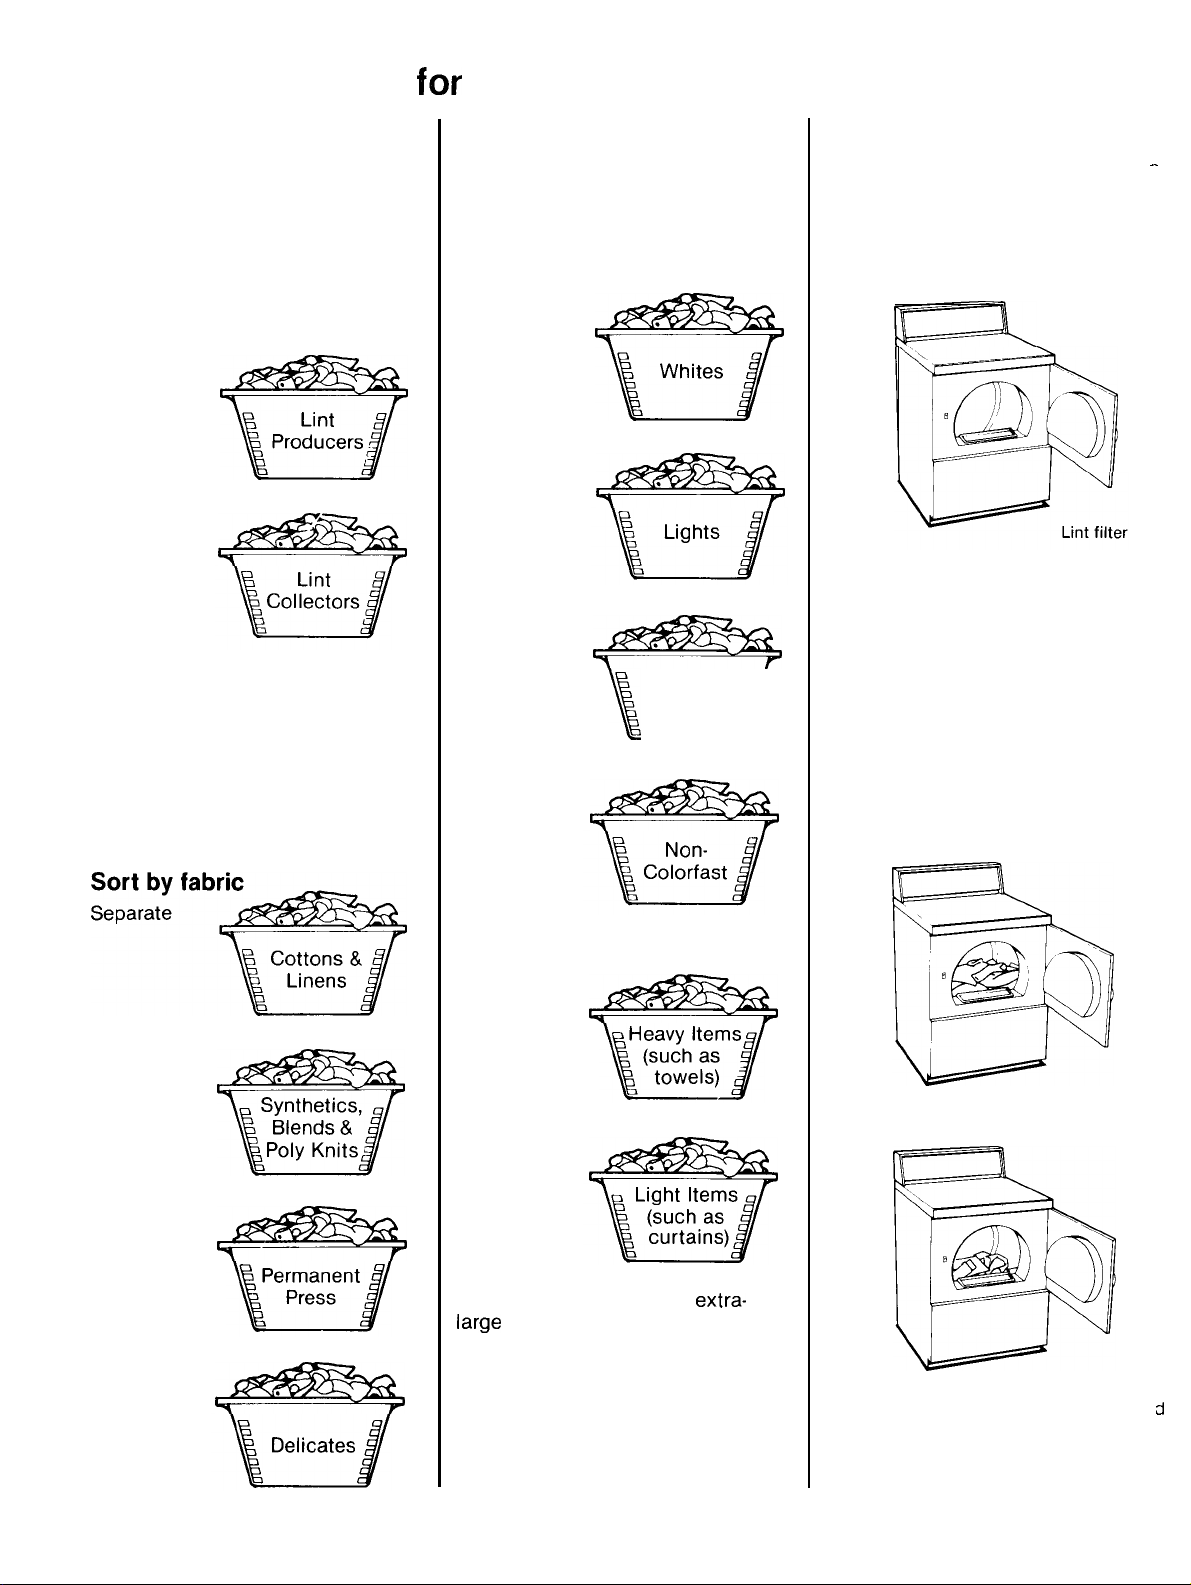
How to sort clothes for drying
Normally, if you have sorted
clothes correctly for washing, you
will also have properly sorted
drying loads.
Here are some additional
suggestions for good dryer load
make-up:
Sort by surface texture
Separate
from
LINT PRODUCERS—such as
terry toweling and chenille—give
up lint.
LINT COLLECTORS—such as
man-made fibers and napped
fabrics like velveteen and
corduroy—attract lint. These
must be dried separately.
In addition to sorting to reduce
lint collection, it is recommended
that fabrics of similar construction be dried together whenever
possible.
Sort by color
Separate
from
from
\
arks/
from
Clean the lint filter before
drying every load.
Clean lint filter (see shaded area)
by putting your moistened fingers
at the corner of filter and wiping
in a downward motion all the way
across to the other corner.
For additional information on lint
filter, see page 7.
Careful loading means
better drying.
Don’t overload your dryer.
Crowded loads don’t dry
efficiently and clothes may be
unnecessarily wrinkled.
Loads should look like this:
.-
—
from
from
from
Sort by weight
Separate
from
For information on drying
Iarge
items and different fabrics
and loads, see page 3.
extra-
Drum with
Cottons & Linens
Drum with -
Permanent Press
d
2
Page 5

Drying
guide
for different fabrics and loads
Save and Refer To Garment Manufacturers’ Drying Instructions
)ric
Care/
oad
!ing
Special Instructions
ection
Cottons &
Permanent Press
Polyester Knits
Silks, Wools, *
Blends with Wool
Rayon and Acetate
Baby
Sturdy: Diapers,
Nightgowns, Shirts,
Pads, Sheets,
Receiving Blankets,
Coveralls. See
Special Instructions.
Baby
Delicate
Blankets—Wool,
Part Wool, Cotton.
See Below Under
“Extra-large Items”
~rtains,
covers.
DO NOT MACHINE
DRY
Linens
Clothes—
Clothes—
Slip-
DraDeries.
FIBERGUSS.
High or
Normal Heat
Medium or
Normal Heat
Low Heat
Low Heat
Low Heat
High or
Normal Heat
Low Heat
High or
Normal Heat
High or
Normal Heat
Do not overload dryer; clothes should tumble freely. Remove as soon as
dryer stops, place clothes on hangers to minimize wrinkling.
Do not overload dryer; clothes should tumble freely. Remove as soon as
dryer stops, place clothes on hangers to minimize wrinkling.
IMPORTANT. If children’s
on Low Heat or Delicate Cycle. High heat or excessive drying can
reduce the flame
drying instructions.
See above instructions.
Place in dryer with 3 or 4 dry towels which have been heated for 5
minutes. Set timer for 20 to 25 minutes. Do not set control for more than
25 minutes. Do only one blanket at a time. Remove blanket at end of
cycle and block blanket back to original shape. Press binding with warm
iron. Allow to dry before storing.
Use dry towels as buffers. Set timer for 20 minutes. Check at end of 20
minutes. If items are still wet, reset for 15 minutes and check again.
Items should be removed while still damp. Place slipcovers on furniture
immediately. Hang draperies and curtains so that creases will fall out.
retardancy of these fabrics. Check manufacturer’s
sleepwear is made of Modacrylic dry only
Chenille Bedspreads, Robes.
See below under
“Extra-large Items”
Rubber-coated items,
laminated fabrics,
vinyl, plastics and
articles with plastic
trim.
Extra-large
queen or king size
sheets, blankets or
spreads, sleeping
bags, insulated
jackets or suits,
mattress covers
(pads), quilted
bedspreads
Pillows—Feather
and Polyester-filled
(if manufacturer
recommends they
be dried in a dryer).
See Special
iructions.
●
NOTE:
ltems—
Woolens may be dried in your dryer only if recommended by the garment manufacturer.
High or
Normal Heat
Fluff
(No Heat)
High or
Normal Heat
High or
Normal Heat
Dry on FLUFF (No Heat) setting as heat may cause alteration in shape,
color and appearance of such articles.
Special precautions must be taken to dry extra large items. Set dryer for
20 minutes then check carefully. Set 15 minutes for second setting, check
again; and 5 minutes for each additional setting. Make sure that article
does not fill drum. Many large articles, when wet, have ample room in
dryer, but as they dry and fluff up may not have room to tumble. Check
carefully every few minutes and if article is still wet or damp and fills
dryer, finish drying on line. Do not, under any circumstances operate
dryer for longer times without checking. CAUTION: If large items do not
have room to tumble, the air flow may be blocked which could result in
scorching your valuable items. Man large items, like shag
be dried in home size dryers.
Check ticking for holes or weak seams where feathers or filling could
escaDe. Drv
time.’ Stop dryer occasionally and shake pillows to
more even drying. Check pillows at end of drying time. If they are
not completely dry, return them to dryer and reset for more drying time.
Feather pillows dry very slowly and must be dried completely to prevent
mildewing.
no more than one
DO NOT dry
pillows containing Kapok.
J
DO N T dry
Dillow
at a time and set dryer for maximum
jackets containing
redist~ibute
ru
s, cannot
R
apok.
filling for
3
Page 6

=
–~~ Questions?
z
Use This Problem Solver.
PROBLEM
DRYER WON’T START
POSSIBLE CAUSE AND REMEDY
Make sure power cord is plugged in.
Check household fuses or circuit breakers. Most electric dryers use
two.
Make sure controls are set and START switch is pressed or turned.
Opening the door during operation stops the dryer. To
the door and press or turn the START switch.
re-start, close
CLOTHES TAKE
TOO LONG
TO DRY
Make sure door is securely closed. Dryer will not run with door open.
Do not operate other appliances on the same electrical outlet or
circuit while the dryer is operating.
Make sure all controls are correctly set for the load you want to dry.
See your Operating Instructions leaflet.
Lint filter may be clogged. Remove and clean filter before every load.
Periodically clean area under lint filter with a vacuum cleaner. (See
Z)
page
Make sure dryer is properly ducted according to Installation
Instructions.
Duct may be obstructed. Make sure it is clean and free of obstruction
and that damper in outside wall cap operates easily. If
ble, make sure it is not kinked and is properly installed according to
Installation Instructions.
ducting is flexi-
4
Page 7

PROBLEM
POSSIBLE CAUSE AND REMEDY
CLOTHESTAKE
TOOLONG
TODRY
SHRINWGE,
GENERAL
House fuse may be blown or circuit breaker tripped. Check fuses or
circuit breaker. Most electrical dryers use two. It is possible for one to
be blown or tripped and the dryer will still tumble without heat.
Load may be improperly sorted. Do not mix heavy, hard-to-dry items
with lightweight articles.
Large load of moisture-holding fabrics, such as beach towels, take a
long time to remove moisture.
Too many items in dryer. Dry only one washer load at a time. Do not
combine loads.
Too few items in dryer. If drying only one article, add two similar
articles, even if dry, to insure proper tumbling.
120-Volt operation. Drying on this circuit takes about three times as
long as on a 240-Volt circuit.
Some fabrics will shrink whether machine washed and tumble dried
or washed by hand and drip dried; others may be safely washed but
will shrink in a dryer. Follow Garment Manufacturers Care
tions exactly. If in doubt, do not machine wash or dry.
instruc-
SHRINKAGE,
KNITS
Relaxation shrinkage can occur in knit fabrics that have been improperly stretched and elongated by the manufacturer. When this occurs,
garment may be pressed back into shape after each wash and dry
cycle.
is
Progressive or delayed shrinkage
some fabrics) is gradually removed by laundering. May be noticed in
older garments that have been laundered many times without
previous shrinkage. Treat as for Relaxation Shrinkage above.
Shrinkage caused
have been heat-shaped. When washing, drying or ironing temperatures
exceed the temperatures used to shape set, shrinkage may occur.
This cannot be corrected, but it can be prevented by washing in cool
or warm water; drying on Low or Delicate heat.
by overheating occurs in certain knit fabrics that
5
caused when starch or sizing (in
Page 8

The Problem Solver (continued)
PROBLEM
WRINKLING IN
PERMANENT PRESS
AND “NO-IRON”
ITEMS
POSSIBLE CAUSE AND REMEDY
Leaving clothes in dryer after tumbling stops. Remove and hang
clothes immediately.
Too many clothes in dryer. Dry only one washer load at a time. Do not
combine loads.
Too few items in dryer. If drying only one article, add two more similar
articles, even if dry, to insure proper tumbling.
Improper loads. Avoid laundering heavy Permanent Press items, such
as work clothes with lighter Permanent Press items such as shirts or
blouses. Do not dry Permanent Press with regular laundry.
Too many clothes in washer. Permanent Press loads should always be
smaller than regular
clothes room to move freely.
Incorrect wash and dry cycles. Use Permanent Press Wash Cycle
which provides a
Permanent Press Dry cycle.
Incorrect water level. Use Full Water Fill for Medium Load, Medium
Fill for Small Load.
Repeated washing in too hot water. Wash in cool or warm water with
plenty of detergent.
Ioads... no more than medium loads to give
cooldown rinse to minimize wrinkling. Also use
Accumulation of lime scale due to use of carbonate detergents. If you
must use a non-phosphate detergent, avoid the use of
built detergent.
Failure to use fabric softener. Proper use will minimize wrinkling.
To remove wrinkles:
1.
Retumble on “Permanent Press” setting.
Rerinse
2.
3. If unsuccessful,
hang immediately.
4. Iron carefully.
5. Send to
6. Some wrinkles may remain which cannot be removed.*
and dry on “Permanent Press” setting.
retumble on high heat for 10-12 minutes and
Drycleaners for pressing.
high-carbonate-
● NOTE: If you follow good laundry procedures and Permanent Press
clothes still come out wrinkled, the finish may not be good quality.
Also, in Permanent Press synthetic/cotton blends, the cotton portion
of the fabric can eventually wear away leaving only the synthetic.
Since it’s the cotton portion which is treated for Permanent Press, a
loss or decrease of Permanent Press performance will result.
—
If
you need more help... call, toll free:
The GE Answer
Center@
800.626.2000
consumer information semice
6
Page 9

:“~ood
(he Drum. Porcelain enamel drum
is rust-resistant and requires no
special care.
The Exterior. Wipe off any spills or
washing compounds. Wipe or dust
with damp cloth. Try not to strike
the surface with sharp objects.
The Lint Filter. Wipe lint filter
before every use as described on
page 2. Periodically lint filter
should be removed and suction
hose from
be inserted into the opening.
See below.
~
dryer
care
vaccum cleaner should
L-
----
. . . . . . .
,
‘“\
,;, .,,-------
,.
. . . .
ra
JO
not obstruct the flow of combustion and ventilating air. On
large capacity models, the air
intake is located on rear of dryer.
To store dryer: For short period of
time, disconnect power supply and
clean lint filter.
L
.
I j –:
CAUTIONS:
●
When converting dryer to
f~om
240-volt operation
lint filter and duct work must be
thorouahlv cleaned. Then set dial
15-~inute operation and run
for
dryer without clothes until it
shuts off.
●
Before having your electric dryer
connected in your new residence,
be sure your licensed electrician
confirms that the supply voltage
matches the voltage specified on
the rating plate.
●
Dryer control panel and finishes
may be damaged by some
laundry pre-treatment soil and
stain remover products if such
products are sprayed on or have
direct contact with the dryer.
Apply these pre-treatment
products away from the dryer.
The fabric may then be washed
and dried normally. Damage to
your dryer caused by pretreatment products is not
covered by your warranty.
120-volt,
Er~ergy-Saving
● Sort clothes by weight so that
you won’t have to
cycle for one or two heavier,
slower-drying items. (See How
to Sort Clothes for Drying.)
●
Do not overload dryer. For
efficient drying, clothes need
to tumble freely.
●
Use Automatic Drying Cycle
whenever possible (on dryers so
equipped) to help prevent
overdying and save energy.
●
To help prevent ironing, use
Permanent Press or Knits Cycle.
Remove garments immediately
at end of drying cycle and place
on hangers.
●
The hotter the drying temperature the more energy that will be
used. Use the lowest possible
setting that will dry load in
reasonable time.
●
Dry your clothes in consecutive
loads. Using a “warm” dryer will
save energy.
●
Clean dryer lint filter each time
dry
you
● Clean dryer exhaust ducting
occasionally. A partially clogged
exhaust can lengthen drying
time.
Tips
r~n
an extra
i+ow
to
rep~ace
Drum Lan3~I (
BEFORE REPLACING LAMP BE
SURE TO UNPLUG THE DRYER
POWER CORD. Press lamp into
socket and rotate counter clockwise 78 turn and remove. To install . . .
place new lamp in socket, press
and rotate
General Electric lamp No. 10C7DC,
or equivalent.
~8
turn clockwise. Use
7
Page 10

8
Page 11

If You
To
obtain service, see your warranty
>n
the back page of this book.
We’re proud
Ned Sewice
of our service and
want you to be pleased. If for some
reason you are not happy with the
service you receive, here are three
steps to follow for further help.
FIRST, contact the people who
serviced your appliance. Explain
why you are not pleased. In most
cases, this will solve the problem.
NEXT, if you are still not pleased,
write all the details—including your
phone number—to:
Manager, Consumer Relations
General Electric
Appliance Park
Louisville, Kentucky 40225
FINALLY, if your problem is still not
resolved, write:
Major Appliance
Consumer Action Panel
20 North
Chicago, Illinois 60606
Wacker Drive
9
Page 12

E
L
Save proof of original purchase date such as your sales slip or cancel led check to establish warranty period.
WHAT
is
COVERED
AUTOMATIC CLOTHES DRYER
RANTY
FULL ONE-YEAR WARRANTY
For one year from date of original
purchase, we
charge, parts and service labor in
your home to repair or replace
part of
of a manufacturing defect.
will provide, free of
the
dryer that fails because
any
~m
This warranty is extended to the
original purchaser and any succeed-
ing owner for products purchased
for ordinary home use in the 48
mainland states, Hawaii and
D.C.
Washington,
warranty is the same except that it
is LIMITED because you must pay
to ship the product to the service
shop or for the service technician’s
travel costs to your home.
All warranty service will be provided
by our Factory Service Centers or
by our franchised Customer
servicers during normal working
hours. Check the White Pages for
GENERAL ELECTRIC COMPANY
or GENERAL ELECTRIC FACTORY
SERVICE. Look in the Yellow
Pages for GENERAL ELECTRIC
CUSTOMER
GENERAL
CUSTOMER
In Alaska the
Care”
CARE”
SERVICE or
ELECTRIC-HOTPOINT
CARE”
SERVICE.
WHAT IS
I
NOT
COVERED
Some states do not allow the exclusion or limitation of incidental or consequential damages, so the above limitation or exclusion
may not apply to you. This warranty gives you specific legal rights, and you may also have other rights which vary from state to state.
To know what your legal rights are in your state, consult your local or state consumer affairs office or your state’s Attorney General.
If further help is needed concerning this warranty, contact:
Manager—Consumer Affairs, General Electric Company, Appliance Park, Louisville, KY 40225
● Service trips to your home to
teach you how to use the product.
Read your Use and Care material.
If you then have any questions
about operating the product,
please contact your dealer or our
Consumer Affairs office at the
address below, or call, toll free:
The GE Answer
800.626.2000
consumer information service
● Improper
If you have an installation problem,
contact your dealer or installer.
You are responsible for providing
Warrantor: General Electric Company
Center@
instal Iation.
adequate electrical, gas, exhausting and other connecting facilities.
● Replacement of house fuses
or resetting of circuit breakers.
. Failure of the product if it is
used for other than its intended
purpose or used commercially.
. Damage to product caused
by accident, fire, floods or acts
of God.
WARRANTOR IS NOT RESPONSIBLE FOR CONSEQUENTIAL
DAMAGES.
Part No. 141 A5599
Pub. No.
1-86
4g-g45g
P198
GENERAL
@
ELECTRIC
—
 Loading...