

Page 1
©
Safety Instructions ........... 2, 3
Operating h_O'uctions
Comrols_kmtrol Fmobs ..... 6, 7
Comrols_I'ouch Pads ........ 4, 5
Care and Cleanir_
Air Filter . ..................... 8
Bait( rics ...................... 8
(;rille and (_se ................ 8
Outdoor Coils ................. 8
Installation Instructions
Through-th(_Vall
Insmllation--O[)tional ......... 15
Window Installation ......... 9-14
7)+oubleshootirN Tips ......... 16
N<mnal Op( rating Sounds ..... 16
ge.com
A& 114"
ASQlS
A S1,l8
ASWI 8
©
Consun_r Support
(kmsum( r Support ............ 20
Product Registration ....... 17, 18
Warramy ..................... 19
*ENERGY ST2d_ _ label(d produ(t
ENERGYSTAR
.ks +ill ENERGY STAR _0 p_wtllcl ", GE h_ls
determined that this produ(t meets
the ENERGYSTAR_'guidelines for
el'm rgT eflicienc>
Write themodeland serial numbers here:
Model #
Serial #
Find tilt+st+tmmbt, rs on a l_d)el on the
side ,.)fthe air o.)nditionel:
49-7582 11-07JR
Page 2

IMPORTANTSAFETYINFORMATION.
READALLINSTRUCTIONSBEFOREUSING.
A WARNING!
For your safeW, the information in this manual must be followed to minimize the risk of fire, electric shock
or personal injury
SAFETYPRECAUTIONS
?;2Use this appliance only tor its intended
ptupose as described ill this ()wn(r's
Manual.
_; This air conditioner must be properly
installed ill all ordan/e with tile his(alia(ion
Instructions before it is tts(d.
_; Never unphtg your air conditioner by pulling
on th( power cord. _Mways grip plug firtnly
and pull straight out fi'onl the re(epm(le.
;;2Ilepktce itnniediat<'ly all electric selwi(:e
cords that have becoln<: fl_ayed or other,rise
dalnaged. A dalnaged ltower supply cord
nlust be replaced with a new power SUl)ply
cord ol)tained ti-oln the mantdimtm-(r and
not lepair<:d. Do not us( a cord that shows
crocks or abl_lsion /]anlage along its length
or at either the phtg or connecU)r end.
_'2If'tile rl'cepmcle does not nlatch th( phtg,
_; Turn th( unit OFFand tnlplttg your air
{_;For your safetv...do not stor( or use
{_;All air conditioners contain refl-igemnts,
HOWTOCONNECTELECTRICITY
th<: r(cepmcle ntust b( chang<'d out l)y a
qttalifled <4<!ctrician.
conditiolmr belbt ("nlaking ally t ('l)ails
or cleaning.
NOTE: Westrongly recommendthatanyservicing
be performedbya quafifiedindividual
(onibustible tnat( l_ials, _lsolille or other
flamtnable w_pors or liquids in tit<! vicinity
of this or ally oth(r altpliance.
whilh till(let fbd< ml law IIIllSt })e reHloved
prior to prodtu t disposal. [t 7,ou art getting
lid ot an old product with r(fiqgciwnts, ch(ck
with the / ompany handling disposal about
what to do.
Do not, under any circumstances, cut or remove
the third (ground) prong from the power cord. For
personal safeW,this appliance must be properly
grounded.
DONOTuse an adapter plug with this appliance.
Th( power cord of this altpliance is (quil)ped
with a 3-prong (grounding) plug whi/:h mates
with a standard ?.prong (grounding) _ll
outl(t to minilnize tile possibility ot ele(tri(
sllock hazard fi-om this applian(e,
Power lord illchldes a ( IllIX!Ill ititelTtl})t< I"
device. A rest and reset button is provided on
the plug (as<:. The devi(e should be t< st_ d on a
p(lJodic ltasis by filst pr(ssing th( TESgbtlt_Oll
and (lien th( HESETbutton while phlggcd into
th<! otttlet. If die rESTbutton d/)es not u-ip
or it die RESgTbtmon will no_ stay (ngagt d,
dis(ontimle use of tile air (onditioner and
contact a qualified ser,ice t_chnician.
tLtve tile wall outlet and citx:uit checked by a
qualified ele( tti(ian to make sure the outlet is
properly grounded.
"_\]lere a 2-prong _ntll outl(t is en/:otnlt_ r(d,
it is your personal responsibility and obli_,tion
to have it rel)laced with a properly groltnded
3-prollg _tll oudet.
The air condition(r should ab_tvs lie
plugged into its own individual electrical
outlet which has a vohage rating that nlatches
the lating plato.
This provides file best p(rlolntanc( and also
prevents oxerloading house wiring ( ircuits
which could cause a fire hazard tiwtn
ovelhealed wit( s.
Set the his(alia(ion [nsttttctions, Electrical
Requirements sc(tion tor spe(iti( eh'(tl'i(al
( onne(tion rcquirelncnts.
2
Page 3

WARNING!
ge.com
USE
Because of potential safety hazards under certain
conditions, we strongly recommend against the
use of an extension cord.
[/ow¢xet, if you mus{ use all extension cord,
it is absohm ly ne cessat T that it be a 1JL-lismd,
14 gauge, _wire grounding _3pe applian_ _
extension cord having a gromlding type plug
and outlet and dmt the elecu'ical rating of the
co_*l be 15 amperes (minimum) and 125 vohs.
CORDS--115-Voltmodelsonly
CAUTION:
DO NOT usean extension cord with any of the
230/208 voltmodels.
READANDFOLLOWTHISSAFETYINFORMAtiONCAREFULLY.
SAVETHESEINSTRUCTIONS
3
Page 4

Aboutthecontrolsontheair conditioner--modelswith touchpads.
Features and appearance wil! varg
COOkOn
[NERGY
SAVEROn
SLEEPOn
Air ConditionerControls RemoteControl
O On/Off
Tunis air (onditi(mer on and ofl_
@ Display
Displaysthe s(t IOHII)eI'_IIHFI_I01"tiIll_'
renlaining on timeL
O Mode
[s_ 1o s(t tim air (ondilioner 1o Cooler Fae
ll]o(le.
Increase •/Decrease • Pads
[ S( I0 S([ I(!lll[)eFaltll-( whel] h l Coolll]od(L
OFan
Us( Io s(t Ihe fhn spe(d at Low, Medor High.
O Cireulaire (onsomemodels)
r]'Hlll Oil [0 pFovid( (onlinuous sid( 4o-sid(
air circulalion.
For fixed side4o_ide air dir( el]on, turn On
until lh( desired air dir( (lion is obtained,
then lllFII it 01_
EnergySaver-Conm:4s th_ fan.
O
Oe_I'he fan and compressor Qcle oll mid
off'. This results in wider vmiations el teen1
tempeF, mlre and humid] b. Normally used
when the room is unoccupied. Note: The fan
will continue to run for a short time after the
compressor cycles off.
0
0
0
Timer
O
On--When the air conditioner is off', it can b(
s(t to automatically mm on in l to 24 hours
at ils pr(vious setting. Each 1ouch will set the
lime in hour_.
Off--When the airconditioneris on, il can
be set IO automalically II/FII offill 1 I024
hours. Each touch will set the lime in houl_s.
To cancel the tilnm; press the Timerpad
until file displa? time disappe_lrs.
Sleep (onsomemodels)
O
Press to set the air (onditioncr to run for
8 hours bel;_re it automat]call) shuts otE
One hour after lhe aloe l) timer is set, th( s(t
mmperamre will auumlaticallv increase 2°E
To cancel th_ sl(ep too&, pr(ss Ihe Sleep pad
_1 se(olld []Ill(,
Note:Thesleep timer willbe cancelledif the
Timer,EnergySaveror Modepad ispresse&
Remote ControlSignal Receiver
@
Off_I'he fhn runs all the time, while die
comprc_sor cycles on and off\
rI'his _,wil(h nlust be set at Oftin order to use
the fhn settings (on the mrxle control).
Remote Control
To ensure prol)( r Ol)(mtion, aim th(
1-011]o[(!(ontrol al Ill( signal F(?C(iV( 1-
011 [h( ail- (Olldi[ioll(E
4
;, 1 he remote control signal has a rang( of
up to Ol fleet.
i!i:"Make sure nothing is betw(en the air conditioner
and the remote colin-el that could [)lock the
signal
i!i:"Make sure l)attelies arc fl-esh and installed
corr(,ctlv--_ee the Care and Cleaning section.
Page 5

Additional controls and important information.
DoNot OperateinFreezingOutdoorConditions
This (eel-only air (onditioncr was not (h,_ign(,d tor
fi-(czing ol/tdoof conditions. It I]]llSt l]Ot l)c lls(d ila
fi-eezing outdoor conditions.
When the air conditioner is turned on, it will
automatically start in the setting last used.
Power Outage Recovery Feature
In the c_lst"ota power outage or interruption, the Sleepfbamrcs _ill reset 1(7tim origin_d setting.
unit will automatically re,tart in the settings lasl You ma? ne(d to set a new time it desired.
used after the power is reslore(l. The rlmerand
Cool Mode
ge.com
l_se the Coolmode with High(3),Med (2)or
Low(1)fhn for cooling. Lse lhe Increase• /
DecreaseV pa(Is 1o set the desired temperature
between 64°F and 86'F in l°F incl-enlents.
CoolingDescriptions
ForNormalCooling--Sele(t tim Coolmode
and High(3)or Med (2)thn with a mid(lk set
temp_ l'ature.
.k [hL!FIIIOSl_I[ is tls(_d H) lllailltaill the 1£)oI11
t_mperamrc. The compressor will iTcle on and off
to keep the room at th{ set level of comlort. Set the
therlllOStat at a lox_er lltllllbel all(1 the ill(Ioof air
will become coolel; Set the thermosta* a*a high{ r
number and the indoor air will become waun(m
NOTE:If theair conditioneris off andis then turnedon
whiteset to Cool,it wilt take approximately3minutesfor
thecompressorto start andcoolingtobegin.
ForMaximumCooling--Sele(t the Coolrood(
and High(3)fhnwith a lower set wmpcc, mlre.
For Quieter & NighttimeCooling--Selecl the
Cool mode and Low (1)fhn with a middle set
temperature.
NOTE:If you switch from a Coolse_ing to Offor to
a fan sorting wait at least 3 minutes before switching
back to a Coolsetting.
Fan Mode
I sc the Fanat High(3),Med(2)or Low(1)to provide Sine( tm only st'ltings do not plox idc (ooling,
_dr cir(ulalion mvI filt('ling without cooling, a tcm[)(,ramr(, setting will not be displayed.
Vent Control (onsome models)
The vent control is localed on the inside of the !
air louvel_, ill Ill(! lox_ r right cornel; [
!_ql(:ll £(I HI CLOSE,Italy IlK air inside the l'OOln _!
will b( circular( d and conditioned. Wh(n set ;at /
OPEN,some inside air is (xhausl(d outsid(.
Toopen the vent, push the lever to the Toopen the vent, push the
right, Toclose it, push it to the left lever to the right Toclose
it, push it to tt_eleft.
Air Direction--Up and Dowu (onsomemodels)
Fing*qtip prcasur( on the horizontal louvcra a(!justs
lhe air direclion lip or down.
Air Directiou--Side-to-Side (onsomemodels)
On some mo(lels, the si(le-t_>si(/e air direction is
a(ljusted b} the lomer levers or by grasping and
lnoving lhe inner xeltical lotlxel-s.
5
Page 6

Aboutthecontrolsontheairconditioner--modelswith controlknob(s).
Features and appearance may va_
Controls modelssoequipped)
Fon
O ON/OFFSwitch
Turns ai_ conditkme_ (m and off,
NOTE:If theairconditionerisoffandis thenturnedonwhile
setinaCoolmode,itwilltakeapproximately3minutesfor
thecompressortostartandcoolingtobegin.
FanSwitch (onsomemodels)
Use to set the t_mspeed to LOor HI.
O Mode/Temp Control
Use to set the air conditione[ to tile FanOnlyor a
Cool mode.
FanOnlyMode
Use FanOnlyat HI or LOFanto provkle air
drculatkm arm fi]tering_dthout cooling.
CoolMode
tJsea Coolsetting with HIo_ LOFanfb_ c(_ding.
Turn the knob c]ock_ise,towalxltile largerblue
ar_m,fb_the indoor area to become coolen Turn
the knob cotmtelvlock_dse, toward the smaller b]ue
High A_ LOW
LO
Fen On]_
-0
Nedium
Cool
area, _b_file indoor air to become wam_e_;
The Mode/Temp conuo] isused to maintain the
room temperature. When set in a CoMmode, the
compressor willc)_:leon and off m keep the morn
at file stone ](we]of comfolt.
CoolingDescriptions
ForNormalCooling_%lect a Coolmode _dth the
ModeiTemp knob set tt the midpoint.
ForMaximumCooling-_Selecta Coolmodewith
the ModeiTemp knob set tow,ud tilt"Imge_
bhle area.
ForQuieter& NighttimeCooling--Select a Coolmode _dth
the ModeiTemp knob _t tos_ard the smaller blue area.
NOTE:Ifyou move the ModeiTemp control knob fi'om a
Coolsettingto the FanOnlysetting, waitat least 3 minutes
before s_dtching back to a Coolsetting.
Controls(o,,models so equipped)
off 5 6
@-
coo,'_ _'io
Ned Co0J Thermostut
ModeControl
O
HiCool,MedCooland LowCoolpro@l( cooling
_dth dttf;erentfansl)eeds.
LowFanor HiFanproddes all circulation and
fill(ring _ithout cooling.
ThermostatControl
@
The flaermostat control is used to maintain the
room mmpelvltute. The compressor willc}de on
and off m keel) the room at file same levelof
comfort. When }ou tuln the hl()b to a higher
mlmbm; the indoor ai__dll become coolen Tmn
6
the knob to a lower mlmber and the indoor air
_ill become xval///ell
NOTE"Ifyoumovetheswitchfroma coolsetbegtoOFFer
toafansetting,waitatleast3minutesbeforeswitchingbacktoa
coolsetting.
CoolingDescriptions
ForNormalCooling-&,lectHiCoolor MedCool_ith the
thermostat (ontrol at midpoint.
ForMaximumCoolino-Se]ectHiCool_dth the thermostat
control at the highest number av,filableon )_)tlrknob.
ForQuieter&NighttimeCoolinouSelectLowCoolwiththe
thermostat control atmidpoint.
-0
Page 7

Additional controls and important information.
Do Nut Operate in Freezing Outdoor Conditions
This reel-only air ronditioner was not designed tor
freezing outdoor conditions. It nmst not b( used ill
fre(zing outdoor conditions.
Vent Control (ol7some models)
The vcnt control is localcd on tile inside of tile air
louvel-_ in th( lower right cornel:
When set at CLOSE, only the air inside tile room
will be circulated and conditioned. When set at
OPEN,sortie inside air is (xhausled outsi(k.
Air Direction--Side-to-Side
On some modds, the sMe-lo-side air direction is
a({justed by tile louver levers or by grasping and
moving the inner xeltieal louvers.
idl
("
Toopenthe vent,pushtheleverto the
right,Tocloseit,pushit tothe left
ge.com
OR
Toopen the vent, push the
lever to the right. Toclose
it, push it to ttle lefL
" OR
Air Direction--Up and Down (o, somemodels)
Fin_el-tip I)l'esStll-e Oil the horizontal louvers a(!justs
Ill(: air dir(clion up or down.
OR
\
Page 8

Careand cleaning ofthe air conditioner.
How to Insert the Batteries
] P.(mov( Ihe /)a11('17¢ (ov(r I)y sliding it
a((ording Io th( arrow dir((tion.
] hls(rl n('_v I)alteries, makillg Slll-t _ I11;11 th(,
(+) alld (-) of/)alteQ' are installed (orr((ll};
] ]'_.eattach the cover by sliding it back
into position.
Grille and Case
"[_lrn the air (ondilioner of'[ and r(lnOV(, lh(
l)hlg tl'olll the x_all outlet I)ef;:n-e (leaning.
Outdoor Coils
The coils on the outdoor side of the air conditioner
should be checked regularl?c If"thQ: m-e clogged
witll dirt or soot, they may be protbssionally
cleaned.
NOTES:
!2_Use 2 AAA (1.5 volt) baueries. Do not use
l*:chargeable batteries.
!_ Remove the batteries fl-om the remol( control if
the _ystem is not going to be used for a long time.
"l'o clean, us( water and a mild delerg(nl.
Do 11o1 [IS( ble_R(h or 21br21sives.
Air Filter
The _lir filter Iwhind tht" front glill_ should b_
(hcl kcd and clcmlcd at l(ast cve_} 3() clays or
more of10n if ne(essal 3.
Clean the filmr with wmm, soapy walen Rinse and
let the filter dlT b(fbrc replacing it.
Toremove (on somemodels):
A CAUTlON: oNoroperatetbea,r
conditioner without a filter becausedirt and lint will
clogit andreduceperformance
Toremove (on some models):
] ()p_n the inlet grille upward by pulling oul
lhe boltonl ()[' Ill(! inlet grille.
] l sing I11( tab, pull up slightly on th( flh(r
to rek ase it and l)ull it down.
&ab the tabson
8
Page 9
Installation
Air Conditioner
Instructions
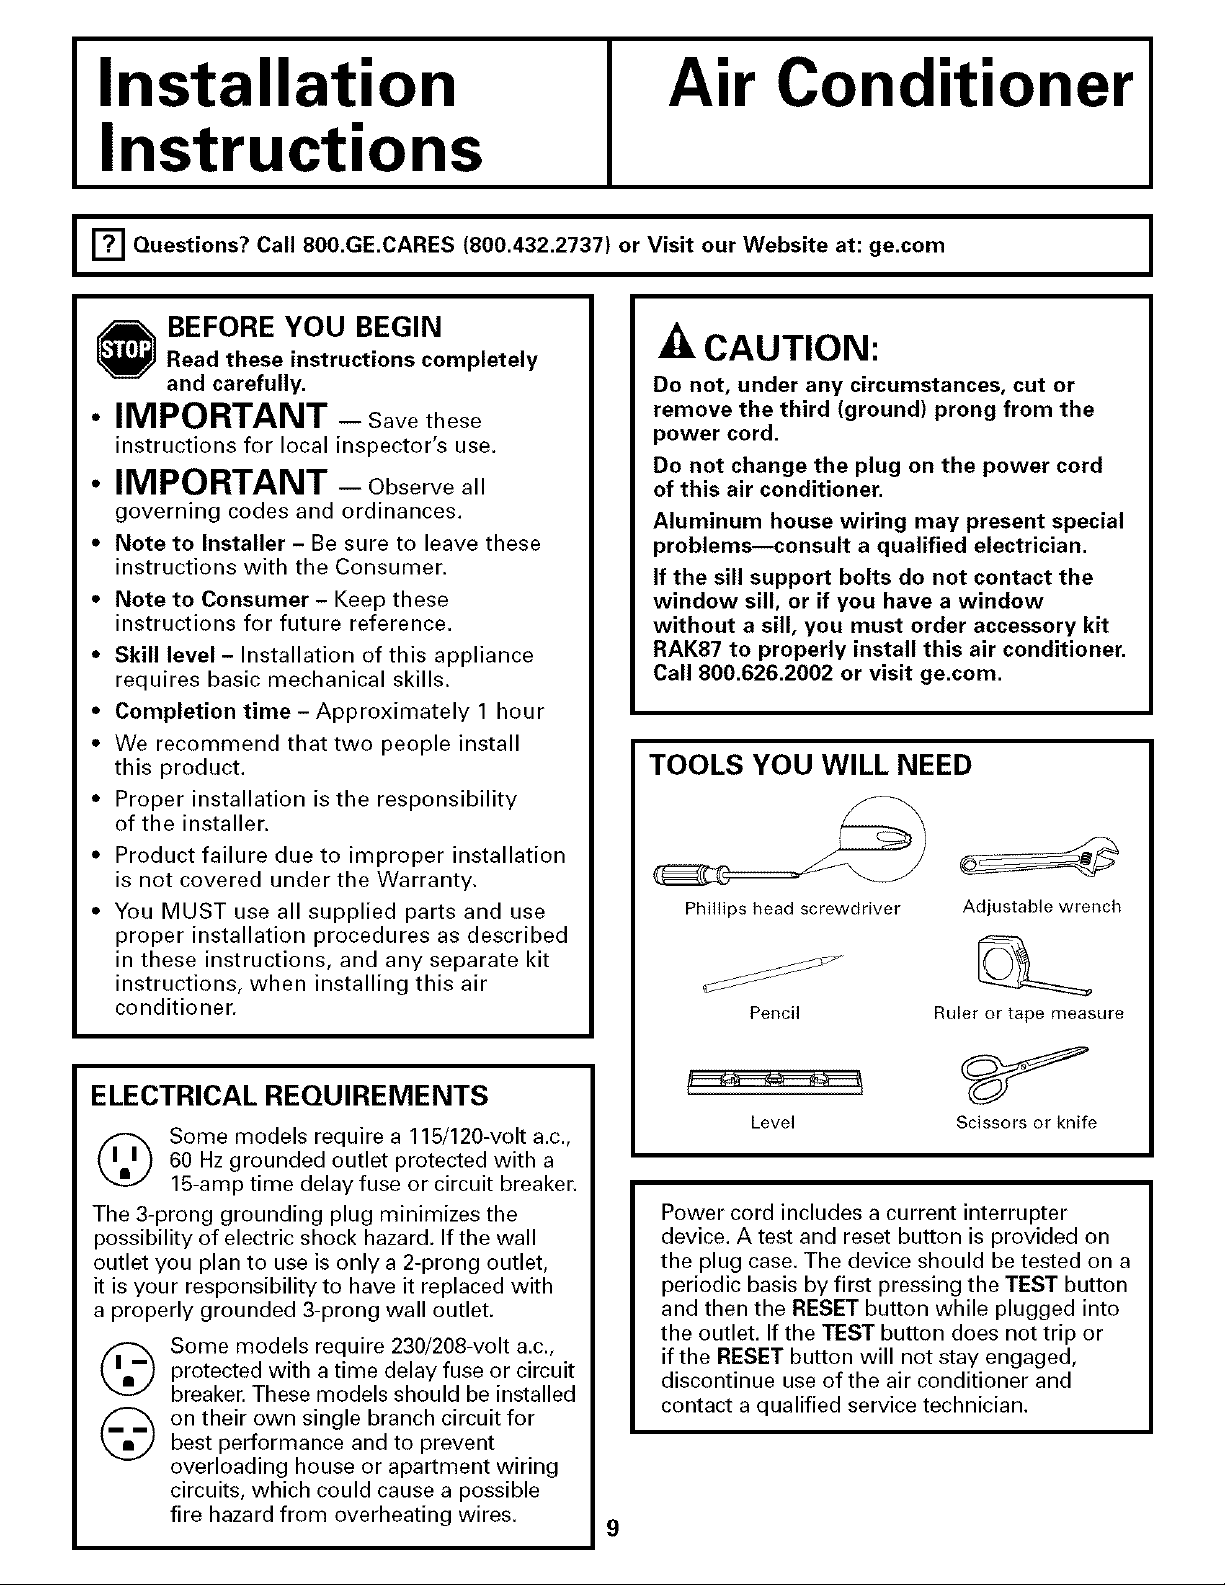
1_'1 Questions? Call 80O.GE.CARES (800.432.2737) or Visit our Website at: ge.com
BEFORE YOU BEGIN
Read these instructions completely
and carefully.
• IMPORTANT - Savethese
instructions for local inspector's use.
• IMPORTANT - Observeall
governing codes and ordinances.
• Note to Installer- Be sure to leave these
instructions with the Consumer.
• Note to Consumer- Keep these
instructions for future reference.
• Skill level - Installation of this appliance
requires basic mechanical skills.
• Completion time- Approximately 1 hour
• We recommend that two people install
this product.
• Proper installation is the responsibility
of the installer.
• Product failure due to improper installation
is not covered under the Warranty.
• You MUST use all supplied parts and use
proper installation procedures as described
in these instructions, and any separate kit
instructions, when installing this air
conditioner.
CAUTION:
Do not, under any circumstances, cut or
remove the third (ground) prong from the
power cord.
Do not change the plug on the power cord
of this air conditioner.
Aluminum house wiring may present special
problems--consult a qualified electrician.
If the sill support bolts do not contact the
window sill, or if you have a window
without a sill, you must order accessory kit
RAK87 to properly install this air conditioner.
Call 800.626.2002 or visit ge.com.
TOOLS YOU WILL NEED
Phillips head screwdriver
Pencil
Adjustable wrench
Ruler or tape measure
ELECTRICAL REQUIREMENTS
(_ Some models require a 115/120-volt a.c.,
The 3-prong grounding plug minimizes the
possibility of electric shock hazard. If the wall
outlet you plan to use is only a 2-prong outlet,
it is your responsibility to have it replaced with
a properly grounded 3-prong wall outlet.
(_ Some models require 230/208-volt a.c.,
(_ on their own single branch circuit forbest performance and to prevent
60 Hz grounded outlet protected with a
15-amp time delay fuse or circuit breaker.
protected with a time delay fuse or circuit
breaker. These models should be installed
overloading house or apartment wiring
circuits, which could cause a possible
fire hazard from overheating wires.
Level
Power cord includes a current interrupter
device. A test and reset button is provided on
the plug case. The device should be tested on a
periodic basis by first pressing the TEST button
and then the RESET button while plugged into
the outlet. If the TEST button does not trip or
if the RESET button will not stay engaged,
discontinue use of the air conditioner and
contact a qualified service technician.
9
Scissors or knife
Page 10
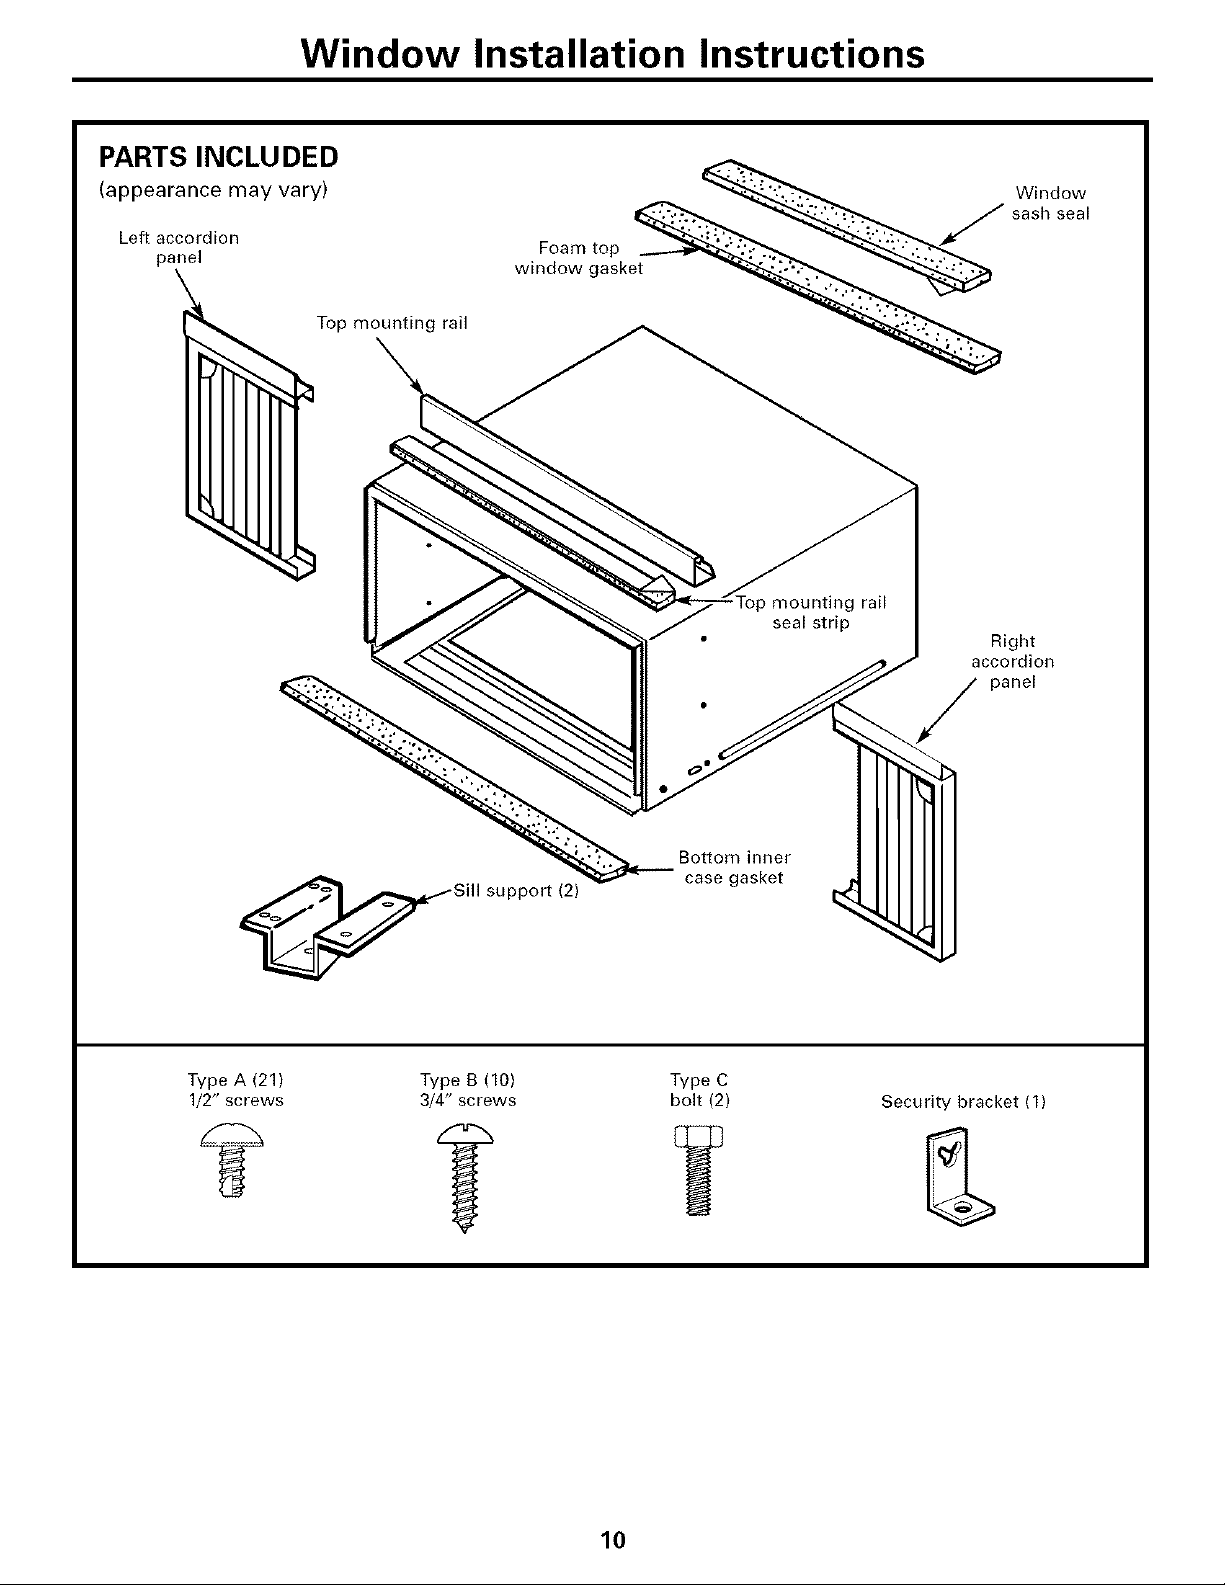
PARTS INCLUDED
(appearance may vary)
Window Installation Instructions
Window
Left accordion
panel
Top mounting rail
sash seal
w,F_aw_;°s_k_
Right
accordion
panel
Bottom inner
case gasket
Sill support (2)
Type A (21) Type B (10) Type C
1/2" screws 3/4" screws bolt (2)
Security bracket (1)
10
Page 11

Window Installation Instructions
[] WINDOW REQUIREMENTS
• These instructions are for a standard
double-hung window. You will need to
modify them for other types of windows.
CAUTION: If the sill support
bolts do not contact the window sill,
or if you have a window without a sill,
you must order accessory kit RAK87 to
properly install this air conditioner. Call
800.626.2002 or visit ge.com.
• All supporting parts must be secured
to firm wood, masonry or metal.
• The electrical outlet must be within
reach of the power cord.
B==_3
17W' rain.
281/2" to 39W"
(With accordion panels)
[] STORM WINDOW REQUIREMENTS
A storm window frame will not allow the
air conditioner to tilt toward the outside,
and will keep it from draining properly.
To adjust for this, attach a piece of wood
to the sill.
WOOD PIECES -
WIDTH: 2"
LENGTH: Long enough to fit inside the
window frame.
THICKNESS: To determine the thickness,
place a piece of wood on the sill to make
it 1/2" higher than the top of the storm
window frame or the vinyl frame.
Attach securely with nails or screws
provided by the installer.
I
1/2" higher
than vinyl frame
1/2" higher
than storm
window
frame
_ _ (on some windows)
SiLl
Storm window Vinyl frame
frame
REMOVE THE FRONT GRILLE
[]
(IF ATTACHED)
[]
Remove shipping tape, if present.
On models with a
raise-up inlet grille,
lift it and remove
the screw behind it
(if present) that holds
the grille in place.
On models with a
slide-out air filter,
remove it and the
screw behind it
(if present) that holds
the grille in place.
[] Gently but firmly grasp
the lower grille corners,
press in on the case
sides and pull forward
to release.
NOTE: Do not pull the
bottom edge toward
you more than 3" or
you may damage the tabs of the grille.
[] Lift the grille up and off the top tabs.
11
• /,_i__
Page 12

Window Installation Instructions
[] REMOVE THE AIR CONDITIONER
FROM THE CASE
[] Remove the 4 screws on each side of
the case. Keep the 2 front-side screws for
later use.
[] Slide the air conditioner from the case by
gripping the base pan handle and pulling
forward while bracing the case.
[] PREPARE THE CASE
[] Remove the backing from the top mounting
rail seal strip and attach it to the bottom of
the top mounting rail. Cut to size.
[] Install the top mounting rail with 5 type A
screws from the outside of the case.
Top mounting rail
Front of air conditioner
Remove packing cardboard and tape,
if present.
_grail
[] Insert the frames for the accordion panels
into the top and bottom mounting rails.
Attach the accordion panels to the side
of the case using 8 type A screws.
Top mounting rail
Accordion
panel
'i
'ilNrl
12
Bottom mounting rail
Page 13

Window Installation Instructions
[] INSTALL THE CASE
IN THE WINDOW
[] Cut the window sash seal to the window
width and stick the adhesive side to the
bottom of the sash.
Window sill
Window sash seal
[] Thread two type C bolts into the support
brackets,
Slide the case into the window and lower
the window behind the top mounting rail.
Position the brackets on the case bottom so
they will be near the outermost point on the
window sill. Attach the support brackets to
each side of the case bottom using 4 type A
screws on each side. The case should be
slightly tilted to the outside, Use a level;
about a 1/2 bubble will be the correct case
slant to the outside, Adjust the leveling bolts
to touch the sill,
U
[] INSTALL THE CASE
IN THE WINDOW (cont.)
[] Locate the 8 screw holes along the bottom
front edge of the case, Center the case, side-
to-side, in the window and mount it to the
window sill using 5 type B screws staggered
in the front and back rows if possible,
Top mounting rail
Type B
screws
Type B screws
[] Extend the left and right accordion panels to
the vertical window sashes and attach with
4 type B screws.
[] INSTALL THE SECURITY
BRACKET AND THE FOAM TOP
WINDOW GASKET
[] Attach the security bracket with a type B
screw.
Type B
screws
,Type A screws
Window sill -----__
_iype C bolts
-& CAUTION: Ifthesillsupport
bolts do not contact the window sill,
or if you have a window without a sill,
you must order accessory kit RAK87 to
properly install this air conditioner. Call
800.626.2002 or visit ge.com.
[] Cut the foam top window gasket to the
window width.
[] Stuff the foam between the glass and the
window to prevent air and insects from
getting into the room.
/
13
Page 14

Window Installation Instructions
[] INSTALL THE AIR CONDITIONER
IN THE CASE
[] Slide the air conditioner into the case,
Reinstall the 2 front-side screws removed
earlier on each side of the case.
[] Place the bottom inner case gasket between
the bottom of the air conditioner and the
inside bottom of the case. Fold up the ends
on both sides and push them in,
Front of air Bottom inner
conditioner case gasket
[] Attach the front grille to the case by inserting
the tabs on the grille into the slots on the
front of the case. Push the grille in until it
snaps into place.
Guide the lever
carefully through the
grille asyou push it in.
[] Secure the front grille to the case by
replacing the screw removed in Step 3,
Caulk or weather-strip any gaps or
openings to the outside to seal the
installation.
The installation is now complete.
14
Page 15

Through-the-Wall Installation InstructionsmOptional
The case may be installed through-the-wall
in both existing and new construction.
Read completely, then follow step-by-step.
NOTE: Obtain all materials locally for
mounting the air conditioner through-
the-wall.
[] IMPORTANT
Through-the-wall installation is not
appropriate if any of the side or top louvers
in the case will be obstructed by the wall.
All side and top louvers in the case must
project on the outdoor side of the wall.
The room side of the case must project
into the room far enough to maximize the
balance of the unit.
The case must be installed level from side-
to-side and with a slight tilt from front to
rear. Use a level; no more than a 1/2 bubble
will be the correct case slant to the outside.
Lintel angle is required to support bricks or
blocks above opening.
Flashing is required and should extend the
length of the opening to ensure no inside
cavity leakage occurs.
[] Remove the air conditioner from the case.
For specific instruction, refer to the Window
Installation Instructions.
[] Make certain that a wall receptacle is
available close to the hole location or make
arrangements to install a receptacle.
i i ..... -
i ..... -
i i
[] IMPORTANT (cont.)
[] Secure with 14 wood screws anchored at
least an inch into the wall support structure.
NOTE: Drill pilot holes, if necessary, for
proper installation. If the frame is oversized,
use shims to prevent case distortion.
[] FINISH THE WALL OPENING
[] Caulk all four sides on the outdoor side of
the case to prevent moisture from getting
through to the interior wall. Use of flashing
(drip rail) will further prevent water from
dripping inside the wall and down the
outside of the building.
, 1,' (._--_Plasterhne
,, I
Lintel angle i I I
I I :_': I]l;I
Cau k ng _ I _1 T' Trim molding
II/ -(if desired)
OUTSIDE /
Air louvers
(top and _
sides must
project on the
outdoor side
of the wall)
Wood filler and
caulking (above
and below the
flashing)
Flashing
(Drip rail)
INSIDE
Bottom rail
J
Bottom
rail
[] Place the case in the wall opening and
place wood support strips between the case
bottom and the flashing on both sides of the
bottom rail. They should be the same height
as the bottom rail and the same length as
the wall opening.
Flashing
(Drip rail) Wood support strips
[] Place the air conditioner into the case.
For specific instruction, refer to the Window
Installation Instructions.
15
Page 16

TroubleshootingTips...
Possible Causes What ToDo
Tile air conditioner * Make sure the air conditioner plug is pushed
is unplugged, completel) into the outlet.
The fttse is blown/circttit * Cbe(k the house iuse/dtcuit breaker box and repla(e
breaker is tripped, the fuse o_ reset the breaker;
Power failure. * If'power fidhlxe occur% tunl tim ai/conditioner Of_
The cm-rent intemlpter * P_e_ the Resetbutton located on the powel co_d plug.
device is tril:,ped. * If the Reset button _dll not sta', engaged discontinue
Airflow is restricted. * Make sure tbere are no curtains, blinds or filrniture
The temp control may * On models _4th touch pads: In C001turtle, press the
not be ,set correctly; Decrease• pad.
The air filter Lsdirty. • Clean the filter at least evmy 30 days.
When power is restore& wait 3 minutes to reshwt file
ak condifione_ to prevent tripping of the compressor
overl(_/d.
use of the ;fir conditioner and contact a qualitied
selwice teclmician.
blocking the h'ont oi the air conditionen
• On I//odels _xJth control kl/obs, ttlrn tbc ternpe/_tttlrc
knob to a higher numben
See the OperatingInstructionssection.
The loom may have been hot. • When the air conditioner _stitst turned on, you need
Cold air is escaping. • Check tier open fllmace regiswrs and cold air returns.
Cooling coils h.ave iced up. • See "Air conditioner freezing up" below.
Ice bNcks the air flow • On models _dth cormel knobs, set the mode control
and stops the air conditioner at HighFanor High Cool_,irb the temp at I or 2
fi'om cooling the room. * On models x_dthtouch pads, set tile controls at
The batteries ate inserted • Check the position (_fthe batmfies. Tile?, should be
incorrectly, inserted in the opposite (+) and (-) direction.
The batteries may be dead. • Replace the batteries.
Hot, httmid weather. • This is normal.
The air conditioner is not • For proper _ater disposal, make sure the air conditioner
tilted to the outside, slants slighdy fi'om the c_tse fi'ont to the real:
Moistm'e removed from air • This isnormal for a short wried in areas wqth little
and drakt,_ into b_e pan. fiumiditv; normal for a longer period in vet) humid areas.
Ftmction error code. • 1Tnphlg the air conditionen Wait 3 minutes and phlg it
A power outage o1"interruption • In the <0se of a pm, er out_Jge or intermptkm, tile unit
occurred, timerand Sleept_:atures will xe_t to the original setting.
to allow time fi)r the rodin to cool do_aq/.
• Set the air conditioner's vent to the closed position.
HighFanor HighCoolandset the thermostat to
a higher tcmpel_lture.
Nick in.
You mm ne(d to set a new tim_ itdesired.
16
Normal Operating Sounds
{;?__,i_tl ma) hear a pinging noise caused by
water being picked up and thrown against tile
condenser on rain} da) s or when the lnmfidit?
is bigh. Tbis design h,ature helps remove
moisture and improve (tficienc?:
i!!{_Youmay bear the tbemloslat click when tbe
compr(ssor cycles on and oft.
)'2Wator will collect ill the base pan during
bigh bumidit} or on l'diny da}s. The wator
ma) ovcrflow and drip from tim outdoor side
ot the unit.
i¢i'The fhn mm mn even when th( compressor
does 110[.
Page 17

GE Service Protection Plus"
(,E, a nam_ re_ogniz_ d worldwid_ [br qualily and d_p_ nda )flit, ofti rs )ou
Serxke Protection Plus '"--( omprehensix e l>i"c)t(•("uon" on all xour. a I>I_liances--.
No Matter _)That Brand!
Benefits Include:
• Backed by GE
• All brands covered
• Unlimited service calls
• All parts and labor costs included
• No out-of-pocket expenses
• No hidden deductibles
• One 800 number to call
You will be <omplelely satisfl(d wilh our serxic( prolection or you may requ(st )'(>Ill-nloney ba(k
on lh( r(maining _alu( of your contract. No qu(stions asked. It's that simpl(.
Protect your r(irig(ralol; dishwasher, washer and dryer, range, "I\. VCR and much more--any brand!
Phls there's no extra charg( for emergency selwi( e and low monthly financing is available. Even icemaker
coverage and fi)od spoilage prolection is oili,red. You can resl easy, knowing that all your vahlable
household products are l)rotected against expensive repairs.
Place your <onfiden<e in GE and call us in dlc l.S. toll-fr_ e at OO0.OZO.ZZZ_
9)r more inf;-)rmation.
:i\]] I)F;IIIds (I)vl_lod, lip Io _0 y{!;lls old, ill IJll_ (I)lllill( I11 I1 [
........................................................................................... __. (ut here
We'll CoverAnyAppliance.
Anywhere. Anytime.*
Please place in envelope and mail to:
General Electric Company
Warranty Registration Department
P.O. Box 32150
Louisville, KY 40232-2150
!7
Page 18

Consumer Product Ownership Registration
Dear Customer:
Thank you fbr purchasing our produ;t and thank you fbr pla(ing your (onfiden;e in us.
Follow these three steps to protect your new appliance investment:
1
Complete and mail
yollr (_ollNl.llner
Prodllct O_alership
Registration today.
Haw tile peace ot
mind ol knowing _"
(!_tll COllla( [ y_)tl in
die unlikel) evem ol:a
satert modilicafion,
2
Model Number Serial Number
I I I I I I I I I I I IIIIIII
After mailing the
registration I)elo_,
sltllTe d?is doctlnlellt
in a salt" place, It
contains i/it itl ilia t]ol/
you will need should
yotl i( quile servke,
Our selxice numbel is
800.GF.CARI'S
(800.432.2737).
Important: If you did not get a registration card with your
product, detach and return the form below to
ensure that your product is registered, or register
online at ge.com.
Consumer Product Ownership Registration
Read yOtll- Owl/el-'S
Mamlal carefllll_.
h will help you
opelall y(itl/n(w
appliance p*operl>
18
Mall]t!
SIy(,e_
Addless
AI)I, #
Mondl
M* Ms 3&s Miss
Filsl
Cil)
In Use
I I I I I I I I I Name I I I I I I I I I I I I
I I I I I I I I I I I I I I I I I I I I I I I I
I I I I I I I E_mail A&hess*
I I I I I I I I I I I I I Slal_ ]
Appliances
General Electric Company
GE Consumer & Industrial
Louisville, KY 40225
ge.com
I I I I I I I I I I I I I I I I I
Model Number Serial Number
I,asl ]
Zip
C,,d_,i
Number I I I I I
,i Please plovide your t_mail address to recelxe, via e-mail, dlscounls, special idtcrs and othel
important communications h'om (;[2 Appliances (GEA),
} Checl here if you do not wahl t<) recei e communications flora GEA's cmethlly selected
partners.
FAIl IdRE TO COMPLETE AN[) RETURN Ttt[S (ARD DOES NOT DIMINIStt YOUR
WA RRANT_ RI(;HTS.
Fo_ intormafion about GEA's privacy and dala usagl polio) go to ge.com and click
on "Pri_cy Policy" or call 800,626 2221
I I I
Page 19

GEAir ConditionerWarranty.
Aft warranty service provided by our Factory Service Centers,
or an authorized Customer Care_*technician. Toschedule service,
on-line, 24 hours a day, visit us at ge.com, or carl 800.GE.CARES
(800.432.2737).Please have serial number and model number
available when calling for service.
GE Will Replace:
Aeypartof the air condidon_ r which fails due to a deli'ct in materials or workmanship.
During this limited one-year warranty, (;E will also pr.vide, free of charge, all labor and rclated
s( lwic( to replace the deli,ctivc [)am
_'_Service UJps to your home to teach you how to
use the product.
)'2Improper installation, delivery or maintenance. If you
have an installation problem, or if the air conditioner
is of improper cooling capacity for the intended use,
contact yore" dealer or installer. You m-e responsible
for provide adequate electrical coimecthlg facilities.
i_i'Fa_ure of the product resttltiikg from modifications m
the product or due to unre&sonable use includit_ failure
to provide reasonable and necessary maintenance.
i_i'In commercial locations labor necessary to move
the unit to a location where it is accessiMe for service
hy an individual technician.
Staple your receipt here.
Proof of the original purchase
date is needed to obtain service
under the warrant_
N Replacement of house fuses or resetting of circtfit
breakers.
_'_Failm-e due to corrosion on models not corrosion-
protected.
i_i'Damage to the product caused by improper power supply
voltage, accident, fire, floods or acts of God.
_'_Incidental or consequential damage caused by possible
defects with tiffs air conditioner.
N Damage caused after delivery.
_i_,Product not accessible to provide required service.
EXCLUSION OF IMPLIED WARRANTIES--Your sole and exclusive remedy is product repair as provided in this
Limited Warranty. Any implied warranties, including the implied warranties of merchantability orfitness for a
particular purpose, are limited to one year or theshortest period allowed by law.
I
This warranty is extended to the original purchaser and any succeeding owner for products purchased for home
use within the USA. If the product is located in an area where service by a GEAuthorized Servicer is not avariable,
you may be responsible for a trip charge or you may be required to bring the product to an Authorized GEService
location for service. In Alaska, the warranty excludes the cost of shipping or service calls to your home.
Some states do not a!low the exclusion or limitation of incidental or consequential damages. This warranty gives
you specific legal rights, and you may also have other rights which vary from state to state. Toknow what your
legal rights are, consult your local or state consumer affairs office or your state's Attorney General
Warrantor: General Electric Company. Louisville, KY 40225
19
Page 20

ConsumerSupport.
M____._
gEAppliancesWebsite
I Ia,,e a question or n(ed assistance wilh you r appliance? "fit Ihe (;E :\pl)lian((s _,Vtbsile any day of th_ yem-!
For ,_1"1 air!l- ('Ollvellit_ll(:( alld _/stel s_ l_ic(, }'ou Call llOXN download '(. )'Wll(_r's ._lalluals, Of e_ell old( 1- l)_lFtS
tna-lin,_.
ScheduleService
Expert (;E repair setvic( is only one step away ii-om your do(n: (;el on-line and schedule your selvice al
your convenience 24 hom-s any da', of the veal-! Or call, O0.(,L.(,:XRI.£ (800.432.2/:,,_) dill-InS normal
/)llSillOSS boil l'S.
RealLifeDesignStudio
(;E supports tile [ nivel_al Design concept--pr_glucts, se_',ic_ s and enviromnents that (an be used by
people of all ages, sizes and (apabilifies. We rctxNnize the need to design lor a wide r,mgc of ph) sical and
mental abilities and impainnenl', For details of GE's Univel_,al I)esign applications, including kitchen
design ideas tot people with disabilities, ch(ck Otlt OUl Wcbsite toda}. For tile hearing impaired, please (:all
800.TDD.GF.\C (800.833.4322).
ExtendedWarranties
t_urchase a GE _Xt(lld_d warrant} and learn abom special discounts that art! available _llil( your x_arranty
is still in eff(ct. You can purchase it on-lin( mlytime, or call 8(X).626.2224 du ring llOFlllal business hom-s.
(;t COllSIIln{ 1 I {Ollle Sel'li(x!s _ill slill be Ihere _lt'lel- yOlll- warranty expires.
ge.com
ge.com
ge.com
ge.com
M_._______
PartsandAccessories
Individuals qualili( d to s_ _,ic( Iheir own applian(es (_]11have parts or accessories s(nt dir{ ctly to their
hom(s (VISA, Mast(rCard and Discov( r car(Is are acccpt¢ d). Olxl( r on-line Iodav 24 hours e_elw' day or
by phon¢ at 800.620.2002 (hn mg normal bus[n{ ss hours.
Instructions contained in this manual cover procedures to be performed by any user, Otherservicing generally
should be referred to qualified service personnel Cautionmust be exercised, since improper servicing may cause
unsafe operation.
ContactUs
IfT,ou are not satisfied with the sel'dce you receive trom (;E, contact us on our Website with all the details
including }our phone ll!llnbel, or write to: (;eneral Manag_ 1; Custom_ r Relations
(;E Appliances, .\ppliance Park
Louisville, KY 40223
RegisterYourAppliance
Register your new appliance on-line--at ?,-our convenience! Timely product registration will allow ibr
('l]ll_lll((_d (Ol_llnlllli(_lliOll _lld [)rolnl)t s(H-vi(( lllld(?l- th( It!llns ol }'Ollr "_al'l_llll_ shollld lhe n(ed alis(.
You may also mail in th( prcl)rilm.d regislralion (ard inchlded in Ihe pa(king malctial.
ge.com
ge.com
ge.com
20 Printed in China
Page 21

•
o<
©
blstrucciones de segTiridad ...... 2, 3
Instrucciones de operaci6n
(kmtrolcs--botones de (ontrol . . .6, 7
Controles--te(las de toqu( ...... 4, 5
Cuidado y limpieza
Bater_as ........................ S
Bobinas para exterior(s ........... 8
Fihro d_ airc .................... 8
PaHilla y _qja ................... 8
Instrucciones de instalaci6n
Instalali6n a tray&
d(3 la lmred--olx ional ........ 15-16
Instala(i6n en mla v(mana ..... 9-14
Ideas" para la identificaci6n
y reparaci6n de problemas... 17-18
Sonidos normaks de op(ra(i6tl . . .18
ge.com
A&_J 14
Asqz
AS II 8
ASII18
°v, q
°v.-q
©
Apoyo al consumidor
_k[)O)'O ;41 (:oilSltlllidol , ........... 20
(;aranl fa ...................... 19
Produclo (ti(ltlcta(Io '_ENERGY STAR °
Como socio (le ENERGY STAR °°,
GE ha (onlh-mado que este
produ(to (umple l_ls directri(es
de ENEP,GYSTARc_>r(L_tiwls al
rendimiento en(rgdtico.
Escribael modeloy n#mero
de serie aqui:
N#merode modelo
N#merode serie
[ stcd pucde (n_olltlm cstos n61ncros
al costado del a_ondicionador de aire.
49-7582 11-07JR
Page 22

f
INFORMACIONIMPORTANTEDESEGURIDAD.
LEATODASLASINSTRUCCIONESANTESDEUSAR.
A iADVERTENCIA!
Por su seguridad, se debe seguir la informaciSn en este manual para minimizar e! riesgo de incendios,
descargas el#ctricas o lesiones personale&
PRECAUCIONESDESEGURIDAD
#: Use este elec{rodomdsfico solamen{c pare
el propdsiU) de_ctminado segfin se d(scribe
en (1 Mmmal del propiemlio.
_ Este acondicionador de aire debe inslalarse
(7OFI'(}({AIII(211{_de aCII(F(10 (O11 las
Instruccion(s de insmlacidn antes de su uso.
i< Ntmca des(nchuib su acondi( ionador de
airc tiFdtldo del cable el& ttico. Siemprc
agarrc firmementc el enchuti: y tit( de
dl dir(cmment_ hacia athera.
_: Rcemplace inmediamment( Iodos los
cables (ldctricos que se hawm pelado o que
se hayan dafiado de alguna otto manem.
Un cable de corriemc dafiado no debe
relmmrse, sino que debe set sustimido pot
uno m_eu) que se adquiem del filblJcalHc.
No use lit1 cable (l('(:ttico que lnuestie
(xiden(ias de deterioro, o dafios de abmsidn
(11 Sll sup(rficie (:ll alguno de SIIS (_X[Y(2IIIOS.
i< Si el receptxlculo no coincide con (l
en( hutk', un ek ctri( ism (alificado &be
icemplazar el r,..cept_i( ulo.
% Apagu( la unidad y desenchuf_
st*acondicionador d( airc ames d( hacer
cualquier icl)amcidn o liml)ian
NOTA:Recomendamosendrgicamenteque cualquier
serviciollevadoa caboeneste equipoIotea/ice un
individuocalificado.
!:,_iPot su segmidad.., no almac(n( ni use
ma_etiak s combustibles, gasolina u otros
vaporcs o h'quidos inflamables (n la
proximidad de &_c o algfin oUo
electrodomdstico.
?!_?_Todos los acondicionadorcs de airc
conti(n( rcfligcmntes, los que [)or Ley
Fed( ral deben ser rcmoxidos antes (t(
desecharlos. Si usmd planea deshacerse de
alg:hl produclo qu(! C011{(:llgll rcflJgcr:mms,
pdngwse en conmct*) con la colnpafi_a ,.lUC
se encatga de recoger su busut-a pare que le
indi(tu( n ,.lUd hac(!t:
COMOCONECTARLAELECTRICIDAD
Bajo ninguna circunstancia, corte o remueva la
tercera pda (tierra) del cane elOctrica Enpos
de la seguriflafl personal, este electroflomostico
flebe siempre conectarse a tierra.
NO use un enchufe adaptador coneste
electrodomestico.
El cat)k el&ctIico de estc electrodomdstico (sill
equipado con un enchufi' de tres pfias (tierra)
(lUe coIilbitla (2oil till tOIllaCOl Fietlt(' est_lndal-
de ms tomas de pared pare minimizar la
posibilidad de una descatga (ldcuica.
El cable d&:trico incluvc un disposifivo pare
intptrup(idn de corriente. S( in(luyc un bot6n
de prueba y de r( ini(io cn el dispositivo.
El dispositix o debe ponerse a pmeba
pefiddi(amenm: primero sept* siona (1 botBn
rssr(I)tuel>a) y luego R_..gL_70vinicio)
miemras se encuentra en(hufi_do al
tomacorriente. Si (l botdn TEST:*() se dispam o
si el botdn RESETno qu(da enganchado, dtje
de utilizar el a( ondkionador de airc v
2
( omunfquese con un tdcnico calificado.
Pida a m: tdcnico (t:1(: inspec( ione el
tomacorfienm v,(l cit*:uim para : elvi::m_rse
(1(1 q:t(! (1 [o111a(ol-][i(!1:[( ( s[,_l (Ol:(!c[i:tdo a
tierra de la man( :'a al)ropiada.
Donde exista t:::tomacorriente de (los tomas,
(s su rcsponsabilidad y obliga(idn personal
ha(er que dicho toma(orrient_ sea
:(:elllp|azado pof [:l:O d(} ires [()111_ts CO::
COI:exi(_l: a lieFt_L
El acondicionador de airc debeda siemprc
estar conecmdo a un U)macorriemc individual
con sit circuitl) de v()lt_,tjecorrcspondionm.
Esto pmporciona el mayor rendimiemo y
ademfis evita qu,_' los (it( uitos del rcsto dc
la (asa se sobrc: argu(n, lo cual l)odr_a (:attsar
inc(ndios por (1 sobt* calentamiento
del cableado.
"_\:r las Instmcciones de insmlacidn, en la
seccidn Roquisitos £1 etricospare los rcquisitos
csp(cificos de con,.:xidn.
Page 23

ge.com
A iADVERTENCIA!
i
USODECABLESDEEXTENSION--Modebsde115voltiossolamente
Debido al potencial de riesgos de seguridad
bajo ciertas confliciones, en#rgicamente
recomendamos contra el uso de cables
de extensi6n.
Sin ,cmbarg-,.>,si usted se xe en Ia nec(sidad
de t_sar un cable (ldctrico de extensidm es
absohnmnentc necesmio qu_ _1 mismo _std
Iist_ldo b_!jo UL, calibre 14, d_ tipo 3 tomas con
_oncxi6n _, ticrm pare clc(_rodomdsfi(os y cl
indice d(be set d( 15 ampe:ios (mfnimo))
125 voltios.
A PRECAUCION:
NO USEun cable de extension con niaguao de los
modelos de230/208 voltios.
LEAYSIGAESTASINSTRUCCIONESDESEGUR/DADCU/DADOSAMENTE.
GUARDEESTASINSTRUCCIONES
3
Page 24

Acerca delos controlesen el acondicionadorde aim--
modeloscon teclas de toque.
Los funciones y el aspecto pueden variar,
FRIOEncendido
AHORRADORDE
EN_RGIA_ncendido
DORMIREacendid0
I o
Controles del acondicionador de aire
O 07_Off (Eneendido/apagado)
ApaR'4 y pt_n(k el acondickmadot de aJr_.
Pantaga
Mt]( stra ]a tempe_:_lut adc @isle o 1] fiempo
I'(tst_tnt(el) t] SiI)(I'OI)JZa(IoL
Modo
@
Usudo para @lstar cl a(ondk ionador dc air_
al modo Cool(Frio)o Fan(Ventilador).
O Teclas de Aumentar,e,/ReduoirV
se cn(ut ntre cn el mode Cool(Frio).
O Fan (Ventilador)
[,silt ) I 'tst/_ 1 ',_1 _('chd delvemilado_a
Low (Bajo), Med (Medio) o High (Alto).
O ircu/aire (Circo/adorde sire) (on a/gunosmoflelos)
P_tI'd p]'Op()]tiO]]al til'(U[_l(](_n dt ail( COI/[JX]tla dt
]ado _ Ddo, ujtlstc cl hncmq)vcw dc (fi_(ulai_c cn
On(Eneendido).
Pro'4 logmr ci1(uladdn de Cdrc t!ja de lade
a lad(), coloque elk On (Eneendido) h_t_ta que la
ci_t ulal idn de aire deseada sea Iograda, ]uego
('o]o(Itlt en Off(Apagado).
( ontrola (1 x_ nlila(lot:
s nergy Saver(Ahorrador de energia)
On (Encendido}--EI vendlador y el comp_esor ha(:en
cic]o cn cncendido _ _pagado. Est_ rcstllta en
_11 ]aciol)tN irlayort's el/ la 1_lllpelaltlta de la
habitacidn y ell la Immedad. Notmalmm/l_ usado
orlando la habilacidn no eslfi ocupada. Nota: El
ventilador continuar# funcionando per un corto tiempo
despu#s de que el compresor haya entrado en el ciclo
de apagado.
Off(Apagado)--E1 _t ntilador ftmciona lode cl
tk rope, mienm_s qtm el compresor ix/sa per los
cic]os de enc{ ndido y apagado.
VENTILADOR
SINCRONIZADO£Encendid0
Controlremote
Este in t(rl-uptor debe (star (n Off (Apagado) pal'a
usar los _}just(s del v( ntilador ten (l (onl]ol
de mode).
O fimer (SincmnizadoO
On (Eneendido)---Cnando (I acondk ionador d( air(
csld upagado, pucdc _!justaxsc pro'4 qtlc st" cn(icnda
atm)mfitkamenw denu'o de [ a 24 hems en el nivel
prcvio. Cada toqne ilj/lsmi5 el tiemlx) el/hoi'as.
Oll(Apagado)---Cumldo el al:(mdicionador tie air("
est_ encel/dklo, ptmde ;@stm_.e pata que se apag-ue
mm)mfificamente (/ent_*) de 1 a 24 hOl;k% Cuda
t{XlUe HjIIS[;II_I el tit I//pO el/ hol_ls.
Pint cancelm el sincroniza(lot; p_csi(me la [e(:la
timer (Sinoronizador) basra qtlt el tiempo en la
panlalla de_tparczca.
O Sleep (Oormir) [onalgunosmodolos)
Pr(sione p_ti_l (]tl_ el a(o]ldi(]on;l(-Iof (le air(
tbn(:iom" per 8 hems anws d_ apa_a'a_',(
aIltOlll_ti( al]lerltt'.
[ha hera despu_s d( qu( (1 sincronizador
pare dormir haya sido _justado, la t( mpel'atul_/
S(t]e( (Tiol)a(I;t a/]l//( nla];{ ;t/llOl//_[i('al//t hi(2 2 °E
Paca cancelar el mode de dornfil; presione la tccla
Sloop(Oormir)una segunda vez.
Nota:Elsincronizadordodormir ser_ cancoladosi
cualquieradelas teclas de Timer(Sinoronizador),
EnergySaver(Ahorradorde energia)oMode (Modo)
sonpresionadas.
Receptordela serialdelcontrolremoto
@
0
0
0
Control remoto
};3Pare garanlizar una opera(i6n npropiada, otiente
(1 (:olllI'ol l'elllOlO hacia el receptor (h sel_lal del
a(7olldi(:iolladOF de ail-e.
I FI receptor d( seilal liene un l_lngo mSximo
4
de 21 pies.
;;!_C(rd6res( (1( qu( no haya lla(la <ntre (1
a(:olldi(:iOll_t(lof (1(! _til'e y (l COllll-_)l F(_III()IO (llle
pueda/)loqu(ar la serial.
_S,Cer(:i6rese (1( que las balerl_as Seal] irescas y
St! illslalell (OIT(_( I_/III(!III(--V( l" la S(!((i(_II (It
Cuidadoy Limpieza.
Page 25

Controles adicionales e informaciSn importante.
Nouseenlas cendicienesexternasdebajeelpuntode
cengelacion
Estc acondicionador (it- ai_ no es dJscfiado pm'd u_ar cn No us_ cn 1_ _on(liciones cxt_ rnas dcb_ljo cl ptmto dc
tcm[x'rattmts extcmas deb_}jo el pm_to de ((mgelacidn. (ongda(idn.
Cuandeatacendicienader de aire se encienda,soencender_
automfiticamenteen etnivet quese encentrabala Oltimavez.
Funci6n de recuperaci6n de perdida de energia
En caso dc k*p61dida de la elac_gf_ o int_*mpcidn, I't'ail./StiU;] al qjuste o_iginal. Es posiblc qnc nstcd nccesite
la urfidad rcini(:iaM automfificamenl_ el/las fimciones @_star un liempo nncvo si _.'.f Io desea.
de la tiltima vcz clue file t_t(Io una vcz la energ_u sea
wstablecida. I as fimciones de/Siecreeizadery Oermir
Modo COOL(FRIO)
Lse el modo Coolom venlilador High(3)(Alto), Med (2)
(Medie) o Low(1)(Baje) pmu (nil i;m I se las l_das dc
Increase• (Aumentar)/Decrease• (Reducir)pm'a qjuslar a
1_ternpcr4m_'d dcsca(lu entre 64<q_"y 86"F cn in(:Tcmentos
de I°E
S(f usa (/I] tcrmosialo pala l//al/[( i]el la I(q]/p( I'd[/]l_/d( _
la habilaci6n. El compw_.or hmfi ciclo entre apagado y
encendido par_4mantenel la habitacidn a la tcmpen_tura
deseada..A:iustc el [tq'lrlOS[;ltl) a t/1/ I]t*lI//eIO HleI/Ol y el
ailc inmrno se enfi'iarJ m_i.,,.Silo ajusm atm ndmero
mayol; ]a lemperalm'a del aiw inferno se calentmfi mils.
NorA: Si atacendicienaderde aire esN apagadey tuege
so.enciendemientras esN ajustadeen Cool(Frie),tomarfi
apreximadamente3minutospara queelcempreser comience
aenfriar otra vez.
ge.com
Descripcienesdeenfriamiente
ParaenfriamientonermaI--Sclcc( ionc cl modo dc Cool
(Frio)y _cntiladol High(3)(Alto)o Med (2)(Medie)con una
tcml)clumr4 (Ic @lstc media.
Para eo#iamieoto maxime--Sele< cione el modo de Cool
yvenfilador High {3) (Alto)(on una lemperamm de ajustc
i_nt=l/Ol
Paraenfriamientosilenciese y enfriamientonectume--
S(k((ion_ (1 modo (k Cool?x(ndH(lor LOw(1)(Baje)
1ol/ /lI/_/ tcl]lpcIaitll_l de ajt/stc ]//edla.
NOTA:gi cambiade una/ustoCool(Frie)a Off(Apagade)e a
un ajustede ventilader,espereapreximadamente3minutes
antesde cambiar otra vezal ajuste de Cool(Erie).
Modo de FAN (Ventiladur)
tse el Fan {Ventilader) en High (3) (Alto), Med (2) (Medie) o
LOw (I) {Bajo) pac,_ plopol(iona_ (ir(ula(idn (1( aide ?
filn-u(:idn sin cnfiim_fient_). Dcbido u qnc los nivelcs dc
Control de la ventilacion (onalgunos modelos) i,I"
E1c(:mlrol de xenfila(:i61/eslfi Io(alizado al interior de !
]as ])cP,ian;t',cnla csquina (lercch:_ intc ri(m
Ctmndo estfi @lstado en CLOSE{CERRADO),solameme
el airc en el imerior de la habitation ci*oflarJ y se I[
acondicionarfi. Cuando est_ qjt_stado en OPEN(ABIERrO),
un po(:o del ai_c inmtno es expelido hacia atue_'4.
Direccion del aire--Hacia arriba y hacia abajo (en algunos modelos)
[na presidn sencilla con los dedos enlas persian¢_'.
ho_izormdes @lsm% la direccidn del ai_c hacia a_Tiba
o hacia abajo.
vcnliladol th/icamenm no propordonml enffiamiento,
el nivel de tcmpclatura no se mueslla en/a p;mlalla.
|
__--_ 0 BIEN
Paraabrirlaparrill& oalpujela Paraabrirlap,_rrilla,empujela
palancahacialaderechaypara palancahaciala derechaypara
cerrarlahacialaizquierda cerrarlahacialaizquierda
Direccion del a#e--de lado a lado (onatgunosmodetos)
En algunos modelos, la dircccidn d( lado a lado
del aire es ajustada l)O_ l_._ palan(_', de las pe_:siaams o
aga]'l_u/do y mob, J( n(lo las pelsiallaS Vel tiC, lira( nit'.
I_ ::_ 0 BIEN
5
Page 26

Acercade loscontrolesen elacondicionadordeaim--
modelosconboton(es)decontrol.
Las funciones y el aspecto pueden variar,
Controles
InterrnptorON/OFF
0
Endcndc _apa_ cl acondidonador (it" aim
NOTA:SJelacondicioeadordeaire estDapagadoyeeroeceses
eecendidomientrasestbeeuemodoCool(Enfriado),elcomFesor
eecesitaraaproximadamente3 mlTlutospare iniciary parequeel
eefriamientocomience
lnterrnptordeFan(Ventilador)
(onatgunosmedetos)
Usc esl}t fimci()l/pala cambiar Ii _elocidad dd _cnlilador
mm-c tO (BAJO)6 HI (ALTO).
Controlde Mode/Temp (Modo/Temp)
@
_sc pala _tjustalcl acondicionador oh"air('
al modo FanOnly(VeatJladorsolamente) o aun Illodo
Cool(Enlriado).
Modode FanOnly(Venti/adorsolamente)
tsc FanOnly_n HI(ALTO)o LO(BAJO)Fan(Venti/ador)
para propo_douiu" cir_nladdn dc aire _ liltnlcidn sin
e]lfi]amiel_IO.
Modode Cool(Enfriado)
[se tm a:juste Coolcon HI(ALTO)o LO(BAJO)Fan
(Venti/ador)i-);ua cnfi-iamk:nIo. (;it( elbol6n end s<mido
Contro/es re,,
de las agqjas del reloj, hacia _1_h-eaa_ul mayor, pala que el aim
de interior se enfifc In;_s.(;i/e el Ilotdn el/seHtido contmAo al de
lasagt!jas del lel@ hacia el fil<a azul ulaispequefia, pma que el
aire de interior se calientc mils.
El control de Modt fh'mp es usado pan! lnantene/a
temperalura ambienl*. (,uando esl(_ colocado en el modo Cool
(Enfriado),cl comprcsor harfi cido cmlc apag:Jdo clmcndido
pala illantcnel el sal(_n al I//iSl//O IliVOI de Icn/peraltlla.
Descripcionesde enfriamiento
Paraenfriamientonorma/_%lccciouc tm modo Cool(Enfriado)con
cl botdn Modci]{'mp cnla posil:idn dcl ccnh'o.
ParaeflfriamieatoIoaximo--Sclc( cionc un modo Cool(Eofriado),
((>nd botdn Modc/Tcmp aptllltal/do hacia d firea a/ul iilayol,
Paraenlriamientomastraoquilo& durante/as noches--Sdecc iom.
un moclo Cool(Enfriado)con el boldn Modc/3_'m l) apunlando
hada cl drca aztll mils pC(lUd]a.
NOTA:Siustvd mulxc cl boi6n dl ((iniml dc ModciTcnlp
del _juste Cool hacia el ;!juste Eaa Oo/g, espelc pot Io mcnos
3 minulos antes de cambi tr otto wz aun ajuslc Cool
| Control de Mode (Modo)
Us_ d modo Hi Cool (Frio AIto), Med Cool (Frio
Modio) y Low Cool (Frio Bajo) pro'4 <nil Jar con l_t_
velo(idad_ s del venlilador _m'ias.
Use (1 Low Fan (Ventilador Bajo) o Hi Fan (llentilador
Alto) panl plopor(ional (irodacidn d( air_ )
filtra('idn sin enfi'iamienlo.
| Control de Termostato
_( /ISll tin l(tyiTios[alo p_/l'd l_)aDl(]/el ]il [t=lTIp(I_aLll_l
de la habita(idn, lq (omprcsol hal_ (:i( Io entre
apagado ?, ell(:_ ndido ptna mantener la habilncidn
it [;/ IOrl/p()l'd[tlI'd d(s(_a(la+ ,A:juste el I(rl]/OSl_ttt-) a till
DI]IIII2FO IIlav(ir _, el _/il'e il)[(:ITlO S(: ( I/_l{a]i;t irl_l._. Si
6
I0 ;{justa a !In n[/i//(:l o i//( 11()1; la [(_]_/p(tFalLIl'H d(I
ili]'{2 il/{(_lI/O _} (a]el_tal'_ Ill'IS.
NOTA:Si cambiadeun ajusteCool(Frio)a Off(Apagado)o a
unajustede ventilador,espereapreximadamente3minutos
antesde cambiar otra vezatajuste de Cool(/:rio),
Descripciones de enfriamiento
Para enfriamiento normal--SM( (( ionc d modo de Hi Cool
(Frio Alto) o Med Cool (Frio Medio) (:on el tel moslato a un
ajuste m( dio.
Para eofriamieoto maximo--S( l_ccionc (1 n/odo d( Hi Cool
(FrioAlto)con d 1( I'I/iOSIHIO a till ]ll]l//t'I'O l]/_tS alto+
Para enfriamiento silencioso y enfriamiento nocturno--
Sckx:cione el modo (k Low Cool (Frio Bajo) ( on el
[(l'l/_OSli_lO _/ lID itj/IS[( I//edio+
Page 27

Controles adicionales e informaciSn importante.
No use en /as condiciones externas debajo el punto
de congelaci6n
Est(' _wondi( i(mador (/(' _dre no es (lis<.tYMo pare
usar en lempeF41u 1-,isexternas (leb_!jo el pu nto
de congelacidn. No use en las condiciones
externas deb@) el punto de (ongelacidn.
Control de la ventilaci6n (onalgunos modotos)
El control de v(ntilacidn estfi localizado al inl( riot ,f
de las pelsianas en la e_'_quina derecha infi,lio*; ¢/
Cuando esl_i @lsm(lo en CLOSE(CERRADO), (
solamemc el aire (n el ira( riot de la habimcidn
circulal',;_ } se aconditionm-,L Cuando est_i @lstado
{n OPEN(ABIERTO), un poco del air(' int_ mo es
{xpelido hacia afil( ra.
Direccion del a#e--de lado a lado
1
II
Paraabrirlaparrifla,empujola
palancahacialaderechaypara
cerrarlahacialaizquiorda
ge.com
Paraabrirlaparrill& empujela
palancahacialaderechaypara
cerrarlahacialaizquierda
En algunos modelos, la direcci6n de lad() a lado
(kl aire es qjusmda pot las palancas de las l)ersianas
o agarrando y moviendo las per,,ianas
",erticahllellte.
Direcci6n del aire--Hacia arriba y hacia abajo (enalgunosmodelos)
l na presidn sencilla con los (led<_ en las persianas
horizonmles ujustal-,i la dir_*(cidn del air(! hacia
arriba o hacia abajo.
0 BIEN
Page 28

Cuidadoy limpiezadelacondicionadordeaire.
Como iusertar las baterias
] Retire la (ubic rla (le la bateria & sliz_indola
d( a(u(rdo (on la direcci6n d( la flecha.
] ]nserte baterfas nuevas, cerciol_hldose d( que
los polos posilivos (+) y n(galixos (-) estfin
Ol'ielll_l(lOS COLT( CI_/IllC 111(.
] Coloque la ctl|)iel_ta (;[l-avez d{slizfindola en
su hlgan
Parrilla y caja
NOTAS:
i;<15se2 balerfas "_L\" de 1,5 xollios. No use
hater gas r( cargabl( s.
b R(th-e las baterfas del control remoto si (1 sistema
llO ha d( _,(1" llS_(]o l)or llll l:)eri(:×h) d( lJ( llll:)O
{:X[(?I]SO.
Apague (1 a¢ondicionador de aire y relire el
(ll(Thl.l_(Y (](l [Oln_l(OITi( Ill( d( 1_1 I)HY((] _]ll[(s
d( limpiar.
Bobinas para exteriores
Las bobinas cn cl lado ('xterior dcl a_on(li( ion_(Ior
de airc debe ser inspe((iomlda legulm-mcnle.
Si la misma estfi obsHuida con suciedad u hollfil,
p(_h-_ ser limpiada protbsionahnente.
Filtro de aire
H filtro de aire d(,mis de la r<jilla h-onml debe
inq)eccionarse y limpiame pot lo menos cada
30 d_as o mils a melmdo si fllese necesario.
Limpie el filtro con agua tibia yjab6n. Elju_iguelo
y permim que se seque antes de colocarlo otra vez
en su hlgal:
/
A PRECAUCION:No
awndMonadordeairesinel filtroctebidoa quelasuciedad
y/aspelusasIoobsmfirbny reducirbnsu rendimiento
Pararetirarlo(enalgunosmodelos):
Para linapim; us( agua y un (lelergente suaxe.
No t/s( (h)]o o lllal( l-ial(s al)l-asi\os.
Pararetirarlo(enalgunosmodelos):
Agarre/asorejillas
enel filtro y tire
haciaafueray
haciaarriba
[_ Abra la parrilla de _ntm(la ha(ia arril)a
tiran(lo (1_la misma des(l( (1 fort(h;.
[_ [san(h:) la or@lla, lit(! hacia arriba
lig(mm{ nt( sobre el fihro para lib( mrlo
yext rfigalo.
8
Page 29

Instruccionespara
Acondicionadordeaire
la instalacion
"_ _Preguntas? Llame al 800,GE.CARES (800,432.2737) o bien Visite nuestra pagina Web: ge,com
ANTES DE INICIAR
Lea estas instrucciones completa y
cuidadosamente
• IMPORTANTE - Guardeestas
instrucciones para uso del inspector local.
• IMPORTANTE - Observetodos
los c6digos y 6rdenes de ley.
• Note al instalador - Aseg@ese de dejar
estas instrucciones con el consumidor.
• Note al consumidor - Conserve estas
instrucciones pare referencia future.
• Nivel de destreza - La instalaci6n de este
aparato requiere de destrezas mecanicas
basicas.
• Tiempo de ejecucion - Aprox. 1 hora
• Recomendamos dos personas pare
la instalaci6n de este producto.
• La instalaci6n apropiada es la
responsabilidad del instalador.
• La falla del producto debido a una
instalaci6n inadecuada no esta cubierta
por la garantia.
• Cuando instale este acondicionador
de aire, DEBE user todas las piezas
suministradas y usar procedimientos
adecuados de instalaci6n como describe
en estas instrucciones y algunas
instrucciones de kit separadas.
O REQUISITOS ELECTRICOS
©
@
APRECAUCION:
Bajo ninguna circunstancia corte o remueva
la tercera pua (conexion a tierra) del cable
electrico.
No cambie el enchufe en el cable electrico
de este acondicionador de aire.
Los cables caseros de aluminio podrian
presentar problemas especiales. Consulte
a un tecnico electricista calificado.
Si los tornillos de soporte del umbral no
tienen contacto con el umbral de la ventana,
o si cuenta con una ventana sin umbral,
debe ordenar el kit de accesorios RAK87
para instalar de forma adecuada este
acondicionador de aire. Llame a
800.626.2002 o visite ge.com.
(cont.)
Algunos modelos requieren 230/208 voltios,
de corriente alterna, protegidos por un
fusible de dilataci6n de tiempo o un
cortacircuitos. Estos modelos deberian
instalarse en un ramal exclusivo del circuito
pare un rendimiento mas notable y para
prevenir sobrecargas en los circuitos de
cableados de su case o apartamento, Io cual
podria representer un riesgo de incendio
por el sobrecalentamiento de los alambres.
(_ REQUISITOS ELECTRICOS
de 115/120 voltios de corriente alterna y
Algunos modelos requieren tomacorrientes
60 Hz conectados a tierra, protegidos con
un fusible de dilataci6n de tiempo de
15 amperios o un cortacircuitos.
El enchufe de tres pleas con conexi6n a tierra
minimize la posibilidad de descargas electricas. Si
el tomacorriente de la pared que usted planea user
solamente tiene 2 tomes, es su responsabilidad
hacer que un t_cnico Io reemplace por uno de tres
tomes con conexi6n a tierra.
El cable de alimentaci6n incluye un dispositivo
para interrupci6n de corriente. Se incluye un
bot6n de prueba y de reinicio en el dispositivo. El
dispositivo debe ponerse a prueba periodicamente:
primero se presiona el bot6n de TEST (prueba)
y luego RESET (reinicio) mientras se encuentra
enchufado al tomacorriente. Si el bot6n TEST
no se dispara o si el bot6n RESET no queda
enganchado, deje de utilizar el acondicionador
de aire y comuniquese con un t_cnico calificado.
9
Page 30

Instrucciones para la instalacion en una ventana
HERRAMIENTAS QUE USTED NECESITARA
Destornillador Phillips
Lfipiz
PARTES INCLUIDAS
(apariencia puede variar)
Panel de
acorde6n
izquierdo
Riel de montaje superior
\
Nivel
Regla o cinta m6trica
Empaque superior de
espuma de la ventana
Tijeras o cuchilla
Llave ajustable
Tornillos 1/2"
tipos A (21)
Soporte
el umbral
Tornillos 3/4"
tipo B (10)
Empaque
inferior de
la caja
Perno
tipo C (2)
Panel de
acordeon
derecho
Soporte de
seguridad (1)
10
Page 31

Instrucciones para la instalacion en una ventana
[] REQUISITOS PARA LA VENTANA
• Estas instrucciones son para una
ventana estandar de dos pliegues. Usted
necesitara modificar el proceso para otros
tipos de ventanas.
=&PRECAUCION: Silos
tornillos de soporte del umbral no tienen
contacto con el umbral de la ventana, o
si cuenta con una ventana sin umbral,
debe ordenar el kit de accesorios RAK87
para instalar de forma adecuada este
acondicionador de aire. Llame a
800.626.2002 o visite ge.com.
• Todas las partes de apoyo deben quedar
totalmente aseguradas a algun metal,
mamposteria o a la madera.
• El tomacorriente electrico debe estar
al alcance del cable electrico del
acondicionador de aire.
I I
B===8
171/2" mfn. I
[] REQUlSITOS DE UNA VENTANA
DE TORMENTAS
Un marco de ventana de tormentas no
permitira que el acondicionador de aire se
incline hacia el exterior y evitara que drene
apropiadamente. Para solucionar este problema,
adhiera un pedazo de madera a el umbral.
PEDAZOS DE MADERA -
ANCHO:2"
LONGITUD: Lo suficientemente largo
como para ajustar en el interior del marco
de la ventana.
GRUESO: Para determinar el grueso, coloque
un pedazo de madera en el umbral para
hacerla 1/2" mas alta que la parte superior
del marco de la ventana de tormentas o del
marco vinilo.
Peguelo firmemente con clavos o con
tornillos proporcionados por el instalador.
| 1/2" mas alto que el
_ marco vinilo (en algunas1/2" mas alto _ventanas)
que el marco I'/T""'''/_ _-" Madera
deventana_rl i rl b/_'/#P
_: 28W' a 39W' _"
(con paneles de acorde6n) 1
de tormentas t i!l umbrarr._Marco de _coventana de vinilo
tormentas
11
Page 32

Instrucciones para la instalacion en una ventana
[] RETIRE LA PARRILLA FRONTAL
(SI ESTA PEGADA)
[] Retire la cinta de envio si todavia esta pegada.
En los modeles con
parrilla de entrada
elevadiza, levantela y
retire el tornillo detras
de el (siesta presente),
Io que sostiene la
parrilla en su lugar.
En los modelos con
filtro deslizables,
muevalo y el tornillo
detras de 61 (siesta
presente), Io que
sostiene la parrilla
en su lugar.
[] Agarre firmemente .'t\ I t1_
pero suavemente las
esquinas inferiores de la
parrilla, presione en los
lados de la caja ytire
para liberar.
NOTA: No tire los
extremos de la parte
inferior hacia usted mas de 3" o podria
dahar las orejillas de la parrilla.
[] Levante la parrilla y lib6rala de las orejillas.
[] RETIRE EL ACONDICIONADOR
DE AIRE DE LA CAJA
[] Retire los 4 tornillos en cada lado de la caja.
Guardelos los 2 tornillos de la parte
delantera para mas tarde.
Frente del acondicionador de aire
[] Deslice el acondicionador de aire de la caja
agarrando la empuhadura del carter base y
tire hacia adelante mientras sostiene la caja.
Frente del acondicionador de aire
Retire el carton de empaquetado y cinta,
siesta presente.
12
Page 33

Instrucciones para la instalacion en una ventana
[] PREPARE LA CAJA
[] Retire el apoyo de la cinta de sellado del riel
de montaje superior y p6guelo al fondo del
riel de montaje superior. Corte al tamaflo
apropiado.
[] Instale el riel de montaje superior con
5 tornillos tipo A desde la parte externa
de la caja.
Riel de montaje superior
[] INSTALE LA CAJA
EN LA VENTANA
[] Corte el sello del marco de la ventana de
acuerdo con el ancho de la ventana y pegue
el lado adhesivo al fondo del marco.
Umbral de
la ventana
Sello del marco de la ventana
[] Enrosque dos pernos tipo C en los soportes
de apoyo.
Deslice la caja hacia el interior de la ventana
y baje la ventana detras del riel de montaje
superior,
Coloque los soportes en el fondo de la caja
para que queden cerca del punto mas externo
en el umbral de la ventana. Una los soportes
de apoyo a cada lado del fondo de la caja
usando 4 tornillos tipo A en cada lado. La caja
deberfa estar ligeramente inclinada hacia el
exterior. Use un nivel; la inclinaci6n de 1/2
de burbuja sera la correcta hacia el exterior.
Ajuste los pernos nivelados tocar el umbral.
u
Riel de montaje inferior
[] Inserte los marcos para los paneles de
acorde6n en los rieles superiores e inferiores
de montaje. Una los paneles de acordeon al
lado de la caja usando 8 tornillos tipo A.
Riel de montaje superior
Panel de
l_ l-ornillos tipo A
Umbral de
la ventana
_e'rnos tipo C
.4LPRECAUCION: silos
tornillos de soporte del umbral no tienen
contacto con el umbral de la ventana, o
si cuenta con una ventana sin umbral,
debe ordenar el kit de accesorios RAK87
para instalar de forma adecuada este
acondicionador de aire. Llame a
800.626.2002 o visite ge.com.
13
Page 34

Instrucciones para la instalacion en una ventana
[] INSTALE LA CAJA
EN LA VENTANA (cont.)
[] Localice los 8 agujeros para los tornillos a Io
largo del frente inferior de la caja. Centre la
caja, de lado y lado, en la ventana y montela
en el umbral de la ventana usando 5 tornillos
tipo B escalonado en las filas frontal y
posterior si es posible.
Riel de montaje superior
Tornillos_
tipo B
Tornillos tipo B
[] Extienda los paneles de acordeon derecho
e izquierdo al marco vertical de la ventana
y peguelos con 4 tornillos tipo B.
Tornillos
tipo B
INSTALE EL ACONDICIONADOR
[]
DE AIRE EN LA CAJA
[]
Deslice el acondicionador de aire en la caja.
Reinstale los 2 tornillos de la parte delantera
removidos anteriormente en cada lado de la
caja.
[]
Coloque el empaque inferior de la caja entre
el fondo del acondicionador de aire y el rondo
interno de la caja. Doble los extremos en
ambos lados y empujelos hacia adentro.
// J/
Frente del Empaque inferior
acondicionador de aire de la caja
[] INSTALE EL SOPORTE DE
SEGURIDAD Y EL EMPAQUE
SUPERIOR DE ESPUMA
DE LA VENTANA
[] Una el soporte de seguridad con un tornillo
tipo B.
[] Corte el empaque superior de espuma de
la ventana al ancho de la ventana.
[] Rellene la espuma entre el vidrio y la
ventana para evitar que aire e insectos
se introduzcan en la habitacion.
/
[] Una la parrilla del frente a la caja insertando
las orejillas en la parrilla en las ranuras en el
frente de la caja. Empuje la parrilla hasta que
encaje en su lugar.
Guie la palanca
cuidadosamente a
traves de la parrilla
mientras la empuja.
[] Asegure la parrilla del frente en la caja
reemplazando el tornillo removido en
el Paso 3.
Calafatee todas las aberturas al exterior
para sellar la instalacion,
14
La instalacion esta ahora completa.
Page 35

Instrucciones de instalacion a traves de la paredmopcional
La caja podria instalarse a traves de la pared
en construcciones existentes o nuevas.
Lea completamente, luego siga paso por paso.
NOTA: Obtenga todos los materiales en tiendas
para montar el acondicionador de aire a traves
de la pared.
[] IMPORTANTE
La instalacion a traves de la pared no
es apropiada si alguna de las persianas
laterales o superiores est,'_ obstruida por
la pared.
Todas las persianas laterales y superiores
en la caja deben proyectarse hacia el lado
exterior de la pared.
El lado de la habitacion de la caja debe
proyectarse hacia el interior de la habitacion
con la distancia suficiente como para
maximizar el equilibrio de la unidad.
La caja debe instalarse a nivel, de lado a
lado, y con una ligera inclinacion desde el
frente hacia la parte posterior. Use un nivel;
la inclinacion correcta sera una inclinacion no
superior a 1/2 burbuja.
Es necesaria una escuadra de lintel para
dar soporte a los ladrillos o bloques que se
encuentran por encima de la abertura.
[] Coloque la caja en la abertura de la pared
y coloque las bandas de soporte de madera
entre la parte inferior de la caja y los
tapajuntas de ambos lados del riel inferior.
Deben ser de la misma altura que el riel
inferior y de la misma Iongitud que la
abertura de la pared.
] Asegure con 14 tornillos para madera fijados
al menos una pulgada hacia el interior de
la estructura de soporte de la pared.
NOTA: Taladre los agujeros piloto, si es
necesario, para una instalacion apropiada.
Si el marco es demasiado grande, use cuhas
para evitar la distorsion de la caja.
Se necesitan tapajuntas que deben
extenderse a Io largo de la abertura para
asegurarse de que no se produzcan fugas
dentro de la cavidad.
[] Retire el acondicionador de aire de la caja.
Para instrucciones especificas, refi6rase alas
Instrucciones para la instalaci6n en una
ventana.
[] Cerciorese de que existe un tomacorriente
disponible cerca del orificio o haga arreglos
para que se instale uno.
15
Page 36

Instrucciones de instalacion a traves de la paredmopcional
[] TERMINE LA ABERTURA
EN LA PARED
[] Calafatee los cuatro lados del lado exterior
de la caja para evitar que la humedad
penetre a tray, s de la abertura en la pared.
El uso de tapajuntas (riel de goteo) evitara
ann m_s que el agua gotee hacia el interior
de la pared y hacia el exterior de la
construcci6n.
J Linea
i i i r de yeso
i J ',,
, , = I I
Angulo del hntel i
Calafateo _ _/I oldeado
, i i _[
i '
_---_111 "_ d_lmarco
EXTERIOR
Persianas
de aire
{persianas Z
superlores y
laterales debe
proyectar
hacia el lado
exterior de
la pared)
Relleno de madera
y calafateo (por
encima y por debajo
deltapajuntas)
/
i'
(si se desea)
INTERIOR
Riel inferior
/
Tapaju ntas de la inferior
(riel de goteo) caja
Tapajuntas
(riel de goteo)
Bandas de soporte
de madera
Riel
[] Coloque el acondicionador de aire hacia
el interior de la caja. Para instrucciones
especificas, refierase alas Instrucciones
para la instalacion en una ventana.
16
Page 37

Solucionarproblemas, go.co,,
Causasposibles Quehacer
El acondidonador de aire *Cerci6rese dc que el a(ondkionador de aire est_i
estfi desconectado, enchufhdo rotulmente en el tonaacorriente.
El fttsible se dispar6 / *1aspecc ) ae 1(s fi s b es / c/:j:_c e ate "rtptores ( e :_c s
el cortacireuitos se d'tspalq), y reemplace cualquier filsible o re@_ste el interluptox:
Interrupd6n en el *Si octme tma interlupcidn en el suministro el&'tfico, agrague
sum'm'mtro el6ctrico. (off)el acondicionador de aire. Cuando la energfu se restaure,
espere 3 mimltos pm_t reinkiar el tcondicionador de aire pal'a
prevenir que se dispare el compresor por sobrecatga.
El dispoglfivo de internlpcidn *Presione el botdn Reset ubicado en el cable de alimentacidn.
de corriente se ha acfivado. *Si el botdn Reset no se mantiene en su luga); no utilice m_s el
acondicionador de aik _y comuniquese con un t&nico cNificado.
El flujo de aire estfi res_ingido. *Cerd6rese de que no existe ningtma coltina, petsiana o
mueble bloqueando el fi'ente del acondicionadol de aire.
El control de temperamra no *En los modelos con teclado: En el modo Cool (Fifo),
es'tfiajustado apropiadamente, presione la teda ReducirV.
*En los modelos con lxltones, give la temperature a un nfimero nla>o/;
El fdtro de aim estfi sudo. *Limpie el filtro (ada 30 d;as por Io menos. Ver la se(ddn
de Instruccionesde OperaciOn.
La habi 'tacidn podrla haber *Qlando el acondidonador de ;fire se enciende, usted
estado caliente, necesim darle tiempo pare que enfiJe la habitaci6n.
El aire frio se estfi escapando. *Cer(idrese de que los registros de la calet:acci6n no estfin
abler tos y se encuenmm )etomando el aire fifo.
*Coloque lu venmnilla del acondicionador de aire en
la [×)sicidn cerlada.
Ias bobinas de enffiamiento *Ver "Acondicionador de aireso estacongelando"m:i, adelanm.
se congelaron.
ElhMo bh_ltlea el flujo *En modelos con los Lu)tones de control, coloque el modo
de aire hac'rael acondMonador deconlrolenHighFan(llontiladoralto)dHighCool
de aire e-dlando que se enfrie (/:rioalto)con la temperatura en I 6 Z
la habitaddn. *En los modelos con tecla_, col(,ultle los contt oles en
HighFan(gentiladoralto)6 HighCool(/:rioalto)y >!jtlsw
el termostato a una tcmpemmm m_i_aim.
[as bate_s es(fin in_rtadas *lnspeccione la posicidn de las baterfa_. Deben estar
incorreclamente, insertadas en la posici6n indicada, (+) y (-).
[as baterlas pueden *Reemplace l_tsbaterfas.
estar ago 'tadas.
Tiempo h(unedo y caliente. *Esto es normal.
Elacondicionador de aire *Pa,a drermr el agua aplopiadan/ente, ( er(/orese de que
no estfi indinado hada afimm, el acondicionador de aire estri inclinado lige_'4mente
La humedad removida del aire *Esto es normal [_)r tm co_1o perh)do en fir{mscon poca
y se drena hasta h bandeja, humedad; rlormal pot tm ]x!rk)do de tiempo m:;_s
posm)gado en rireas narishdmedas.
C6_go de error de flmcidn. *De_onecm el acondickmador de aire. Espere 3 minutos y
Una p&dida en el sumin'mt_'o
eli,c(rico o tma interrupd6n ha
ocurrido.
enchdf;elo otlvt vez.
*En el caso de una p&*/idadel suministro el&trio) o
una interrupci6n, las [unciones de SincronizadoryOo_iren la
unidad se re@lsmrrial @lste origim/I, Es [x_sibleque usted necesite
@lsl:arun tiempo nuevo si&_iIodesea.
17
Page 38

Solucionarproblemas.
Sonidos de operacion normales
i_ Ouiz5s escnche un sonido metfilico cmlsado pot
el agxla tomada y timda contra el condensador en
los d_as llm iosos o cuando la humedad es alto. Esta
caracmt_stica de disefio a) uda a temow'r la humedad
y mttjota la eficiencia.
N ()jliz[ks escuche que el wrmostato hace clic cuando el
comptesor hace cido emre encendido y apagado.
_ E1agua se acumula en la bandeja dumnte dirtsIluvi(_os
o con mucha humedad. Elagua podrfa dermmars*,y
gomar desde el lalo extemo de la unidad.
_0E1ventiladot p(_/rfuf'unckmaraun si el compresor no
Iohace.
18
Page 39

Garantiadesuacondicionadordeaire deGE.
Todos los servicios de garantfa los proporcionan nuestros Centros
de ReparaciSn de F#brica onuestros t#cnicos Customer Care®
autorizados. Para concertar una cita de reparaci6n, en line&
24 horas al dfa, visftenos al ge.com, oflame a1800.GE.CARES
(800.432.2737). Cuando flame para solicitar servicio, por favor
tenga a mano el n#mero de serie y el n6mero de model&
GE reemplazara:
Cualquierpartedel acon(licionador de aire que falle debido a (]e]L,cto _,en los materiales o en
la fhbri(aci(m. Durante esta garantia limitada de un a_& (;E tmnbi6n propordonm-J, sin costo
alguno, t_×la la mano dc oln',l v cl s_ c,ido rcla(ionad(_-l_m_ rc(,mpl;czm- pm-tcs dctb(mosas.
_, Viajes de servicio a su ca_sapara mostrarle cdmo
fundmm d eq_dpo.
_2InstMaci6n o entrega inapropiada, o mantenimien/o
impropio. Si tts/ed fiene un problema durante la
instalaci6n, o si su acondicionador de aire no tiene la
capacidad de enfriamien/o clue ttsted necesita, p6ngase
en contacto con nu_tro distribuidor o instalador.
Usted es responsable de proporcionar las facilidades
de conexi6n el6ctrica nec_sarias.
_ Fallo del producto resultante de modificaciones al
producto o debido a rtso irrazonable indttyendo no
proporcionar mantenimiento razonable y necesmio.
;_!fEn locales comerciales, la mano de obra necesm'ia para
reth-ar la tmidad hacia un l_ar para revisi6n por parte
de un t6cnico h_dividtud.
Grape aqufsu recibo.
Serequiem facilitar prueba
de la fecha de compra orighTat
para obtener un servicio
bajo la garantfa.
_ Reemplazo de f_tsibles de la casa o reajtts/e del sistema
de circtdtos.
_ Fallos debido a la corrosi6n en modelos que no esthn
protegidos contra la corrosi6n.
;_!_Daho al producto ca_tsado por voltaje inapropiado hacia
el eqttipo, accidentes, incendios, inundaciones o actos
de la natttraleza de ftlerza mayor.
_!_Dahos hwidentales o consecuenciales causados por
defeclos posibles con este acondicionador de ah-e.
_, Dafios despu6s de la entrega.
_, Producto no accesible para facilitar el servicio requerido.
come se indica en esta Garentia limitada. Cualquier garentia implicita, incluyendo las garantias implicitas de
comereiabilidad o adecuacion para un fin determinado, esMn limitadas a un ale o el periodo de tiempo mas
EXCLUSIONDE GARANTIAS IMPLiCITAS--Su unico y exclusivo derecho es la reparecion del producto, tal y
breve permitido per la ley.
Esta garantia se extiende al comprador original y cualquier comprador posterior de productos comprados para uso
residencial dentro de Estados Unido& Si el producto est# situado en un #rea que no dispone de servicio por parte
de un proveedor de servicio autorizado de GE,podria tener que hacerse cargo de los costes de envio o bien podria
solicit#rsele que fleve el producto a una centro de servicio de GE autorizado para realizar la reparaciSn. EnAlaska,
la garantia excluye el costo de envio o las visitas deservicio asu casa.
Algunos estados no permiten la exclusi6n o las limitaciones de dafios incidentales o consecuenciales. Esta garantia
da derechos legales especificos, y usted podria tener otros derechos que variar#n de estado aestado. Para saber cuales
son sus derechos legales, consulte a la oficina de asuntos del consumidor local o la oficina del Attorney General en
su Iocalidad.
Garente: General Electric Company.Louisville, KY 40225
19
Page 40

Apoyoal Consumidor.
PaginaWebdeGEAppliances
qTien( alguna pregunm sobr( su ,el,ectrodomdstio:)? iF'm(l:,_ la p:_gina "_'_!1:,de (;E ,\pF, lianc(s, cualquier
,:lfi/del afio! Pare l]a_ziTvoF(onvenien(ia ,, s( rvi(io mils r@ido, ya puede des(argar los Mamlales de los
FTol)i( ratios, o inchlso pedir piezas hac(r una cim en linea.
Soliciteunareparaci6n
FI s( l'd(io de (xpertos (;E (s1_i a tan s61o un paso de su puerta, iEntre ell lfnea y solicile su reparacidn
(uando It venga bi(n 24 horns al dfa ( ualquier dfa del aflo! O llame al 800.GE.( 'JtRES (8) 1.4:,2.2 :. _)
(ltlt'atlle hol_as tlOl'lll_tles de of](ina.
RealLibDesignStudio(Estudiodedisefioparalavidareal)
GE apoya el concepto de I)isefio Univelxal--pl-_Muctos, smxicios y ambientes que pueden usar genre de
todas las edade% tamal'_os y capacidades. Reconocemos la nece.,idad de disel'mr pal-,tuna gmn gama de
habilk/ades v dificultades fisicas v mentales. Pare narisdetall(s cobre las aplicaciones d( GE I)iseflo 1_niversal,
inchlyendo ideas de disefio pare la cocina paa-a personas con discapacktades, mire nuestr, i pfigina Web hoy
mismo. Pare pemonas con dificuhades auditiwls, tiwor de llamar al 800.TDD.(;EAC (8t_).833.4322).
garantfasampliadas
Conlpr( una garantfa ampliada y obtenga d(lall(s sobr( d( s(uentos esp((ial(s disponibl(s nai(nlms su
gvlrantfa (!st_ alhl activa. Pu((l(: conq)rarla en lhlea en (U,II(IuI(I m ln(tlto, o Ilatn _1 ,al (8(X).62(_.2224)
(huvante horns nornlales de oficina. (;E Consunmr I lome Sel_.ic(s estarfi alin ahi (uan(lo su gamnt_a tellnine.
ge.com
ge.com
ge.com
ge.com
M_______
Piezasy accesorios
Aquellos individuos con la calificacidn necesafia pare a-upar_wsus propios electrodom6sficos pueden
pedir que se les naanden las piezas o accesorios dirccmmente a sus hogares (acepmmos las ml-jetas
VISA, MasterCard ) Discover). t Iag',l su pedido en l/nea ho?, 24 horas cada d/a o llamar por tel_fbno
al 8(_).626.2002 dur, mte hol'as normales de oficina.
Las instrucciones descritas en este manual cubren los pmcedimientos a seguir por cualquier usuario. Cualquier
otra reparaci6n deberia, por regla general, referirse a personal calificado autorizado. Debe ejercerse precaution
ya que /as reparacionea incorrectas pueden cauaar condiciones de funcionamiento inseguras.
P6ngaseoncontactoconnosotros
Si no esla satisf_ cho con el servicio que recibe (le (;E, l)6ngas( en conla(:lo cotl IIOSOIFOS(:tl 1111(SII_I pfigina
Web indicando tcMos los detalles as_ como su lllllal(:l-O (l(! teh:fono o es( rfl)anos a:
(;eneml Mana er (_uslomer Relations
(;E Appliances, Appliance Park
LoulS',lll_, Ix_ 4(122a
Registresuelectrodom_stico
iRe_stre su nuew_ electrodom_stico en llnea---cuando usted prefiera! El rt gistmr su producto a ti(mpo le
prtq3orcionarfi, si su_giem la n(cesidad, una na£jor colmmicacidn y un s( lwicio narisa-fipido b@) los t&minos
de su gaa-dntiil. "Ihmbi_n puede enviar su tarjeta de registro pre-impresa que se inchl) e _n _1lnal_ rill (le
embaL!je o 1. corte y use (1 tbrnnllario de _ste Manual del Propi( talio.
ge.com
ge.com
ge.com
20 tmwoso on China
 Loading...