

Page 1
GEApplia nces.c orn
U
og
W
/
/
®!
U
0
C:
O
C:
O
Safety Instructions ............................ 2-5
Operating Instructions
Kitchen Timer .......................................... 11
Oven ............................................... 10-27
Adjust Oven Thermostat .............................. 15
Baking or Roosting .................................... 13
|
|
Broiling, Broiling Guide ................................ 14
Controls ............................................... 10
Convection Oven ................................. 16,17
Pizza .................................................. 17
Preheating ............................................ 13
Probe ................................................. 18
Sabbath Feature ...................................... 27
Self-Cleaning ...................................... 22, 23
SlowCookand Worming Features....................... 20
Special Features .................................. 25, 26
Steam Cleon .......................................... 24
Timed Baking and Roosting ........................... 19
Worming Drawer ..................................... 21
Surface Units ......................................... 6-9
Cookwure .............................................. 9
Gloss Cooktop ......................................... 8
Worming Zone ......................................... 7
Next Step Control
Cure and Cleaning
Aluminum Foil................................... 3, 4, 5, 13
Control Panel ......................................... 28
Gloss Cooktop ..................................... 34, 35
Lift-Off Oven Door .................................. 30, 31
Light ................................................... 29
Oven Floor ............................................. 33
Oven Heating Elements ................................ 33
Rocks ................................................. 31
RemovableWarming Drawer/Drawer Pan................ 33
Storage Drawer ....................................... 33
Surfaces .............................................. 28
Vent ................................................... 33
Espaffol
Fora Spanishversion of this manual, visit
our Website at GEAppliances.com.
Para consultar una version en espaflol
de este manual de instrucciones, visite
nuestro sitio de internet
GEAppliunces.com.
In Canada:
www. GEAppliances.ca
Printed in the United States 49-80637-2 02-12 GE
Troubleshooting Tips .......................... ;6-4o
Accessories ........................................ 41
Consumer Support
Consumer Support ........................... Back Cover
Warranty .............................................. 43
Write the model end serial
numbers here:
Model #
Serial #
You can find them on a label
behind the drawer or behind the
lower oven door on the front of
the range frame.
Printed on
Recycled Paper
Page 2
IMPORTANT SAFETY INFORMATION.
READ ALL INSTRUCTIONS BEFORE USING.
[A WARNING ]
Read all safety instructions before using the product. Failure to follow these instructions may result in fire, electric shock,
serious injury or death.
ANTI-TIP DEVICE
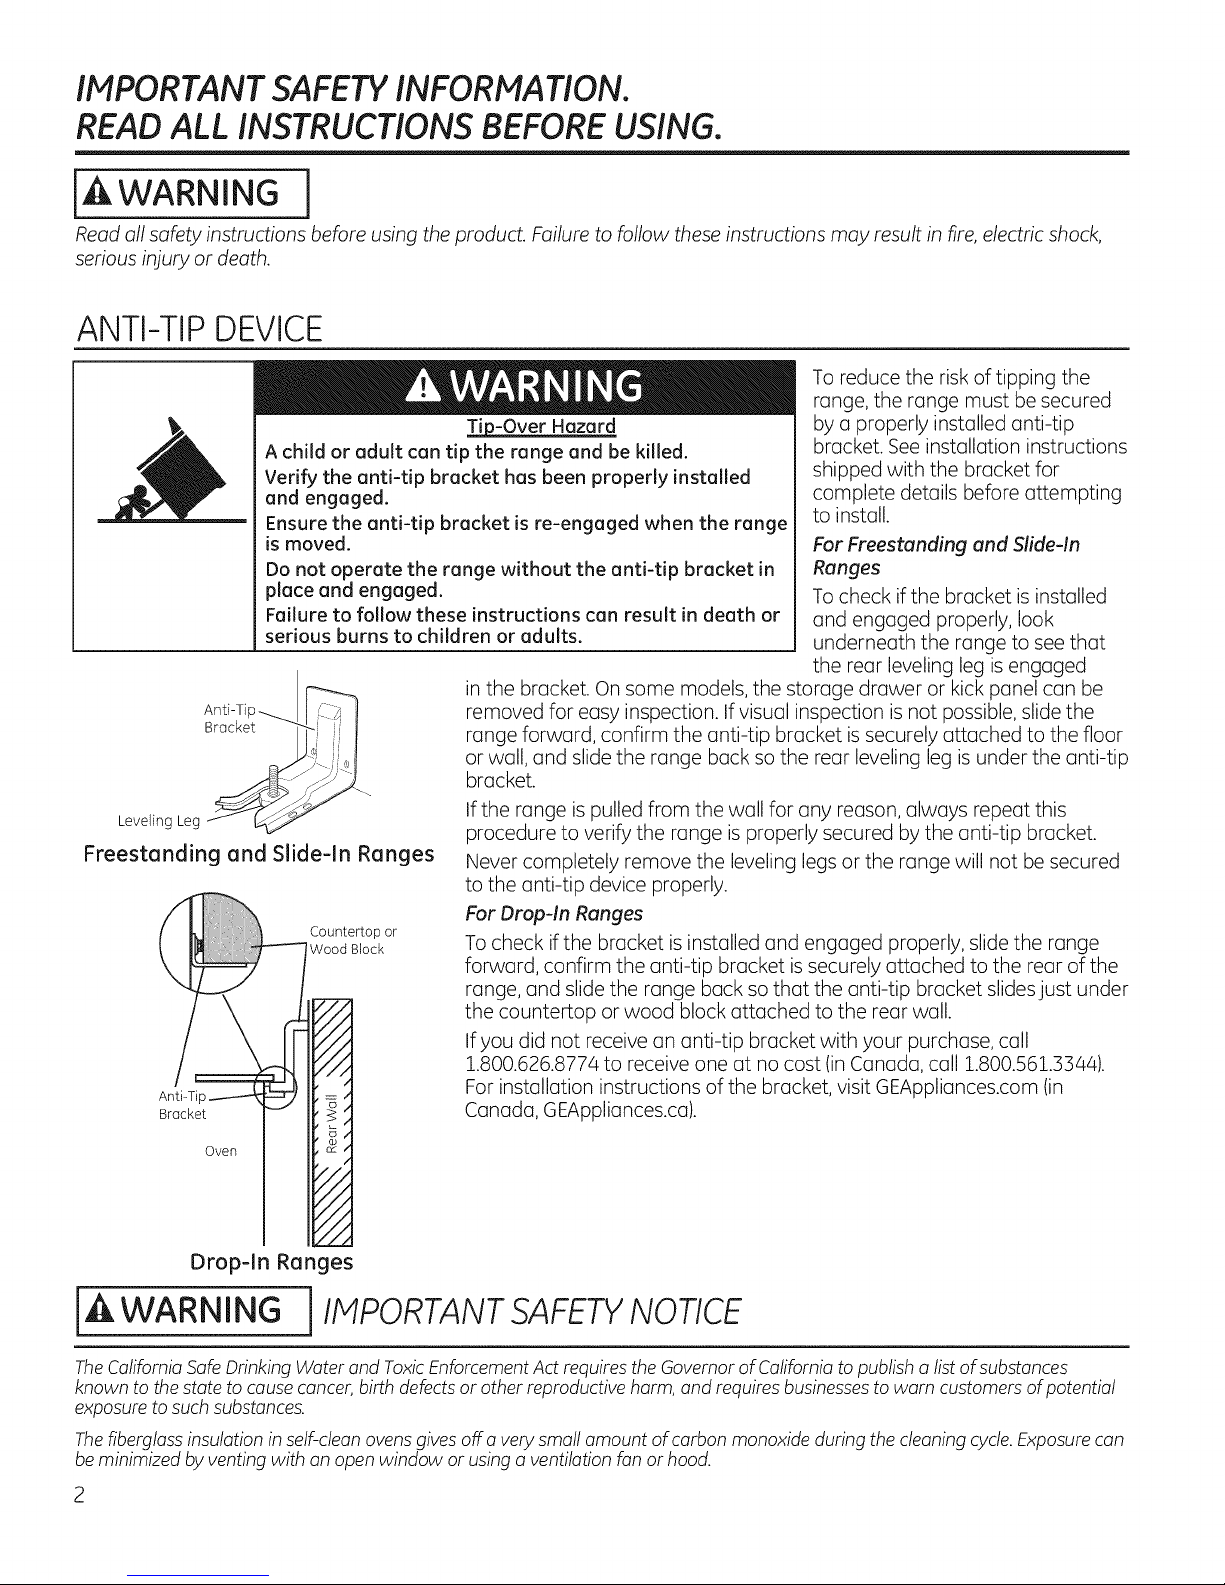
To reduce the risk of tipping the
range, the range must be secured
_p-Over Hazard
A child or adult can tip the range and be killed.
Verify the anti-tip bracket has been properly installed
and engaged.
Ensure the anti-tip bracket is re-engaged when the range
is moved.
Do not operate the range without the anti-tip bracket in
place and engaged.
Failure to follow these instructions can result in death or
serious burns to children or adults.
in the bracket. On some models, the storage drawer or kick panel can be
AntPTip_ I !' _ I removed for easy inspection. Ifvisual inspection is not possible, slide the
Bracket -_-- ; !
i i range forward, confirm the anti-tip bracket is securely attached to the floor
.J---...,_,I or wall, and slide the range back so the rear leveling leg is under the anti-tip
by a properly installed anti-tip
bracket. See installation instructions
shipped with the bracket for
complete details before attempting
to install.
For Freestanding and Slide-in
Ranges
To check if the bracket is installed
and engaged properly, look
underneath the range to see that
the rear leveling leg is engaged
__// If the range is pulled from the wall for any reason, always repeat this
Leveling Leg _ _ procedure to verify the range is properly secured by the anti-tip bracket.
Freestanding and Slide-In Ranges Never completely remove the leveling legs or the range will not be secured
to the anti-tip device properly.
Countertop or
WoodBlock TOcheck if the bracket is installed and engaged properly, slide the range
Anti-T-- For installation instructions of the bracket, visit GEAppliances.com (in
Bracket Canada, GEAppliances.ca).
Oven
Drop-In Ranges
For Drop-In Ranges
forward, confirm the anti-tip bracket is securely attached to the rear of the
range, and slide the range back so that the anti-tip bracket slides just under
the countertop or wood block attached to the rear wall.
If you did not receive an anti-tip bracket with your purchase, call
1.800.626.8774 to receive one at no cost (in Canada, call 1.800.561.3344).
iAWARNINOjIMPOnTANTSAFmYNOTICE
TheCaliforniaSafeDrinkingWater and ToxicEnforcementAct requiresthe Governor of Californiato publish a list of substances
known to the state to causecancer,birth defectsor other reproductive harm, and requires businessesto warn customers ofpotential
exposure to such substances.
Thefiberglassinsulation in self-cleanovens givesoff a very small amount of carbon monoxide during the cleaning cycle.Exposurecan
be minimized by venting with an open window or usinga ventilation fan or hood.
Page 3
j WARNING i GENERAL SAFETYINSTRUCTIONS
GEAppliances.com
Usethis appliancefor its intendedpurposeasdescribedinthis
Owner'sManual.
Besureyour applianceisproperlyinstalledand grounded bya
qualifiedinstallerin accordancewith theprovidedinstallation
instructions.
Donot attempt to repairor replaceany part of your range unless
it isspecificallyrecommendedin this manual.Allother servicing
shouldbetransferredto a qualifiedtechnician.
Beforeperformingany service,unplug therange or disconnect
the powersupplyat the householddistribution panelby removing
thefuse or switchingoff the circuit breaker.
Donot leavechildrenalone-children shouldnot beleft alone
or unattended inan area wherean appliance is in use.They
shouldneverbe allowedto climb,sitor stand on any partof the
appliance.
CAUTION : Donotstoreitemsofinteresttochildren
abovea range or onthe backguardof a range-children climbing
on the rangeto reach items could beseriouslyinjured.
Useonlydry pot holders-moist or damp pot holderson hot
surfacesmay resultin burnsfrom steam.Donotlet pot holders
touch hot surfaceunitsor heatingelements.Donotusea towel
or other bulkycloth in placeof pot holders.
Neveruseyourapplianceforwarming or heating the room.
Donottouch the surfaceunits,the heatingelementsor the
interiorsurfaceof theoven.Thesesurfacesmay be hotenough
to burn eventhough they aredark in color.Duringand after use,
do not touch,or let clothingor other flammable materialscontact
the surfaceunits,areas nearbythe surface unitsor any interior
area of the oven;allowsufficienttime for cooling first.Other
surfacesof theappliancemay becomehot enoughto cause
burns.Potentiallyhot surfacesincludethe cooktop,areasfacing
thecooktop,ovenvent opening,surfacesnearthe openingand
crevicesaround the oven door.
Donot heatunopenedfood containers.Pressurecouldbuild up
and the container couldburst,causingan injury.
Donot usealuminum foil to linethe drip pansor anywhere inthe
oven,exceptasdescribedin this manual.Misusecouldresultin
damageto the rangeand shockor fire hazard.
Avoidscratchingor impactingglassdoors,cooktopsor control
panels.Doingso may leadto glassbreakage.Donot cookon a
product with brokenglass.Shock,fire or cuts mayoccur.
iii_Cookmeatand poultrythoroughly-meat to at leastan internal
temperatureof Z60°Fandpoultry to at leastan internal
temperatureof Z80°F.Cookingto thesetemperaturesusually
protectsagainst foodborneillness.
jA WARNING j KEEPFLAIVllVlABLEMATERIALSAWAY FROM
THE RANGE.
iii_,Donotstoreor useflammablematerialsin an ovenor near
the cooktop,includingpaper,plastic,potholders,linens,wall
coverings,curtains,drapesand gasolineor otherflammable
vaporsand liquids.
iii_,Neverwear loose-fittingor hanginggarments while using
the appliance.Thesegarments may ignite if they contact hot
surfaces,causingsevereburns.
iA i
iii_,Donotletcookinggreaseor otherflammablematerials
accumulate in or nearthe range.Greaseinthe oven or onthe
cooktop may ignite.
iii_,Cleanventilatinghoodsfrequently.Greaseshouldnot be allowed
to accumulate onthe hood or filter.
In WARNING 1IN THEEVENTOFA FIRE,TAKETHEFOLLOWINGSTEPS
TOPREVENTTHE FIREFROM SPREADING:
iii_,Do not usewater on greasefires.Neverpick up a flaming pan.
Turnthe controlsoff.Smothera flaming pan on a surfaceunitby
coveringthe pancompletelywith awell-fitting lid,cookiesheet
or flat tray.Usea multi-purposedry chemicalor foam-type fire
extinguisher.
iii_Ifthere isa fire inthe ovenduring baking,smotherthefire by
closingthe ovendoor and turning the oven off or byusinga
multi-purposedry chemical or foam-type fireextinguisher.
iii_Ifthere isa fire inthe ovenduringself-clean,turn theoven
off andwait for thefireto go out. Donotforce the door open.
Introductionoffresh air at self-cleantemperaturesmay leadto
a burstof flame from the oven.Failureto follow this instruction
may resultin severeburns.
]
Page 4

IMPORTANT SAFETY INFORMATION.
READ ALL INSTRUCTIONS BEFORE USING.
iA WARNING i COOKTOPSAFETYINSTRUCTIONS
Never leave the surface units unattended at medium or
high heat settings. Boilovers cause smoking and greasy
spillovers that may catch on fire.
iiiiiiiiiiii_i;i
Never leave oil unattended while frying. If allowed to
heat beyond its smoking point, oil may ignite, resulting
in fire that may spread to surrounding cabinets. Use a
deep fat thermometer whenever possible to monitor oil
temperature.
To avoid oil spillover and fire, use a minimum amount of
oil when shallow pan-frying and avoid cooking frozen
foods with excessive amounts of ice.
iiiiiiiiiiii_i;i
Useproper pan size--selectcookware having flat
bottoms large enough to coverthe surface heating
element.Theuse of undersizedcookware will expose
a portion of the surface unit to direct contact and may
result in ignition of clothing. Properrelationship of
Only certain types of glass,glass/ceramic, earthenware
or other glazedcontainers are suitable for cooktop
service;others may break because of the sudden
change in temperature.
iiiiiiiiiiii_i;i
To minimize the possibility of burns, ignition of
flammable materials and spillage, the handle of a
container should be turned toward the center of the
range without extending over nearby surface units.
iiiiiiiiiiii_i;i
When preparing flaming foods under a hood, turn the
fan on.
iiiiiiiiiiii_i;i
If power is lost to an electric cooktop while a surface
unit is ON, the surface unit will turn back ON as soon
as power is restored. In the event of power loss, failure
to turn all surface unit knobs to the OFF position may
result in ignition of items on or near the cooktop leading
to serious injury or death.
cookware to surface unit will also improve efficiency.
[A WARNING i RADIANT COOKTOPSAFETYINSTRUCTIONS
(some models)
Use care when touching the cooktop. The glass surface
of the cooktop will retain heat after the controls have
been turned off.
Do not cook on a broken cooktop. If glass cooktop
should break, cleaning solutions and spillovers
may penetrate the broken cooktop and create a
risk of electric shock. Contact a qualified technician
immediately.
Avoid scratching the glass cooktop. The cooktop can be
scratched with items such as knives, sharp instruments,
rings or other jewelry and rivets on clothing.
Do not place or store items that can melt or catch fire
on the glass cooktop, even when it is not being used. If
the cooktop is inadvertently turned on, they may ignite.
Heat from the cooktop or oven vent after it is turned off
may cause them to ignite also.
iiiiiiiiiiii_i;i
UseCERAMABRYTE®ceramic CooktopCleaner and
CERAMABRYTE®CleaningPadto clean the cooktop.
Wait until the cooktop cools and the indicator light
goes out before cleaning.A wet sponge or cloth on a
hot surface can cause steam burns.Some cleaners
can produce noxiousfumes if applied to a hot surface.
NOTE:Sugarspillsare an exception.They should be
scraped off while still hot using an oven mitt and a
scraper.Seethe Cleaningthe glass cooktop section for
detailed instructions.
Read and follow all instructions and warnings on the
cleaning cream label.
Do not use aluminum foil to line drip pans. Foil can trap
heat or melt resulting in damage to the product and a
shock or fire hazard.
[A WARNING !
COIL COOKTOP SAFETYINSTRUCTIONS
(somemodels)
Do not immerse or soak the removable surface units.
Do not put them in a dishwasher. Do not self-clean the
surface units in an oven. Doing so may cause them to
fail, presenting a burn or fire hazard.
To avoid the possibility of a burn or electric shock, always
be certain that the controls for all surface units are at the
OFF position and all coils are cool before attempting to lift
or remove a coil surface unit.
4
Be sure the drip pans are not covered and are in place.
Their absence during cooking could damage range
parts and wiring.
i Do not use aluminum foil to line drip pans. Foil can trap
heat or melt, resulting in damage to the product and a
shock or fire hazard.
Page 5

[A WARNING [OVEN SAFETYINSTRUCTIONS
GEAppliances.com
Stand away from the range when opening the oven
door. Hot air or steam which escapes can cause burns
to hands, face and/or eyes.
Keep the oven vent unobstructed.
Keep the oven free from grease buildup. Grease in the
oven may ignite.
Place oven racks in desired location while oven is cool.
If rack must be moved while oven is hot, do not let pot
holder contact hot heating element in oven.
When using cooking or roasting bags in the oven,
follow the manufacturer's directions.
[,&WARNING
(Some models)
The self-cleaning feature operates the oven at temperatures high enough to burn away food soils in the oven.
Follow these instructions for safe operation.
Before operating the self-clean cycle, remove pans,
shiny metal oven racks and other utensils from the
oven. Only gray or black porcelain-coated oven racks
and drip pans may be left in the oven. Do not use
self-clean to clean other parts, such as shiny drip pans
or bowls.
Before operating the self-clean cycle, wipe grease and
food soils from the oven. Excessive amount of grease
may ignite, leading to smoke damage to your home.
] SELF-CLEANING OVEN SAFETYINSTRUCTIONS
Pull the oven rack to the stop-lock position when
loading and unloading food from the oven. This helps
prevent burns from touching hot surfaces of the door
and oven walls.
Do not leave items such as paper, cooking utensils or
food in the oven when not in use. Items stored in an
oven can ignite.
Do not use aluminum foil to line the oven bottom. Foil
may trap or reflect heat, leading to a shock or fire
hazard.
If the self-cleaning mode malfunctions, turn the oven
off and disconnect the power supply. Have it serviced
by a qualified technician.
Do not clean the door gasket. The door gasket is
essential for a good seal. Care should be taken not to
rub, damage or move the gasket.
Do not use oven cleaners. No commercial oven cleaner
or oven liner protective coating of any kind should be
used in or around any part of the oven.
WARNING JWARIVllNGDRAWER/LOWEROVENDRAWERSAFETY
INSTRUCTIONS(somemode sl
The purpose of the warming drawer isto hold hot
cooked foods at serving temperature. Bacteria will grow
in food while it is below 140°F. Do not put cold food
in warming drawer. Do not heat food for more than 2
hours. Failure to follow these instructions may result in
foodborne illness.
Do not leave paper products, plastics, canned food or
combustible materials inthe drawer. They may ignite.
Do not touch the heating element or the interior surface
of the drawer. These surfaces may be hot enough to
cause burns.
Usecare when opening the drawer. Open the drawer a
crack and let hot air or steam escape before removing or
replacing food. Hot air or steam that escapes can cause
burns to hands,face and/or eyes.
Do not use aluminum foil to line the lower drawer. The
foil will trap heat below, and upset the performance
of the oven. Foil can melt and permanently damage
the drawer bottom. Damage from improper use of
aluminum foil is not covered by the product warranty.
Page 6
Using the surface units,
[,AWARNING i IRE HAZARD: Never leave the range unattended with the cooktop on medium or highsettings. Keep flammable items away from the cooktop. Turn off all controls when
done cooking. Failure to follow these instructions can result in fire, serious injury or
death.
Throughout this manual, features and appearance may vary from your model.
Surface Unit Cook Settings
Thepower levelwith a fraction
indicatesthe additional
half-step setting. Youmay
hear clicking sounds indicating
the control is maintaining your
desiredsetting.
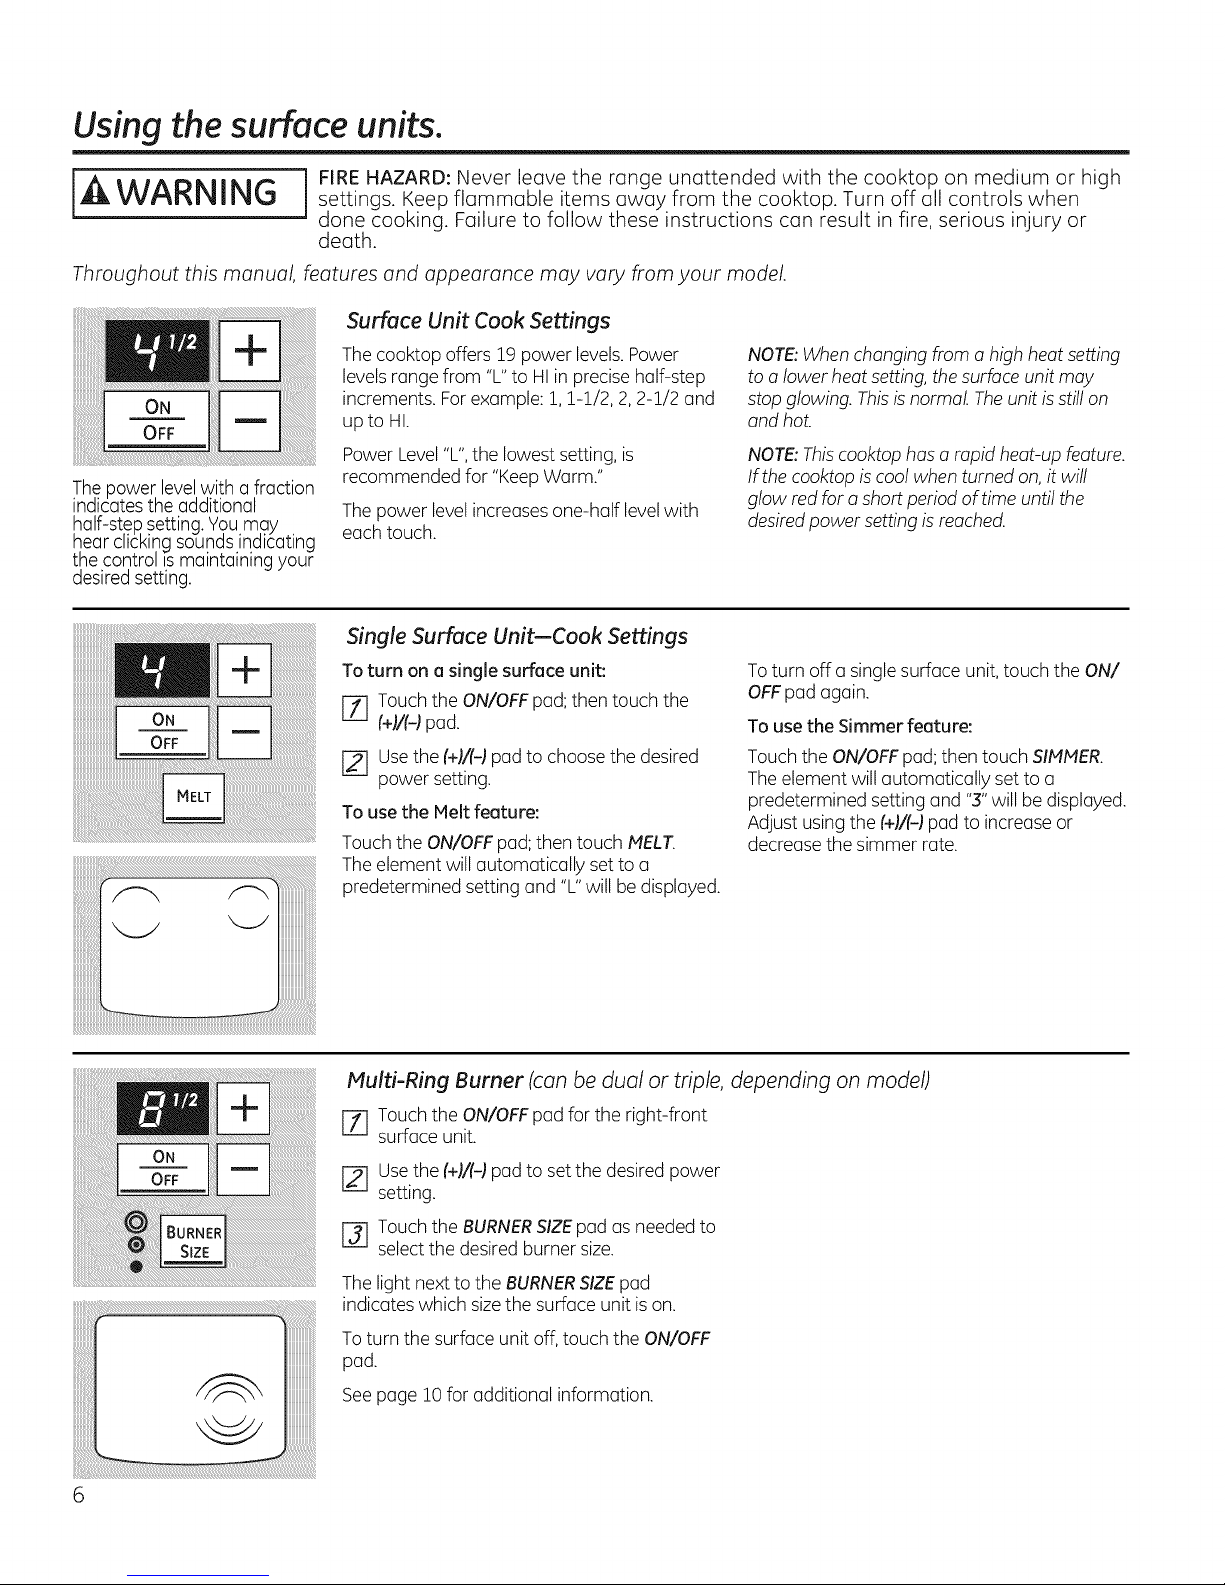
The cooktop offers 19 power levels.Power
levelsrange from "L"to HI in precise half-step
increments. Forexample: 1,1-1/2, 2,2-1/2 and
up to HI.
Power Level"L",the lowest setting, is
recommended for "KeepWarm."
Thepower level increases one-half levelwith
each touch.
Single Surface Unit--Cook Settings
To turn ona single surface unit:
[Z] Touch the ON/OFFpad;then touch the
(+)/(-)pad.
[] Usethe (+)/(-)pad to choose the desired
power setting.
To use the Melt feature:
Touch the ON/OFF pad; then touch MELT.
The element will automatically set to a
predetermined setting and "L" will be displayed.
NOTE:When changing from a high heat setting
to a lower heat setting, the surface unit may
stop glowing. Thisisnormal. Theunit isstill on
and hot.
NOTE:Thiscooktophas a rapid heat-up feature.
If the cooktop iscool when turned on, it will
glow red for a short period of time until the
desiredpower setting is reached.
Toturn off a single surface unit, touch the ON/
OFFpad again.
To use the Simmer feature:
Touch the ON/OFF pad; then touch SIMMER.
The element will automatically set to a
predetermined setting and "3" will be displayed.
Adjust using the (+)/(-) pad to increase or
decrease the simmer rate.
iiiiiiiiiii_iiii!iiii!iiiiiiiiiiiiiiiiiiiii_iii_i_lil_l_l_l_l_iil_i_i_il_iiiiiiiiiiiiiiiiiiiiiiiiiiiiiiiiiiiiiiiiiiiiiiiiiiiiiiiiiiiiiiiiiiiiiiiiiiiiiiiiiiiiiiiiiii\_......................................_-J iiiiiiiiiiiiiiiiiiiiii
, iiiiiiiiiiiii
iiiiiiiiiiiiiiiiiiiiiiiiiiiiiiiiiiiiiiiiiiiiiiiiiiiiiiiiiiiiiiiiiiiiiiiiiiiiiiiiiiiiiiiiiiiiiiiiiiiiiiiiiiiiiiiiiiiiiiiiiiiiiiiiiiiiiiiiiiiiiiiiiiiiiiiiiiiiiiiiiL
Multi-Ring Burner (con be dual or triple, depending on model)
[-_ Touch the ON/OFFpad for the right-front
surface unit.
Usethe (+)/(-)pad to set the desiredpower
setting.
rJ] Touch the BURNERSIZEpad usneeded to
selectthe desired burner size.
The light next to the BURNERSIZEpad
indicates which sizethe surface unit is on.
To turn the surface unit off, touch the ON/OFF
pad.
Seepage 10 for additional information.
Page 7
GEAppliances.com
[,AWARNING
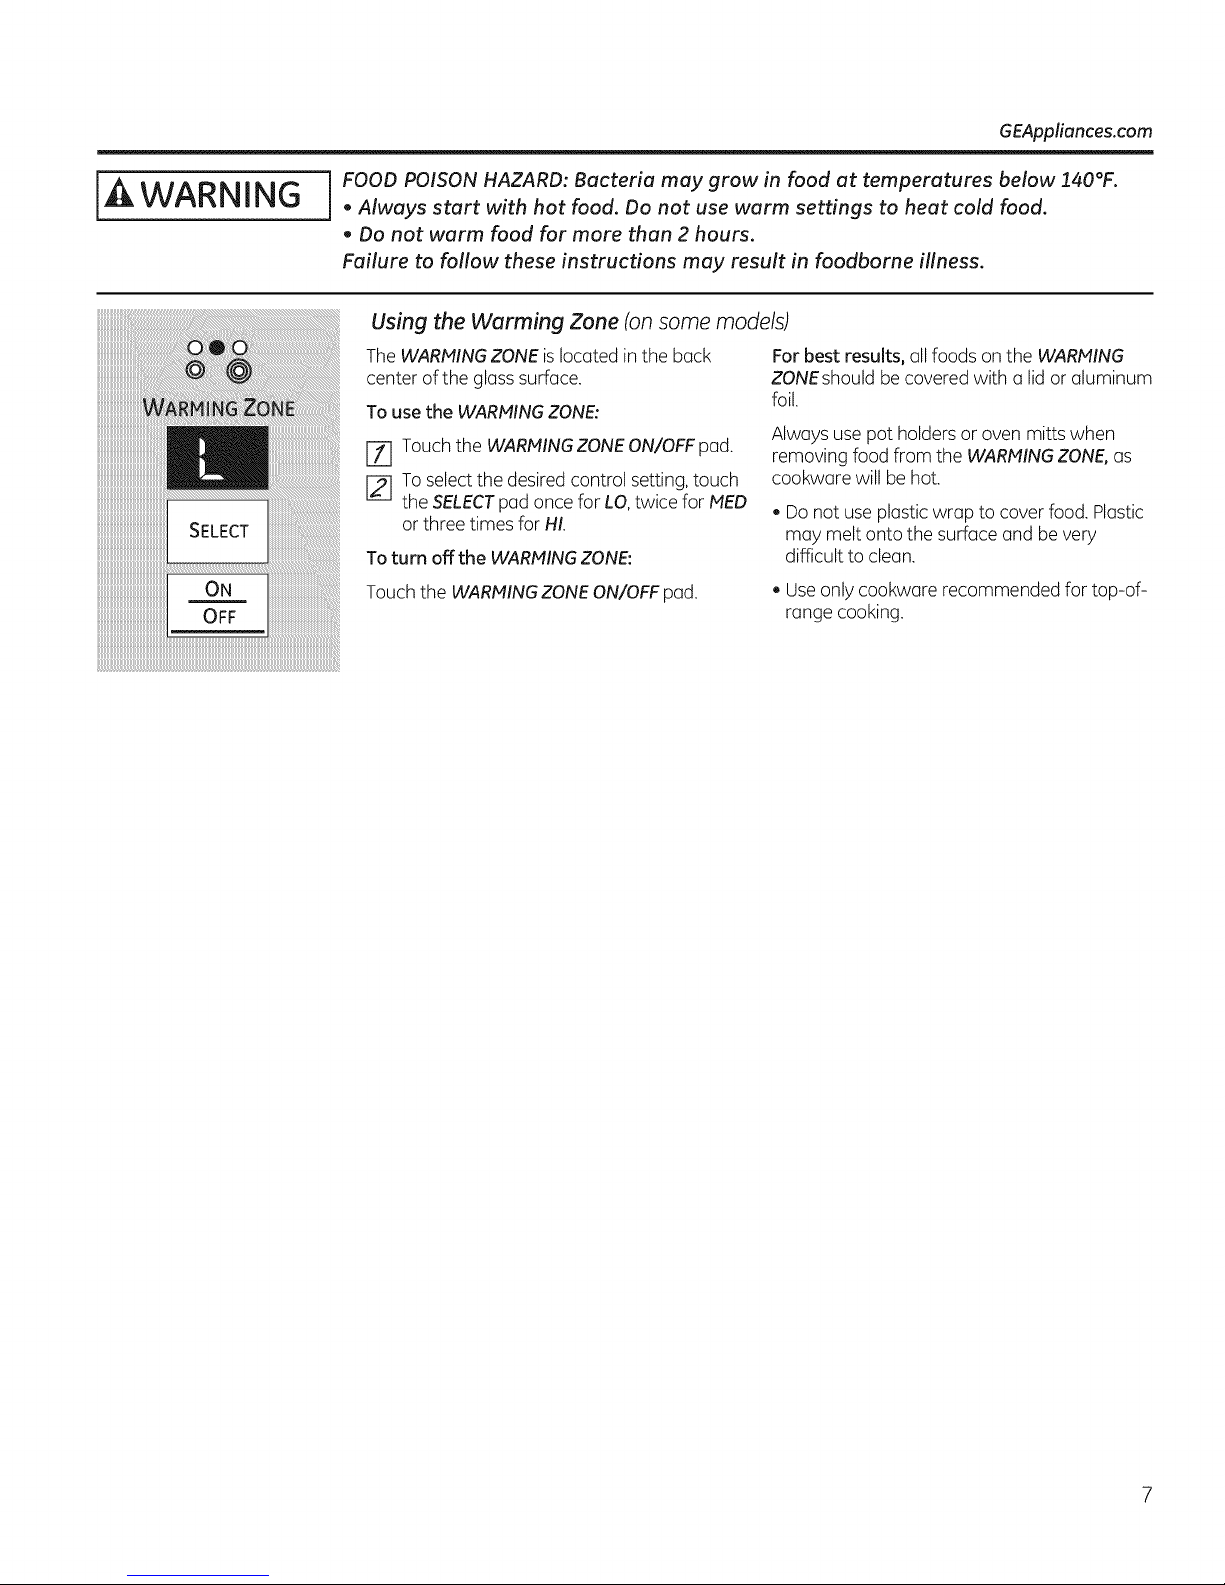
FOOD POISON HAZARD: Bucteriu muy grow in food ut temperutures below 140°F.
• Alwuys sturt with hot food. Do not use wurm settings to heut cold food.
• Do not wurm food for more thun 2 hours.
Fuilure to follow these instructions muy result in foodborne illness.
Using the Warming Zone (on some models)
The WARMINGZONEislocated in the back
center of the glass surface.
To use the WARMING ZONE:
E_ Touch the WARHINGZONEON/OFFpad.
[] To select the desired control setting, touch
the SELECTpad once for LO, twice for MED
or three times for HI.
To turn offthe WARHING ZONE'.
Touch the WARMINGZONEON/OFFpad.
For best results, all foods on the WARHING
ZONEshould be covered with a lid or aluminum
foil.
Always use pot holders or oven mitts when
removing food from the WARMINGZONE,as
cookware will be hot.
. Do not useplastic wrap to cover food. Plastic
may melt onto the surface and be very
difficult to clean.
. Useonly cookw(]re recommended for top-of-
range cooking.
Page 8
Using the surface units,
Home Canning Tips
Be sure the conner is centered over the surface
unit.
Make surethe conner isflat on the bottom.
Toprevent burns from steam or heat, use
caution when conning.
For Models With a Radiant Glass Cooktop
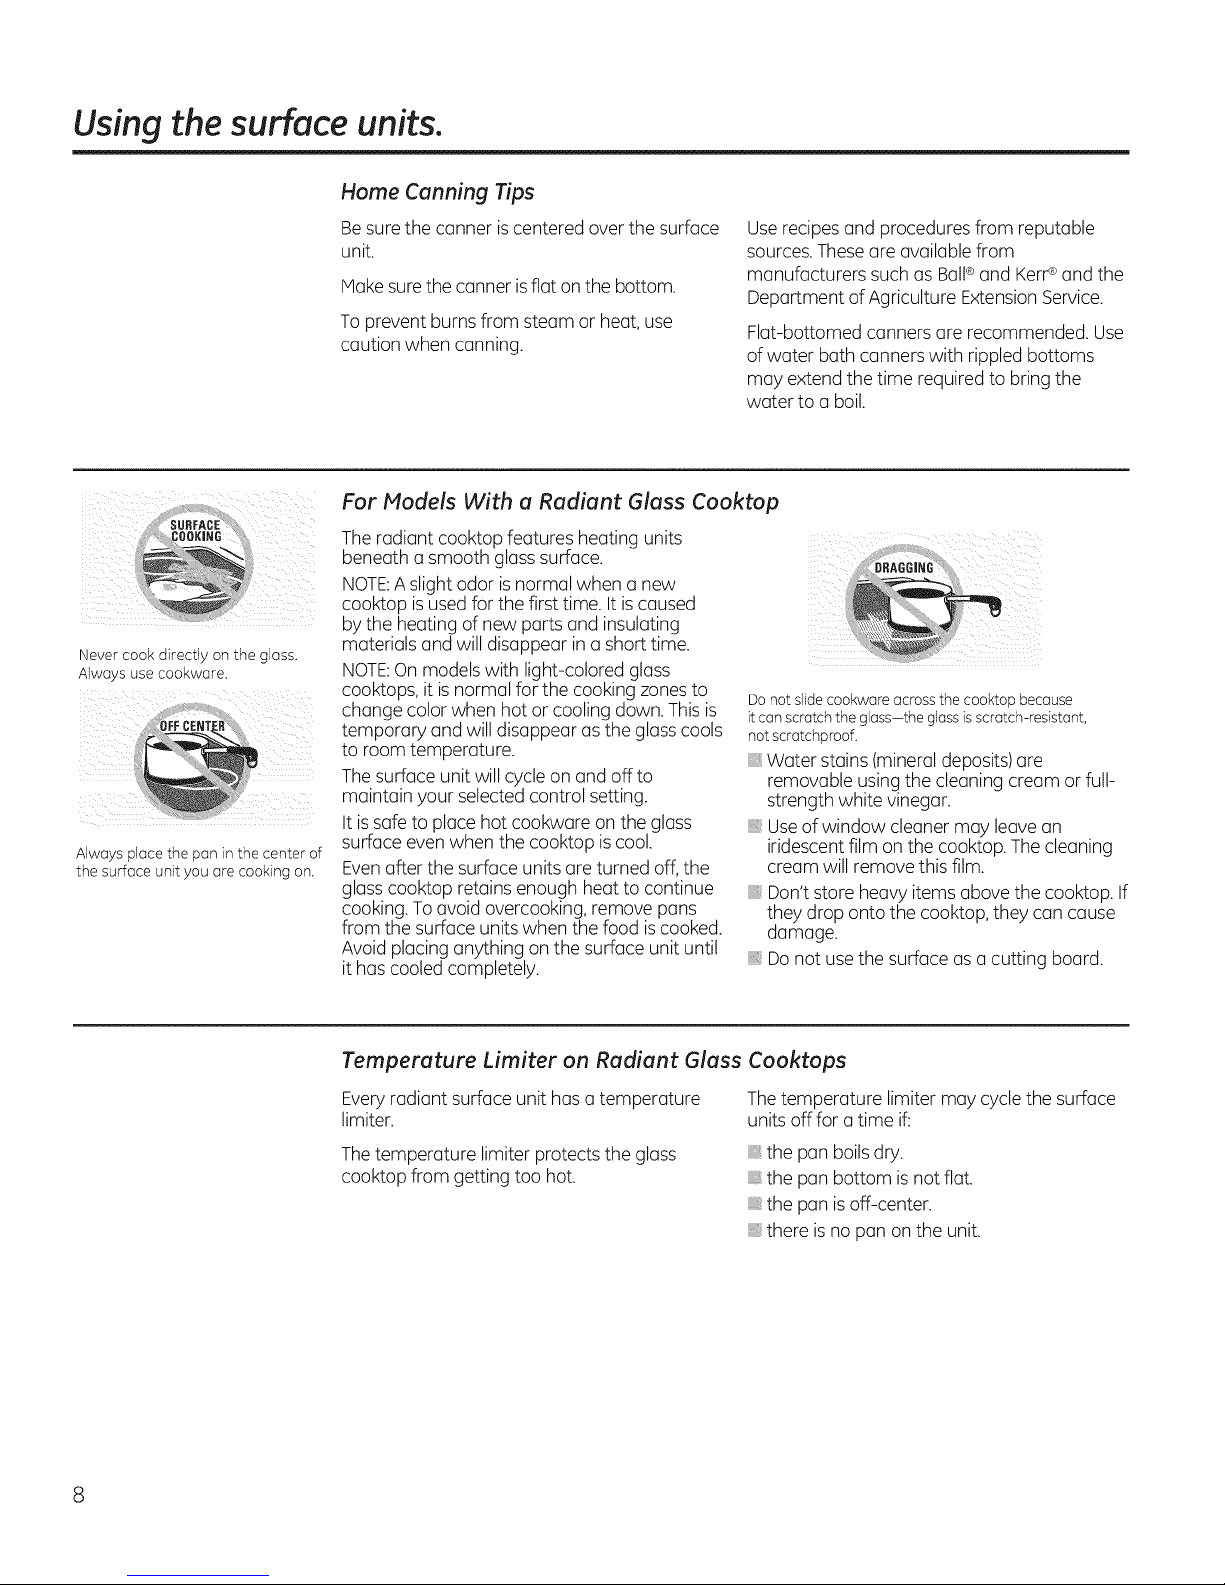
The radiant cooktop features heating units
beneath o smooth glosssurface.
NOTE:Aslight odor isnormal when o new
cooktop is used for the first time. It iscaused
bythe heating of new ports and insulating
Never COOK Jirect j )n _neglass
AIwo} s use COOKware.
Always place the pan in the center of
the surface unit you are cooking on.
materials and will disappear in o short time.
NOTE:On models with light-colored gloss
cooktops,it is normal for the cooking zonesto
change color when hot or cooling down. This is
temporary and will disappear us the gloss cools
to room temperature.
Thesurface unit will cycle on and off to
maintain your selected control setting.
It is safe to place hot cookwore on the gloss
surface evenwhen the cooktop is cool.
Evenafter the surface units ore turned off, the
glasscooktop retains enough heat to continue
cooking.Toavoid overcooking, remove pans
from the surface unitswhen the food is cooked.
Avoid placing an½hing on the surface unit until
it has cooled completely.
Use recipesund procedures from reputable
sources.Theseore ovuiloble from
manufacturers such os Boll®and Kerr®and the
Deportment of Agriculture ExtensionService.
Fiat-bottomed conners ore recommended. Use
of water both conners with rippled bottoms
may extend the time required to bring the
water to o boil.
Donot slide cookwore across the cooktop because
t can scratch the glass-the glass isscratch-resistant,
notscratchproof.
Water stains (mineraldeposits)ore
removable using the cleaning cream or full-
strength white vinegar.
Useof window cleaner may leave on
iridescent film on the cooktop. The cleaning
cream will remove this film.
Don'tstore heavy items abovethe cooktop. If
they drop onto the cooktop,they can cause
damage.
Donot usethe surface asa cutting board.
Temperature LimNer on Radiant Glass
Everyrudiont surface unit hos o temperoture
limiter.
Thetemperature limiter protects the gloss
cooktop from getting too hot.
Cooktops
Thetemperoture limiter moy cycle the surface
units offfor o time if:
the pon boilsdry.
the pon bottom isnot flot.
the pon isoff-center.
there is no pon on the unit.
Page 9
Selectingtypes ofcookwarefor
lass cooktop models. GEAppliances.com
The following information will help you choose cookware which will give good performance on glass cooktops.
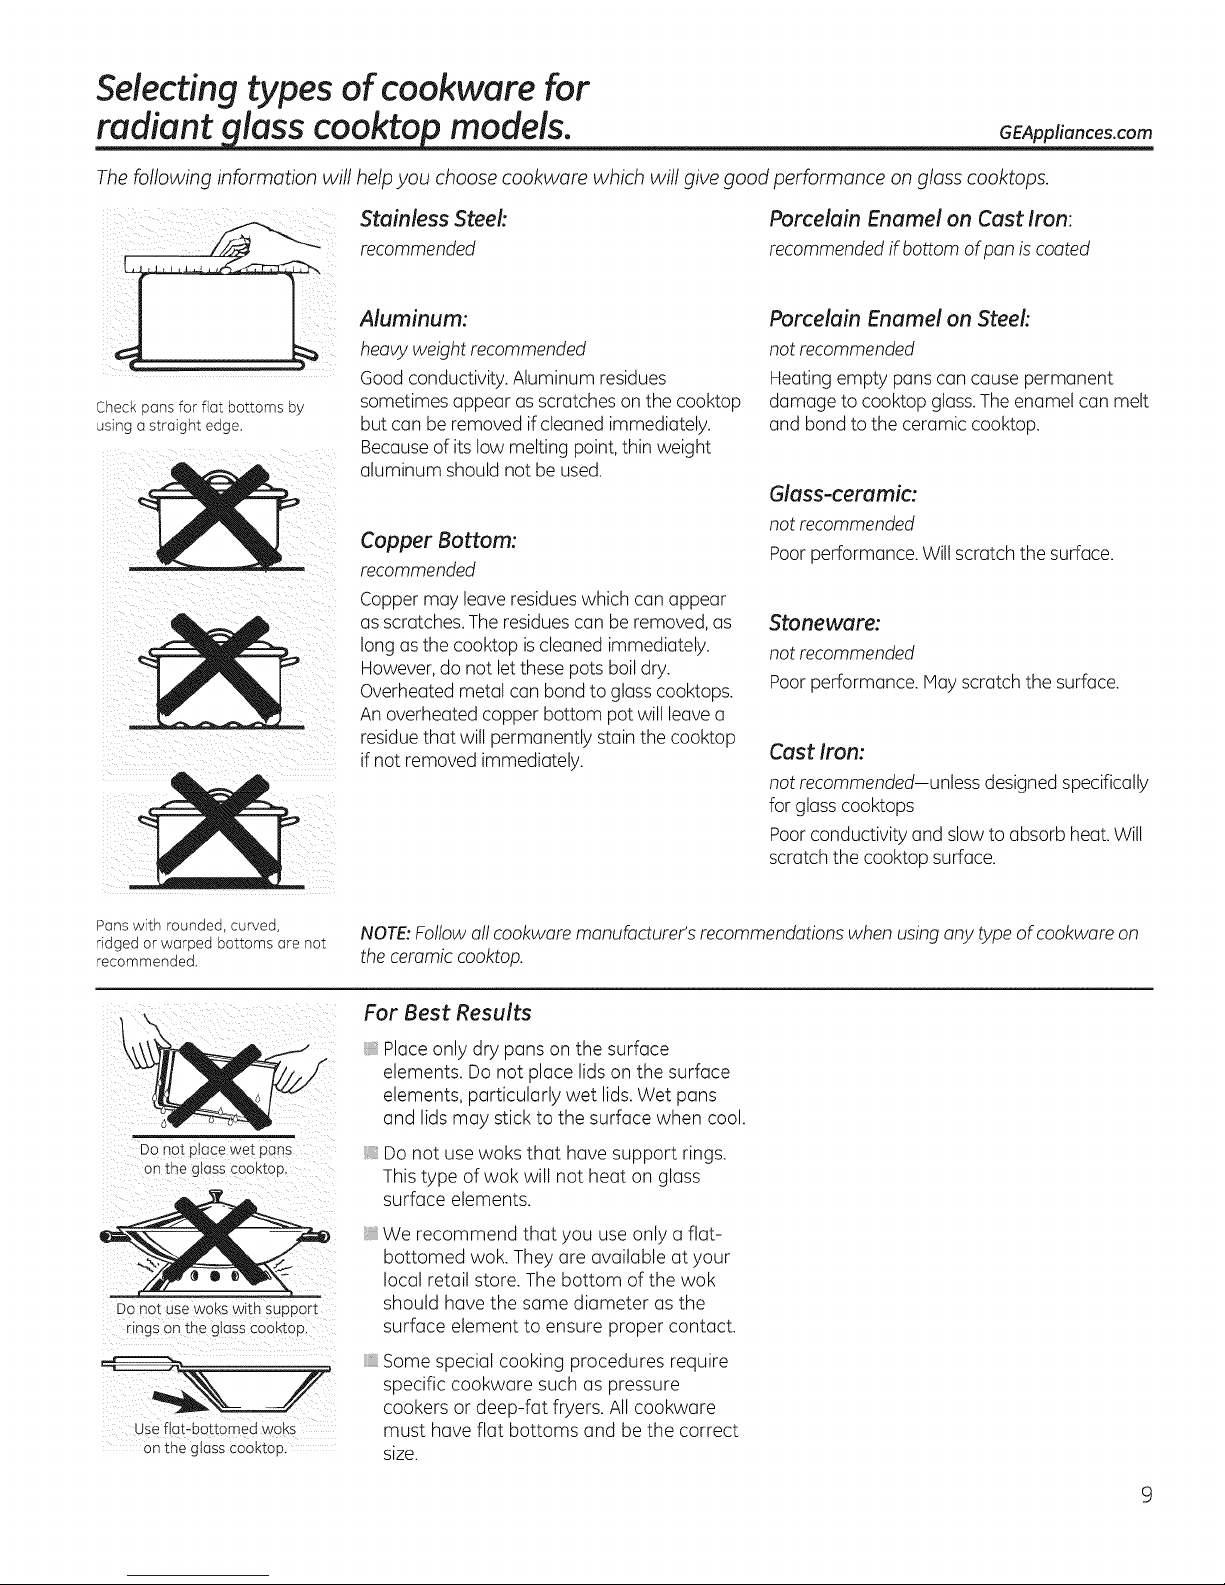
Check pans for flat bottoms by
using a straight edge,
Stainless Steel:
recommended
Aluminum:
heaW weight recommended
Good conductivity. Aluminum residues
sometimes appear as scratches on the cooktop
but can beremoved if cleaned immediately.
Becauseof itslow melting point,thin weight
aluminum should not be used.
Copper Bottom:
recommended
Coppermay leave residueswhich can appear
asscratches. The residues can be removed, as
long as the cooktop iscleaned immediately.
However, do not letthese pots boil dry.
Overheated metal can bond to glass cooktops.
An overheated copper bottom pot will leave a
residuethat will permanently stain the cooktop
if not removed immediately.
Porcelain Enamel on Cast Iron:
recommended if bottom of pan is coated
Porcelain Enamel on Steek
not recommended
Heating empty pans can cause permanent
damage to cooktop glass. The enamel can melt
and bond to the ceramic cooktop.
Glass-ceramic:
not recommended
Poor performance. Willscratch the surface.
Stoneware:
not recommended
Poor performance. May scratch the surface.
Cast Iron:
not recommended-unless designed specifically
for glass cooktops
Poor conductivity and slow to absorb heat. Will
scratch the cooktop surface.
Pans with rounded, curved,
ridged or warped bottoms are not
recommended.
Do not place wet pans
On the glass cooktop.
Donot use woks with support
iiii i i
Use flat-bottomed woks
On the glass Cooktop,
NOTE:Followall cookware manufacturer'srecommendations when usingany type ofcookware on
the ceramiccooktop.
For Best Results
:: Placeonly dry pans on the surface
elements. Do not place lids on the surface
elements, particularly wet lids.Wet pans
and lids may stick to the surface when cool.
Do not use woks that have support rings.
This type of wok will not heat on glass
surface elements,
We recommend that you use only a flat-
bottomed wok. They are available at your
local retail store. The bottom of the wok
should have the same diameter as the
surface element to ensure proper contact.
Some special cooking procedures require
specific cookware such as pressure
cookers or deep-fat fryers. All cookware
must have flat bottoms and be the correct
size.
Page 10
Usingthe oven controls.
Throughout this manual, features and appearance may vary from your model.
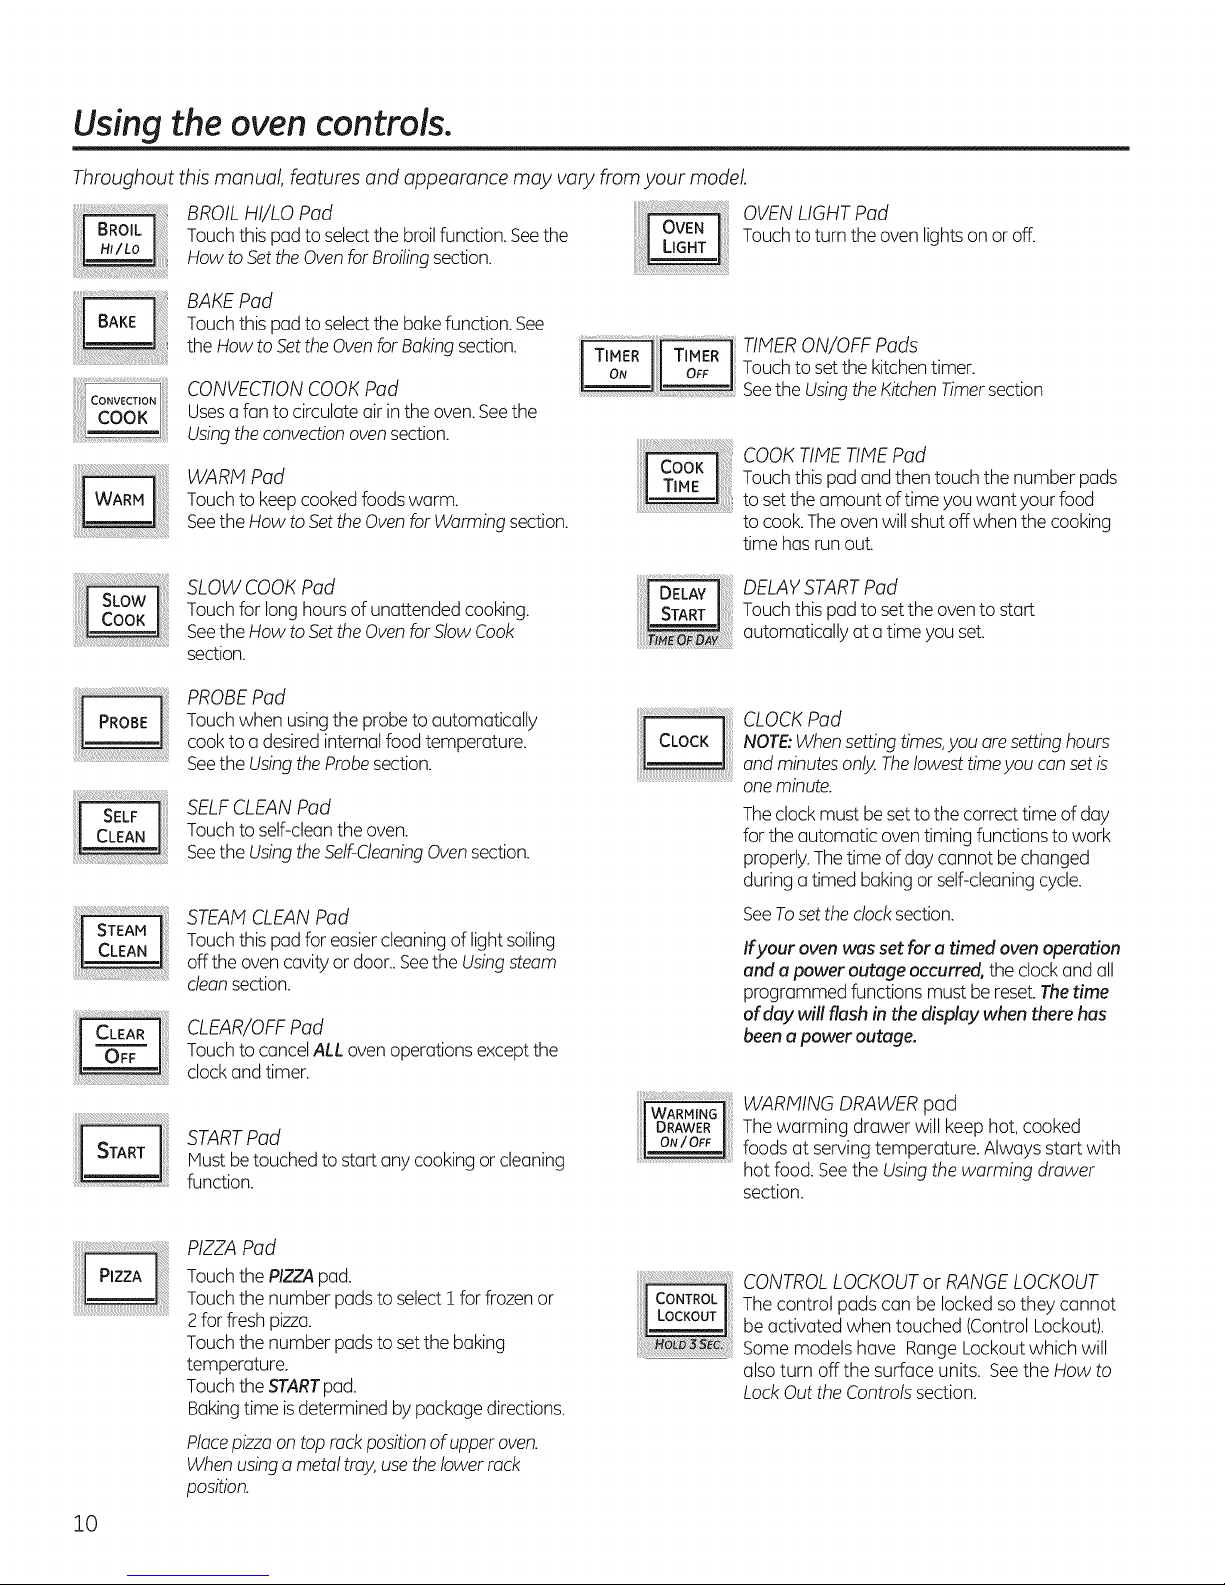
BROIL NI/LO Pad
Touchthis pad to selectthe broilfunction. Seethe
How toSetthe Ovenfor Broilingsection.
BAKE Pad
Touchthis pad to selectthe bakefunction. See
the How to SettheOvenfor Baking section.
CONVECTIONCOOKPad
Usesafan to circulate air in theoven.Seethe
Usingtheconvectionovensection.
WARM Pad
Touchto keep cookedfoods warm.
Seethe How to SettheOvenfor Warmingsection.
...............................................................................................Seethe Usingthe KitchenTimersection
_ TIMERON/OFF Pads
OVENLIGHT Pad
Touchto turn theoven lightson or off.
Touchto setthe kitchentimer.
COOKTIME TIMEPad
Touchthis pad and then touch the number pads
to setthe amount oftime youwant your food
to cook.Theovenwill shut off when the cooking
time has run out.
iiiiiiii_!i!i!i!il
SLOW COOKPad
Touchfor long hoursof unattended cooking.
Seethe How to SettheOvenfor Slow Cook
section.
PROBEPad
Touchwhen using the probeto automatically
cook to a desired internalfood temperature.
Seethe Usingthe Probesection.
SELF CLEAN Pad
Touch to self-clean the oven.
See the Using the Self-Cleaning Oven section.
STEAM CLEANPad
Touchthis pad for easiercleaning of lightsoiling
off the ovencavity or door..Seethe Usingsteam
cleansection.
CLEAR/OFFPad
Touchto cancelALL oven operationsexceptthe
clockand timer.
STARTPad
Mustbetouched to start any cookingor cleaning
function.
DELAYSTARTPad
Touchthis pad to setthe oven to start
automatically at a time you set.
CLOCKPad
NOTE:Whensettingtimes,you oresettinghours
and minutesonly.Thelowesttimeyou consetis
oneminute.
Theclock must be setto the correct time of day
for theautomatic oventiming functions to work
properly.Thetime of daycannot be changed
during a timed bakingor self-cleaningcycle.
See To set the clock section.
Ifyour oven was set for a timed oven operation
and a power outage occurred, the clock and all
programmed functions must be reset. The time
of day will flash in the display when there has
been a power outage.
WARMING DRAWER pad
Thewarming drawer will keep hot, cooked
foods at serving temperature. Always start with
hot food. Seethe Usingthe warming drawer
section.
PIZZA Pad
Touchthe PIZZApad.
Touchthe number padsto selectI for frozenor
2for fresh pizza.
Touchthe number padsto setthe baking
temperature.
Touchthe START pad.
Bakingtime isdetermined bypackage directions.
Placepizzaon top rock positionof upper oven.
Whenusingo metal troy,usethelowerrock
position.
10
CONTROLLOCKOUTor RANGE LOCKOUT
Thecontrol pads can belocked sothey cannot
be activated when touched (ControlLockout).
Somemodels have Range Lockout which will
alsoturn off the surface units. Seethe How to
LockOut the Controlssection.
Page 11
Using the clock, kitchen timer, end control lockout. GEAppliances.com
To Set the Clock
TIMER
ON
TheKitchenTimer isin hours and
minutes.
TheKitchenTimerdoesnotcontroloven
operations.Themaximum settingonthe
KitchenTimeris9hoursand59minutes.
TIMER ]
OFF
Theclock must be set to the correct time of day
for the DelayStart functions to work properly.
Thetime of day cannot be changed during
a delayed cooking or a delayed self-cleaning
cycle.
Touch the CLOCKpad.
%
Touch the number pads untilthe correct
[21
time of day isshown in the display. Ifthe
number pads are not touched within one
minute after you touch the CLOCKpad,
the display revertsto the original setting. If
this happens,touch the CLOCKpad and
enter the time of day.
To Set the Kitchen Timer
Touch the TIMERON pad.
%
Touch the number pods untilthe amount
[]
of time you wont shows in the display.For
example,to set 2 hours and 45 minutes,
touch 2, 4 and 5 in that order.If you make
a mistake,touch the TIMEROFFpad and
begin again.
r_ Touch the STARTpad.
Aftertouching the STARTpod,SET
disappears;this tellsyou the time iscounting
down, although the display doesnot change
r-_ Touch the STARTpad until the time of day
shows in the display.This enters the time
and starts the clock.
Tocheck the time of day when the display is
showing other information, touch the CLOCK
pad.Thetime of day shows until another pad
istouched. Tochange the time format or turn
off the clock display, see the SpecialFeatures
section.
until one minute has passed.Secondswill not
be shown inthe display untilthe lust minute is
counting down.
r_ When the kitchen timer reaches:00,the
control will beep 3 timesfollowed by one
beep every 6 seconds until the TIMEROFF
pad istouched.
The6-second tone can be cancelled by
following the steps in the Special features of
your oven control section under Tonesat the
Endof o TimedCycle.
To Reset the Kitchen Timer
If the display is still showing the time remaining,
you may change it by touching the TIMERON
pad,then touching the number pads sothat the
time you want appears in the display.
TIMER TIMER Touch the TIMEROFFpad.
ON OFF
] To Cancel the Kitchen Timer
How to Lock Out the Controls
Control Lockout or Range Lockout will allow
you to lockoutthe touch pods sothey cannot
be activated when touched. Some models
have Range Lockout which will also disable the
surface units. Hake sure all surface unit controls
are turned off when using RangeLockout. Any
surface unit that is setto an "on" position while
the Range Lockout isenabled will automatically
come on after the Range Lockout isdisabled.
Tolock/unlock the controls:
F-_ Touch and hold the Control Lockout or
Range Lockout pad for 3 seconds. The
oven display will show "Loc On Loc".
If the remaining time isnot in the display(clock,
delay start orcooking time are inthe display),
recall the remaining time by touching the
TIMERON pad and then touch the number
pads to enter the new time you want.
Tounlock the control, touch and hold the
Control Lockout or Range Lockout pod
for 3 seconds.The oven display will show
"Loc OFFLoc".
When this feature ison,the touch pads will not
respond except for the Clear/Off pad.
Theadjustment will be retained in memory
after a power failure.
11
Page 12
Usingthe oven.
Toavoid possible burns,place the racks in the desired position before you turn on the oven.
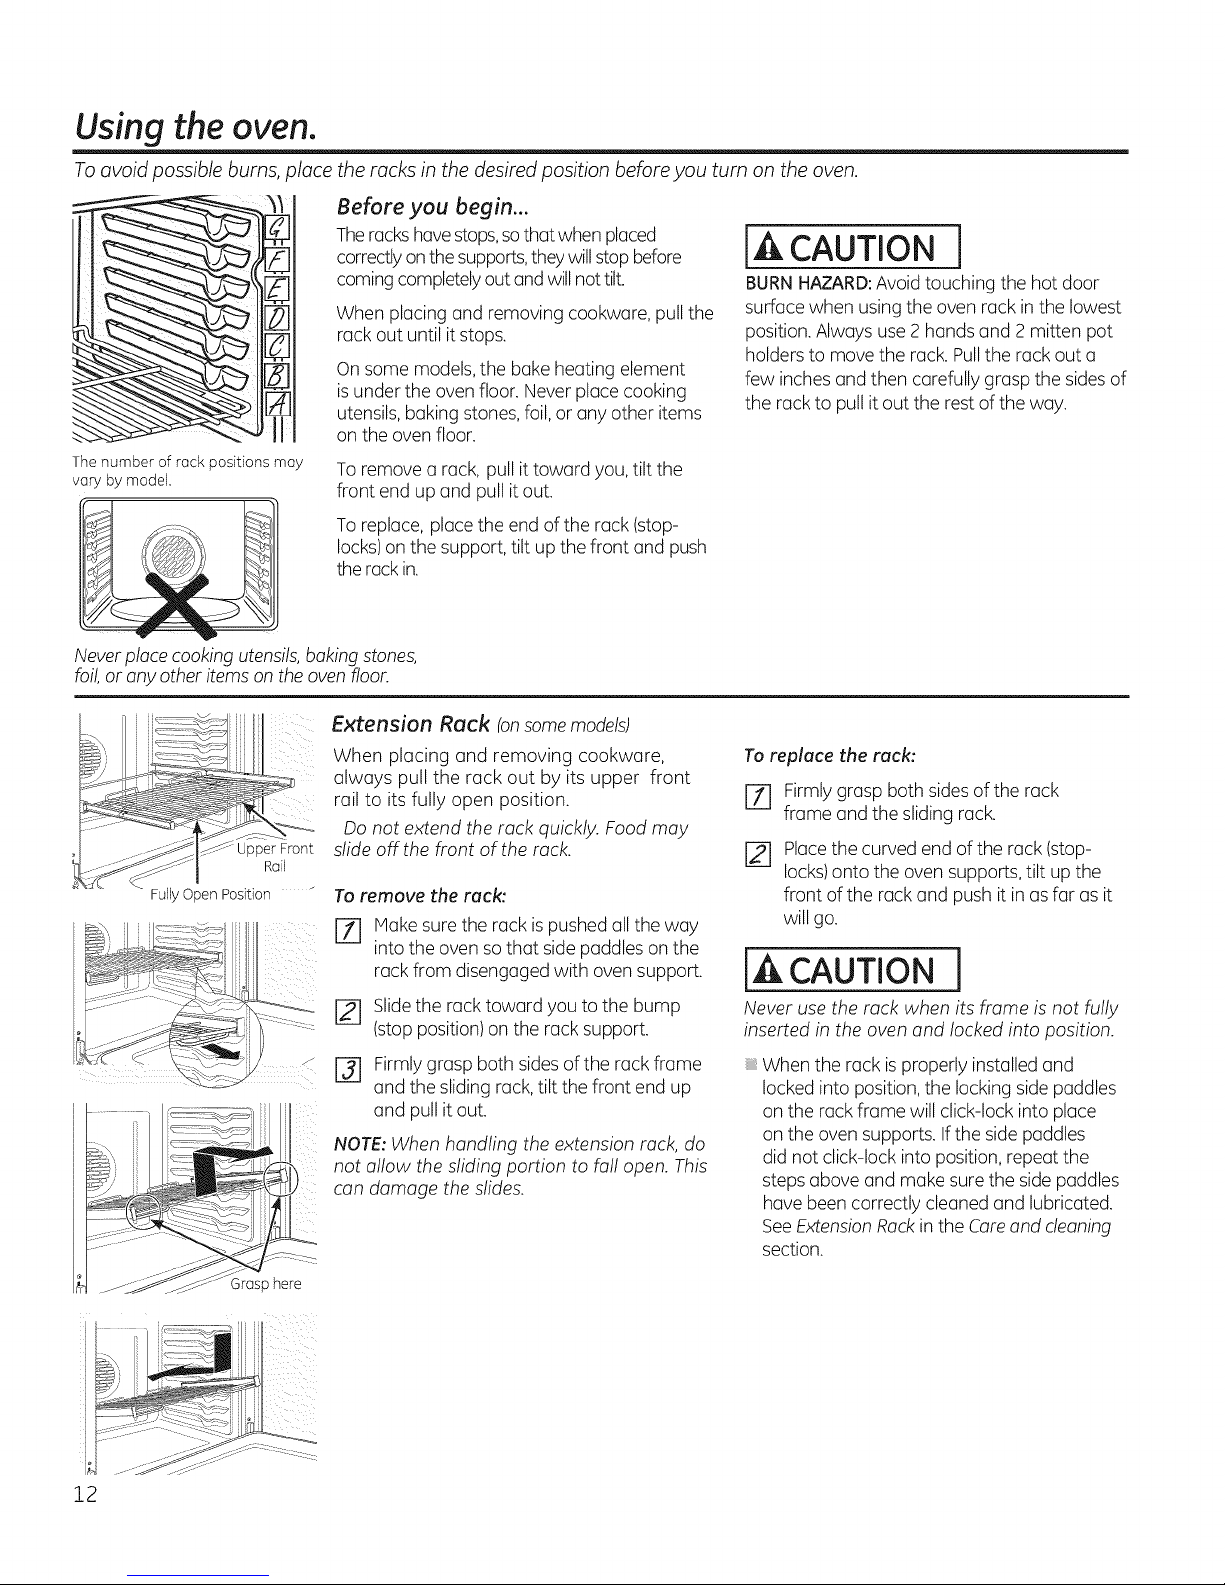
Before you begin...
Therackshavestops,sothat when placed
correctlyonthe supports,theywillstop before
comingcompletelyout andwillnottilt.
When placing and removing cookware, pull the
rack out until itstops.
On some models,the bake heating element
isunder the oven floor. Never placecooking
utensils,baking stones, foil,or any other items
on the ovenfloor.
The number of rack positions may
vary by model.
Neverplace cooking utensils,baking stones,
foil,or any other itemson the ovenfloor.
Toremove a rack, pull it toward you, tilt the
front end up and pull it out.
Toreplace, placethe end of the rack (stop-
locks)on the support, tilt up the front and push
therack in.
[A CAUTION
BURNHAZARD:Avoid touching the hot door
surface when usingthe oven rack in the lowest
position.Always use 2 hands and 2 mitten pot
holders to move the rack.Pullthe rack out a
few inches and then carefully graspthe sidesof
the rack to pullit out the rest of the way.
Front
Rail
Fully Open Position "
3rasp here
Extension Reck (onsome models)
When placing and removing cookware,
always pull the rack out by its upper front
rail to its fully open position.
Do not extend the rack quickly. Food may
slide off the front of the rack.
To remove the rack:
[Z] Hake surethe rack is pushed all the way
_ntothe oven sothat side paddles on the
rack from disengaged with oven support.
r_ Slidethe racktoward you to the bump
(stop position) on the rack support.
[] Firmlygrasp both sidesof the rack frame
and the sliding rack, tilt the front end up
and pull it out.
NOTE:When handling the extension rack, do
not allow the sliding portion to fall open. This
can damage the slides.
To replace the rack:
[Z] Firmlygrasp both sidesof the rack
frame and the sliding rack.
Placethe curved end of the rack (stop-
r21
locks)onto the oven supports,tilt up the
front of the rack and push it in asfar as it
will go.
[A CAUTION
Never use the rack when its frame is not fully
inserted in the oven and locked into position.
When the rack is properly installed and
locked into position,the locking sidepaddles
on the rack frame will click-lock into place
on the oven supports. If the side paddles
did not click-lock into position, repeat the
stepsabove and make surethe side paddles
have been correctly cleaned and lubricated.
SeeExtensionRackin the Careand cleaning
section.
12
Page 13
Aluminum Foil
GEAppliances.com
EP
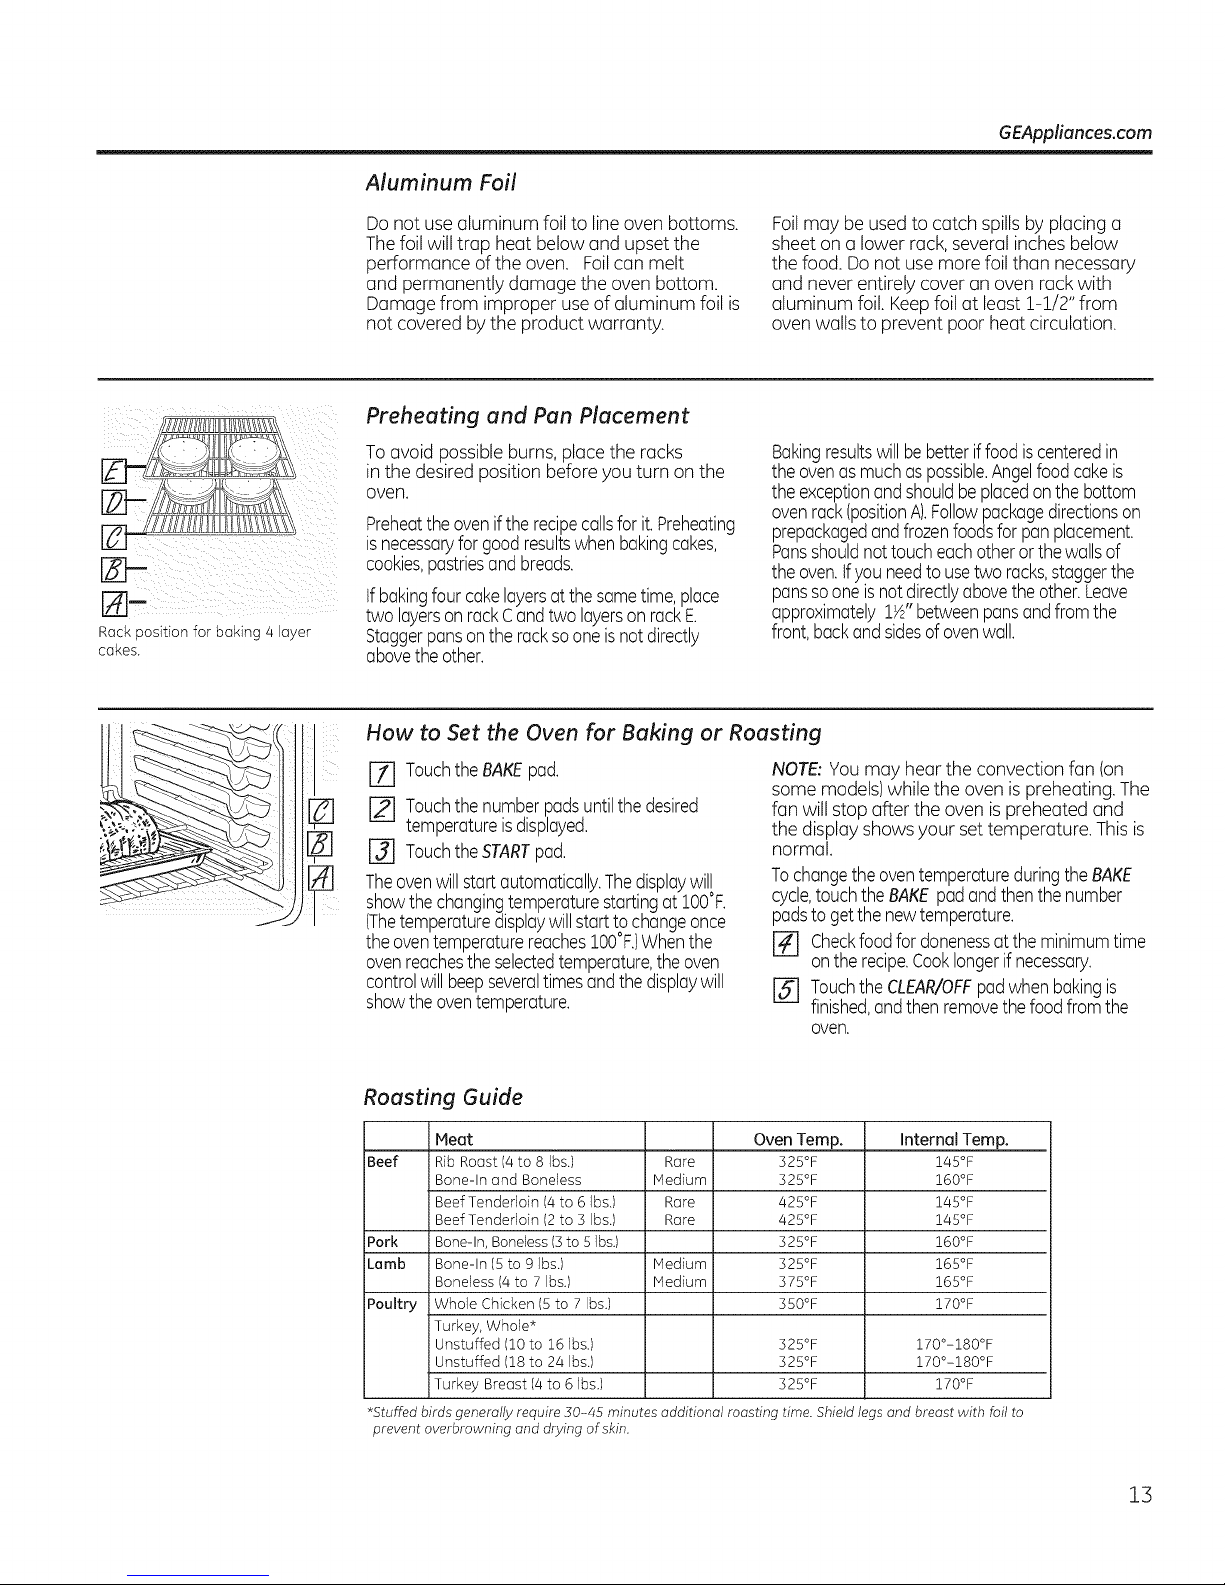
%-
Rackposition for baking 4 ayer
cakes.
Do not use aluminum foil to line oven bottoms.
Thefoil will trap heat below and upset the
performance of the oven. Foilcan melt
and permanently damage the oven bottom.
Damage from improper useof aluminum foil is
not covered by the product warranty.
Preheating and Pan Placement
To avoid possible burns, placethe racks
in the desired position beforeyou turn on the
oven,
Preheatthe oveniftherecipecallsforit.Preheating
isnecessaryfor goodresultswhenbakingcakes,
cookies,pastriesandbreads.
tfbakingfourcakelayersatthesametime,place
two layersonrackCandtwo layersonrackE.
Staggerpansonthe racksooneisnot directly
abovetheother.
How to Set the Oven for Baking or Roasting
rT] TouchtheBAKEpad.
[] Touchthenumberpadsuntilthedesired
temperatureisdisplayed.
,[_ [] TouchtheSTARTpad.
r-_ Theovenwillstart automatically.Thedisplaywill
showthechangingtemperaturestartingat 100°F.
(Thetemperaturedisplaywillstartto changeonce
theoventemperaturereaches100°F.)Whenthe
ovenreachesthe selectedtemperature,theoven
controlwillbeepseveraltimesandthedisplaywill
showtheoventemperature.
Foilmay be used to catch spills by placing a
sheet on a lower rack,several inches below
the food. Do not usemore foil than necessary
and never entirely cover an oven rack with
aluminum foil. Keepfoil at leastt-!/2" from
oven walls to prevent poor heat circulation.
Bakingresultswillbebetteriffoodiscenteredin
theovenas muchas possible.Angelfoodcakeis
theexceptionandshouldbeplacedonthe bottom
ovenrack(positionA).Followpackagedirectionson
prepackagedandfrozenfoodsforpanplacement.
Pansshouldnottoucheachotherorthewallsof
theoven.tfyou needto usetwo racks,staggerthe
panssooneisnotdirectlyabovethe other.Leave
approximately1½"betweenpansandfromthe
front,backandsidesof ovenwall.
NOTE.:You may hear the convection fan (on
some models)while the oven ispreheating. The
fan will stop after the oven ispreheated and
the display showsyour settemperature. This is
normal.
TochangetheoventemperatureduringtheBAKE
cycle,touchthe BAKEpadandthenthenumber
padstogetthenewtemperature.
r_ Checkfoodfor donenessatthe minimumtime
ontherecipe.Cooklongerifnecessary.
[] TouchtheCLEAR/OFFpadwhenbakingis
finished,andthen removethefoodfromthe
oven.
Roasting Guide
Beef
Pork
Lamb
Poultry
*Stuffed birds generally require 30-45 minutes additional roasting time. Shield lec
prevent overbrowning and dcving of skin.
Heat Oven Temp.
Rib Roast (4to 8 Ibs.) Rare 525°F
Bone-In and Boneless Medium 525°F
Beef Tenderloin (4 to 6 Ibs.) Rare 425°F
Beef Tenderloin (2 to 3 Ibs.) Rare 425°F
Bone-In, Boneless (5to 5 Ibs.) 525°F
Bone-In (5 to 9 Ibs.) Medium 525°F
Boneless 14to 7 Ibs.) Medium 575°F
Whole Chicken (Sto 7 Ibsj 550°F
Turkey, Whole*
Unstuffed 110to 16 Ibs.) 525°F
Unstuffed (18 to 24 Ibs.) 325°F
Turkey Breast (4 to 6 ]bs.) 525°F
Internal Temp.
145°F
160°F
145°F
145°F
160°F
165°F
165°F
170°F
170°-180°F
170°-180°F
170°F
s and breast with foil to
13
Page 14
Usingthe oven.
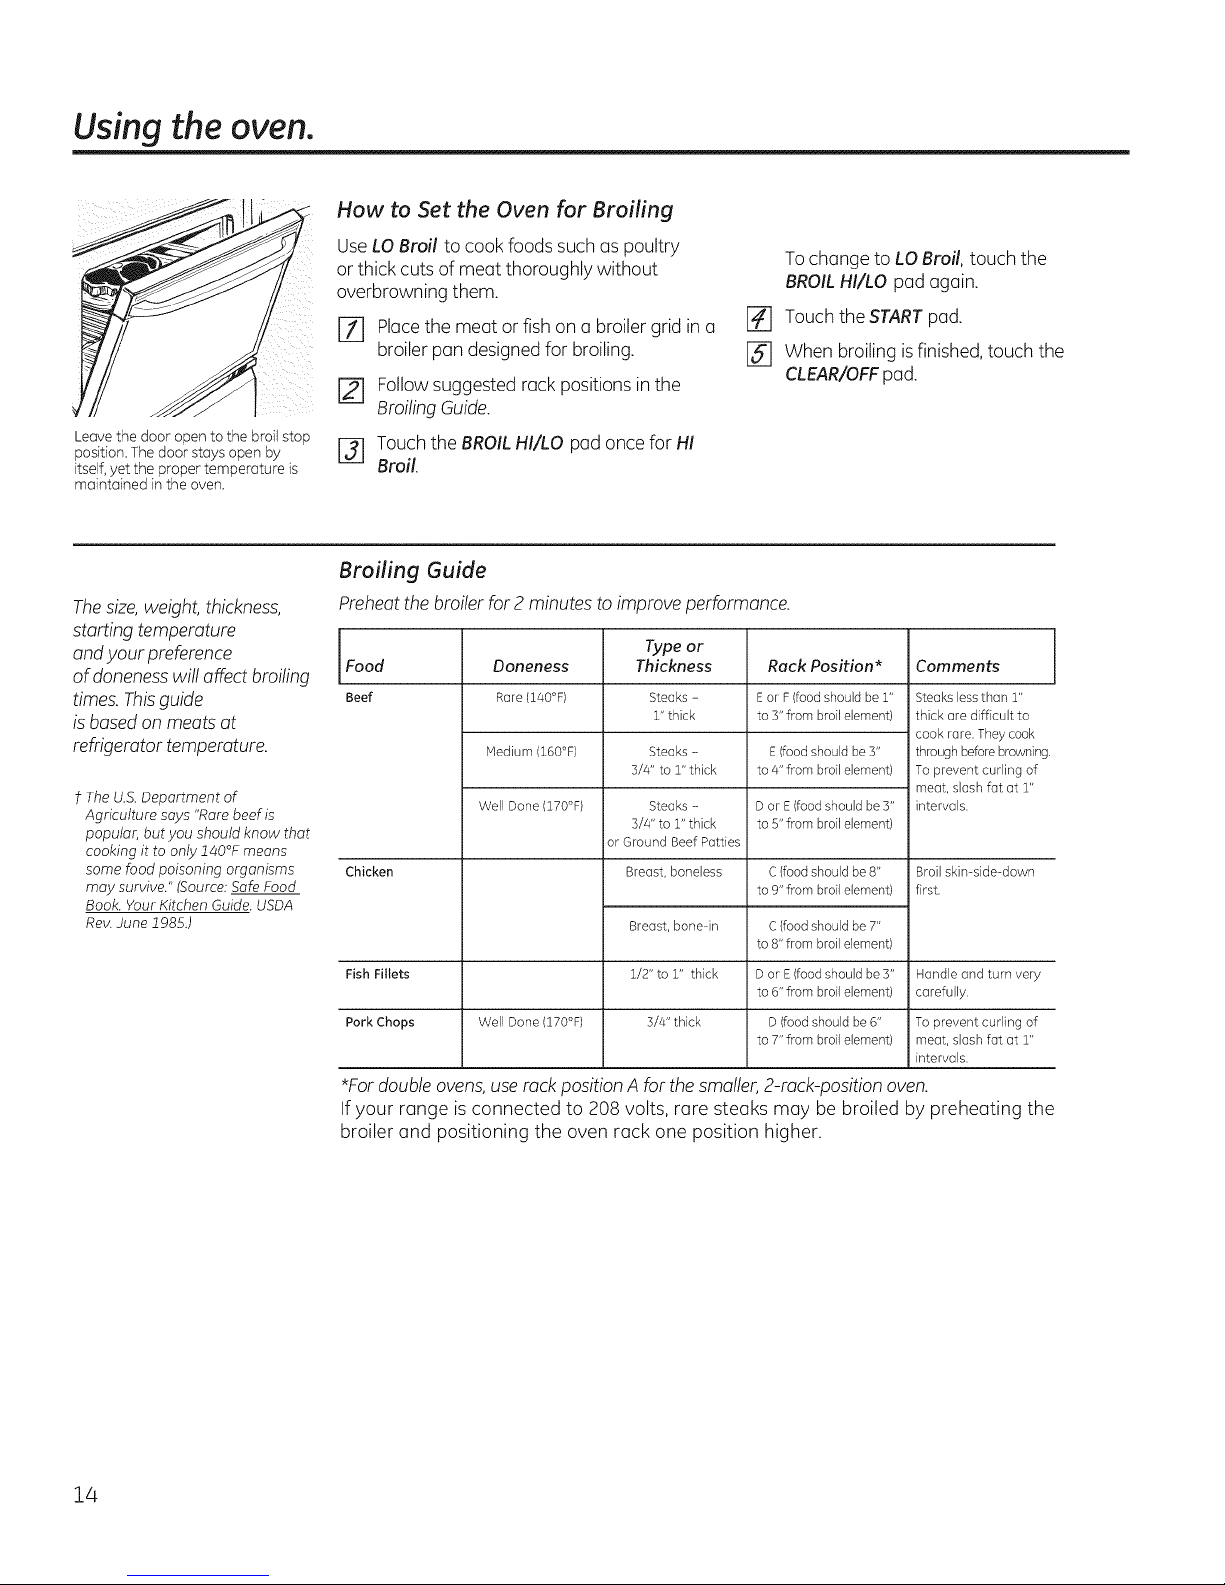
Leave the door open to the broil stop
position, The door stays open by
itself,yet the proper temperature is
maintained in the oven.
Thesize,weight, thickness,
starting temperature
and your preference
of alonenesswill affect broiling
times. Thisguide
is basedon meats at
refrigerator temperature.
t The U.S.Department of
Agriculture says "Rare beef is
popular, butyou should know that
cooking it to only 140°F means
some food poisoning organisms
may survive." (Source:Safe Food
Book. Your Kitchen Guide.USDA
Rev.June 1985.)
How to Set the Oven for Broiling
Use LOBroil to cook foods such as poultry
or thick cuts of meat thoroughly without
overbrowning them.
[_ Placethe meat or fish on a broiler grid in a
broiler pan designedfor broiling.
To change to LO Broil, touch the
BROIL HI/LO pad again.
Touch theSTART pad.
%
When broilingisfinished,touchthe
@
CLEAR/OFF pad.
r_ Followsuggested rack positions in the
Broiling Guide.
r_ Touch the BROILHI/LO pad once for HI
Broil.
Broiling Guide
Preheatthe broiler for2 minutes to improve performance.
Food Doneness Thickness Rack Position* Comments
Beef Rare (140°F) Steaks - Eor F (food should be 1" Steaks less than 1"
Medium (160°F) Steaks - E(food should be 3" through before browning
Well Done (170°F) Steaks - Dor E(food should be 3" intervals.
Chicken Breast, boneless C(food should be 8" Broil skin-side-down
Fish Fillets D or E (food should be S" Handle and turn very
Pork Chops Well Done (170°F) D (food should be 6" To prevent curling of
*For double ovens,userack position A for the smaller,2-rock-position oven.
If your range isconnected to 208 volts, rare steaks may bebroiled by preheating the
broiler and positioning the oven rack one position higher.
Type or
1" thick to 3" from broil element} thick are difficult to
cook rare. They cook
3/4" to 1" thick to 4" from broil element} To prevent curling of
3/4" to 1" thick to S"from broil element/
or Ground Beef Patties
to 9" from broil element} first.
Breast, bone-in
2/2" to 2" thick
3/4" thick
C(food should be 7"
to 8" from broil element)
to 6" from broil element/ carefully.
to 7" from broil element/ meat, slash fat at 1"
meat, slash fat at 1"
intervals.
14
Page 15
Adjust the oven thermostat--Do it yourself! GEApplionces.com
You may find that your new oven cooks differently than the one it replaced. Use your new oven for a few weeks to
become more familiar with it. If you still think your new oven is too hot or too cold, you can adjust the thermostat
yourself.
Do not use thermometers, such as those found in grocery stores, to check the temperature setting of your oven. These
thermometers may vary 20-40 degrees.
NOTE:This adjustment will only affect baking and roasting temperatures; it will not affect broiling or self-cleaning
temperatures. The adjustment will be retained in memory after a power failure.
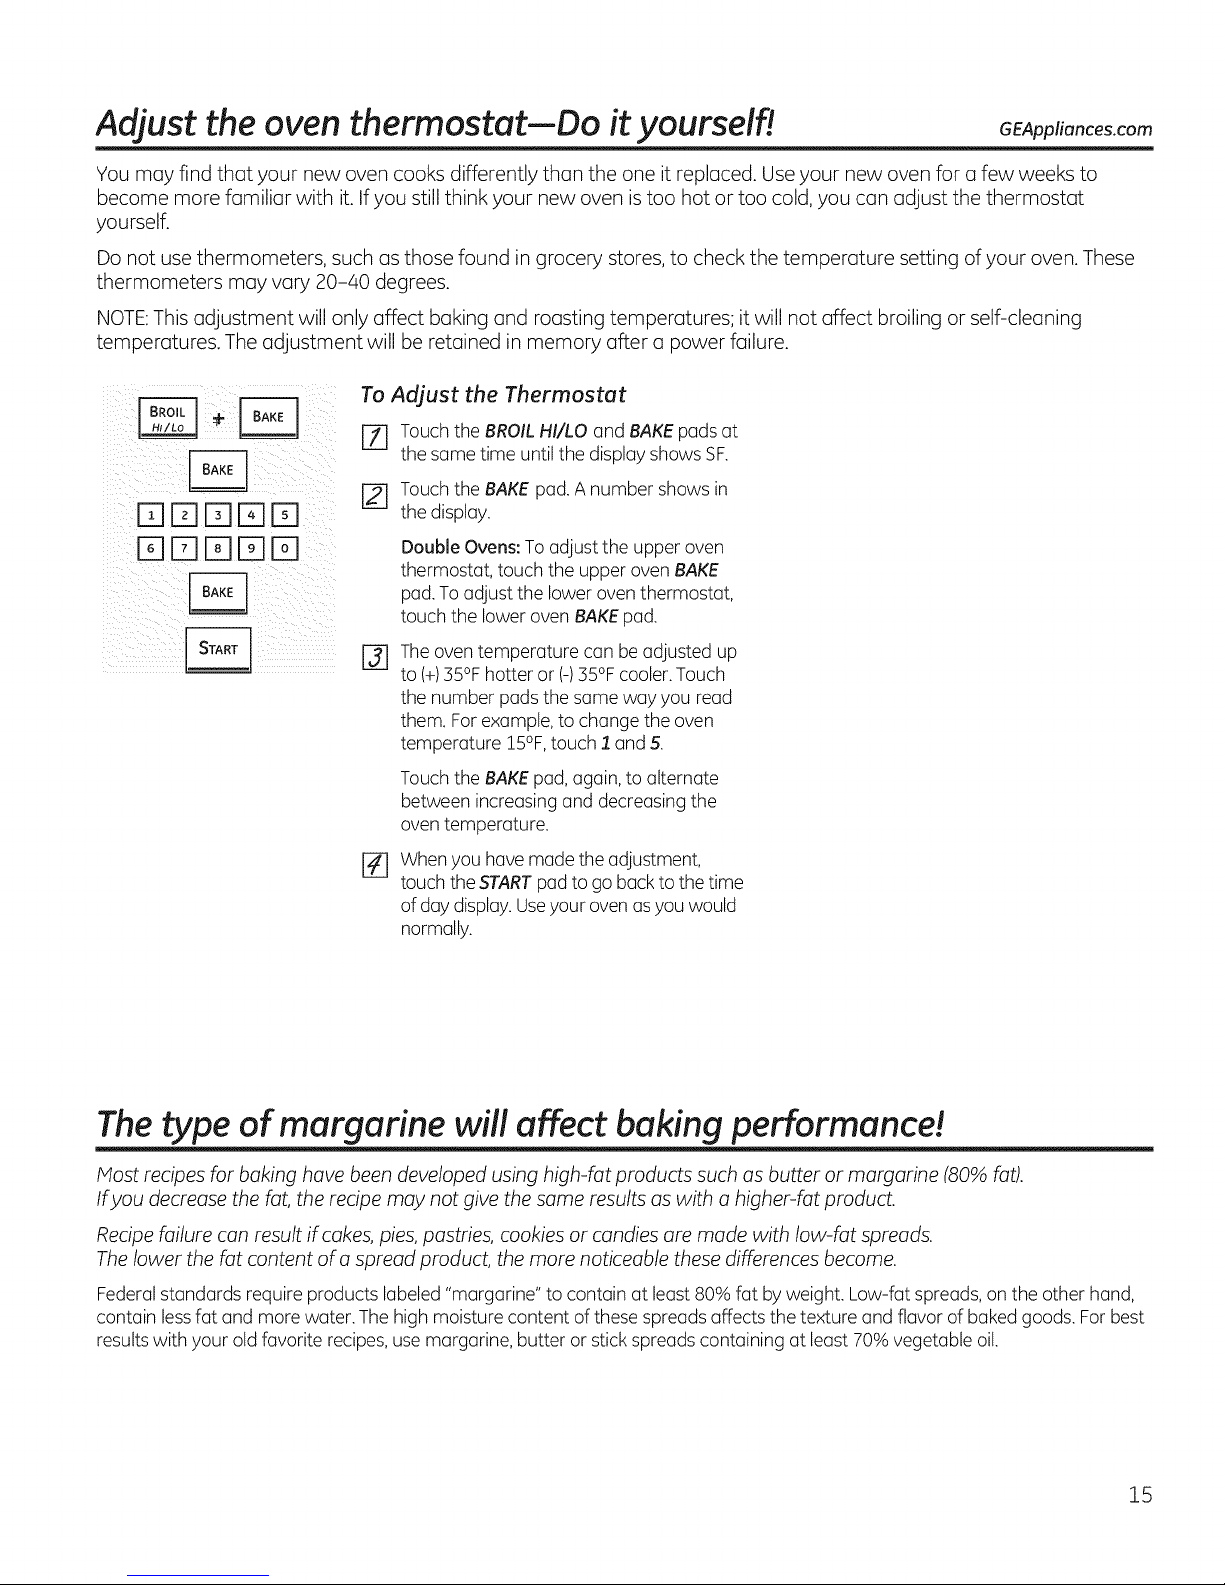
To Adjust the Thermostat
r!] Touch the BROILHI/LO and BAKEpadsat
the same time until the display shows SF.
r_ Touch the BAKEpad. A number shows in
[]DDDD
[]DDDD
the display.
Double Ovens: To adjust the upper oven
thermostat, touch the upper oven BAKE
pad.Toadjust the lower oventhermostat,
touch the lower oven BAKEpad.
Theoventemperature can be adjusted up
@
to (+)35°F hotter or (-)35°F cooler.Touch
the number pads the same way you read
them. Forexample,to change the oven
temperature !5°F, touch 1 and 5.
Touch the BAKEpad, again,to alternate
between increasing and decreasing the
oven temperature.
Whenyou have made the adjustment,
%
touch the STARTpadto go back to the time
of day display.Useyour oven asyou would
normally.
The type of margarine will affect baking performance!
Most recipes for baking have been developed using high-fat products such as butter or margarine (80% fat).
Ifyou decrease the fat, the recipe may not give the same results as with a higher-fat product.
Recipe failure can result if cakes, pies, pastries, cookies or candies are made with low-fat spreads.
The lower the fat content of a spread product, the more noticeable these differences become.
Federalstandards require products labeled"margarine" to contain at least 80% fat byweight. Low-fat spreads,on the other hand,
contain lessfat and more water. The high moisture content of these spreads affects the texture and flavor of baked goods. Forbest
resultswith your old favorite recipes,use margarine, butter or stick spreads containing at least 70% vegetable oil.
15
Page 16
Usinq the convection oven.consomemode_s_
Convection Fan Operation
In a convection oven, a fan circulates hot air
over, under and around the food.
Thiscirculating hot air isevenly distributed
throughout the oven cavity.Asa result,foods
are evenlycooked and browned-often in less
time with convection heat.
Convection Cook
CONVECTION
_!i_i__!i_i_i_i!_i_i!_i__ii_I_)_I_I_I_(U_
Multi-rack position.
The convection oven comes with one
convection cook mode and can be used
for Multi-Rack Convection Baking or !-Rack
Convection Baking.
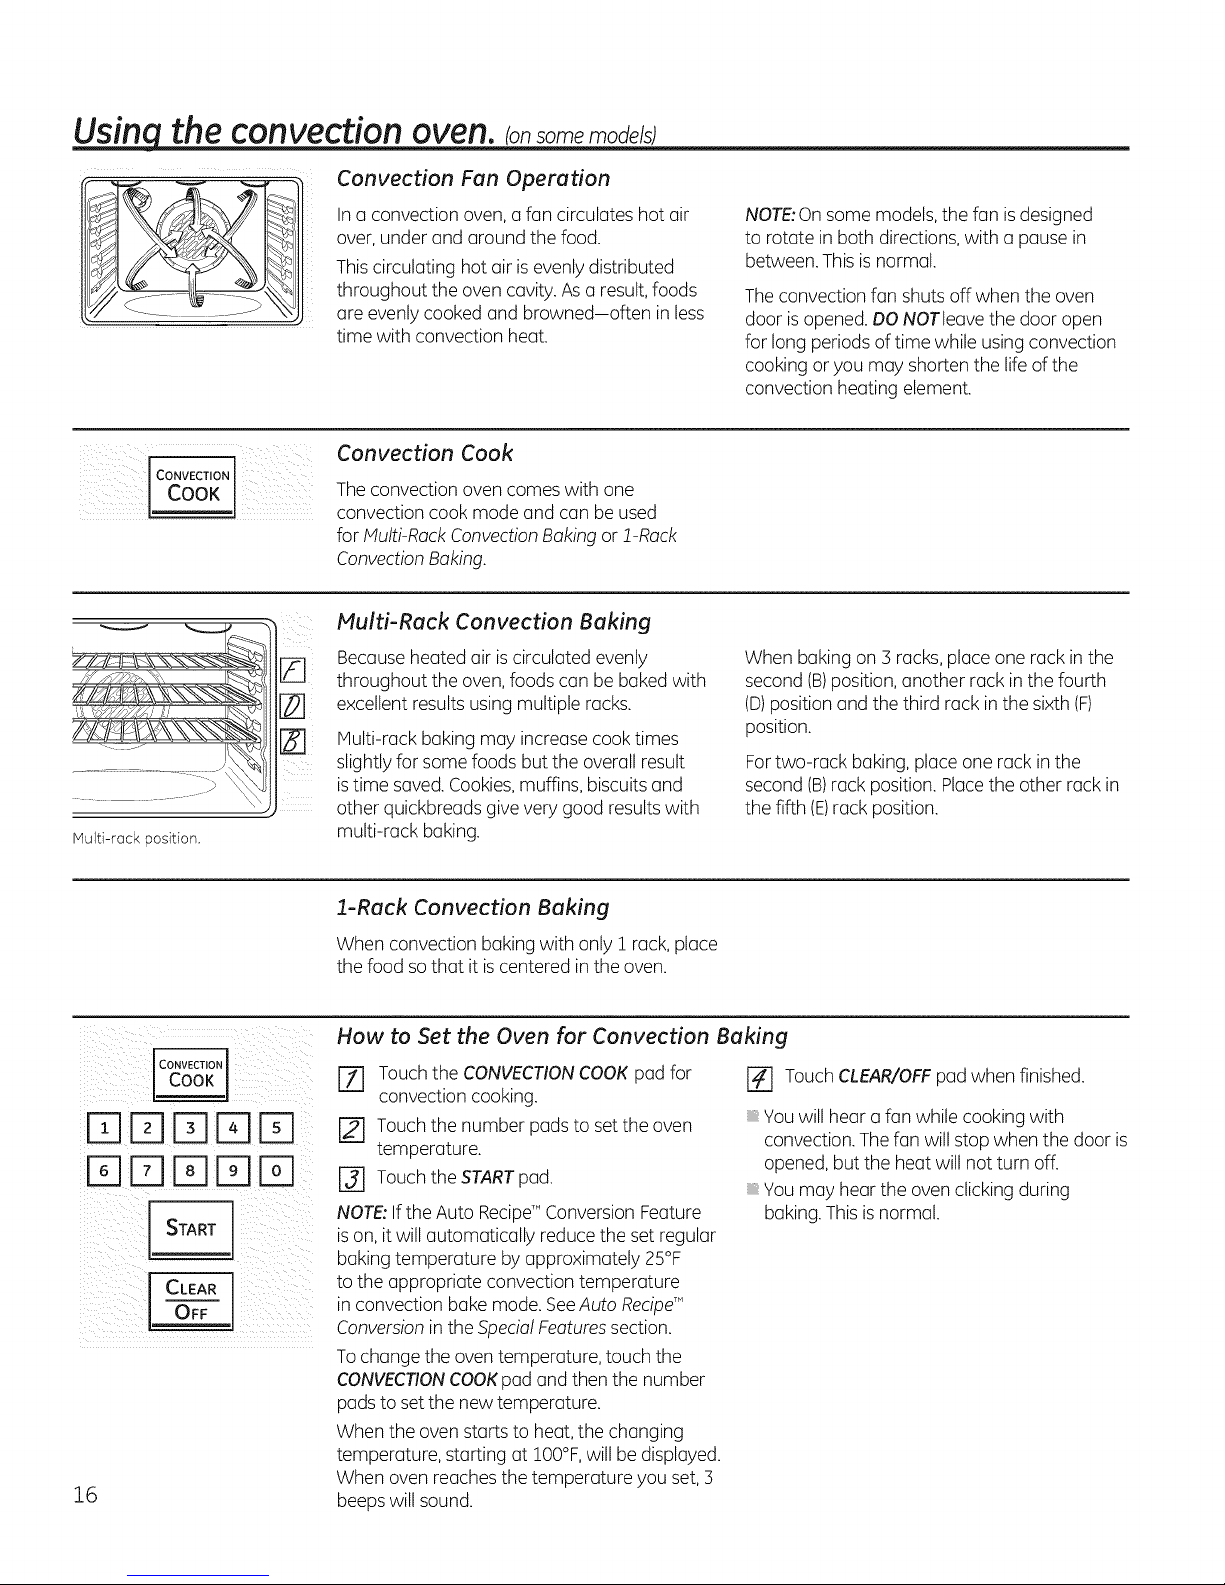
Multi-Reck Convection Baking
Because heated air iscirculated evenly
throughout the oven,foods can be baked with
excellent resultsusing multiple racks.
Multi-rack baking may increase cook times
slightly for some foods but the overall result
istime saved.Cookies,muffins, biscuits and
other quickbreads givevery good resultswith
multi-rack baking.
NOTE"On some models,the fan isdesigned
to rotate in both directions,with a pause in
between.This is normal.
Theconvection fun shuts off when the oven
door isopened. DONOTleave the door open
for long periods of time while using convection
cooking or you may shorten the lifeof the
convection heating element.
When baking on 3 racks,place one rack in the
second (B)position, another rack in the fourth
(D)position and the third rack inthe sixth (F)
position.
Fortwo-rack baking, place one rack in the
second (B)rack position. Placethe other rack in
the fifth (E)rack position.
ilT1!p-II-qI-qD :¸
i i!i
i¸))(/ CLEARIi¸
OFF ! ¸¸
16
1-Reck Convection Baking
When convection baking with only I rack, place
the food sothat it iscentered in the oven.
How to Set the Oven for Convection Baking
[Z] Touch the CONVECTIONCOOK pad for
convection cooking.
[] Touch the number pads to set the oven
temperature.
[] Touch the STARTpad.
NOTE:Ifthe Auto Recipe_"Conversion Feature
ison, it will automatically reduce the set regular
baking temperature by approximately 25%
to the appropriate convection temperature
in convection bake mode. SeeAuto RecipeM
Conversionin the Special Featuressection.
Tochange the oven temperature, touch the
CONVECTIONCOOKpad and then the number
pads to set the new temperature.
When the oven starts to heat,the changing
temperature, starting at 100°F,will be displayed.
When oven reaches the temperature you set, 3
beepswill sound.
r_ Touch CLEAR/OFFpad when finished.
You will hear a fan while cooking with
convection.Thefan will stop when the door is
opened,but the heat will not turn off.
You may hear the oven clicking during
baking.This isnormal.
Page 17
Cookware for Convection Cooking
When baking cookies, you will get
the best results if you use a flat
cookie sheet instead of o pan with
low sides.
Beforeusingyour convection oven,check to see
ifyour cookware leavesroom for air circulation
in the oven. Ifyou are bakingwith severalpans,
leavespace between them. Also,be sure the
pans do not touch each other or the walls of the
oven.
Paper and Plastic
Heat-resistant paper and plastic containers that
are recommended for use in regular baking can
also be used for convection baking but should
not be used at temperatures higher than the
temperature recommended by the cookware
manufacturer. Plastic cookware that is heat-
resistant to temperatures of 400°F can also be
used.
Using the pizza feature somemodels)
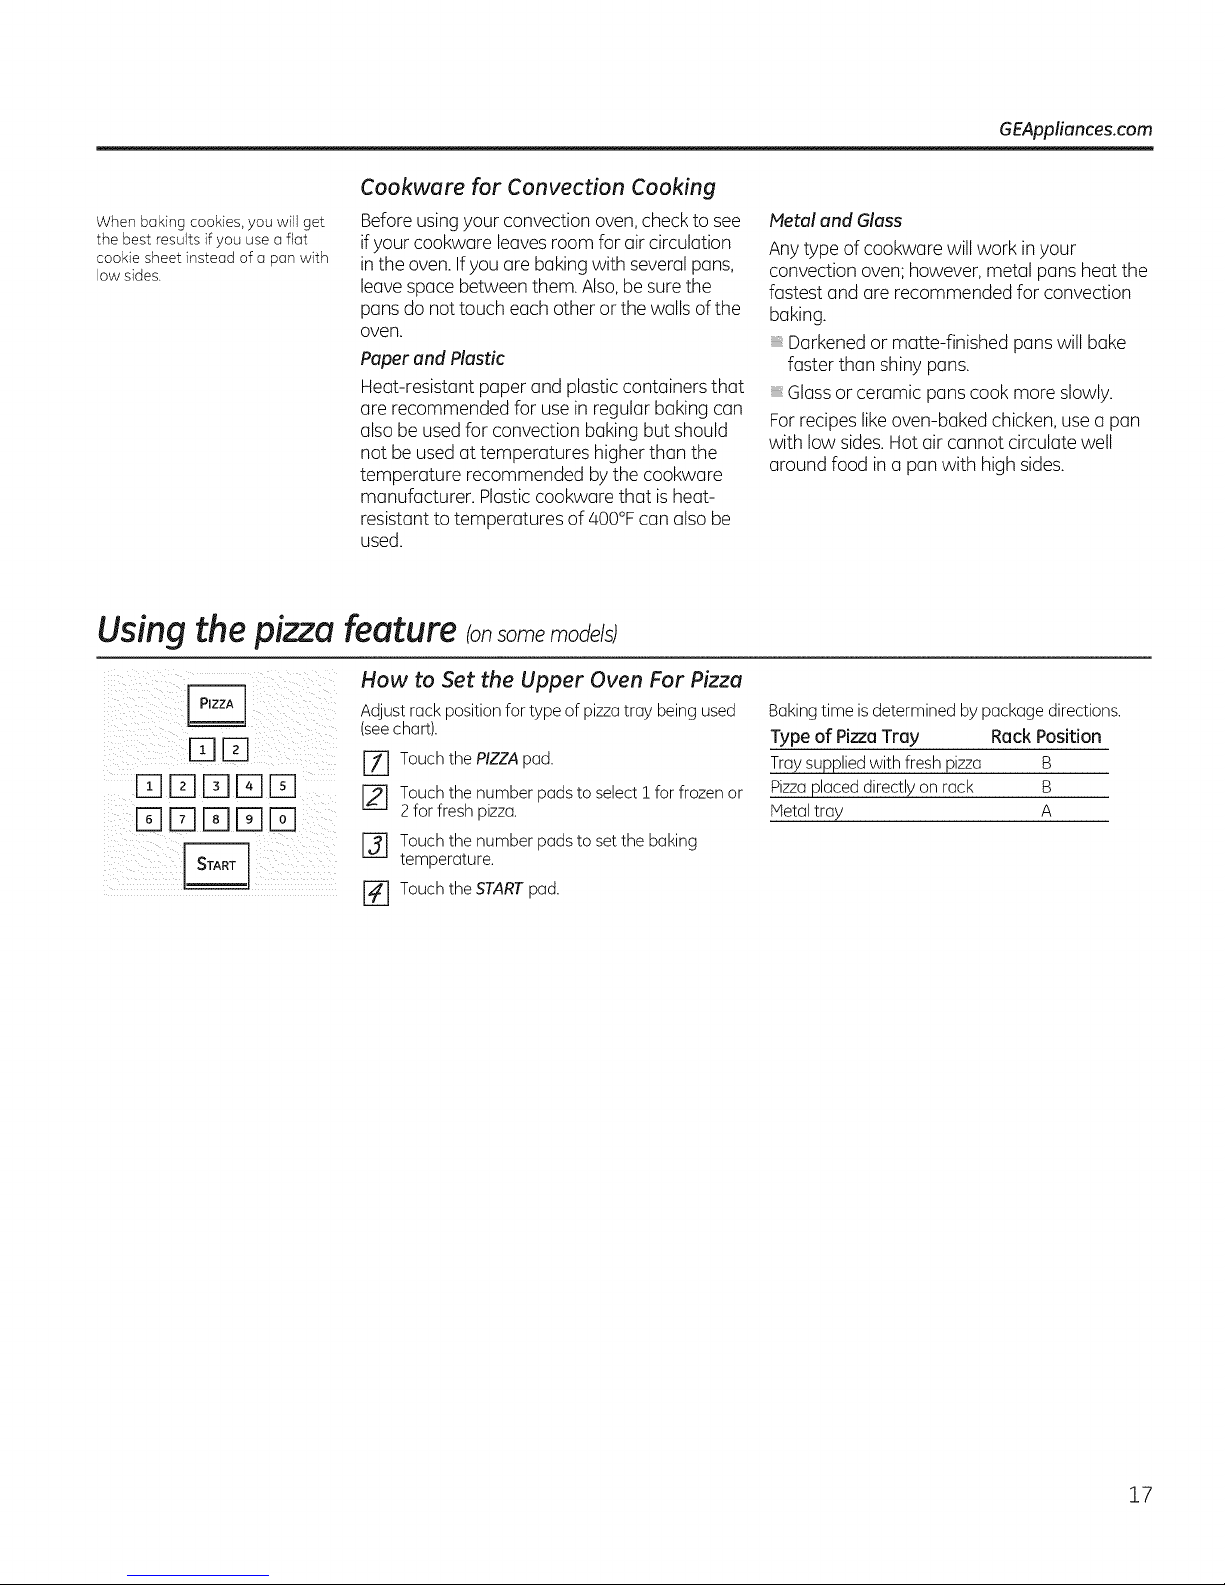
How to Set the Upper Oven For Pizza
Adjustrackpositionfortypeof pizzatraybeingused
(see chart).
DEE
DE]DEED
EEFqlZ]EEIT1
rl1 TouchthePIZZApad.
-21 Touchthenumberpadstoselect! forfrozenor
2forfreshpizza.
I-_ Touchthe numberpadsto setthebaking
temperature.
GEAppliances.com
Metal and Glass
Any type of cookware will work in your
convection oven: however, metal pans heat the
fastest and are recommended for convection
baking.
Darkened or matte-finished pans will bake
faster than shiny pans.
Glass or ceramic pans cook more slowly.
For recipes like oven-baked chicken, use a pan
with low sides. Hot air cannot circulate well
around food in a pan with high sides.
Bakingtime is determined by package directions.
Type of Pizza Tray Rack Position
Tray supplied with fresh pizza B
Pizzaplaced directly on rack B
Metaltray A
r4-] Touch the STARTpad.
17
Page 18
Using the probe, consomemode sI
For many foods, especially roasts and poultry, internal food temperature is the best test for doneness. The temperature
probe takes the guesswork out of roasting by cooking foods to the exact alonenessyou want.
[,& CAUTION
Topreventburns,do not unplug the probe from
the ovenoutlet untilthe ovenhascooled.
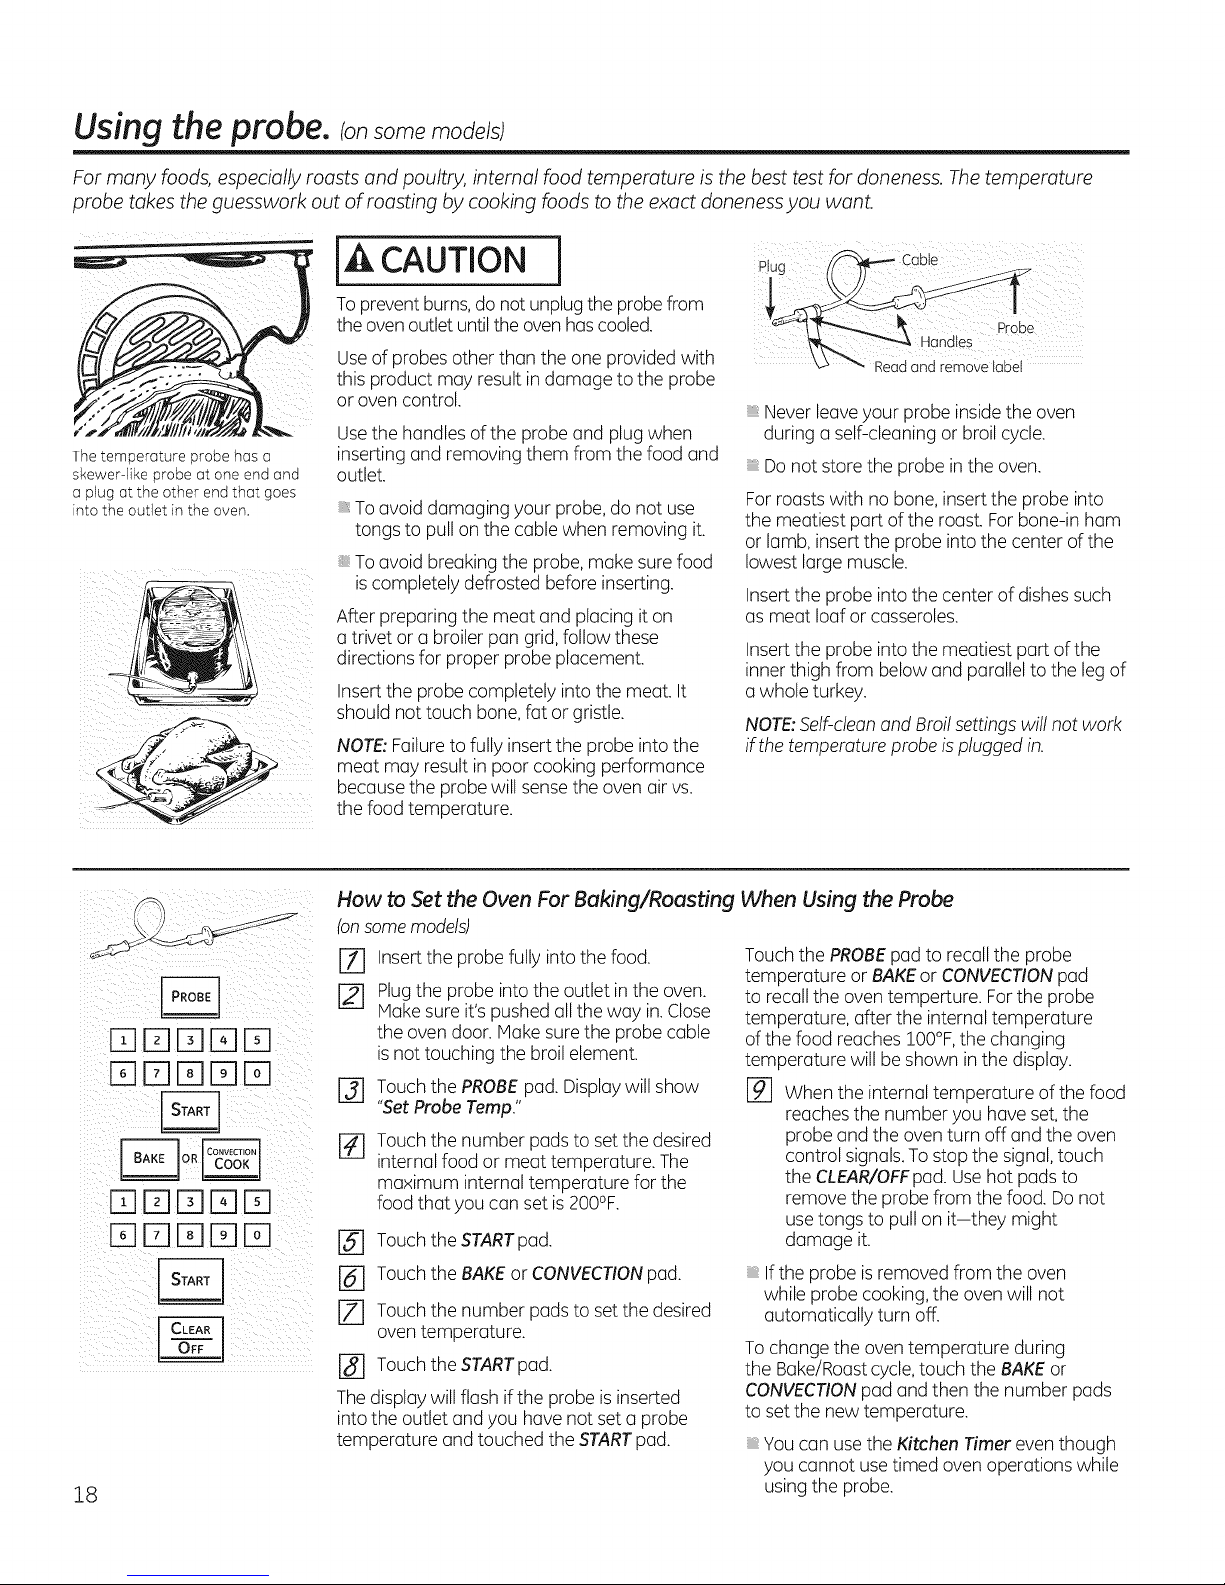
The temperature probe has a
skewer-like probe at one end and
a plug at the other end that goes
into the outlet in the oven.
IT1rq I-q%El
DE]DE]El
DE]DE]El
I-qElITII-qEl
18
Use of probes other than the one provided with
this product may result in damage to the probe
or oven control.
Usethe handles of the probe and plug when
inserting and removing them from the food and
outlet.
Toavoid damaging your probe, do not use
tongs to pull on the cable when removing it.
Toavoid breaking the probe, make sure food
iscompletely defrosted before inserting.
After preparing the meat and placing it on
a trivet or a broiler pan grid, follow these
directions for proper probe placement.
Insertthe probe completely into the meat. It
should not touch bone, fat or gristle.
NOTE:Failureto fully insert the probe into the
meat may result in poor cooking performance
because the probe will sense the oven air vs.
the food temperature.
How to Set the Oven For Baking/Roasting When Using the Probe
(onsome models)
Insertthe probe fully intothe food.
ryl
Plugthe probe into the outlet in the oven.
r21
Makesure it's pushed all the way in.Close
the oven door. Make sure the probe cable
is not touching the broil element.
[] Touchthe PROBEpad. Displaywill show
"SetProbe Temp."
[] Touch the number pads to set the desired
internal food or meat temperature. The
maximum internal temperature for the
food that you can set is200°F.
_-] Touch the STARTpad.
[] Touch the BAKEor CONVECTIONpad.
[Z] Touch the number pads to set the desired
oven temperature.
[] Touch the STARTpad.
Thedisplay will flash ifthe probe is inserted
into the outlet and you have not set a probe
temperature and touched the STARTpad.
Never leaveyour probe inside the oven
during a self-cleaning or broil cycle.
Do not store the probe in the oven.
For roastswith no bone, insert the probe into
the meatiest part of the roast. Forbone-in ham
or lamb, insert the probe into the center of the
lowest large muscle.
Insertthe probe into the center of dishessuch
as meat loaf or casseroles.
Insertthe probe into the meatiest part of the
inner thigh from below and parallel to the leg of
a whole turkey.
NOTE:Self-cleanand Broil settings will not work
if the temperature probe is plugged in.
Touch the PROBEpadto recall the probe
temperature or BAKEor CONVECTIONpad
to recall the oven temperture. Forthe probe
temperature, after the internal temperature
of the food reaches !00°F,the changing
temperature will be shown in the display.
[] When the internal temperature of the food
reaches the number you have set,the
probe and the oven turn off and the oven
control signals.To stop the signal,touch
the CLEAR/OFFpad. Usehot pads to
remove the probe from the food.Do not
usetongs to pull on it-they might
damage it.
If the probe isremoved from the oven
while probe cooking, the oven will not
automatically turn off.
Tochange the oventemperature during
the Bake/Roastcycle,touch the BAKEor
CONVECTIONpad and then the number pads
to set the new temperature.
You can usethe Kitchen Timer even though
you cannot use timed oven operations while
usingthe probe.
Readand remove label
Page 19
Usingthe timed baking
and roasting features,conso=e=ode sl GEAppliances.com
NOTE: Foods that spoil easily-such us milk, eggs, fish, stuffings, poultry and pork-should not be allowed to sit for more
than 1 hour before or offer cooking. Room temperature promotes the growth of harmful bacteria.
Be sure that the oven light is off because heat from the bulb will speed harmful bacteria growth.
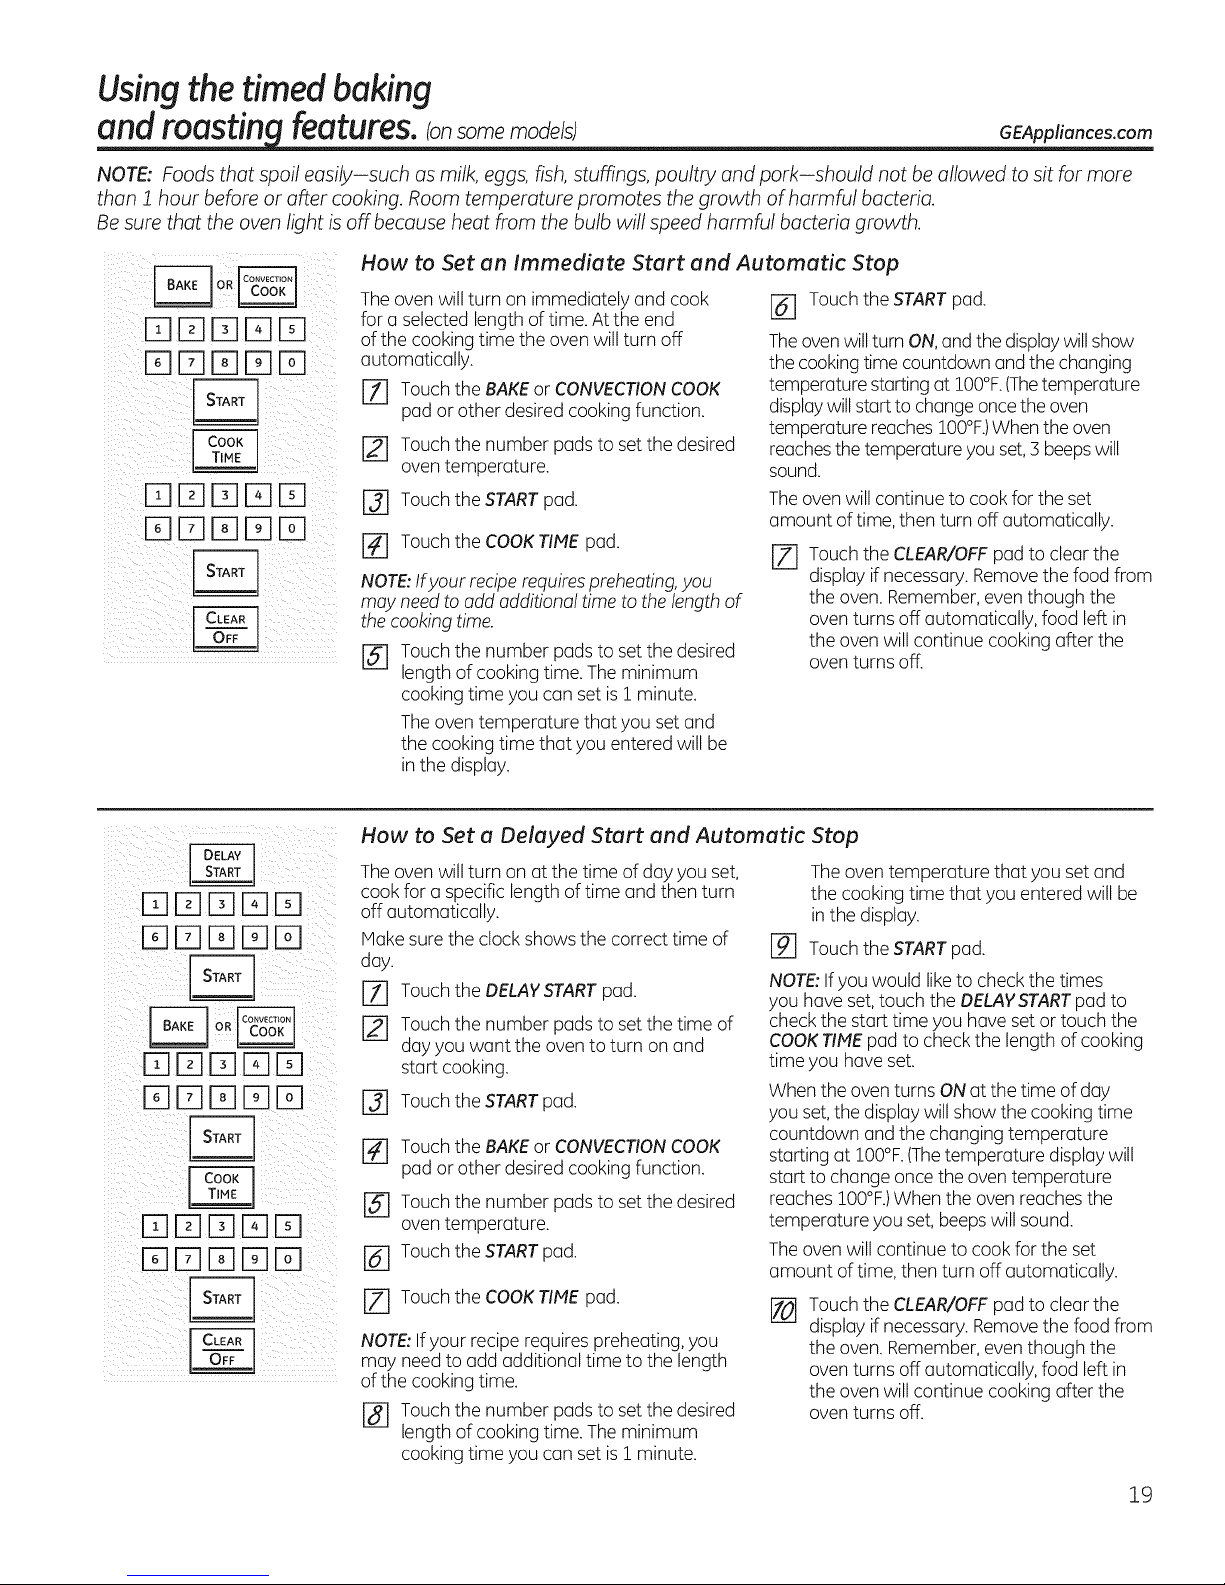
How to Set an Immediate Start and Automatic Stop
DDD[]D
DDD D
DDDD[]
E]DDD[]
DDD D
[]DD[]D
Theoven will turn on immediately and cook
for a selected length of time.At the end
of the cooking time the oven will turn off
automatically.
[Z] Touch the BAKEor CONVECTIONCOOK
pad or other desired cooking function.
[] Touchthe number pads to set the desired
oven temperature.
r3] Touch the STARTpad.
[] Touchthe COOKTIMEpad.
NOTE:Ifyour recipe requires preheating, you
may need to add additional time to the length of
the cooking time.
[] Touch the number pads to set the desired
length of cooking time. The minimum
cooking time you can set is I minute.
The oven temperature that you set and
the cooking time that you entered willbe
in the display.
How to Set a Delayed Start and Automatic Stop
Theoven will turn on at the time of day you set,
cook for a specific length of time and then turn
off automatically.
Make sure the clock showsthe correct time of
day.
[Z] Touch the DELAYSTARTpad.
[_ Touch the number pads to setthe time of
day you want the oven to turn on and
start cooking.
[-_ Touch the STARTpad.
Touch the BAKEor CONVECTIONCOOK
pad or other desired cooking function.
Touch the number pads to set the desired
oven temperature.
[_] Touch the STARTpad.
[] Touch the COOKTIME pad.
NOTE:Ifyour recipe requirespreheating, you
may need to add additional time to the length
of the cooking time.
r_] Touch the number pads to setthe desired
length of cooking time. Theminimum
cooking time you can set isI minute.
[] Touch the START pad.
Theoven will turn ON,and the displaywillshow
the cookingtime countdown andthe changing
temperature startingat 100°F.(Thetemperature
displaywillstart to changeoncethe oven
temperature reaches100°F.)When the oven
reachesthe temperature you set,3 beepswill
sound.
Theovenwill continue to cook for the set
amount oftime, then turn off automatically.
r_ Touch the CLEAR/OFF pad to clear the
display ifnecessary.Removethe food from
the oven. Remember,even though the
oven turns off automatically, food left in
the oven will continue cooking after the
oven turns off.
Theoven temperature that you set and
the cooking time that you entered will be
in the display.
rg] Touch the STARTpad.
NOTE:Ifyou would liketo check the times
you have set, touch the DELAVSTARTpad to
check the start time you have set or touch the
COOKTIMEpad to check the length of cooking
time you have set.
When the oven turns ON at the time of day
you set,the displaywill show the cooking time
countdown and the changing temperature
starting at 100°F.(Thetemperature displaywill
start to change oncethe oven temperature
reaches 100°F.)When the oven reaches the
temperature you set,beepswill sound.
Theoven will continue to cook for the set
amount of time, then turn off automatically.
[] Touchthe CLEAR/OFFpad to clear the
display ifnecessary.Removethe food from
the oven. Remember,even though the
oven turns off automatically, food left in
the oven will continue cooking after the
oven turns off.
19
Page 20
Using the slow cookand warming features.
[A WARNING i OOD POISONHAZARD. Bacteria may grow in food at temperatures below !40°F.
• Always start with hot food. Do not use warm settings to heat cold food.
• Do not warm food for more than 2 hours.
Failure to follow these instructions may result in foodborne illness.
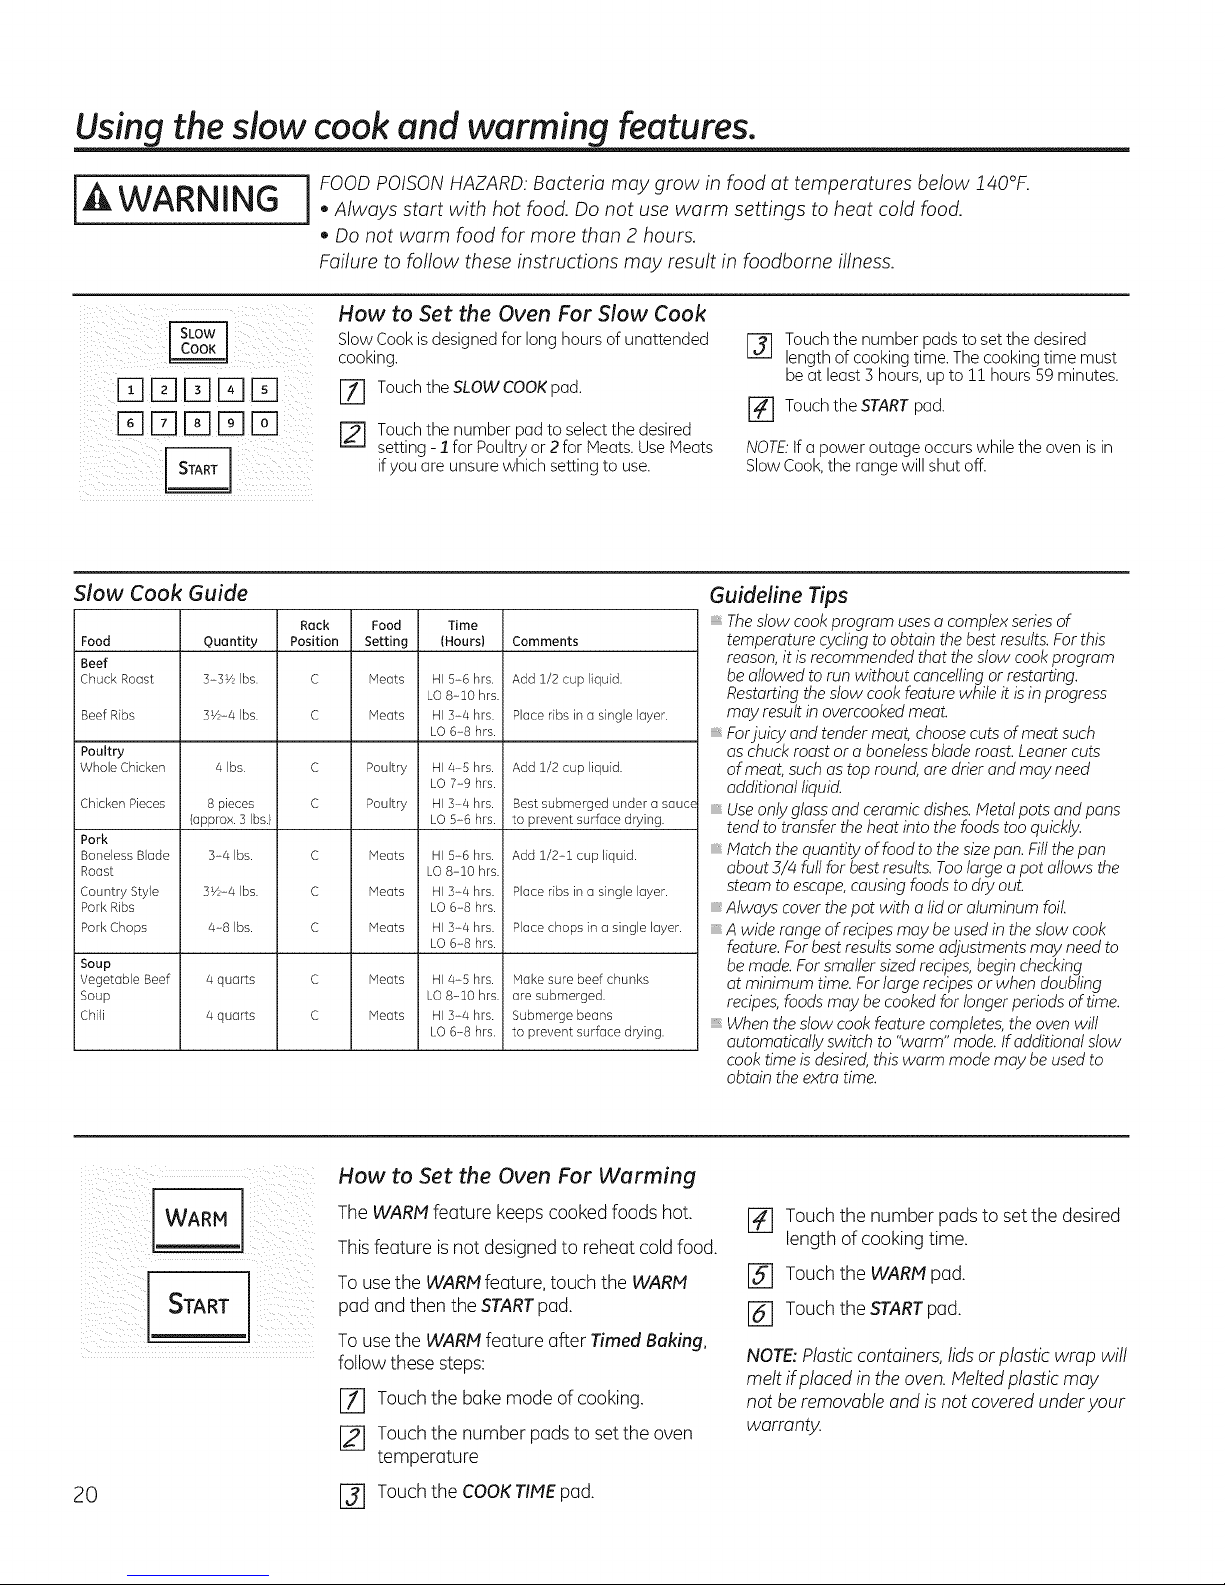
How to Set the Oven For Slow Cook
@N1DDD
DPlDDN1
Slow Cook Guide
Food
Beef
Chuck Roast
Beef Ribs
Poultry
Whole Chicken
Chicken Pieces
Pork
Boneless Blade
Roast
Country Style
Pork Ribs
Pork Chops
Soup
Vegetable Beef
Soup
Chili
Quantity Position Setting (Hours)
3-3V2 Ibs. C Heats HI 5-6 hrs.
3Vz-4 Ibs. C Heats HI 3-4 hrs.
4 Ibs.
8 pieces
(approx. 3 Ibs.)
3-4 Ibs.
3Vz-4 Ibs.
4-8 Ibs.
4 quarts
4 quarts
Slow Cook is designed for long hours of unattended
cooking.
rT] Touch the SLOW COOK pad.
F_ Touch the number pad to select the desired
setting - 1 for Poultry or 2 for Meats. UseMeats
ifyou are unsure which setting to use.
Rack Food Time
LO8-10 hrs.
LO6-8 hrs.
C
C
c
c
c
c
c
Poultry HI 4-5 hrs.
Poultry HI 3-4 hrs.
Heats HI g-6 hrs.
Heats HI3-4 hrs.
Heats HI3-4 hrs.
Heats HI4-g hrs.
Heats HI3-4 hrs.
LO 7-9 hrs.
LO5-6 hrs.
LO8-10 hrs.
LO6-8 hrs.
LO6-8 hrs.
LO8-10 hrs.
LO6-8 hrs.
Comments
Add 1/2 cup liquid.
Place ribs in o single layer.
Add 1/2 cup liquid.
Best submerged under a sauce
to prevent surface drying.
Add 1/2-2 cup liquid.
Place ribs in a single layer.
Place chops in a single layer.
Hake sure beef chunks
are submerged.
Submerge beans
to prevent surface drying.
I-_ Touch the number pads to setthe desired
length of cooking time. Thecooking time must
be at least 3 hours, up to !! hours 59 minutes.
[-4-1 Touch the STARTpad.
NOTE:Ifa power outage occurswhile the oven is in
SlowCook,the range will shut off.
Guideline Tips
The slow cook program uses a complex series of
temperature cycling to obtain the best results. For this
reason, it is recommended that the stow cook program
be allowed to run without cancelling or restarting.
Restarting the stow cook feature while it is in progress
may result in overcooked meat.
Forjuicy and tender meat, choose cuts of meat such
aschuck roast or a bonelessblade roast. Leanercuts
of meat, such as top round, ore drier and may need
additional liquid.
Useonly glossand ceramic dishes.Metalpots and pans
tend to transfer the heat into the foods too quickly.
Match the quantity of food to the size pan. Fillthe pan
about 3/4 fullfor best results. Too large a pot allows the
steam to escape, causing foods to dry out.
, Always cover the pot with a lid or aluminum foil.
A wide range of recipes may be used in the stow cook
feature. Forbest results some adjustments may need to
be made. Forsmaller sized recipes, begin checking
at minimum time. For large recipes or when doubling
recipes, foods may be cooked for longer periods of time.
When the slow cook feature completes, the oven will
automatically switch to "warm" mode. Ifadditional stow
cook time is desired, this warm mode may be used to
obtain the extra time.
How to Set the Oven For Worming
The WARM feature keeps cooked foods hot.
j[WARMl
This feature is not designed to reheat cold food.
To use the WARM feature, touch the WARM
pad and then the START pad.
iii ill STARTiii
To use the WARM feature after Timed Buking,
follow these steps:
FY] Touch the bake mode of cooking.
F_ Touch the number padsto setthe oven
temperature
20
I-_ Touch the COOKTIME pad.
[] Touch the number pads to set the desired
length of cooking time.
F_ Touch the WARMpad.
@ Touch the STARTpad.
NOTE:Plasticcontainers,lids or plastic wrap will
melt if placed in the oven.Meltedplastic may
not be removable and is not covered underyour
warranty.
Page 21
Using the warming drawer, consomemodelsl GEAppliances.com
WARNING .AlwaysstartwithhotfoodDonotusewarmsettingstoheatcoldfood
j ,_ FOODPOISONHAZARD.Bacteriamay grow in food at temperatures below ! 40°K
, Do not warm food for more than 2 hours.
Failure to follow these instructions may result in foodborne illness.
The warming drawer will keep hot, cooked foods at serving temperature. Always start with hot food.
Do not use to heat cold food other than crisping crackers, chips or dry cereal.
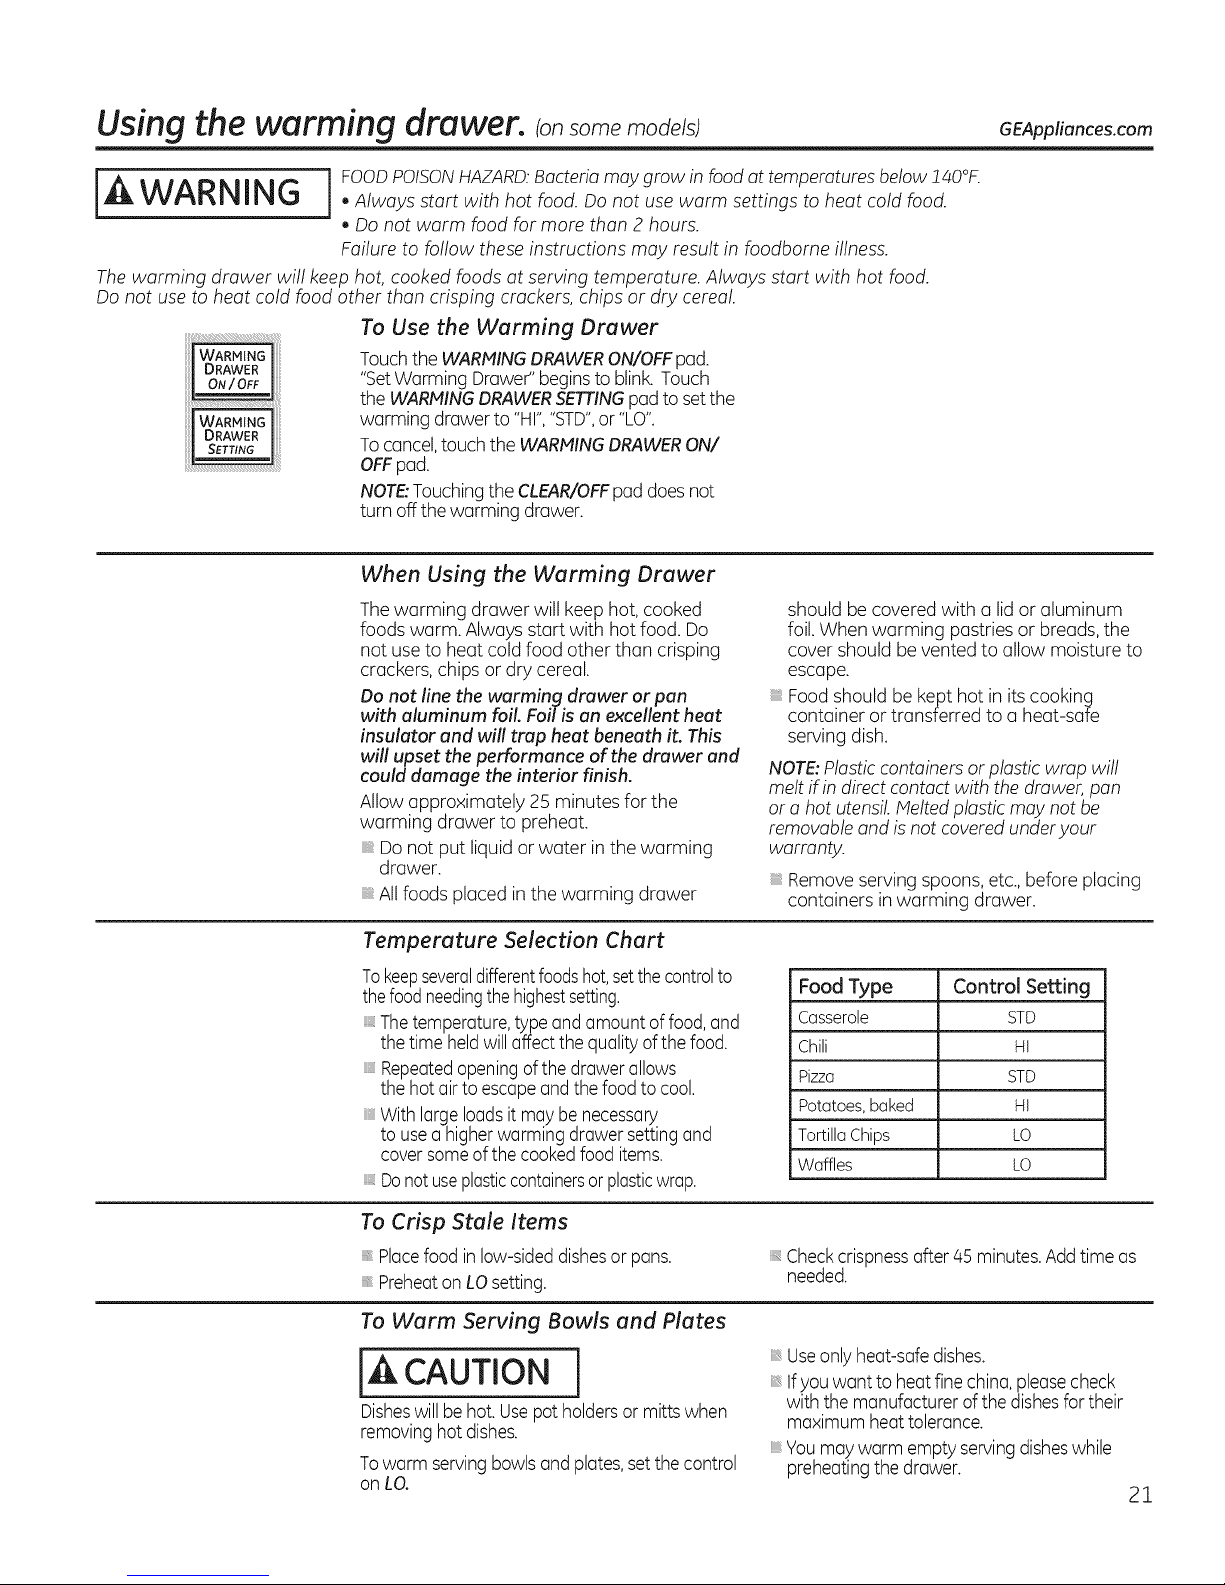
To Use the Warming Drawer
WARMING iiiii
I DRAWER liiiii
_iiii
........ iiii
Touch the WARMING DRAWER ON/OFF pad.
"Set Warming Drawee' begins to blink. Touch
the WARMING DRAWER SETTINGpad to set the
warming drawerto "HI","STD",or "LO".
Tocancel,touch the WARMINGDRAWERON/
OFFpad.
NOTE:TouchingtheCLEAR/OFFpad doesnot
turn off thewarming drawer.
When Using the Warming Drawer
Thewarming drawer will keep hot, cooked
foods warm. Always start with hot food. Do
not use to heat cold food other than crisping
crackers,chips or dry cereal.
Do not line the warming drawer or pan
with aluminum foiL Foil is an excellent heat
insulator and will trap heat beneath it. This
will upset the performance of the drawer and
could damage the interior finish.
Allowapproximately 25 minutes for the
warming drawer to preheat.
Do not put liquid or water in the warming
drawer.
Allfoods placed in the warming drawer
should be covered with a lid or aluminum
foil. When warming pastries or breads, the
cover should be vented to allow moisture to
escape.
Foodshould be kept hot inits cooking
container or transferred to a heat-safe
serving dish.
NOTE:Plasticcontainers or plastic wrap will
melt if in direct contact with the drawer, pan
or a hot utensil Melted plastic may not be
removable and is not covered underyour
warranty.
Removeserving spoons, etc.,before placing
containers in warming drawer.
Temperature Selection Chart
Tokeepseveraldifferentfoodshot,setthecontrolto
thefood needingthe highestsetting.
Thetemperature,type andamount of food,and
thetime heldwillaffect the qualityofthefood.
Repeatedopeningof the drawerallows
thehot airto escapeandthe food to cool.
With largeloadsit may be necessary
to usea higherwarming drawer setting and
coversomeof the cookedfood items.
Donot useplasticcontainersorplasticwrap.
To Crisp Stale Items
Placefood in low-sideddishesor pans.
Preheaton LOsetting.
To Warm Serving Bowls and Plates
{, CAUTION j
Disheswillbe hot.Usepot holdersor mitts when
removinghot dishes.
Towarm servingbowlsand plates,setthecontrol
on LO.
Food Type Control Setting
Casserole STD
Chili HI
Pizza STD
Potatoes,baked HI
TortillaChips LO
Waffles LO
Checkcrispnessafter45 minutes.Addtime as
needed.
Useonly heat-safedishes.
Ifyou want to heatfine china,pleasecheck
with the manufacturer of the dishesfortheir
maximum heat tolerance.
Youmaywarm empty servingdisheswhile
preheatingthe drawer.
21
Page 22
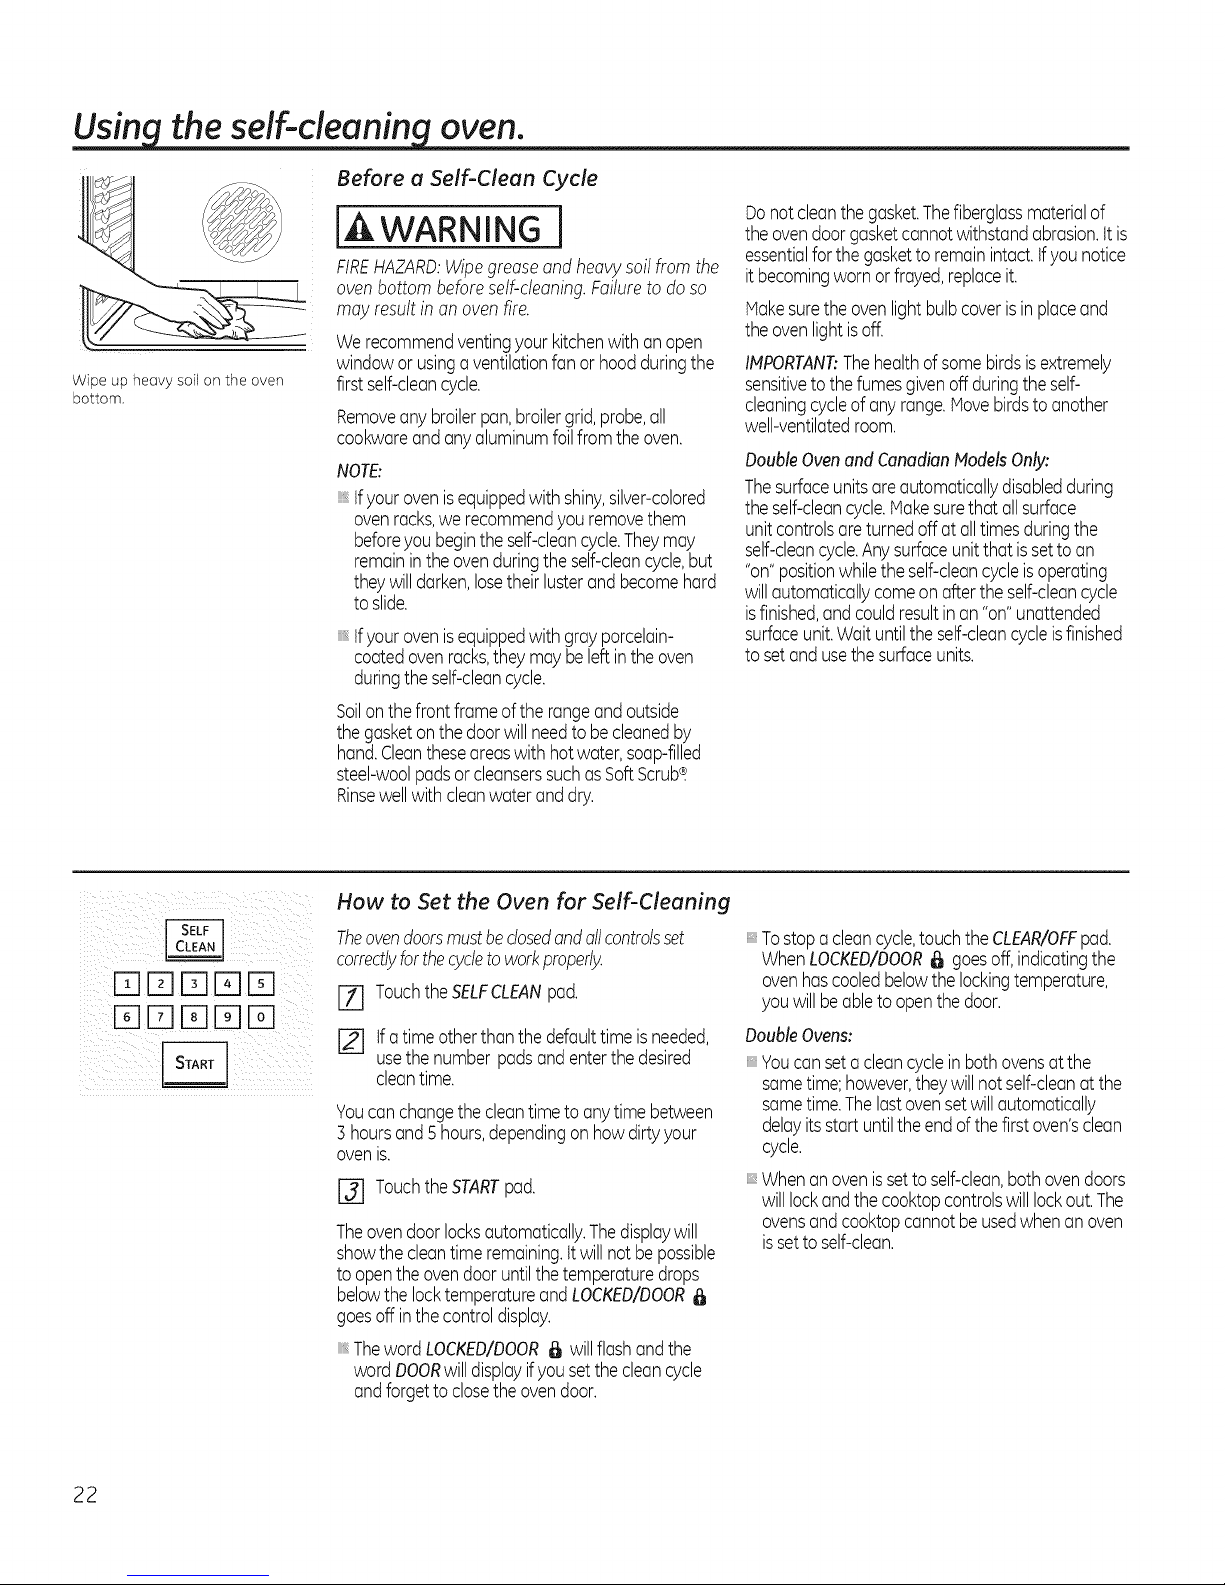
Usin the self-cleanin oven.
Before a Self-Clean Cycle
[A WARNING i
FIREHAZARD:Wipegreaseand heavysoilfrom the
ovenbottom beforeself-cleaning.Failureto doso
may resultin an ovenfire.
Werecommendventingyourkitchenwith anopen
Wipe up heavy soil on the oven
bottom.
windowor usinga ventilationfanor hoodduringthe
firstself-cleancycle.
Removeanybroilerpan,broilergrid,probe,all
cookwareandanyaluminumfoilfromtheoven.
NOTE:
tfyourovenisequippedwith shiny,silver-colored
ovenracks,we recommendyouremovethem
beforeyou beginthe self-cleancycle.Theymay
remaininthe ovenduringtheself-cleancycle,but
theywilldarken,losetheirlusterand becomehard
to slide.
tfyourovenisequippedwith grayporcelain-
coatedovenracks,theymaybe leftinthe oven
duringtheself-cleancycle.
Soilonthe front frameofthe rangeandoutside
thegasketonthe doorwillneedto becleanedby
hand.Cleantheseareaswith hotwater,soap-filled
steel-woolpadsorcleanserssuchasSoftScrub_.
Rinsewellwith cleanwateranddry.
Donot cleanthegasket.Thefiberglassmaterialof
theovendoorgasketcannotwithstandabrasion,it is
essentialforthegasketto remainintact,tfyou notice
itbecomingwornorfrayed,replaceit.
Makesuretheovenlightbulbcoverisinplaceand
theovenlightisoff.
IMPORTANT:Thehealthofsomebirdsisextremely
sensitivetothefumesgivenoff duringtheself-
cleaningcycleofanyrange.Hovebirdstoanother
well-ventilatedroom.
DoubleOvenand CanadianModelsOnly:
Thesurfaceunitsareautomaticallydisabledduring
theself-cleancycle.Flakesurethat allsurface
unitcontrolsareturnedoff at alltimesduringthe
self-cleancycle.Anysurfaceunitthat issettoan
"on"positionwhiletheself-cleancycleisoperating
willautomaticallycomeonafterthe self-cleancycle
isfinished,andcouldresultinan "on"unattended
surfaceunit.Waituntiltheself-cleancycleisfinished
tosetandusethesurfaceunits.
DN1D ID
@DD N1
How to Set the Oven for Self-Cleaning
Theovendoorsmustbedosedandallcontrolsset
correctlyfor thecycletoworkproperly.
[] TouchtheSELFCLEANpad.
[] tfa timeotherthanthe defaulttimeisneeded,
usethenumberpadsandenterthedesired
cleantime.
Youcanchangethecleantimetoanytime between
3 hoursand 5hours,dependingonhowdirtyyour
ovenis.
[] TouchtheSTARTpad.
Theovendoorlocksautomatically.Thedisplaywill
showthecleantimeremaining,itwillnotbepossible
toopentheovendooruntilthe temperaturedrops
belowthe locktemperatureandLOCKED/DOOR
goesoffinthecontroldisplay.
ThewordLOCKED/DOOR_ willflashandthe
wordDOORwilldisplayifyousetthe cleancycle
andforgetto closetheovendoor.
Tostopa cleancycle,touchthe CLEAR/OFFpad.
WhenLOCKED/DOOR_ goesoff,indicatingthe
ovenhascooledbelowthelockingtemperature,
youwillbeabletoopenthedoor.
DoubleOvens:
Youcansetacleancycleinbothovensatthe
sametime;however,theywillnotself-cleanatthe
sametime.Thelastovensetwillautomatically
delayitsstart untiltheendofthefirstoven'sclean
cycle.
Whenanovenissetto self-clean,both ovendoors
willlockandthecooktopcontrolswill lockout.The
ovensandcooktopcannotbeusedwhenanoven
issettoself-clean.
22
Page 23

The oven doors must be closed and all controls set correctly for the cycle to work properly.
How to Delay the Start of Self-Cleaning
[Z] Touch the DELAYSTART pad. [] Touch the START pad.
DDD[]D
DDDDD
Usingthe number pads, enter the time of
[]
dayyou want the clean cycleto start.
Touch the STARTpad.
@
Touch the SELFCLEANpad.
%
Theoven door locksautomatically. It will not
be possible to open the oven door until the
temperature drops below the locktemperature
and LOCKED/DOOR_ goes off inthe control
display.
GEAppliances.com
DDDDD
DDDDD
[] Usethe number pads and enter the
desiredclean time.
Youcan change the clean time to anytime
between 3 hoursand 5 hours,depending on
how dirty your oven is.
After a Self-Clean Cycle
Youmay notice some white ash in the oven.
Wipe it up with a damp cloth after the oven
cools.
If white spots remain, remove them with a
soap-filledsteel wool pad and rinsethoroughly
with a vinegarand water mixture.
Thesedeposits are usually a salt residue that
cannot be removed bythe clean cycle.
If the oven is not clean after one clean cycle,
repeat the cycle.
You cannot set the ovenfor cooking until the
oven is cool enough for the door to unlock.
While the oven isself-cleaning, you can touch
CLOCKto display the time of day.To return to
the clean countdown, touch SELFCLEAN.
Standard Racks
If they become hard to slide,wipe their side
edgesand the oven racksupports with cooking
oil.
Extension Rack
If it becomes difficult to slide,seeExtension
Rackin the Careand cleaning section. Donot
spray extension rack with cooking spray or
other lubricant sprays.
If it becomes hard to removeor replace, wipe
the oven rack supports with cooking oil.Do not
wipe cooking oil on the slides.
NOTE:After the firstself-cleancycle,thegray
stainlesssteel surfaceswill change color on
enameledextensionrocks.Thisis normal. It is
not recommended to self-dean nickel extension
racksas thewhole rockwill discolor becauseof
theself-cleantemperatures.
23
Page 24
Using Steam Clean. consomemode s
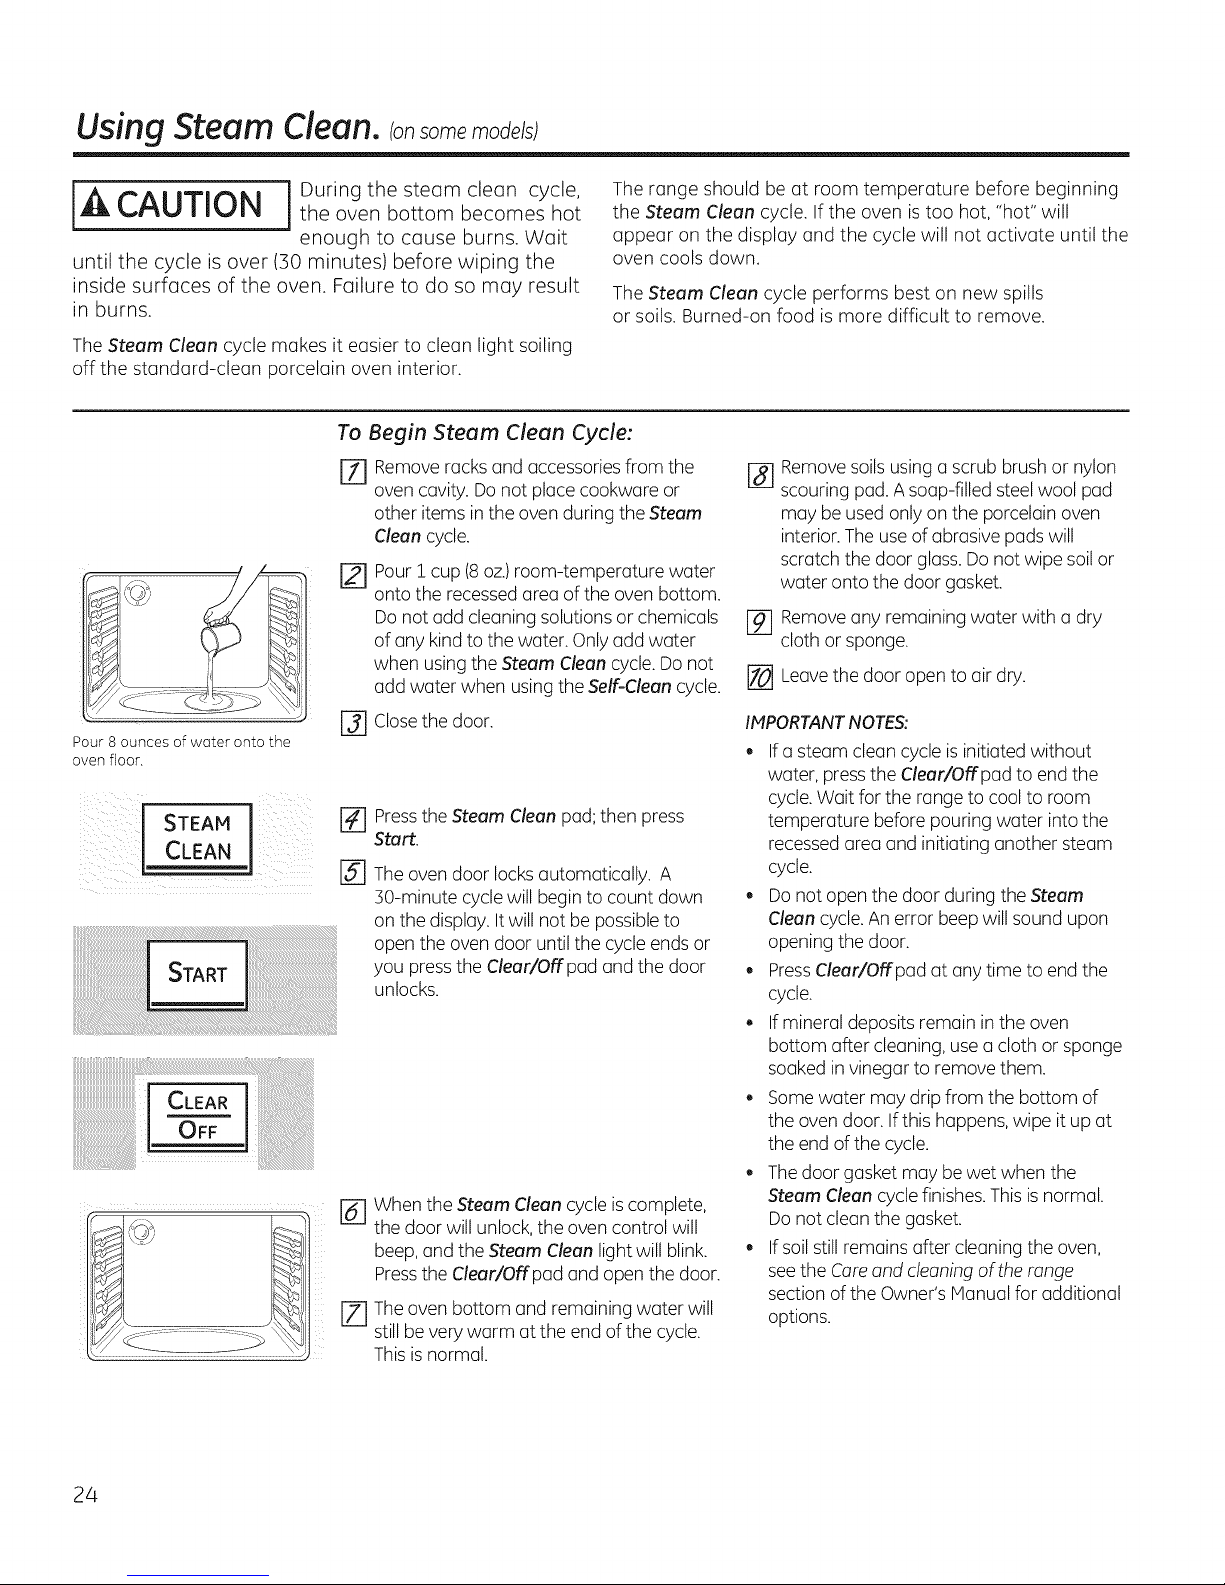
CAUTION the oven bottom becomes hot
[_t_ ] During the steam clean cycle,
enough to cause burns. Wait
until the cycle is over (30 minutes) before wiping the
inside surfaces of the oven. Failure to do so may result
in burns.
The Steam Clean cycle makes it easier to clean light soiling
off the standard-clean porcelain oven interior.
To Begin Steam Clean Cycle:
[Z] Remove racks and accessoriesfrom the
oven cavity. Do not placecookware or
other items inthe oven during the Steam
Clean cycle.
Pour ! cup (8oz.)room-temperature water
r21
onto the recessedarea of the oven bottom.
Do not add cleaning solutions or chemicals
of any kind to the water. Onlyadd water
when using the Steam Clean cycle. Donot
add water when usingthe Self-Clean cycle.
Pour 8 ounces of water onto the
oven floor.
STEAM i
CLEAN
r3] Closethe door.
[] Pressthe Steam Clean pad; then press
Start.
[_ The oven door locks automatically. A
30-minute cyclewill begin to count down
on the display.It will not be possibleto
open the oven door until the cycle endsor
you press the Clear/Off pad and the door
unlocks.
r_ When the Steam Clean cycle iscomplete,
the door will unlock,the oven control will
beep,and the Steam Clean light will blink.
Pressthe Clear/Off pad and open the door.
r_ The oven bottom and remaining water will
still be very warm at the endof the cycle.
This is normal.
The range should be at room temperature before beginning
the Steam Clean cycle. If the oven istoo hot, "hot" will
appear on the display and the cycle will not activate until the
oven cools down.
The Steam Clean cycle performs best on new spills
or soils. Burned-on food is more difficult to remove.
[] Removesoilsusing a scrub brush or nylon
scouring pad.A soap-filled steelwool pad
may be used only on the porcelain oven
interior.The use of abrasive padswill
scratch the door glass.Donot wipe soilor
water onto the door gasket.
r-_ Removeany remaining water with a dry
cloth or sponge.
[] Leavethe door open to air dry.
IMPORTANTNOTES:
. If a steam clean cycle isinitiated without
water, pressthe Clear/Off pad to endthe
cycle.Wait for the range to coolto room
temperature before pouring water into the
recessedarea and initiating another steam
cycle.
. Donot open the door during the Steam
Cleancycle.An error beep will sound upon
opening the door.
. PressClear/Off pad at any time to end the
cycle.
. If mineral deposits remain inthe oven
bottom after cleaning, use a cloth or sponge
soaked in vinegar to remove them.
. Somewater may drip from the bottom of
the oven door. Ifthis happens, wipe itup at
the end of the cycle.
. The door gasket may bewet when the
Steam Clean cyclefinishes.This isnormal.
Donot clean the gasket.
. If soil still remains after cleaning the oven,
seethe Careand cleaning of the range
sectionof the Owner's Manual for additional
options.
24
Page 25
Special features ofyour oven control. GEApp,ancoscom
Your new touch pad control has additional features that you may choose to use. The following are the features and how
you may activate them.
The special feature modes can only be activated while the display is showing the time of day. They remain in the control's
memory until the steps are repeated.
To enter a special feature for either oven, you must first touch the upper oven BROIl_HI/LO and BAKE pads at the same
time. The lower oven BROIL HI/LO and BAKE pads will not activate special features.
When the display shows your choice, touch the STARTpad. The special features will remain in memory after a power
failure, except tor the Sabbath feature, which will have to be reset.
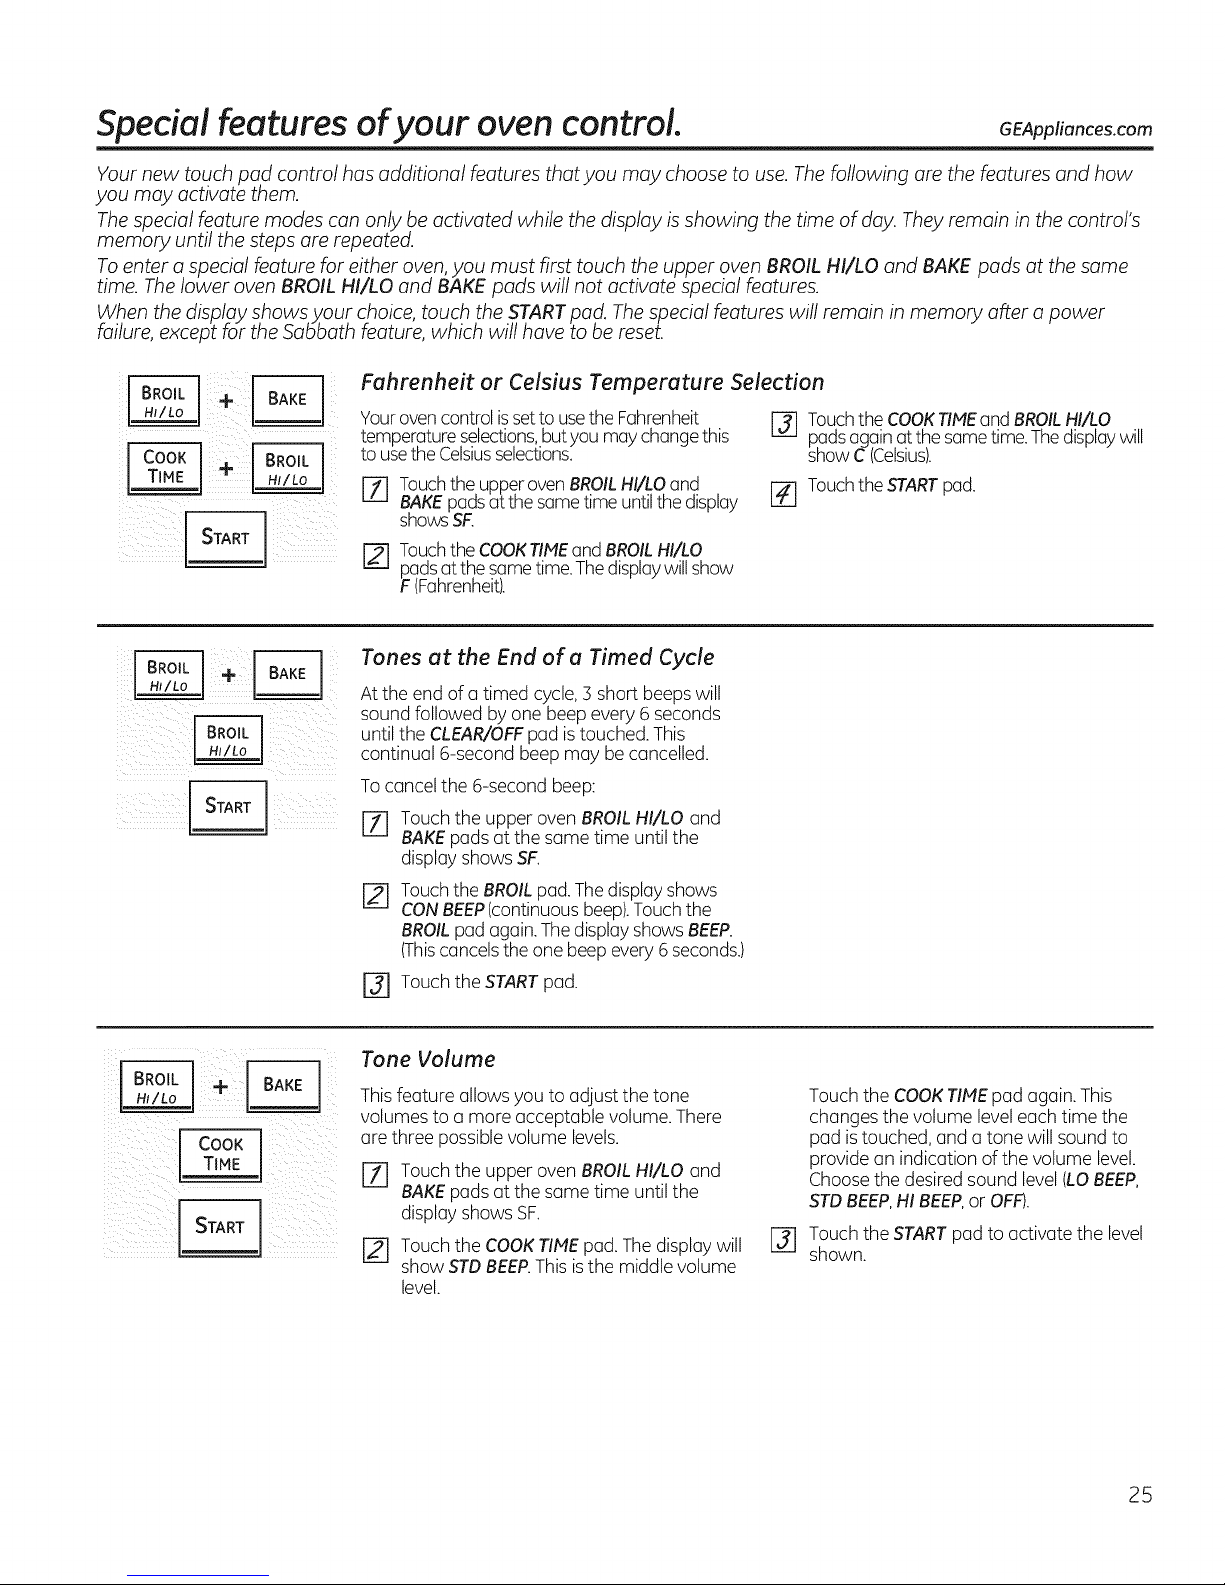
Fahrenheit or Celsius Temperature Selection
Yourovencontrolissetto usethe Fahrenheit
temperatureselections,butyou may changethis
to usetheCelsiusselections.
[] Touchthe COOKTIMEandBROILHI/LO
padsagain atthe sametime.Thedisplaywill
show C (Celsius).
_i_I_!!I__i!/i!_:_i_ _iii_i_i__i_i:_i_ill_ii
[] Touchthe upperoven BROILHI/L.Oand
BAKEpadsutthe sametime untilthedisplay
showsSF.
I-ffl Touchthe COOKTIMEand BROILHI/LO
padsat the sgmetime.Thedisplaywill show
F (Fahrenheit).
Tones at the End of a Timed Cycle
At the end of atimed cycle, 3 short beeps will
sound followed by one beep every 6 seconds
until the CLEAR/OFFpad istouched. This
continual 6-second beep may be cancelled.
Tocancel the 6-second beep:
Touch the upper oven BROILHI/LO and
BAKEpadsat the same time until the
display shows SF.
Touchthe BROILpad. Thedisplay shows
[]
CONBEEP(continuousbeep).Touchthe
BROILpad again. The displayshowsBEEP.
(Thiscancelsthe one beep every 6 seconds.)
r_ Touch the START pad.
Tone Volume
[-_ Touchthe STARTpad.
This feature allows you to adjust the tone
volumes to a more acceptable volume. There
are three possible volume levels.
[Z] Touch the upper oven BROILHI/LO and
BAKEpadsat the same time until the
display shows SF.
(_ii_ii_iI_i__-_ !_iiiiii_ii__ii__ii
r_ Touch the COOKTIMEpad. The display will
show STDBEEP.This isthe middle volume
level.
Touch the COOKTIlE pad again.This
changes the volume leveleach time the
pad istouched, and a tone will sound to
provide an indication of the volume level.
Choosethe desiredsound level (LOBEEP,
STDBEEP,HI BEEP,or OFF).
r_ Touch the STARTpad to activate the level
shown.
25
Page 26
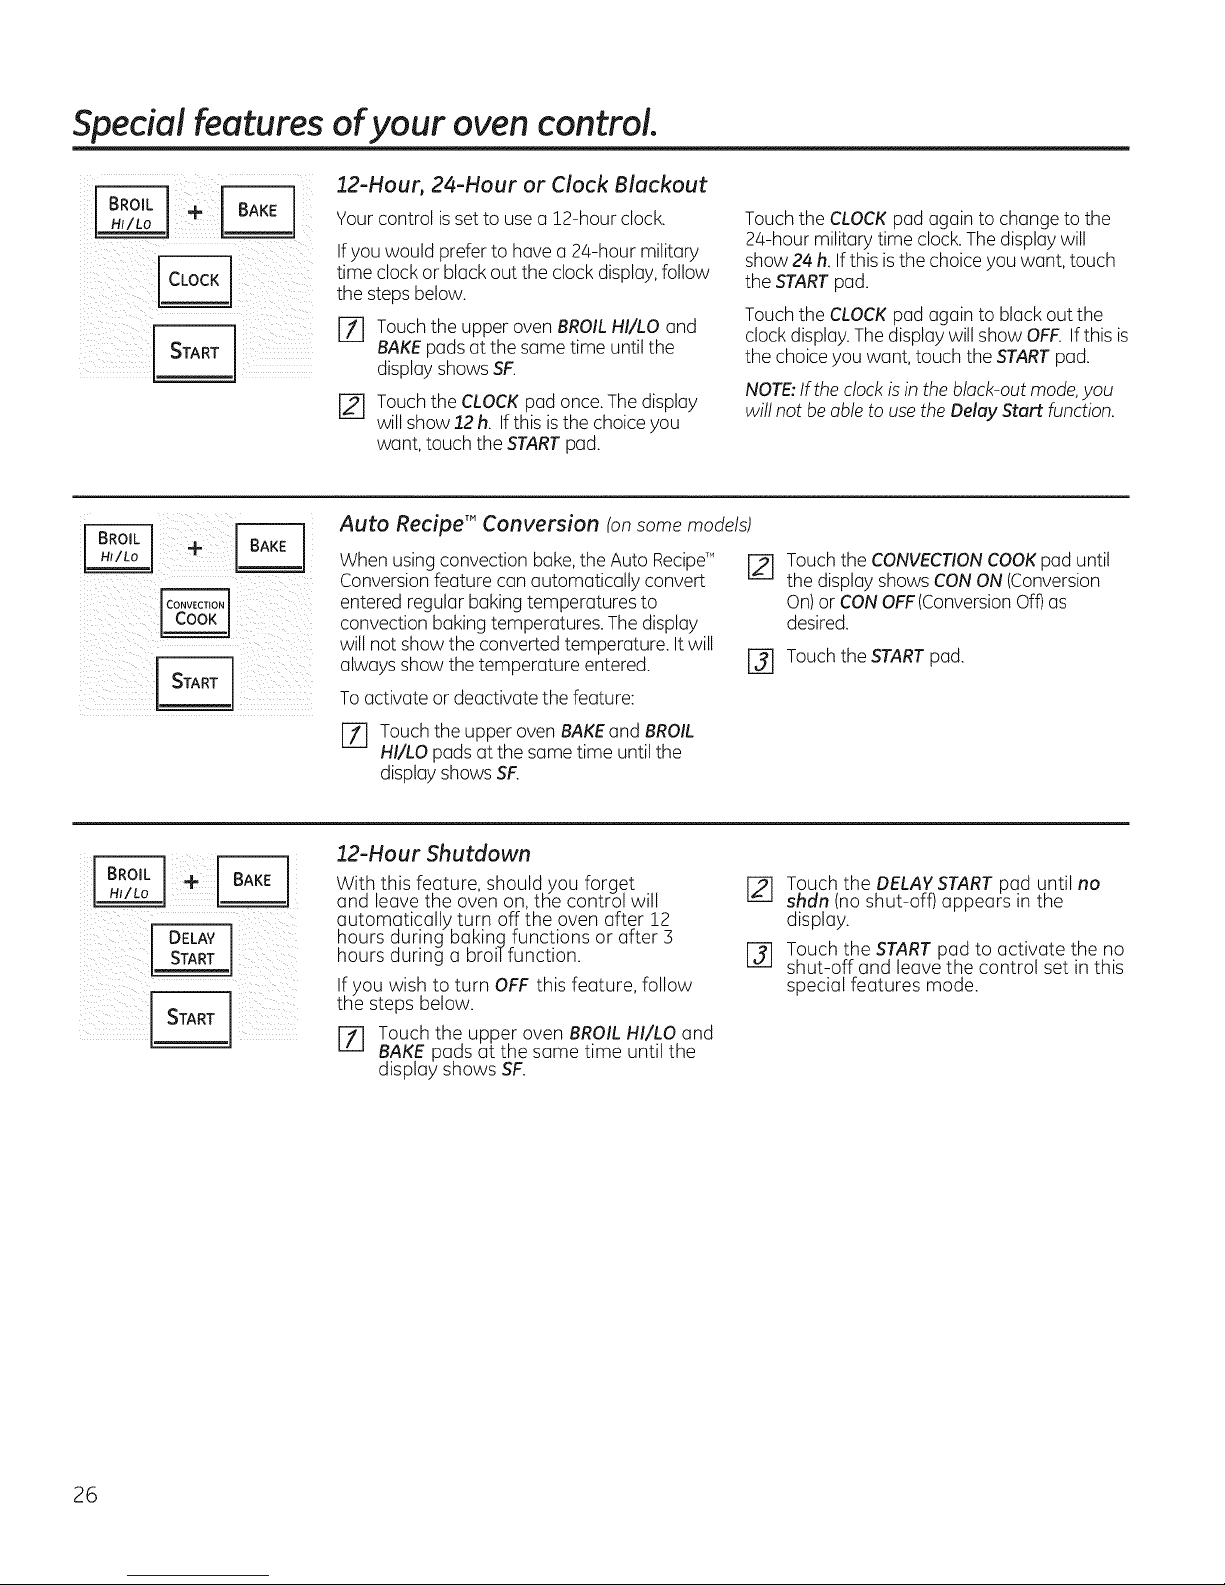
Special features ofyour oven control.
12-Hour, 24-Hour or Clock Blackout
Your control is set to usea 12-hour clock.
If you would prefer to have a 24-hour military
time clock or black out the clock display,follow
the steps below.
[Z] Touch the upper oven BROILHI/LO and
BAKEpadsat the same time until the
display shows SF.
Touch the CLOCKpad once.The display
[]
will show 12h. Ifthis isthe choice you
want, touch the STARTpad.
Auto Recipe T"Conversion (on some models)
_ _ ii i ii iii
i_ilii__i__ ii: i_ii_
_!_!i_ ii_illi_ _ i_i_ii_
When using convection bake,the Auto Recipe,M
Conversionfeature can automatically convert
entered regular baking temperatures to
convection baking temperatures. The display
will not show the converted temperature. Itwill
always show the temperature entered.
To activate or deactivate the feature:
Touch the CLOCKpad again to change to the
2Q-hour military time clock.Thedisplay will
show 24 h. Ifthis isthe choice you want, touch
the STARTpad.
Touch the CLOCKpad again to black out the
clock display.The display will show OFF.If this is
the choice you want, touch the STARTpad.
NOTE:Ifthe clockisin the black-out mode,you
will not beable to usetheDelay Start function.
Touch the CONVECTIONCOOKpad until
the display shows CONON (Conversion
On)or CONOFF(ConversionOff)as
desired.
[] Touchthe STARTpad.
_ii¸ :4 DELAyli5:/
ill:i__!iii__:i_ !::__i_i!ill
JT] Touchthe upper oven BAKEand BROIL
HI/LO pads at the same time until the
display shows SF.
12-Hour Shutdown
With this fe.ature, should you forget
and leave the oven on, the control will
automatically turn off the oven after 12
hours during baking functions or atter 3
hours during a broiTfunction.
If you wish to turn OFF this feature, follow
the steps below.
J-f] Touch the upper oven BROIL HI/LO and
BAKE pads at the same time until the
display shows SF.
[_ Touch the DELAYSTART pad until no
shdn (no shut-off) appears in the
display.
Touch the START pad to activate the no
shut-off and leave the control set in this
special features mode.
26
Page 27
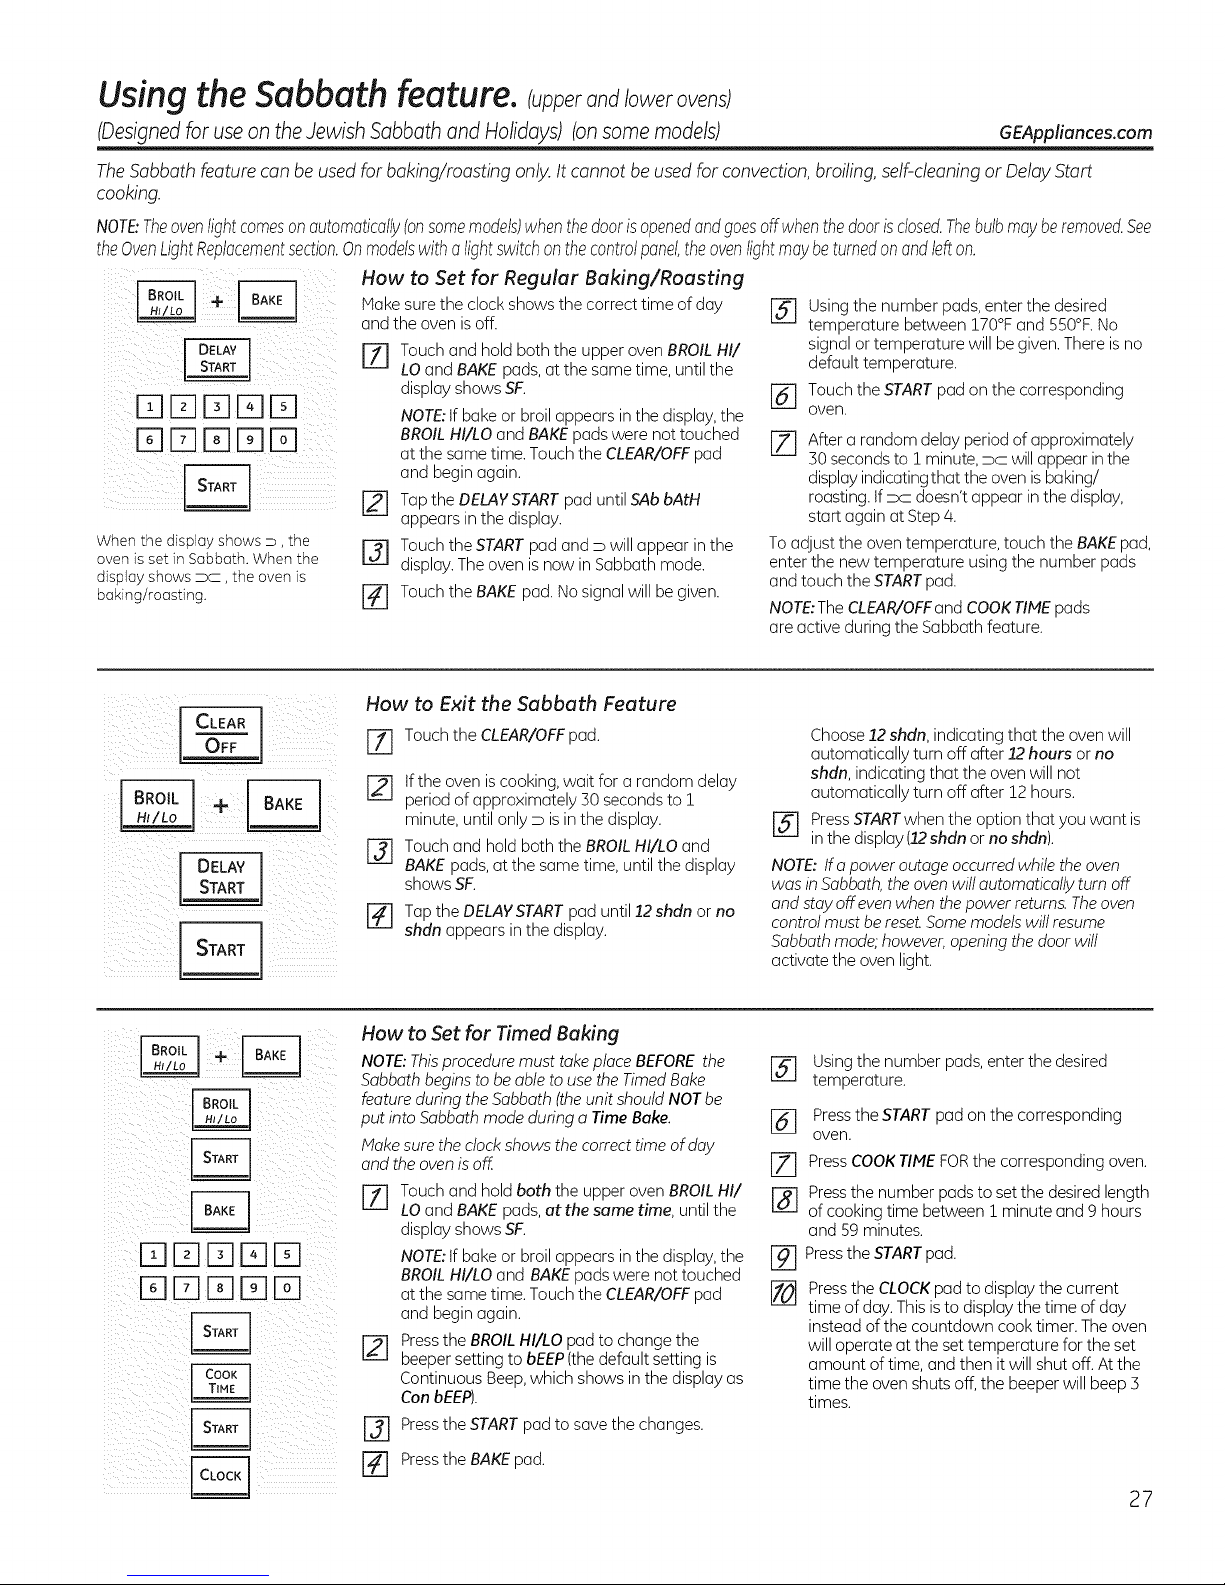
Using the Sabbath feature. (u erand/owerovensl
(Designedfor useontheJewish Sabbathand Holidays) (onsome models) GEAppliances.com
TheSabbath feature can be used for baking/roasting only.It cannot be used for convection,broiling, self-cleaning or Delay Start
cooking.
NOTE:Theovenlightcomesonautomatically(onsomemodels)whenthedoorisopenedandgoesoffwhenthedoorisclosed.Thebulbmayberemoved.See
theOvenLightReplacementsection.Onmodelswitha lightswitchonthecontrolpanel,theovenlightmaybeturnedonandIdt on.
How to Set for Regular Baking/Roasting
) 16-1FTiI-qEZ]I-q5¸
When the display shows D, the
oven is set in Sabbath. When the
display shows DC, the oven is
baking/roasting.
Hake sure the clock shows the correct time of day
and the oven isoff.
[] Touch and hold both the upper oven BROILHI/
LOand BAKE pads, at the same time, until the
display shows SK
NOTE:tf bake or broil appears in the display, the
BROILHI/LO and BAKEpads were not touched
at the same time. Touch the CLEAR/OFFpad
and begin again.
[] Tapthe DELAYSTARTpad until SAbbAtH
appears in the display.
r-_ Touch the STARTpad and D will appear in the
display.The oven is now in Sabbath mode.
[] Touch the BAKE pad. No signal will be given.
[_ Using the number pads, enter the desired
temperature between !70°F and S50°F.No
signal or temperature will begiven. There isno
default temperature.
[] Touch the STARTpad on the corresponding
oven.
[] After a random delay period of approximately
50 seconds to ! minute, DC will appear in the
displayindicatingthat the oven isbaking/
roasting. If_ doesn't appear in the display,
start again at Step 4.
Toadjust the oven temperature, touch the BAKEpad,
enter the new temperature using the number pads
and touch the STARTpad.
NOTE:TheCLEAR/OFFand COOKTIMEpads
are active during the Sabbath feature.
iji[ii[ CLEAR5C5
ilI_ iii _!i ii_ i _i:
I OELAvI
DD[]DD
DD[]DD
How to Exit the Sabbath Feature
Z] Touch the CLEAR/OFFpad.
Ifthe oven iscookinq, wait for a random delay
period of approximately 50 seconds to !
minute, until only D is inthe display.
[-_ Touch and hold both the BROILHI/LO and
BAKEpads,at the same time, until the display
shows SF.
Tapthe DELAYSTARTpad until 12shdn or no
shdn appears in the display.
How to Set for Timed Baking
NOTE:Thisprocedure must take place BEFOREthe
Sabbath begins to be able to use the Timed Bake
feature during the Sabbath (the unit should NOT be
put into Sabbath mode during a Time Bake.
lake sure the clock shows the correct time of day
and the oven is off.
77 Touch and hold both the upper oven BROILHI/
LOand BAKE pads, at the same time, until the
display shows SK
NOTE:tf bake or broil appears in the display, the
BROILHI/LO and BAKEpads were not touched
at the same time. Touch the CLEAR/OFFpad
and begin again.
Pressthe BROILHI/LO pad to change the
beeper setting to bEEP(the default setting is
Continuous Beep,which shows in the display as
ConbEEP).
r-_ press the START pad to save the changes.
r_ press the BAKE pad.
Choose12shdn, indicating that the oven will
automatically turn off after/2 hours or no
shdn, indicating that the oven will not
automatically turn off after !2 hours.
PressSTARTwhen the option that you want is
r-_
'"' in the display (/2 shdn or no shdn).
NOTE: Ira power outage occurred while the oven
was in Sabbath,the ovenwill automatically turn off
and stay off even when the power returns.The oven
control mustbe reset.Some models will resume
Sabbath mode;however,opening the door will
activate the oven light.
[_ Usingthe number pads, enter the desired
temperature.
[_ Pressthe STARTpad on the corresponding
oven.
[Z] PressCOOKTIMEFORthe corresponding oven.
[-_-] Pressthe number padsto set the desired length
of cooking time between 1minute and 9 hours
and 59 minutes.
J-9-1Pressthe STARTpad.
Pressthe CLOCKpad to display the current
[]
time of day. Thisis to display the time of day
instead of the countdown cook timer. Theoven
will operate at the set temperature for the set
amount of time, and then it will shut off. At the
time the oven shuts off, the beeper will beep5
times.
27
Page 28
Care and cleaning of the range,
Be sure all controls are off and all surfaces are cool before cleaning any part of the range.
Ifyour range is removed for cleaning, servicing or any reason, be
[A WARNING l
sure the anti-tip device is reengaged properly when the range is
replaced. Failure to take this precaution could result in tipping of
the range and can result in death or serious bums to children or
adults.
How to Remove Protective Shipping Film
Carefullygrasp a corner of the protective shipping
filmwith your fingers and slowlypeel itfrom the
appliance surface. Do not use any sharp itemsto
remove the film.Removeallofthe filmbefore using
the appliance for the firsttime.
Control Panel
tfdesired,thetouch padsmay bedeactivatedbefore
cleaning.
SeeHowtoLockOuttheControlsin theUsingthe
clock,kitchentimerandcontrollockoutsectioninthis
manual.
Painted Surfaces
Paintedsurfacesincludethesidesoftherangeand
thedoor,topof controlpanelandthedrawerfront.
Cleanthesewith soapandwateror avinegarand
watersolution.
Stainless Steel Surfaces (on some models)
Do not use a steel wool pad; it will scratch the
surface.
To cleanthe stainlesssteel surface, usewarm,
sudsywater or a stainlesssteel cleaner or
polish.Alwayswipe the surface in the direction
of the grain. Followthe cleaner instructions for
cleaning the stainless steelsurface.
and Packaging Tape
To ensure no damage isdone to the finish ofthe
product,the safest way to remove the adhesive from
packaging tape on new appliances isan application
ofa household liquiddishwashing detergent. Apply
with a soft cloth and allowto soak.
NOTE:Theadhesivemustberemovedfromallparts.
Itcannotberemovedif it is bakedon.
Cleanupsplatterswith a dampcloth.
Youmayalsousea glasscleaner.
Removeheaviersoilwith warm,soapywater.Donot
useabrasivesofanykind.
Reactivatethetouch _adsaftercleaning.
Donot usecommercialovencleaners,cleaning
powders,steelwoolor harshabrasiveson any
paintedsurface.
Toinquire about purchasing stainless steel
appliance cleaner or polish or to find the
location of a dealer nearest you, please
call our toll-free number:
National Parts Center 1.800.626.2002
GEAppliances.com
Porcelain Enamel Cooktop (onsome models)
Theporcelain enamel finish is sturdy but
breakable if misused.This finish is acid-
resistant.However, any acidic foods spilled
(such as fruit juices, tomato or vinegar) should
not be permitted to remain on the finish.
If acids spillon the cooktop while it ishot, use
a dry paper towel or cloth to wipe it up right
28
away.When the surface has cooled, wash with
soap and water. Rinsewell.
Forother spills such as fat spatterings,wash
with soap and water or cleansing powders
after the surface has cooled. Rinsewell. Polish
with a dry cloth.
Page 29

iAWARNING
GEAppliances.com
SHOCK ORBURN HAZARD: Before replacing oven light bulb, disconnect
the electrical power to the range at the main fuse or circuit breaker panel.
Failure to do so may result in electric shock or burn.
iA CAUTION
Socke_
Recep_a_@_
/
Glasscover
(onsome models)
i k i ' x ¸¸
i BURN HAZARD: The glass cover and bulb should be removed when cool.
Touching hot glass with bare hands or a damp cloth can cause burns.
Oven Light Replacement (on some models)
To remove:
[Z] Turn the glass cover counterclockwise 1/4
turn until the tabs of the glass cover clear
the grooves of the socket. Wearing latex
gloves may offer a better grip.
BE Usinggloves or a dry cloth, remove the
bulb by pulling it straight out.
To replace:
[] Usea new 120/130-volt halogen bulb, not
to exceed 50 watts. Replacethe bulb with
the same type of bulb that was removed.
Your model will have one of the two types
shown on the left.Todetermine the
correct replacement bulb,check the bulb
terminals. Bulbswith 2 straight pin
terminals are G6.35bulbs.Bulbs with 2
looped terminals are G9bulbs. (Donot
interchange.) Besure the replacement
bulb israted 120 volts or 130 volts (NOT12
volts).
Usinggloves or a dry cloth, remove the
BE
bulb from its packaging. Donot touch the
bulb with bare fingers.Oilfrom skinwill
damage the bulb and shorten its life.
Rece
Pushthe bulb straight into the receptacle
@
all the way.
Placethe tabs of the glass cover into the
%
grooves of the socket.Turn the glass cover
clockwise 1/4 turn.
Forimproved lighting inside the oven,
clean the glasscover frequently using a
wet cloth.Thisshould be done when the
oven is completely cool.
[] Reconnectelectrical power to the oven.
gloves o[
Glasscover
(onsome models)
Oven Light Replacement (onsome models)
Toremove:
rf] Turnthe glasscover counterclockwise 1/4
iiii_ I_ i __
i i i i i
ii
turn until the tabs of the glass cover clear
the grooves of the socket. Wearing latex
gloves may offer a better grip.
BE Removethe bulb by turning it counter-
clockwise.
Toreplace:
Eli Replacebulb with a new 40-watt
appliance bulb. Insert the bulb and turn it
clockwise until it istight.
[] Placethe tabs of the glass cover into the
grooves of the socket.Turn the glass
cover clockwise !/4 turn.
Forimproved lighting inside the oven, clean the
glass cover frequently usinga wet cloth. This
should be done when the oven iscompletely
cool.
[] Reconnect electrical power to the oven.
29
Page 30

Care and cleaning of the range.
Cleaning the Oven Door
Tocleantheinsideofthedoor:
Becausetheareainsidethegasketiscleaned
duringtheself-cleancycle,you do notneedto
cleanthisbyhand.
Theareaoutsidethegasketandthedoorliner
Thegasket isdesignedwith o gap
at the bottom to allow for proper air
circulation.
Donot rub or cleon the door gasket-it
hasan extremely low resistanceto
abrasion.
Ifyou notice thegasket becoming
worn, frayed or damaged in any way
or if it has becomedisplaced on the
door, you shouldhave it replaced.
canbecleanedwith a soap-filledor plastic
scouringpad,hotwateranddetergent.Rinsewell
with avinegarandwatersolution.
Toclean the outside of the doon
Usesoapandwaterto thoroughlycleanthetop,
sidesandfront oftheovendoor.Rinsewell.You
mayalsouseaglasscleanerto cleantheglasson
theoutsideofthedoor.Donot letwaterdrip into
theventopenings.
Lift-Off Oven Door (on some models)
': tfanystainonthe doorventtrim ispersistent,use
a softabrasivecleaner
anda sponge-scrubberfor bestresults.
Spillageofmarinades,fruitjuices,tomatosauces
andbastingmaterialscontainingacidsmay
causediscolorationandshouldbewipedup
immediately.Whensurfaceis cool,cleanand
rinse.
': Donot useovencleaners,cleaningpowdersor
harshabrasivesontheoutsideof the door.
(
Pull hinge locks down to unlock.
Removal position
Thedooris veryheavy.Becarefulwhenremoving
and lifting the door.
Donot liftthedoorbythe handle.
Toremovethe door:
[] Fullyopenthe door.
[] Pullthe hingelocksdowntowardthedoor
frame,to the unlockedposition.Atool,suchas
asmallflat-bladescrewdriver,mayberequired.
[] Firmlygraspboth sidesofthedoorat thetop.
[_ Closedoortothedoorremovalposition,which
ishalfwaybetweenthe broilstoppositionand
fullyclosed.
[]_] Liftdoor upandoutuntilthe hingearm isclear
oftheslot.
Toreplacethedoor:
[-71 Firmlygraspbothsidesofthedoorat thetop.
Withthe Bottom
dooratthesame edge
angle ofslot
I | | Hinge arm
\
asthe removal
position,seatthe
indentationofthehinge
armintothebottomedge
ofthehingeslot.Thenotch
in the hingearm mustbefull
seated intothe
bottomoftheslot.
Fullyopenthedoor.tfthe doorwillnotfully
@
open,theindentationis notseatedcorrectlyin
thebottomedgeofthe slot.
Pushthehingelocksupagainstthefrontframe
%
oftheovencavityto the lockedposition.
Hint
lock
Push hinge locks up to lock.
[_] Closetheovendoor.
30
Page 31

Lift-Off Upper Oven Door Ion some models)
To remove the door'.
GEAppliances.com
To replace the door'.
frl
// /
Door
frame,,,_ ,' "
, /
• /
E_ Fullyopen the door.
[27 Lift up on the hinge lock toward the oven
frame until they stop.
[-_ Closethe door to 45degrees (you will feel
the door stop).Thehinge lock will contact
the oven frame.
[] Onboth sides of the door, pressdown on
/
/
/
the releasebuttons on each hinge.
[] Liftdoor up until it is clear of the hinge.
[] Pullon hinge arms slightly to relieve
pressure on the lockingtabs.
r_ Pushthe hinge locksdown onto the hinge.
[] Pushthe hinges in toward the unit so they
are closed.
[Z] pullthe hingesdown away from the oven
frame to the fully open position.
[_ Liftup on the hinge lockstoward the oven
frame untilthey stop.
[] Thehingeswill releaseto the 45-degree
position.Thehinge lockswill contact the
oven frame.
Slidethe door back onto the hinges. Make
surethe buttons pop back out.
[]_] Fullyopen the door.
Pushthe hinge locksdown onto the hinge.
[] Closethe oven door.
31
Page 32

Care and cleaning of the range,
Oven Racks
Handles
Fordouble ovens,usethe rack with the
two front handles in the upper oven.
For double ovens, use the rock
without the two front handles in
the lower oven.
_B
ZE_
[_ _ L_,
All oven racks may be cleaned by hand with an
abrasive cleaner or steel wool. After cleaning,
rinsethe racks with clean water and drywith a
clean cloth. Gray porcelain-coated oven racks
may remain in the oven during the self-cleaning
cycle without beingdamaged. Thenickel-plated
oven racks may remain in the oven during the
self-cleaning cycle, but they will lose their luster
Extension Rack (on some models)
Extensionracks may be cleaned by hand
with an abrasive cleaner or steel wool. During
cleaning, be careful not to allow water or
cleaner to enter the extension slideson the
sides of the rack.
NOTE: Do not clean in a dishwasher.
Ifthe rack becomes hard to remove or replace,
lightly wipe the oven rack supports with
cooking oil. Donot wipe cooking oil on the
slides.
Tolubricate the slides:
NOTE:Do not spray extensionrack with cooking
spray or other lubricant sprays.
[7] Removethe rackfrom the oven.See
ExtensionRackin the Usingthe oven
section.
r21 Fullyextendthe rackon atable or
countertop.Newspapermay beplaced
underneaththe rackfor easycleanup.
[_ Ifthere is debris in the slidetracks, wipe it
away using a paper towel.
NOTE:Any graphite lubricant wiped away
must be replaced - seesteps 4 through 7.
[] Shakethe graphite lubricant before
opening it.Starting with the left slide
mechanism of the rack,place four (4)
small drops of lubricant on the two (2)
bottom tracks of the slideclose to the
bearing carriers.
[_ Repeatfor the right slide mechanism of
the rack.
and become hard to slide.It will be necessary
to grease all oven rack side edgeswith a light
coating of vegetable oil after cleaning them by
hand or inthe oven.Thiswill helpmaintain the
easeof sliding the racks in and out of the oven.
Ifthe rackbecomes difficult to slideor ifthe
paddle isdifficult to actuate, the rack may
need to be lubricated usingthe Graphite
Lubrication shipped with your oven.Toorder
additional Graphite Lubrication, callour
National PartsCenter at 800.626.2002and
reference WBO2T!0303.
[_ Open and closethe rack several times to
distribute the lubricant.
[] Replacethe cap on the lubricant and
shake it again.Turn the rack over and
repeat steps 3,/4,5 and 6.
[] Closethe rack,turn rack right-side-up and
place in the oven. SeeExtensionRackin
the Using theoven section.
Tolubricate the paddle:
Shakelubricant and apply to the moving parts
of the paddle mechanisms as shown.
32
Page 33

Wipe up heavy soil on the oven
bottom.
Oven Heating Elements
Do not clean the bake element or the broil
element.Any soilwill burn off when the
elements ore heated.
GEAppliances.com
Tocleanthe oven floor, gently lift the bake
element. On some models,the bake element is
not exposed and isunder the oven floor. Cleon
with worm, soapy water.
Stop guide
Oven Vent on Radiant Glass Cooktops
Allmodels have on ovenvent located behind the
rightrearsurfaceunit.Ondoubleovens,there isan
additionalovenventfor the upperovenbehindthe
tt is normalforsteamto comeoutofthevent,and
moisturemaycollectunderneathitwhenthe oven
isinuse.
leftrearsurfaceunit.
Theventis importantfor properair circulation.Never
Thisore(]couldbecomehot duringovenuse.
blockthisvent.
Storage Drawer Removal (onsomemodels)
Toremove the drawen
r_ Pullthe drawer out until itstops.
[] Liftthe front of the drawer until the stops
clear the guides.
[] Removethe drawer.
Removable Warming Drawer/Drawer Pan (on some models)
NOTE:Formodels with an electric
warming drawer, beforeperforming
any adjustments,cleaning or service,
disconnectthe range electricalpower
supply at the householddistribution panel
by removing the fuse or switching off the
circuit breaker.Makesure thedrawer
heating element iscool.
To replace the drawer'.
r_ Placethe drawer rails on the guides.
r_ Pushthe drawer backuntil itstops.
r_ Liftthe front of the drawer and push back
until the stops clearthe guides.
r_ Lowerthe front of the drawer and push
back until it closes.
Never place,use or self-clean the drawer pan
in the upper oven.
Warming drawer has a removable pan for
easycleaning. Cleanwith hot, soapy water
and a sponge or dishtowel. Dry with a
cleancloth. Replacethe pan inthe warming
drawer.
NOTE:Allow warming drawer to cool before
removing pan.
NOTE:Wipe spillspromptly after each use.
33
Page 34

Cleaningthe glass cooktop, consomemodels;
Normal Daily Use Cleaning
ONLVuse CERANABRVTE®CeramicCooktop
Cleaneron the glass cooktop. Other creams
may not be as effective,
To maintain and protect the surface of your
glass cooktop, follow these steps:
Before usingthe cooktop for the
[]
first time, clean itwith CERAIVlABRYTE®
CeramicCooktop Cleaner.This helps
Clean your cooktop after each
spill, Use CERAMABRVTE®Ceramic
Cooktop Cleaner.
protect the top and makes cleanup easier.
r_ Daily use of CERAMABRYTE®Ceramic
CooktopCleanerwill help keepthe
cooktop looking new.
Burned-On Residue
Shakethe cleaning cream well. Apply a
@
few drops of CERAMABRVTE®Ceramic
Cooktop Cleanerdirectly
to the cooktop.
r-_ use a paper towel or CERAMABRYTE®
CleaningPad for Ceramic Cooktopsto
clean the entire cooktop surface.
r51 use a dry cloth or paper towel
to remove all cleaning residue.
No need to rinse.
NOTE:It is very important that you DONOT
heat the cooktop until it has been cleaned
thoroughly.
Use a CERAMA BRYTE® Cleaning
Pad for Ceramic Cooktops.
The CERAMABRVTE®Ceramic
Cooktop Scraper and all
recommended supplies are
available through our Parts
Center. See instructions under "To
Order Parts" section on next page.
NOTE:Do not use a dull or
nicked blade.
NOTE:DAMAGEtoyour glass surface may
occur ifyou use scrub pads other than those
recommended.
rT] Allow the cooktop to cool.
[] Spread a few drops of CERAiVlABRYTE®
Ceramic Cooktop Cleaneron the entire
burned residue area.
Using the included CERAMABRYTE®
%
Cleaning Padfor Ceramic Cooktops,rub
the residue area, applying pressure as
needed.
Heavy, Burned-On Residue
Allow the cooktop to cool.
F71
Use a single-edge razor blade scraper
at approximately a a,5° angle against
the glass surface and scrape the soil. It
will be necessary to apply pressure to
the razor scraper in order to remove
the residue.
After scraping with the razor scraper,
%
spread a few drops of CERAMABRYTE®
CeramicCooktop Cleaneron the entire
burned residuearea. Usethe CERAMA
BRVTE®Cleaning Padto remove any
remaining residue.
If any residue remains, repeat
%
the steps listed above as needed.
For additional protection, after all
@
residue has been removed, polish the
entire surface with CERAMABRVTE®
CeramicCooktop Cleanerand a paper
towel.
For additional protection, after all
%
residue has been removed, polish the
entire surface with CERAMABRYTE®
CeramicCooktop Cleanerand a paper
towel.
3q
Page 35

Metal Marks and Scratches
GEAppliances.com
J-_ Be careful not to slide pots and pans
across your cooktop. It will leave metal
markings on the cooktop surface.
These marks are removable using the
CERAMABRYTE®CeramicCooktop Cleaner
with the CERAMABRYTE®Cleaning Pad
for Ceramic Cooktops.
[] If pots with a thin overlay of aluminum
or copper are allowed to boil dry, the
overlay may leave black discoloration
on the cooktop.
Cooktop Seal
To clean the cooktop seal around the edges
of the glass, lay a wet cloth on it for a few
Glass surface--potential for permanent damage.
This should be removed immediately
before heating again or the
discoloration may be permanent.
NOTE'.Carefully check the bottom of pans for
roughness that would scratch the cooktop.
minutes, then wipe clean with nonabrasive
cleaners.
Sugaryspillovers(suchas
jellies,fudge,candy,syrups)
or melted plasticscancause
pittingofthe surfaceofyour
cooktop(notcoveredbythe
warranty)unlessthe spillis
removedwhilestillhot.Special
careshouldbetakenwhen
removinghotsubstances.
Besureto usea new,sharp
razorscraper.
Donotusea dullor nicked
blade.
j I1
Damage from Sugary Spills and Melted Plastic
[7] Turn off all surface units. Remove hot
pans.
Wearing an oven mitt:
o. Use a single-edge razor
blade scraper (CERAIVlABRYTE®
Ceramic Cooktop Scraper)
to move the spill to a cool
area on the cooktop.
b. Remove the spill with paper towels.
To Order Parts
To order CERAMABRYTE®Ceramic Cooktop
Cleaner and the cooktop scraper, please call
our toll-free number:
National Parts Center 800.626.2002
CERAHABRYTE®Ceramic
Cooktop Cleaner .......... #WX! OX300
CERAMABRYTE®Ceramic
Cooktop Scraper .......... #WX10;40302
Kit ........................ #W864X5027
(Kitincludes cream and cooktop scraper)
r_ Any remaining spillover should be left
until the surface of the cooktop has
cooled.
[] Don't use the surface units again until
all of the residue has been completely
removed.
NOTE:If pitting or indentation in the glass
surface has already occurred, the cooktop
glass will have to be replaced.
In this case, service will be necessary.
CERAMABRYTE®Cleaning Pads for
Ceramic Cooktops ....... #WX!OX350
35
Page 36

Before You Call For Service...
Troubleshooting Tips
Save time and money! Review the charts on the following
pages first and you may not need to call for service.
Possible Causes What To Do
Surface units will not Improper cookware * Use pans which are flat and match the diameter of
maintain a rolling bail being used. the surface unit selected.
or cooking is not
fast enough (voltagel may be low.
not work properly blown or the circuit breaker
Surface unit stops This isnormal. The unit
glowing when turned is still on and hot.
to a Iovversetting
Scratches (may appear Incorrect cleaning , Scratches are not removable.Tiny scratches will become
as cracks) on cool_op methods being used. lessvisible in time as a result of cleaning.
glass surface Cookware with rough bottoms . To avoid scratches,usethe recommended cleaning
Areas of discoloration Food spillovers not cleaned * See the Cleaning the glass cooktop section.
on thecooktop beforenextuse.
Plastic melted to Hot cooktop came into , See the Glasssurface-potential for permanent damage
the surface contact with plastic placed section in the Cleaning the glass cooktop section.
Pitting (or indentation) Hot sugar mixture spilled , Call a qualified technician for replacement.
ofthecooktop on the cooktop.
Frequent cycling Improper cookware , Use only flat cookware to minimize cycling.
off and on of being used.
surface units
In some areas, the power , Cover pan with a lid until desired heat is obtained.
A fuse in your home may be • Replacethefuse or reset the circuit breaker.
tripped.
Cooktop controls . Check to see the correct control is set for the surface
improperly set. unit you are using.
being used or coarse particles procedures. Make sure bottoms of cookware are clean
Isalt or sand} were between before use,and use cookware with smooth bottoms.
the cookware and the surface
of the cooktop.
Cookware has been slid
across the cooktop surface.
Hot surface on a model , This is normal. The surface may appear discolored
with a light-colored cooktop, when it is hot. This istemporary and will disappear
as the glass cools.
on the hot cooktop.
Ovenlight does Light bulb is loose. , Tighten or replacethe bulb.
not work
Oven will not work Plugon range isnot completely , Make sure electrical plug is plugged into a live,properly
inserted in the electrical outlet, grounded outlet.
A fuse in your home may • Replacethe fuse or reset the circuit breaker.
be blown or the circuit
breaker tripped.
Oven controls improperly set. • Seethe Using the oven section.
Oven too hot. . Allow the oven to cool to below locking temperature.
36
Page 37

Possible Causes What To Do
Food doesnot bake Oven controls improperly set. • Seethe Using theoven section,
or roast properly
Rock position is incorrect * Seethe Using theoven section.
or the rack is not level.
Incorrect cookware or • Seethe Using theoven section.
cookwore of improper
size being used.
Oven thermostat needs . Seethe Adjust the oven thermostat Do it yourselfi
adjustment, section.
Food does not Oven controls improperly set. _ Hake sureyou touch the BROILHI/LO pad.
broil properly Improper rack position • Seethe Broiling Guide.
being used.
Cookware not suited • Forbest results,usea pan designedfor broiling.
for broiling.
The probe isplugged • Unplugand remove the probe from the oven.
into the outlet in the oven.
(on some models)
GEAppliances.com
In some areas the power _ Preheatthe broilelement for 10minutes.
(voltage) may be low.
Broil for the longest period of time recommended
in the Broiling Guide.
Oven temperature Oven thermostat _ See the Adjust the oven thermostat Do it yourself!
too hot or too cold needs adjustment, section.
Storage drawer Rear drawer support is _ Reposition the drawer. Seethe Storage Drawer
on top of the guide rail. Removal instructions in the Care and cleaning of the
is crooked _ range section.
Check to make sure drawer is properly seated
if removed.
Storage drawer Power cord may be • Repositionthe drawer and power cord. Seethe
won t Close obstructing drawer StorageDrawer Removalinstructions in the Care and
in the lower back cleaningof the range section.
ofthe range.
:Rear drawer support is . Reposition the drawer. Seethe Storage Drawer
............ on top of the guide rail. Removal instructions in the Care and cleaning of the
range section.
mndooriS crooked The door is out of position. . Becausethe oven door isremovable, it sometimes gets out
of position during installation.
e
Tostraighten the door, push down on the high corner.
37
Page 38

Before Vou Call For Service...
Troubleshooting Tips
Possible Causes What To Do
Clock and timer do Plug onrange is not completely . Hake sure electrical plug isplugged into a live,properly
not work inserted in the electrical outlet, grounded outlet.
A fuse in your home . Replacethe fuse or reset the circuit breaker.
may be blown or the
circuit breaker tripped.
Oven controls improperly set. . See the Using the kitchen timer section.
Oven will notself-clean The oven temperature is • Allowthe range to cool and reset the controls.
too high to set o self-cleon
operation.
Oven controls improperly set. • Seethe Using the self-cleaning oven section.
The probe is plugged into . Remove the probe from the oven.
the outlet in the oven.
(on some modelsl
"Crackling" or This is the sound of the . Thisisnormal.
"popping" sound metal heating and cooling
during both the cooking and
cleaning functions.
Excessive smoking
during a clean cycle
Oven door will not Oven too hot. , Allow the oven to cool below locking temperature.
open after a clean cycle
Oven not clean after a Oven controls not properly set. • See the Using the self-cleaning oven or Using steam clean section.
clean cycle
"LOCKED" flashes The self-cleon cycle has been , Close the oven door.
in the display selected but the door is not
"LOCKED" is on The oven door is locked . Touch the CLEAR/OFFpad. Allow the oven to cool.
when you want because the temperature
to cook inside the oven has not
Excessive soil.
Oven was heavily soiled. , Clean up heavy spillovers before starting the clean
closed.
dropped below the
locking temperature.
. Touch the CLEAR/OFFpad. Open the windows to
rid the room of smoke. Wait until LOCKED/DOOR
goes off. After the oven cools, wipe up the
excess soil and reset the clean cycle.
cycle. Heavily soiled ovens may need to be cleaned again.
"F--" and a number
or letter flash
in the display
38
You hove o function error code. , Disconnect all power to the range for at least
30 seconds and then reconnect power. If the function
error code repeats, call for service.
Page 39

GEAppliances.com
Possible Causes What To Do
Control signals after You forgot to enter a . Touch the BAKE pad and desired temperature or
entering cooking time bake temperature or the SELF CLEAN pad and desired clean time.
or start time cleaning time.
Display goes blank A fuse in your home may be . Replacethe fuse or reset the circuit breaker.
blown or the circuit
breaker tripped.
The clock is in the . See the Special features ofyour oven control section.
black-out mode.
--Display flashes Power failure. . Reset the clock.
Unable to get the Oven control pads were . The BROIL HI/LO and BAKE pads must be touched at
display to show SF" not touched properly, the same time and held for 3 seconds.
" " Thi
Probe appears nn s is reminding you to . Enter a probe temperature.
the display enter a probe temperature
(on some models} after plugging in the probe.
Power outage, Power outage or surge. . Reset the clock. Ifthe oven was in use, you must reset
clock flashes it by touching the CLEAR/OFF pad, setting the clock
and resetting any cooking function.
Steam from the vent When using the ovens, . This is normal.
it is normal to see steam
coming out of the oven
vents. As the number of racks
or amount of food being
cooked increases, the amount
of visible steam will increase.
rt B " _s s_ • _s
urmng or oily This is normal in a new oven
odor emitting from and will disappear in time.
the vent
Strong odor
An odor from the insulation
To speed the process, set a self-clean cycle for a
minimum of 3 hours. See the Using the self-cleaning
oven section.
. This is temporary.
around the inside of the oven
is normal for the first few times
the oven is used.
Fan noise A convection fan may
fan some modelsl automatically turn on
and off.
A cooling fan may . This isnormal on some models. The cooling fan will turn off and
automatically turn on and off. on to cool internal parts. It may run after the oven is
This isnormal. The fan isdesigned to operate intermittently
to maximize cooking evenness.
The convection fan will operate during preheat
of the bake cycle. The fan will turn off after the oven
is heated to the set temperature. This is normal.
turned off.
39
Page 40

Before Vou Call For Service...
Troubleshooting Tips
Possible Causes What To Do
Oven racks are The shiny, silver-colored , Apply a small amount of vegetable oil to a paper
difficult to slide racks were cleaned in a towel and wipe the edges of the oven racks with
self-clean cycle, the paper towel. Do not spray with Pam®or other
lubricant sprays.
Drawer does not slide The drawer is out * Fully extend the drawer and push it all the way in.
smoothly or drags of alignment. See the Care and cleaning of the range section.
Drawer is over-loaded or * Reduce weight. Redistribute drawer contents.
load is unbalanced.
Warming drawer A fuse in your home may be * Replace the fuse or reset the circuit breaker.
will not work blown or the circuit breaker
tripped.
Controls improperly set. , See the Using the warming drawer section.
Excessivecondensation Liquid in drawer. • Remove liquid.
in the drawer
Uncovered foods. • Cover food with lid or aluminum foil.
Temperature setting too high. * Reduce temperature setting.
Food dries out in the Moisture escaping. * Cover food with lid or aluminum foil.
warming drawer Drawer not fully closed. , Push drawer in until latch engages.
Water remaining on This is normal. , Remove any remaining water with a dry cloth or sponge.
oven floor after Steam
Clean cycle
Oven will not steam Display flashes HOT. , Allow the oven to cool to room temperature and reset the
clean controls.
Oven controls improperly set. * See the Using Steam Clean section.
Oven door is not closed. , Hake sure you close the door to start steam clean cycle.
40
Page 41

Accessories, GEAppliances.com
Looking For Something More? (Not all accessories ore available for oil models.)
You can find these accessories and many more at GEAppliances.com (U.S.)
or www.GEAppliances.ca (Canada), or call 800.626.2002 (U.S.) or 800.661.1616 (Canada)
(during normal business hours). Have your model number ready.
Grates Surface Burner Heads and Caps Surface dements and Drip Pans Knobs
......
P,, S
Oven Racks
!*Ifyour model included on extension rack, you con increase the functionality of your range when you purchase additional extension racks. Visit
www.geopplianceports.com or call 800-626-2002, and order part number WB¢8TlO071. Please note, extension racks do not fit oil model ranges.
Experience these other great products to keep your kitchen looking great!
j coo_ToP
/ CLEANIN_KIT
Cool<top Cleaning Wipes Appliance Polish Appliance
Cleaning Kit. Wipes Cleaner
Includes cleaner,
scraper and pod
WX1OX117GCS WX10?(500 WX1OX1O001 PPI10?(511
Oven Elements
Light Bulbs Extension Rack !*
Getthe most out of your Broiler Pan!(Not for usewith Broiler Drawer models.)
Useyour pan and grid coverto broil hamburgers, seafood, steaks, vegetables, bacon, chops and so much more! The pan below catches
the excess fats and oils.
* Genuine GEPart
* EasyTo Clean
* One-YearWarranty
Limited Time Offed Free Shipping!
When you order your broiler pan within 50 days of purchasing your GE cooking product.
Small Large*
U.S. Part # WB/48X1005 5 WB/48X10056
Dimensions 8-3/¢'Wxl-1/¢'Hxl3-1/2"D 12-3/¢'Wxl-1/¢'Hxl5-1/¢'D
* Thelarge {standard) broil pan does not fit in 20"/24" ranges.
** TheXL pan does not fit in 2¢" wall ovens,27" drop-ins or 20"/2¢" ranges.
To place your order, call 800.626.2002 (U.S.),800.661.1616 (Canada) or mail this form to:
Inthe U.S.: GE Parts, P.O. Box221027, Memphis, TN 38122-1027. In Canada: GE Parts, 1 Factory Lane, Moncton, N.B. EIC 9M3
15-1/2" W x l-1//4" H x lg" D
XL**
WB¢8XI O057
Broiler Pan Order Form
Quantity
Model Number
First Name
Address
City
Phone
Check
Call 800.626.2002 in the U.S. or 800.661.6161 in Canada for current pricing. All credit card orders must be called in. /41
Money Order
Serial Number Brand Date of Purchase
Part Number
Last Name
State Zip Code
E-Mail
Page 42

Notes.
/42
Page 43

GE Electric Range Warranty. GEAppliances.com
All warranty service provided by our Factory Service Centers,
or an authorized Customer Care®technician. To schedule
service, visit us on-line at GEAppliances.com, or call 800.
GE.CARES(800.432.2737). Please have serial number
and model number available when calling for service.
Staple your receipt here.
Proof of the original purchase
date is needed to obtain service
under the warranty.
GE Will Provide:
One Year Anv part of the range which fails due to a defect in materials or workmanship.
From the date of the During this limited one-year warranty, GEwillalso provide, free of charge, all labor and in-home
original purchase service to replace the defective part.
For Profile Models:
Five Years
From the date of the
original purchase
Service trips to your home to teach you how to use
the product.
For Profile Models:
A replacement glass cooktop ifit should crack due to thermal shock, discolor or ifthe pattern
wears off.
A replacement radiant surface element ifit should burn out.
During this limited additonal four-year warranty, you willbe responsible for any labor or
in-home service.
Damage to the product caused by accident, fire, floods or
acts of God.
Improper installation, delivery or maintenance.
Product damage or failure of the product if it is abused,
misused, modified, used for other than the intended
purpose, or used commercially.
Damage to the glass cooktop caused by use of cleaners
other than the recommended cleaning creams and pads.
Damage to the glass cooktop caused by hardened spills
of sugary materials or melted plastic that are not cleaned
according to the directions in the Owner's lvlonuol.
Replacement of house fuses or resetting of circuit breakers.
EXCLUSION OF IMPLIED WARRANTIES--Your sole and exclusive remedy is product repair as provided in this Limited
Warranty. Any implied warranties, including the implied warranties of merchantability or fitness for a particular purpose,
are limited to one year or the shortest period allowed by law.
This warranty is extended to the original purchaser and any succeeding owner for products purchased for home
use within the USA. If the product is located in an area where service by a GEAuthorized Servicer is not available, you
may be responsible for a trip charge or you may be required to bring the product to an Authorized GEService location for
service. In Alaska, the warranty excludes the cost of shipping or service calls to your home.
Some states do not allow the exclusion or limitation of incidental or consequential damages. This warranty gives
you specific legal rights, and you may also have other rights which vary from state to state. To know what your
legal rights are, consult your local or state consumer affairs office or your state's Attorney General.
Incidental or consequential damage caused by possible
defects with this appliance.
Damage caused after delivery.
Product not accessible to provide required service.
Warranton General Electric Company. Louisville, KY 40225
43
Page 44

Consumer Support.
GEAppliances Website GEAppliances.com
Have a question or need assistancewith your appliance?Try the GEAppliancesWebsite 24 hours a day,
any day of the year! Forgreater convenience and faster service,you can now download Owner's Manuals,
order parts or even schedule service on-line.
Schedule Service GEAppliances.com
Expert GErepair service is only one step away from your door. Get on-line and schedule your service at
your convenience any day of the year! Or call 800.GECARES(800.432.2737) during normal business hours.
RealLifeDesignStudio GEAppliances.com
GEsupports the Universal Designconcept-products, servicesand environments that can be used by
people of all ages,sizesand capabilities. We recognizethe need to designfor a wide range of physicaland
mental abilities and impairments. Fordetails of GE'sUniversalDesignapplications, including kitchen design
ideasfor people with disabilities,check out our Website today. Forthe hearing impaired, please call 800.TDD.
GEAC(800.833.4322).
ExtendedWarranties
Purchase a GEextended warranty and learn about special discounts that are available while your warranty
isstill in effect. You can purchase it on-line anytime, or call 800.626.2224during normal business hours.
GEConsumer Home Serviceswill still be there after your warranty expires.
Partsand Accessories
Individuals qualified to servicetheir own appliances can have parts or accessoriessent directly to their homes
(VISA,MasterCard and Discovercards are accepted).Order on-line today, 24 hours every day or by phoneat
800.626.2002during normal businesshours.
Instructions contained in this manual cover procedures to be performed by any user. Other servicing
generally should be referred to qualified service personnel. Caution must be exercised, since improper
servicing may cause unsafe operation.
Contact Us
If you are not satisfied with the serviceyou receivefrom GE,contact us on our Website with all the details
including your phone number, or write to: General Manager, Customer Relations
GEAppliances,Appliance Park
Louisville,KY40225
GEAppliances.com
GEAppliances.com
GEAppliances.com
] RegisterYourAppliance GEAppliances.cam
communication and prompt service under the terms of your warranty, should the need arise.
Registeryaur new appliance an-line--at your convenience! Timely product registration will allow for enhanced
You may also mail inthe pre-printed registration card included in the packing material.
44
Page 45

GEAppliances.com
induction
Self-Cleaning Convection
IMPORTANT SAFETY INFORMATION.
READ ALL INSTRUCTIONS BEFORE USING.
WARNING!
Foryour safety, the information in this manual must be
followed to minimize the risk of fire, explosion, electric shock,
or to prevent property damage, personal injury, or loss of life.
This unit has been tested and found to comply with the
limits for a class B digital device, pursuant to Part 18
of the FCC rules. These limits are designed to provide
reasonable protection against harmful interference in
a residential installation. This unit generates, uses and
can radiate radio frequency energy and, if not installed
and used in accordance with the instructions, may cause
harmful interference to radio communications. However,
there is no guarantee that interference will not occur in
a particular installation. Ifthis unit does cause harmful
interference to radio or television reception, which can
be determined by turning the unit off and on, the user is
encouraged to try to correct the interference by one or
more of the following measures:
• Reorient or relocate the receiving antennae.
• Increase the distance between the unit and receiver.
• Connect the unit into an outlet or a circuit different from
that to which the receiver is connected.
A CAUTION!
Persons with a pacemaker or similar medical device
should exercise caution when using or standing
near an induction unit while it is in operation. The
electromagnetic field may affect the working of the
pacemaker or similar medical device. It is advisable to
consult your doctor or the pacemaker manufacturer
about your particular situation.
Using the cooktop.
How Induction Surface Cooking Works
Induction coils under the glo]ss cooking surfo]ce produce
o]mo]gnetic field tho]t generates heo]t in ferrous meto]ls
thot ore in close proximity. The glo]sscooking surfoce is
not heo]ted directly since it is not o]ferrous meto]l,but the
glo]ssmo]y eventuo]lly become hot from the po]n.Induction
surfo]ce coils (]re more efficient o]nd will heo]t much fo]ster
tho]n conventiono]l electric o]ndgo]scooking surfo]ce cooking
products.
CAUTION'.
. The induction cooking elements mo]yo]ppeo]rto be coolwhile
turned ON ond o]tierthey hove been turned OFF.The gloss
surface mo]ybe HOTfrom residuo]lheo]ttransferredfrom the
cookwo]reo]ndburnsmo]yoccur.
. DO NOTTOUCHHOTCOOKWAREor PANSdirectly with ho]nds.
Alwo]ysuse mitts or pot holders to protect ho]ndsfrom burns.
DONOTSLIDEcookwo]re(]crossthe cooktop surface. Doing
somoy permo]nentlydo]mo]gethe o]ppeo]mnceof the ceramic
cooktop.
/49-80630 02-11GE
Page 46

Using the cooktop. (cont.)
What Type of Pans Are Required?
You must usea ferrous pan when using the induction coils on
this range.Thewarming zone isnot an induction coil and will
work with any type of cookwure.Youcan verifyyour pun is
ferrous ifa magnet sticksto it. Quality cookwure with heavy
bottoms made of cast iron,magnetic stainless steel and
enameled steel work best.Forbest results, usepunswith flat
bottoms. Woks that do not have flat bottoms in close contact to
the glass surface will not work. Some puns are made especially
for induction cooking.
Pan Size and Shape
Theinduction coils require a minimum pan sizein order for the element to turn on.
In order for the induction coil to correctly determine if the pun islarge enough, it is
important that the pun be centered within the circular graphics marked on the
glass cooking surface.Theminimum pun sizethat will work for each induction coil
isshown on the right. Punsthat are not ferrous or are too small will not allow the
induction coil to turn on, and the power leveldisplay for that coillocation will flush
for 30 secondsand then turn off. If u pan isremoved from the induction coil for
more than 30 seconds,the power will be shut off. Square pans will work, although
round pans that match the induction coilsizeswork best.Cookware larger than
the cooktop glassgraphics will work. Forbest results, match the pun sizewith
the nearest-sizegraphics on the glass cooking surface.
Use flat-bottomed pans. Useo griddle. Use o flat-bottomed wok.
Boost Mode and Power
Sharing
PowerSharingis activatedwhen
bothelementsinthe samecooking
zoneare activatedand one element
isset for Boost(H).Theelement
that isnot setfor Boostwill change
to a lowerpowerlevel.Thisis
calledPowerSharing.WhenBoost
operation iscomplete(10minutes),
the otherelement may be resetto
any powerlevel.Bothelementscan
operatesimultaneouslyat normal
powerlevelsettingsof"L"to 9.
Cookware "Noise"
A low humming noise isnormal when using induction coils,
especiallyon higher power settings. Heavy enamel cast-iron
pots produce less noisethan lightweight steel pans.The amount
of content inthe puns can also affect noise level. Punsthat
IMPORTANT NOTE FOR RIGHT
SIDE POWER SHARING
Theelements on the right side share one
generator. Both elements can operate at
any non-Boost (levelLto 9)power level
at the same time. When the large 1!"
element is set for "H" or Boost, the smaller
element is automatically shut off and
cannot be activated. After !0 minutes,
Boost (t4)will revert to power level 9.
At that time, the smaller element may be
activated and set for any power level.
completely cover the graphics on the glass will produce less
noise.Water trapped under puns can boil,causing the cookwure
to vibrate or slideon the glass surface.
4 burner cooktops with right- and left-side (21
induction generators
Use the minimum size pan shown for each cooking element.
Before you call for service...
Possible Causes What To Do
!units do Improper cookware being used. , Wrong pantype. Usea magnet to check that cookware is
not work properly or induction-compatible. Usea flat induction-capable pan that meets
flashing power setting the minimum sizefor the element being used.Seethe Pansizeand
shape section.
Pan is too small. • Pansizeisbelow the minimum sizefor the element. Seethe Pansize
and shape section.
Pan not positioned correctly. , Center the pan in the cooking zone.
Pandetection/sizing Pan is improperly placed. • Hake sure the pan iscentered on the corresponding surface element.
not WOrkingproperly Cooktop control improperly set. , Checkto see that the control is set properly.
Power sharing. • Checkto see ifpower was being shared between two elements. See
Changedor turned Boost Mode and Power Sharing section.
High cooktop temperature. , Allowthe internal fan to cool the cooktop.
Page 47

GEAppliances.com
Cocinos
autolimpiantes de convecci6n e inducd6n
INFORMACiON IMPORTANTEDESEGURIDAD.
LEA TODASLASINSTRUCCIONESANTESDESU USO.
unidad, el usuario puede corregir la interferencia a trav_s
iADVERTENCIA!
Para su segufidad, la informaci6n de este manual debe
seguirse al pie de la letra a fin de minimizar el riesgo de
incendio o e×plosi6n, descarga el_ctrica, o para prevenir
dafios, lesiones personales o la muerte.
Esta unidad se ha puesto a prueba y se ha determinado
que cumple con los limites de un dispositivo digital de clase
B, de conformidad con la Parte 18 de las normas de la FCC.
Estos limites est6n disefiados para bfindar una protecci6n
razonable contra interferencia dafiina dentro de una
instalaci6n residenciaL Esta unidad genera, utiliza y puede
irradiar energia de frecuencia de radio y, si no se instala y
usa de acuerdo con las instrucciones, puede provocar una
interferencia dafiina a las comunicaciones de radio. Sin
embargo, no hay garantia de que no haya interferencia
en una instalaci6n determinada. Sila unidad provoca
interferencia nociva a la recepci6n de radio y televisi6n,
Io que puede determinarse encendiendo y apagando la
de una o m_s de las siguientes medidas:
• Reoriente o cambie la posici6n de las antenas
receptoras.
Incremente la distancia entre la unidad y el receptor
Conecte la unidad a un tomacorriente o un circuito
diferente del que est_ usando el receptor.
A iPRECAUCION!
Las personas que utificen un marcapasos o un
dispositivo m_dico similar deben tener cuidado cuando
utilicen y se encuentren cerca de una unidad por
inducci6n. El campo electromagn_tico puede afectar
el funcionamiento del marcapasos o del dispositivo
m_dico similar Es recomendable consultar a su m_dico
o al fabricante del marcapasos sobre su situaci6n
particular
C6mo usar la estufa.
C6mo funciona la superficie de cocci6n por inducci6n
Las bobinos de inducci6n ubicodas debajo de la superficie de
cocci6n de vidrio producen un campo magn6tico que genera
color en metoles ferrosos que se encuentmn muy cerca. La
superficie de cocci6n de vidrio no se calienta directamente ya
que no es un metal ferroso, pero el vidrio puede calentarse
por estar en contocto con el recipiente de cocci6n. Las
bobinas de la superficie de inducci6n son m_s eficientes
y se calientan con m_s rapidez que las cocinas el6ctricos
o a gas con superficies de cocci6n convencionoles.
PRECAUCION:
. Los elementos de cocci6n por inducci6n pueden parecer
fr[os cuondo est_nencendidos (ON)y despu_s de haber sido
apagodos (OFF).Lo superficie de vidrio puede estar CALIENTE
debido o calor residual transferido delrecipiente de cocci6ny
pueden provocarse quemoduras.
. NOTOQUERECIPIENTESDECOCCIONCALIENTESdirectomente
con sus manos. Siempreuseguantes de cocina o agarraderos
paro proteger las manos de quemaduras.
. NO DESLICErecipientes de cocci6n o trov6s de Iosuperficie de
la estufa. Hacerlo puede dahar permonentemente la apariencia
de la estufa de cerdmico.
49-80630 02-11GE
Page 48

C6mo usar la estufa. (cont.)
gQu_ close de recipientes debe usorse?
Deben utilizarserecipientesferrosos cuando se usenlas bobinas
de inducci6n de esta cocina. Lazona de calentamiento no es una
dbobinade inducci6n y funciona con cualquier close de recipiente
e cocci6n. Usted puede verificar sisu recipiente es terroso si
un imc_nse adhiere a _1.Losrecipientes de cocci6n decalidad
con bases pesudas hechas de hrerrofundido, acero inoxidable
magn6tico y 9cero esmaltado funcionan mejor.Para mejores
resultudos, utilice recipientes con bases planus. Loswoks que no
poseen bases planasen contacto con la superficie de vidrio no
funcionan. Algunos recipientes estan fabricados especialmente
paro cocci6n par inducci6n.
UtiFce recipientes UtiFce una plancha. UtiFce un wok
de base plana, de base plana.
Tamaflo y forma de los recipientes
Lasbobinasde inducci6nrequierenun tama_o mfnimode recipienteparaque el elementose
encienda.Paraque labobina de inducci6npuedadeterminarcorrectamente si el recipientees
Iosuficientementegrande,resultaimportante queel recipientesecentredentro de losgraficos
f
Recipiente
de 4-3/4"
minima DT
circularesmarcados en lasuperficiedecocci6n de vidrio.Eltama_o minima de recipienteque
funcionaraen cada bobinade inducci6nse indicaa laderecha.Losrecipientesno ferrososy
demasiadopeque_osno permitir6nel accionamientode la bobinade inducci6ny la pantalladel nivel
de di6metro
minima DF
de energfade la ubicaci6nde esabobinadestellarcidurante 30 segundosyluego seapagarci.Siun
recipienteseretirade la bobina de inducci6npar masde 30 segundos,laenergiasedesactivara.
Puedenutilizarserecipientescuadrados,aunquefuncionanmejorlosredondosque seajustana los
tama_osde las bobinasde inducci6n.Losrecipientesdecocci6nde mayor tama_o que los grdicos
devidrio de laestufa funcionarcin.Paramejoresresultados,ajusteeltama_o del recipientecon los
grcificosdetama_o m6scercano quese encuentransabrelasuperficiede cocci6nde vidrio.
Nodo impulso (Boost) y distribuci6n de energfo
Losanafes de cinco quemadores estan divididos en 3zonas.
Losladosderecho e izquierdotienen zonas de cocci6n
separadas y el elemento central grandees otra zona de
cocci6n individual. La distribuci6n de energia se activa cuando
ambos elementos de la misma zona de cocci6n seactivan y
un elemento se configura para Impulso(H).Elelemento que
no est6 configurado para Impulsocambiarc_a un nivel de
energia mc_sbajo. Estosedenomina distribuci6n de energia.
Cuando la operaci6n de impulso haya finalizado (!0 minutos),
el otto elemento puede reconfigurarse para cualquier nivel
de energia. Ambos elementos pueden funcionar de manera
simultc_neaa nivelesde energia normales de "L" a 9.
Distribution de erergia en el lado derecho
Losanafes de cinco quemadores estdn divididos en 3 zonas. Los
lados derecho e izquierdo tienen zonas de cocci6n separadas y
el elemento central grandees otra zona de cocci6n individual.
Lo distribuci6n de energia seactiva cuando ambos elementos
de la misma zona de cocci6n seactivan y un elemento se
configura para Impulso (H).Elelemento que no estd configurado
para Impulso cambiar6 a un nivel de energia mds bajo. Esto
se denomina distribuci6n de energfa. Cuando la operaci6n de
impulso haya finalizado (10minutos), el otro elemento puede
reconfigurarse para cualquier nivel de energfa. Ambos elementos
pueden funcionar de manera simultdnea a niveles de energfa
normales de "L"a 9.
Estufas de 4 quemadores con generadores
de inducci6n de lados derecho e izquierdo
(2)Utilice el recipiente de tama_o minima
ilustrado para cada elemento de cocci6n.
"Ruidos" de los recipientes de cocci6n
Unzumbido bajo es normal cuando se utilizan bobinas de inducci6n,especialmente en configuraciones de energ[a mayores. Los
recipientes pesados de hierro fundido esmaltado producen menos ruido que los recipientes de acero liviano. Lacantidad de contenido
dentro de los recipientes tambi6n puede modificar el nivelde ruido. Losrecipientesque cubren par completo elgr_fico del vidrio
producen menos ruido. Elagua que queda atrapada debajo de los recipientes puede hervir, Ioque puede provocar que los recipientes
vibren o sedeslicensabre la superficie de vidrio.
Antes de llamar al servicio t .cnico...
Causas posibles Qu6 hacer
Lasunidades de Seest6n utilizando recipientes , Recipienteincorrecto. Useun im6n para verificar que el recipiente sea
superficie no funcionan de cocci6n inadecuados, compatible con la inducci6n. Useun recipiente piano con capacidad
oieno destella de inducci6n que cumpla con eltama_o minimo para el elemento
a configuraa6n que seestc_usando. Ver la secci6nTamaho y forma de los recipientes.
de energ[a Elrecipiente esmuy peque_o. • Eltamaho del recipiente esmenor al tamaho minimo para el elemento.
Elrecipientenoestc_biencolocado. , Centre el recipiente en la zona de cocci6n.
Ladetecci6n/medici6n Elrecipiente estc_real colocado. , Verifique que el recipiente est6 centrado en el elemento de superficie
de recipientesno est0 correspondiente.
funcionando de manera Elcontrol de la estufa estd , Verifiqueque el control est6 bien configurado.
adecuada mal configurado.
La configuraci6n de la Distribuci6n de energ[a. , Verifiquesise estc_compartiendo la energ[a entre dos elementos.
unidad de superficie Vet la secci6n ivlodoimpulso (Boost)y distribuci6n deenerg[a.
cambi6 o se apag6 Temperatura elevadade , Permitaque el ventilador interno enfr[ela estufa.
de repeme la estufa.
Ver la secci6nTamaho y forma de los recipientes.
Page 49

/
,
/
,
O
O
I/i
O
E
GEAppliances.com
Instrucciones de Seguridad ................... 2-5
Instrucciones de Operaci6n
Homo .............................................. 10-27
Ajuste del termostato del homo ...................... 15
Asado, Guia de asado ................................ 14
Auto-limpieza ..................................... 22, 23
Caj6n calentador ..................................... 21
Caracterfsticas de cocci6n lenta, calentamiento
y leudado ............................................. 20
Caracteristicas especiales ........................ 25, 26
Controles ......................................... 10, 11
Funci6n Sabbath ..................................... 27
Homeado o rostizado ................................ 13
Homeado y rostizado con temporizador ............. 19
Homo de convecci6n ............................. 16, 17
Pizza .................................................. 17
Precalentamiento ..................................... 13
Sonda ................................................. 18
Temporizador de cocina ............................... Zl
Unidades de superficie .............................. 6-11
Ouemador del Puente ................................ 7
Seleccionar tipos de utensilios ......................... 9
Zona de calentamiento ................................ 7
Control del
Siguiente Pasol
En Canadd:
www. GEAppliances.ca
Impreso en los Estados Unidos
E
O
O
el
"O
0
0
"0
O_
0
eg
tJ
"0
/
0
Cuidudo y limpiezu
Bandejas .............................................. 52
Caj6n calentad0r desmontable/Recipiente
del caj6n del homo .................................... 33
Caj6n de almacenamiento ........................... 33
Elementos calentadores del homo .................... 33
Estufa de vidrio .................................... 34, 35
Luz .................................................... 29
Panel de control ...................................... 28
Papel de aluminio ............................... 3, 4, 5,,13
Piso del homo .......................................... 33
Puerto del homo desmontable ....................... 33
Superficies ............................................ 28
Ventilaci6n ............................................ 33
Cons,ejgs para la ]dentificaci6n
y so_uaon ae proo_emas ..................... 36-40
Accesorios .......................................... 41
Apoyo al cliente
Apoyo al cliente ....................................... 44
Garantia .............................................. 43
Escriba los nElmeros de modelo y de serie aqui:
Modelo #
Serie #
Puede encontrorlos en uno etiqueto ubicodo detrds
del coj6n o detrds de Io puerto del homo inferior en
el frente del marco de Io cocino.
Impreso en
papel reciclado
49-80637-2 02-12 GE
Page 50

s
INFORMACiON IMPORTANTE DE SEGURIDAD.
LEA TODAS LAS INSTRUCCIONES ANTES DE SU USO.
jA ADVERTENCIA i
Leo todas los instrucciones de seguridad antes de utilizar este producto. No seguir estas instrucciones puede generar un
incendio, una descarga eldctrica, lesiones corporales o la muerte.
DISPOSITIVOANTI-VOLCADURAS
Para reducir el riesgo de volcar
la cocina, _sta debe sujetarse
mediante un soporte anti-
volcadums con una adecuada
instalaci6n. Vet los instrucciones de
instalaci6n enviadas con el soporte
para obtener detalles completos
antes de iniciar la instalaci6n.
Para Cocinas Sin Apoyo y
Deslizabless
Para controlar si el soporte es
instalado y ajustado de forma
apropiada, mire que debajo de
Un niffo o adulto pueden volcar la cocina y morir.
Verifique que el soporte anti-volcaduras se haya
instalado y ajustado correctamente.
Verifique que el soporte anti-volcaduras se haya
instalado y ajustado correctamente.
No utilice la cocina sin que el soporte anti-volcaduras
est_ colocado y ajustado.
Siestas instrucciones no se siguen, coma resultado se podra
producir la muerte o quemaduras graves de niffos y adultos.
Soporte Anti- r_,,,_,_ ,_
volcaduras _L_ _ I
0
--i..i .,0
Cocinas Sin Apoyo y Deslizables
Base o Bloque de
Ivladera Negra
%
//4
//,4
//,4
So
Anti-Volcaduras
Homo
!//1
//4
de Volcaduras
la cocina la pata niveladora trasera est6 ajustada al soporte. Enalgunos
modelos, el caj6n de almacenamiento o el panel de protecci6n se pueden
retirar para una fBcil inspecci6n. Si no es posible realizar una inspecci6n
visual, deslice la cocina hacia adelante, confirme que el soporte anti-
volcaduras est6 ajustado de forma segura al piso o la pared, y deslice la
cocina hacia atrBs de modo que la pata niveladora trasera se encuentre
debajo del soporte anti-volcaduras.
Si la cocina esexpulsada de la pared par alguna raz6n,siempre repita este
procedimiento a fin de verificar que est_ aseguradode forma correcta con un
soporte anti volcaduras.
Nunca quite las paras de nivelaci6n par completo ya que la cocina no
quedar6 bien sujeta al dispositivo anti-volcaduras.
Cocinas Empotrables
Para controlar si el soporte est6 instalado y conectado correctamente,
deslice la cocina hacia adelante, confirme que el soporte anti-volcaduras
est6 adherido de forma segura a la parte trasera de la cocina, y deslice
esta 01tima hacia atrBs de modo que el soporte anti-volcaduras se deslice
par debajo del mostrador o bloque de madera adjunto a la pared trasera.
Si usted no recibi6 un soporte anti-volcaduras con su compra, Ilame al
1.800.626.8774 para recibir uno sin costa alguno (en Canadd, Ilame al
1.800.561.3344). Para consultar instrucciones de instalaci6n del soporte,
visite GEAppliunces.com (en Canadc], GEAppliunces.ca).
Cocinas Empotrables
iA ADVERTENCIA j
La lay de California sabreaguaspotablesy tBxicosexigequa el Gobemador de Californiapublique una Iistade sustanciasquasegOn
el estadoprovoquen cdncer,defectos congdnitosu otros dahos reproductivos,y exigealas empresasqueadviertan a los clientes
sabrela exposiciBnpotencial a dichassustancias.
La aislaci6n de fibra de vidrio de los homos auto-limpiantes emite una pequeha cantidad de mon6xido de carbono durante
el ciclo de limpieza. La exposici6n puede minimizarse ventilando con una ventana abierta o usando una campana o ventilador.
NOTIRCACIONIIPORTANTE DESEGURIDAD
Page 51

GEAppliances.com
jA ADVERTENCIA ] INSTRUCCIONESGENERALESDESEGURIDAD
Useesteaparato s61oconel objetivopara elque fuecreado,
coma se describeen esteManualdel Propietario.
Aseg0resede queun t6cnicocalificadorealiceuna correcta
instalaci6ny puestaa tierradel artefacto de acuerdocon las
instruccionesdeinstalaci6nprovistas.
Nointente repararo cambiar ninguna piezade sucocinaa
menosque est6espedficamenterecomendadoen estemanual.
Cualquierotto serviciodeberealizarlount6cnico calificado.
Antesde realizarcualquierclosede reparaci6n,desenchufela
cocinao desconecteelsuministroel6ctricodesdeel panelde
distribuci6ndom6sticoquitandoel fusibleo desconectandoel
interruptor de circuitos.
Nodejea losninossolos;6stosno debenquedar soloso sin
atenci6nen un 6rea dondeun aparato est_en uso.Nuncadebe
permitirseque sesuban,sienteno parenen cualquierpartede
esteaparato.
PRECAUCION:Noalmaceneelementosde interns
para ninos sabreuna cocina oen la protecci6ntraserade
una cocina:losniflosque setrepan a la cocina paraalcanzar
elementospuedenresultargravementeheridos.
$61ouseagarraderassecas:las agarraderash0medaso
mojadascolocadasen superficiescalientespuedenprovocar
quemadurasde vapor.Nopermita que lasagarraderasentren
en contacto conunidadesde superficieo loselementos
calentadorescalientes.No utilicetoallas
u otras telasgruesasen lugar de una agarradera.
Nunca usesuelectrodom_sticopara calentar la habitaci6n.
No toque los unidades de superficie, los elementos calentadores
o la superficie interior del homo. Estas superficies pueden estar
Io suficientemente calientes para quemar a0n cuando tengan
un color oscuro. Durante y despu_s del usa, no toque o deje que
su vestimenta u otros materiales inflamables entren en contacto
con unidades de superficie, 6reas cercanas a las unidades de
superficie o cualquier 6rea interior del homo; deje pasar un
tiempo prudencial para que se enfrbn. Otras superficies del
aparato pueden calentarse Io suficiente coma para provocar
quemaduras. Las superficies potencialmente calientes incluyen
la estufa, las 6reas orientadas hacia la estufa, la abertura de
ventilaci6n del homo, las superficies cercanas a la abertura y las
hendiduras ubicadas alrededor de la puerta del homo.
No caliente recipientes cerrados de alimentos. Podr[a haber una
acumulaci6n de presi6n en el recipiente y 6ste podr[a explotar,
provocando lesiones.
No utilice papel de aluminio para revestir las bandejas colectoras
o ninguna parte del homo, con excepci6n de Io descripto en este
manual. Un uso inadecuado puede provocar da_os a la cocina y
una descarga el6ctrica o un riesgo de incendio.
Trate de no rayar o golpear las puertas, estufas o paneles
de control de vidrio. SiIo hace podr[a romperse el vidrio. No
cocine si un producto tiene un vidrio roto. Puede provocarse una
descarga, un incendio o heridas.
Cocine carnes de res y de ave por completo: Lascarnes de
res hasta alcanzar una temperatura interna de por Io menos
Z60°F(7].°C)y las carnes de ave a una temperatura interna de
por Io menos :180°F(82°C).La cocci6n a estas temperaturas
generalmente protege de enfermedades transmitidas por los
alimentos.
IA ADVERTENCIA i IVlANTENGALOS IVlATERIALES
INFLAfVlABLESALEJADOS DE LA COCINA.
Noalmaceneo utilice materialesinflamablesdentro de un horno
o cerca dela estufa,tales coma papel,pl6stico,agarraderas,
telas,recubrimientosde pared,cortinasy gasolinau otros
vaporesy Ifquidosinflamables.
Nunca usevestimentasholgadaso ampliasmientrasutiliceel
aparato.Estasvestimentaspuedenprendersefuegosientran
en contacto consuperficiescalientes,provocandoquemaduras
graves.
iii,No permita que la grasade la cocci6n u otros materiales
inflamablesse acumulendentrode la cocinao en sucercanb. La
grasadentrodel homo o sabrela estufapuedeencenderse.
Limpielas campanas deventilaci6nconfrecuencia.Nodebe
permitirsela acumulaci6ndegrasa en la campana o en elfiltro.
iA ADVERTENCIA i N CASO DE INCENDIO, SIGA LOS
SIGUIENTESPASOS PARA EVITAR
LA PROPAGACION DEL FUEGO:
Noutiliceagua en incendiosde grasa.Nuncalevanteuna sart6n
en llamas.Apague loscontroles.Apagueuna sart6nen llamas
sobreuna unidadde superficiecubriendola sart6nporcompleto
con unatapa que ajustebien,una planchapara galletaso una
bandejaplana.Utiliceun qdmico secomultiusoo un extintorde
incendiosde espuma.
Sihayun incendioen el homodurante elhorneado,ap6guelo
cerrandola puerta del homoy apagandoel control o usandoun
qdmico secomultiusoo un extintorde incendiosdeespuma.
Sihayun incendioenel homodurante la auto-limpieza,
apague el homoy esperea que el incendiose consuma.No
abra la puertadel homo a lafuerza.Elingresode airefrescoa
temperaturas deauto-limpiezapuedeprovocaruna explosi6n
de llamasdesdeel homo. Noseguir esta instrucci6npuede
provocarquemadurasgraves.
Page 52

INFORNIACiON IMPORTANTE DESEGURIDAD.
LEA TODASLASINSTRUCCIONESANTESDESU USO.
IA ADVERTENCIA 1INSTRUCCIONESDESEGURIDADDE LAESTUFA
Nunca deje las unidades de superficie sinatenci6n
en configuraciones de calor media o alta. Los alimentos que
hierveny sederraman pueden provocar humo y derrames
grasososque pueden prendersefuego.
Nunca deje aceite sinatenciTn mientras fr[e.Sisedeja
calentar mTs all@del punto de humeo, el aceite puede
encenderse,provocando un incendio que podr[a propagarse
a los gabinetes cercanos. Utiliceun termTmetro para grasa
cuando sea posible para controlar la temperatura del aceite.
Paraevitar el derrame de aceite y un incendio,utilice una
cantidad minima de aceite cuando fr[a en sartenes poco
profundas y evite la cocciTn de alimentos congeladoscon
una cantidad excesiva de hielo.
Utiliceel tamaho de recipiente adecuado: Elijarecipientes
con bases planas Iosuficientemente grandes paracubrir
elelemento calentador de superficie. La utilizaciTn de
recipientesmTs pequeBosdejar6 expuesta una porciTn de
la unidad de superficie al contacto directo, Io que puede
provocar el encendido de sus vestimentas.
Una relaci6nadecuada del recipiente con launidad
IA ADVERTENCIAj
INSTRUCCIONESDE SEGURIDAD DE LA
ESTUFARADIANTE (algunos modelos)
Tengacuidado al tocar la estufa. La superficie de vidrio de la
estufa retendr6 calor despuTsde que los controles se hayan
apagado.
Nococine sabre una estufa rata. Sila estufa se rompe, las
solucionesde limpieza y losderrames pueden penetrar
en la estufa rata y crear un riesgode descarga elTctrica.
Comun[quese con un tTcnico calificado de inmediato.
Eviterayar la estufa devidrio. La estufa puede rayarse con
elementos tales coma cuchillos,instrumentos filosos,anillos u
otrasjoyas, y remaches de la ropa.
Nocoloque o almacene elementos que pueden derretirse o
prendersefuego sabre la estufa de vidrio, alancuando no la
est6 usando.Sila estufa seenciende en forma accidental,
pueden prenderse fuego. Elcalor proveniente de la estufa o
de la ventilaciTn del homo tambiTn puede prenderlos fuego,
a0n siel aparato est6 apagado.
de superficie tambi_n mejorar6 la eficiencia.
$61ociertos tipos de recipientes de vidrio,vidrio/cerTmico,
cerTmica, u otros recipientesvidriados pueden utilizarse
sabre la estufa; otros pueden romperse debido al cambio
repentino de temperatura.
Paraminimizar laposibilidad de quemaduras,
el encendido de materiales inflamables y los derrames,
la manija de losrecipientesdeben girarse hacia el centro de
la cocina sin extendersesabre ninguna unidad
de superficie cercana.
Siflambea alimentos bajo la campana, encienda
el ventilador.
• $i se produce un carte de luz en una cocina elTctrica
mientras la unidad superficialest6 en ON(Encendido),la
unidad sevolver6 a encender cuando regrese la luz.Encaso
de falta de corriente, si no segiran todas las perillasde la
unidad de superficial a la posici6n OFF(Apagado)se podrTn
incendiar art[culos en o cerca de la estufa, Iocual podr6
producir lesiones graves o la muerte.
Useel limpiador de estufas cerTmicas CERAMABRVTE®
y la esponjilla de limpieza CERAIVlABRYTE®para limpiar
la estufa. Esperehasta que la estufa seenfr[e y la luz
indicadora seapague antes de limpiar. Unaesponja
o un paho hOmedossabre una superficie caliente pueden
provocar quemaduras de vapor. Algunoslimpiadores pueden
producir humos t6xicos siselosaplica auna superficie
caliente. NOTA:Losderrames de azOcarson la excepciTn.
Estosdeben quitarse mientras estTncalientes utilizando una
agarradera y un raspador. Para instrucciones detalladas,vet
la secciTnCTmolimpiar
la estufa de vidrio.
Leay cumpla con todas las instruccionesy advertenciasde la
etiqueta de la crema de limpieza.
JA ADVERTENCIA i lNSTRUCCIONESDE SEGURIDAD DE LA
ESTUFADE BOBINAS Iolgunosmodelosl
Nosumerja o remoje lasunidades de superficie
desmontables. No las coloque en el lavavajillas.
Nocoloque las unidades de superficie dentro del homo
cuando realice la auto-limpieza. SiIohace pueden Ilegara
fallar, provocando un peligro de quemaduras o de incendio.
Paraevitar la posibilidad de una quemadura o descarga
elTctrica,siempreverifique que loscontrolesde todas
lasunidadesde superficieseencuentren en la posiciTnOFF
(apagado)y que todas lasbobinasestTnif[as antes
4
de levantar o quitar una unidad de superficiede bobinas.
AsegOresede que las bandejas colectoras no estTncubiertas
y seencuentren en su lugar.Su ausencia durante la cocciTn
podr[adahar laspiezasy el cableado dela cocina.
Nouse papel de aluminio para cubrir cacerolas en la
parte inferior. Elpapel puede atrapar el calor oderretirse,
ocasionando dahos sabre el producto y riesgo de descarga
elTctrica o incendio.
Page 53

GEAppliances.com
[A ADVERTENCIA i INSTRUCCIONESDESEGURIDADDEL HORNO
Mant6ngase alejado de la cocina cuando abra
la puerta del horno. Elairey elvapor calientes que salen de la
cocina pueden provocar quemaduras en manos, rostro y/o
OJOS.
iVlantengasin obstrucciones la ventilaci6n del homo.
ivlantenga el homo librede acumulaciones de grasa.
LGgrasa dentro del homo puede prenderse fuego.
Siemprecoloque las bandejas del horno en la posici6n
deseada mientras el homo est_fifo. Sila bandeja debe
quitarse cuando el homo toduv[a est6 caliente,no permita
que la agarradera toque elelemento calentador del horno.
Cuando utilice bolsas de cocci6n o de asado en el homo, siga
lasinstrucciones del fabricante.
i
ADVERTENCIA
JlNSTRUCCIONES DESEGURIDAD DEL
Tirede la bandeja del horno hasta la posici6n de tope
de detenci6n cuando cargue o descargue alimentos
del homo. Estoayuda a evitar quemaduras por tocar
superficies calientes de la puerta y lasparedes del homo.
Nodeje productos como papel, utensiliosde cocina
o alimentos en el homo cuando no Io est6 usando.
Loselementos guardados en el homo puedenprenderse
fuego.
Nouse papel de aluminio para cubrir el fondo del homo. El
aluminio puede atrapar elcalor o derretirse, Io cual puede
dahar el producto y provocar riesgo de descarga el6ctrica o
un incendio.
HORNO AUTO-LltVlPIANTE u gunosmodelos)
La caracteristica de auto-limpieza funciona en el homo a temperaturas Io suficientemente elevadas como para quemar los
restos de alimentos que quedaron dentro del horno. Siga estas instrucciones para una operaci6n segura.
Antes de iniciar el ciclo de auto-limpieza, quite las ollas,
bandejas del homo de metal brillantey otros utensilios
del homo. $61opuedendejarse en el homo las bandejas
revestidas de porcelana gris o negro. Noutilice la auto-
limpieza para limpiar otras piezas,como bandejas colectoras
o tazones.
Antes de utilizar el ciclo de auto-limpieza, limpie la grasa y los
derrames de alimentos del homo. Unacantidad excesiva de
grasa puede encenderse,generando da_os por el humo en
suhogar.
Siel modo de auto-limpieza nofunciona, apague el homo
y desconecte el suministro de energia. Llamea un t6cnico
calificado para solicitar el arreglo.
No limpie la empacadura de la puerta. Laempacadura de
la puerta esesencial para un buen sellado. Debetenerse
cuidado de no refregar, daBar o mover la empacadura.
No utilice limpiadores de homo. No debe utilizarse ning0n
limpiador comercial o revestimiento protector de ninguna
clasedentro o alrededor de ninguna piezadel horno.
lk ADVERTENCIA .s ._
CAJONCALENTADOR/CAJONDELHORNO
INFERIORINSTRUCCIONE5 DE 5EGURIDAD
(algunos modelos)
Elobjetivo del caj6n calentador esmantener alimentos
cocidos calientes a latemperatura de servicio. Pordebajo de
los140°F(60°0 puede producirse crecimiento de bacterias en
losalimentos. No coloque alimentos fr[os
en elcaj6n calentador. No caliente alimentos por mSs
de 2 horas. No seguir estas instrucciones puede provocar
enfermedades transmitidas por losalimentos.
Nodeje productos de papel,plSsticos,comida enlatada
o materiales combustibles en el caj6n. Pueden prenderse
fuego.
Notoque el elemento calentador o la superficie interna del
caj6n. Estassuperficies pueden estar Io suficientemente
calientescomo para provocar quemaduras.
Tenga cuidado al abrir el caj6n.Abra un poco el caj6n y deje
salirel aire caliente y elvapor antes de quitar ovolver a
colocar losalimentos. Elaire y el vapor calientesque salen
pueden provocar quemaduras en manos, rostro y/o ojos.
No usepapel de aluminio para cubrir elcaj6n inferior. Elpapel
atraparc_en calor del fondo y alterar@elfuncionamiento
del homo. Elpapel se podrc_derretir y dahar de forma
permanente la parte inferior del caj6n. CualquierdaBo por
usoinadecuado del papel de aluminio no estarc_cubierto pot
la garantia del producto.
Page 54

Uso de unidades de la superficie.
L____t_Ar_l _r'_'T'r'L at-_.,_^ J RIESGO DE INCENDIO: Nunca pierda de vista la cocina cuando la estufa est6/_UVlY..II/lY..I_I_,Ig4/_ I en las configuraciones medio o alto.Mantenga los items inflamables alejados
...... de la estufa. Apague todos los controles cuando finalice la cocci6n. Sino se
siguen estas instrucciones se podrd producir incendios, lesiones graves o la muerte.
Esposible que las funciones y apariencias varien con relaci6n a su modelo a Io largo de/manual.
Configuraciones de cocci6n de las unidades de superficie
La estufa ofrece 19 niveles de energfa.
Losnivelesde energfavan desde "L"(baja)
hasta "HI"(alta)en precisos aumentos de
medio paso.Pot ejemplo: !, 1-1/2, 2,2-1/2 y
hasta HI.
Elnivelde ener_fa con
una fracci6n inc]icala
configuraci6n adicional de
medio paso. Ustedpuede ofr
chasquidos que indican .queel
control est6 manteniendo su
configuraci6n deseada.
Serecomienda el nivelde energia de "L",
la configuraci6n mc_sbaja, para "mantener
caliente".
Elnivelde energia aumenta de a medio nivel
con cada toque.
Unidad de superScie _nica-Configuraciones de cocciSn
Paraencender una unidad de supedicie _nica: Para utilizar lacaractedstica"Simmer" ffuego
[Z] Presioneel bot6n ON/OFF(encendido/
r_ Utiliceel bot6n (+]/(-] para elegir la
Poro utilizor Io corocteristico "Melt" (derretir):
Presioneelbot6n ON/OFF(encendido/apagado);
luego presioneMELT(derretir).Elelemento
autom6ticamente quedar6 en una configuraci6n
predeterminada y podr6 verse"L".
iiiiiiiiiii_iiii!iiii!iiiiiiiiiiiiiiiiiiiii_iii_:i_lil_l_l_l_l_iil_i_i_il_iiiiiiiiiiiiiiiiiiiiiiiiiiiiiiiiiiiiiiiiiiiiiiiiiiiiiiiiiiiiiiiiiiiiiiiiiiiiiiiiiiiiiiiiiii\_......................................_-J iiiiiiiiiiiiiiiiiiiiii
, iiiiiiiiiiiii
Para apagar una unidad de supefficie Onica,
presione el bot6n ON/OFF(encendido/
apagado) de nuevo.
apagado);luego presione el bot6n (+)/(-).
configuraci6n de energ[a deseada.
NOTA:Cuandose cambia de una configuraci6n
de calor alta a una baja,la unidad desuperficie
puede dejar de resplandecer.Estoesnormal. La
unidad sigue encendiday caliente.
NOTA:Estaestufa cuenta con una caractefistica
de calentamiento rdpido. Si la estufaestd ffia
cuando sela enciende,resplandecerddurante
un periodo corto hasta que se alcance la
configuraci6n de energia deseada.
lent@
Presioneel bot6n ON/OFFlencendido/
apagado);luego presioneSIHHER Ifuegolento).
Elelemento automcXicamente quedarc_en una
configuraci6n predeterminada y podrc_verse
"3". Ajuste utilizando el bot6n (+)/(-)para subir o
bajar el nivel de fuego lento.
iiiiiiiiiiiiiiiiiiiiiiiiiiiiiiiiiiiiiiiiiiiiiiiiiiiiiiiiiiiiiiiiiiiiiiiiiiiiiiiiiiiiiiiiiiiiiiiiiiiiiiiiiiiiiiiiiiiiiiiiiiiiiiiiiiiiiiiiiiiiiiiiiiiiiiiiiiiiiiiiiiL
Ouemador de anillos mElltiples (puedeserdoble o triple,dependiendo delmodelo)
1-71Presioneel bot6n ON/OFF(encendido/
apagado) para la unidaclde superficie
frontal clerecha.
[] Utiliceel bot6n (+)/(-)para elegir la
configuraci6n de energia deseada.
r3] Presioneel bot6n BURNERSIZE(tamaho
de quemador) para seleccionar eltamaho
de quemador deseado.deseado.
La luz ubicada al lado del bot6n BURNERSIZE
(tamaho de quemador) indica eltamaBo de la
unidad de superficie.
Paraapagar (OFF)launidad de supefficie,
presioneel bot6n ON/OFF(encendido/
apagado).
Ver la pc_gina10 para informaci6n adicional.
Page 55

[A ADVERTENCIA i
GEAppliances.com
RIESGO DE INTOXICACION ALIIENTARIA: Par debajo de los 140°F (60°CI puede
producirse crecimiento de bacterias en los alimentos.
Siempre empiece con alimentos calientes. No utilice configuraciones
de mantener caliente para calentar alimentos frios.
No caliente alimentos par m6s de 2 horas.
No seguir estas instrucciones puede provocar enfermedades transmitidas par
los alimentos.
C6mo usar la zona de calentamiento (en
LaZONA DE CALENTANIENTO se encuentra
en la parte trasera central de la superficie de
vidrio.
Para utilizar la ZONA DE CALENTAMIENTO:
J-_ Presionela tecla WARNINGZONEON/
OFF(zonade calentamiento encendido/
apagado).
[] Para seleccionar la configuraci6n de
control deseada, presione el bot6n SELECT
(seleccionar)una vez para LO(baja),dos
veces para N1ED(media)o tres veces para
HI(alta).
algunosmodelos)
Para apagar la ZONA DECALENTAMIENTO:
Presionela tecla WARNINGZONEON/OFF
(zonade calentamiento encendido/apagado).
Para mejores resultados,todos
losalimentos de la ZONA DECALENTAMIENTO
deben cubrirse con
una tapa o con papel de aluminio.
Siempre utilice agarraderas o guantes de
cocina cuando quite alimentos de la ZONA
DECALENTANIENTO,ya que los recipientes
estardn calientes.
, No utilice envoltorios pldsticospara cubrir
alimentos. Elpldsticopuede derretirseen la
superficiey serd muy diffcillimpiarlo.
, Utilice s61orecipientes de cocina
recomendados para cocci6n sabre estufas.
Page 56

Uso de unidades de la superficie.
consejos para Productos Enlatados en el Hogar
AsegOrese que el producto enlatado se
encuentre sabre la unidad superficial.
AsegOresede que el producto enlatado sea
piano en su parte inferior.
Para evitar quemadoras de vapor o calor,
tenga cuidado al enlatar el producto.
Para Modelos con Estufa de Vidrio Radiante
La estufa radiante cuenta con unidades
calentadoras debajo de una superficielisa de
vidrio.
NOTA:Un ligem olor es normal cuando
una estufa nuevaseutiliza par primem vez.
Espmvocado par el calentamiento de piezas
Nunca codne directamente sabre el
vidfio. Siempre utilice redpientes de
cocci6n.
Siempre coloque el recipiente en el
centro de la unidad de superficie
sobre la que est6 cocinando.
nuevasy materiales aislantesy desaparecerden
poco tiempo.
NOTA:Enmodelos con estufasde vidrio
de color clara, esnormal que las zonas
de cocci6n cambien de color cuando estdn
calienteso enfridndose.Estoes temporal y
desaparecerda medida que el vidrio seenfrb
a temperatura ambiente.
La unidad superficial seguir6 un ciclo de
encendido y apagado para mantener su
configuraci6n de control seleccionada.
Esseguro colocar utensilioscalientes en la
superficiede vidrio, incluso cuando laestufa
est6fr[a.
Aunque las unidades de superficie se hayan
apagado, la estufa de vidrio retiene suficiente
calor para continuar la cocci6n. Paraevitar la
sobrecocci6n,quite las alias de las unidadesde
superficiecuando los alimentos est6n cocidos.
Use recetas y procedimientos de fuentes
confiables. Estosseencuentran disponibles u
truv6s de fabricantes coma Ball® y Kerr® y el
Department of Agriculture ExtensionService
(Serviciodel Depurtumento de Agriculturu).
Elusa de enlatados cerrados a ba_o maria con
rondos ondeados podr6n extender el tiempo
requerido para traer el agua al punto de hervor.
Nodeslicelosrecipientesdecocci6natrav6sdelcontrol
y lasuperficiede laestufaporquepuederayarelvidrio.
Elvidrioesresistentea losrayones,peronoa pruebade
losmismos.
Nocoloque nada sabre la unidad de superficie
hasta que se haya enfriado par completo.
Lasmanchas de agua (dep6sitosminerales)
pueden quitarse utilizando crema limpiadora
o vinagre blancosin diluir.
Elusade limpiador de ventanaspuede dejar
una pelicula iridiscentesabre la estufa.
La crema limpiadora quitard esta
decoloraci6n.
Noalmacene elementospesados sobre
la estufa.Sicaensobre la estufa,podfian
provocar dahos.
No utilicela superficiecomo una tabla para
cortar.
Limitador de Temperatura en Estufas de Vidrio Radiante
Cada unidad de superficie radiante cuenta con
un limitador de temperatura.
Ellimitadordetemperaturaevitaquela estufade
vidriosecalienteenexceso.
Ellimitador de temperatura podr6 apagar las
unidades superficiales par ciclosdurante un
tiempo si:
• laalia hiervehasta secarse.
• elfondo de la alia no espiano.
• laalia est6 fuera del centro.
• no hay alia en la unidad.
Page 57

C6mo seleccionar tipos de utensilios para
modelos de estufa de vidrio radiante.
Lo siguiente informaci6n Io ayudard a elegir los recipientes de cocci6n que brindan un buen desempeho
en estufas de vidrio. Ver el folleto sabre recipientes para usar con estufas de inducci6n.
GEAppliances.com
Verifique que los recipientes
tengan bases pianos utilizando
una regla.
Acero inoxidable:
Recomendado
Aluminio:
Se recomienda de capa gmesa
Buena conductividad. Los residuos de aluminio
a veces parecen rayones sabre la estufa pero
pueden quitarse si se los limpia de inmediato.
Debido a su bajo punto de fusi6n, no debe
utilizarsealuminio de capa fina.
Base de cobre:
Recomendado
Elcobre puede dejar residuos que pueden
parecer rayones. Los residuos pueden
eliminarse,siempre y cuando la estufa
selimpie de inmediato. Sinembargo, no
permita que estasalias hiervan en seco.
Elmetal sobrecalentado puedeadherirse
a los estufas de vidrio. Sino seelimina de
inmediato, una alia con la basede cobre
sobrecalentado dejarc_un residuo que
manchard la estufa en forma permanente.
Esmalte de porcelanu sabre hierro
fundido:
Serecomiendasi la base de la alia seencuentra
revestida
Esmalte de porcelana sabre acero:
No se recomienda
Calentar recipientes vac[os puede provocar
da_os permanentes al vidrio de las estufas. El
esmalte puede derretirse y adherirse a la estufa
cerc_mica.
Vidrio-cer4mico:
No se recomienda
Desempeho pobre. Raya la superficie.
Cer4mica:
No se recomienda
Desempeho pobre. Puede rayar la superficie.
Hierro fundido:
No se recomienda, a menos que se encuentre
espedficamente disehado pare estufas de vidrio
Pobre conductividad y lentitud para absorber el
calor. Raya la superficie de la estufa.
Noserecomiendanrecipientescon NOTA:Sigatodas los recomendaciones del fabricantede recipientes cuando utilicecualquierclose
basesredondeadas,curvadas,con de recipientede cocci6nsabrela estufacerdmica.
rebordesotorceduras.
Para mejores resultados
iiiii_i
No col0qUe recipientes mojados
No use woks Con anillosde
soporte sabre ia estufa de vidrio.
Utilicewoks de basep!anaSabre
taestufa devidrio.
Coloque s61orecipientes secos sobre los
elementos de superficie. No coloque tapas
sobre los elementos de superficie, en
especial tapas mojadas.
ii No use woks con anillos de soporte.
Esta clase de wok no se calienta sabre
elementos de superficie de vidrio.
Recomendamos el usa de woks de
base plana solamente. Se encuentran
disponibles en su negocio minorista local.
La base del wok debe tenet el mismo
di@metroque el elemento de superficie
para asegurar un contacto adecuado.
Algunos procedimientos de cocci6n
especiales requieren recipientes
de cocci6n especFicos, como ollas
a presi6n, freidoras, etc. Todos los
recipientes de cocci6n deben tenet bases
planas y set del tamaho correcto.
No permita que los alimentos hiervan en
seco ya que los recipientes de cocci6n
pueden adherirse a la superficie de
cocci6n, provocando da_os permanentes
a la estufa.
Page 58

Uso de los controles de! homo.
(Esposible que los funciones y apariencias varien con relaci6n a su modelo a Io largo del manual.)
TeclaAsar Alto/Bojo
Presionepara seleccionar la funci6n asar. Lea
lasecci6nC6moConfigurarelHomo paraAsar.
Tecla de Homeado
Presioneparaseleccionarlafunci6nhornear.Lea
lasecci6nCdmoConfigurarelHomopara Hornear.
Tecla de Cocci6n por Convecci6n
Useun ventilador para hacer circularaire enel
horno.Leala secci6nsobreUsodelhomo por
convecci6n.
TecloWARM (Calentar)
presionepara mantener calienteslascomidas
ya cocinadas.Lealasecci6nC6moCoNgurar el
Homo para Calentar.
Teclo SLOW COOK(Cocci4n Lento)
Presioneparalargashorasde cocci6n sin su
presencia.Leala secci6nC6moConfigurorel
Homo paro una Cocci6nLento.
Tecla PROBE (Sonda)
Presioneal usar lasonda para cocinar deforma
autom6tica en la temperatura de comida interna
deseada.Consultela secci6nUsode laSonda.
TecloSELFCLEAN(Auto Limpieza)
Presionelaauto limpiezadel homo.Consultela
secci6nUsodelHomo conAutoLimpieza.
Teclo STEAMCLEAN (Limpieza al Vapor)
Presioneesta tecla para una limpiezaf6cil de
suciedad levede la cavidad del homoo la puerto.
Consultela secci6nUsode Limpiezaal Vapor.
Teclade TiempodeCoccidn
Presioneparacancelar TODASlosoperaciones
del homo exceptoel relojy el temporizador.
Tecla OVENLIGHT (Luzdel Homo)
Presionepara encendero apagar laslucesdel
horno.
Teclos TIMERON/OFF (Encender/ Apogor
Temporizador)
Presionepara configurar el temporizador
de la cocina.Consultela secci6nde Usodel
TemporizodordeIoCocino.
Teclo COOKTIME FFemporizodor del
Cocci6n)
Presioneesta teclay luego presionelasteclas
num6ricaspara configurar lacantidad detiempo
durante elcual deseeque sucomida secocine.El
homo seapagarc_cuandoeltiempo de cocci6n
sehayaterminado.
kuz del Homo Encendida/ Apagada
Touchthis pad to setthe oven to start
automatically at a time you set.
TeclaBorrar/Apagar
ojustesdehorosy minutos.Eltiempomfnimo que
NOTA:AI configurorlostiempos,s61osereolizon
..............................................................sepuede configuroresde un minuto.
Elrelojsedeberc_configurar en la hora correcta
deld[a para que lasfunciones autom@icasdel
temporizadordel homo funcionen deforma
adecuada. Lahora deld[a no sepuedecambiar
durante un horneado por tiempo o elciclode
limpiezaautom6tica.
Consultela secci6nPoroconfigurorelreloj.
Sisu homo fueconfigurodo para un
funcionamiento por tiempa y seproduce
un cortede corriente, el rdojy los funciones
programadasserdnreiniciadas.La hora deldia
titilar6 en la pantalla cuando haya habido un
cortede corriente.
Teclade Prueba(enalgunosmodelos)
Presionepara seleccionarunambiente c61ido
lue sea Otilpara la elevaci6nde productos
ermentadosa basede levadura.
Bot6n PIZZA
Presionelaalmohadilla PIZZA.
Presionelasalmohadillasnum6ricasparaseleccionar
:Lparapizzacongeladay2 parapizzafresca.
Presionelasalmohadillasnum6ricas para
configurar latemperatura de horneado.
Presioneel bot6n START(iniciar).
Eltiempo de horneado est6 determinado por
lasinstruccionesdel paquete.
Coloquelapizzaen la posici6nde bandejasuperior
del homo superior.Cuandoutiliceun recipientede
10
metal,utilicelaposici6nde bandejainferior.
Tecla del CAJON CALENTADOR
Elcaj6n calentador mantendr6 lascomidas
calientesy cocinadasen latemperatura para
servir.Siemprecomiencecon comida caliente.
Consultela secci6nde Usodd caj6ncalentador.
BLOOUEODEL CONTROLo BLOOUEO DE LA
COCINA
Lasteclas de control se podrc_nbloquear de
modo que no sepuedan activar sise presiones
(Bloqueodel Control).Algunos modelos cuentan
con Range Lockout (Bloqueode la Cocina),que
tambi6n apagar6 losunidades superficiales.
Consultela secci6n C6mo Bloquear los
Controles.
Page 59

Usadelreloj,temporizador dela cocina,
y bloqueo del control.
Para Configurar el Reloj
Elreloj sedeber6 configurar en la hora
correcta del d[a para que lasfunciones Delay
Start (Inicio Demorado) funcionen de forma
adecuada. La hora del d[a no sepuede cambiar
durante una cocci6n demorada o durante el
ciclo de auto limpieza.
Presionela tecla Clock (Reloj).
%
Presionelas teclas num@icas hasta que la
r21
hora correcta del d[a aparezca en la
pantalla. Silasteclas num&icas no se
tocan dentro de un minuto luego de haber
tocado la tecla CLOCK{Reloj),la pantalla
Para Programar el Contador de Tiempo
[] Presionela tecla TIMERON ITemporizador
Encendido)
TIMER TIMER ]
ON OFF
ElTemporizador de IoCocina cuentu
en horasy minutos.
ElTemporizadorde IoCocinuno
controloJasoperacbnesdelhomo.La
configuraci6nm6ximo delTemporizador
deIoCodnaesde9 horas759minutos.
[2-1 Presionelasteclas num&icas hastaque la
cantidad de tiempo que deseaaparezca en
la pantalla. Parejemplo, para programar 2
horasy 45 minutos,toque 2,4y 5 en ese
arden.Sicomete un error, presione latecla
TIMEROFFff emporizador Apagado) y
vuelva a comenzar.
j-_ Presionela tecla STARTflniciad
Luego de presionarla tecla STARTflniciafl, SET
[Configuraci6n) desaparece; esto le indicaqua
el tiempo est6 en cuenta regresiva,aunque la
GEAppliances.com
vuelve a la configuraci6n original. Siesto
sucede,presione la tecla CLOCK(Reloj)y
vuelva a ingresar la hora del d[a.
r-_ Presionela tecla Start (Iniciar)hasta que la
hora del d[a aparezca en la pantalla. Esto
ingresa la hora e iniciael reloj.
Para controlar la hora del d[a cuando
la pantalla muestra otra informaci6n,
simplemente presione la tecla CLOCK(Reloj).
La hora del d[a aparece hasta que otra tecla
es presionada. Paracambiar el formato de la
hora o apagar la pantalla del reloj,consulte la
secci6nSpecialFeatures(FuncionesEspeciales).
pantalla no cambia hasta que haya pasado un
minuto. Lossegundosno se mostrar6n en la
pantalla hasta que serealicela cuenta regresiva
del Oltimominuto.
[] Cuandoelcontadordela cocinaIleguea :00,
elcontrolhard 3pitidosagudosseguidosde
unpitido agudocoda6segundoshastaqua
sepresioneteclaTIMEROFF(Temporizador
Apagado).
Eltono de6 segundos se puede cancelar
siguiendo lospasos en la secci6n de control de
funciones Especialesde su homo, en Tonesat
the Endof a TimedCycle(Tonosal Finalde un
Ciclopar Tiempo).
TIMER
ON
TIMER
OFF
Para Reiniciar el Temporizador de la Cocina
Sila pantalla aOnmuestra eltiempo restante, la
puede cambiar presionando la tecla TIMERON
(Temporizador Encendido),y luegopresionando
lasteclas num&icas hasta que el tiempo que
deseaaparezca en la pantalla.
Siel tiempo restante no seencuentra en la
Presione la tecla TIMEROFF ffemporizador
Para Cancelar el Temporizador de la Cocina
Apagado).
pantalla (reloj,inicio demorado o tiempo de
cocci6n aparecen en la pantalla),recuerde el
tiempo restante presionando la tecla TIMERON
ffemporizador Encendido)y luego presionando
lasteclas num@icaspara ingresarel nuevo
tiempo que desee.
C6mo Bloquear los Controles
Control Lockout (81oqueodel Control) le
permitir6 bloquear lasteclast6ctiles, de modo
que no se puedan activar al sertocadas.
Algunosmodelos cuentan con Range Lockout
(Bloqueode la Cocina], que tambi6n apagar6
las unidadessuperficiales.Aseg0resede que
todos loscontroles de la unidad superficial est6n
apagados al usarRange Lockout (Bloqueode
la Cocina).Cualquier unidad superficial que
est6 configurada en la posici6n "encendido',
mientras que RangeLockout (Bloqueode la
Cocina)est6 activado se encender6 de farina
autom6tica una vezque RangeLockout
(Bloqueode la Cocina]est6 desactivado.
Para bloquear/ desbloquear los controles:
[7] Hantenga presionada la tecla Control
[] Paradesbloquearelcontrol,mantenga
Cuando esta funci6n est6 encendida, las teclas
t6ctiles no responder6n excepto la tecla Clear/
Off (Borrar/ Apagafl.
• Losajustes se guardar6n en la memoria
luego de un carte de corriente.
Lockout (Bloqueo del Control) o Range
Lockout (Bloqueo de la Cocina) par 3
segundos. La pantalla del homo mostrar6
"Loc On Loc" (Bloqueo Encendido).
presionadalatecla ControlLockout(Bloqueo
delControl)o RangeLockout(Bloqueode la
Cocina)par 3 segundos.Lapantalla delhomo
mostrar6"LocOFFLoc"(BloqueoApagado).
11
Page 60

C6mousar el homo.
Para evitar posibles quemaduras, coloque las bandejas en la posicidn deseada antes de encender el homo.
Antes de comenzar...
Lasbandejas tienen topes, de modo que
La cantidad de posiciones
de la bandeja puede variar en
relaci6n al modelo.
Nunca coloque utensilios de
cocina, piedras para pizza, ni otros
articulos en el piso del homo.
cuando se las coloca correctamente en los
soportes sedetendrc_nantes de salirsedel todo,
y no sevolcarc_n.
Cuando coloque o quite recipientesde cocci6n,
tire de la bandeja hasta que se detenga.
Enalgunos modelos,el elemento calentador
para horneado se encuentra debajo del piso del
homo. Nunca coloque utensilios de cocina,
piedras para pizza, ni otros art[culos en el
piso del homo.
Para quitar una bandeja, tire de ella,incline el
extremo frontal hacia arriba y sc_quela.
Para volver a colocarla, deposite elextremo
de la bandeja (topesde detenci6n) sobre el
soporte, inclineel frente hacia arriba y presione
la bandeja hacia adentro.
[A PRE
Cuandoutilice la bandeja en laposician mds
baja (A),necesitard tenet cuidado cuando la
quite. Recomendamosque deslicela bandeja
varias pulgadas y luego,utilizando dos
agarraderas, la quite sosteniendode ambos
lados.La bandeja se encuentra muy abajoy
usted puede quemarsesi coloca la mano enla
mitad de la bandejay tim haciaafuera. Tenga
mucho cuidado de no quemarse la mano con la
puerta cuando utilice la bandejaen la posician
mds baja (A).
3rasp here
Parrilla de extensi6n (enalgunos modelos)
Cuando coloque o quite recipientes
de cocci6n, siempre tire de la parrilla hacia
afuera desde el riel frontal superior hasta
alcanzar la posici6n de apertura total.
No extienda la parrilla rdpidamente. Los
alimentos pueden deslizarse desde el frente
de la parrilla.
Para
quitar la parrilla:
Aseg@esede introducir la parrilla hasta el
%
fondo del homo, de modo que las paletas
laterales del armaz6n de la parrilla se
desenganchen de la cavidad.
Deslicela parrilla hacia usted hasta que
Ilegueal tope (posici6ndetenida) del
soporte de la parrilla.
r-_ Inclineel extremo frontal hacia arriba y
quffelo.
NOTA: Cuando manipule la parrilla de
extensi6n, no permita que la porci6n
deslizable se abra. Estopuede dahar los
deslizadores.
Para volver a colocar la parrilla:
[] Tome firmemente ambos lados del
armaz6n de la parrilla y laparrilla
deslizable.
F_ Coloque el extremo curvo del estante en la
posici6n deseada, incline el frente hacia
arriba y presione la parrilla hacia adentro.
APRECAUCiON:
Nunca utilice la parrilla cuando su armaz6n
no se encuentra completamente introducido
en el homo y trabado en su posici6n.
Cuandola parrilla se encuentm bien instalada
y tmbada en sulugar, laspaletas latemlesde
bloqueodel armaz6n de la parrilla setmbardn
ensu lugar en lossoportesdel homo. Si
laspaletas latemles no se tmbamn en su
posici6n,repita lospasos anterioresy verifique
que las paletas lateralesse hayan limpiado
y lubricado correctamente. Vet Parrilla de
extensi6nen la secci6nCuidadoy limpieza.
....
12
Page 61

Zb
%-
Papel de aluminio
No usepapel de aluminio para cubrir elrondo
del horno. Elaluminio atrapar6 el calor en la
parte inferior y alterar6 el funcionamiento del
horno. Elaluminio sepuede derretir y daflar
de forma permanente el rondo del horno.
Cualquier daflo por uso inadecuado del
aluminio no estar6 cubierto por la garant[a del
producto.
Elaluminiosepuede usar para retener derrames,
colocando una hojaen el estanteinferior,varias
pulgadas por debajo de lacomida. Nouse
mds aluminio que el necesarioy nunca cubra
totalmente un estante delhomo conpapel de
aluminio. IVlantengael aluminio por Iomenos a
una pulgaday mediade lasparedesdel homo
para evitar una mala circulaci6n del calor.
Precalentamiento y colocaci6n de recipiente
Para evitar posiblesquemaduras, coloque
los bandejasen la posicidn deseadaantes de
encenderel homo.
PrecalientedelhomosiasfIoindicalareceta.
Elprecalentamientoesnecesarioparaobtener
buenosresultadoscuandohorneepasteles,
galletas,pastelitosy panes.
Siva a hornearcuatro capasde pastelal mismo
tiempo,coloquedoscapasen la bandejaCy dos
capasen la bandejaE.Distribuyalosrecipientes
de modo que no quedendirectamenteuno
encima delotro.
Losresultadosdehorneadoseranmejoressi
losalimentossecentranbiendentrodelhomo.
Elpastel"Angelfood"eslaexcepci6ny debe
colocarseenla bandejainferiordelhomo(posici6n
A).Sigalasinstruccionesdelpaquetedealimentos
preempaquetadoso congeladosparalaubicaci6n
delosrecipientes.Losrecipientesnodebentocarse
entresfotocarlas paredesdelhomo.Sinecesita
utilizardosbandejas,distribuyalosrecipientesde
modoque noquedendirectamenteunoencima
delotro.Dejeaproximadamente1½"(5,8cm)entre
recipientesydesdeelfrente,partetraseray ladosde
lasparedesdelhomo.
GEAppliances.com
C6mo configurar el horno para horneado o rostizado
[-_ Presioneelbot6nBAKE(hornear).
[] Presionelasalmohadillasnum@icashasta
queaparezcalatemperaturadeseada.
[-_ Presioneelbot6nSTART(iniciar).
Elhomoseiniciardautomdticamente.La
pantallamostrard PrEmientras realizael
precalentamiento.Cuandoelhomo alcanzala
temperaturaseleccionada,el controldel homo
emitiravarios pitidosy la pantallamostrara la
temperaturadel homo.
NOTA: Ustedescuchardelventilador
de conveccidn(enalgunosmodelos)mientrasel
homo realiza el precalentamiento.
Elventilador sedetendrd cuando el homo se
hayaprecalentado y la pantalla mostmrd la
temperature configumda. Estoes normal
Paracambiarlatemperaturadelhomoduranteel
cicloBAKE(homear),presioneelbotdnBAKE
y luego/asalmohadillasnumdricasparaconfigurar
lanuevatemperatura.
r_ Verifiqueelniveldecocci6nde losalimentos
cuandohayaalcanzadoeltiempomfnimo
indicadoenla receta.Codnelosmdssifuese
necesario.
Presioneelbot6nCLEAR/OFF(borrar/
apagado)cuandosehayafinalizadoel
horneadoyluegoquitelosalimentosdel
homo.
Guia para Dorar
Carnes Temperatura Temperatura
Bife Asado de Costilla 14a 8 lb.) Jugoso 525°F 145°F
Deshuesada y Con Huesos A Punto 525°F 160°F
Bife de Lomo !4 a6/b.) jugoso 425°F 145°F
Bife de Lomo 12 a S lb.) Jugoso 425°F 145°F
Cerdo Con Huesos, Deshuesada (5a S Lbs.) 525°F 160°F
Cordero ConHuesos (5 a9Lbs.) APunto 525°F 165°F
Deshuesada 14a 7 lb.) A Punto 575°F 165°F
Ave Polio Entero (5 a 7 lb.) 550°F 170°F
Pavo,Entero*
Sin Relleno (10 a 16 lb.) 525°F 170-180°F
Pechuga de Pavo (4a 6 lb.) 525°F 170°F
*Las ayes con plumus generulmente requieren de un tiempo de usado udicionol de 30 u 45 minutos. Cubru
los patas y la pechuga con papel de aluminio para evitar un dorado excesivo y que se seque Iopiel.
del Homo Interior
525°F 170-180°F
13
Page 62

C6mo usar el horno.
C6mo configurar el horno para asar
Deje la puerta abierta en la posici6n
de detenci6n de asado. La puerta
queda abierta, y a_n asTse
mantiene la temperatura adecuada
en el homo.
EltamaBo, peso,grosor,
temperatura inicial y
el punto de cocci6n preferido
afectaran los tiempos
de asado. Estaguia est6
basada en carnes a
temperatura de refrigerador.
? ElIVlinisterio deAgriculturo de
los EEUU. ofirmo: "la come de
resjugosa es popular, pero debe
saberse que al cocinarla o s61o
140°F (60°C)algunos organismos
queprovocon intoxicoci6n
olimentaria pueden sobrevivir".
(Fuente:Safe Food Book. Your
Kitchen Guide. USDA Rev.
Junio 1985.)
Si su cocina estd conectada a 208 voltios,
pueden asarse filetesjugosos precalentando el
asador y colocando la bandeja del homo en
una posici6n mds elevada.
UtiliceLO Broil (asar bajo) para cocinar par
completo alimentos coma ayes o cortes
Presioneel bot6n BROILHI/LO (asaralto/
@
bajo) una vez para configurar HI Broil
(asaralto).
Paracambiar a LO Broil (asar bajo),
presione el bot6n BROILHI/LO (asaralto/
bajo) de nuevo.
gruesos de came sin dorarlos de mc_s,
Presioneel bot6n START(iniciar).
r-f] Coloquela came o pescado sabre una r_
asadera dentro de una rejilla dise_ada []
para asar.
Cuando haya finalizado de asar, presione
el bot6n CLEAR/OFF(borrar/apagado).
r_ siga las posiciones de las bandejas
sugeridas en la Guia deasado.
Guia de asado
Precaliente la asadera durante 2 minutos para mejorar el desempeho.
Alimento
Came de res
Polio
Nivel
de cocci6n
gugosa
140°F(60°C}
A punto
160°F (71°G
Bien cocida
170°F {77°C}
Tipo o grosor
Filetes -
Grosor de 1" (2,5 cm)
Filetes -
3/4" a 1" (1,9cm a
25 cm} de grosor
Filetes -
3/4" a 1" (1,9cm a
25 cm) de grosor o
aatties de came picada
Pechuga, sin hueso
Posici6n
de la bandeja*
Eo F(los alimentos
deben estar 1" a 3"
[25 cm a 7,6 cm] del
elemento de asado}
E(los alimentos deben
estar de 3" a 4"
[7,6 cm a 102 cm] del
elemento de asado}
D o E (los alimentos
deben estar de 3" a 5"
[7,6 cm a 12,7 cm] del
elemento de asado)
C (los alimentos deben
estar de 8" a 9"
[20,3 cm a 22,9 cm] del
elemento de asado)
Comentarios
Esdificil cocinar filetes de menos
de la 1" (2,5cm) de grosor y que
queden jugosos. Se cocinan
por completo antes de dorarse.
cocinan par completo
Para evitar que la carna
se enrosque, carte la grasa a se
enrosque, intervalos de 1" (2,5cm/.
Asar sabre el lado de la piel
primero.
Filetes de
pescado
Chuletas
de cerdo
*Utilicela posici6n de bandejaA para el homo mdspequeho con posici6n de2 bandejas.
14
Bien cocida
170°F (77°C)
Pechuga, con hueso
i/2" a i" (1,3cm a
2,5 cm) de grosor
3/4"(1,9 cm)
de grosor
C (los alimentos deben
estar de 7" a 8"
[17,8 cm a 20,3 cm] del
elemento de asado)
D o E (los alimentos
deben estar 3" a 6"
[7,6 cm a 15,2 cm] del
elemento de asado)
D (los alimentos deben
estar de 6" a 7"
[15,2 cm a 17,8 cm} del
elemento de asado)
Manipule y gire con
mucho cuidado.
Para evitar que la carna
se enrosque, carte
la grasa a intervalos
de i" 12,5cm).
Page 63

iAjuste el termostato de! homo usted mismo! GEApU °. . om
Esposible que su nuevo homo cocine de manera diferente a la que usted se encuentra acostumbrado. Utilicelo durante
algunas semanas para familiarizarse con sus funciones. 5i luego de este periodo considera que la temperatura del homo
es demasiado baja o demasiado alta, usted puede regular el termostato.
No utilice term6metros, coma los que se venden en los tiendas, para verificar la configuraci6n de temperatura del homo.
Esos term6metros pueden variar entre 20-40 grados.
NOTA:Esteajuste s61oafectalos temperaturas de horneadoy rostizado;no afectalostemperaturas deasado o
deauto-limpieza. Elajusteseconservarden la memoria aOndespudsde uncarte deenergfa.
C6mo ajustar el termostato
Presione los botones BROIL HI/LO (asar
D
alto/bajo) y BAKE(hornear)al mismo
tiempo hasta queen la pantalla pueda
DDDD[]
DDDD
verse SF.
r2] Presionela tecla BAKE(Horneafl. Enla
pantalla se muestra un nOmero.
Hornos Dobles: Paraajustar el termostato
del homo superior, presione la tecla BAKE
(Horneafl del homo superior. Paraajustar
el termostato del homo inferior, presione la
tecla BAKE(Horneafl del homo inferior.
Latemperatura del homo puede subirse
%
en (+)35°F (19°C)o bajarseen (-)35°F
(19°C).Presionelasalmohadillas num@icas
de la misma manera en que laslee.Par
ejemplo, para cambiar la temperatura del
homo 15°F(8°C),presioneI y 5.
Presionela tecla BAKE(Horneod,
nuevamente, para alternar entre
incrementar y reducir la temperatura del
horno.
Cuando hayafinalizadoel ajuste,presione
%
el bot6n START(iniciar)para volvera la
pantalla de la hora. Utiliceel homo de la
manera normal.
iE! tipo de margarina utilizado modifica el horneado!
Lo mayoria de los recetas de horneado incluyen productos de alto contenido graso tales coma la manteca o la margarina
(80% de grasa). 5i se reduce el contenido de grasa, el resultado final puede ser diferente al esperado.
Si se utilizan productos de bajo contenido graso en tortas, pasteles, masas, galletas o dulces, la receta puede fracasar. A
menor contenido graso, mayores diferencias en el resultado final.
Lasnormas federales exigen que los productos con denominaci6n de "margarina" tengan un contenido graso de al menos 80%
en relaci6n al peso. Los productos de bajo contenido graso contienen menos grasa y mc_sagua. Elelevado contenido de humedad
de estos productos afecta la textura y el sabor de losalimentos horneados. Paraobtener los mejores resultados con sus recetas
tradicionales favoritas, utilicemargarina uotros productos con un contenido de par Iomenos 70% de aceite vegetal.
15
Page 64

C6mo usar el homo de convecci6n, ten enosmode osl
Funcionamiento del ventilador de convecci6n
CONVECTION
............
Posici6n de bandejas mOltiples.
Enun horno de convecci6n, un ventilador
huce circular uire caliente sabre, par debajo y
alrededor de losalimentos.
Estacirculaci6n deaire caliente sedistribuye de
manera pareja a trav_s de la cavidad del horno.
Coma resultado, losalimentos se cocinan y
doran en forma pareja, a menudo en menos
tiempo.
NOTA:Enalgunos modelos,el ventilador rue
disehado para girar en ambas direcciones, con
una pausa intermedia. Estoesnormal.
Elventilador de convecci6n seapaga cuando
seabre la puerta de homo. NO OEJEla puerta
abierta durante perfodos prolongados mientras
utiliza la cocci6n par convecci6n ya que puede
acortar la vida 6til del elemento calentador de
convecci6n.
Cocci6n par convecci6n (enalgunos modelos)
Elhomo deconvecci6n viene con un modo
de cocci6n par convecci6n y puede utilizarse
para horneado par convecci6n de ! bandeja
u homeado par convecci6n con bandejas
mOItiples.
Horneado par convecci6n con bandejas m(lltiples
[] Debido a que el aire caliente circula en forma Cuando hornee con 3 bandejas, coloque una
pareja en todo el homo, los alimentos pueden en la segunda (B)posici6n,otra en la cuarta (D)
[] hornearse con excelentes resultados usando posici6ny la tercera en la sexta (F)posici6n.
[] bandejas m61tiples. Para horneado con dos bandejas, coloque
Elhorneado con bandejas m61tiplespuede una en la segunda (B)posici6n.Coloque la otra
incrementar un poco lostiempos de cocci6n bandeja en la quita (E)posici6n.
de algunos alimentos, pero el resultado total
esel ahorro de tiempo. Lasgalletas,muffins,
bizcochos y otros panes r6pidos Iogran
resultados muy buenos con el horneado con
bandejas m61tiples.
16
Horneado par convecci6n con/. bandeja (en algunos modelos)
Cuando realice un horneado par convecci6n
con s61o]_bandeja, coloque losalimentos enel
centro del horno.
C6mo configurur el homo pure horneudo par convecci6n
r_ Presionelatecla CONVECTION COOK
(Cocci6n par Convecci6n) para utilizar esta
funci6n
[] Presionelasalmohadillas num@icas para
configurar la temperatura del horno.
J-_ Presioneel bot6n START(iniciar).
NOTA:Sila Funci6nde Conversi6nAuto RecipeTM
seencuentra activada, autom6ticamente
reducir6 latemperatura de horneado regular en
aproximadamente 250Fhasta la temperatura
de convecci6n apropiada en el modo de
horneado par convecci6n. Lea Conversi6n con
Auto Recipe TM en la secci6n de CaracteEsticas
Especiales.
Paracambiar la temperatura del homo, presione
el bot6n CONVECTIONCOOKy luego las
almohadillas num@icaspara configurar la nueva
temperatura.
Cuando el horno comienza a calentar, podr6
verse la temperatura cambiante, comenzando
a 100°F(38°C).Cuando el homo alcanza la
temperatura con figurada, sonar6n 3 pitidos.
r-_ Presioneelbot6n CLEAR/OFF(borrar/
apagado) cuando hayafinalizado.
Mientrascocine par convecci6n seair6
un ventilador. Elventilador sedetendr6
cuando seabra la puerta pero el calor
no se apagar&
Durante el horneado, pueden escucharse
chasquidos provenientes del horno.
Estoesnormal.
Page 65

Cuando homee galletas, obtendr6
mejores resultados si usa una
plancha plana para galletas en
lugar de un recipiente de lados
bajos.
Recipientes para cocci6n par convecci6n
Antesde utilizurel homo de convecci6n, verifique
que sus elementosde cocci6n dejen espacio
suficiente para la circuluci6n de aire en el horno.
Sivu a horneur convarios recipientes,deje un
espacioentre elias.Adem_s,asegOresedeque
losrecipientesno se toquen entre s[o toquen las
paredesdel horno.
Papel y pl6stico
Los recipientes de papel y pl6stico resistentes
al calor recomendados para utilizar en
horneado normal tambi6n pueden utilizarse
para horneado par convecci6n, pero no deben
utilizarse a temperaturas mas elevadas que la
temperatura recomendada par elfabricante
de los elementos de cocci6n, mambi6n pueden
utilizarse elementos de cocci6n plSsticos
resistentes a temperaturas de 400°F (204,4°C).
GEAppliances.com
Metal y vidrio
Cualquiertipo de recipiente de cocci6n funciona
en su homo de convecci6n; sin embargo,
los recipientesde metal se calientan m@s
r(_pidamentey se recomiendanpara horneado
par convecci6n.
Lasbandejasoscuras o con acabado mate
hornean alimentos m@sr@pidoque las
brillantes.
Losrecipientesde vidrio o cer@micacocinan
m@sdespacio.
Para recetas coma polio horneado, utilice un
recipienteconladosbajos.Elairecalienteno puede
circular bien alrededor de losalimentos en un
recipiente de lados altos.
Con la funci6n de la pizza, teno gunosmode osl
C6mo configurar el horno superior para pizza (enalgunos modelos)
Ajuste la posici6n de la bandeja para el tipo de
recipiente para pizza que se est6 usando (ver tabla).
DE]
FqE]E]FqE
DE]DEED
r_ Presione el bot6n PIZZA.
[] Presione las almohudillus num6ricus paru
seleccionar 1 para pizza congelada y 2 para
pizza fresca.
r3] Presione las almohadillas num6ricas para
configurar la temperatura de horneado.
r_ Presione el bot6n START(iniciar).
Eltiempo de horneado est6 determinudo
par los instrucciones del paquete.
Tipo de recipiente Posici6n de
de pizza la bandeja
Recipientecon pizza fresca B
Pizzacolocada directamente B
sabre lu bundeju
Recipientede metal A
17
Page 66

C6mo usar la sonda, oUuno mod /o
Enmuchos alimentos, especialmenteasadosy carnes de ave,la temperatura interna de los alimentos esla mejor prueba para
verificar elgrado de cocci6n.Mediante la sonda de temperatura se evita tenerque adivinar el grado de cocci6n
y se !ogra e!punto de cocci@ exacto.
Eric
Paraevitar quemaduras, no desenchufe lasonda de
la boca desalidadel homo hastaque6ste se haya
enfriado.
Eluso de sondas distintas alas provistas con este
La sonda de temperatura cuenta
con una sonda similar a un pincho
en un e×tremo y un enchufe en el
otro extremo que se introduce en
la boca de salida del homo.
iiiF_ii_i_xlk "_
producto puede provocarles da_os alas mismas oal
control del horno.
Utilice las manijas de la sonda y el enchufe cuando
las introduzca y quite de los alimentos y de la boca
de salicta.
Paraevitarda_osa lasonda,no utilicepinzaspara
tirardelcablecuandoIoquite.
Para no romper la sonda, verifique que los
alimentos est6n totalmente descongelados antes
de introducirla.
Despu6sde preparar la came y colocarla en un
posafuentes o sobre la rejillade la asadera,siga estas
instrucciones para una colocaci6n adecuada de la
sonda.
Introduzca la sonda completamente en la carne. No
debetocar hueso, grasa ocartilago.
NOTA:No insertar pot compteto la sonda dentro de la
camepuede provocar un pobre desempeho de cocci6n
porque la sonda detector6 elaire del homo y no la
temperatura delos alimentos.
Nunca deje la sonda dentro del homo durante un
ciclo de auto-limpieza o de asado.
No guarde la sonda dentro del homo.
Para asados sin hueso, introduzca lasonda dentro
de la parte mas camosa. Parajam6n o cordero con
hueso, introduzca la sonda en el centro del m0sculo
grande mas bajo.
Introduzca la sonda en el centro de platos tales
como pan de came o estofados.
Introduzca la sonda dentro de la parte mas carnosa
del muslo interno ctesdeabajo yen forma paralela a
la pata de un pavo entero.
NOTA:No sepodrdn utilizar los configuraciones de
auto-limpieza ni de asodo si la sonda de temperatura
seencuentra enchufada.
....
I-qE]133 1E]
I-qE]I-qEZ]D
DDDi-qE]
D I-qi-qE]E]
18
C6mo configurar el homo para horneado/rostizado cuando usa la sonda
(enalgunosmodelos)
r-_ Introduzcalasondaporcompletoenlos
alimentos.
Enchufe la sonda dentro de la boca de salida
del horno. Verifiqueque est6 introducida hasta
el fondo. Cierrela puerta del horno. Verifique
que el cable de la sonda notoque el elemento
asactor.
Presioneel bot6n PROBE(sonda).
La pantalla mostrara "Set Probe Temp."
(Temperaturade la Sonda).
Presionelas almohadillas num@icas
-tELJ
para configurar la temperatura interna
deseada de losalimentos ode la carne. La
temperatura intema maxima a la que pueden
configurarse los alimentos es200°F(95°C).
Presione la tecla START (Iniciafl.
@
Presione la tecla BAKE (Horneafl o
@
CONVECTION (Convecci6n)
F-_ Presionelas almohadillas num@icas para
ill
configurar latemperatura deseada del horno.
Presioneel bot6n START(iniciar).
La pantalla destellar6 sila sonda se encuentra
enchufada dentro de la boca de salida y usted no ha
configurado una temperatura de sonda
y presionado el bot6n START(iniciar).
Presione la tecla PROBE (Sondal para recordar la
temperatura de la sonda o la tecla BAKE (Norneafl
o CONVECTION (Convecci6n) para recordar la
temperatura del homo. Para la temperatura de
la sonda, luego de que la temperatura interna de
la comida alcance los 100° F, los cambios de la
temperatura interna apareceran en la pantalla.
[] Cuando la temperatura interna de los
alimentos alcanza la cifra que usted ha
configurado, la sonda y el homo se apagan y
los controles del homo comienzan a destellar.
Para detener el destello,presione el bot6n
CLEAR/OFF(borrar/apagado). Utiliceguantes
de cocina para quitar la sonda de los alimentos.
No utilice pinzas para quitarla, porque podrian
daflarla.
Sila sonda se quita del homo mientras
seestaba cocinando, el homo no se apagara
autom@icamente.
Para cambiar la temperatura del homo durante el
ciclo de homeado/rostizado, presione el bot6n BAKE
(hornear)o CONVECTION(conveccidnl y luego las
almohadillas num6ricas para configurar la nueva
temperatura.
Puede utilizar el temporizador de cocina aunque
no pueden usarse operaciones
del homo con temporizador mientras se utilice la
soncta.
Page 67

C6mo utilizar ias caracteristicas dehorneado
y rostizado con temporizador, teno/guno mode/o l GEAppliances.com
NOTA:Los alimentos que se echan a perder confacilidad-como lethe, huevos,pescado,rellenos,camede avey cerdo-no deben
dejarsereposarpot mds de! horn antesy despudsde la cocci6n.La temperature ambiente promueve el crecimientode bacterias
dahinas. Verifiqueque la luz del homo estd apagada porque el calor pmveniente de la bombilla puede acelemr el crecimiento de
bacterias.
C6mo configurur un inicio inmediato y un apagudo uutom4tico
!£E] 1-71DEEE] (/
ii_i_i__i_I)iiii_ii__ i;i_i_i_/i!_iii_
<<DE]DE]D4(
Elhomo seenciendeinmediatamente
y cocina losalimentos durante un periodo de
tiempo seleccionado.AIfinalizar eltiempo de
cocci6n,el homo seapaga automdticamente.
I-f] Presioneel bot6n CONVECTIONCOOK
(Homeadopot Convecci6n).
r_ Presionelasalmohadillas num@icas para
configurar la temperatura deseada del
horno.
r_ Presionela tecla START (Iniciafl.
r_ Presione el bot6n COOK TIME(tiempo de
cocci6n).
NOTA: Sisu receta requiem precalentamiento,
puede necesitar ag!egar tiempo adicional
al tiempo de cocc/bn.
[] Presionelasalmohadillas num@icas para
configurar eltiempo de cocci6n deseado.
Eltiempo de cocci6n m[nimo queusted
puede configurar es ! minuto.
Latemperatura del homo que ha
configurado y el tiempo de cocci6n
ingresado aparecerdn en la pantalla.
[] Presioneel bot6n START(iniciar).
Elhomo estar6en la posici6nON (Encendidoly
en la pantallaaparecer6el conteo de la cocci6n
yel cambio de temperatura a partirde los
100°F.(Lapantalladetemperatura comenzar@a
cambiar unavez que latemperatura del homo
alcance los 100°F).Cuandoelhomo alcance la
temperatura que program6, sonar6n 3 pitidos.
Elhomo continuar6 cocinando durante la
cantidad de tiempo configurada, y luego de
apagar@de forma autom@tica.
Sifuera necesario, presione elbot6n
D
CLEAR/OFF(borrar/apagado) para borrar
la pantalla. Quite los alimentos del homo.
Recuerde, aunque el homo se apaga
automdticamente, los alimentos que se
dejen en el homo seguirdn cocin6ndose
despu@sde apagado el mismo.
DDDD[]
DDDD_
BDDDD
%DE]E]E]
DDDD[]
DDE]E][]
C6mo configurar un inicio retardado y un apagado autom6tico
El homo se encenderd en el horatio que
usted haya configurado, cocinard alimentos
durante un pefiodo de tiempo espedfico
y luego se apagard automdticamente.
AsegOrese de que el reloj muestre la hora
correcta.
r-71 Presione latecla DELAY START(Inicio
RetrasadoJ.
Presione las almohadillas num@icas
para configurar la temperatura deseada
del horno.
Presione la tecla START(Iniciafl.
Presionela tecla CONVECTIONCOOK
(Horneado pot Convecci6nJ u otra funci6n
de cocci6n deseada.
Toque loslasteclas num@icas para
@
programar la temperatura del homo
deseada.
Presione la tecla START (Iniciarl.
@
Z] Presionela tecla COOKTIME
£remporizador de Cocci6nJ.
NOTA: Si su receta requiere precalentamiento,
puede necesitar agregar tiempo adicional al
tiempo de cocci6n.
[] Presione las almohadillas num@icas para
configurar el tiempo de cocci6n deseado.
Eltiempo de cocci6n minimo que usted
puede configurar es 1 minuto.
La temperatura del homo que ha
configurado y el tiempo de cocci6n
ingresado aparecer6n en la pantalla..
[] Presione el bot6n START(iniciar).
NOTA:Si desea verificar los horarios que ha
configurado, presione el botan DELAYSTART
(inicio retardado) para controlar la hora de
inicio configurada opresione el bot6n COOK
TIME (tiempo de cocci6n) para verificar la
extensi6n de cocci6n que ha configurado.
Cuando el homo se enciende (ON)en
el horaTio que ha configurado, la pantalla
mostrar@ la cuenta regresiva del tiempo
de cocci6n y la nueva temperatura
comenzando en !00°F (38°0. (La pantalla
de temperatura comenzar(_ a cambiar
cuando la temperatura del homo Ilegue a
los !00°F [38°C].)Cuando el homo alcanza la
temperatura configurada, sonar@npitidos.
El homo seguir@cocinando durante un
per[odo de tiempo determinado y luego
se apagar(_ autom@ticamente.
J70] Sifuera necesario, presione el bot6n
CLEAR/OFF(borrar/apagado) para
borrar la pantalla. Quite los alimentos
del horno. Recuerde, aunque el homo se
apaga autom6ticamente, los alimentos
que se dejen en el homo seguir6n
cocin6ndose despu6s de apagado
el mismo.
19
Page 68

Usodelas funciones decocci6n lentay calentar.
crecimiento de bacterias en los alimentos.
[A ADVERTENCIA
I-qE]ITIlT1
DITlrTlrqP-1
ITlP-IlT1Fqrs]
RtESGODE INTOXICACION ALIMENTARIA: Par debajo de los 140°F (60°C) puede producirse
• Siempre empiece con alimentos calientes. No utilice configuraciones de mantener caliente
para calentar alimentos frfos.
• No caliente alimentos par mds de 2 horas.
No seguir estasinstrucciones puede provocar enfermedades transmitidas par los alimentos.
Configuraci6n del Horno para una Cocci6n Lenta
La cocci6n fenta estd disehada para periodos
prolongados de cocci6n sin atenci6n.
[] Presioneel bot6n SLOWCOOK(cocci6n lenta).
[] La pantalla mostrar6 Poultry (Ave).Para
cambiar a Meats (Carnes),presione la tecla
SLOWCOOK(Cocci6n Lenta) nuevamente.
Para una configuraci6n correcta, presione la
Guia de Cocci6n Lenta. Use Meats (Carnes)si
no est6 seguro de qu6 configuraci6n usar.
[] Presione las almohadillas num@icas para
configurar eltiempo de cocci6n deseado. El
tiempo de cocci6n debe ser de par Io menos
3 horas, basra un m6ximo 1! horas 59
minutos.
r_ Presione el bot6n START(iniciar).
NOTA:Si ocurre un carte de energfa durante
la cocci6n lento, la cocina se apagard.
Guia de cocci6n lento
Alimento
Carne de res
Asado de cuarto
delantero
Costillas
Came de ave
Polio entero
Trozos de polio
Cerdo
] Asado de paleta
]sin hueso
Chuletas de cerdc
] estilo de campo
Chuletas de cerdc
Sopa
Sopa de came
vegetal
Chile
Cantidad
3b-4 Ibs.
{1,6-1,8 kg)
4 Ibs.(1,8 kg)
8 trozos
(oprox. 3 Ibs.
[1,/4kg])
3b-4 Ibs.
{1,6-1,8 kg)
4 cuartos
de gal6n
15,8 liters)
4 cuartos
de gal6n
15,8 liters)
Posici6n Config.
de la de los Tiempo
bandeja alimentos (Horas) Comentarios
Carnes
Carries
Came
deave
Came
deave
Carries
Carries
Carries
Carnes
Carnes
HI (olta) Agregue 1/2 taza de Ifquido.
5-6 hrs.
LO(baja}
8-10 hrs.
HI (alta) Coloque los costillas en
3-4 hrs. una sola capa.
LO(baja}
6-8 hrs.
HI (alta) Agregue 1/2 taza de liquido.
4-5 hrs.
LO(baja}
7-9 hrs.
HI (alta) Hejor coloque bajo una salsa
3-4 hrs. para que no se seque.
LO(baja/
5-6 hrs.
HI (alta)
5-6 hrs.
LO(baja)
8-10 hrs.
HI (alta)
3-4 hrs.
LO(baja/
6-8 hrs.
HI (alta)
3-4 hrs.
LO(baja}
6-8 hrs.
HI (alta) AsegOrese de que los trozos
4-5 hrs. de came est6n sumergidos.
LO(baja}
8-10 hrs.
HI (alta/ Sumerja los frUoles para que
3-4 hrs no se sequen.
LO(baja/
6-8 hrs.
Agregue 1/2-1 taza de liquido.
Coloquelascostillasen
unasola capa.
Coloque las chuletas en
una sola capa.
Elprogmma de cocci6n fenta utifiza una serie
compteja de ciclos de temperotura para obtener los
mejores resultados. Par esta raz6n, se recomienda
que el progromo de cocci6n lento funcione sin
cancelaciones ni reiniciaciones. Si se reinicia fa
caracteristica de cocci6n fenta mientras se encuentra
en progreso, fa came puede cocinarse de mds.
Para carne jugosa y tiema, efija cortes de came coma
asado de cuarto delantero o un asado de paleta
sin hueso. Los cortes de came mds magros, coma
el cuarto trosero superior, son mds secos y pueden
necesitar lfquido adicional.
Utifice s6fo ptatos de vidrio o cerdmica. Los olios y
sartenes de metal tienden a transferir el color a los
alimentos demasiado rdpido.
Ajuste facantidad de alimentos al tamaho dd
recipiente. Llene el recipiente hasta ¾ para mejores
msultados. Una olfa muy grande deja escapar el
vapor, Io que seca los atimentos.
Siempre cubra la offacon una tapa o con papal de
aluminio.
Puede usarse una gama rods amplia de recetas
con fa caracterfstica de cocci6n lento. Para mejores
resultados, deben realizarse algunos ajustes. Para
recetas de tamahos mds pequehos, comience a
controlar en el tiempo minima. Paro recetas mds
grandes o cuando done fas cantidades de fas
recetas, los alimentos pueden cocinarse par perfodos
mds profongados.
Cuando fa camcterfstica de cocci6n lento finaliza, el
homo cambia automdticamente elmodo "worm"
(mantener caliente). Si se desea tiempo adicional pare
cocci6n fenta, este modo de mantener caliente puede
utilizarse para obtener tiempo extra.
C6mo configurar el horno pure mantener
La funci6n WARM (Calentafl mantiene colientes l-g]
las comidas cocinadas.
Esta funci6n no fue diseflada para volver a
calentar comida fria.
Parausar lafunci6n WARM/Cdentafl, presionela tecla [_]
WARM(Calentar)y luegotateclaSTART(Iniciar).
Para utilizar la caracteristica WARM (caliente)
despu6s de horneado por temporizador, siga
estos pasos:
J-_ Presione el modo hornear
20
Presione las almohadillas num@icas
configurar latemperatura del homo.
para
culiente
Presione el bot6n COOKTIME(tiempo de
cocci6n).
Presione las almohadillas num@icas para
ig i
configurar el tiempo de cocci6n deseado.
Presione el bot6n WARM (caliente).
r_ Presione el bot6n START(iniciar).
NOTA: Los recipientes o topos de pldstico o
envoltorios pldsticos se derretirdn si selos co!oca
dentro de! homo. Esposible que no pueda quitar
e!p!dstico derretido y esto no estd cubierto par la
garantio.
Page 69

C6mo usar el caj6n calentador, mod lo l GEAppliances.com
ADVERTENCIAbacterias en los alimentos.
IA 1 RIESGODEINTOXICACt0NALIMENTARIA:Pardebajo de los 140°F(60°C)puede producirse crecimiento de
El cajdn calentador mantendrd alimentos catientes y cocidos a una temperaturo de servicio. Siempre empiece con olimentos colientes. No Io
use para calentar alimentos frfos, con excepcidn de secor golletos, popitos y cereol.
I WARMtNGlii
DRAWER ii
I
• Siempre empiece con alimentos calientes. No utilice configuraciones de mantener
caliente para calentar alimentos if[as.
• No caliente alimentos par mas de 2 horas.
No seguir estas instrucciones puede provocar enfermedades transmitidas par losalimentos.
C6mo usar el caj6n calentador
Presione la tecla WARMING DRAWER ON/OFF
(Encendido/ Apagado de/Caj6n Calentador).'Set
Warming Drawer" (Configuraci6n del Caj6n
Calentador)comienzaa titilar.Presionelatecla de
WARMING DRAWER SETTING (Configuraci6ndel
Caj6n Calentador) para configurar elmismo en
"HI" (Alto).'STD",o "LO".
Cuando use el cuj6n calentador
Elcaj6ncalentadormantendr6alimentoscalientes
y cocidosa unatemperaturadeservicio.Siempreempiece
conalimentoscalientes.NoIouseparacalentaralimentos
ffios,conexcepci6ndesecargalletas,papitasycereal.
Norecubrael cajancalentadororecipientedecocci6ncon
papelmet61ico.Elpapelmet61icoesunexcelenteaislante
decalory atrapar6elcalordebajode_!.Estoalterar6el
desempe_odelcaj6ny podriada_arelacabadointerior.
Permitaqueelcaj6ncalentadorseprecalientedurante
aproximadamente2Sminutos.
Nocoloqueliquidoo aguaenelcaj6ncalentador.
Paracancelar,presioneelbot6nWARMING
DRAWER(caj6ncalentador).
NOTA:Presionarel bot6nCLEAR/OFF(borrar/
apagado)no apagaelcaj6ncalentador.
, Todos los alimentos que se coloquen en ei caj6n
calentador deben cubrirse con una tapa o papei met61ico.
Cuando caliente pastelitos y panes, la tapa debe contar
con una ventilaci6n para permitir la salida dehumedad.
, Losalimentos deben mantenerse en su recipiente caliente
otraspasarse a un plato de servicioresistente al calor.
NOTA:Losrecipientes pldsticoso losenvoltorios pldsticosse
derritensi entron encontoctodirecto con el coj6n,recipiente
de cocci6no utensiliocoliente.Elpldstico derretidono puede
removersey estono seencuentro cubiertopor Iogorontfo.
, Quite lascucharas de servicio,etc. antes decolocar
recipientesen ei caj6n calentador.
Tabla de selecci6n de temperatura
Paramantenercalientesdiferentestiposdealimentos,
estabtezcaelcontrolconleconfiguroci6nm6selevada.
Latemperatura,tipo,cantidaddealimentosy
eltiempoenquesemantengandentrodelhomo
afectanlacalidaddelosalimentos.
AIabrirelcaj6nenformareiterada,elairecalientese
escaparay losalimentosse enfriar6n.
Congrandescargas,puedesernecesarioutilizaruna
configuraci6ndelcaj6ncalentadorm@selevaday
cubriralgunosdelosalimentoscocidos.
Noutilicerecipientesoenvoltoriospl6sticos.
Tipo de alimento de control
Chile HI/5
Estofado MED/2
Papasal homo HI/5
Pizza MED/2
Totopos LO/1
Wafles LO/1
Configumci6n
Para volver crujientes productos no frescos
Coloquelosalimentosenplatosobandejas _ Despu_sde 45minutos,verifiquesiest6ncrujientes.
de ladosbajos. Agreguetiemposifuesenecesario.
, Precalienteenla configuraci6nLO/!
Para calentar tazones y platos de servicio
, Utilice s61orecipientes resistentes al calor.
PRECAUCI6N
Losplatosestar6ncalientes.Utiliceagarraderas
oguantescuandoquiteplatoscalientes.
Paracalentartazonesy platosdeservicio,configureel
controlenLO/I
, Sidesea calentar porcelana fina, consulte
al fabricante de la vajiila sobre su tolerancia m6xima al
calor.
Usted puede calentar platos de servicio vacios mientras
precalienta el caj6n.
21
Page 70

Uso del horno con auto limpieza
Antes de un ciclo de Auto Limpieza
PELIGRODEINCENDIO:kimpielagrasay lasuciedad
rebeldedelpisodelhomoantesdelaauto-limpieza.
Nohacerlopuedeprovocarunincendioenelhomo.
Recomendamosventilarsu cocinaconunaventana
abiertao utilizandounventiladorocampana
Limpie con un patio los desechos
rebeldes acumulados en el piso del
horno.
duranteelprimerciclodeauto-limpieza.
Quitelaasadera,rejilla,s onda,todoslosrecipientes
decocci6nycualquiertrozode papeldealuminiodel
horno.
NOTAS:
'_ Sielhomoseencuentraequipadocon parrillas
parahomobrillosasyde colorplateado,se
recomiendaretirarlasmismasantesdecomenzar
conelciclodeautolimpieza.Podrdnpermanecer
enelhomoduranteelciclodeauto limpieza,pero
seoscurecer6n,perder6nsulustrey ser6dificil
deslizarlas.
': Sisuhomoest6equipadocon bandejasrevestidas
deporcelanagrispuedendejarsedentrodelhomo
duranteelciclodeautolimpieza.
Lasuciedadubicadaenelmarcofrontalde lacocina
yfuerade lajuntade lapuertadeber6limpiarse
a mano.Limpieestas6reasconaguacaliente,
esponjillasde lanadeaceroembebidasenjab6n o
limpiadorestalescomoSoftScrub_LEnjuaguebien
conagualimpiay seque.
Nolimpielajunta.Elmaterialdefibradevidriode
lajunta dela puertadelhomonoresisteproductos
abrasivos.Esesencialquelajunta semantenga
intacta.Siustednotaqueest6desgastada,
reempl6cela.
Verifiquequelatapadelabombilladeluzdelhomo
est@ensu lugary quelaluzdelhomoest@apagada.
IMPORTANTE:Lasemanacionesproducidaspor
elciclodeautolimpiezadecualquierhomoafectan
lasaluddealgunasayesdemaneranotoria.Procure
Ilevarsusayesaotrahabitaci6nbienventilada.
Homodobley modeloscanadiensessolamente:
Lasunidadesdesuperficiesedesactivan
autom6ticamenteduranteelciclodeauto-limpieza.
Verifiquequetodosloscontrolesde unidades
desuperficieest@napagadosentodomomento
duranteelciclodeauto-limpieza.Cualquierunidad
desuperficieconfiguradaenunaposici6n"on"
(encendido)mientrasfuncionael ciclodeauto-
limpiezaseaccionar6autom6ticamentedespu@sde
terminadoelciclo,y puedeprovocarelencendido
deuna unidadde superficieyquedarsinatenci6n.
Esperehastaquetermineelciclodeauto-limpieza
paraconfiguraryusarlasunidadesdesuperficie.
IT112]rq ElI-q
ITIi-q133ElF0]
22
C6mo configurar el horno para una auto-limpieza
Laspuertasdel homodebe estarcerradasy todos
loscontrotesdebenestarcorrectamenteconfigurados
paraque elciclofuncioneenformaadecuada.
Presioneetbot6nSELFCLEAN(auto-limpieza).
[71
Serecomiendaunciclode3horasparalimpiar
derramespequeflosycontenidos.Serecomienda
unciclodeauto-limpiezade5horasparaun
homom6ssucio.
[] Sinecesitaun ciclodiferentede 5 o 3horas,utilice
lasalmohadiltasnum@icase ingreseettiempo de
limpiezadeseado.
Eltiempodelimpiezapuedeconfigurarseentre3horas
y5horas,deacuerdoconetgradodesuciedaddet
homo.
[] Presioneetbot6nSTART(iniciar).
Laspuertasdethomosuperioreinferiorsebloquean
autom6ticamente.Losetementosdetaestufatambi6n
sebloqueandurantetalimpieza.Lapantallamostrar6
eltiempodelimpiezarestante.Nopodr6nabrirse
laspuertasdethomooutilizarlaestufahastaquela
temperaturadesciendapordebajodelatemperatura
debloqueoyseapagueLOCKED/DOOR_ (puerta
bloqueada)delapantaltadecontrol.
LapalabraLOCKED/DOOR_ (Puertabloqueada)
titilar6ylapalabraDOOR(Puerta)aparecer6si
configuraelciclodelimpiezay olvidacerrarlapuerta
dethorno.
Siustedconfiguraelciclodelimpiezay seolvidade
cerrarlaspuertasdethomo,desteltar6LOCKED/
DOOR_ (puertabloqueada)ylapalabradoor
(puerta)aparecer6enlapantalta.
Paradetenerelciclodelimpieza,presioneetbot6n
CLEAR/OFF(borrar/apagado).Cuandoseapaga
LOCKED/DOOR_ (puertabloqueada),indicando
quetatemperaturadeloshomoshadescendidopor
debajodelatemperaturadebloqueo,ustedpodr6
abrirlaspuertas.
Homosdobles:
_,Ustedpuedeconfigurarunciclodelimpiezaen
amboshomosalmismotiempo;sinembargo,no
efectuar6nlaauto-limpiezaal mismotiempo.El
Oltimohomoenconfigurarseretardar6suinicio
autom6ticamentehastalafinalizaci6ndetciclode
limpiezadelprimerhomo.
Cuandoseconfigureunhomoparalaauto-limpieza,
lasdospuertasdethomoy loscontrolesdetaestufa
sebloquear6n.Loshornosy laestufanopueden
usarsecuandounhomoest6configuradopara
laauto-limpieza.
Page 71

GEAppliances.com
Las puertas del homo debe estar cerradas y todos los controles deben estar correctamente configurados para que el ciclo
funcione en forma adecuada.
C6mo configurar un inicio retardado de limpieza
/_ i/ (
ii/¸Fq D3133E]E] :
ii__i!!_iii_I_II_ !i!_i_i_!ii_i_i_
r-_ Presione el bot6n DELAY START finido La puerta del homo se cierra autom_ticamente.
retardado). No podr_n abdrse las puertas del homo o
utilizarse la estufa hasta que la temperatura
r_ Hediante las almohadillas num@icas, descienda por debajo de la temperatura de
_ngreselahora en que desea iniciar bloqueo y seapague LOCKED/DOOR_ (puerta
el ciclo de limpieza, bloqueada) de la pantalla decontrol.
Presioneel bot6n START(iniciar).
[]
_ E] l-qrq Fq ¸
Presioneel bot6n SELFCLEAN(auto-
%
limpieza).
i_i ii_il_ _i !II_iiIII__
Hediante lasalmohadillas num@icas,
@
ingrese la hora en que desea iniciar
el ciclo de limpieza.
Eltiempo de limpieza puede configurarse entre
3 horas y 5 horas,de acuerdo con el grado de
suciedad del horno.
[] Presioneel bot6n START(iniciar).
Despu#s de un ciclo de limpieza
Esposiblequeobservealgunascenizasblancasenel
homo.LimpMasconun paBohOmedodespu@sdequeel
homoseenfrie.
Silasmanchasblancaspermanecen,remu@alas
conun estropajodeaceroIlenodejab6ny enjuague
generosamenteconunamezdadevinagrey agua.Estos
dep6sitossonusualmenteresiduosdesalqueelcidode
Fimpiezanopuedeeliminar.
SielhomonoquedaFimpiodespu@sdeunciclode
Fimpieza,repitaelcido.
Ustednopuedeconfigurarelhomoparacocci6nhasta
queel homoest@Iosuficientementefrio comoparaque
la puertasedesbloquee.
IVlientraselhomoest@enautolimpieza,ustedpuede
presionarelbot6nRELOFparamostrarenpantalla
la horadeldia.Paravolvera lacuentaregresivade
limpieza,presioneelbot6nAUTOLINPIEZA.
Parrillas est6ndar
Siresultadificildeslizarlas,paseaceitedecocci6nconun
paBoensuscostadoslateralesy en lossoportesdelas
parrillasdelhomo.
Parrilladeextensi6n
Sideslizarla mismaresultadificil,ver Parrilladeextensi6n
enlasecci6nCuidadoy limpieza.Norociela parrilla
deextensi6nconpulverizadorparacocci6nuotros
lubricantesenspray.
Siresultadificilquitarlaocolocarla,paseaceitedecocci6n
conunpaBoen lossoportesdelasparriliasdelhomo.No
paseaceitedecocci6nenlosdeslizadores.
NOTA:Luegodelprimercidodelimpiezaautomdtica,las
superficiesdeaceroinoxidablegfiscambiardndecoloren
losestantesextensiblesesmaltados.Estoesnormal Nose
recomienda/alimpiezaautomdticadeestantesextensib/es
denfquel,ya quetodo elestanteperderdcolordebidoalos
temperaturesde lalimpiezaautomdtica.
23
Page 72

Usa de la Limpieza al Vapor. tenalgunosmodelosl
El ciclo Steam Clean (Limpieza al Vapor) facilita la limpieza
PRECAUCI N limpieza al vapor,
[_ 6 ] Durante el cicIo de
se vuelve Io suficientemente caliente coma para
ocasionar quemaduras. Espere hasta que el cicIo est6
terminado (30 minutos) antes de limpiar las superficies
interiores del homo. Si esto no se cumple, se podr6
sufrir quemaduras.
el fondo del homo
de suciedad leve del interior del homo de porcelana de
limpieza estc_ndar.
La cocina estard a temperatura ambiente antes de comenzar
el ciclo Steam Clean (Limpieza al Vapor). Si el homo est6
demasiado caliente, en la pantalla se observard "caliente" y
el ciclo no se activard hasta que el horno se enfrfe.
El ciclo Steam Clean (Limpieza al Vapor) funciona mejor en
nuevos derrames o suciedades. La comida quemada es mas
dificil de eliminar.
Vierta 8 onzas de agua en el piso
delbarrio. []
STEAM j r_
CLEAN
Para Comenzar el Ciclo de
Retirelosestantes y accesorios de la
B]
cavidad del homo, No coloque utensiliosu
otros art[culos en el homo durante el Ciclo
de Limpiezaal Vapor.
Vierta i taza (8 oz.)de agua a temperatura
[]
ambiente en el area intermedia del rondo
del horno. No agregue solucionesde
limpieza ni quimicos dening6n tipo al
agua. $61oagregue agua al usar el ciclo
Steam Clean (Limpieza al Vapor). $61o
agregue agua al usar el ciclo Self-Clean
(AutoLimpieza).
Cierrela puerta.
Presionela tecla Steam Clean (Limpieza al
Vapor);luego presione Start (Iniciar).
La puerta del homo secierra
autom@icamente. Unciclo de 30 minutos
comenzarc_la cuenta regresiva en la
pantalla. Noserc_posibleabrir la puerta del
homo hasta que el ciclo finalice o hasta
que usted presione la tecla Clear/Off
(Borrar/Apagar) y que la puerta se
desbloquee.
Cuando el ciclo Steam Clean(Limpiezaal
@
Vapor) est6 completo, la puerta de
desbloquearc_,el control del homo emitird
un pitido,y laluzde Limpiezaal Vapor
titilarc_.Presionela tecla Clear/Off (Borrar/
Apagar) y abra la puerta.
Elfondo delhorno y elagua restante aOn
estarc_nmuy calientes al final del ciclo. Esto
esnormal.
Retirela suciedad fregando con un cepillo
o almohadilla de nylon.Se podra usar una
almohadilla de estropajo conjab6n s61oen
el interior del homo de porcelana. Elusa de
almohadillas abrasivas rayarc_el vidrio de
la puerta. No limpie la suciedad ni el agua
de lajunta de la puerta.
Limpieza al Vapor:
[] Retireel agua restante con una esponja o
tela seca.
[] Dejela puerta abierta para que seseque
con el aire.
NOTASIIvIPORTANTES:
. Siun cido de limpieza al vapor esiniciado
sinagua, presione la tecla Clear/Off
(Barrar/Apagar) para finalizar dicho cido.
Esperea que la cocina realice la cocci6n a
temperatura ambiente antes de verter agua
en el agua intermedia e iniciar otro cido de
vapor
. Noabra la puerta durante el cido Steam
Clean(Limpieza al Vapor). Un pitido de error
sonar5 al abrir la puerta.
. Presionela tecla Clear/Off(Borrar/Apagar)
en cualquier momenta para finalizar el cido.
. Sipermanecen dep6sitos minerales en el
rondo del homo luego de la limpieza use
una tela o espon]a mo]ada en vinagre para
eliminar.
. Esposible que gotee alga de agua desde la
parte inferior de la puerta delhomo. Siesto
sucede,limpie la misma al finalizar el cido.
. Lajunta de la puerta podr5 estar mo]ada
cuando el cido Steam Clean (Limpieza al
Vapor)finalice. Estoesnormal. Nolimpie la
junta.
. Sia@npermanece suciedad luego de la
limpieza del homo, consulte la secci6n de
Cuidadoy limpieza de la cocina,en el Manual
del Propietario para acceder a opciones
adicionales.
2q
Page 73

Caracteristicas especiales de los controles dd homo. GEAppliances.com
Los nuevos controles con botones de toque cuentan con caractefisticas adicionales, kas siguientes son las caracteristicas
y la manera en que usted puede activarlas.
Los modos de caracteristicas especiales s61opueden activarse mientras la pantalla muestra la hora. Se conservan en la
memoria de los controles hasta que se repitan los pasos.
Para ingmsar una caracteristica especial en uno de los dos homos, usted debe primero presionar los botones BROIL HI/
LO [asar alto/bajo) y BAKE [homear) del homo superior al mismo tiempo. Los botones BROIL HI/LO [asar alto/bajo) y BAKE
[homear) del homo inferior no activan caracteristicas especiales.
Cuando Io pantalla muestra su opci6n, presione el bot6n START (iniciar). kas caracteristicas especiales se conservardn en la
memoria despu4s de un corte de energia, con excepci6n del Sabbath, que debe reconfigurarse.
Selecci6n de temperatura en Fahrenheit o Celsius
Sucontrolde homoest@configuradopara utilizar
lasseleccionesdetemperatura Fahrenheit,pero
puedemodificarsepara usarseleccionesen
Celsius.
[7] PresionelosbotonesBROILHI/LO(asaralto/
bajo)y BAKE(hornear)delhomo superioral
mismotiempo hasta queen la pantalla
puedaverseSF.
[] PresionelosbotonesCOOKTIME(tiempode
cocci6n)y BROILHI/LO (asaralto/bajo)al
Sefiales sonoras al finalizar un ciclo con temporizador
mismotiempo. Enla pantallapodr@verseF
(Fahrenheit).
[] PresionelosbotonesCOOKfINE (tiempode
cocci6n)y BROILHI/LO (asaralto/bajo)de
nuevoal mismotiempo.Enlapantalla podra
verseC(Celsius).
J41 Presioneelbot6n START(iniciar).
AIfinalizarun ciclocontemporizadorseescuchan r_
3 pitidoscortos seguidospor un pitidocada 6
segundoshastaque sepresioneelbot6n CLEAR/
OFF(borrar/apagado).Estepitidocontinuode 6
segundospuedecancelarse.
Paracancelarel pitidocontinuode 6 segundos: r_
[Z] PresionelosbotonesBROILHI/LO (asaralto/
bajo)y BAKE(hornear)delhomo superioral
mismotiempo hasta queen la pantalla
puedaverseSF.
Volu men del tono
Esta caracter[stica permite regular el volumen de
los tonos para Iograr un volumen mas aceptable.
Existentres niveles devolumen diferentes.
r-_ Presione los botones BROILHI/LO (asaralto/
I/I
bajo)y BAKE(hornear)del homo superior al
mismo tiempo hasta queen la pantalla pueda
verse SF.
Presioneel bot6n COOKTiME (tiempo de
cocci6n).Enla pantalla podra verse STD BEEP
(PITIDOSTD).Estees el nivel de volumen media.
Presioneelbot6nBROIL(asar).Lapantalla
muestraCONTIBEEP(pitidocontinuo).
Presioneelbot6nBROIL(asar)de nuevo.La
pantallamuestra SINGLEBEEF)(pitido0nico).
(Estocancelaelpitidocada6 segundos.)
Presioneelbot6nSTART(iniciar).
Touch the COOKTINE pad again. This
changes the volume leveleach time the
pad istouched, and a tone will sound to
provide an indication of the volume level.
Choosethe desiredsound level(LOBEEF),
STDBEEP,HI BEEP,or OFF).
Presioneel bot6n START(iniciar)para activar el
nivelelegicto.
25
Page 74

Caractefisticas especia/es de los contro/esde! homo.
12 horas, 24 horas o bloqueo del reloj
i _iiii_i_ i_!i_IIIII
ilii__:__ iiiiI_I_ii_i_!_i_il__
ii ii i
Suscontroles est6n configurados para usar un reloj
de 12 horas.
Siprefiere tener un reloj de estilo militar de 24 horas
o anular la visualizaci6n del reloj, siga lossiguientes
pasos.
Presionelos botones BROILHI/LO (asaralto/
bajo)y BAKE(hornear)del homo superior al
mismo tiempo hasta queen la pantalla pueda
verse SF.
[] Presione el bot6n CLOCK(reloj)una vez. Enla
pantalla podr6 verse 12hr. Siesta es la opci6n
que desea,presione el bot6n START(iniciar).
ConversiOn Autom_tica de Recetas'" (en algunos modelos)
AI usarel horneado por convecci6n, la funci6n de [_ Presione lateela CONVECTIONCOOK(Coccidn
Conversi6nAuto Recipe®podrciautomciticamente pot Conveccidn)hasta que la pantalla muestre
eonvertir temperaturas de horneado regular CON ON (ConversidnEncendida)o CONOFF
ingresadas a temperaturas de horneado por (ConversidnApagada) seg0n se desee.
convecci6n. Lapantalla no mostrarci la temperatura
convertida. Siempre mostrarci la temperatura
ingresada.
Paraactivar o desactivar lafunci6n:
Presioneel bot6n CLOCK(reloj)de nuevo para
cambiar al reloj estilo militar de 24 horas. Enla
pantalla podr6 verse 28 hr. Siesta es la opci6n que
desea, presione el bot6n START(iniciar).
Presioneel bot6n CLOCK(reloj)de nuevo para anular
la visualizaci6n del reloj. Enlapantalla podrciverse
OFF(apagado).Siesta es la opci6n que desea,
presione el bot6n START(iniciar).
NOTA:Siel retojse encuentro en el modo sin
visuotizoci6n,ustedno podrd utilizor Iofunci6n de
inicio retordodo.
Presione
el bot6n
START(iniciar).
i i ii i xlii : ii
I DELAY J
START
Z] Presionelos botones BAKE(hornear) y BROIL
HI/LO (asaralto/bajo) del homo superior al
mismo tiempo hasta queen la pantalla pueda
verseSF.
Apagado luego de 12 horas
Conestaopci6n,en casodedejurseelhorno
encendidoaccidentulmente,elcontrolIoapagu
enforma uutom@iculuegode 12 horusdurunte
funcionesdehorneadoo despu6sde3 horus
duruntelafunci6n deasado.
Sideseaapagar (OFF)estafunci6n,siga lospasos
siguientes.
PresionelosbotonesBROILHI/LO (asaralto/
bajo)yBAKE(hornear)delhomo superioral
mismotiempo hastaque en lapantalla
puedaverseSF.
Presioneel bot6nDELAYSTART(inicio
retardado)hastaque aparezcano shdn(no
apagado)en la pantalla.
Presioneel bot6nSTART(iniciar)para activar
[_ la caracteristicade no apagadoy dejarel
controlconfiguradoen estemodo de
caracteristicasespeciales.
26
Page 75

C6mo usar la funci6n Sabbath. Chomossu er o e
(Disehadapara utilizarseduranteel Sabbathu otrasFiestasJudfas) (enalgunosmodelos) GEAppliances.com
La funci6n Sabbath solamente puede utilizarse para hornear/rostizar. No es posible utilizarla para convecci6n, asado, auto-limpieza o cocci6n con
inicio retardado.
NOTA: La luz interior del homo se enciende automdticamente (en algunos modetos) cuando se abre la puerta y se apaga cuando se la cierra. Puede
quitarse la bombilla de luz. Vet la secci6n de Reemptazo de bombilla de luz. En los modelos con interruptor de luz en el panel de control, la luz del
homo puede encendersey dejarseasL
Cuando la pantalla muestra _,
el homo est6 configurado para
Sabbath. Cuando la pantalla
muestra _ c, el homo est6
horneando/rostizando.
Aseg0rese de que et retoj muestre la hora correcta y que
el homo est@apagado.
Z] Presione y sostenga los botones BROIL HI/LO
(asar alto/bajo)y BAKE (hornear) al mismo tiempo
hasta queen la pantalla pueda verse SF.
NOTA: Sien la pantalla aparecen Bake (hornear) o
Broil (asar), los botones BROIL HI/LO (asar alto/
halo)y BAKE (hornear) no se presionaron al mismo
tiempo. Presione el bot6n CLEAR/OFF (borrar!
apagado) y comience de nuevo.
r_ Presione el bot6n DELAY START (inicio retardado)
hasta que aparezca SAb bAtH en la pantalla.
r_ Presione el bot6n START(iniciar) y _ aparecer5 en
la pantalla. El homo se encuentra ahora en el
modo Sab@ico.
r_ Presioneet bot6n BAKE(hornear). No se dar6 una
seF_aL
C6mo desactivar la funci6n Sabbath
r_ Presioneel bot6n CLEAR/OFF(borrar!apagado).
[_ i el homo est6 cocinando, espere un perfodo
aleatorio de aproximadamente 30 segundos a 1
minuto, hasta que s61om aparezca en la pantalla.
r_ Presione y sostenga los botones BROIL HI/LO
(asar alto/bajo) y BAKE (hornear) al mismo tiempo
hasta que en la pantalla pueda verse SK
r_ Presione el bot6n DELAY START(inicio retardado)
hasta que 12shdn o no shdn aparezcan en la
pantalla.
Elija 12 shdn, indicando que el homo se apagar6
autom6ticamente despu@sde 12 horas o no
shdn, indicando que el homo no se apagar6
autom6ticamente despu6s de 12 horas.
r_ Mediante las almohadillas num@icas, ingrese la
temperatura deseada entre 170°F (77°C)y 550°F
(288°C). No se dar6 ninguna sepal o temperatura.
No hay una temperatura predeterminada.
r_ Presione el bot6n START(iniciar) en el homo
correspondiente.
r_ Despu_s de un perYodoaleatorio de
aproximadamente 30 segundos a z minuto, _ c
aparecer6 en lapantalla indicando que el homo
est6 horneando/rostizando. Si _ c no aparece en
la pantalla, comience de nuevo en el paso 4.
Para ajustar la temperatura del homo, presione el bot6n
BAKE (hornear), ingrese la nueva temperatura usando
las almohadillas num6ricas y presione el bot6n START
(iniciar).
NOTA: Los botones CLEAR/OFF(borrar/apagado) y
COOK "FINE(tiempo de cocci6n) se encuentron octivos
duronte Io funci6n Sabbath.
r_ PresioneSTART(iniciar)cuandola opci6n deseada
apareceenla pantalla (12shdno no shdn).
NOTA:Encasodecartedeenergfaconla funci6n
deSabbathactivada,dichafunci6nseapagard_
automd_ticamenteaOncuandovuelvala energfa.El
controldelhomodebevolvera conflgurarse.Algunos
modeloscontinuard_nel modoSabbath;sinembargo,si
seabrela puerto,seactivard_la luzdel homo.
C6mo ponerse para cocci6n calculada
NOTA: Este procedimiento debe Ilevarse a cabo ANTES
de que comience el Sabbath para poder utilizar la lel
caracteristica de horneado con temporizador durante
el Sabbath (la unidad NO debe colocarse en el modo [-_
Sabbath durante un horneado con temporizador).
Presione y sostenga los botones BROIL HI/LO
WLJ
(asar alto/bajo)y BAKE (homear) al mismo tiempo
hasta queen la pantalla pueda verse SK
NOTA: Sien la pantalla aparecen Bake (homear) o l-h-I
Broil (asar), los botones BROIL HI/LO (asar alto/ lYl
DD DD
DD DD
bajo)y BAKE (homear) no se presionaron al mismo
tiempo. Presione et bot6n CLEAR/OFF (borrar/ [_
apagado) y comience de nuevo.
r_ Presione el bot6n BROIL HI/LO (asar alto/bajo)
para cambiar la configuraci6n del pitido a bEEP (la
configuraci6n predeterminada es pitido continua,
que se visualiza en la pantalla coma Con bEEP).
Presione el bot6n START (iniciar) para guardar los
%
cambios.
Presione el bot6n BAKE (homear).
Presionelasalmohadillasnum@icaspara
%
configurarla temperatura deseada.
Presione et bot6n START(iniciar)en el homo
i-Z1
correspondiente.
Presione COOK TINE (tiempo de cocci6n) para el
/LL_J
homo correspondiente.
Presione las almohadillas num6ricas para
IuI
configurar eltiempo deseado de cocci6n entre z
minuto y 9 horas y 59 minutos.
Presione et bot6n START (iniciar).
Presione et bot6n CLOCK (reloj) para poder
visualizar la hora actual. Esto es para poder
visualizar la hora actual en lugar de la cuenta
regresiva del temporizador de cocci6n. El homo
funcionar(_ a la temperatura configurada para la
cantidad de tiempo configurada, y despu6s se
apagar(_. En el momenta en que el homo se
apaga, et pitido sonar(_ 3 veces
27
Page 76

Cuidado y limpiezade la codna.
AsegOresedequetodoslos controlesestdnapagadosy quelassuperficiesestdnfrfasantesde limpiarcualquierpartedela cocina.
ADVERTENCIA cuo/quierotro oz n,ve i iqueq.e
j_ j Sise quita la cocinapara efectuar una limpieza,reparaciones o
C6mo quitar el envoltorio de protecci6n y la cinta de embalaje
Concuidado,tome una punta delenvoltorio
de protecci6n con sus@dos y tentamente quitelode la
superficiedetaparato. No use elementosfilosospara
quitar el envoltorio.Quitetodo el envoltorioantes de
usaret aparato porprimera vez.
Panel de control
Siasi Io desea,puededesactivar losbotones detoque
antes dela limpieza.
Verla informaci6n sobreBloqueode controtesen la
secci6nCdmousorel reloj,el temporizodory elbfoqueo
de controtesde estemanual.
Limpielosderrames con un patio h0medo.
l
el dispositivo anti-volcaduras secoloque demanera adecuada
cuando vuelvaa instalarse la cocina.
5i no toma estaprecaud6n, la cocina puede volcarse
y provocar lesiones.
Paraasegurarsede no daBarel acabado del producto,
la mejor forma dequitar el pegamento dela cinta de
empaquede losaparatos nuevosconsisteenaplicar
detergente para vajillasI[quido.Apliqueconun patio
suavey deje remojar.
NOTA"Deberedrorseel odhesivodetodoslosportes.
5i secofiento,serdimposibfedequitor.
Tambi@npuede utitizarun limpiador de vidrios.
Quitesuciedadesm6s rebetdescon aguatibia
jabonosa.No utiliceabrasivosdeninguna clase.
Vuelvaa activarlosbotonesdetoque despu@sde la
limpieza.
Superficies pintadas
Lassuperficiespintadasincluyenlostadosdelacocina
ylapuerta,lapartesuperiordetpaneldecontroly et
frentedelcaj6n.Limpielasconjab6ny aguao conuna
No utilice limpiadoresdehomo comerciales,polvos
limpiadores,esponjillasdeacero o abrasivospotentes
sobrecualquier superficiepintada.
soluci6ndeaguayvinagre.
Superficies de acero inoxidable (en algunos modelos)
No utilice almohadillas de acero porque rayan
la superficie.
Paralimpiarla superficiedeaceroinoxidable,
utiliceagua tibiajabonosa o un limpiadoro
lustradorde aceroinoxidable.Siemprelimpie
la superficieen direcci6nde laveta.Sigalas
Para consultar sobre la compra de limpiadores
o lustradores de aparatos de acero inoxidable, o
para encontrar la ubicaci6n del distribuidor m6s
cercano a su domicilio, Ilame a nuestro nOmero
gratuito:
Centro naciona! de repuestos
instruccionesdelproductopara limpiarla
superficiedeaceroinoxidable.
GEAppliances.com
Estufa de esmalte de porcelana (en algunos modelos)
Elacabado de esmalte de porcelana es
resistente pero puede romperse si se utiliza
incorrectamente. Este acabado es resistente
al 6cido. Sin embargo, no debe permitirse que
algunos alimentos 6cidos que
sederraman (comojugos de fruta, tomate o
vinagre) permanezcan en el acabado.
Sise derraman 6cidos en la estufa mientras est6
caliente, utilice una toalla de papel o un pano
secospara limpiarloen elmomento.Cuando
lasuperficiesehayaenfriado,limpieconagua
jabonosa. Enjuaguebien.
Enel caso de otros derrames, como salpicaduras
de grasa, etc., limpie con agua jabonosa o polvos
limpiadores cuando la superficie se haya enfriado.
Enjuague bien. Pula con un pano seco.
1.800.626.2002
28
Page 77

GEAppliances.com
[A ADVERTENCIA
del homo, desconecte la alimentaci6n de energfa al homo desde el panel principal
de fusibles o del interruptor de circuitos. No hacerlo puede provocar una descarga
eldctrica o una quemadura.
PELIGRODEOUEMADURAS:La tapa de vidfio y la Idmpara de luz se deberdn retirar cuando
PELIGRODEDESCARGAELECTRICA00UEMADURAS: Antes de reemplazar la bombilla
PRECAUCI6N
estdn frfas. Tocar el vidfio caliente sin protecci6n en las manos o con un trapo hOmedo
puede ocasionar quemaduras.
_eceo_0cuio Portaiamoara Reemplazo de la bombilla del horno (en algunos modelos)
Para retirar:
[Z] Gire la cubierta de vidrio en sentido contrario
o las manecillas del reloj 1/4 de vuelta hasta
que las lengOetas de la cubierta de vidrio
liberen los surcos del portal6mparas.
Colocarse guantes de 16texpuede brindar
Je G6.35
en o gunas moaelosJ
Receo_6cuto _ortat6_Toara
_ BomoIlla
de G9
(enalgunas modelos)
un mejor agarre.
Utilizando guantes o un pano seco, remueva
[] la bombillajal6ndola en Ifnea recta.
Para reemplazan
[] Utilice uno nuevo bombilla hal6gena de
!20/!30 voltios, no exceda SOratios.
Reemplace la 16mpara de luz con el mismo
tipo de 16mpara que se retir6. Ensu modelo
corresponder6 uno de los dos tipos que
figuran a la izquierda. Para determinar cu61
es la 16mpara correcta, controle las
terminales de la 16mpara.Las16mparascon 2
terminales con clavijas rectas son 16mparas
de G6.35. Las 16mparas con 2 terminales con
clavijas con curvas son 16mparasde G9. (No
las intercambie.) Aseg0rese al reemplazar la
16mpara que sea de 120 volts o 130 volts
(NOde 12 volts).
Utilizando guantes o un paho seco, remueva
la bombilla de su paquete. No toque la
bombilla con los dedos desnudos. Elaceite
para piel dahar6 la 16mpara y acortar6 su
tiempo de duraci6n.
Recept6cut0
r_ Empuje la bombilla en Ifnea recta dentro del
recept6culo hasta el tope.
[] Coloque las leng0etas de la cubierta de
vidrio dentro de los surcos del
portal6mparas. Gire la cubierta de vidrio en
sentido de las manecillas del reloj 1/4 de
vuelta.
Para una mejor iluminaci6n dentro del
homo, limpie frecuentemente la cubierta
de vidrio utilizando un patio hOmedo. Esto
deber[a hacerse cuando el homo est6
cornpletamente fib.
Conecte nuevamente el suministro el@ctrico
@
al homo.
guantes
pano
Reemplazo de la bombilla del horno lenalgunos modelos)
Verifique que la tapa de la 16mparay la
bombilla se hayan enfriado por completo.
Para quitar la tapa:
Hagagirar la lenteen 1Ade vuelta en
sentido antihorario para quitarla.
Noquite ningOntornillo para sacar la tapa.
Coloqueuna bombilla de 40 ratios o una
bombilla hal6gena de dos espigas,seg0n
corresponda.
Para volver a colocar la tapa:
Alinee las leng0etas de la lentefrente a las
leng0etas de la carcasa y gire en sentido
horario para trabar.
29
Page 78

Cuidado y limpieza de la cocina.
C6mo limpiar la puerta del homo
Para limpiar la parte interna de la puerta:
Debidoaqueel6reaqueseencuentra
dentrodelajuntaselimpiaduranteetciclode
autolimpieza,noesnecesariolimpiarlaamano.
El6reaqueseencuentrafueradelajunta
Lajunta est(_diseflodacon un espacio
enIo parte inferior para permitir una
adecuadacirculoci6n de aire.
Nofrote olimpie Iojunta de la puerta
porquetiene uno resistencia muy bajo
a la abrasi6n.
Sise advierteque Iojunta est6
desgastada,raida o daflado, o sEse
ha desplazadode su lugor, sela debe
reemplozor.
yelburletedela puertapuedenlimpiarsecon
unaesponjillapkisticaconjab6n,aguacaliente
ydetergente.Enjuaguebienconunasoluci6nde
aguayvinagre.
gara limpiar la parte externa de la puerta:
Utilicejab6nyaguaparalimpiarcuidadosamente
lapartesuperior,losladosy etfrentedeiapuerta
delhomo.Enjuaguebien.Tambi@nesposible
utilizarunlimpiadordevidriosparalimpiarla parte
exteriordelapuerta.Nopermitaquecaigaagua
sobrelasaberturasdeventitaci6n.
Siquedaaiguna mancha persistenteen
Puerta del homo desmontable (en algunos modelos)
lasecci6ndeventitaci6ndelapuerta,utilice
unlimpiadorabrasivosuavey unaesponjapara
obtenerlosmejoresresultados.
iiiiii_
Lassalpicadurasdesalsas,jugosdefrutas,salsas
detomateyjugosdealimentosquecontienen
cicidospuedendecoiorarlasuperficie,potIoque
sedebeenjuagarlosdeinmediato.Cuandola
superficieest@fria,limpieyenjuague.
Noutilicelimpiadoresparahornos,polvos
limpiadoreso abrasivospotentesenlaparte
extemadelapuerta.
la bisagra
Tire Jas trabas de Jabisagra hacia
abajo para destrabar.
Posici6n de remoci6n
Lapuerta esmuy pesada. Tengacuidado al quitar y
levantar la puerta.
No levantela puerta dela mania.
Para quitar la puerta:
[71 Abrala puerta por completo.
Presionelastrabasdelabisagrahaciaabajoen
r21
direcci6ndetmarcodelapuertahasta
destrabarlas.Puedenecesitarseunaherramienta,
comoundestornittadorpianopequer]o.
Tomeconfirmezaambosladosdelapuertadela
[2]
partesuperior.
Cierretapuertahastalaposici6nderemoci6nde
%
puerta,queesamitaddecaminoentreta
posici6ndeasadoy lapuertacerrada.
[] Levantelapuertahastaqueetbrazodela
bisagrahayasalidodelaranura.
Para volver a colocar la puerta:
I71 Tomecon firmezaambos ladosde la puerta de la
parte superior.
Conla puertaen Extremo
r21
elmismo6ngulo inferiorde
delaposici6nde laranura
remoci6n,
introduzca
lamuescadelbrazo
delabisagradentro
detextremoinferiordela
ranuradela bisagra.La
ranuradelbrazodela
bisagradebe
estarbiencolocadaenlaparteinferior
dela ranura.
Abralapuertaporcompleto.Silapuerta
@
noseabrepotcompleto,lamuescanoestcibien
colocadaenelextremoinferiorde
laranura.
Presionelastrabasdeiabisagrahaciaarriba
%
contraelmarcofrontaldelacavidaddelhomo,
hastaalcanzarlaposici6ndebloqueo.
Traba de
Iabi._
Brazode
la bisagr
Presione Jastrabas de la bisagra
hacia arriba para bloquear.
Brazo de
la bisagra
3O
[] Cierrelapuertadethorno.
Page 79

Marco
del
h_
/' //
Marco
dela _"//z/A L]\
puerta ,' ,'
_.-----S_Botones de
- //_ _Iberaci6n
Puerta del horno superior desmontable len algunos modelos)
Para
quitar la puerta:
Abra la puerta por completo.
%
Levante la traba de la bisagra hacia el marco
del homo hasta que se detenga.
Cierre la puerta en 45 grados (sesentir6 el
@
tope de la puerta). La traba de la bisagra
har6 contacto con el marco del homo.
[] Sobre ambos lados de la puerta, presione
hacia abajo sobre los botones de liberaci6n
de cada bisagra.
r_ Levante la puerta hacia arriba hasta que se
salga de la bisagra.
[] Tire de los brazos de la bisagra suavemente
para liberar presi6n sobre las leng@etasde
bloqueo.
[71 Presione las trabas de la bisagra hacia abap
dentro de la bisagra.
[] Presione las bisagras hacia la unidad para
que se cierren.
Para volver a colocar la puerto:
[Z] Tire de los bisagras hacia abojo en sentido
contrario del marco del homo basra alcanzar
la posici6n abierta total.
r_ Levante las trabas de la bisagra hacia
el marco delhomo basra que se detengan.
Las bisagras se liberan en la posici6n
de 45 grados. Las trabas de la bisagra har6n
contacto con el marco del homo.
[-#-1 Deslice la puerta dentro de las bisagras.
ii i
Aseg0rese de que los botones vuelvan a
salir.
[] Abra la puerta pot completo.
Presione las trabas de la bisagra hacia abajo
dentro de la bisagra.
r-z-1 Cierre la puerta del homo.
GEAppliances.com
iii
31
Page 80

Cuidado y iimpieza de la cocina,
Bandejaplana
Manijas
Parahornos dobles,use la parilla con
lasdos manijasfrontales en el horno
superior.
Parahornosdobles,usela parilla sin
lasdos manUasfrontalesenel homo
inferior.
Bandejas del homo
Todas las bandejas del homo pueden limpiarse a
mano con un limpiador abrasivo o una esponjilla
de acero. Despu6s de limpiar, enjuague las
bandejas con agua limpia y s6quelas con un pano
limpio. Las bandejas revestidas de porcelana gris
pueden permanecer en el homo durante el ciclo
de auto-limpieza sinsufrir danos. Las bandejas del
homo de niquel pueden permanecer en el homo
durante el ciclo de auto-limpieza, pero perder6n el
Parrilla de extensi6n (en algunos modelos)
Lasparrillasdeextensi6nsepodr6nlimpiaramano
conunlimpiadorabrasivooestropajo.Durantela
limpieza,evitequeingreseaguao limpiadorenlas
barrasdeslizantesdeextensi6na loscostadosdela
parrilla.
NOTA: No la lave en ellavavajillas.
Si retirar o reemplazar la parrilla resulta dificil,
limpie ligeramente los soportes de la parrilla con
aceite de cocina. No pase aceite de cocci6n en los
deslizadores.
Para lubricar los deslizadores:
NOTA: No rode la parrilla de extensi6n con
putverizador para cocci6n u arras lubricantes en
spray.
[] Quite la parrilla del horno. Ver Parrilla de
extensi6n en la secci6n Usa del horno.
r_ Extienda par completo la parrilla sabre una
mesa o mostrador de encimera. Puede
colocarse papel de diario debajo de la parrilla
para una limpieza sencilla.
Sihay residuos en las guias de deslizamiento,
@
limpielas con una toalla de papel.
NOTA:Todo el lubricante de grafito eliminado
durante lalimpieza debe volver a colocarse
see steps 4 through 7.
[_ Agite el lubricante de grafito antes de abrirlo.
Comenzando con el mecanismo de
deslizamiento izquierdo de la parrilla, coloque
euatro (4)gotas de lubricante sabre las dos (2)
gGas traseras eereanas a los eojinetes de
apoyo.
Repita en el meeanismo del lado dereeho de
[] la gala.
lustre y resultar6 diffcil deslizarlas. Ser6 necesario
engrasar todos los extremos de las bandejas con
una capa de aceite vegetal suave despu6s de
limpiarlas a mano o en el homo. Esto ayudar6 a
mantener el f6cil deslizamiento de las bandejas.
Si resulta dificil deslizar la parrilla o si resulta dificil
accionar la paleta, debe lubricarse la parrilla
utilizando el lubricante de grafito enviado con su
horno. Para solicitar lubricante de grafito adicional,
Ilame a nuestro centro nacional de repuestos al
800.626.2002 con la referencia WB02T10303.
i-2-1 Abra y cierre la guia varias veces para
IvI
distribuir el lubricante.
Vuelva a colocar la tapa del lubricante y
it i
agitelo nuevamente. D@vuelta la parrilla y
repita los pasos 3,4, 5y 6.
Cierre la parrilla, gire la parrilla dejando el
lado derecho hacia arriba y col6quela en el
homo. Ver Parrilla de extensi6n en la secci6n
Uso del homo.
Para lubricar la paleta:
Agite el lubricante y aplique el mismo alas partes
m6viles de los mecanismos de las paletas coma se
muestra.
Guialado derecho arriba
F_ _ r
L
LadoderechO
Guialadoderechoarriba
32
Page 81

Elementos calentadores del horno
GEAppliances.com
Limpie con un patio los desechos
rebeldes acumulados en el piso del
homo.
No limpie elelemento para hornear o el
elemento para asar. Las suciedades se
quemar6n cuando secalienten loselementos.
Para limpiar el piso del homo, eleve
suavemente el elemento a hornear. Enalgunos
modelos,el elemento a hornear no est6
expuestoy se encuentra debajo del piso del
suelo.Limpiecon agua caliente yjab6n.
Ventilaci6n del horno en estufas de vidrio radiantes
Todoslosmodeloscuentanconunaventitaci6npara
hornoubicadadetr6sdelaunidadsuperficialtrasera
derecha.Enhornosdobles,hayunaventitaci6nde
homoadicionalparaelhomosuperiordetr6sdela
unidadsuperficialtraseraizquierda.
Esta6rea puedecalentarsedurante el usodel
homo.
Esnormal que salga vapor de la ventilaci6n
y puedejuntarse humedad debajo de la misma
cuando el homo est6 en uso.
Laventilaci6nesimportante para Iograruna
adecuadacirculaci6ndeaire.Nuncabloqueeesta
ventilaci6n..
Gufade tope
Remoci6n del caj6n de almacenamiento lenalgunos modelos)
Para quitar elcaj6n:
[Z] TiredelcajOnhaciafuera basra quese [Z]
detenga.
[] Levanteel frente delcaj6nhasta que las
trabassalgande lasguias.
[] Retireelcaj6n. []
Cuj6n calentador desmontable/Olla del Caj6n (en algunos modelos)
NOTA: En los modefos con caj6n catentador
efdctrico, antes de realizar cualquier clase
de ajuste, fimpieza o reparaci6n, desconecte
la conexi6n efdctrica de la cocina desde el
panel de distribuci6n domdstico quitando
el fusible o desconectando el interruptor
de circuitos. Verifique que el efemento
calentador del caj6n estd fifo.
NOTA:Deje que el caj6n calentador se enfrien
antes de quitar el recipiente.
NOTA: Limpie los derrames rdpidamente
despuds de cada uso.
Para volver a colocar el caj6n:
Coloquelosrielesdelcaj6n en lasgulas.
Empujeelcaj6n hastaque sedetenga.
Levanteelfrente delcaj6ny empujehasta
que lastrabassuperenlasguias.
Bajeelfrente delcaj6n y empujehaciaabajo
[]
hasta quecierre.
iiiiiiiiii[_iii
Nunca coloque, utilice o limpie mediante la
caracter[stica de auto-limpieza el recipiente
del caj6n en el homo superior.
iiiiiiiiii[_iii
Elcaj6n calentador cuentan con un
recipiente desmontable para una limpieza
f6cil. Limpiecon agua jabonosa calientey
una esponja o repasador. Sequecon un paho
suavey limpio.Vuelva a colocar el recipiente
en el caj6n calentador o el caj6n del homo
inferior.
33
Page 82

C6mo limpiar ia estufa de vidfio, mod /o )
Limpieza normal de uso diario
Limpie la estufa despu6s
de cada derrame. Utilice
el limpiador de estufas
cer6micas CERAMABRYTE®.
SOLOutilice el limpiador de estufas cer6micas
CERAMABRYTE®en la estufa de vidrio. Otras
cremas pueden no sertan efectivas.
Paramantener y proteger la superficie de su
estufa de vidrio, siga estos pasos:
Antes de usar la estufa por primera vez,
r-f1
limpiela con el limpiador deestufas
cer6micas CERAMA BRYTE®.Esto ayuda a
proteger la estufa y hace la limpieza m6s
sencilla.
[2-1 Eluso diario del limpiador de estufas
cer6micas CERAMABRYTE®ayudar6 a
que la estufa quede como nueva.
Residuos pegados
Agite bien la crema de limpieza. Aplique
@
unasgotas del limpiador de estufas
cer6micas CERAMABRYTE®directamente
sobre la estufa.
Utiliceuna toalla de papel o un paho de
%
limpieza CERAMABRYTE®para estufas
cer6micas para limpiar toda lasupedicie
de la estufa.
[] Use un paso seco o una toalla de papel
para quitar los restos del limpiador. No
hace falta enjuagar.
NOTA: Esmuy importante que NO CALIENTE
la estufa hasta que la haya limpiado por
completo.
Utilice un pa_o de limpieza CERAMA
BRYTE®para estufas cer6micas.
Elraspador de estufas cer6micas
CERAIVlABRYTE®y todos los
insumos recomendados se
encuentran disponibles en
nuestro Centro de Repuestos.
Vet instrucciones bajo la secd6n
"Para solicitar repuestos" en la
p6gina siguiente.
NOTA:No utilice hojas desafiladas
o da_adas.
NOTA: Usted puede DA--AR la superficie de
vidrio si udliza esponjillas que no sean las
recomendadas.
Deje enfriar la estufa,
%
Coloque unas gotas del limpiador de
r21
estufas cer6micas CERAMABRYTE®
sobre toda el6rea de residuos pegados.
Utilizando el paho de limpieza CERAMA
BRYTE®para estufas cer6micas incluido,
frote el 6tea sucia aplicando presi6n
seg0n sea necesario.
Residuos pegados rebeldes
Deje enfriar la estufa,
%
Utilice el raspador de filo 0nico a un
6ngulo aproximado de aS degrees
contra la superficie del vidrio y raspe la
suciedad. Puede ser necesario aplicar
presi6n al raspador para quitar la
suciedad.
Despu6s de utilizar el raspador, coloque
@
unas gotas de limpiador de estufas
cer6micas CERAMA BRYTE®sobre toda
el 6rea de suciedad quemada. Utilice el
paho de limpieza CERAMABRYTE®para
quitar la suciedad restante.
Para protecci6n adicional, despu6s de
%
haber quitado todos los restos, pula
toda la superficie con limpiador de
estufas cer6micas CERAMABRYTE®y
una toalla de papel.
Siquedan restos, repita los pasos
%
indicados con anterioridad.
Para protecci6n adicional, despu6s de
@
haber quitado todos los restos, pula
toda la superficie con limpiador de
estufas cer6micas CERAMABRYTE®y
una toalla
de papel.
34
Page 83

Marcus de metal y rayanes
Tenga cuidado de no deslizar alias y
%
sartenes a travOs de su estufa. Dejar6
marcus de metal sabre la superficie de la
estufa.
Estas marcus pueden quitarse utilizando
limpiador de estufas cer6micas CERAMA
BRYTE® con el paho de limpieza CERAMA
BRYTE® para estufas cer6micas.
Si se permite que alias con una capa rinG
de aluminio o cobre hiervan en seco, la
capa puede dejar una decoloraci6n
negro en la estufa.
NOTA: Verifique con detenimiento que fa base
de fas oflas no sea dspera para no rayar la
estufa.
Sellada de la estufa
Para limpiar el sellado de la estufa alrededor
de los bordes de vidrio, coloque un pano
h0medo sabre los mismos durante unos
minutos y luego limpie con limpiadores no
abrasivos.
Superficie de vidrio: posibilidades de dafio permanente.
GEAppliances.com
Esto debe quitarse de inmediato antes
de calentar de nuevo o la decoloraci6n
puede Ilegar a ser permanente.
Los derrames azucarados
(coma gelatinas, dulce,
caramelo, jarabes)o pl6sticos
derretidos pueden marcar
la superficie de la estufa (no
cubierto par la garant[a) a
menos que el derrame se
quite mientras est6 caliente.
Debe tenerse mucho cuidado
al remover sustancias
calientes.
AsegOrese de utilizar un
raspador nuevo y afilado.
No utilice hojas desafiladas o
danudas.
Dafios par derrames azucarados y pl(Tstico derretido
[-_ Apague todas las unidades de superficie.
Quite los olios calientes.
Utilizando un guante de cocina:
[]
a. Use un raspador de filo 0nico
(raspador para estufas cer6micas
CERAMA BRYTE®)para desplazar el
derrame a un 6rea fifo de la estufa.
b. Quite el derrame con toallas de papel.
Cualquier derrame restante debe dejarse
@
hasta que la superficie de la estufa se haya
enfriado.
[] No use los unidades de superficie de
nuevo basra que todos los restos se
hayan eliminado par completo.
NOTA: Si la superficie de vidrio ya ha sufrido
mamas o hendiduras, el vidrio de fa estufa
deberd cambiarse. En ese caso, serd necesaria la
atenci6n de un tdcnico.
Para salicitar repuestos
Para solicitar el limpiador de estufas
cer6micas CERAMA BRYTE®y el raspador de
estufas, Ilame a nuestro nOmero gratuito:
Centro nacional de piezas 800.626.2002
Limpiador de estufas cer_micas CERAMA
BRYTE®................... #WXIOX300
Ruspudor de estufus cerSmicus
CERAh4ABRYTE® .......... #WXI OX0302
Kit ....................... #WB64X5027
(Elkit inctuye lacrema y el raspador de estufas)
Pahos de limpieza CERAMA BRYTE para
estufas cer6micas ........ #WXl OX550
®
35
Page 84

Antes de llamar a! servicio t cnico...
consejos para identificaci6n y soluci6n de problemas
iAhorre tiempo y dinero! Lea las tablas de las siguientes
pdginas y quizds no necesite Ilamar al servicio tdcnico.
Causas posiNes (2u6 hacer
Las unidades de Seest6n utilizando recipientes . Use recipientes de base plana y que se ajusten
superficieno mantienen de cocci6n inadecuados, al die,metro de la unidad de superficie elegida.
un hervar constante a
la cacci6n eslenta Enalgunas regiones la energia . Cubra el recipiente con una tapa hasta obtener el calor
Loselementasd-e Elfusible puede haberse . Cambie el fusible o vuelva a configurar el interruptor
superficie no funcianan quemado o el interruptor de de circuitos.
bien circuitos puede haber saltado.
La unidad de superficie Estoes normal. La unidad sigue
deja de resplandecer encendida y caliente.
cuando se cambia a
unacon_guraci6nmenor
Rayones(puedenparecer Seestan usando m6todos • Losrayonesnopuedenremoverse.Losrayonesmaspeque_os
coma roturas) en la de limpieza incorrectos, sevolver6nmenosvisiblescomaresultadodelalimpieza.
superficie de vJdrio
de la estufa Seest6n usando recipientes . Para evitar rayones,use losprocedimientos de limpieza
,_reas de decalaraci6n No se limpiaron los derrames • Ver la secci6n C6mo limpiar la estufa de vidrio.
en la estufa de alimentos antes del usa
PI6stica derretida La estufa caliente entr6 . Ver la secci6n Superficie de vidrio: posibilidades de daho
sabre la superficie en contacto con pl6stico permanente en la secci6n C6mo limpiar la estufa
(voltaje) puede ser baja. deseado.
Los contrales de la estufa . Verifique que se haya configurado el control correcto
est@nmal configurados, para el elemento de superficie que esta utilizando.
con bases 6speras o hay recomendados. Verifique que lasbasesde los recipientes
particulas gruesas (sal o arena) est6nlimpias antes del usa,y utilice recipientes con bases
entre el recipiente y la superficie lisas.
de la estufa.
Seha deslizado un redpiente a
trav6s de la superfide de la estufa.
siguiente.
Superficie caliente en . Esto es normal. La superficie puede parecer decolorada
un modelo con una estufa cuando est6 caliente. Estoes temporal y desaparecerc_
de color clara, a medida que se enfria el vidrio.
colocado sabre la misma, de vidrio.
Marcas (a hendidurasJ Se ha derramado una mezcla . Llame a un t6cnico calificado para el reemplazo.
en la estufa azucarada caliente en la estufa.
Lasunidadesdesuper_de Se est6n utilizando recipientes . Uses61orecipientes de base plana para minimizar
seenciendenyapagan de cocci6n inadecuados, el encendido y apagado.
canmucha frecuencia
La_uzde! homo La bombilla de luz est6 floja. . Ajuste o cambie la bombilla.
no funciona
Elhomo no funcJana El enchufe de la cocina . Verifiqueque el enchufe el6ctrico est6 conectado
no est6 introduddo del todo a un tomacorriente contensi6n y adecuada conexi6n
en el tomacorriente, a tierra.
Elfusible puede haberse . Cambie el fusible o vuelva a configurar el interruptor
quemado o el interruptor de de circuitos.
drcuitos puede haber saltado.
Los controlesdel horno est6n • Ver la secci6n C6mo usar el homo.
mal configurados.
EJhomo est6 muy caliente. . Deje que el homo se enfrie par deba]o
36
de la temperatura de bloqueo.
Page 85

Ou6 hacer
Los alimentos no Los controles del homo est6n • Ver la secci6n C6mo user el homo.
se hornean o rostizan mal configurados.
correctamente
La posici6n de la bandeja es • Ver la secci6n C6mo user el homo.
incorrecta o no est6 nivelada.
Se est_n utilizando recipientes • Ver la secci6n C6mo user el homo.
de cocd6n incorrectos o
de tama_o inapropiado.
El termostato del homo debe . Ver la secci6n Ajuste el termostato de/homo usted
ajustarse, mismo.
Los alimentos no Los controles del homo est6n . AsegOrese de presionar el bot6n BROIL HI/LO
seasan de manera mal configurados. (asaralta/baja).
adecuada
Seest_ usando una posid6n • Verla diuia de asado.
de bandeja inadecuada.
Los redpientes no son . Paramejores resultados,utilice un recipiente dise_ado
adecuados para asar. para asado.
La sonde est6 enchufada . Desenchufey quite la sonda delhomo.
dentro de la salida del homo
(enalgunos modelos).
GEAppliances.com
En algunas regiones la energia . Precalienteel elemento para asar durante 10 minutos.
(voltaje) puede ser baja. . Ase pot el periodo de tiempo mc_sprolongado que
se recomiende en la Guia de asado.
La temperature Eltermostato del horno debe , Ver la secci6n Ajuste el termostato del homo usted
del horno es muy alta ajustarse, mismo.
o muy baja
El caj6n de El soporte de caj6n trasero . Vuelva a colocar el caj6n. Ver las instrucciones de
almacenamiento se encuentra sobre el riel Remoci6n del caj6n de almacenamiento en la secci6n
est6 torcido de la guia. Cuidado y limpieza de la cocina.
. Verifique que el caj6n est6 bien colocado si se Io quita.
Elcaj6n de Elcable de energia puede . Cambie la ubicaci6n del caj6n y del cable de energ[a.
almacenamiento ester obstruyendo el caj6n Ver las instrucciones de Remoci6n del caj6n de
no cierra en la parte trasera inferior almacenamiento en la secci6n Cuidado y limpieza
de la codna, de la cocina.
El soporte de caj6n trasero . Vuelva a colocar el caj6n. Ver las instrucciones de
se encuentra sobre el riel Remoci6n del caj6n de almacenamiento en la secci6n
de la guia. Cuidado y limpieza de la cocina.
La puerta del homo La puerta no est_ bien , Dadoque la puerta delhomo esdesmontable, a vecesest6 torcida
alineada, sedesequilibra durante la instalaci6n.
Paraenderezar la pue_a, presione hacia aba]osobre la esquina
superior.
37
Page 86

Antes de llamar al servicio t cnico...
Consejos para identificaci6n y soluci6n de problemas
Causas posibles 9u6 hacer
Elrda]y el tempofizadar Elenchufe de la cocina no esta • Verifique que el enchufe el6ctrico est6 conectado a un
no fundonan introducidodeltodoeneltomacorriente, tomacorriente contensi6n y adecuada cone×i6n a tierra.
Elfusible puede haberse . Cambie el fusible o vuelva a configurar el interruptor
quemado o el interruptor de circuitos.
de drcuitos puede haber saltado.
Loscontrolesdel horno estSn . Ver la secci6n C6mo usar el temporizador decocina.
mal configurados.
El homo no realiza Latemperatura del homo est6 * Dejeque la cocina seenfrie y vuelva a configurar
la auto-limpieza muy elevada para configurar los controles.
la funci6n de auto-limpieza.
Loscontroles del homo estSn • Ver la secci6n Usodel homo conauto limpieza.
mal configurados.
La sonda est6 enchufada _ Quite la sonda del homo.
dentro de la boca de salida
del homo. {en algunos modelos)
Ruido de "crujidos" Esel sonido del metal _ Esto es normal.
o "chasquidos" calent6ndose y enfri6ndose
durante las funciones
de cocci6n y limpieza.
Humo e_ Suciedad excesiva.
en el homo durante
ciclo de limpieza
La pinta del horno El horno est8 muy caliente. _ Deje que el homo se enffie por debajo
no seabredespu_sde! de latemperatura de bloqueo.
un title de limpieza
El homo no est6 limpio Loscontroles del homo no est_n • Ver la secci6n Usodel homo conauto limpieza.
despu6s de un ciclo configurados correctamente.
de limpieza
El homo estaba muy sucio. _ Limpie los derrames m6s rebeldes antes de iniciar el cicIo
Laluzdebloqueo Seha seleccionado el ciclo . Cierre la puerta del homo.
("LOCKED,')destel!a de auto-limpieza pero
en la pantalla .......... la puerta no est8 cerrada.
Presione el bot6n CLEAR/OFF(borrar/apagado).
Abra las ventanas para que salga el humo. Espere el
hasta que se apague LOCKED/DOOR _. Despu6s de que
se enfrie el homo, limpie el e×ceso de suciedad y vuelva a
configurar el cido de limpieza.
de limpieza. Los hornos muy sucios pueden necesitar una
nueva auto-limpieza o una limpieza mas prolongada.
L_z de b!oqueo
"L E " °
( OCK D)esta
encendida CUando
desea cocinar
,F--"y un numero
o letra destellan
en la panta!la ...............
38
La puerta del horno
est6 bloqueada porque
la temperatura dentro
del mismo no ha descendido
debajo de la temperatura
de bloqueo.
Hay un c6digo de error
de fund6n.
Presione el bot6n CLEAR/OFF(borrar/apagado).
Deje enfriar el homo.
Desenchufe el homo por Io menos 30 segundos y luego
vuelva a enchufarlo. Si el c6digo de error de funci6n
se repite, Ilame al servicio t6cnico.
Page 87

GEAppliances.com
Causas posibles Ou6 hacer
_iteuna OIvid6 ingresar , Presione el bot6n BAKE (hornear) y la temperatura
seflaldespu_s deingresar un temperatura de horneado deseada o el bot6n SELF CLEAN (auto-limpieza)
un tiempo de cocci6n o un horario de limpieza, y el tiempo de limpieza deseado.
o de inicio
La pantalla queda Elfusiblepuedehobersequemado , Cambie el fusible o vuelva a configurar el interruptor
en blanco o el interru ptor de circuitos de circuitos.
puede haber saltado.
El reloj se encuentra en , Ver la secci6n de Caracter[sticas especiales de
el modo sin visualizad6n, los controles del homo.
La pan,alia des,ella Carte de energia. , Reconfigure el reloj.
La pantalla no Losbotones de control det homo , Los botones BROIL HI/LO (asar alto/bajo) y BAKE
muestra "SF" nosepresionaroncorrectamente. (hornear) deben presionarse al mismo tiempo
y sostenerse durante :3segundos.
Apurece "Probe" alia Esto le recuerda de ingresar , Ingrese una temperatura de sonda.
(sonde) en la pant una temperatura de sondo
(olgunos modelos) despu_s de enchufarla.
--Carte de energio, Carte de energia o subida , Reconfigure el reloj. Si el homo estaba en usa, usted
el reloj des,ella de tensi6n, debe reconfigurarlo presionando el bot6n CLEAR/OFF
(borrar/apagado). configurando el reloj y
reconfigurando cualquier funci6n de cocci6n.
Emisi6n de vapor Cuondo se utilizan loshornos, • Esto es normal.
desde la ventilaci6n es normal ver unu emisi6n de vapor
de luventiluci6n det homo. A medida
que el n_mero de bundejus o
la cuntidud de ulimentos u codnar
se incrementa, lucuntidad de vapor
visibleseelevar6.
Un olor a quemad Esto es normal en un homo , Paraacelerar el proceso, configure un ciclo de
t, 0_1
o "aceitoso" sale nuevo y desaparece con auto-limpieza durante un minima de 3 horas. Vet
de la ventilaci6n el tiempo. Vet la secci6n Usadel homo conauto limpiezo.
Olor penetronte Las primeras veces que , Esto es temporal.
se utilize el homo es normal
sentir un olaf proveniente
del aislante que recubre
la parte interna del homo.
Se aye un ventilador Un ventilador de convecci6n , Esto es normal. Para potenciar al mc_ximo una cocci6n
{analgunosmoaetosJ puede encenderse y apagarse pareja, el ventilador est6 dise_ado para girar en ambas
autom6ticamente, direcciones, con una pausa entre elias.
, Elventilador de convecci6n funciona durante el
precalentamiento del ciclo de horneado. Elventilador
se apagara despu6s de que el homo haya alcanzado
la temperatura configurada. Esto es normal.
Un ventJlador de refrJgeracJ6n ,
puede encenderse y apagarse
autom6ticamente.
Esto es normal. Se encender6 y apagar6 un ventilador
de refrigeraci6n para enfriar las piezas internas. Puede
funcionar aOn despu6s de que el homo se haya
apagado.
39
Page 88

Antes de llamar al servicio t cnico...
Consejos para identificaci6n ,vsoluci6n de problemas
Causas posibles (_u6 hacer
Resulta dificil deslizar
las bandejas del homo
Las parrillas de color , Aplique una pequeha cantidad de aceite vegetal en
plateado brillante se limpiaron una toalla de papel y frote los bordes de las bandejas
en un ciclo de auto limpieza, del homo. No rocie con Pare®u otro lubricante en spray.
El caj6n no se desliza
bdi_nlohay que tirar
No funcionan el caj6n
calentador
Condensaci6n excesiva Liquido en el caj6n. • Quite el liquido.
en elcaj6n Alimentos sin cubrir. , Cubra los alimentos con una tapa o con papel
Losalimentas se secan La humedad se escapa. , Cubra los alimentos con una tapa o con papel
en el caj6n calentador de aluminio.
El caj6n no est6 bien
alineado.
El caj6n est6 muy cargado • Reduzca el peso. Redistribuya el contenido del caj6n.
o la carga no est8 equilibrada.
El fusible puede haberse , Cambie el fusible o vuelva a configurar el interruptor
quemado o el interruptor de de circuitos.
circuitos puede haber saltado.
Los controles estSn mal , Ver la secci6n C6mo usar el caj6n calentador.
configurados.
La configuraci6n de , Reduzca la configuraci6n de la temperatura.
temperatura est8 muy alta.
El caj6n no est8 totalmente , Presione elcaj6n hacia adentro hasta que el sujetador
cerrado, enganche.
Extienda el caj6n por completo y presi6nelo hasta
el fondo. Ver la secci6n Cuidado y limpieza de la cocina.
de aluminio.
40
Page 89

Accesorios. GEAppliances.com
_Desea alga m6s? (No todos los accesorios se encuentran disponibles para todos
los modelos)
Ustedpuede encontrar estos accesorios y muchos rods en GEAppliances.com, o Ilame al
800.626.2002 (enhorario de trabajo normal). Tengalisto el nOmero de modelo.
i¸ i;
Rejillas Cabezaleso tapas de
uemadores de superficie
Elementos de superficie y Perillas
bandejas colectoras
..... ii <! ¸¸7¸<¸¸¸¸¸¸¸¸(¸¸¸
i iii i iii i / i i IZZZZZZZZZIII ZZZII
Bandejas del homo
!*Si su modelo incluye una parrilla de extensi6n, puede incrementar la funcionalidad de su alcance al adquirir parrillas de extensidn adicionoles Visite www geapplianceparts.
cam o Ilame o1800-626-2002, y ordene Io piezo n(;mero WB48T20072 Sedebe tener en cuenta que los parrillas de extensi6n no corresponden a todos los tipos de modelos
EJementos del homo
Bombillas de Juz
Pruebe estos arras excelentes productos para que su cocina se yea estupenda!
J ........... de anafes de limpieza pulir artefactos
lncluye limpiador, vitrocerdmicos inoxidable
_E vitrocerdmicos: de anafes de acero
rasqueta y paho
WX10Xll 7GCS WX10X305 WX10X10001
iAprovecheal mdximo su bandeja para asar! (Nopara usarcon modelos de caj6n asador.)
iUtilicesu bandeja y tapa de rejilla para asar hamburguesas, frutos de mar, filetes,vegetales, panceta,
costillasy mucho mc_s!La bandeja inferior retiene el exceso de grasasy ace_tes.
. PiezaGEgenuina
Fckilde limpiar
• Garantiadeun a_o
iOferta de tiempo limitado! iEnvio sin cargo!
Cuando solicitela bandeja para asar dentro de los 30 alas de haber adquirido suproducto de cocina GE,
Pequefla Grande*
N° depieza WB¢8X10055 WB/48X10056
Dimensiones 8-3/4"A x 1-1/4" A x 13-1/2" P 12-3/4" A x 1-1/4" A x 15-1/4" P
Parrilla de e×tensi6n
Limpiador
de artefactos
de acero
inoxidable
PMIOXSII
Extra grande**
WB48X10057
15-1/2"A x 1-1//4" A x 19" P
* Lobandeja para asar grande (estdndar) no entra en cocinas de20/24 pulgadas.
** Lo bandeja extra grande no entra en boreas de paredes de2¢ pulgadas, empotradas de27 pulgadas o cocinasde 20/2¢ pulgadas.
Llame a1800.626.2002 o utilice este formulario para enviar su solicitud par correo:
GEPorts,P.O.Box 221027, Memphis,TN 38122-1027.
Formulario de solicitud de la bandeja para asar
Cantidad
N(lmero de modelo
Nombre
Direcci6n
Ciudad
Tel#fono
Check __ Giro postal
Para consultar sobre los precias actuales Ilame a1800.626.2002. Tadas las 6rdenes con tarjeta de cr6dito se deber6n realizar
enforma telef6nica. /41
N(lmero de pieza
N(lmero de serie Narca Fecha de compra
Apellido
Estado C6digo Postal
Correo electr6nico
Page 90

Notas.
42
Page 91

Garantia decocina el .ctrica deGE. GEAppliances.com
Todos los servicios tdcnicos de gamnEa son otorgados par nuestros
Centros de Servicio de Fdbrica, o un tdcnico autorizado par
Customer Care®,Para programar el servicio t4cnico, visitenos on-line
en GEAppliances.com, o Ilame a1800.GE.CARES(800.432.2737).
Tenga el ndmero de serie y de modelo a mano cuando Ilame para
solicitar un servicio tdcnico.
GE otorgar_:
Un aria
Desdela fecha de
compra original
Para los Modelos Profile:
Cinco Arios
Desdela fecha
de la compra onginal
Visitas a su hogar para ensefiarle a usar el producto.
Instalaci6n, entrega omantenimiento inadecuados.
Dafio ofallas del producto en caso de abuso, usa
inadecuado, usa para otros prop6sitos que nosean el
adecuado, o usa comercial.
Dafios a la estufa de vidrio provocados par el usa
de limpiadores distintos de las cremas y patios
recomendados.
Dafios a la estufa de vidrio provocados par derrames
endurecidos de materiales azucarados o pl6stico derretido
que no se limpiaron de acuerdo con
las instrucciones del Manual del Propietario.
Cualquierpieza de la cocina que falle debido a un defecto de los materiales o mano de obra.
Durante esta gamntla limitada de un aho,GEtambi6n ofrece, en forma gratuita, la mano de
obra y trabajos en el hogar para reemplazar la piezadefectuosa.
Para los Modelos Profile:
El reemplazo de una estufa de vidrio si seagrieta debido a un choque t6rmico
o si el patr6n sedesgasta.
El reemplaza de la unidad de la superficie radiante sise quemara.
Durante esta garantia limitada adicianal de cuatra arias, usted sera responsablepar
par cualquier trabajo o reparaci6n en el hogar.
Abroche su recibo aquL
Se necesita una prueba
de la fecha de compra original para
obtener servicio tdcnico cubierto par
la garanda.
Reemplazode fusibles dom6sticos o la reconfiguraci6n de
interruptores de circuito.
Dafios al producto provocados par accidentes, incendios,
inundaciones o fuerza mayor.
Dafios incidentales oresultantes provocados par posibles
defectos en este artefacto.
Dafios provocados despu6s de la entrega.
Un producto no accesible para prestar elservido t6cnico
solidtado.
se establece en la presente Garantia Limitada. Las garantias implicitas, incluyendo garantias de comerciabilidad
L XCLUSION DE GARANT[AS IMPLiCITAS--Su _nico y exclusivo recursa es la reparaci6n del producto como
y aptitud para un objetivo particular, se encuentran limitadas a un afio o al periodo m6s corto permitido por la ley.
Esta garantia se extiende al comprador original y cualquier dueho posterior para productos adquiridos para
usa domdstico dentro de los EE.UU. Si el producto se encuentra en una regi6n donde no hay Servicio Tdcnico
autorizado de GE,usted serd responsable del costa del viaje ousted puede tener que Ilevar el producto a un
Servicio Tdcnico Autorizado de GEpara efectuar la reparaci6n. En Alaska, la garantfa excluye el costa de envfo o
visitas para efectuar arreglos en su hogar.
Algunos estados no permiten la exclusi6n o limitaci6n de dahos incidentales o resultantes. Esta garantfa
le otorga derechos legales especfficos y usted puede contar con arras derechos, que pueden variar de estado a
estado. Para conocer sus derechos legales, consulte a su oficina del consumidor local o estatal
o al Fiscal General de su estado.
Garante: General Electric Company. Louisville, KY 40225
43
Page 92

Apoyo al cliente.
__ Web de GE_ GEApplianc_s.com
Jl J Lmienealguna pregunta sabre suelectrodom6stico? iPruebela p6gina Web de GEAppliances, 24 horas al d[a,
| J cualquier d[a del aho! Paramayor convenienciay servicio m6s r6pido,ya puede descargar los Manuales
de los Propietarios,pedir piezaso incluso hacer una cita en I[neapara quevengan arealizar una reparaci6n.
Solicite una reparaci6n GEAppliances.com
Elserviciode expertosGEest6 a tan s61oun pasode su puerta, iEntreen I[neay solicite su reparaci6n cuando
le venga cualquier d[a del aho! O Ilame a1800.GE.CARES(800./432.2737)durante horas normales de oficina.
RealLifeDesignStudio(Estudiodedisehoparalavidareal) GEAppliunces.com
GEapoya el concepto deDise_o Universal-productos, serviciosy ambientes que pueden usar gente de todas
lasedades, tamaBos y capacidades. Reconocemos la necesidad de diseBar para una gran gama de habilidades
y dificultades fisicas y mentales. Param6s detalles cobre las aplicaciones de GEDiseBoUniversal,incluyendo
ideas de dise_o para la cocina para personas con discapacidades, mire nuestra p6gina Web hay mismo.
Para personas con dificultades auditivas, favor de Ilamar al 800.TDD.GEAC(800.833./4322).
Garandas ampliadas GEAppliances.com
Compre una garant[a ampliada y obtenga detalles sabre descuentos especiales disponibles mientras su garant[a
est6 a0n activa. Puede comprarla en I[nea en cualquier momenta, o Ilamar a1800.626.222/4 durante horas
normales de oficina. GEConsumer Home Services estar6 a0n ah[ cuando su garant[a termine.
piezas y accesorios GEAppliunces.com
Aquellos individuos con la calificaci6n necesaria para reparar sus propios electrodom6sticos pueden
pedir que se les manden las piezas o accesorios directamente a sus hogares (aceptamos las tarjetas
VISA,MasterCard y Discover). Haga su pedido en I[nea hay, 24 horas cada d[a o Ilamar par tel6fono
a1800.626.2002 durante horas normales de oficina.
Lasinstrucciones descritas en este manual cubren los procedimientos a seguir par cualquier usuario.Cualquier
otra reparaci6n deberia,par regla general, referirsea personal calificado autorizado. Debe ejercerse precauci6n
ya que lasreparaciones incorrectas pueden causar condiciones de funcionamiento inseguras.
ase en contacto con nosotros GEAppliunces.com
Sino est6 satisfecho con el servicio que recibe de GE,p6ngase en contacto con nosotros en nuestra p6gina
Web indicando todos los detalles as[ coma su n0mero de tel6fono o escr[banos a:
General Manager, Customer Relations
GEAppliances,Appliance Park
Louisville,KY40225
Registre su electrodomdsdco GEAppliances.com
iRegistre su nuevo electrodomdstico en Ifnea-cuando usted prefiera! Elregistrar su producto a tiempo
le proporcionar6, si surgiera la necesidad, una mejor comunicaci6n y un servicio m6s r6pido bajo lost6rminos
de su garant[a, mambi6n puede enviar su tarjeta de registro pre-impresa que se incluye en el material de
embalaje.
 Loading...