

GE Appliances JGB850, CGS990, PGB995 Owner's Manual And Installation Instructions
GEAppliances.com
L9
®l
0
U
0
09
Safety Instructions ..... 2-s
Operuting Instructions
Aluminum Foil................. 11
Clock and Timer ............... 14
Oven ....................... 9-28
Baking and Roasting ......... 11
Broiling, Broiling Guide....... 13
Control Lockout.............. 22
Convection ............... 17-21
Lights ....................... 10
Oven Control ................. 9
Power Outage ............ 10, 14
Preheating .................. 11
Probe.................... 16, 19,
Racks .................... 25,3S
Sabbath Feature ............. 24
Self-Cleaning ............. 27, 28
Special Features .......... 22, 23
Thermostat Adjustment ...... 26
Timed Baking
and Roasting ................ 15
Timed Convection Baking .20, 21
Vent......................... 10
Surface Cooking ............. 6-8
Griddle ....................... 8
Installation
Instructions ........... 38-48
Air Adjustment ............. 47, 48
Anti-Tip Device................ 48
Assemble Surface Burners ..... 46
Checking Burner
Ignition ....................... 47
Connecting the Range
to Gas .................... 42-44
Dimensions and Clearances ... 40
Electrical Connections ......... 45
Leveling the Range............ 48
LP ............................ 41
Troubleshooting
Tips ..................... 49-52
Accessories ............... s3
Consumer Support
Consumer Support ... Back Cover
Warranty for Customers
in Canada .................... 55
Warranty for Customers
in the U.S.A................... 54
JGB850
JGB870
PGB995
CGS990
For a Spanish version
of this manual,
visit our Website at
GEAppliances.com.
Para consultar una
version en espafiol
de este manual de
instrucciones, visite
nuestro sitio de internet
GEAppliances.com.
In Canada contact us at:
www. GEAppliances.ca
Cure and Cleaning
Burner Assembly .............. :30
Burner Grates .............. 31, :32
Control Panel and Knobs ...... 33
Cooktop ...................... 33
Door ....................... 34, 36
Griddle........................ 31
Oven Bottom .................. 34
Oven Light Replacement ...... 37
Oven Vents ................... 33
Racks......................... 35
Self-Cleaning ............... 27, 28
Stainless Steel Surfaces ....... 36
Write the model end serial
numbers here:
Model #
Serial #
You con find them on a label under
the manifold above the upper oven
door.
49-85181-3 08-12 GE
IMPORTANT SAFETY INFORMATION.
READ ALL INSTRUCTIONS BEFORE USING.
IA WARNING I If the information in this manual is not followed exactly, cl fire or explosion may
result, causing property damage, personal injury or death.
- Do not store or use gasoline or other flammable vapors and liquids in the vicinity of this or any other appliance.
- WHAT TO DO IFYOU SMELL GAS
_:_ Do not try to light any appliance.
':, Do not touch any electrical switch; do not use any phone in your building.
':, Immediately call your gas supplier from a neighbor's phone. Follow the gas supplier's instructions.
':, If you cannot reach your gas supplier, call the fire department.
- Installation and service must be performed by a qualified installer, service agency or the gas supplier.
[A WARNING l
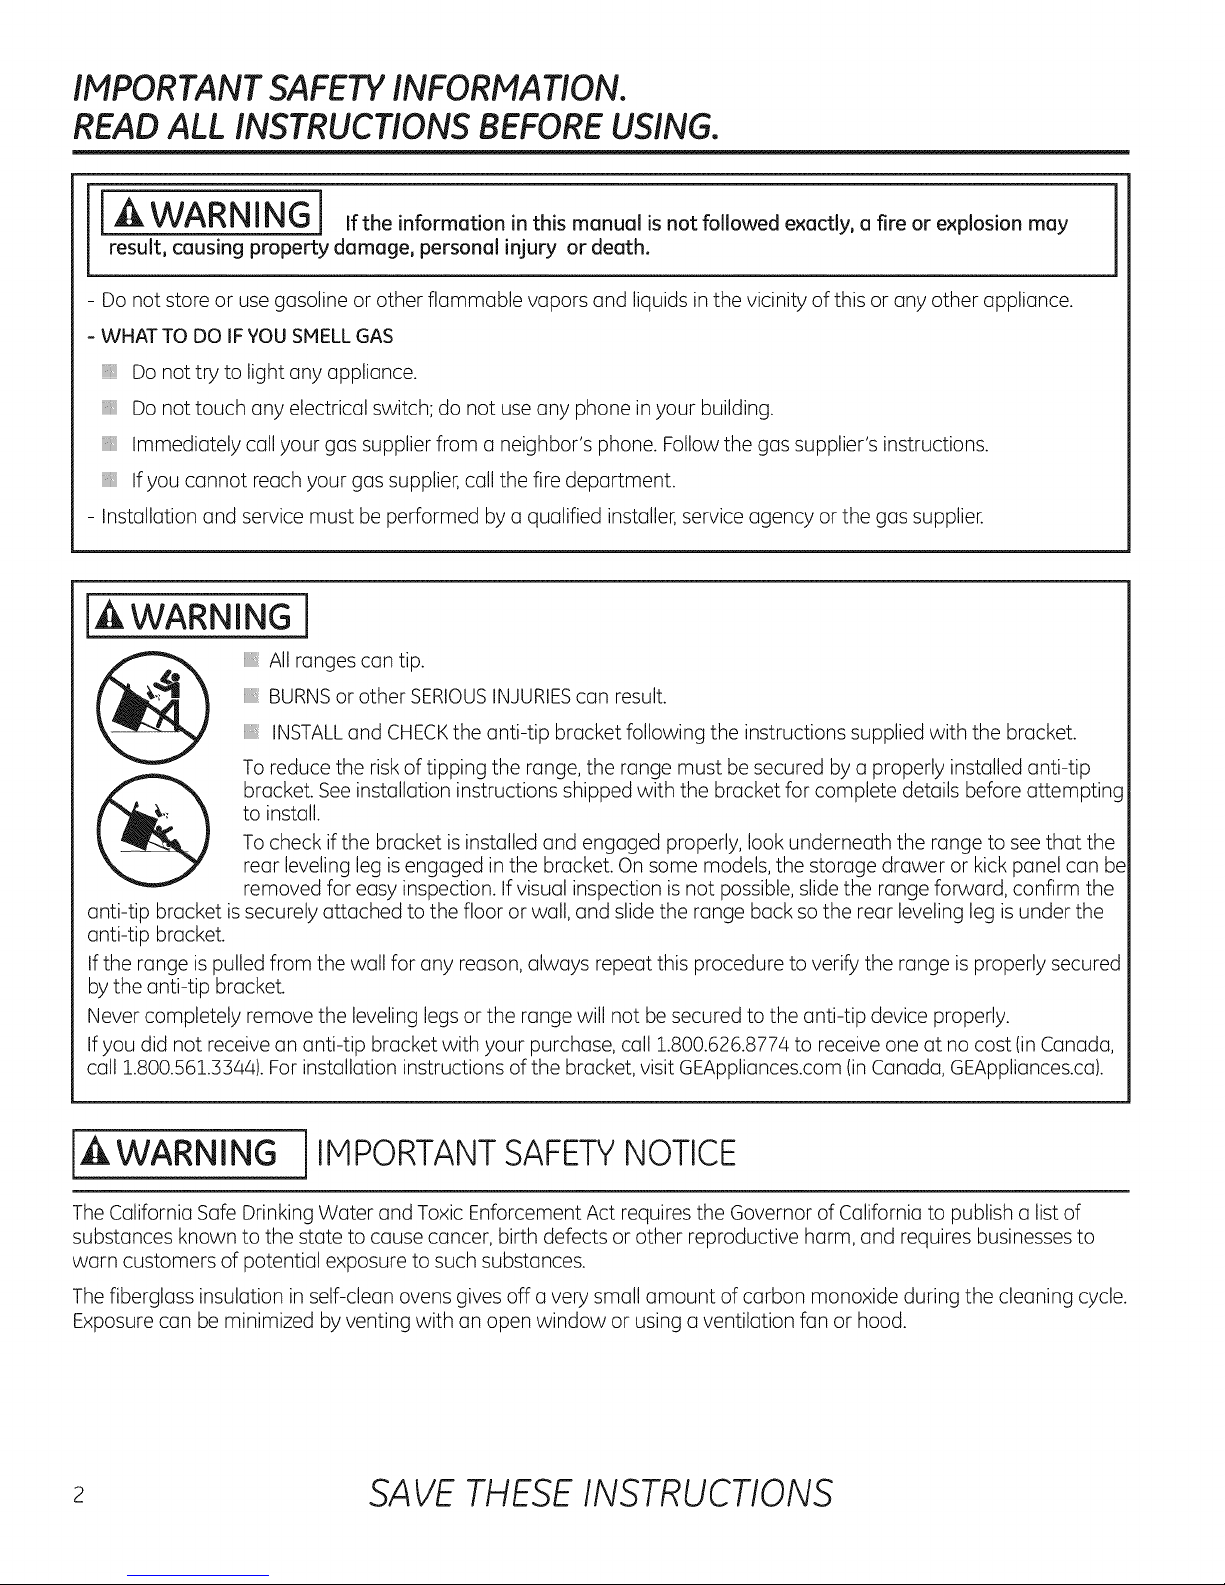
All ranges can tip.
BURNS or other SERIOUSINJURIEScan result.
INSTALLand CHECKthe anti-tip bracket following the instructions supplied with the bracket.
To reduce the risk of tipping the range, the range must be secured by a properly installed anti-tip
bracket. See installation instructions shipped with the bracket for complete details before attempting
to install.
To check if the bracket is installed and engaged properly, look underneath the range to see that the
rear leveling leg is engaged in the bracket. On some models, the storage drawer or kick panel can be
removed for easy inspection. If visual inspection is not possible, slide the range forward, confirm the
anti-tip bracket is securely attached to the floor or wall, and slide the range back so the rear leveling leg is under the
anti-tip bracket.
If the range is pulled from the wall for any reason, always repeat this procedure to verify the range is properly secured
by the anti-tip bracket.
Never completely remove the leveling legs or the range will not be secured to the anti-tip device properly.
If you did not receive an anti-tip bracket with your purchase, call 1.800.626.8774 to receive one at no cost (in Canada,
call 1.800.561.3344). For installation instructions of the bracket, visit GEAppliances.com (in Canada, GEAppliances.ca).
[ WARNING ]IMPORTANT SAFETYNOTICE
The California Safe Drinking Water and Toxic Enforcement Act requires the Governor of California to publish a list of
substances known to the state to cause cancer, birth defects or other reproductive harm, and requires businesses to
warn customers of potential exposure to such substances.
The fiberglass insulation in self-clean ovens gives off a very small amount of carbon monoxide during the cleaning cycle.
Exposure can be minimized by venting with an open window or using a ventilation fan or hood.
2 SAVE THESE INSTRUCTIONS
IMPORTANT SAFETY INFORMATION.
READ ALL INSTRUCTIONS BEFORE USING. GEApp,o,,cesco,,
IAWARNING ]GENERAL SAFETY INSTRUCTIONS
iiiiiil
Do not leave children alone or unattended in an
WARNING i
NEVER use thisapplianceas a space heaterto heat
orwarm the room. Doing so may resultincarbon
monoxide poisoningand overheatingofthe oven.
Use this appliance for its intended purpose as described
in this owner's manual.
area where an appliance is in use. They should never
be allowed to climb, sit or stand on any part of the
appliance.
iiiiiiili_
Do not store items of interest to children above a range
or on the backguard of a range-children climbing on
the range to reach items could be seriously injured.
Have yaur range installed and praperly grounded by
a qualified installer in accordance with the pravided
installation instructians. Any adjustment and service
should be perfarmed only by o qualified gas range
installers or service technicians. Do not attempt to repair }
or replace any part of your range unless it is specifically
recammended in this manual.
*:,Your range is shipped from the factory set for use
with natural gas. It can be converted for use with LP
gas. If required, thse adjustments must be made by a
qualified technician in accordance with the installatoin
instructians and local codes. The agency performing this
work assumes responsibility for the canversion.
i Have the installer show you the location of the range
gas shut-aff valve and how to turn it off if necessary.
Plug your range inta a 120-volt grounded outlet anly. Do
not remave the raund grounding prong from the plug.
If in daubt about the graunding of the hame electrical
system, it is your responsibility and obligation to have an
ungrounded outlet replaced with a properly grounded,
three prong autlet in accordance with the Notional
Electrical Cade. Do not use on extension card with this
appliance.
Before performing any service, unplug the range
or disconnect the pawer supply at the hausehold
distribution panel by removing the fuse or switching off
the circuit breaker.
Be sure all packing materials are removed from the
range before operating to prevent ignition of these
materials.
Do not allow anyone to climb, stand or hang on the
oven doar, drawer or cooktop. They could damage the
range or tip it over causing severe injury or death.
Never block the vents (air openings) of the range. They
provide the air inlets and outlets that ore necessary for
the range to operate properly with carrect combustion.
Air openings are located at the rear of the cooktop,
at the top and battam of the oven doar, and at the
bottomof the range under the warming drawer, lower
oven drawer or kick panel.
iiiil}i
Use anly dry pot halders-moist or damp pot holders on
hot surfaces may result in burns from steam. Do not let
pot holders touch surface burners, burner grate, or oven
heating element. Do not use a towel or other bulky cloth
in place of pot holders.
Be careful not to touch hot surfaces of the range.
Potentially hot surfaces include burners, grates, cooktop,
backguard, oven and door interior and crevices around
the oven door.
Do not heat unopened food containers. Pressure could
build up and the container could burst, causing an
injury.
iiiil}i
Cook meat and poultry thoroughly-meat to at least an
internal temperature of 160°F and poultry to at least
an internal temperature of 180°F. Cooking to these
temperatures usually protects against foodborne illness.
*:, Avoid scratching or impacting glass doars, cooktops or
contral panels. Doing so may lead to glass breakage. Do
not caok on a product with broken glass. Shock, fire or
cuts may occur.
SAVE THESE INSTRUCTIONS s

IMPORTANT SAFETY INFORMATION.
READ ALL INSTRUCTIONS BEFORE USING.
iA WARNING iKEEP FLAMMABLE MATERIALS AWAY FROM THE RANGE
Do not store or use flammable materials in an oven or
near the cooktop, including paper, plastic, pot holders,
linens, wall coverings, curtains, drapes and gasoline or
other flammable vapors and liquids.
Never wear loose-fitting or hanging garments while
using the appliance. Avoid storing commonly used items
in cabinetes above the range and be careful when
reaching over the range. Clothing in close proximity to
burners or hot surfaces may ignite causing severe burns.
iiiiiil
Do not let cooking grease or other flammable materials
accumulate in or near the range. Grease in the oven or
on the cooktop may ignite.
iiiiiiili_
Clean ventilating hoods frequently. Grease should not
be allowed to accumulate on the hood or filter.
iA WARNING iINTHE EVENT OF A FIRE,TAKE THE FOLLOWING STEPS
TO PREVENT INJURYAND FIRESPREADING:
Do not use water on grease fires. Never pick up
a flaming pan. Turn the controls off. Smother a
flaming pan on a surface burner by covering the pan
completely with a well-fitting lid, cookie sheet or flat
tray. If necessary, use a multi-purpose dry chemical or
foam-type fire extinguisher.
If there is a fire in the oven during baking, turn the oven
off and keep the door closed until the fire goes out. If
IA WARNING ICOOKTOP SAFETY INSTRUCTIONS
necessary, use a multi-purpose dry chemical or foam
type fire extinguisher.
iiiiiil
If there is a fire in the oven during self-clean, turn the
oven off and wait for the fire to go out. Do not force
the door open. Introduction of fresh air at self-clean
temperatures may lead to a burst of flame from the
oven. Failure to follow this instruction may result in
severe burns.
Never leave the surface burners unattended at medium
or high heat settings. Foods, especially oily foods, may
ignite resulting in fire that could spread to surrounding
cabinets.
*:, Never leave oil unattended while frying. If allowed to
heat beyond its smoking point, oil may ignite resulting
in fire that may spread to surrounding cabinets. Use a
deep fat thermometer whenever possible to monitor oil
temperature.
To avoid oil spillover and fire, use a minimum amount of
oil when shallow pan-frying and avoid cooking frozen
foods with excessive amounts of ice.
_:, Use proper pan size and avoid pans that are unstable
or easily tipped. Select cookware that is matched to the
size of the burner. Burner flames should be adjusted so
that they do not extend beyond the bottom of the pan.
Excessive flame may be hazardous.
Always use the LITEposition when igniting the top
burners and make sure the burners have ignited.
When using glass/ceramic cookware, makesure it is
suitable for cooktop service;others may break because
of sudden change intemperature.
To minimize the possibility of burns, ignition of
flammable materials and spillage, the handle of a
container should be turned toward the center of the
range without extending over nearby burners.
When preparing flaming foods under a hood, turn the
fan on.
Do not use a wok with a round metal support ring. the
ring may trap heat and block air to the burner resulting
in a carbon monoxide hazard.
iiiil}i
Do not attempt to lift the cooktop. Doing so may
damage the gas tubing to the surface burners resulting
in a gas leak and risk of fire.
iiiiiiili_
When disabling Gas/Control Lockout (on some models),
make sure the surface controls are set to the OFF
position. This will prevent unintended gas flow from the
burners.
iiiil}i
Do not use aluminum foil to cover the grates or line
any part of the cooktop. Doing so may result in carbon
monoxide poisoning, overheating of the cooktop
surfaces, or a potential fire hazard.
4 SAVE THESE INSTRUCTIONS
IMPORTANT SAFETY INFORMATION.
READ ALL INSTRUCTIONS BEFORE USING. GEApp,o,,cesco,,,
iA WARNING jOVEN SAFETYINSTRUCTIONS
iiiil}i
lainWARN IN_t'_-INEVER coverany slots,holes,or
passages in the oven bottom or cover an entire rack with
materials such as aluminum foil. Doing so blocks air flow
through the oven and may cause carbon monixide
poisoning. Aluminum foil linings may also trap heat, causing
6 fire hazard.
Stand away from the range when opening the oven
door. Hot air or steam which escapes can cause burns }
to hands, face and/or eyes.
Keep the oven free from grease buildup. Grease in the
oven may ignite. }
} Place oven racks in desired location while oven is cool.
If rack must be moved while oven is hot, be careful to }
avoid touching hot surfaces.
Pull the oven rack to the stop-lock position when
loading and unloading food from the oven. This helps
prevent burns from touching hot surfaces of the door
and oven walls.
iiiiiiili_
Do not leave items such as paper, cooking utensils or
food in the oven when not in use. Items stored in an
oven can ignite.
Do not leave items on the cooktop near the oven vent
which is in the center of the backguard. Items may
overheat resulting in a risk of fire or burns.
When using cooking or roasting bags in the oven, follow
the manufacturer's directions.
Never broil with door open. Open-door broiling is not
permitted due to overheating of control knobs.
iA WARNING iSELF-CLEANING OVEN SAFETY INSTRUCTIONS
The self-cleaning feature operates the oven at temperatures high enough to burn away food soils in the oven.
Follow these instructions for safe operation.
Before operating the self-clean cycle, remove pans,
shiny metal oven racks and other utensils from the
oven. Only porcelain-coated oven racks may be left in
the oven. Do not use self-clean to clean other parts, }
such as grates.
Beforeoperating the self-clean cycle,wipe grease and
food soilsfrom the oven.Excessiveamount of grease
may ignite leading to smoke damage to your home.
If the self-cleaning mode malfunctions, turn the oven off
and disconnect the power supply. Have it serviced by a
qualified technician.
Do not clean the door gasket. The door gasket is
essential for a good seal. Care should be taken not to
rub, damage or move the gasket.
iiiiiil
Do not use oven cleaners. No commercial oven cleaner
or oven liner protective coating of any kind should be
used in or around any part of the oven.
iAWARNING l WARMING DRAWER/LOWER OVEN DRAWER SAFETY
INSTRUCTIONS (Somemodels)
The purpose of the warming drawer is to hold hot
cooked foods at serving temperature. Bacteria will grow
in food while it is below 140°F. Do not put cold food in
warming drawer. Do not heat food for more than
2 hours. Failure to follow these instructions may result in
foodborne illness.
Do not leave paper products, plastics, canned food or
combustible materials in the drawer. They may ignite.
Usecare when opening the drawer. Openthe drawer a
crack and let hot air or steam escape before removing
or replacing food. Hot air or steam that escapes can
cause burnsto hands,faceand/or eyes.
Do not use aluminum foil to line the warming drawer.
Foil is an excellent heat insulator and will trap heat
beneath it.This will upset the performance of the
drawer and potentially cause a fire hazard.
Do not touch the heating element or the interior surface
of the drawer. These surfaces may be hot enough to
cause burns.
SAVE THESE INSTRUCTIONS s
Using the gas surface burners.
Throughout this manual, features and appearance may vary from your model.
After Lighting a Gas Burner
Donot operate the burner for an extended
period of time without cookware on the
grate.Thefinish on the grate may chip
without cookware to absorb the heat.
Besure the burners and grates are cool
beforeyou placeyour hand, a pot holder,
cleaning cloths or other materials on them.
Youwill hear a little clicking noise-the sound
of the electric spark igniting the burner.
Turnthe knob to adjust the flame size. Ifthe
knob stays at LITE,it will continue to click.
When one burner isturned to LITE, allthe
burners spark. Donot attempt to disassemble
or clean around any burner while another
burner is on. An electric shockmay result,which
could cause you to knock over hot cookware.
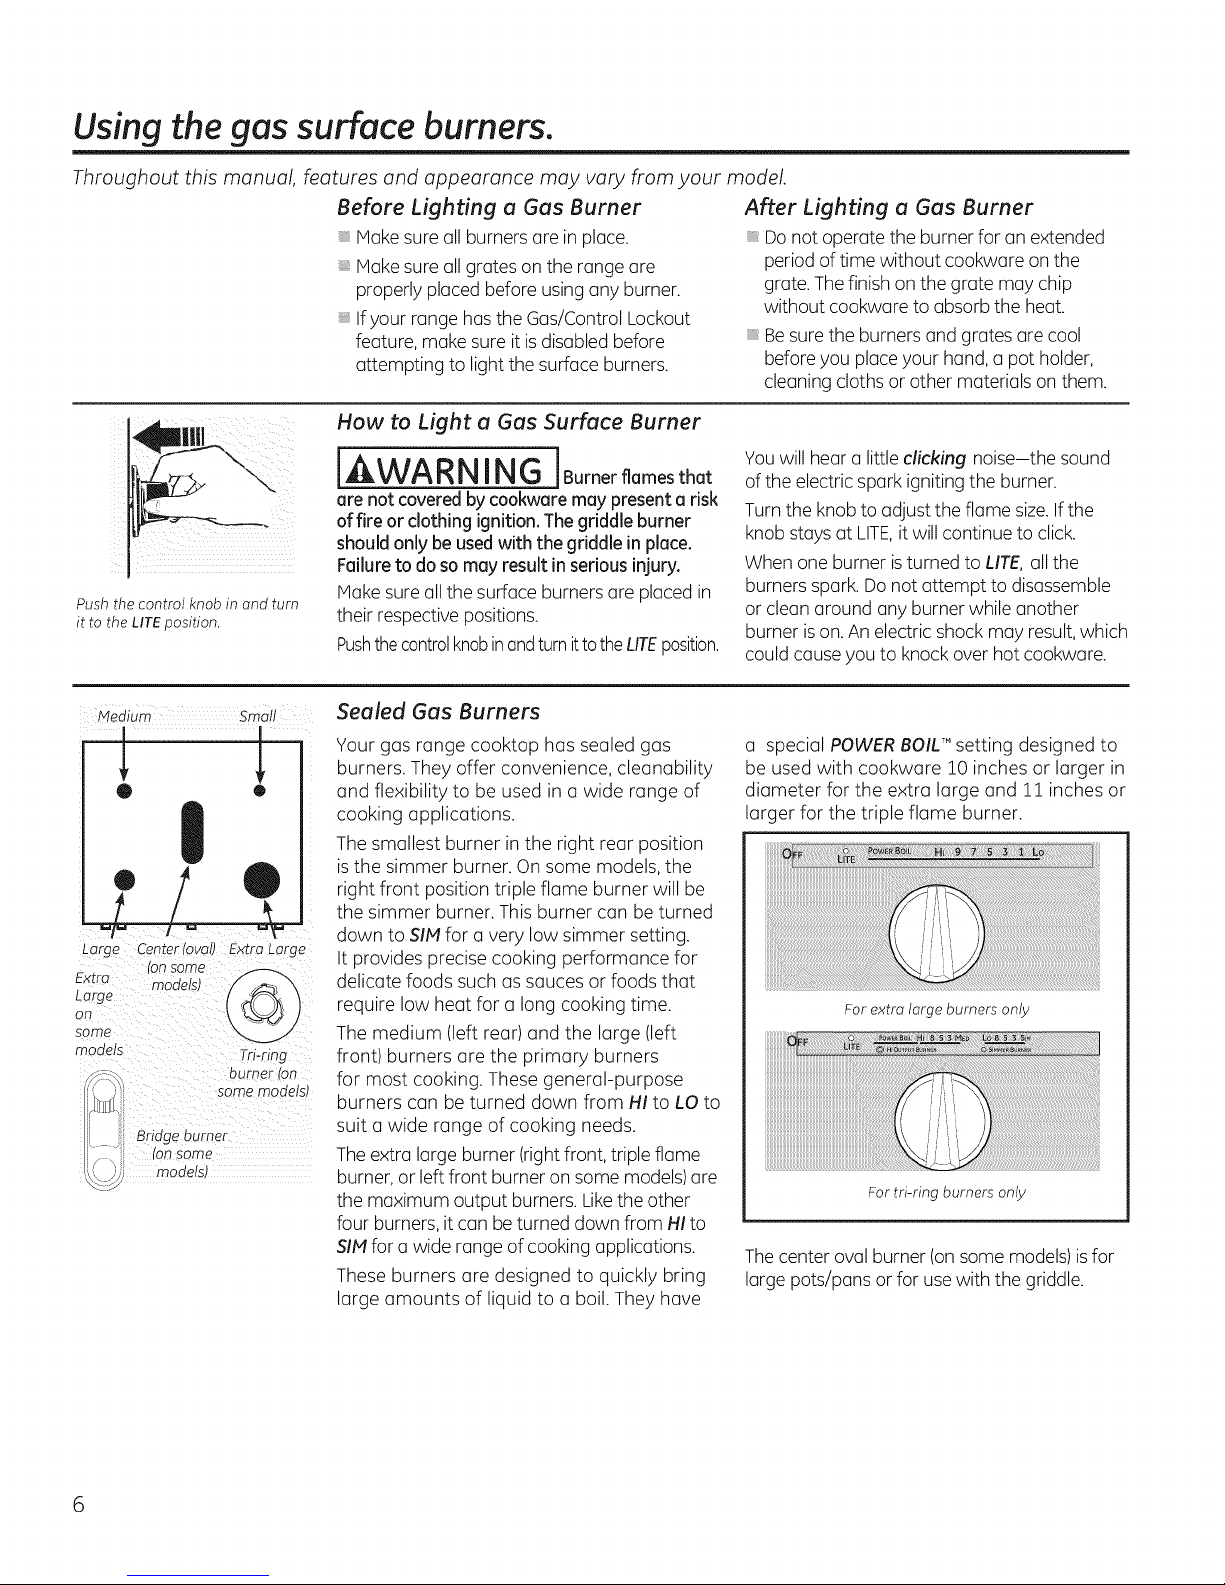
Push the control knob in and turn
it to the LITEposition.
Before Lighting a Gas Burner
Make sure all burners are in place.
Make sure all grates on the range are
properly placed before using any burner.
Ifyour range hasthe Gas/Control Lockout
feature, make sure it isdisabled before
attempting to light the surface burners.
How to Light a Gas Surface Burner
[AWARNING ] Burner flames that
are not covered bycookware may present a risk
of fire or clothing ignition. Thegriddle burner
should only be usedwith the griddle in place.
Failureto do somay result in seriousinjury.
Make sure all the surface burners are placed in
their respective positions.
PushthecontrolknobinandturnittotheLife position.
_eclium Small
I
Large Center (oval) Extra Large
Extra
Large (on
some
moaels Tri-ring
on some
moaelsl
Px- burner _an
]]]][[L some modelsJ
Bridge burner
(on same
/ \,
¢ moaels)
Sealed Gas Burners
Your gas range cooktop has sealed gas
burners. They offer convenience, cleanability
and flexibility to be used in a wide range of
cooking applications.
The smallest burner in the right rear position
isthe simmer burner. On some models, the
right front position triple flame burner will be
the simmer burner. Thisburner can be turned
down to SIM for a very low simmer setting.
It provides precise cooking performance for
delicate foods such as sauces or foods that
require low heat for a long cooking time.
The medium (left rear) and the large (left
front) burners are the primary burners
for most cooking. These general-purpose
burners can be turned down from HI to LO to
suit a wide range of cooking needs.
Theextra large burner (right front, triple flame
burner, or left front burner on some models)are
the maximum output burners. Likethe other
four burners, itcan be turned down from Ill to
SIM for a wide range of cooking applications.
These burners are designed to quickly bring
large amounts of liquid to a boil.They have
a special POWER BOILTM setting designed to
be used with cookware 10 inches or larger in
diameter for the extra large and !! inches or
larger for the triple flame burner.
For extra large burners only
iiiiiiiiiiiiiiiiiiiiiiiiiiiiii'i i iii iTM
For tri-ring burners only
Thecenter oval burner (onsome models)is for
large pots/pans or for usewith the griddle.
How to Select Flame Size
GEAppliances.com
[AWARNING iFlamesthatare
not covered by cookware may present a risk
of burns or clothing igniton. Never let flames
extend beyond the sides of the cookware.
Watch the flame, not the knob, asyou adjust
heat. When fast heating is desired,the flame
Top-of-Range Cookware
Aluminum: Medium-weight cookwure is
recommended because it heats quickly
and evenly. Most foods brown evenly in an
aluminum skillet. Use saucepans with tight-
fitting lids when cooking with minimum
(]mounts of water.
Cost-Iron: If heated slowly, most skillets will
give satisfactory results.
Enamelware: Under some conditions, the
enamel of some cookwure may melt. Follow
cookwure manufacturer's recommendations
for cooking methods.
Gloss: There (]re two types of glass
cookware-those for oven use only and
sizeon u gas burner should match the
cookware you are using.
Flumeslarger than the bottom of the cookware
will not result infaster heating and may be
hazardous.
those for top-of-range cooking (saucepans,
coffee and teapots). Glass conducts heat
very slowly.
Heatproof Gloss Ceramic: Can be used for
either surface or oven cooking. It conducts
heat very slowly and cools very slowly. Check
cookware manufacturer's directions to be
sure it can be used on gas ranges.
Stainless Steel: This metal alone has poor
heating properties and is usually combined
with copper, aluminum or other metals for
improved heat distribution. Combination
metal skillets usually work satisfactorily
if they are used with medium heat us the
manufacturer recommends.
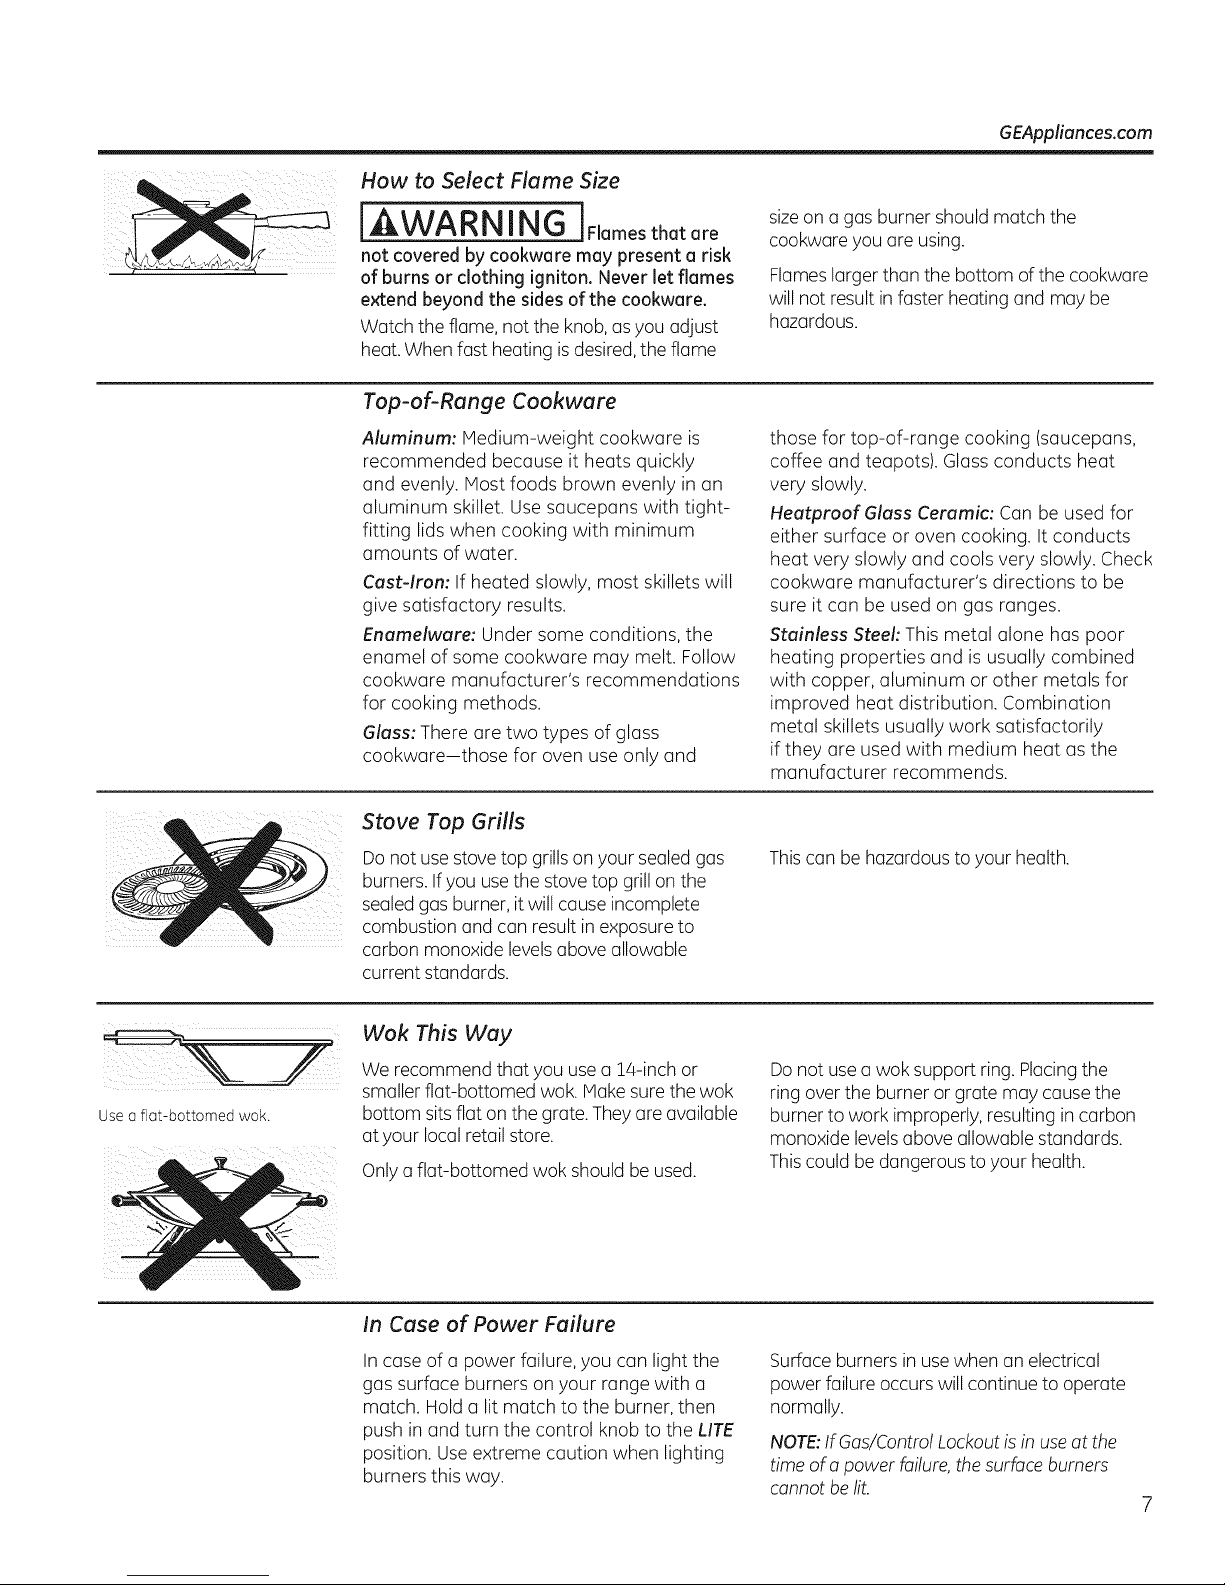
Use (] f](]t-bottomed wok.
Stove Top Grills
Do not usestove top grillson your sealedgas
burners. Ifyou use the stovetop grill on the
sealedgas burner, it will cause incomplete
combustion and can result in exposure to
carbon monoxide levelsabove allowable
current standards.
Wok This Way
We recommend that you use a 14-inch or
smaller flat-bottomed wok. Make sure the wok
bottom sits flat on the grate. They are available
at your local retail store.
Onlya flat-bottomed wok should be used.
In Case of Power Failure
In case of a power failure, you can light the
gas surface burners on your range with a
match. Hold a lit match to the burner, then
push in and turn the control knob to the LITE
position. Use extreme caution when lighting
burners this way.
Thiscan be hazardous to your health.
Donot usea wok support ring. Placingthe
ring over the burner or grate may causethe
burner to work improperly, resulting in carbon
monoxide levelsabove allowable standards.
Thiscould be dangerous to your health.
Surface burners in usewhen an electrical
power failure occurs will continue to operate
normally.
NOTE:If Gas/Control Lockout is in use at the
time of a power failure,the surface burners
cannot be lit.
Using the griddle, consomemode sl
Your nonstick coated griddle or preseasoned
griddle (on some models)provides an
extra-large cooking surface for meats,
pancakes or other food usually prepared in a
frying pan or skillet.
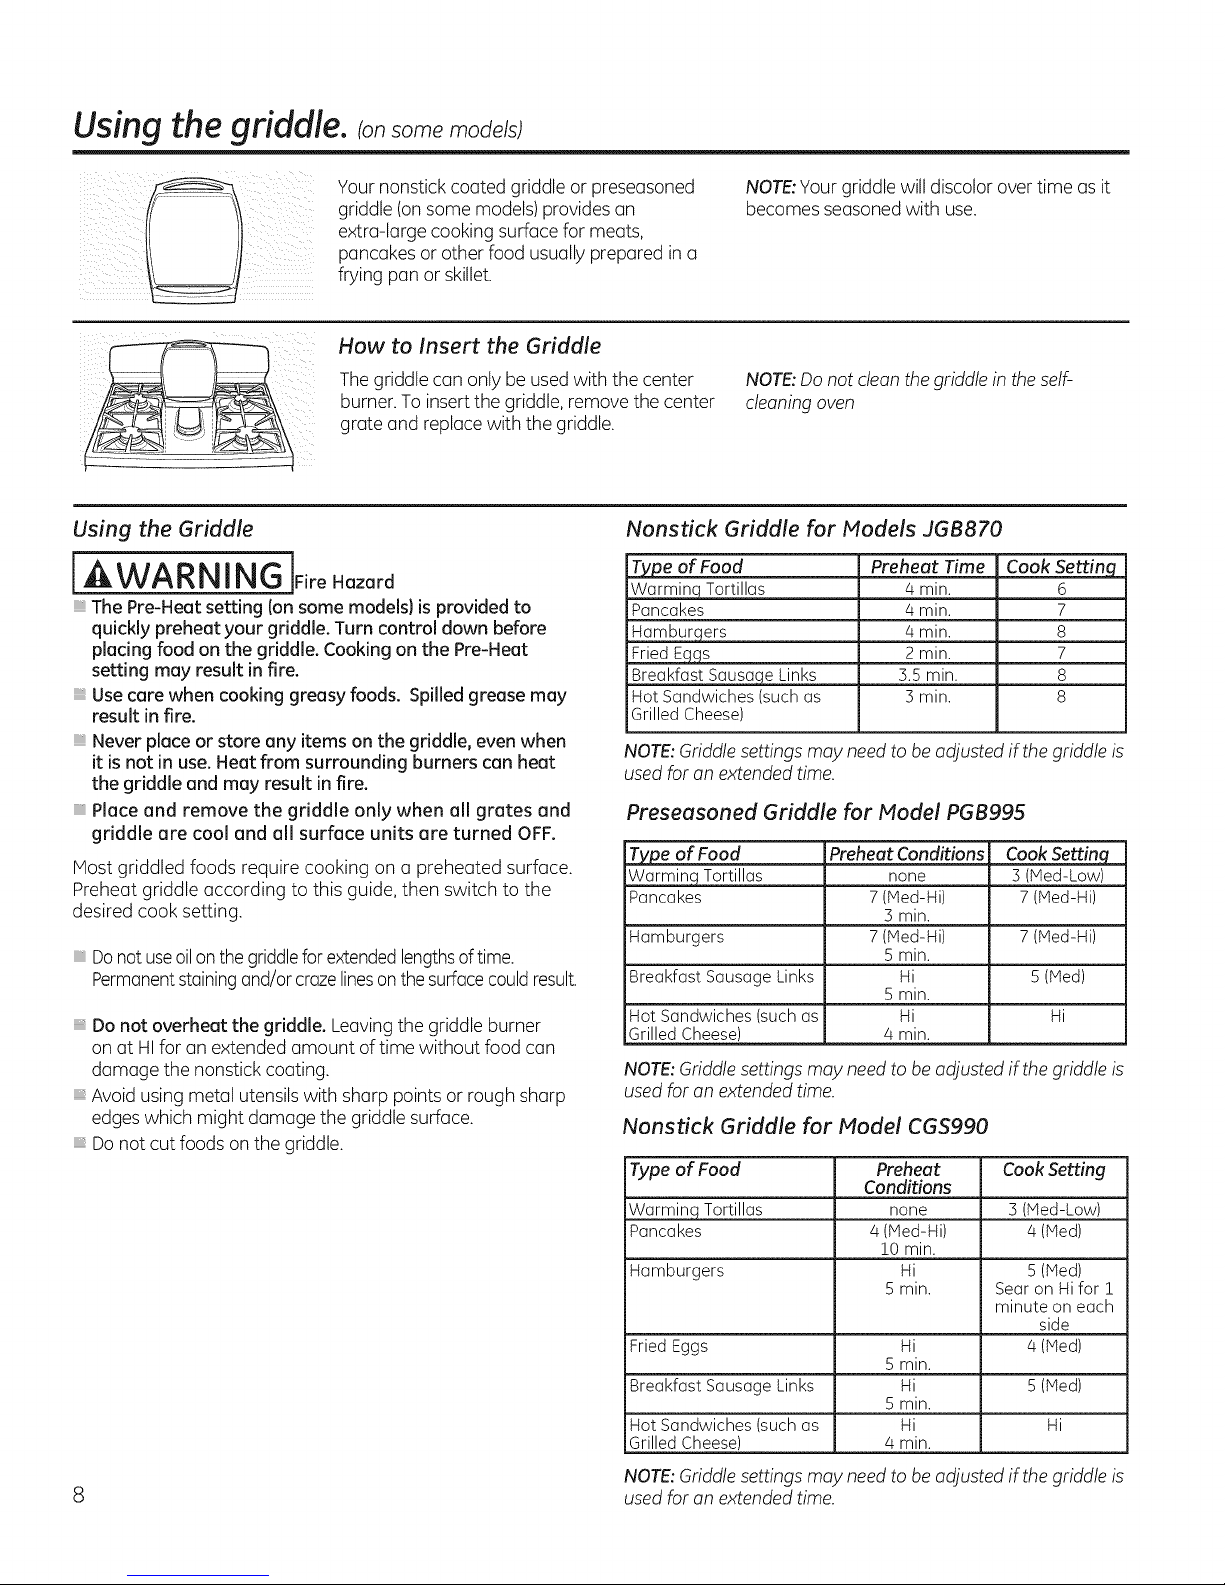
How to Insert the Griddle
Thegriddle can only be usedwith the center
burner.To insertthe griddle, removethe center
grate and replace with the griddle.
Using the Griddle
[AWARNING jF,re.ozord
The Pre-Heat setting (onsome models) is provided to
quickly preheat your griddle. Turn control down before
placing food on the griddle. Cooking on the Pre-Heat
setting may result in fire.
Usecare when cooking greasy foods. Spilled grease may
result in fire.
Never place or store any items on the griddle, even when
it is not in use. Heat from surrounding burners can heat
the griddle and may result in fire.
Place and remove the griddle only when all grates end
griddle are cool and ell surface units ere turned OFF.
Host griddled foods require cooking on a preheated surface.
Preheat griddle according to this guide, then switch to the
desired cook setting.
Donot useoilonthe griddlefor extendedlengthsoftime.
Permanentstainingand/orcrazelinesonthe surfacecouldresult.
Do not overheat the griddle. Leavingthe griddle burner
on at HIfor an extended amount of time without food can
damage the nonstick coating.
Avoid using metal utensils with sharp points or rough sharp
edgeswhich might damage the griddle surface.
Donot cut foods on the griddle.
NOTE:Yourgriddle will discolor over time as it
becomes seasoned with use.
NOTE:Do not clean the griddle in theself-
cleaning oven
Nonstick Griddle for Models JGB870
Type of Food Preheat Time Cook Setting
Warmiqq Torti!!as 4 min. 6
Pancakes 4 min. 7
Hamburgers /4min. 8
Fried Eggs 2 min. 7
Breakfast Sausage Links 55 min. 8
Hot Sandwiches (such as 3 min. 8
Grilled Cheese)
NOTE:Griddle settings may need to be adjusted ifthe griddle is
used for an extended time.
Preseusoned Griddle for Model PGB995
Type of Food Preheat Conditions Cook Settinq
Warming Tortillas none 5 (led-Low)
Pancakes 7 (Hed-Hi) 7 (Hed-Hi)
Hamburgers 7 (Hed-Hi) 7 (Hed-Hi)
Breakfast Sausage Links Hi 5 (iVied)
Hot Sandwiches (such as Hi Hi
Grilled Cheese) /4 min.
S min.
5 min.
5 min.
NOTE:Griddle settings may need to be adjusted ifthe griddle is
used for an extended time.
Nonstick Griddle for Model CGS990
Type of Food Preheat Cook Setting
Warming Tortillas none 5 (He&Low)
Pancakes 4 (Me&Hi) 4 (iVied)
Hamburgers Hi 5 (iVied)
Fried Eggs Hi 4 (iVied)
Breakfast Sausage Links Hi 5 (iVied)
Hot Sandwiches (such as Hi Hi
Grilled Cheese) /4min.
Conditions
!0 min.
5 min. Searon Hi for !
minute on each
side
5 min.
5 min.
8 usedfor an extended time.
NOTE:Griddle settings may need to be adjusted ifthe griddle is
Using the lower oven.
(Throughout this manual, features and appearance may vary from your model.)
LOWER OVI
TrueTemp
CONVMgLTI BAKE WARMER :
1
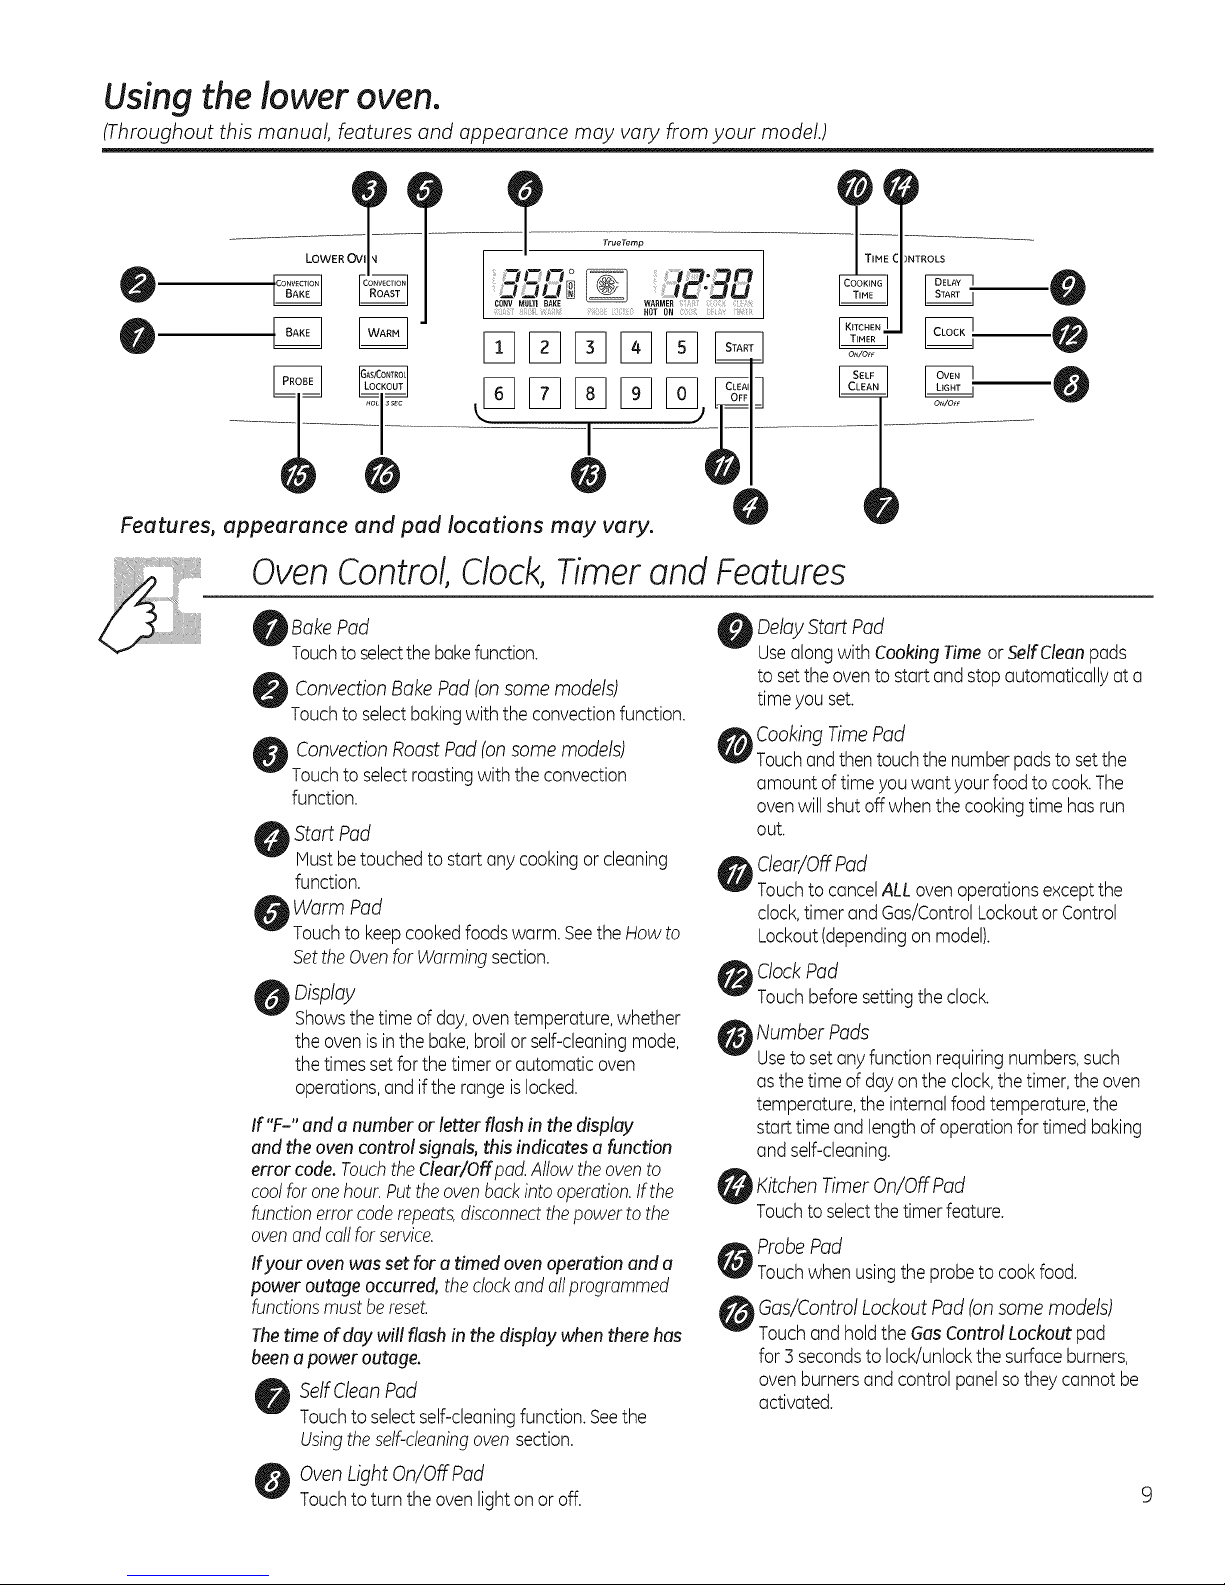
Features, appearance and pad locations may vary.
Oven Control, Clock, Timer and Features
Bake Pad
Touchto selectthebakefunction.
Convection Bake Pad (on some models)
Touchto selectbakingwith the convectionfunction.
Convection Roast Pad (on some models)
Touchto selectroastingwith theconvection
function.
Start Pad
Mustbe touchedto start anycookingor cleaning
function.
Warm Pad
touch to keepcookedfoodswarm. SeetheHow to
Setthe Ovenfor Warmingsection.
_Display
Showsthe time of day,oventemperature,whether
the ovenisinthe bake,broilor self-cleaningmode,
the timessetfor the timer or automatic oven
operations,and ifthe range islocked.
If "F-" and a number or letter flash in the display
and the oven control signals,this indicates a function
error code.TouchtheClear/Offpad. Allow theovento
coolforonehour. Putthe oven backintooperation.Ifthe
functionerrorcoderepeats,disconnectthepower to the
ovenandcall for serdce.
Ifyour oven was set for a timed oven operation and a
power outage occurred, theclockand attprogrammed
functionsmustbereset.
Thetime of day will flash inthe display whenthere has
beena power outage.
SelfClean Pad
Touchto selectself-cleaningfunction. Seethe
Usingtheself-cleaningoven section.
OvenLight On/Off Pad
Touchto turn theoven lighton oroff.
)NTROLS
HOT ON
OtdO_
Delay Start Pad
Usealongwith CookingTime orSelfCleanpads
to setthe ovento startand stop automatically at a
time you set.
Cooking Time Pad
Touchand then touchthe numberpadsto setthe
amount of timeyou want your foodto cook.The
ovenwill shut off when the cookingtime hasrun
out.
Clear/Off Pad
Touchto cancelALLoven operationsexceptthe
clock,timer and Gas/ControlLockoutor Control
Lockout(dependingonmodel).
ClockPad
Touchbeforesettingthe clock.
Number Pads
Useto set any function requiringnumbers,such
asthetime of dayon the clock,thetimer,the oven
temperature,the internalfoodtemperature,the
starttime and lengthofoperationfor timed baking
and self-cleaning.
Kitchen Timer On/Off Pad
Touchto selectthe timerfeature.
Probe Pad
Touchwhen usingtheprobeto cook food.
Gas/Control Lockout Pad (onsome models)
Touchand holdthe GasControl Lockout pad
for 3 secondsto lock/unlockthe surface burners,
ovenburnersand control panelso they cannot be
activated.
Using the ovens.
To avoidpossibleburns,place the racksin the desiredposition beforeyou turn the oven on.
Before you begin...
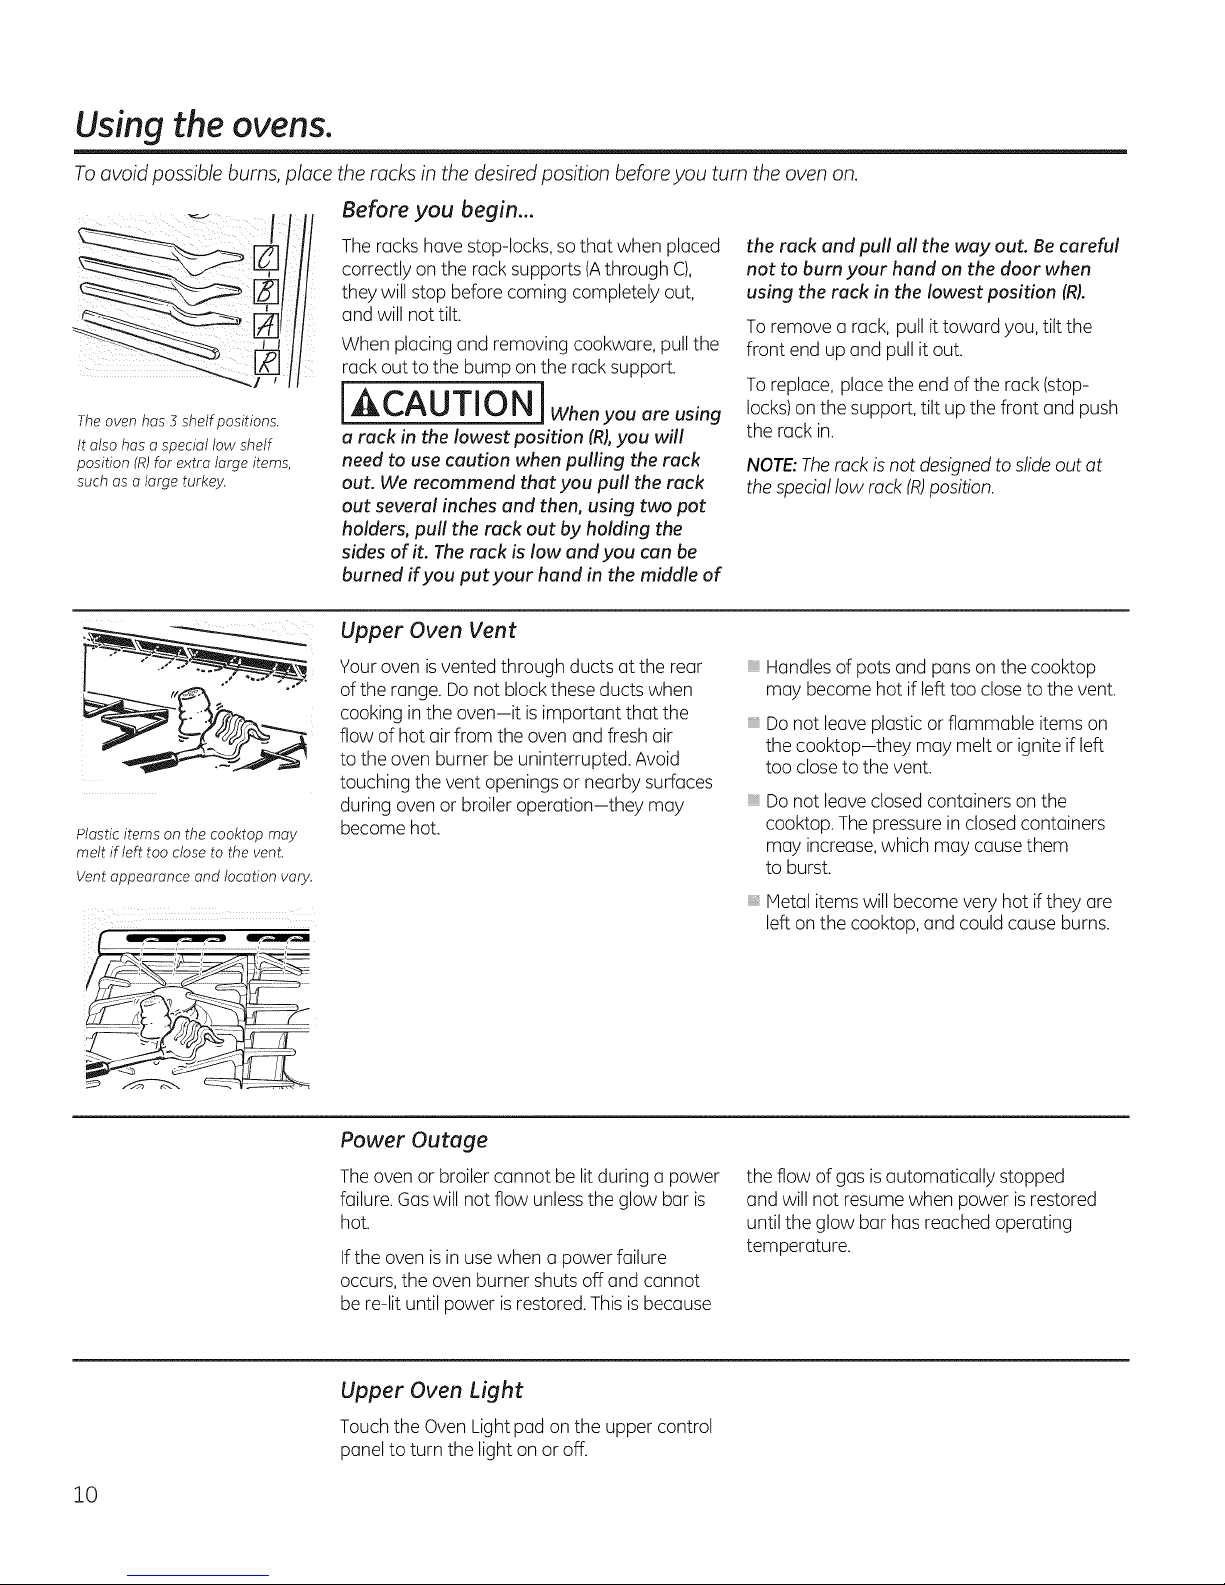
The oven has 3 shdf positions.
It also has a special low shelf
position (R)for extra large items,
such as a large turkey.
Plastic items on the cooktop may
melt if left too close to the vent.
Vent appearance and location vary.
The rackshave stop-locks, sothat when placed
correctly on the rack supports (Athrough C),
they will stop before coming completely out,
and will not tilt.
When placing and removing cookware, pull the
rack out to the bump on the rack support.
j CAUTiON j whenyouareusing
a rack in the lowest position (R),you will
need to use caution when pulling the rack
out. We recommend that you pull the rack
out several inches and then, using two pot
holders, pull the rack out by holding the
sides of it. Therack is low and you can be
burned ifyou put your hand in the middle of
Upper Oven Vent
Your oven is vented through ducts at the rear
of the range. Donot block theseducts when
cooking inthe oven-it isimportant that the
flow of hot air from the oven and fresh air
to the oven burner be uninterrupted. Avoid
touching the vent openings or nearby surfaces
during oven or broiler operation-they may
become hot.
the rack and pull all the way out. Be careful
not to burn your hand on the door when
using the rack in the lowest position (R).
To remove a rack, pull it toward you, tilt the
front end up and pull it out.
To replace, place the end of the rack (stop-
locks)on the support, tilt up the front and push
the rack in.
NOTE:The rack is not designed to slide out at
the special low rack (R)position.
Handlesof pots and pans on the cooktop
may become hot if left too closeto the vent.
Donot leaveplastic or flammable items on
the cooktop-they may melt or ignite if left
too closeto the vent.
Donot leaveclosed containers on the
cooktop. The pressure in closedcontainers
may increase,which may causethem
to burst.
iiiiiiiiiiii_iii
Metal items will become very hot ifthey are
left on the cooktop, and could cause burns.
Power Outage
Theoven or broilercannot be litduring a power
failure. Gas will not flow unlessthe glow bar is
hot.
If the oven is in usewhen a power failure
occurs,the oven burner shuts off and cannot
be re-lit until power isrestored.This isbecause
Upper Oven Light
Touch the OvenLight pad on the upper control
panel to turn the light on or off.
10
the flow of gas isautomatically stopped
and will not resume when power is restored
until the glow bar has reached operating
temperature.
the lower oven. GEAppliances.com
Ifyour model has adoor latch, do not lock the oven door with the latch during baking or roasting. The latch is used for self-
cleaning only.
How to Set the Lower Oven for Baking or Roasting
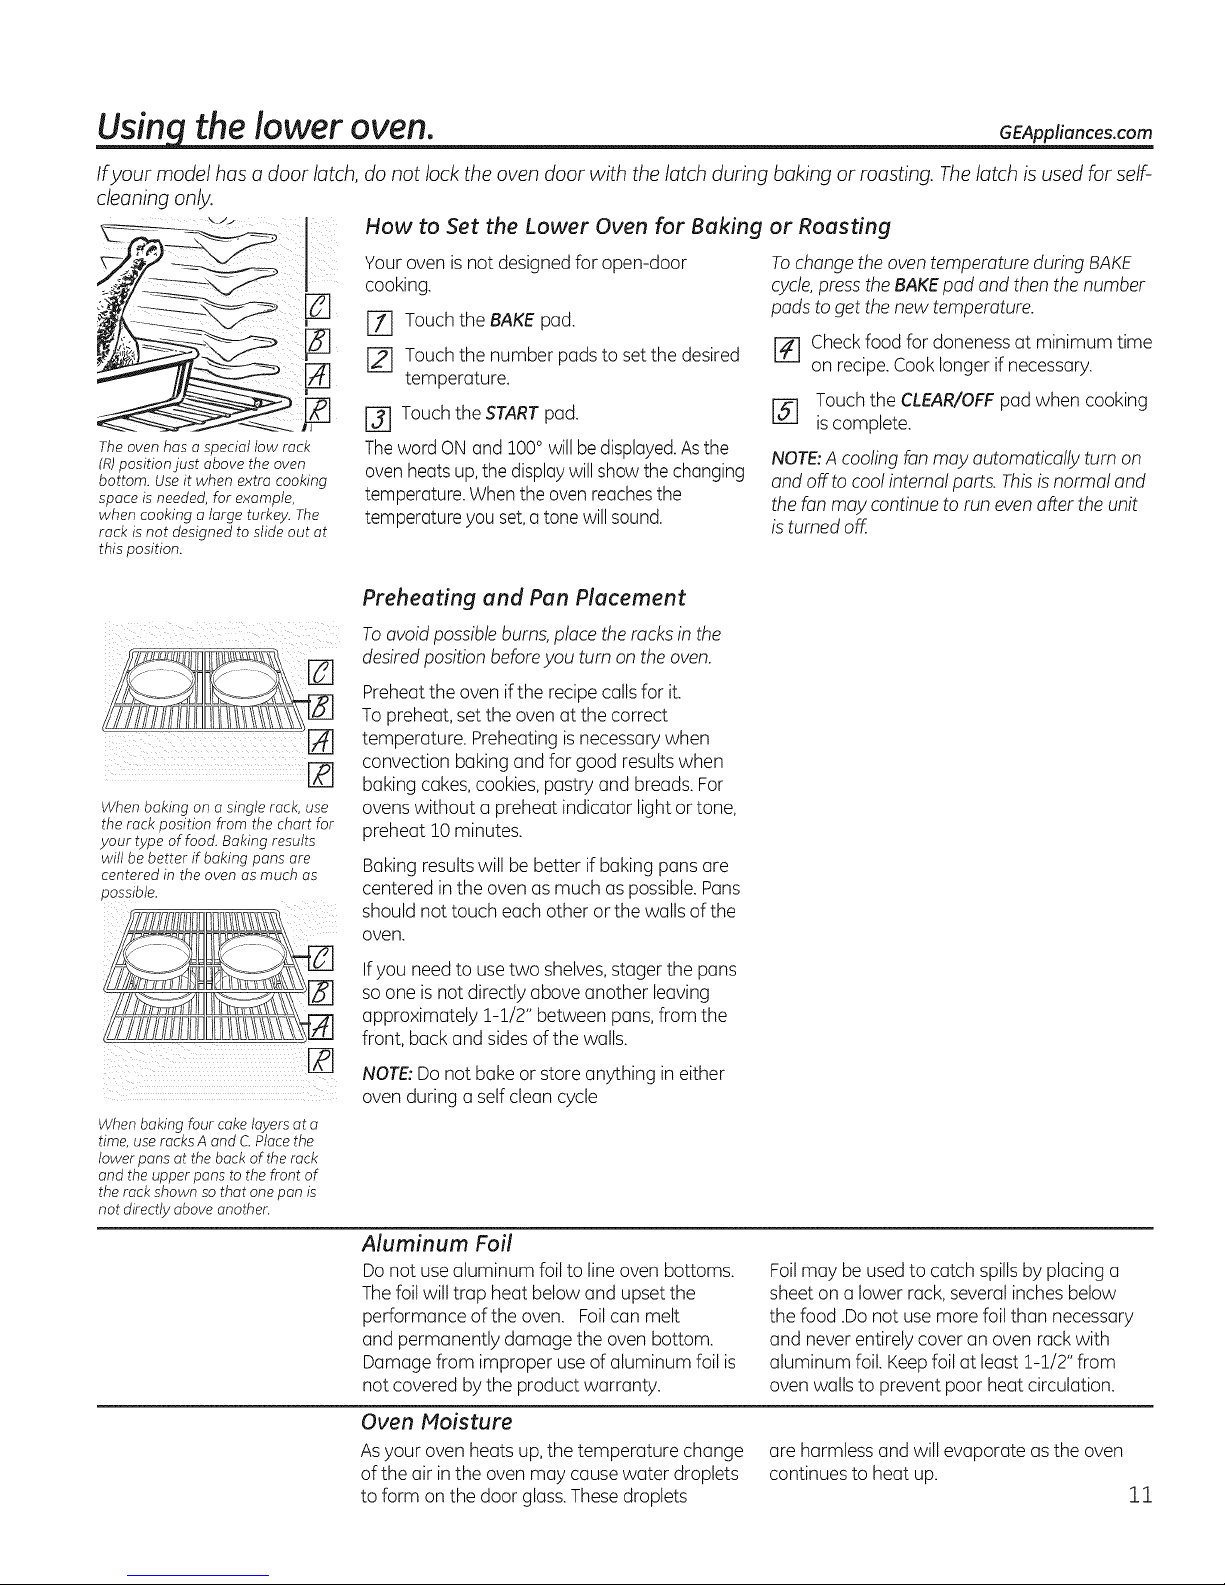
The oven has a special low rack
(R)position just above the oven
bottom. Use it when extra cooking
space is needed, for example,
when cooking a large turkey. The
rack is not designed to slide out at
this position.
ii _ i ii i iI
When baking on a single rack, use
the rack position from the chart for
your type of food. Baking results
will be better if baking pans ore
centered in the oven us much us
possible.
Your oven is not designed for open-door
cooking.
E_ Touchthe BAKEpad.
[] Touch the number padsto set the desired
temperature.
[_ Touch the STARTpad.
Theword ON and 100° willbe displayed.Asthe
oven heatsup,the displaywill show the changing
temperature.Whenthe ovenreachesthe
temperatureyou set,a tone willsound.
Preheating and Pan Placement
To avoid possible burns, place the racks in the
desired position before you turn on the oven.
Preheatthe oven ifthe recipecalls for it.
To preheat, set the ovenat the correct
temperature. Preheatingisnecessary when
convection baking and for good resultswhen
baking cakes,cookies, pastry and breads. For
ovens without a preheat indicator light or tone,
preheat 10 minutes.
Baking resultswill be better if baking pans are
centered in the oven as much as possible. Pans
should not touch each other or the walls of the
oven.
Tochangethe oven temperature during BAKE
cycle,press the BAKEpad and then the number
pads to get the new temperature.
[] Check food for doneness at minimum time
on recipe.Cook longer if necessary.
Touch the CLEAR/OFF pad when cooking
[] is complete.
NOTE:Acooling fan may automatically turn on
and off to cool internalparts. Thisisnormal and
the fan may continue to run even after the unit
isturned off.
When baking four cake layers at a
time, use racks A and C.Place the
Iower pans at the back of the rack
and the upper pans to the front of
the rack shown so that one pan is
not directly above another.
Ifyou need to usetwo shelves,stager the pans
soone is not directly above another leaving
approximately 1-1/2" between pans, from the
front, back and sides of the walls.
NOTE:Do not bake or store anything in either
oven during a self clean cycle
Aluminum Foil
Do not use aluminum foil to line oven bottoms.
The foil willtrap heat below and upset the
performance of the oven. Foil can melt
and permanently damage the oven bottom.
Damage from improper use of aluminum foil is
not covered by the product warranty.
Oven Moisture
As your oven heats up, the temperature change
of the air in the oven may cause water droplets
to form on the door glass. These droplets
Foilmay be usedto catch spills by placing a
sheet on a lower rack,several inches below
the food .Do not use more foilthan necessary
and never entirely cover an oven rack with
aluminum foil. Keepfoil at least !-!/2" from
oven walls to prevent poor heat circulation.
are harmless and will evaporate asthe oven
continues to heat up.
11
Usingthe upper oven.
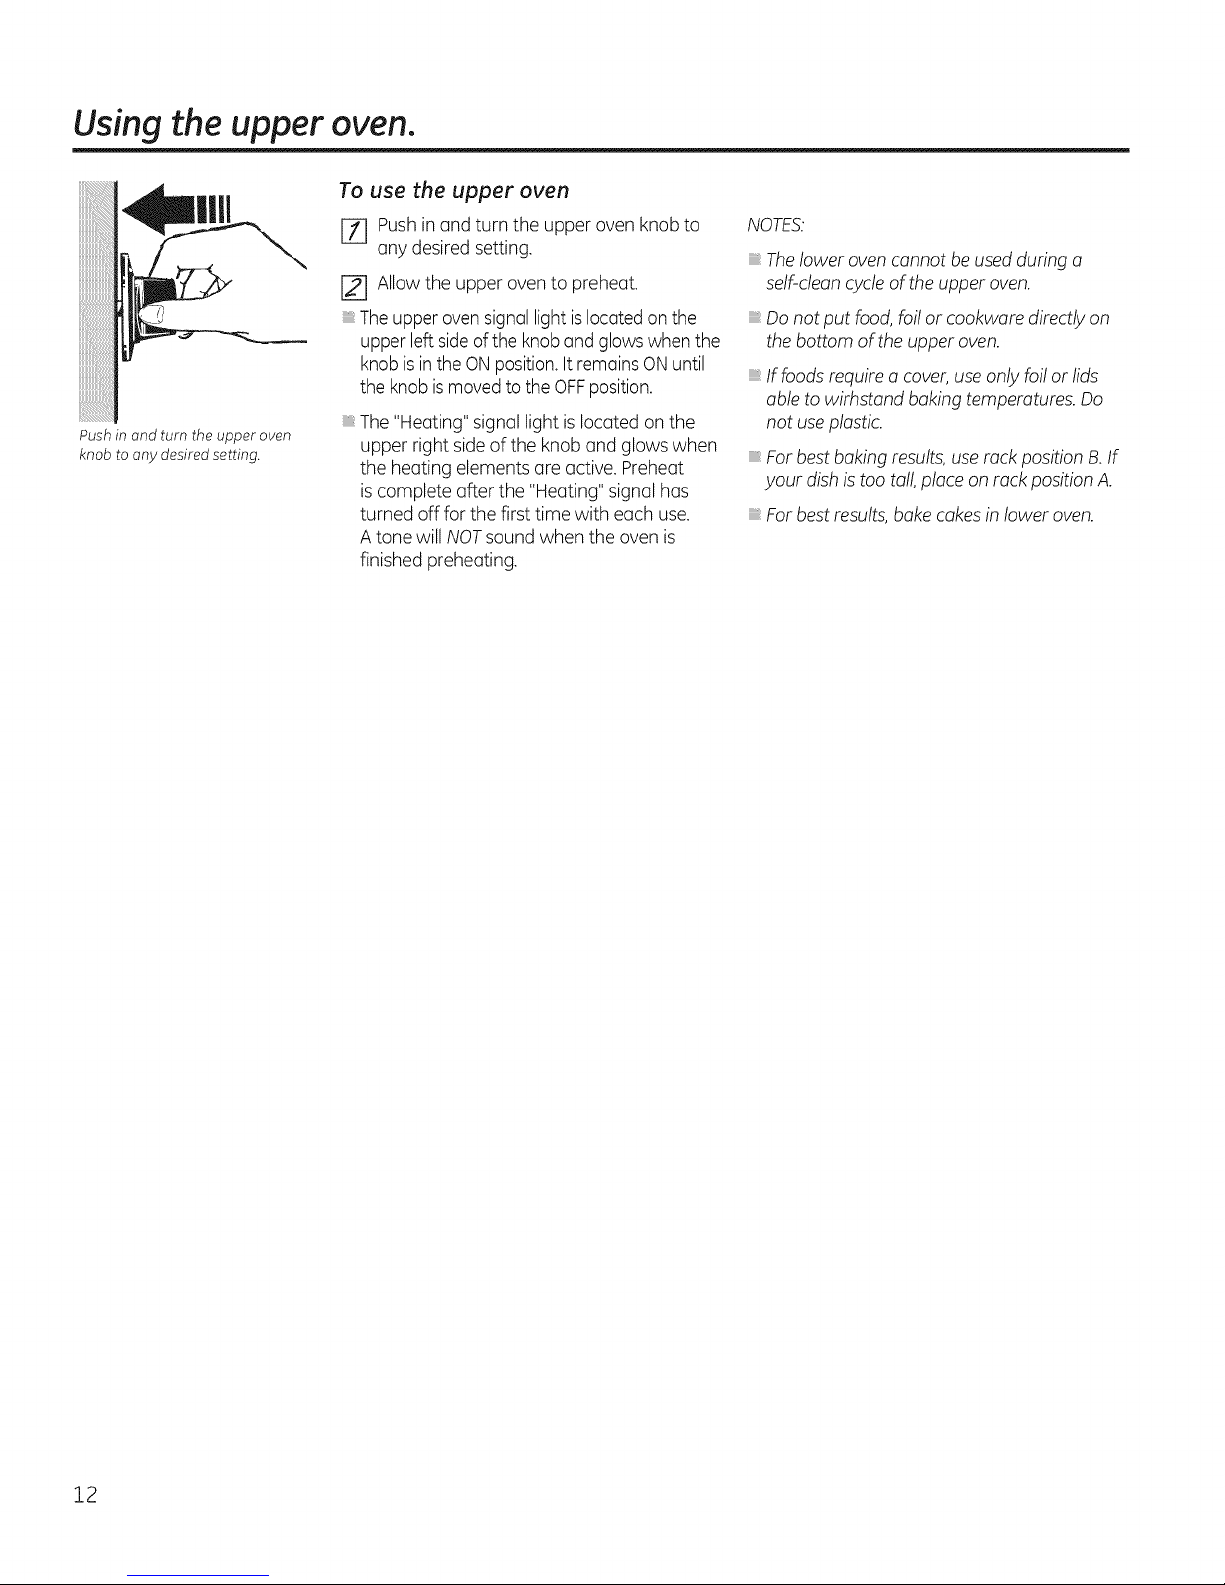
To use the upper oven
J-f] Pushin and turn the upper oven knob to
any desired setting.
[] Allow the upper oven to preheat.
Theupper ovensignallightislocatedon the
upper left sideof the knob andglowswhen the
knobisin the ONposition.It remainsONuntil
the knobismovedto the OFFposition.
Push in and turn the upper oven
knob to any desired setting.
The"Heating"signal light is located on the
upper right side of the knob and glows when
the heating elements are active. Preheat
iscomplete after the "Heating" signal has
turned off for the first time with each use.
Atone will NOTsound when the oven is
finished preheating.
NOTES."
Thelower ovencannot be usedduring a
self-cleancycleof the upper oven.
Donot put food,foil or cookware directly on
the bottom of the upper oven.
If foods require acover,useonly foil or lids
able to withstand baking temperatures. Do
not useplastic.
Forbest bakingresults,userack positionB.If
your dish is too tall,place on rackposition A.
Forbestresults,bake cakesin lower oven.
12

Thesize,weight, thickness,
starting temperature and
your preference of doneness
will affect broiling times. This
guide is based on meats at
refrigerator temperature.
?The U.S.Department of
Agriculture says "Rare beef is
popular, but you should know that
cooking it to only 140°F means
some food poisoning organisms
may survive." (Source: Safe Food
Book Your Kitchen Guide USDA
Rev.June 1985.)
The upper oven has 2 rack positions.
** In general, higher rack positions
yield darker external searing and
lower positions yield more doneness.
For best results, the broil pan should
be oriented parallel to the broiler.
GEAppliances.com
Broiling Guide
Preheat oven for 5 minutes.
Food
Beef
Chicken
Fish
fillets
Pork
chops
*Dueto the varietyof meatsand cuts available,you mayselectalternate rack positionsbasedon personal
preferenceofdonenessand externalsearing.Seeillustrationfordescriptionof rackpositions.
Doneness Type or Rack Type Rack Comments
Medium
Rare (140°-
160°F)
Medium
(160°F)
Well Done
(170°F)
Medium
(160°F)
Thickness Position*
Steaks- 1"thick Roller/Flat ARare -
Steaks - Roller/Flat A
3/4" to !" thick
Steaks - Roller/Flat A
3/4" to 1" thick
Ground Beef Roller/Flat A
Patties - 1/2" to
Steaks less than !" thick are
difficult to cook rare. They may
cook through before browning.
Toavoid curling, slash fat at !"
intervals.
For best results, broil no more
than 8 ground beef patties at
onetime.
3/4" thick
Well Done
(170°F)
Patties - 1/2" to
Roller/Flat AGround Beef
3/4" thick
Breast,
Roller/Flat
A
Broil skin side down first.
boneless
Breast, bone-in
1/2" to !" thick Handle and turn very carefully.
Well Done 3/4" thick Toavoid curling, slash fat at 1"
Roller/Flat
Roller/Flat
Roller/Flat
A
A
A
(170°F) intervals.
How to Set the Upper Oven for Broiling
E_ Place the meat or fish on a broiler grid in a
broiler pan.
[] Follow suggested rack positions in the
Broiling Guide.
[] The oven door must be closed during
broiling.
Closethe door, Always broil with
the door closed.
[_ Push in and turn the upper oven knob to
broil setting.
Serve the food immediately, and leave the pan
outside the oven to cool during the meal for
easiest cleaning.
13
Using the clock and timer.
Not all features are on all models.
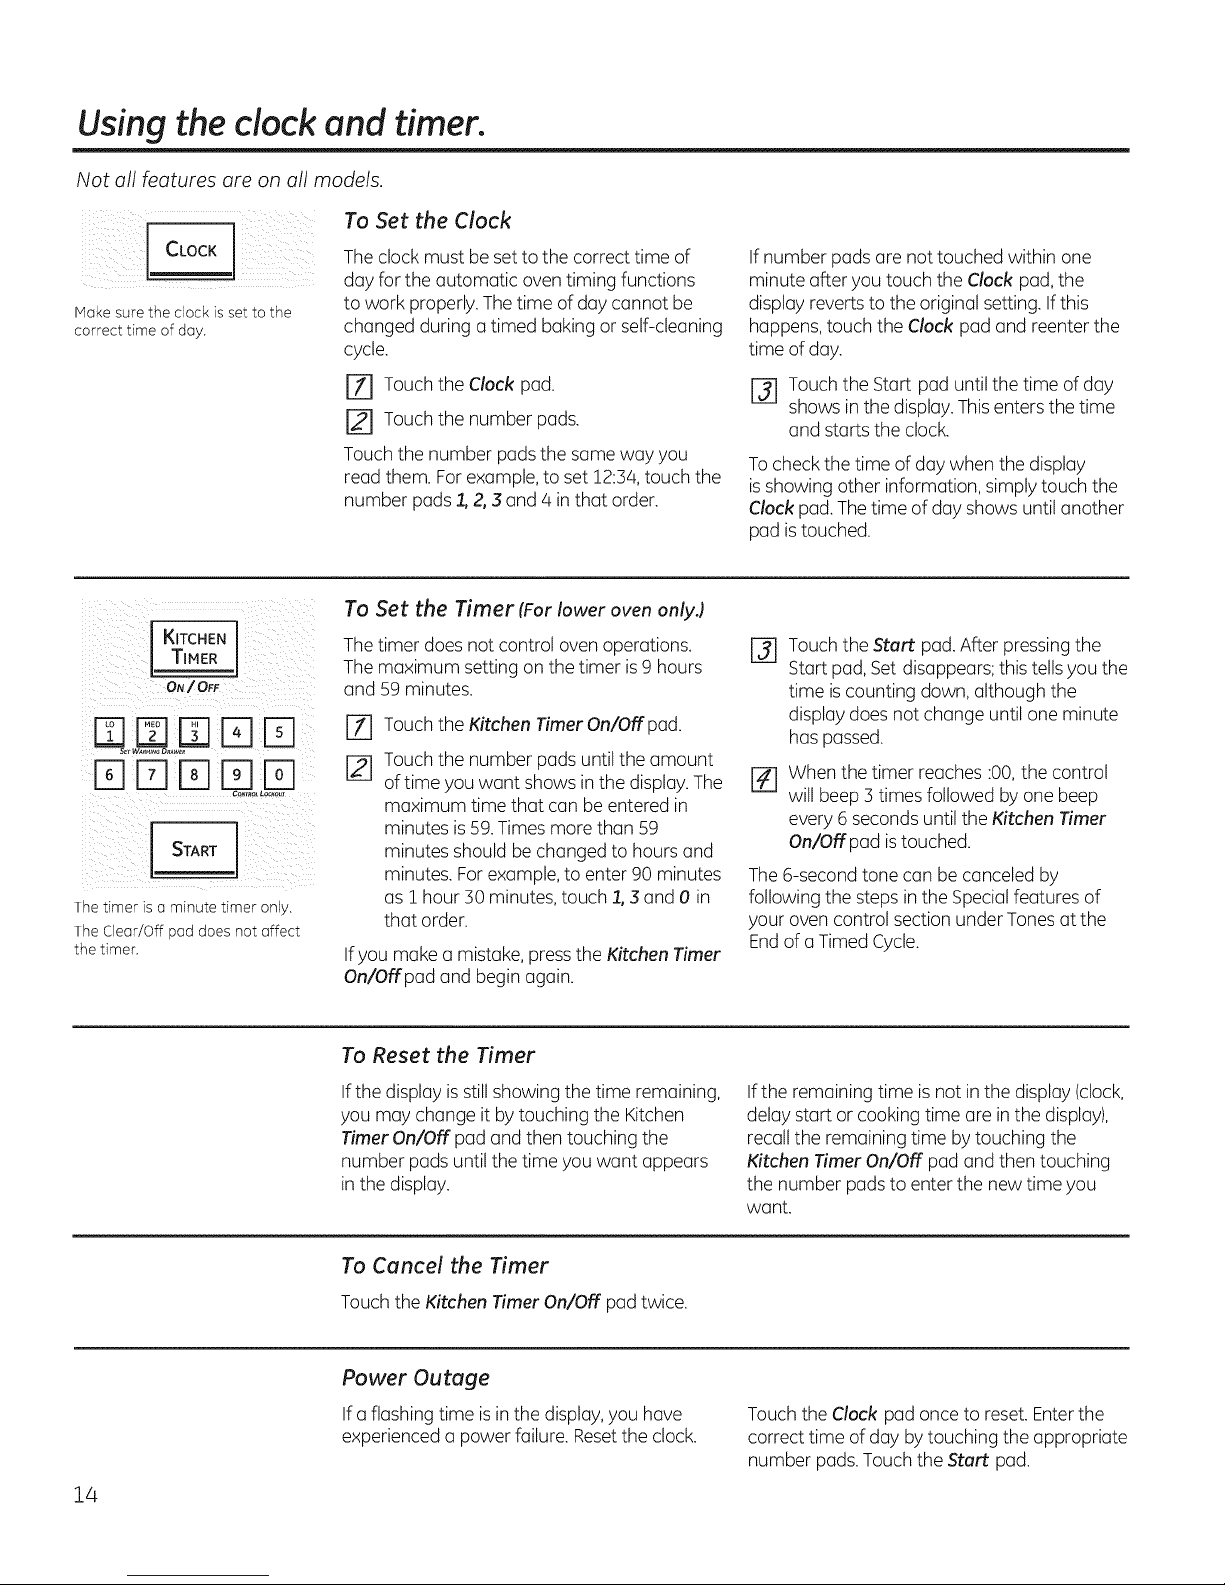
To Set the Clock
IVlakesure the clock is set to the
correct time of day.
KITCHEN
TIMER I
ON/Or_
rqrqN rqrq
C_r.o_Lockout
START
The timer is a minute timer only,
The Clear/Off pad does not affect
the timer.
The clock must be set to the correct time of
day for the automatic oventiming functions
to work properly. The time of day cannot be
changed during a timed baking or self-cleaning
cycle.
ry] Touchthe Clock pad.
[_ Touchthe number pads.
Touch the number pads the same way you
read them. Forexample,to set 12:34,touch the
number pads 1,2,3 and 4 in that order.
To Set the Timer (For lower oven only.)
Thetimer does not control oven operations.
The maximum setting on the timer is9 hours
and 59 minutes.
Touchthe KitchenTimerOn/Off pad.
%
Touchthe number pads until the amount
r21
of time you want shows in the display.The
maximum time that can be entered in
minutes is59.Times more than 59
minutes should be changed to hours and
minutes. For example, to enter 90 minutes
as 1 hour 30 minutes,touch 1,3 and 0 in
that order.
Ifyou make a mistake, pressthe Kitchen Timer
On/Offpad and begin again.
If number pads are not touched within one
minute after you touch the Clock pad, the
display reverts to the original setting. Ifthis
happens, touch the Clock pad and reenter the
time of day.
[] Touchthe Start pad untilthe time of day
shows in the display. Thisenters the time
and starts the clock.
Tocheckthe time of day when the display
isshowing other information, simply touch the
Clock pad.Thetime of day shows until another
pad is touched.
Touchthe Start pad. After pressing the
@
Start pad, Set disappears; thistells you the
time is counting down, although the
display does not change until one minute
has passed.
When the timer reaches :00, the control
%
will beep 3 times followed by one beep
every 6 secondsuntil the Kitchen Timer
On/Off pad istouched.
The6-second tone can be canceled by
following the steps in the Specialfeatures of
your oven control section under Tonesat the
Endof aTimed Cycle.
To Reset the Timer
Ifthe display isstill showing the time remaining,
you may change it by touching the Kitchen
Timer On/Off pad and then touching the
number pads until the time you want appears
in the display.
To Cancel the Timer
Touch the Kitchen Timer On/Off pad twice.
Power Outage
If a flashing time isin the display,you have
experienced a power failure. Resetthe clock.
14
If the remaining time isnot in the display (clock,
delay start or cooking time are inthe display),
recallthe remaining time by touching the
Kitchen Timer On/Off pad and then touching
the number pads to enter the new time you
want.
Touch the Clock pad once to reset. Enterthe
correct time of day bytouching the appropriate
number pads.Touch the Start pad.
Using the timed baking and roasting features. lowerovenonly GEAppliances.com
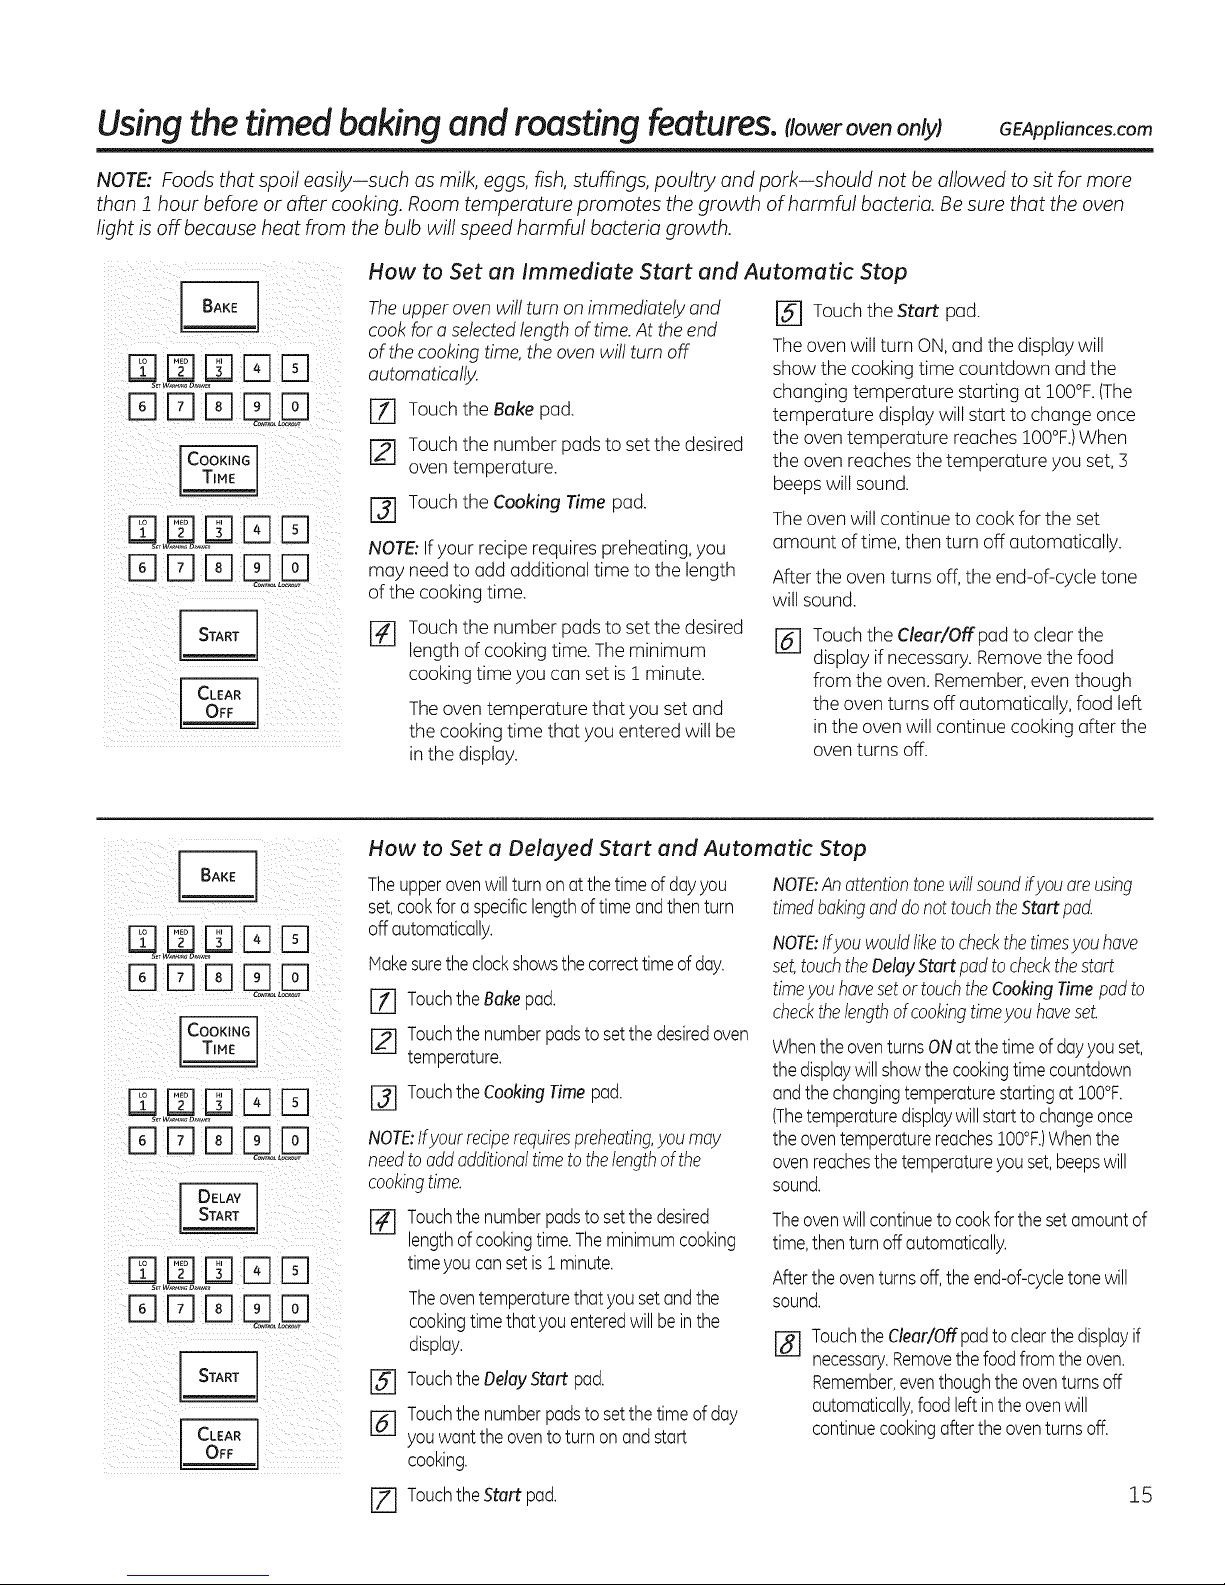
NOTE: Foods that spoil easily-such as milk, eggs, fish, stuffings, poultry and pork-should not be allowed to sit for more
than i hour before or after cooking. Room temperature promotes the growth of harmful bacteria. Be sure that the oven
light is off because heat from the bulb will speed harmful bacteria growth.
How to Set an Immediate Start and Automatic Stop
i!k £ (i
N E] !N
D D D Fq
CoN_ t_Ko._
The upper oven will turn on immediately and
cook for a selected length of time. At the end
of the cooking time, the oven will turn off
automatically.
[Z] Touch the Bake pad.
[_ Touch the number pads to set the desired
oven temperature.
[_ Touch the Cooking Time pad.
NOTE:Ifyour recipe requirespreheating, you
may need to add additional time to the length
of the cooking time.
r_ Touch the Star pad.
Theoven willturn ON,and the display will
show the cooking time countdown and the
changing temperature starting at IO0°F.(The
temperature display will start to change once
the oven temperature reaches IO0°F.)When
the oven reaches the temperature you set, 3
beepswill sound.
Theoven will continue to cook for the set
amount of time, then turn off automatically.
After the oventurns off,the end-of-cycle tone
will sound.
I CLEA_I
D E]rq
ICOOKINGI
DDD D
I DELAYI
rqESm
r_ Touch the number pads to set the desired
length of cooking time. Theminimum
cooking time you can set is! minute.
Theoven temperature that you set and
the cooking time that you entered will be
in the display.
How to Set a Delayed Start and Automatic Stop
Theupperovenwillturnon atthe timeofdayyou
set,cookfor aspecificlengthoftimeandthenturn
off automatically.
Makesuretheclockshowsthecorrecttimeofday.
[] TouchtheBakepad.
[] Touchthenumberpadsto setthedesiredoven
temperature.
[] TouchtheCookingTimepad.
NOTE:Ifyour reciperequirespreheating,youmay
needtoaddadditionaltimetothelengthofthe
cookingtime.
Touchthenumberpadstosetthe desired
%
lengthofcookingtime.Theminimumcooking
timeyou cansetis1 minute.
Theoventemperaturethat yousetandthe
cookingtimethat youenteredwillbein the
display.
TouchtheDelayStart pad.
@
Touchthenumberpadstosetthe timeofday
@
youwantthe oventoturn on andstart
cooking.
[] Touch the Clear/Offpad to clear the
display if necessary. Removethe food
from the oven. Remember,eventhough
the oven turns off automatically, food left
in the ovenwill continue cooking after the
oven turns off.
NOTE:Anattentiontonewillsoundifyouareusing
timedbakinganddonottouchtheStartpad.
NOTE:Ifyou wouldliketo checkthetimesyouhave
set,touchtheDelayStart padtocheckthestart
timeyouhavesetortouchtheCookingTimepad to
checkthe lengthofcookingtimeyouhaveset.
WhentheoventurnsONat thetime ofdayyouset,
thedisplaywillshowthecookingtimecountdown
andthechangingtemperaturestartingat IO0°F.
(Thetemperaturedisplaywillstartto changeonce
theoventemperaturereachesIO0°F.)Whenthe
ovenreachesthe temperatureyouset,beepswill
sound.
Theovenwillcontinuetocookforthesetamountof
time,thenturnoffautomatically.
Aftertheoventurnsoff,theend-of-cycletone will
sound.
[] TouchtheClear/Offpadto clearthedisplayif
necessary.Removethefoodfromtheoven.
Remember,eventhoughtheoventurnsoff
automatically,foodleftintheovenwill
continuecookingaftertheoventurnsoff.
[Z] TouchtheStart pad. 15
Using the probe. lowerovenonlyJ
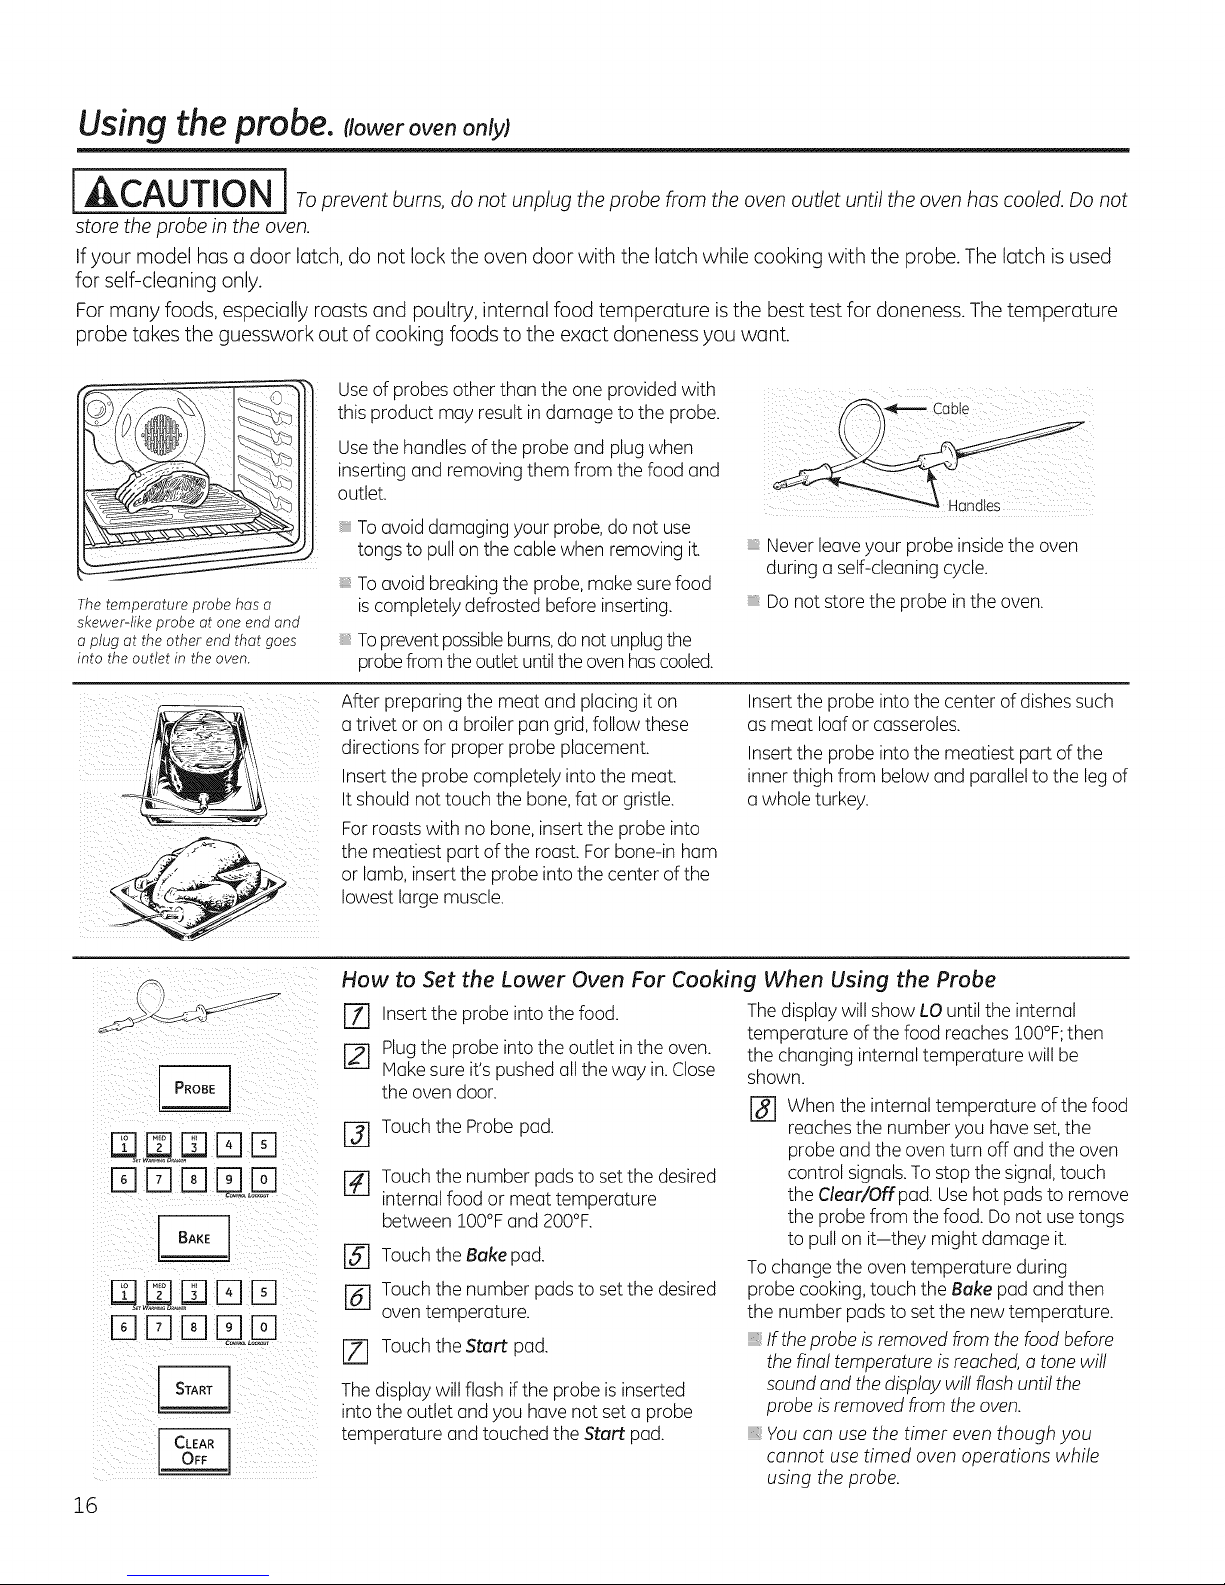
[ACAUTION j To prevent burns, do not unplug the probe From the oven outlet until the oven has cooled. Do not
store the probe in the oven.
If your model has a door latch, do not lock the oven door with the latch while cooking with the probe. The latch is used
for self-cleaning only.
For many foods, especially roasts and poultry, internal food temperature is the best test for doneness. The temperature
probe takes the guesswork out of cooking foods to the exact doneness you want.
Useof probes other than the one provided with
this product may result indamage to the probe.
i
Usethe handles of the probe and plug when
inserting and removing them from the food and
outlet.
The temperature probe has a
skewer-like probe at one end and
a plug at the other end that goes
into the outlet in the oven.
DDDaLD
DDD LD
16
Toavoid damaging your probe,do not use
tongs to pull on the cable when removing it.
Toavoid breaking the probe, make sure food
iscompletely defrosted before inserting.
Topreventpossibleburns,donot unplugthe
probefrom theoutlet untilthe oven hascooled.
After preparing the meat and placing it on
a trivet or on a broiler pan grid, follow these
directions for proper probe placement.
Insertthe probe completely into the meat.
It should not touch the bone, fat or gristle.
Forroastswith no bone,insert the probe into
the meatiest part of the roast. Forbone-in ham
or lamb, insertthe probe into the center of the
lowest large muscle.
How to Set the Lower Oven For Cooking When Using the Probe
[Z] Insert the probe into the food.
[] Plugthe probe intothe outlet in the oven.
Hake sure it's pushed all the way in. Close
the oven door.
r_ Touch the Probe pad.
[] Touch the number padsto set the desired
internal food or meat temperature
between 100°Fand 200°F.
[-5-1Touch the Bakepad.
r_ Touch the number padsto set the desired
oventemperature.
!Z] Touch the Start pad.
Thedisplay will flash ifthe probe isinserted
intothe outlet and you havenot set a probe
temperature and touched the .Start pad.
Never leave your probe insidethe oven
during a self-cleaning cycle.
Donot store the probe inthe oven.
Insertthe probe into the center of dishessuch
as meat loaf or casseroles.
Insertthe probe into the meatiest part ofthe
inner thigh from below and parallel to the leg of
a whole turkey.
Thedisplay will show LO until the internal
temperature of the food reaches 100°F;then
the changing internal temperature will be
shown.
r_] When the internal temperature of the food
reachesthe number you have set,the
probe and the oven turn off and the oven
control signals.To stop the signal,touch
the Clear/Offpad. Use hot pads to remove
the probe from the food. Donot use tongs
to pull on it-they might damage it.
Tochange the oven temperature during
probe cooking, touch the Bake pad and then
the number pads to set the new temperature.
If the prate isremoved from the food tefore
the final temperature isreached,a tone will
soundand the display will flash until the
prate is removed from the oven.
,, You can use the timer even though you
cannot use timed oven operations while
using the prate.
Using the convection lower oven. some modelsl GEAppliances.com
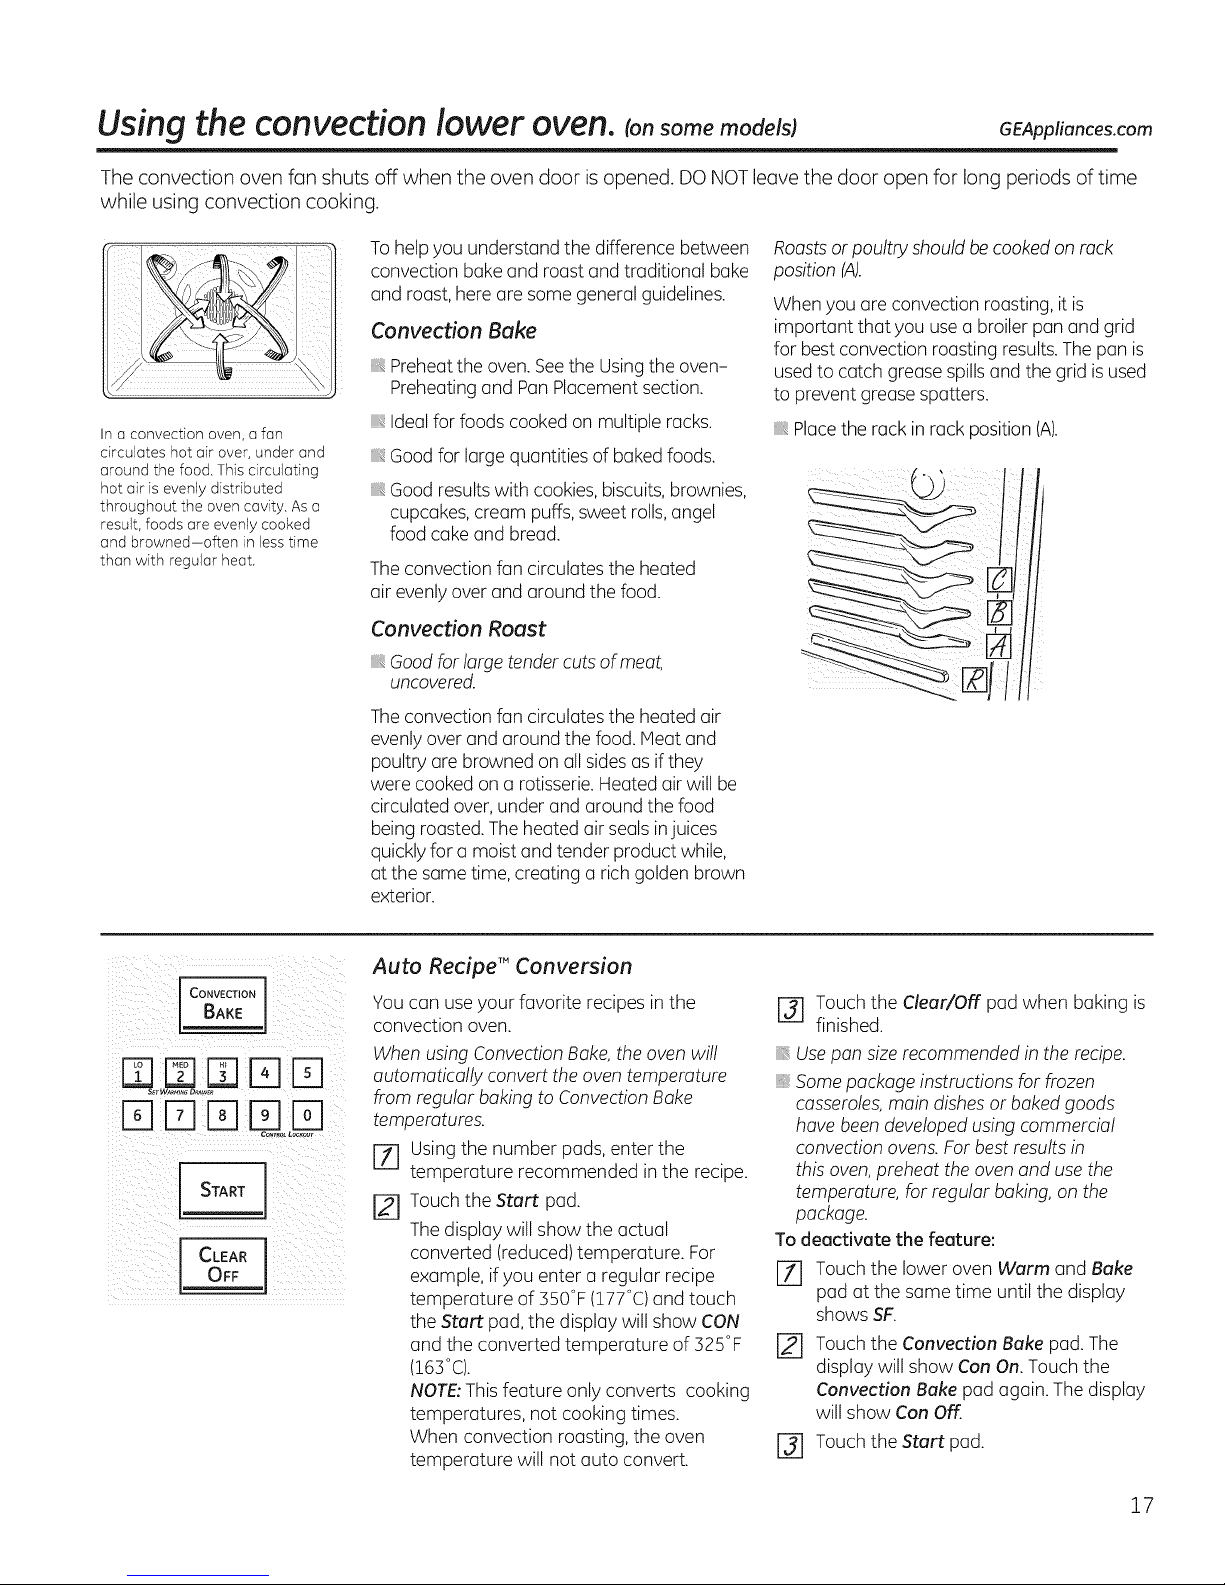
The convection oven fun shuts off when the oven door is opened. DO NOT leave the door open for long periods of time
while using convection cooking.
In a convection oven, a fan
circulates hot air over, under and
around the food. This circulating
hot air is evenly distributed
throughout the oven cavity. As a
result, foods are evenly cooked
and browned-often in less time
than with regular heat.
Tohelp you understand the difference between
convection bake and roast and traditional bake
and roast, here are some general guidelines.
Convection Bake
Preheatthe oven. Seethe Usingthe oven-
Preheatingand PanPlacement section.
Idealfor foods cooked on multiple racks.
Goodfor large quantities of baked foods.
Good results with cookies, biscuits,brownies,
cupcakes,cream puffs, sweet rolls,angel
food cake and bread.
Theconvection fan circulates the heated
air evenlyover and around the food.
Convection Roast
Goodfor large tender cuts ofmeat,
uncovered.
Theconvection fan circulates the heated air
evenly over and around the food. Heat and
poultry are browned on all sidesas ifthey
were cooked on a rotisserie.Heated air will be
circulated over,under and around the food
being roasted. The heated air seals injuices
quickly for a moist and tender product while,
at the same time, creating a rich golden brown
exterior.
Roastsor poultry should be cookedon rack
position (A).
When you are convection roasting, it is
important that you useu broiler pan and grid
for best convection roasting results.The pan is
usedto catch grease spillsand the grid isused
to prevent greasespatters.
Placethe rack in rack position (A),
CONVECTIONBAKEJ
START J
I I
Auto Recipe T"Conversion
You can use your favorite recipes in the
convection oven.
When using Convection Bake, the oven will
automatically convert the oven temperature
from regular baking to Convection Bake
temperatures.
[_ Using the number pads, enter the
temperature recommended in the recipe.
Touch the Start pad.
The display will show the actual
converted (reduced) temperature. For
example, if you enter a regular recipe
temperature of 350°F (177°C) and touch
the .Start pad, the display will show CON
and the converted temperature of 325°F
(163°C).
NOTE: This feature only converts cooking
temperatures, not cooking times.
When convection roasting, the oven
temperature will not auto convert.
r_ Touch the Clear/Off pad when baking is
finished.
Usepan sizerecommended in the recipe.
Somepackage instructions for frozen
casseroles,main dishes or baked goods
have been developed using commercial
convection ovens. For best results in
this oven,preheat the oven and usethe
temperature, for regular baking, on the
package.
To deactivate the feature:
Touch the lower oven Warm and Bake
pad at the same time until the display
shows .SF.
Touch the Convection Bake pad.The
display will show Con On. Touch the
Convection Bake pad again. Thedisplay
will show Con Off.
r_ Touch the .Start pad.
17

Using the convection lower oven. some models)
Cookware for Convection Cooking
Before usingyour convection oven,check
to see ifyour cookware leavesroom for air
circulation in the oven.If you are baking with
several pans, leavespace between them. Also,
be sure the pansdo not touch each other or the
walls of the oven.
Paper and Plastic
Heat-resistant paper and plastic containers that
are recommended for use in regular ovens can
be used in convection ovens.Plasticcookware
that isheat-resistant to temperatures of 400°F
can also be used,when oven is below 400°F.
Metal and Glass
Anytype of cookware willwork in your
convection oven. However, metal pans heat the
fastest and are recommended for convection
baking.
Darkenedor matte-finished pans will bake
fasterthan shiny pans.
Glassor ceramic pans cook more slowly.
When baking cookies,you will get the best
results ifyou usea flat cookie sheet insteadof a
pan with low sides.
Forrecipes likeoven-baked chicken,usea pan
with low sides.Hot air cannot circulate well
around food in a pan with high sides.
ICo.vEcT,o.I ICONVECT,O,I
_or ROAST
Dr-qDU,,U
Is,,.T1
i CLEAR J
OFF !
How to Set the Lower Oven for Convection Baking or Roasting
[] TouchtheConvectionBake orConvection
Roastpad.
[] Touch the number pads to set the desired
oven temperature.
r3] Touch the Start pad.
Tochange the oventemperature, touch the
Convection Bake or Convection Roast pad
and then the number padsto set the new
temperature.
When the oven starts to heat, the changing
temperature, starting at IO0°F,will be displayed.
When the oven reachesthe temperature you
set,3 beepswill sound.
[] Touch the Clear/Offpad when finished.
NOTE:Youwill hear afan while cooking with
convection.Thefan will stop when the door is
opened,but the heat will not turn off.
The fan will not start until the preheat
temperature is reached.
NOTE: When convection baking, the oven
temperature willbe 25F HdC)lower than the set
temperature. See Auto Recipe Conversion in the
Special Features section for more information.
When convection roasting, oven temperature
willnot auto convert.
18
z
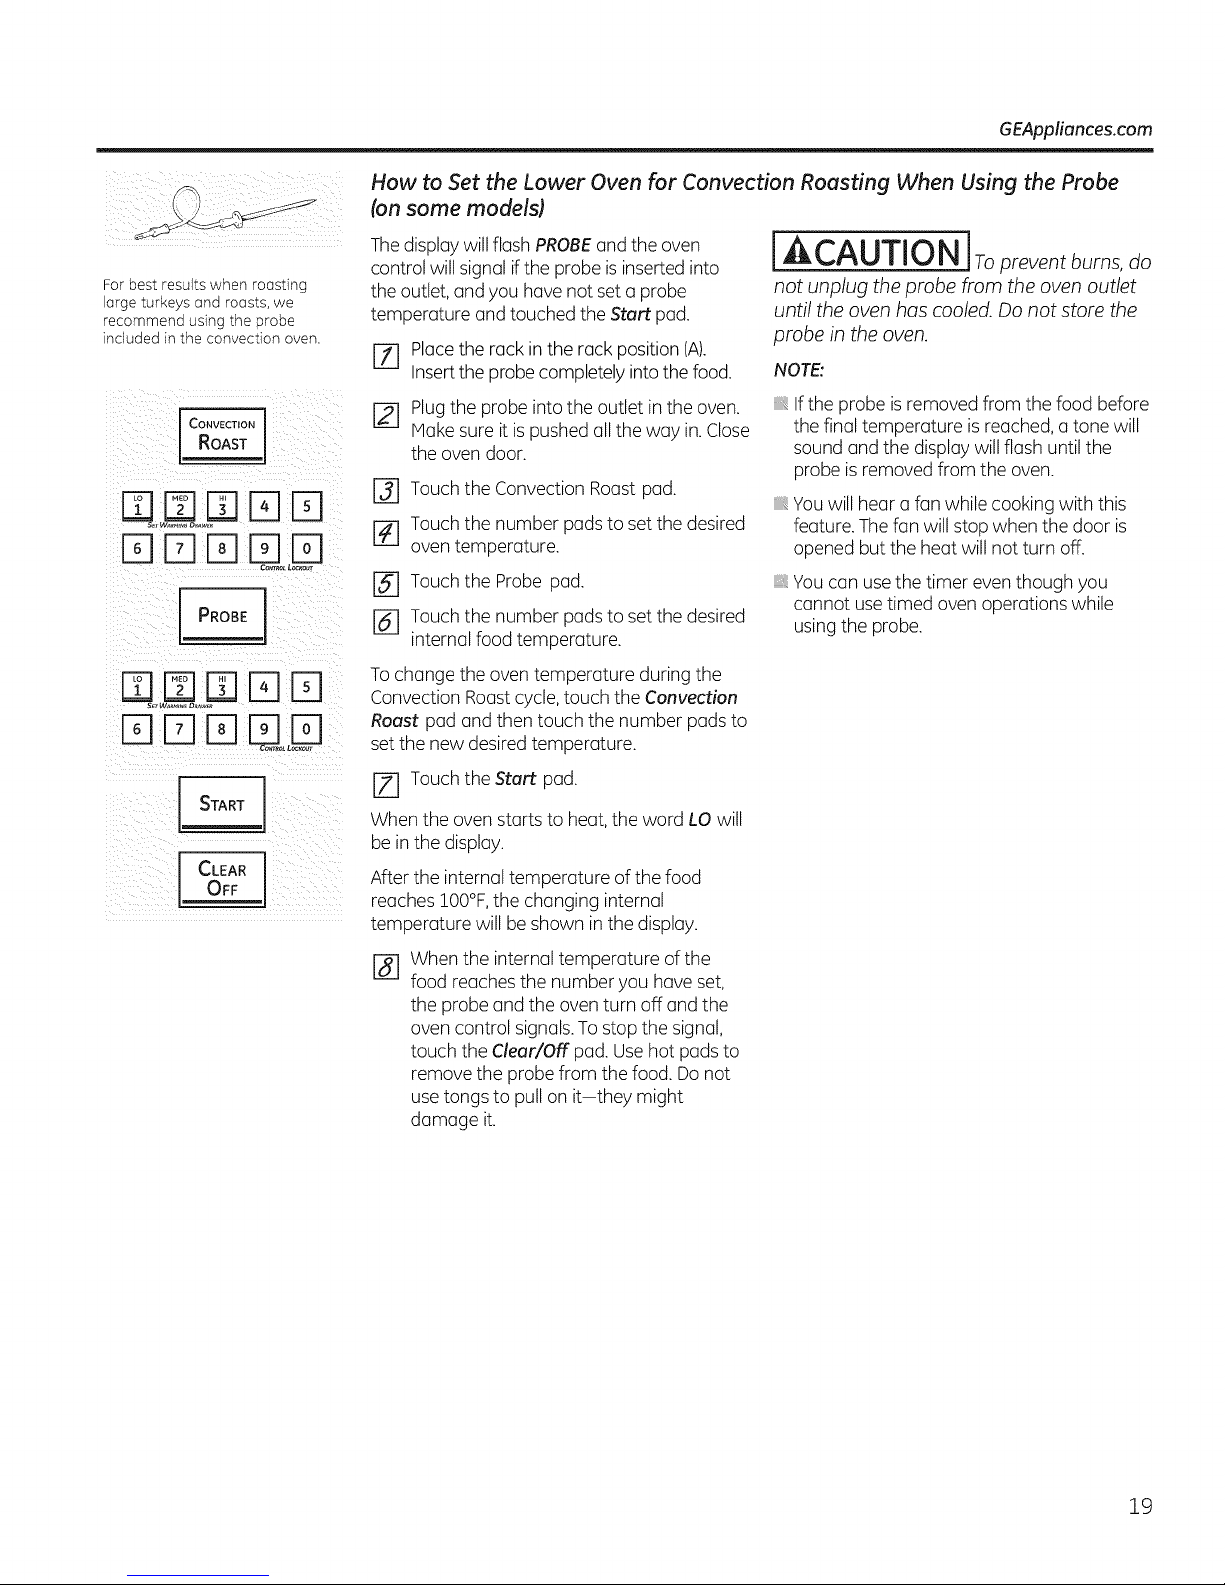
For best results when roasting
large turkeys and roasts, we
recommend using the probe
included in the convection oven.
CONVECTION
ROAST
GEAppliances.com
How to Set the Lower Oven for Convection Roasting When Using the Probe
(on some models)
Thedisplaywill flash PROBEandthe oven j CAUTION ]Toprevent burns, do
control will signal if the probe is insertedinto
the outlet, and you have not set a probe not unplug the probe from the oven outlet
temperature and touched the Start pad.
until the oven has cooled. Do not store the
probe in the oven.
[-il Place the rack in the rack position (A).
Insertthe probe completelyinto the food.
r_ Plugthe probe into the outlet in the oven.
Make sure it is pushed allthe way in.Close
the oven door.
NOTE:
Ifthe probe isremoved from the food before
the final temperature is reached,a tone will
sound and the display will flash until the
probe is removed from the oven.
[] Touch the Convection Roast pad.
r_ Touch the number padsto set the desired
oven temperature.
[] Touch the Probe pad.
Youwill hear a fan while cooking with this
feature. Thefan will stop when the door is
opened but the heat will not turn off.
You can use the timer eventhough you
cannot usetimed oven operations while
r_ Touch the number padsto set the desired
internal food temperature.
using the probe.
Tochange the oventemperature during the
Convection Roastcycle,touch the Convection
Roast pad and then touch the number pads to
set the new desiredtemperature.
START
OFF
CLEAR J
[] Touch the Start pad.
When the oven starts to heat,the word LO will
be inthe display.
After the internal temperature of the food
reaches 100°F,the changing internal
temperature will be shown in the display.
When the internal temperature of the
%
food reachesthe number you have set,
the probe and the oven turn off and the
oven control signals.To stop the signal,
touch the Clear/Off pad.Use hot pads to
remove the probe from the food. Do not
usetongs to pull on it-they might
damage it.
19
Using the convection lower oven. consomemode sI
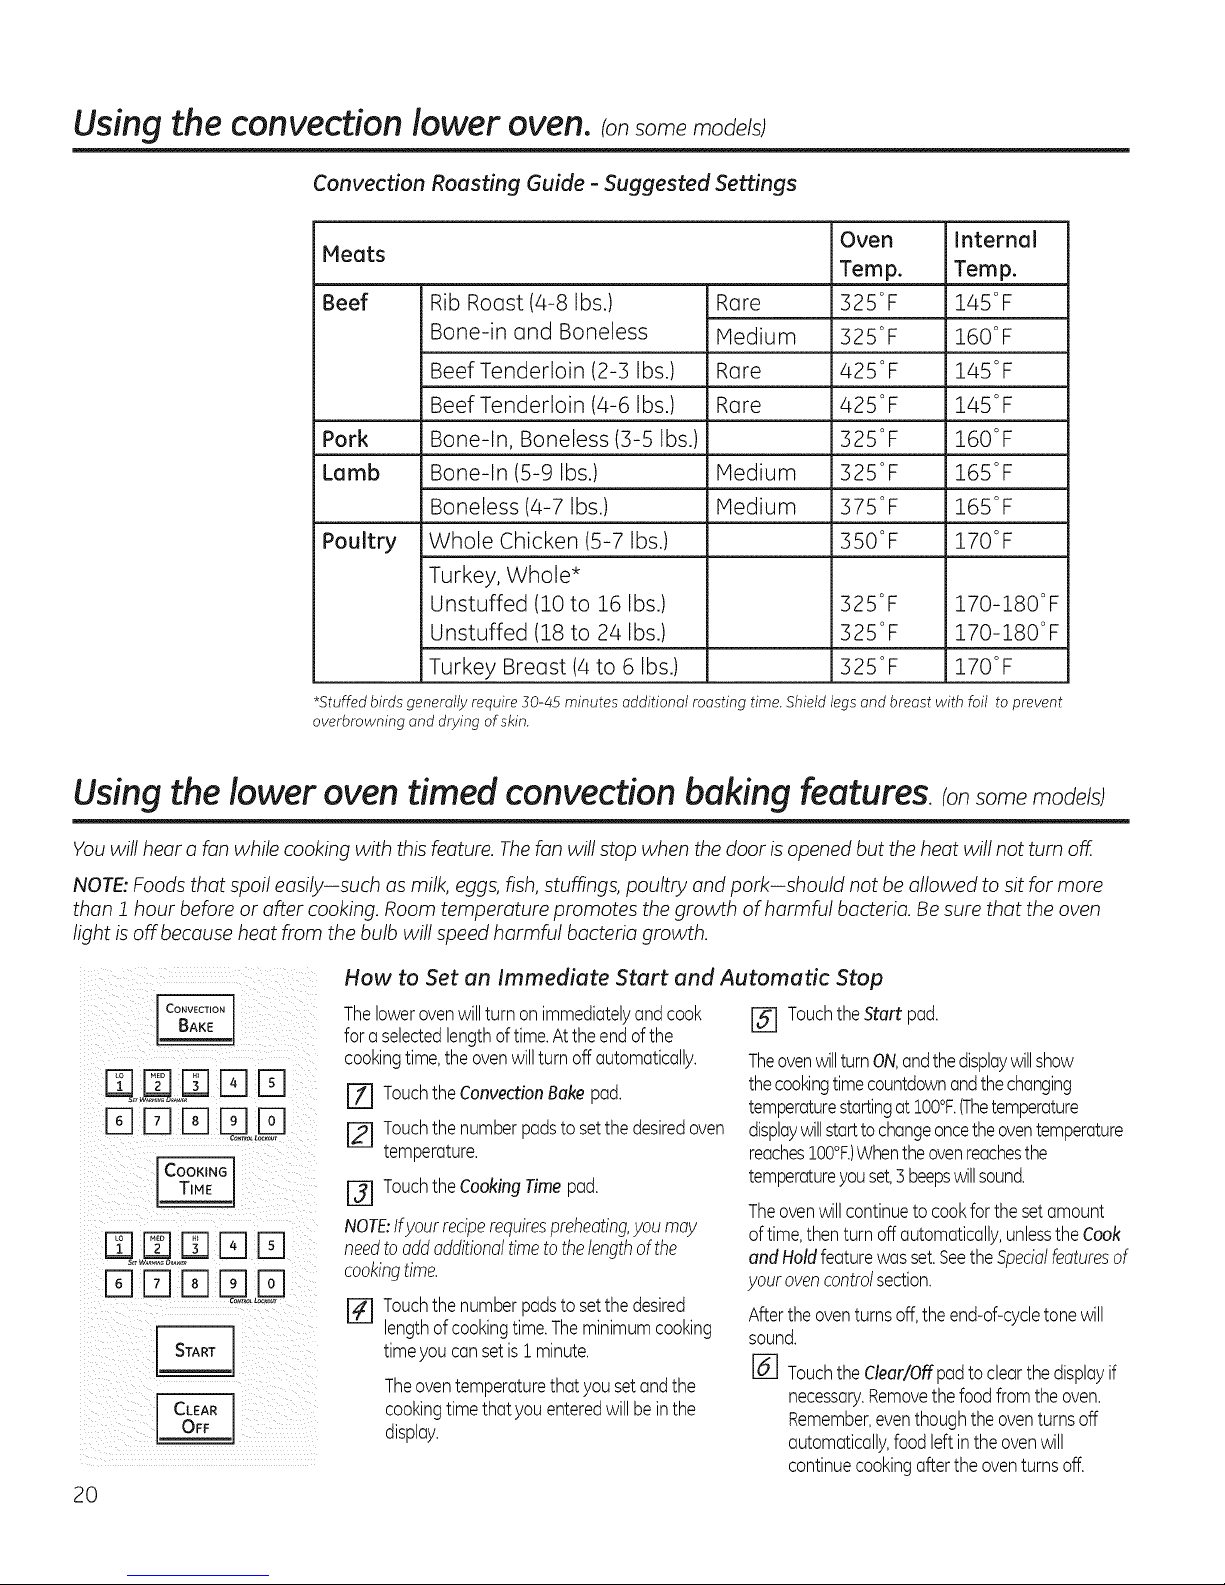
Convection Roasting Guide - Suggested Settings
Meats
Beef
Pork
Lamb
Rib Roast (4-8 Ibs.)
Bone-in and Boneless
Beef Tenderloin (2-3 Ibs.)
Beef Tenderloin (4-6 Ibs.)
Bone-In, Boneless (3-5 Ibs.)
Bone-In (5-9 Ibs.)
Boneless (4-7 Ibs.)
Rare
Medium
Rare 425
Rare 425
Medium 325
Medium 375
Oven
Temp.
325°F
325°F
325
Poultry Whole Chicken 15-7 Ibs.) 350
oF
oF
oF
oF
oF
oF
Internal
Temp.
145°F
160°F
145°F
145°F
160°F
165°F
165°F
170°F
Turkey, Whole*
Unstuffed (10 to 16 Ibs.) 325°F 170-180°F
Unstuffed (18 to 24 Ibs.) 325°F 170-180°F
Turkey Breast (4 to 6 Ibs.) 325°F 170°F
*Stuffed birds generally require 30-45 minutes additional roasting time. Shield legs and breast with foil to prevent
overbrowning and drying of skin.
Using the lower oven timed convection baking features, consom mod /sI
You will hear a fan while cooking with this feature. Thefan will stop when the door is opened but the heat will not turn off.
NOTE: Foods that spoil easily-such as milk, eggs, fish, stu_ngs, poultry and pork-should not be allowed to sit for more
than 1 hour before or after cooking. Room temperature promotes the growth of harmful bacteria. Be sure that the oven
light is off because heat from the bulb will speed harmful bacteria growth.
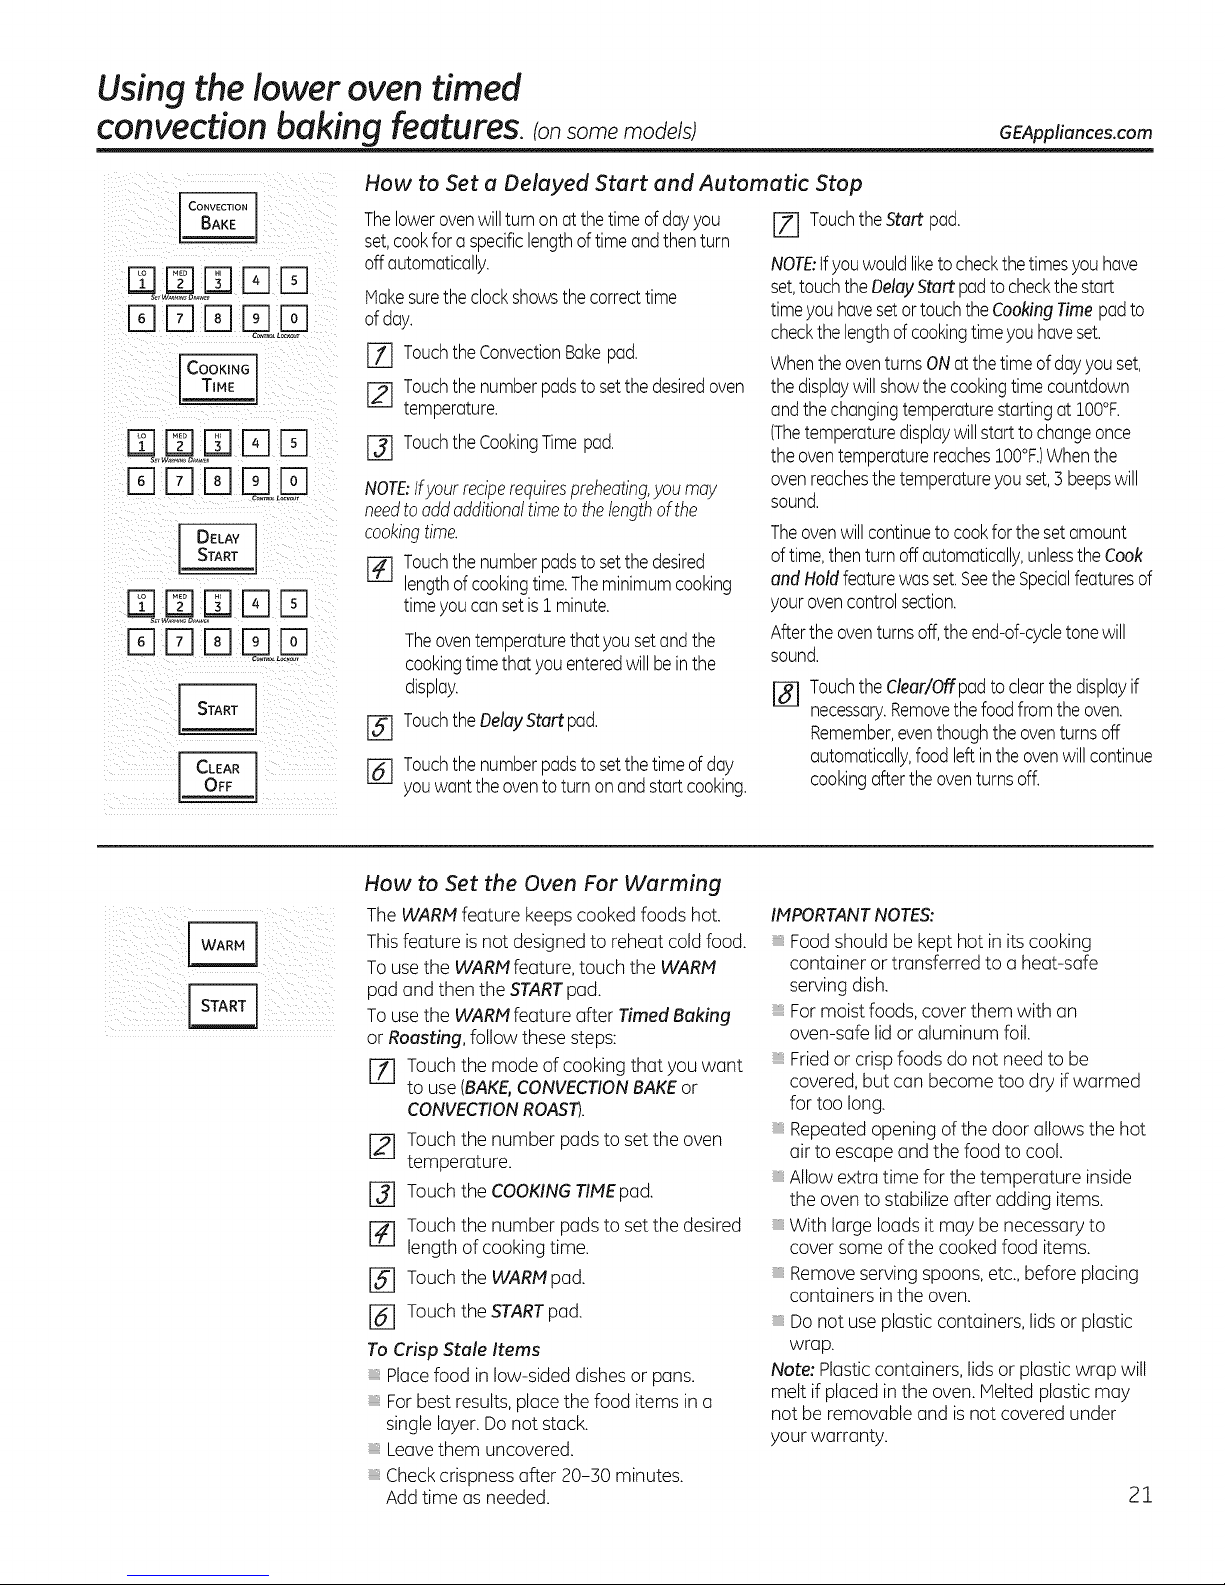
How to Set an Immediate Start and Automatic Stop
CONVECTION
BAKE
D rqrq
I J
Thelowerovenwillturn onimmediatelyandcook
fora selectedlengthoftime.Attheendof the
cookingtime,the ovenwillturnoffautomatically.
[Z] TouchtheConvectionBakepad.
[] Touch the number pads to set the desired oven
temperature.
F_ TouchtheCookingTimepad.
NOTE:Ifyour reciperequirespreheating,youmay
needtooddadditionaltimetothelengthofthe
cookingtime.
r_ Touchthenumberpadstosetthe desired
lengthofcookingtime.Theminimumcooking
timeyou cansetis$ minute.
Theoventemperaturethat yousetandthe
cookingtimethat youenteredwillbein the
display.
[] TouchtheStart pad.
TheovenwillturnON,andthedisplaywillshow
thecookingtimecountdownandthechanging
temperaturestartingatIO0°F.(Thetemperature
displaywillstarttochangeoncetheoventemperature
reachesIO0°F.)Whenthe ovenreachesthe
temperatureyouset,3beepswillsound.
Theovenwillcontinuetocookforthesetamount
oftime,thenturnoff automatically,unlesstheCook
andHoldfeaturewasset.Seethe Specialfeaturesof
yourovencontrolsection.
Aftertheoventurnsoff,theend-of-cycletone will
sound.
[] TouchtheClear/Offpadto clearthedisplayif
necessary.Removethefoodfromtheoven.
Remember,eventhoughtheoventurnsoff
automatically,foodleftintheovenwill
continuecookingaftertheoventurnsoff.
2O
Usingthe lower oventimed
convection baking features,tonsomemode/s
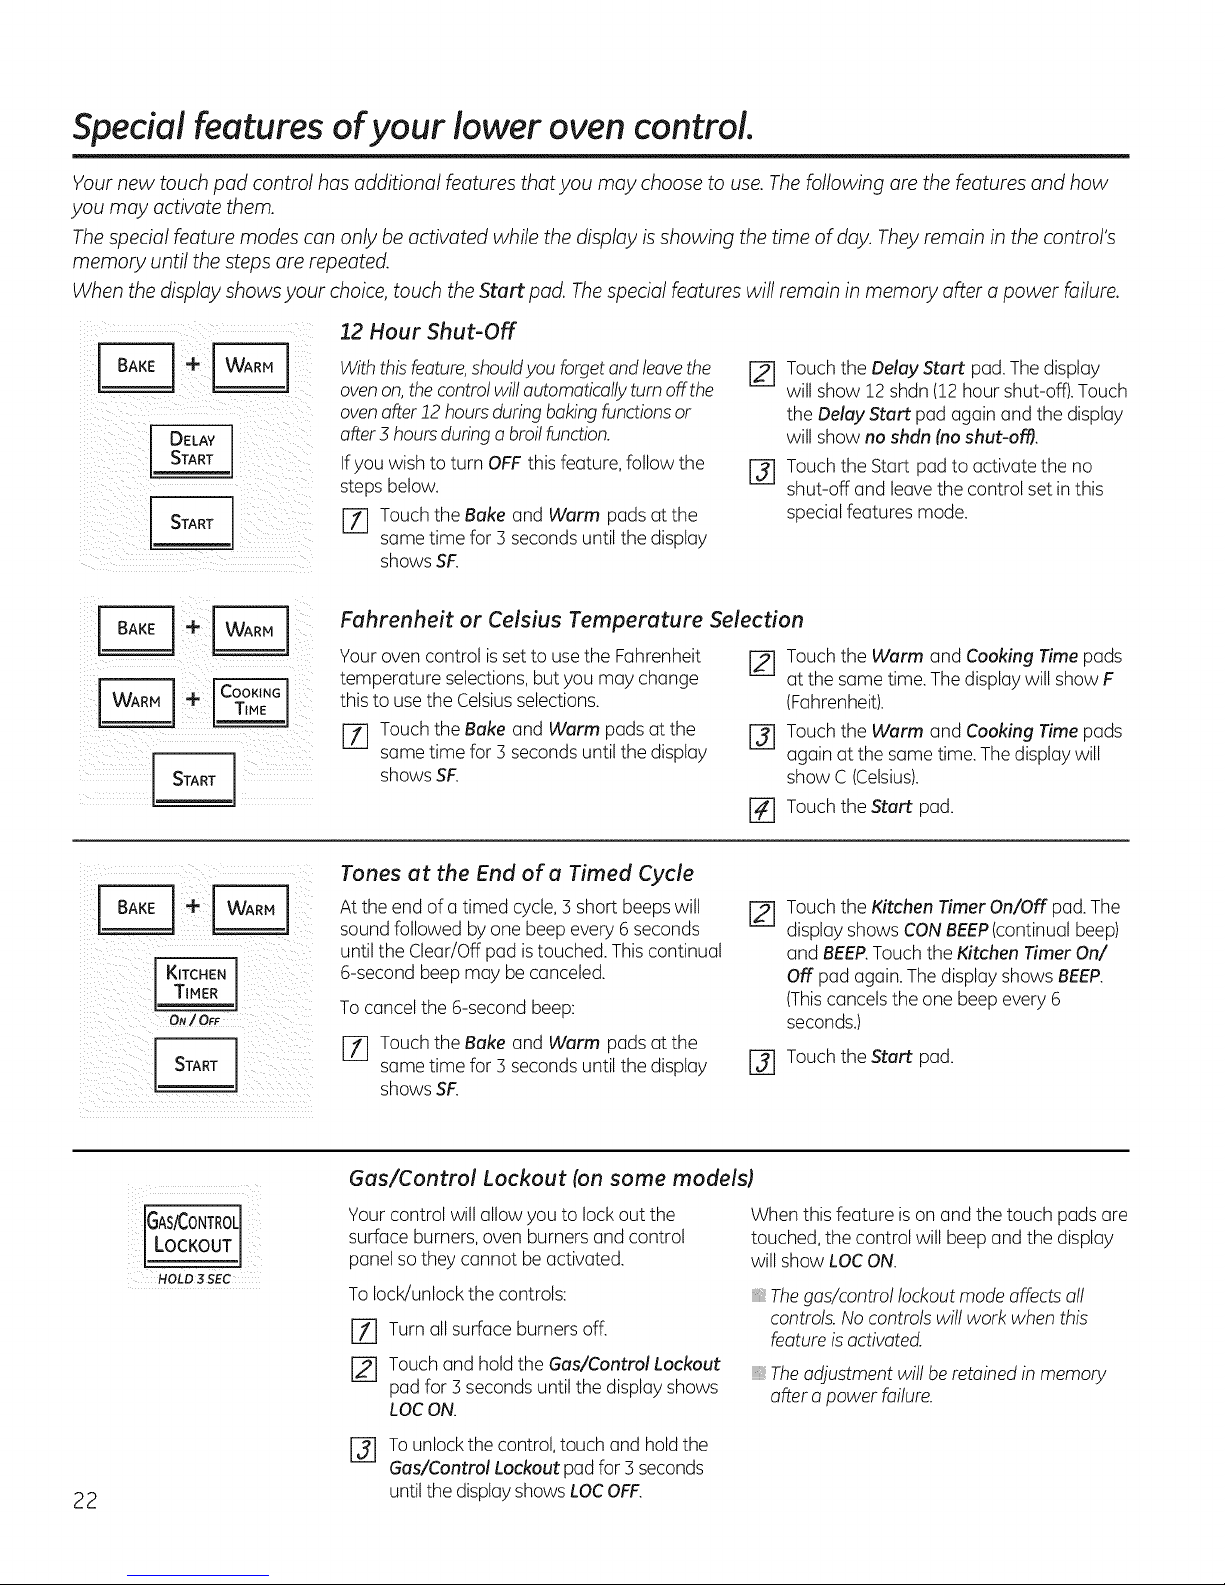
How to Set a Delayed Start and Automatic Stop
Thelowerovenwillturn onatthetime ofdayyou
set,cookfor aspecificlengthoftimeandthenturn
offautomatically.
Makesuretheclockshowsthecorrecttime
E]E]E]EEE]
C_T_ L_KOU_
Dmm ,LD
Dmm ,L
ofday.
rl] Touchthe ConvectionBakepod.
[] Touchthenumberpodsto setthedesiredoven
temperature.
r_ TouchtheCookingTimepod.
NOTE:Ifyour reciperequirespreheating,youmay
needtoaddadditionaltimetothelengthofthe
cookingtime.
r_ Touchthenumberpadstosetthe desired
lengthofcookingtime.Theminimumcooking
timeyoucan setis:].minute.
Theoventemperaturethat yousetandthe
cookingtimethat youenteredwillbeinthe
display.
TouchtheDelayStartpad.
@
Touchthenumberpadstosetthetime ofday
@
youwontthe ovento turnonandstartcooking.
GEAppliances.com
[-_ TouchtheStart pad.
NOTE:if you wouldliketocheckthetimesyouhave
set,touchtheDelayStart padto checkthestart
timeyouhavesetortouchthe CookingTimepadto
checkthelengthofcookingtimeyouhaveset.
WhentheoventurnsONat thetimeof dayyou set,
thedisplaywillshowthecookingtimecountdown
andthechangingtemperaturestartingat IO0°F.
(Thetemperaturedisplaywillstartto changeonce
theoventemperaturereaches].O0°F.)Whenthe
ovenreachesthe temperatureyouset,3beepswill
sound.
Theovenwillcontinuetocookforthesetamount
oftime,thenturnoff automatically,unlesstheCook
and Holdfeaturewasset.Seethe Specialfeaturesof
yourovencontrolsection.
Aftertheoventurnsoff,theend-of-cycletonewill
sound.
[] TouchtheClear/Offpadto clearthedisplayif
necessary.Removethefoodfrom theoven.
Remember,eventhoughtheoventurnsoff
automatically,foodleftintheovenwillcontinue
cookingaftertheoventurnsoff.
_/i___/_/_i[]_'i ill}_i_
_!{i_i_i__ii_iI_ii_ !i!i_i!_{ _!!ii_iii
How to Set the Oven For Warming
The WARMfeature keeps cooked foods hot.
Thisfeature isnot designedto reheat coldfood.
Tousethe WARMfeature, touch the WARM
pad and then the STARTpad.
Tousethe WARMfeature after Timed Baking
or Roasting, follow these steps:
r_ Touch the mode of cooking that you want
to use(BAKE,CONVECTIONBAKEor
CONVECTIONROAST).
Touch the number padsto set the oven
temperature.
[] Touchthe COOKING TtMEpad.
[_ Touch the number pads to set the desired
length of cooking time.
[] Touch the WARM pad.
[] Touch the START pad.
To Crisp Stale Items
Place food in low-sided dishes or pans.
For best results, place the food items in a
single layer. Do not stack.
Leave them uncovered.
Check crispness after 20-30 minutes.
Add time as needed.
IMPORTANT NOTES:
Foodshould be kept hot in its cooking
container or transferred to a heat-safe
serving dish.
Formoist foods,cover them with an
oven-safe lid oraluminum foil.
Friedor crisp foods do not need to be
covered, but can become too dry if warmed
for too long.
Repeatedopening of the door allows the hot
air to escape and the food to cool.
Allow extra time for the temperature inside
the ovento stabilize after adding items.
With large loads it may be necessary to
cover some of the cooked food items.
Removeserving spoons,etc., before placing
containers in the oven.
Donot useplastic containers, lidsor plastic
wrap.
Note: Plasticcontainers, lidsor plastic wrap will
melt if placed in the oven. Meltedplastic may
not be removable and isnot covered under
your warranty.
21
Specialfeatures ofyour lower ovencontrol.
Your new touch pad control has additional features that you may choose to use. The following are the features and how
you may activate them.
The special feature modes can only be activated while the display isshowing the time of day. They remain in the control's
memory until the steps are repeated.
When the display shows your choice, touch the Start pad. The special features wi!! remain in memory after a power failure.
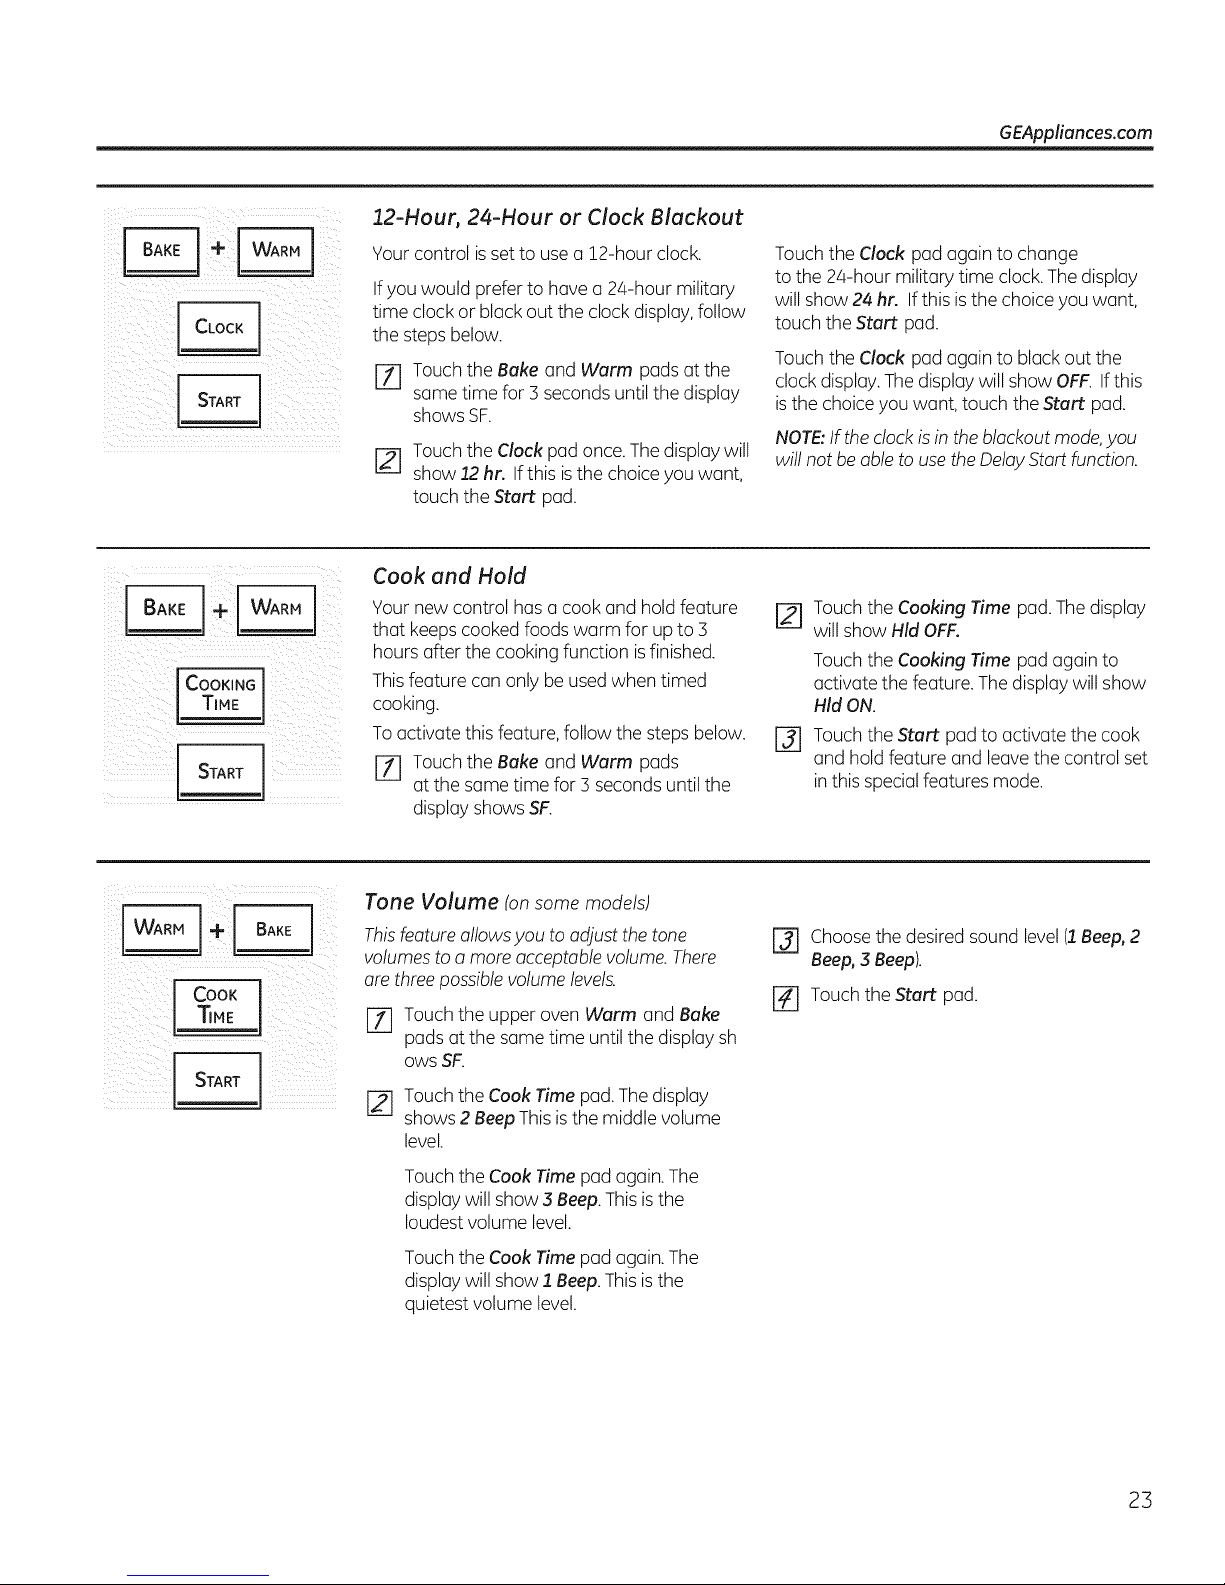
12 Hour Shut-Off
I DELAY I
KITCHEN
LT'MER
With this feature, should you forget and leave the
oven on, the control willautomatically turn off the
oven after !2 hours during baking functions or
after 5 hours during a broilfunction.
Ifyou wish to turn OFFthis feature, follow the
steps below.
[Z] Touch the Bake and Warm pads at the
same time for 3 seconds until the display
showsSF.
I-_ Touch the DelAyStart pad.The display
[] Touch the Start pad to activate the no
Fahrenheit or Celsius Temperature Selection
Your oven control is setto usethe Fahrenheit
temperature selections, but you may change
this to usethe Celsiusselections.
[Z] Touchthe Bake and Warm pads at the
same time for 3 seconds until the display
showsSF.
Tones at the End of a Timed Cycle
At the end of a timed cycle,3 short beeps will
sound followed by one beep every6 seconds
until the Clear/Off pad istouched. This continual
6-second beep may be canceled.
To cancel the 6-second beep:
[] Touchthe Bake and Warm pads at the
same time for 3 seconds until the display
showsSF.
[] Touch the Warm and Cooking Time pads
[] Touch the Start pad.
will show 12 shdn (12 hour shut-off).Touch
the Delay Start pad again and the display
will show no shdn (no shut-off).
shut-off and leave the control set in this
special features mode.
at the same time.The display will show F
(Fahrenheit).
Touch the Warm and Cooking Time pads
again at the same time. The displaywill
show C (Celsius).
Touch the Kitchen Timer On/OFFpad.The
display shows CONBEEP(continual beep)
and BEEP.Touchthe Kitchen Timer On/
OFFpad again. Thedisplay shows BEEP.
(Thiscancelsthe one beepevery 6
seconds.)
Touch the Start pad.
Gas/Control Lockout (on some models)
IGAS/CONnOLJ
HOLD 3 SEC
22
Your control will allow you to lock out the
surface burners, oven burners and control
panel so they cannot be activated.
Tolock/unlock the controls:
[Z] Turn all surface burners off.
Touch and hold the Gas/Control Lockout
pad for 3 secondsuntil the display shows
LOCON.
Tounlockthe control,touch and hold the
Gas/Control Lockout pad for 3seconds
until the displayshowsLOCOFF.
When this feature is onand the touch pads are
touched, the control will beep and the display
will show LOCON.
Thegas/control lockout mode affectsall
controls.No controls will work when this
feature is activated.
The adjustment will be retained in memory
after a power failure.
i¸i¸¸¸ !
i_i_i_i_i_iiIii_i_i_i_ i!i_!i__
COOKING
12-Hour, 24-Hour or Clock Blackout
Your control is set to use a 12-hour clock.
If you would prefer to have a 24-hour military
time clock or black out the clock display,follow
the steps below.
r_ Touch the Bake and Warm pads at the
same time for 3 seconds until the display
shows SF.
[] Touch the Clock pad once.Thedisplay will
show 12hr. Ifthis isthe choice you want,
touch the Start pad.
Cook and Hold
Your new control has a cook and hold feature
that keeps cooked foods warm for up to 3
hours after the cooking function isfinished.
This feature can only be used when timed
cooking.
Toactivate this feature, follow the steps below.
FT] Touch the Bake and Warm pads
at the same time for 3 seconds until the
display shows SF.
GEAppliances.com
Touch the Clock pad again to change
to the 24-hour military time clock.Thedisplay
will show 24 hr. Ifthis is the choiceyou want,
touch the Start pad.
Touch the Clock pad again to black out the
clock display.The display will show OFF. Ifthis
isthe choiceyou want, touch the Start pad.
NOTE:Ifthe clock is in the blackout mode, you
willnot be able to use the Delay Start function.
Touch the Cooking Time pad.The display
will show Hid OFF.
Touch the Cooking Time pad again to
activate the feature.Thedisplay will show
Hid ON.
r_ Touch the Start pad to activate the cook
and hold feature and leave the control set
inthis specialfeatures mode.
ZZZZZZZZZ
i!¸WAR + BAK i ¸
_ii/_i i ii i i i i i_i
[ COOKj
T,MEJ
S_T
Tone Volume (on some models)
Thisfeature allowsyou to adjust thetone
volumesto a more acceptable volume.There
are three possiblevolume levels.
r_ Touchthe upper oven Warm and Bake
pads at the same time until the display sh
ows SF.
Touchthe Cook Time pad. Thedisplay
shows2 BeepThisis the middle volume
level.
Touch the Cook Time pad again. The
display will show 3 Beep. Thisis the
loudest volume level.
Touch the Cook Time pad again. The
display will show 1 Beep. Thisisthe
quietest volume level.
Choosethe desired sound level(1Beep,2
@
Beep,3 Beep).
Touch the Start pad.
%
23
":-usingthe Sabbath feature. (/owerovenonU
(Designed for use on the Jewish Sabbath and Holidays)
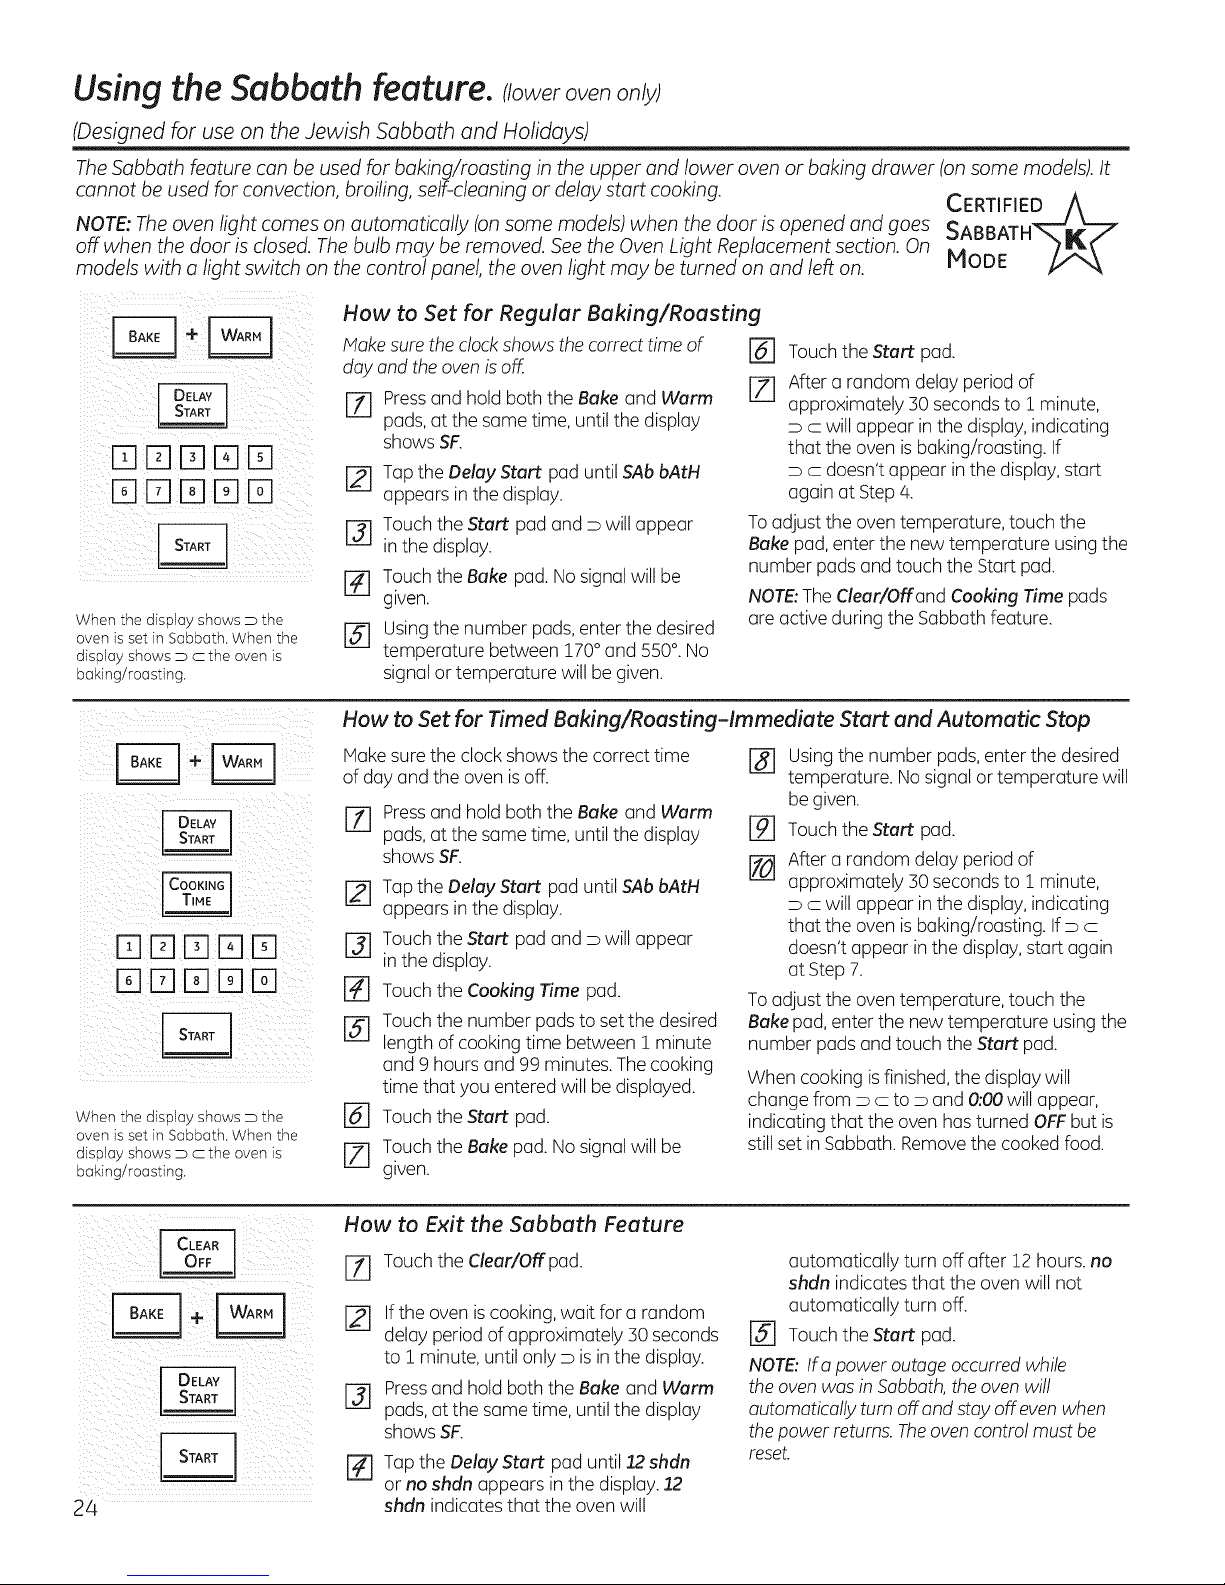
TheSabbath featurecan be usedfor baking/roasting in theupper and lower oven or bakingdrawer (onsomemodels).It
cannot be usedfor convection,broiling,self-cleaningor delaystart cooking.
NOTE: The oven light comes on automatically (onsome models) when the door is opened and goes
off when the door is closed. The bulb may be removed. See the Oven Light Replacement section. On
models with a light switch on the control panel, the oven light may be turned on and left on.
How to Set for Regular Baking/Roasting
CERTIFIED A
SABBATH__
MODE
When the display shows D the
oven is set in Sabbath. When the
display shows D c the oven is
baking/roasting.
When the display shows D the
oven is set in Sabbath. When the
display shows D c the oven is
baking/roasting.
Hake sure the clock shows the correcttime of []
day and the oven is off.
[Z] Pressand hold both the Bake and Warm [Z]
pads,at the same time, until the display
shows SF.
F_ Tapthe Delay Start pad until SAbbAtH
appears in the display.
F_ Touch the Start padand D will appear
inthe display.
F-_ Touch the Bake pad.No signalwill be
g,ven.
FS] Usingthe number pads,enter the desired
temperature between !70 ° and 550°. No
signal or temperature will be given.
Touchthe Start pad.
After a random delay period of
approximately 30 seconds to i minute,
D C will appear in the display,indicating
that the oven isbaking/roasting. If
D C doesn't appear in the display, start
again at Step/4.
Toadjust the oventemperature, touch the
Bakepad, enter the new temperature usingthe
number pads and touch the Start pad.
NOTE:The Clear/Off and Cooking Time pads
are active during the Sabbath feature.
How to Set for Timed Baking/Roasting-Immediate Start and Automatic Stop
Hake sure the clock shows the correct time []
of day and the oven isoff.
17] Pressand hold both the Bake and Warm
pads, at the same time, until the display F-_
shows SF. [-_
Tapthe Delay Start pad until SAb bAtH
[]
appears inthe display.
Touch the Start pad and D will appear
@
in the display.
[]
Touch the Cooking Time pad.
Touch the number pads to setthe desired
@
length of cooking time between 1 minute
and 9 hours and 99 minutes. Thecooking
time that you entered will be displayed.
F_ Touch the Startpad.
[-_ Touch the Bake pad. Nosignal will be
given.
Usingthe number pads, enter the desired
temperature. Nosignalor temperature will
be given.
Touch the Start pad.
After a random delay period of
approximately 50 seconds to ! minute,
D C will appear in the display,indicating
that the oven isbaking/roasting. If D C
doesn't appear in the display,start again
at Step7.
To adjust the oven temperature, touch the
Bake pad, enter the new temperature using the
number pads and touch the Start pad.
When cooking isfinished, the display will
change from D C to D and 0:00will appear,
indicating that the oven hasturned OFFbut is
still set in Sabbath.Remove the cooked food.
How to Exit the Sabbath Feature
i?iiii il
ii! ilklli!i
24
F-f] Touch the Clear/Off pad.
If the oven is cooking, wait for a random
delay period of approximately 50 seconds
to 1 minute, until only D is inthe display.
Pressand hold both the Bake and Warm
%
pads, at the same time, untilthe display
shows SF.
Tapthe Delay Start pad until 22 shdn
%
or no shdn appears in the display.:[2
shdn indicates that the oven will
automatically turn off after 12 hours, no
shdn indicates that the oven will not
automatically turn off.
[] Touchthe Start pad.
NOTE:Ira power outage occurred while
the ovenwas in Sabbath,the oven will
automatically turn off and stay off evenwhen
thepower returns. Theovencontrol must be
reset.
Removeand replace full extensionracks, somemodels GEApp,ancos.com
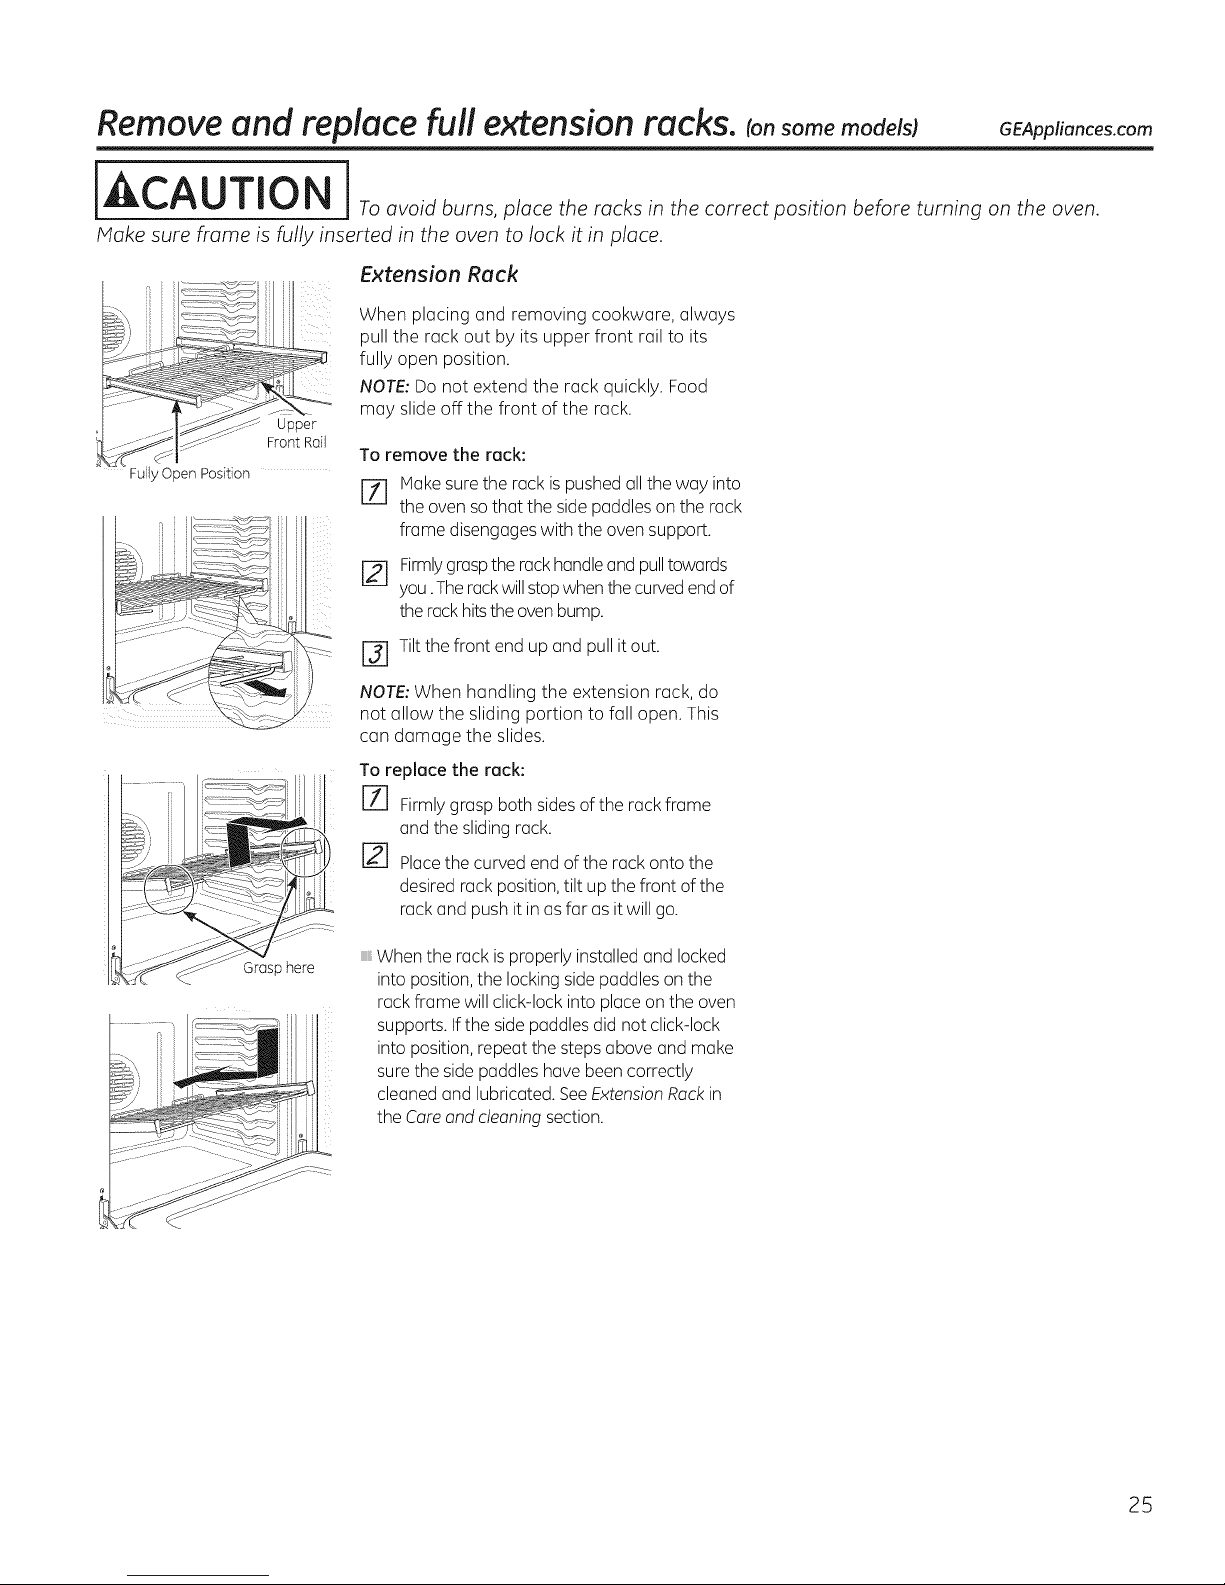
[ CAUTION
Make sure frame is fully inserted in the oven to lock it in place.
Extension Rack
When placing and removing cookware, always
pull the rack out by its upper front rail to its
fully open position.
NOTE: Do not extend the rack quickly. Food
_ Upper
FullyOpen Position
Front Rail
may slide off the front of the rack.
To remove the rack:
[-_ Make sure the rack is pushed all the way into
the oven so that the side paddles on the rack
frame disengages with the oven support.
Firmlygrasp the rack handle and pull towards
you .The rack will stop when the curved end of
the rack hitsthe oven bump.
r3] Tilt the front end up and pull it out.
NOTE: When handling the extension rack, do
not allow the sliding portion to fall open. This
can damage the slides.
To replace the rack:
[7] Firmly grasp both sides of the rack frame
and the sliding rack.
Place the curved end of the rack onto the
desired rack position, tilt up the front of the
rack and push it in as far as it will go.
Grasp here
When the rack is properly installed and locked
into position, the locking side paddles on the
rack frame will click-lock into place on the oven
supports. Ifthe side paddles did not click-lock
into position, repeat the steps above and make
sure the side paddles have been correctly
cleaned and lubricated. See Extension Rack in
the Care and cleaning section.
25
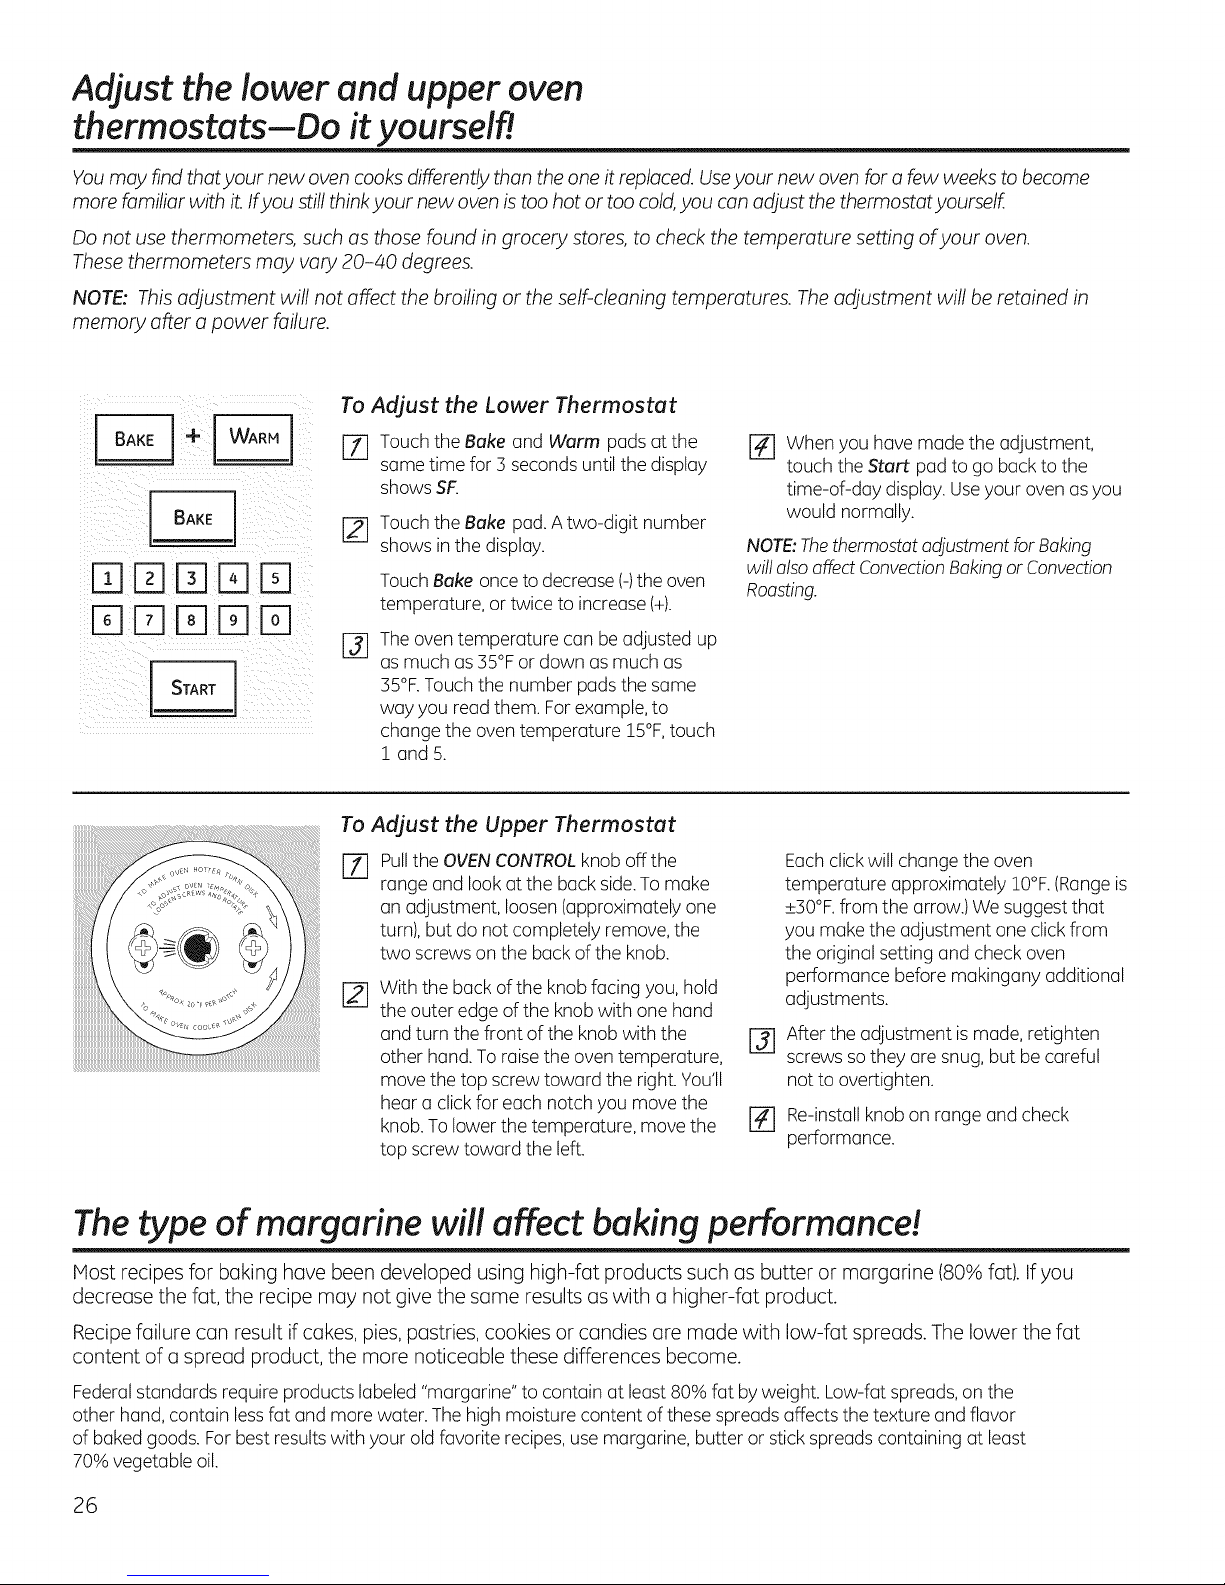
Adjust the lower and upper oven
thermostats--Do it yourselfl
You may find that your new oven cooks differently than the one it replaced. Useyour new oven for a few weeks to become
more familiar with it. Ifyou still think your new oven is too hot or too cold,you can adjust the thermostat yourself
Do not use thermometers, such as those found in grocery stores, to check the temperature setting of your oven.
These thermometers may vary 20-40 degrees.
NOTE: This adjustment will not affect the broiling or the self-cleaning temperatures. The adjustment will be retained in
memory after a power failure.
To Adjust the Lower Thermostat
E]lTlrqrq
STARTI
[71 Touchthe Bake and Warm pads at the
same time for 3 seconds until the display
showsSF.
[] Touchthe Bake pad.A two-digit number
shows in the display.
TouchBake once to decrease(-)the oven
temperature, or twice to increase (+).
Theoventemperature can be adjusted up
@
as much as 35°F or down as much as
35°F.Touch the number pads the same
way you read them. For example,to
change the oventemperature !5°F,touch
1 and 5.
To Adjust the Upper Thermostat
Pullthe OVENCONTROLknob off the
%
range and lookat the back side.To make
an adjustment, loosen (approximately one
turn),but do not completely remove,the
two screws on the back of the knob.
With the back of the knob facing you, hold
r21
the outer edge of the knobwith one hand
and turn the front of the knob with the
other hand.Toraise the oventemperature,
move the top screwtoward the right. You'll
hear a clickfor each notch you move the
knob.To lower the temperature, move the
top screw toward the left.
r4] When you have made the adjustment,
touch the Start pad to go back to the
time-of-day display. Useyour oven asyou
would normally.
NOTE:Thethermostatadjustment for Baking
will alsoaffectConvectionBakingor Convection
Roasting.
Eachclickwill change the oven
temperature approximately IO°F.(Rangeis
_+30°F.from the arrow.) We suggest that
you make the adjustment one clickfrom
the original setting and check oven
performance before makingany additional
adjustments.
After the adjustment ismade, retighten
@
screws so they are snug,but be careful
not to overtighten.
r-_ Re-installknob on range and check
performance.
The type of margarine will affect baking performance!
Most recipes for baking have been developed using high-fat products such as butter or margarine (80% fat). If you
decrease the fat, the recipe may not give the same results as with a higher-fat product.
Recipe failure can result if cakes, pies, pastries, cookies or candies are made with low-fat spreads. The lower the fat
content of a spread product, the more noticeable these differences become.
Federalstandards require products labeled "margarine" to contain at least 80% fat by weight. Low-fat spreads,on the
other hand,contain lessfat and more water. The high moisture content of these spreadsaffects the texture and flavor
of baked goods. For best resultswith your old favorite recipes, usemargarine, butter or stick spreads containing at least
70% vegetable oil.
26
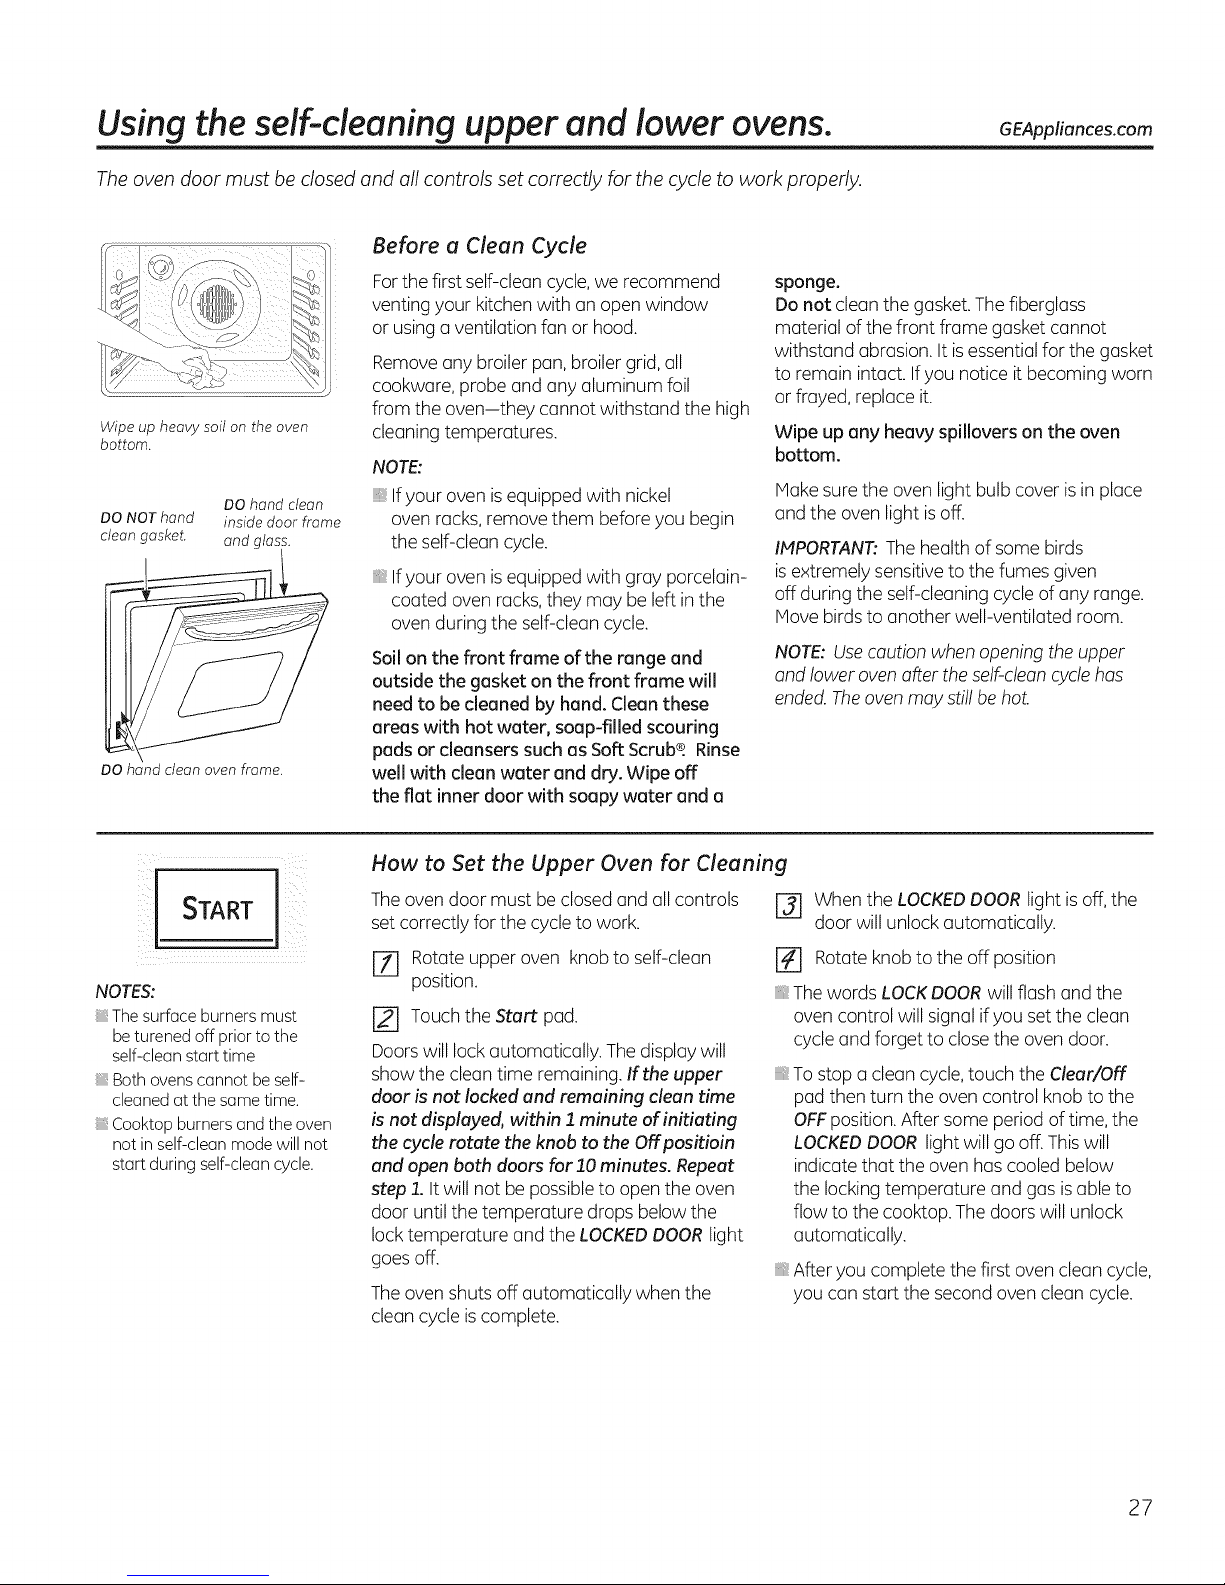
Usingthe self-cleaning upper and lower ovens.
Theoven doormust:be closedand allcontrols set correctlyfor the cycleto work properly.
Before a Clean Cycle
Wipe up heavy soil on the oven
bottom.
DO hand clean
DO NOT hand inside door frame
clean gasket, and glass.
DO hand clean oven frame.
Forthe first self-cleancycle,we recommend
venting your kitchenwith an open window
or using a ventilation fan or hood.
Removeany broiler pan, broilergrid, all
cookware, probe and any aluminum foil
from the oven-they cannot withstand the high
cleaning temperatures.
NOTE:
Ifyour oven is equipped with nickel
oven racks, remove them before you begin
the self-clean cycle.
Ifyour oven is equipped with gray porcelain-
coated oven racks,they may be left in the
oven during the self-cleancycle.
Soilon the front frame of the range and
outside the gasket on the front frame will
need to be cleaned by hand. Clean these
areas with hot water, soap-filled scouring
pads or cleansers such as Soft ScrubQ.Rinse
well with clean water and dry. Wipe off
the flat inner door with soapy water and a
sponge.
Do not clean the gasket. Thefiberglass
material of the front frame gasket cannot
withstand abrasion. It isessentialfor the gasket
to remain intact. Ifyou notice it becoming worn
or frayed, replace it.
Wipe up any heavy spillovers on the oven
bottom.
Hake sure the oven light bulb cover isin place
and the oven light isoff.
IMPORTANT'.The health of some birds
isextremely sensitiveto the fumes given
off during the self-cleaning cycle of any range.
Hove birds to another well-ventilated room.
NOTE:Usecaution when opening the upper
and lower ovenafter theself-cleancyclehas
ended.Theoven may still behot.
GEAppliances.com
i START J
NOTES:
Thesurface burners must
be turened off prior to the
self-clean start time
Both ovens cannot be self-
cleaned at the same time.
Cooktop burners and the oven
not in self-clean mode will not
start during self-clean cycle.
How to Set the Upper Oven for Cleaning
Theoven door must be closedand all controls
set correctly for the cycle to work.
[] Rotate upper oven knob to self-clean
position.
[] Touch the Start pad.
Doorswill lock automatically. The display will
show the clean time remaining. If the upper
door is not locked end remaining clean time
is not displayed, within 1 minute of initiating
the cycle rotate the knob to the Off positioin
and open both doors for 10 minutes. Repeat
step 1. Itwill not be possible to open the oven
door until the temperature drops below the
locktemperature and the LOCKEDDOOR light
goes off.
Theoven shuts off automatically when the
clean cycle iscomplete.
r_ When the LOCKEDDOORlight isoff, the
door will unlock automatically.
r_ Rotate knob to the off position
Thewords LOCKDOORwill flash and the
oven control will signal if you set the clean
cycle and forget to closethe oven door.
Tostop a clean cycle,touch the Clear/Off
pad then turn the oven control knob to the
OFFposition.After some period of time,the
LOCKEDDOOR light will go off.Thiswill
indicate that the oven has cooled below
the locking temperature and gas isable to
flow to the cooktop. The doors will unlock
automatically.
After you complete the first oven clean cycle,
you can start the second oven clean cycle.
27
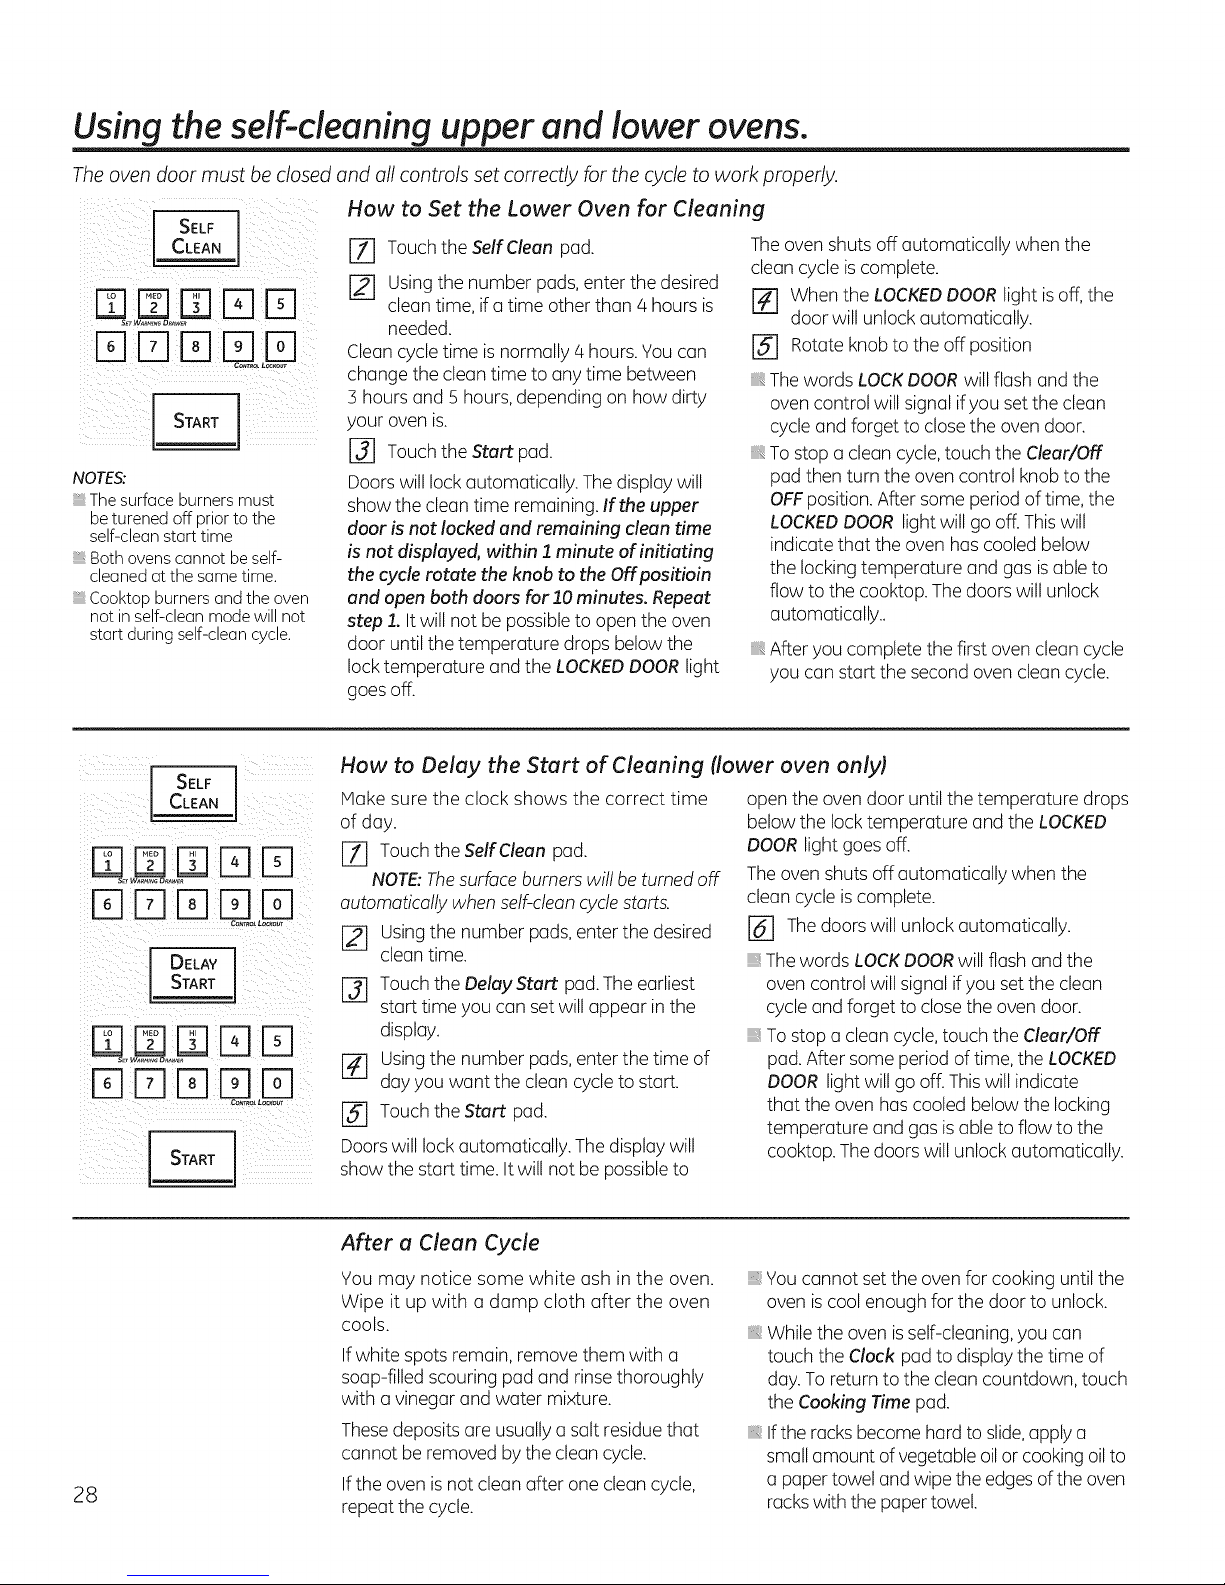
Usingthe self-cleaning upper and lower ovens.
The oven door must be closed and all controls set correctly for the cycle to work properly.
SELF
CLEA
START
NOTES:
The surface burners must
beturened off prior to the
self-clean start time
Both ovens cannot be self-
cleaned at the same time.
Cooktop burners and the oven
not in self-clean mode will not
start during self-clean cycle.
How to Set the Lower Oven for Cleaning
[] Touch the Self Clean pad.
r_ using the number pads,enter the desired
clean time, ifa time other than 4 hours is
needed.
Cleancycle time is normally 4 hours.You can
change the clean time to anytime between
3 hours and Shours, depending on how dirty
your oven is.
[-_ Touch the Start pad.
Doorswill lock automatically. The displaywill
show the clean time remaining. If the upper
door is not locked and remaining clean time
is not displayed, within 1 minute of initiating
the cycle rotate the knob to the Off positioin
and open both doors for 10 minutes. Repeat
step 1. It will not be possibleto open the oven
door untilthe temperature drops below the
locktemperature and the LOCKEDDOORlight
goes off.
Theoven shuts off automatically when the
clean cycle iscomplete.
r_ When the LOCKEDDOORlight isoff, the
door will unlock automatically.
[] Rotate knob to the off position
Thewords LOCKDOORwill flash and the
oven control will signal ifyou set the clean
cycle and forget to closethe oven door.
Tostop a clean cycle,touch the Clear/Off
pad then turn the oven control knob to the
OFFposition.After some period of time,the
LOCKEDDOOR light will go off.Thiswill
indicate that the oven has cooled below
the locking temperature and gas isable to
flow to the cooktop. The doors will unlock
automatically..
After you complete the first oven clean cycle
you can start the second oven clean cycle.
W CSELF
LEAN
DFqDUo
E3N
r-qrqDUoD
I START
28
How to Delay the Start of Cleaning (lower oven only)
Hake sure the clock shows the correct time
of day.
[71 Touchthe SelfClean pad.
NOTE:Thesurface burnerswill be turned off
automatically when self-cleancyclestarts.
[] Usingthe number pads, enter the desired
clean time.
[] Touchthe Delay Start pad.Theearliest
start time you can set will appear in the
display.
[] Usingthe number pads, enter the time of
dayyou want the clean cycleto start.
Touchthe Start pad.
Doorswill lock automatically. The displaywill
show the start time. Itwill not be possibleto
open the oven door until the temperature drops
below the lock temperature and the LOCKED
DOOR light goes off.
Theoven shuts off automatically when the
clean cycle iscomplete.
r_ The doors will unlock automatically.
Thewords LOCKDOORwill flash and the
oven control will signal if you set the clean
cycleand forget to closethe oven door.
Tostop a clean cycle,touch the Clear/Off
pad.After some period of time, the LOCKED
DOOR light will go off. Thiswill indicate
that the oven has cooled below the locking
temperature and gas isable to flow to the
cooktop. The doors will unlock automatically.
After a Clean Cycle
You may notice some white ash in the oven.
Wipe it up with a damp cloth after the oven
cools.
Ifwhite spots remain, remove them with a
soap-filled scouring pad and rinse thoroughly
with a vinegar and water mixture.
Thesedeposits are usuallya salt residue that
cannot be removed bythe clean cycle.
Ifthe oven is not clean after one clean cycle,
repeatthe cycle.
Youcannot set the oven for cooking until the
oven iscool enough for the door to unlock.
While the oven isself-cleaning, you can
touch the Clock pad to display the time of
day. To return to the clean countdown, touch
the Cooking Time pad.
If the racks becomehard to slide,applya
small amount of vegetable oilor cookingoil to
a paper towel and wipe the edgesof the oven
rackswith the paper towel.
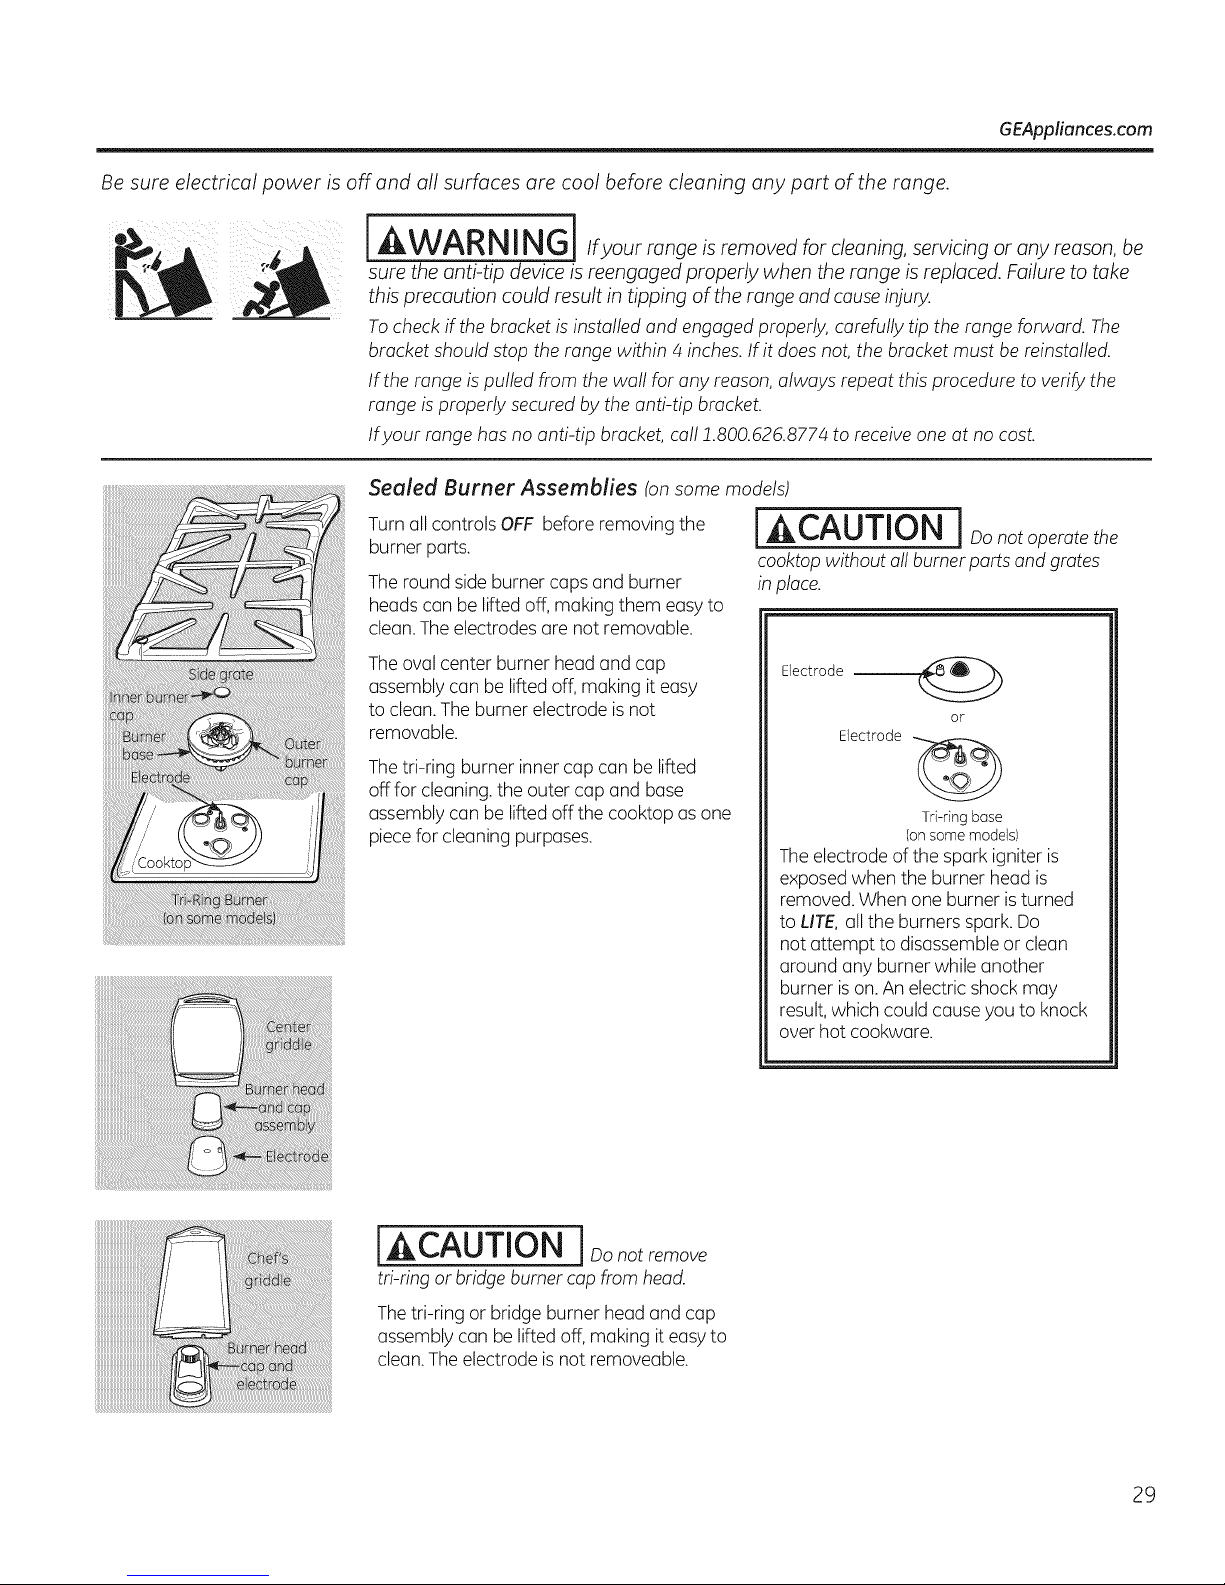
Be sure electrical power is off and all surfaces are cool before cleaning any part of the range.
I^ I
I_WARNINGI/fyour rangeisremovedforcleaning,servicingoranyreason,be
sure the anti-tip device is reengaged properly when the range is replaced. Failure to take
this precaution could result in tipping of the range and cause injury.
Tocheck if the bracket is installed and engaged properly, carefully tip the range forward. The
bracket should stop the range within 4 inches. If it does not, the bracket must be reinstalled.
If the range is pulled from the wall for any reason, always repeat this procedure to verify the
range is properly secured by the anti-tip bracket.
Ifyour range has no anti-tip bracket, call !.800.626.8774 to receive one at no cost.
Sealed Burner Assemblies fan some models)
GEAppliances.com
Turnall controls OFF before removing the
burner parts.
Theround side burner caps and burner
heads can be lifted off, making them easy to
clean.The electrodesare not removable.
Theoval center burner head and cap
assembly can be lifted off,making it easy
to clean. The burner electrode is not
removable.
Thetri-ring burner inner cap can be lifted
off for cleaning, the outer cop and base
assembly can be lifted off the cooktop as one
piecefor cleaning purpases.
[ACAUTION i _onotoperotethe
cooktop without all burner parts and grates
in place.
Electrode --
or
Electrode
Tri-dng bose
(onsome models)
Theelectrode of the spark igniter is
exposed when the burner head is
removed.When one burner isturned
to LITE,all the burners spark.Do
not attempt to disassembleor clean
around any burner while another
burner ison. An electric shock may
result,which could cause you to knock
over hot cookware.
!iiiiiiiiiiiiiiii
IACAUTION I_onotremove
tri-ring or bridge burner cap from head.
Thetri-ring or bridge burner head and cap
assembly can be lifted off, making it easyto
clean. The electrode isnot removeable.
29

Care and cleaning of the range,
Burner Caps, Bases and Heads
Beforeremovingthe burner capsand heads(on
some models),remembertheir sizeand location.
Replacethem inthe same locationafter cleaning.
NOTE: Do not use steel wool or scouring
powders to clean the burner parts.
Burner caps
Lift off when cool.Wash burner caps in hot,
soapy water and rinsewith clean water. You
Burner cap is Burner cap is
properly seated. NOTproperly
Burner heads (onSome models)
The burner heads (on sOmemOdels)
are removable: Simply lift them off
Tri-ring head (on some models)
Burnerhead
Burnerbase
MakeSuretheringintheburnerhead
ispositionedovertheelectrodeand
thatthe burne[headisfullyinserted
insidetheburnerbase.A smal!gap
betweenthebaseand headisnormal.
Front-right head (on s0me models),
front-left head, back-right head and
Stability nber useasewing
Burner(k._-_) tounclogthe
• "_'_ smallholeinthe
base_'_ Electrode burnerhead:
Make Surethe Slotin the burner head
Theovalburnerhead/capassemblyis
removable_Simplylift it Offtherange for
cleaning usea sewingneedleor twistrtie
to Unclogthesmallholeinthe burner
heads,
baCk:left head
_i_ needleort_vistTtie
iSpOSitionedOverthe electrode,
seated.
)
Hole in
head
30
may scour with a plastic scouring pad to
remove burned-on food particles.Toget rid of
burned on food, place the caps ina covered
container. Add 1/4 cup ammonia and let soak
for several hours orover night. Wash, rinsewell
and dry.
Tri-ring burner (onsome models)
Theouter cap on the tri-ring burner isnot
removable.Onlythe center round capmay be
removed for cleaning.
Tocleanthe burnerbases,usesoapywater anda
plasticscouringpad.Wipecleanwith a dampcloth.
Makesure that no water gets into the burner
bases.Allow them to dry fully before using.
Burner Heads (on some models) and Oval
(Center) Burner Head/Cap Assembly
The burner heads and the oval burner head/cap
assembly are removable. Simply lift them off the
range for cleaning.
For proper ignition, make sure the small hole in
the section that fits over the electrode is kept
open. A sewing needle or wire twist-tie works
well to unclog it.
The slits in the burner heads must be kept clean
at alltimes for an even, unhampered flame.
Clogged or dirty burner ports or electrodes will
not allow the burner to operate properly.
Any spillon or around an electrode must
be carefully cleaned. Take care to not hit an
electrode with anything hard or it could be
damaged.
Clean the burner heads routinely, especially
after bad spillovers, which could clog the
openings. Liftoff when cool.
To remove burned-on food, soak the burner
heads in a solution of mild liquid detergent
and hot water for 20-30 minutes. Formore
stubborn stains, use a toothbrush.
After cleaning
Beforeputting the burner caps,heads(onsome
models)and oval head/cap assemblyback,shake
out excesswater and then drythem thoroughly
bysettingin awarm ovenfor 30 minutes.
Replacement Burner Heads (onsomemodels)
Replaceburner heads overthe electrodes on
the cooktop, inthe correct locations according
to their size.Thereisone small,one medium,
one large and one extra-large burner head.
Front of range
'on some moaels
Trl-rln ] neaa
Makesurethe starornotedependingonmodel
tneournerheadispositionedovertneetectroae.
4ole
:troae
_S at or
E ectr
Oval (tented Burner Head/Cap Assembly
ReD,aceme ova center)neaa/caDassemDtyover
theelectrodeonme COOKtOp.
Ovai neaa and cad
assemE.,
MaKe sure 1:hesict in l:ne
burner heac [s oositioned
over _neelectrode.
0
Front of ranoe
Caps
ReolacethematchingsizeCaDSonto me burner
Dosesorheads
Hakesurethatthe headson somemodelsana
capsarereplacedintnecorrectiocattons
. i__ Rame models)
. o
Front of range Trl-nng caF
°/
Elec_roae
on some models
0
 Loading...