

GE Appliances JGB500, JGB605, PGB916, PGB918, PGB975 Owner's Manual And Installation Instructions
...Page 1
GEAppliances.com
- ----_are_yInstructions .... 2-7
Installation
Instructions ........... 4o-s1
Operating Instructions
Aluminum Foil ................. 14
Clock and Timer ............... 15
Lower Oven Drawer ........... 30
Oven ...................... 11-32
Baking and Roasting ......... 14
Control Lockout .............. 24
Om
Convection .............. 18-22
Gas/Control Lockout ......... 24
Oven Control ............. 11, 12
Power Outage ............ 13, 15
Preheating .................. 14
Probe ........................ 17
Racks ....................... 13
Sabbath Feature ......... 25, 26
Self-Cleaning ............. 31, 32
Special Features ......... 23, 24
Thermostat Adjustment ...... 27
Timed Baking
and Roasting ................ 16
Timed Convection Baking .... 22
Surface Cooking ............ 8-10
Griddle ...................... 10
Warming Drawer .......... 28, 29
Air Adjustment ................ 50
Anti-Tip Device ............ 43, 51
Assemble Surface Burners ..... 48
Checking Burner
Ignition ....................... 49
Connecting the Range
to Gas .................... 44-46
Dimensions and Clearances ...42
Electrical Connections ..... 47, 48
Leveling the Range ............ 50
LP ............................ 51
Troubleshooting
Tips ...................... 52-55
Accessories ............... 57
Consumer Support
Consumer Support ,, ,Back Cover
Warrantg for Customers
in Canada ..................... 59
Warrantg for Customers
in the U.S.A................... 58
JGB500
JGB605
PGB900
PGB908
PGB910
PGB916
PGB918
PGB975
In Canada contact us at:
www.G EAppliances.ca
Care and Cleaning
Burner Assemblg .......... 33, 34
Burner Grates ................. 35
Control Panel and Knobs ...... 36
Cooktop ...................... 35
Door Removal ................. 37
Griddle ........................ 35
Oven Bottom .................. 36
Oven Light Replacement ...... 38
Oven Vents ................... 36
Racks ......................... 38
Self-Cleaning .............. 31, 32
Stainless Steel Surfaces ....... 37
Drawer .................... 38, 39
Write the model and serial
numbers here:
Model #
Serial #
You can find them on a label
on the front of the range behind the
warming drawer or lower
oven drawer.
183D5580P25149-85169-1 06-09JR
Page 2
IMPORTANTSAFETYINFORMATION.
READALL INSTRUCTIONSBEFOREUSING.
WARNING!
For your safety, the information in this manual must be followed to minimize the risk of fire or
explosion, electric shock, or to prevent property damage, personal injury, or loss of life.
WARNING: If the information
in this manual is not followed exactlg,
a fire or explosion meg result, causing
propertg damage, personal in]urg
®
or death.
Do not store or use gasoline or other
flammable vapors and liquids in the
vicinity of this or any other appliance.
- WHAT TO DO IF YOU
SMELL GAS
....Do not trg to light ang appliance.
.... Do not touch ang electrical switch;
do not use ang phone in gour building.
Immediatelg call gour gas supplier
from a neighbor's phone. Follow the
gas supplier's instructions.
.... If gou cannot reach gour gas supplier,
call the fire department.
- Installation and service must be
performed bg a qualified installer,
service agencg or the gas supplier.
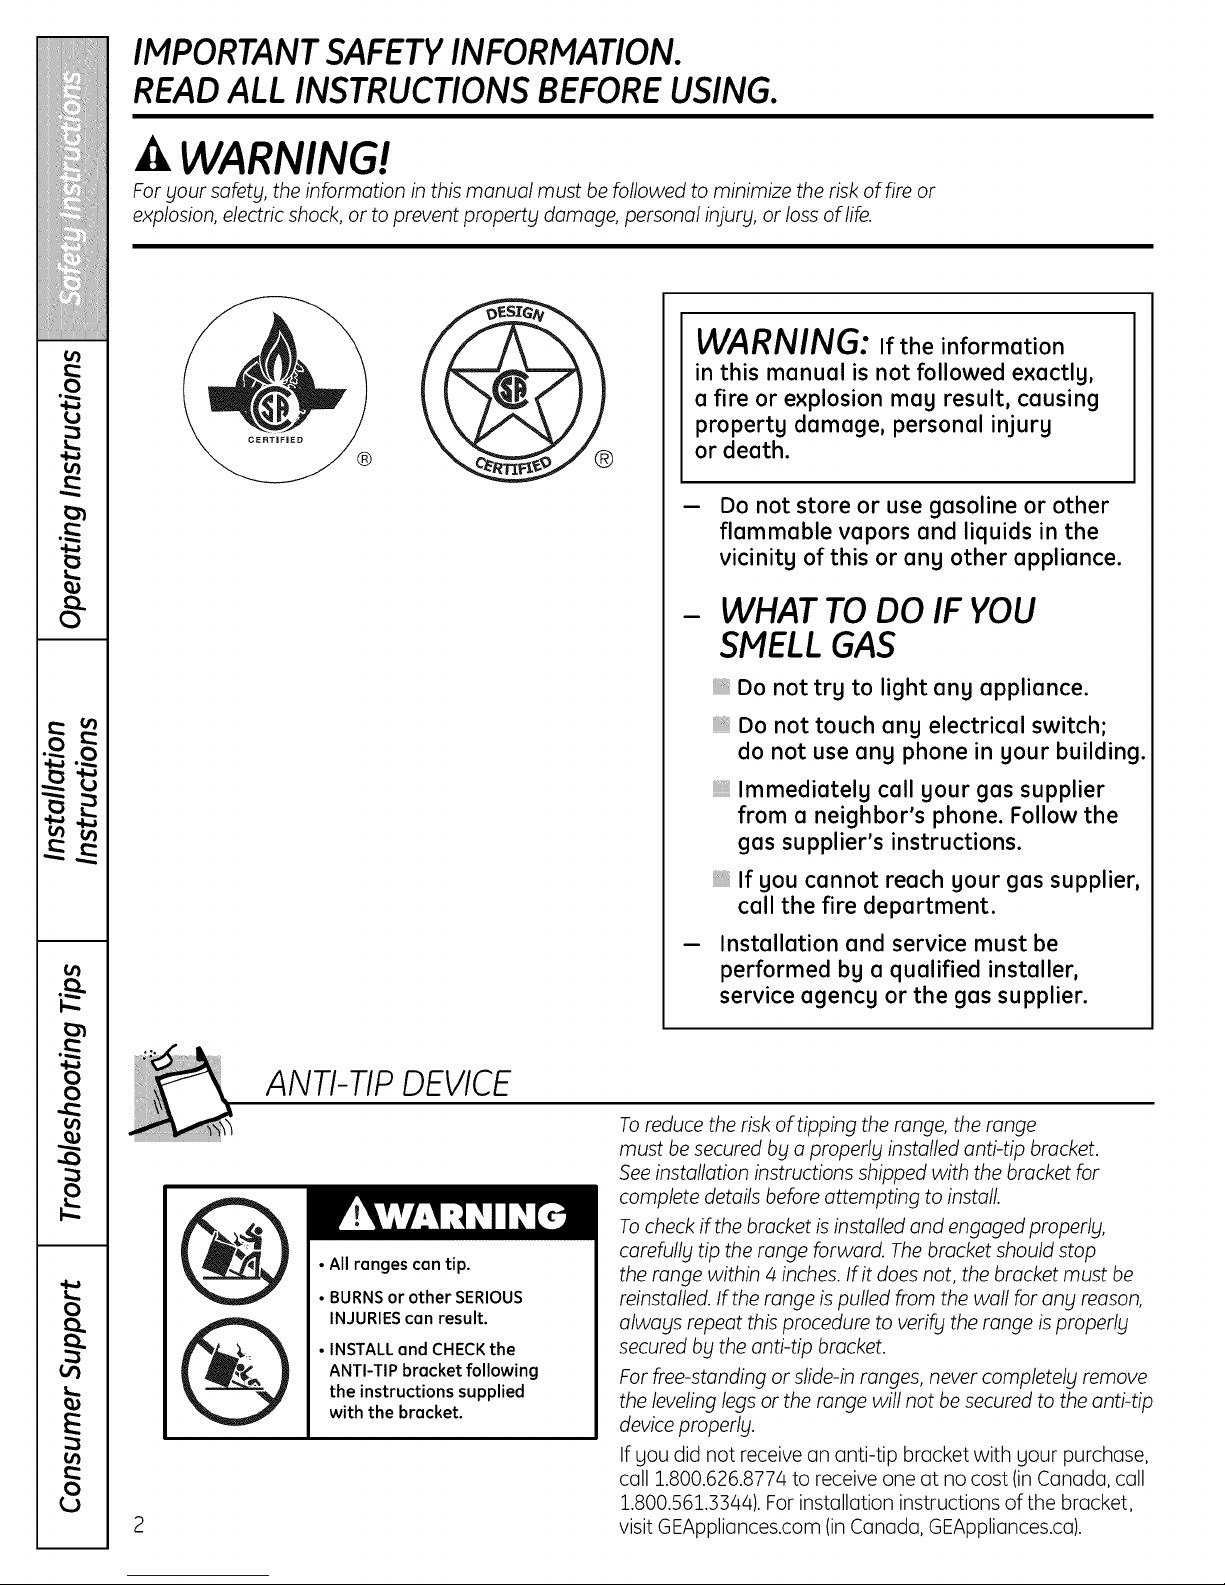
ANTI-TIP DEVICE
To reduce the risk of tipping the range, the range
must be secured by a properly installed anti-tip bracket.
See installation instructions shipped with the bracket for
complete details before attempting to install.
To check if the bracket is installed and engaged properly,
• All ranges can tip.
• BURNSor other SERIOUS
INJURIEScan result.
• INSTALLand CHECKthe
ANTI-TIP bracket following
the instructions supplied
with the bracket.
2
carefully tip the range forward. The bracket should stop
the range within/4 inches. If it does not, the bracket must be
reinstalled. If the range is pulled from the wall for any reason,
always repeat this procedure to verify the range is properly
secured by the anti-tip bracket.
For flee-standing or slide-in ranges, never completely remove
the leveling legs or the range will not be secured to the anti-tip
device properly.
If you did not receive an anti-tip bracket with your purchase,
call 1.800.626.8774 to receive one at no cost (in Canada, call
1.800.561.3344). For installation instructions of the bracket,
visit GEAppliances.com (in Canada, GEAppliances.ca).
Page 3

GEAppliances.com
WARNING!
IMPORTANT SAFETY NOTICE
TheCalifornia Safe Drinking Water and Toxic Enforcement Act requires the Governor of California to
publish a list of substances known to the state to cause birth defects or other reproductive harm, and
requires businesses to warn customers of potential exposure to such substances.
Gas appliances can cause minor exposure to four of these substances, namely benzene, carbon
monoxide, formaldehyde and soot, caused primarily by the incomplete combustion of natural gas or
LPfuels. Properly adjusted burners, indicated by a bluish rather than a yellow flame, will minimize
incomplete combustion. Exposure to these substances can be minimized by venting with an open
window or using a ventilation fan or hood.
SAFETY PRECAUTIONS
Have the installer show you the location of the range gas shut-off valve and how to shut it off if necessary.
Have your range installed and properly
grounded by a qualified installer, in
accordance with the Instalk_tion Instructions.
Any adjustment and service should be
performed only by qualified gas range
installers or service technicians.
Do not attempt to repair or replace any
p(]rt of your range unless it is specific(lily
recommended in this m(]nu(]l. All other service
should be referred to (] qu(]lified technician.
Plug your range into (] 120-volt grounded
outlet only. Do not remove the round
grounding prong from the plug. If in doubt
(]bout the grounding of the home electric(]l
system, it is your person(]l responsibility and
oblig(]tion to hove on ungrounded outlet
replaced with (] properly grounded, 3-prong
outlet in accord(]nce with the Nation(]l
Electric(]l Code. Do not use on extension
cord with this (]ppliance.
Page 4

IMPORTANTSAFETYINFORMATION.
READALL INSTRUCTIONSBEFOREUSING.
SAFETYPRECAUTIONS
Locate the range out of kitchen traffic path
and out of drafty locations to prevent poor
air circulation.
Be sure all packaging materials are removed
from the range before operating it to prevent
fire or smoke damage should the packaging
material ignite.
Be sure your range is correctly adjusted by
a qualified service technician or installer for
the type of gas (natural or LP)that is to be
used. Your range can be converted for use
with either type of gas. See the Installation
of the range section.
WARNING:Theseadjustments
must be made by a qualified service
technician in accordance with the
manufacturer's instructions and all codes
and requirements of the authority having
jurisdiction. Failure to follow these instructions
could result in serious injury or property
damage. The qualified agency performing
this work assumes responsibility for the
conversion.
After prolonged use of a range, high floor
temperatures may result and many floor
coverings will not withstand this kind of use.
Never install the range over vinyl tile or
linoleum that cannot withstand such type
of use. Never install it directly over interior
kitchen carpeting.
Do not leave children alone or unattended
where a range is hot or in operation.
They could be seriously burned.
Do not allow anyone to climb, stand or hang
on the oven door, lower oven drawer, warming
drawer or cooktop. They could damage the
range and even tip it over, causing severe
personal injury.
CAUTION:Items of interest to
children should not be stored in cabinets
above a range or on the backsplash of a
rangeichildren climbing on the range to
reach items could be seriously injured.
Never wear loose-fitting or hanging garments
while using the appliance. Be careful when
reaching for items stored in cabinets over the
range. Flammable material could be ignited
if brought in contact with flame or hot oven
surfaces and may cause severe burns.
Do not store flammable materials in an oven,
a range drawer or near a cooktop.
Do not store or use combustible materials,
gasoline or other flammable vapors and
liquids in the vicinity of this or any other
appliance.
Do not let cooking grease or other flammable
materials accumulate in or near the range.
Do not use water on grease fires. Never pick
up a flaming pan. Turn the controls off.
Smother a flaming pan on a surface burner
by covering the pan completely with
a well-fitting lid, cookie sheet or flat tray.
Use a multi-purpose dry chemical or
foam-type fire extinguisher.
Flaming grease outside a pan can be put
out by covering it with baking soda or,
if available, by using a multi-purpose dry
chemical or foam-type fire extinguisher.
Flame in the upper oven or lower oven drawer
can be smothered completely by closing the
oven door or drawer and turning the control
to off or by using a multi-purpose dry
chemical or foam-type fire extinguisher.
Let the burner grates and other surfaces cool
before touching them or leaving them where
children can reach them.
Never block the vents (air openings) of the
range. They provide the air inlet and outlet
that are necessary for the range to operate
properly with correct combustion. Air openings
are located at the rear of the cooktop, at the
top and bottom of the oven door, and at the
bottom of the range under the warming
drawer, lower oven drawer or kick panel.
Large scratches or impacts to glass doors
can lead to broken or shattered glass.
WARNING: NEVERusethis
appliance as a space heater to heat or
warm the room. Doing so may result
in carbon monoxide poisoning and
4
overheating of the oven.
Page 5
GEAppliances.com
WARNING!
SURFACEBURNERS
Use proper pan s/zelavoid pans that are unstable or easily tipped. Select cookware having flat
bottoms large enough to cover burner grates. Toavoid spillovers, make sure cookware is large enough
to contain the food properly. This will both save cleaning time and prevent hazardous accumulations
of food, since heavy spattering or spillovers left on range can ignite. Use pans with handles that can
be easily grasped and remain cool.
Always use the L/TE position when igniting
the top burners and make sure the burners
have ignited.
Never leave the surface burners unattended
at high flame settings. Boilovers cause smoking
and greasg spillovers that may catch on fire.
Adjust the top burner flame size so it does
not extend begond the edge of the cookware.
Excessive flame is hazardous.
Use onlg drg pot holders- moist or damp pot
holders on hot surfaces mag result in burns
from steam. Do not let pot holders come near
open flames when lifting cookware. Do not use
a towel or other bulks cloth in place of a pot
holder.
When using glass cookware, make sure it
isdesigned for top-of-range cooking.
To minimize the possibilitg of burns, ignition
of flammable materials and spillage, turn
cookware handles toward the side or back
of the range without extending over adjacent
burners.
Carefullg watch foods being fried at a high
flame setting.
Alwags heat fat slowlg, and watch as it heats.
Do not leave ang items on the cooktop. The
hot air from the vent mag ignite flammable
items and will increase pressure in closed
containers, which mag cause them to burst.
If a combination of oils or fats will be used
in frging, stir together before heating or
as fats melt slowlg.
Use a deep fat thermometer whenever
possible to prevent overheating fat begond
the smoking point.
Use the least possible amount of fat for
effective shallow or deep-fat frging. Filling the
pan too full of fat can cause spillovers when
food is added.
Do not flame foods on the cooktop. If you
do flame foods under the hood, turn the
fan on.
Do not use a wok on the cooking surface
if the wok has a round metal ring that is
placed over the burner grate to support the
wok. This ring acts as a heat trap, which mag
damage the burner grate and burner head.
Also, it mag cause the burner to work
improperlg. This mag cause a carbon
monoxide level above that allowed bg current
standards, resulting in a health hazard.
Foods for frging should be as drg as possible.
Frost on frozen foods or moisture on fresh
foods can cause hot fat to bubble up and
over the sides of the pan.
Never trg to move a pan of hot fat, especiallg
a deep fat frger. Wait until the fat is cool.
Do not leave plastic items on the cooktop-
theg mag melt if left too close to the vent.
Keep all plastics awag from the surface
burners.
To avoid the possibilitg of a burn, alwags be
certain that the controls for all burners are
at the OFF position and all grates are cool
before attempting to remove them.
If range is located near a window, do not hang
long curtains that could blow over the surface
burners and create a fire hazard.
If SOUsmell gas, turn off the gas to the range
and call a qualified service technician. Never
use an open flame to locate a leak.
Alwags turn the surface burner controls off
before removing cookware.
Do not lift the cooktop. Lifting the cooktop can
lead to damage and improper operation of the
range.
When disabling Gas/Control Lockout, make
sure the surface controls are set to the OFF
position. This will preclude gas flow when the
range is turned on.
Page 6
IMPORTANTSAFETYINFORMATION.
READALL INSTRUCTIONSBEFOREUSING.
ELECTRICWARMINGDRAWER
AND LOWEROVENDRAWERConsome models)
The purpose of the warming drawer and the
WARM ZONE setting of the lower oven drawer
isto hold hot cooked foods at serving
temperature. Always start with hot food; cold
food cannot be heated or cooked in the
warming drawer or the WARM ZONE setting
of the lower oven drawer.
Do not use the drawer to dry newspapers.
If overheated, they can catch on fire.
Do not leave paper products, plastics, canned
food, or combustible materials in the drawer.
Never leave jars or cans of fat drippings in or
near your drawer.
Do not warm food in the drawer for more
than two hours.
Never place, use or self-clean the lower oven
drawer pan in the upper oven.
Do not touch the heating element or the
interior surface of the drawer. These
surfaces may be hot enough to burn.
REMEMBER: The inside surface of the drawer
may be hot when the drawer is opened.
Use care when opening the drawer. Open
the drawer a crack and let hot air or steam
escape before removing or replacing food.
Hot air or steam which escapes can cause
burns to hands, face and/or eyes.
Do not use aluminum foil to line the lower
oven drawer. Foil is an excellent heat insulator
and will trap heat beneath it. This will upset
the performance of the drawer and it could
damage the interior finish.
COOK MEATAND POULTRY THOROUGHLY...
Cook meat and poultry thoroughly-meat to ot least on INTERNALtemperature of160°F and poultry
to ot least on INTERNALtemperature of l 80°E Cooking to these temperatures usually protects against
foodbome illness.
SELF-CLEANING THE UPPEROVEN
Be sure to wipe off excess spillage before
self-cleaning operation.
Before self-cleaning the oven, remove any
broiler pan, broiler grid, all cookware, probe
and any aluminum foil.
Never place, use or self-clean the lower oven
drawer pan in the upper oven.
Nickel oven racks (on some models) should be
removed from the oven before beginning the
self-clean cycle.
Gray porcelainicoated oven racks (on some
models) may be cleaned in the oven during
the self-clean cycle.
Clean only parts listed in this Owner's Manual.
6
Do not clean the door gasket. The door gasket
isessential for a good seal. Care should be
taken not to rub, damage or move the gasket.
If the self-cleaning mode malfunctions,
turn the oven off and disconnect the power
supply. Have it serviced by a qualified
technician.
iiiiiiiiiiiii!Do not use oven cleaners. No commercial
oven cleaner or oven liner of any kind should
be used in or around any part of the oven.
Residue from oven cleaners will damage
the inside of the oven when the self-clean
cycle is used.
Page 7
GEAppliances.com
UPPEROVEN
Stand away from the range when opening the door of a hot oven. The hot air and steam that escape
can cause burns to hands, face and eyes.
Do not usetheoven fora storagearea.
Itemsstoredintheoven can ignite.
Keep theoven freefrom greasebuildup.
Placetheoven racksinthedesiredposition
whiletheoven iscool.
Pulling out the rack to the stop-lock is a
convenience in lifting heavy foods. It is also
a precaution against burns from touching hot
surfaces of the door or oven walls. The lowest
position isnot designed to slide.
Do not heat unopened food containers.
Pressure could build up and the container
could burst, causing an injury.
WARNING: NEVERcoverany
slots, holes or passages in the oven bottom
or cover an entire rack with materials such
as aluminum foil. Doing so blocks air flow
through the oven and may cause carbon
monoxide poisoning. Aluminum foil linings
may also trap heat, causing a fire hazard.
Do not use aluminum foil anywhere in the
oven except as described in this manual.
Misuse could result in a fire hazard or damage
to the range.
When using cooking or roasting bags in the
oven, follow the manufacturer's directions.
Do not use your oven to dry newspapers.
If overheated, they can catch fire.
Use only glass cookware that is recommended
for use in gas ovens.
Always remove any broiler pan from range
as soon as you finish broiling. Grease left in
the pan can catch fire if oven is used without
removing the grease from the broiler pan.
When broiling, if meat istoo close to the flame,
the fat may ignite. Trim excess fat to prevent
excessive flare-ups.
Make sure any broiler pan is in place correctly
to reduce the possibility of grease fires.
If you should have a grease fire in a broiler
pan, press the Clear/Off pad, and keep
the oven door closed to contain fire until
it burns out.
For safety and proper cooking performance,
always bake and broil with the oven door
closed.
Never place, use or self-clean the lower oven
drawer pan in the upper oven.
READAND FOLLOW THISSAFETYINFORMATIONCAREFULLY.
SAVE THESE INSTRUCTIONS
Page 8
Using the gas surface burners.
Throughout this manual, features and appearance may vary from your model.
Pushthe control knobin andturn it to
the LITE position.
Before Lighting u Gus Burner
Make sureallburnersareinplace.
Make sureallgratesontherangeore
properlgplacedbeforeusingang burner,
IfgourrangehastheGas/ControlLockout
feature, make sureit isdisabled before
attempting to light the surface burners.
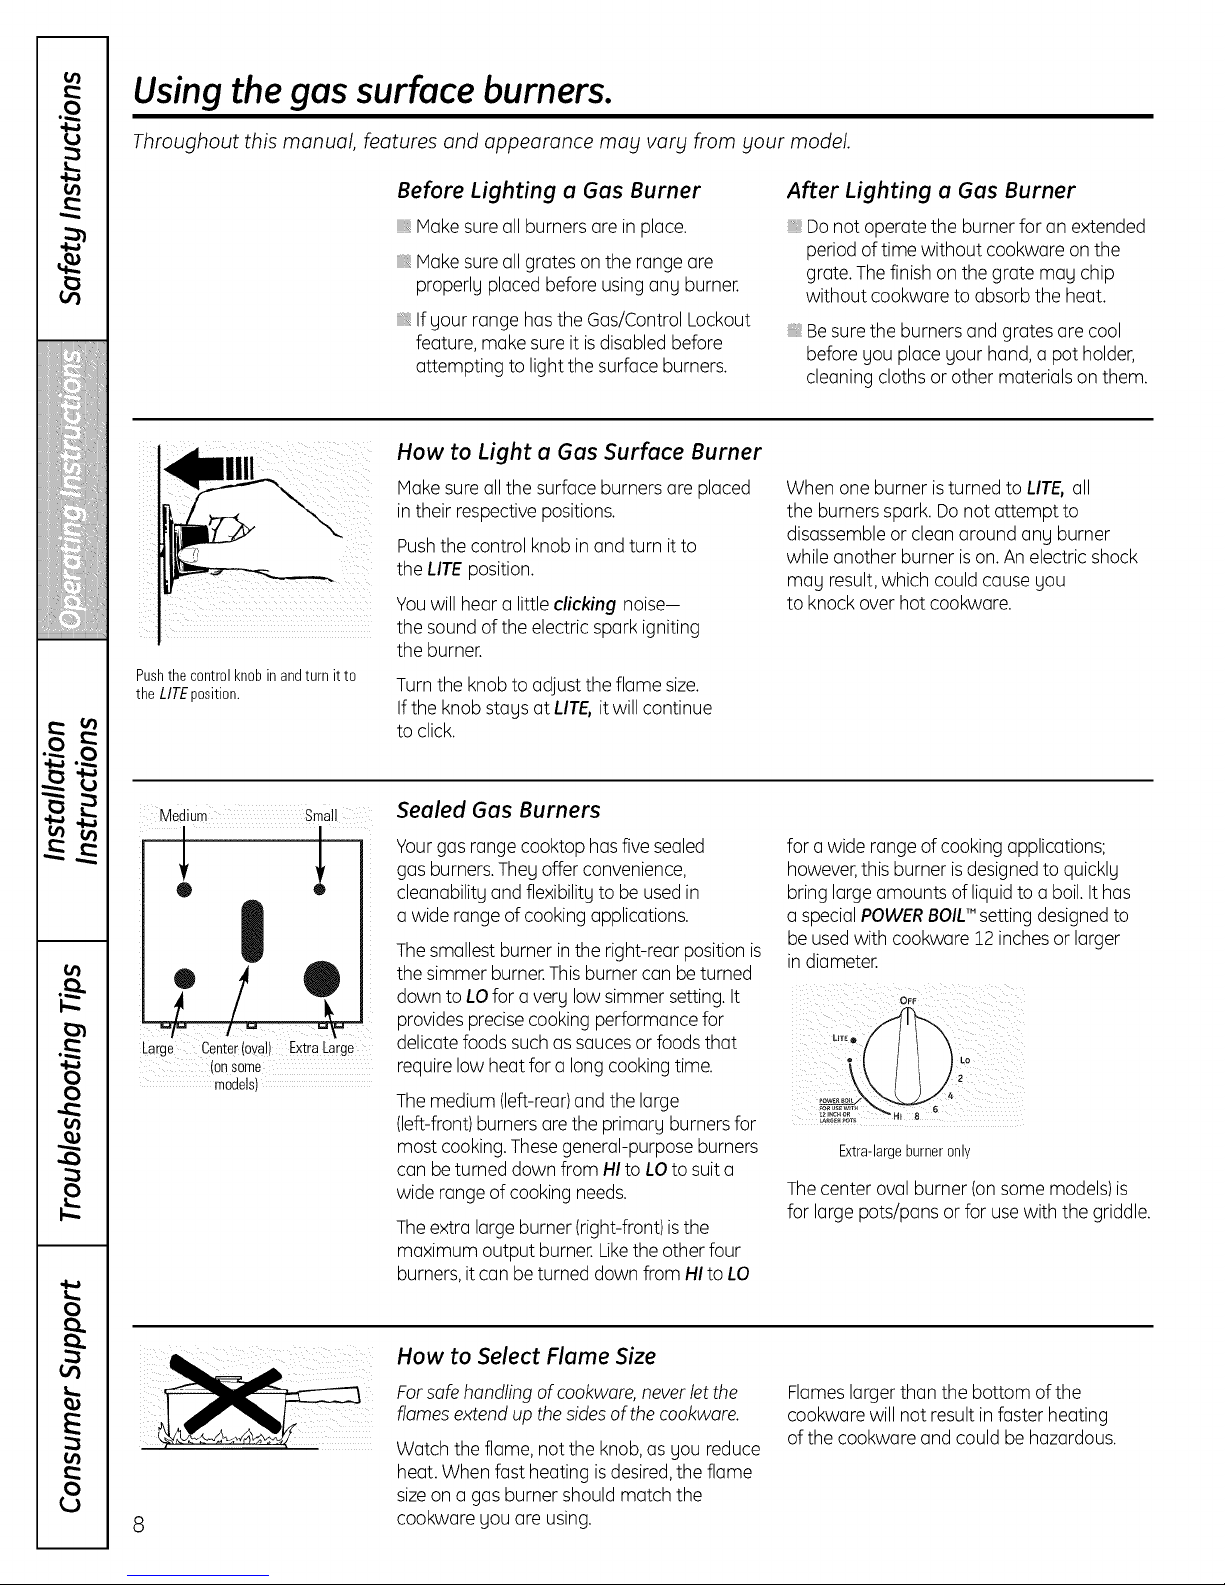
How to Light u Gus Surfuce Burner
lake sure all the surface burners are placed
in their respective positions.
Push the control knob in and turn it to
the LITE position.
Youwillhear a little clicking noise-
the sound of the electric spark igniting
the burner.
Turnthe knobto adjust the flame size.
If the knobstags at LITEoit will continue
to click.
After Lighting a Gas Burner
Donot operate the burner for on extended
period of time without cookware on the
grote. Thefinish onthe grote may chip
without cookware to absorbthe heat.
Besurethe burners and grates ore cool
before you place your hand, a pot holder,
cleaning cloths or other materials on them.
When one burner isturned to LIT& all
the burners spark. Donot attempt to
disassembleor cleon around ang burner
while another burner is on.An electric shock
may result,which could cause you
to knock over hot cookware.
Vlediur Small
L
Large Center(oval) ExtraLarge
ionsome
rnodels_
Seuled Gus Burners
Yourgas range cooktop hasfivesealed
gas burners.Theg offer convenience,
cleanability and flexibilityto be usedin
a wide rangeof cooking applications.
Thesmallest burner in the right-rear position is
the simmer burner.Thisburnercon beturned
down to LOfor a very low simmer setting. It
provides precisecooking performance for
delicate foods such as saucesor foods that
require low heat for a long cooking time.
Themedium (left-rear)andthe large
(left-front)burnersore the primarg burnersfor
most cooking. Thesegeneral-purposeburners
con be turned down from HI to LOto suit a
wide range of cooking needs.
Theextra large burner (right-front)isthe
maximum output burner. Likethe other four
burners, itcon be turned down from HIto LO
How to Select Flume Size
for a wide range of cooking applications;
however,this burner isdesignedto quickly
bring large amounts of liquid to a boil.It has
a special POWERBOIL'"setting designedto
be usedwith cookwore 12 inchesor larger
in diameter.
Lo
Extra-largeburneronly
Thecenter ovalburner (on some models)is
for largepots/pans or for usewith the griddle.
Forsafe handling of cookware, never let the
flames extend up the sides of the cookware.
Watch the flame, not the knob,as gou reduce
heat. When fast heating isdesired,the flame
sizeon a gas burner should match the
8
cookware you ore using.
Flameslarger than the bottom of the
cookware will not result in foster heating
of the cookware and could behazardous.
Page 9
Top-of-Range Cookware
GEAppliances.com
Aluminum: Medium-weight cookware is
recommended becauseit heats quickly
and evenly.Host foods brown evenly in an
aluminum skillet. Usesaucepanswith tight-
fitting lidswhen cooking with minimum
amounts of water.
Cast-Iron: If heated slowly,most skillets
will give satisfactory results.
Enamelware: Undersomeconditions,
the enamel of some cookware may melt.
Follow cookware manufacturer's
recommendations for cooking methods.
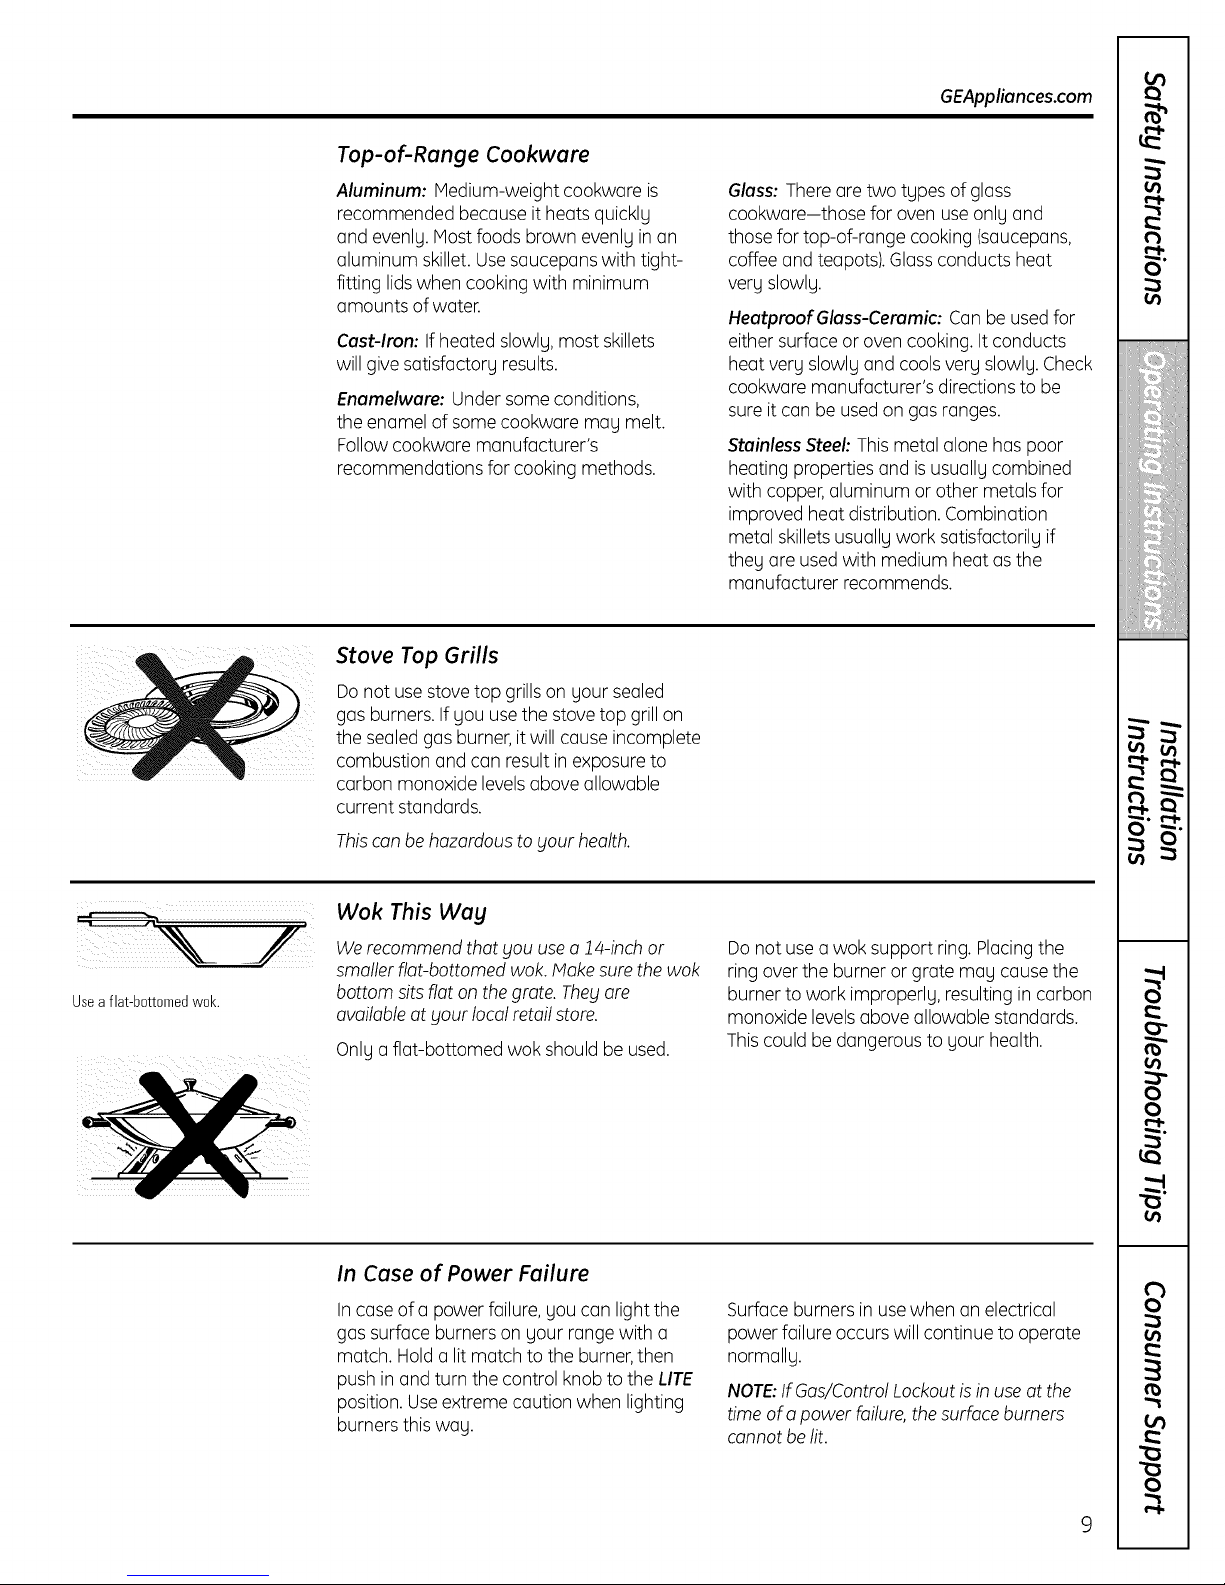
Stove Top Grills
Donot usestovetop grillson your sealed
gas burners. If you usethe stove top grillon
the sealed gas burner, itwill cause incomplete
combustion and can result in exposureto
carbon monoxide levelsabove allowable
current standards.
This can be hazardous to your health,
Glass: There are two types of glass
cookware-those for oven use only and
those for top-of-range cooking (saucepans,
coffeeand teapots).Glassconducts heat
very slowly.
HeatproofGlass-Ceramic: Canbe usedfor
either surface or oven cooking. It conducts
heat very slowly and cools very slowly.Check
cookware manufacturer's directions to be
sureit can be usedon gasranges.
Stainless Steel: Thismetal alone has poor
heating properties and isusually combined
with copper,aluminum or other metals for
improved heat distribution. Combination
metal skilletsusually work satisfactorily if
they are usedwith medium heat asthe
manufacturer recommends.
t_
O"
o_
iii!i!!!iii_iiiiiiill
!i_iiiiiiiiiiiiiiiiii
,,iiiii_bl
i!5"i!i!iii!
• IP
Usea flat-bottomedwok,
Wok This Way
We recommend that you use o 14-inch or
smaller riot-bottomed wok. Make sure the wok
bottom sits flat on the grote. They ore
availableat your local retail store.
Only a flat-bottomed wok should be used.
In Case of Power Failure
In caseof a power failure, you can light the
gas surface burners on your range with a
match. Hold a lit match to the burner,then
push in and turn the control knob to the LITE
position. Useextreme caution when lighting
burners this way.
Donot use a wok support ring. Placingthe
ring overthe burner orgrate may causethe
burner to work improperly, resulting in carbon
monoxide levelsabove allowable standards.
Thiscould be dangerousto your health.
Surface burners in use when an electrical
power failure occurs will continue to operate
normally.
NOTE:IfGas/Control Lockout is in use at the
time of o power failure, the surface burners
cannot be lit.
o_
0
0
r,,l-
o_
on
R
0
Page 10
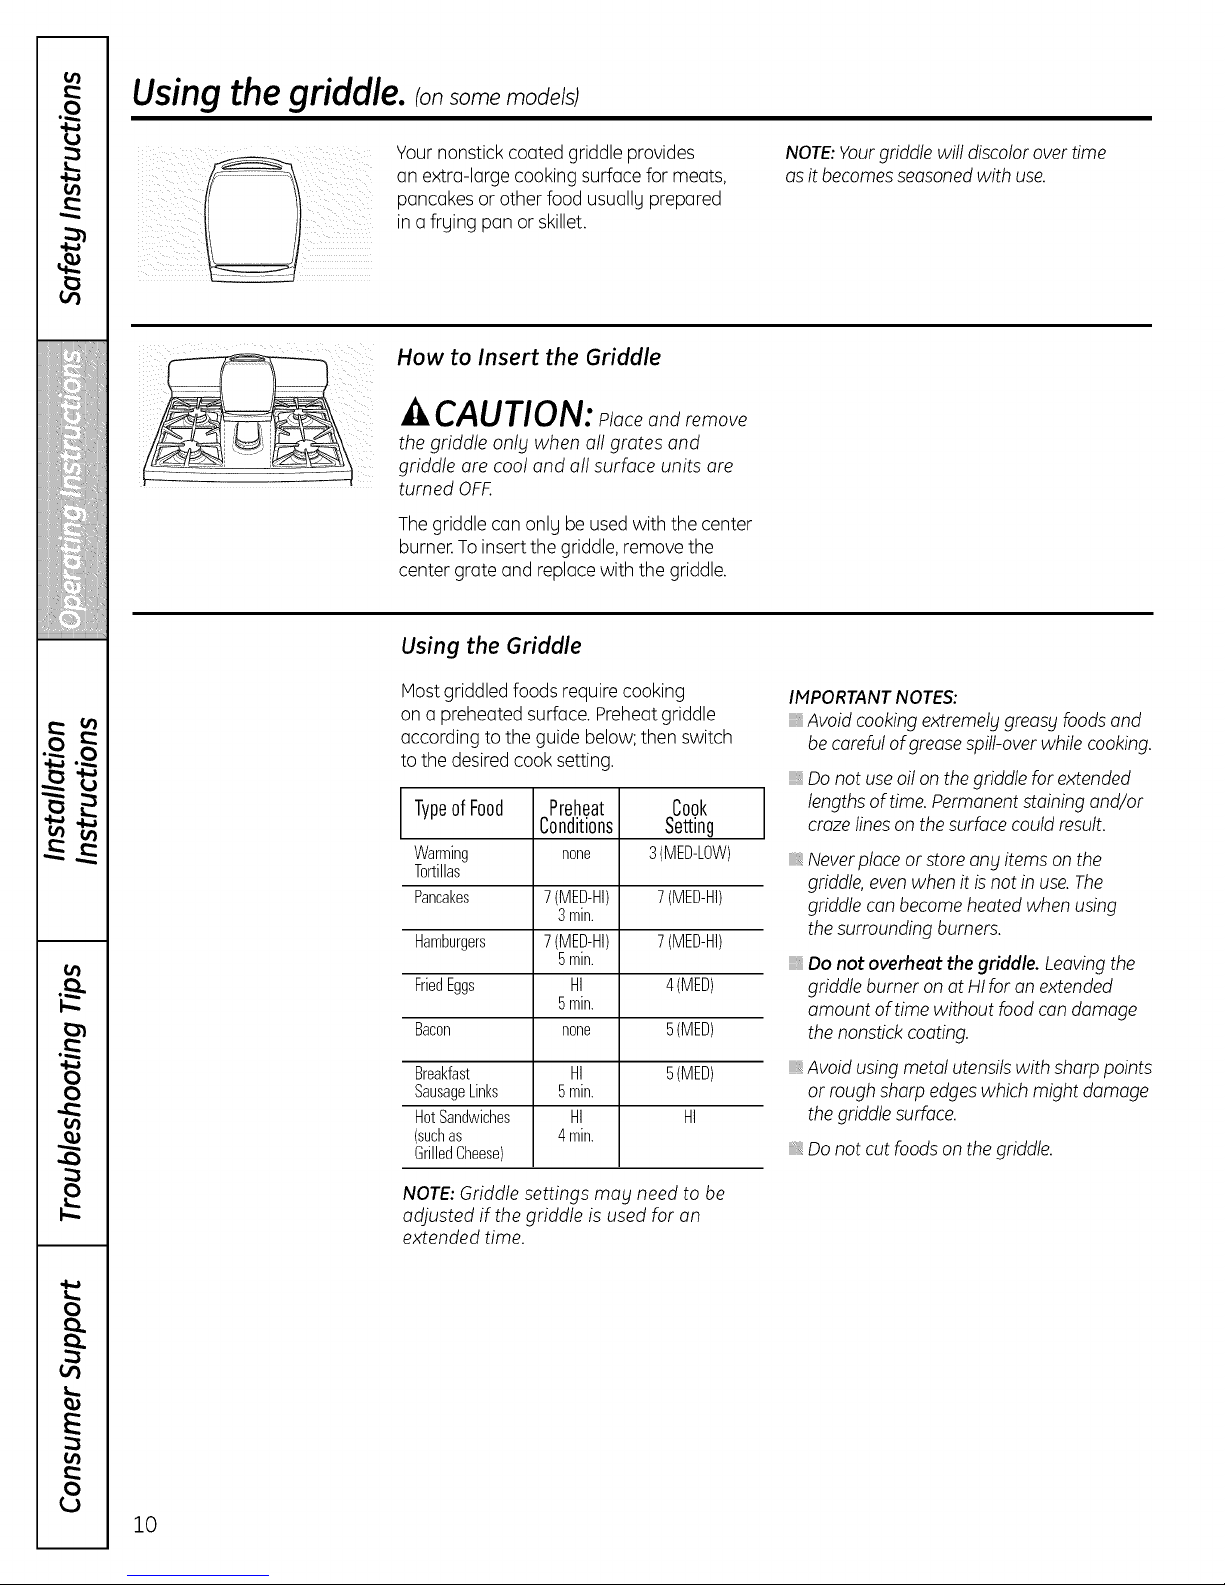
Usingthe griddle, ionsomemode/sj
Yournonstick coated griddle provides
on extra-large cooking surface for meats,
pancakes or other food usuallg prepared
in o frging pan or skillet.
How to Insert the Griddle
CAUTION: placeandremove
the griddle only when oil grates and
griddle ore cool and oil surface units ore
turned OFF.
The griddle can onlg be used with the center
burner.To insert the griddle,remove the
center grate and replace with the griddle.
Using the Griddle
Most griddled foods requirecooking
on u preheated surface. Preheatgriddle
according to the guide below; then switch
to the desired cook setting.
L Typeof Food Preheat Cook
Warming none 3(MED-LOW)
Tortillas
Pancakes 7(MED-HI) 7(MED-HI)
Hamburgers 7(MED-HI) 7(MED-HI)
FriedEggs HI 4(MED)
Bacon none 5(NED)
Conditions Setting
3min.
5min.
5min.
NOTE:Yourgriddle will discolor overtime
asit becomesseasonedwith use.
IMPORTANTNOTES:
Avoid cooking extremely greasy foods and
be careful of grease spill-over while cooking.
Do not use oil on the griddle for extended
lengths of time. Permanent staining and/or
craze lineson the surfacecould result.
Never place or store any items on the
griddle, even when it is not in use. The
griddle can become heated when using
the surrounding burners.
Do not overheut the griddle. Leaving the
griddle burner on at HIfor an extended
amount of time without food con damage
the nonstick coating.
NOTE:Griddle settings moblneed to be
adjusted if the griddle is used for on
extended time.
10
Breakfast HI 5(MED)
SausageLinks 5min.
HotSandwiches HI HI
(suchas 4min.
GrilledCheese)
Avoid using metal utensils with sharp points
or rough sharp edges which might damage
the griddle surface.
Do not cut foods on the griddle.
Page 11
Using the ovencontrols.
(Throughout this manual, features and appearance may vary from your model.) GEAppliances.com
) q
'o ncontT, '
&oOGQ
Hi/Lo
Proof _rower) 6 7 8
On/iOft Co Itrol Locke ut
!oO o)
Features, appearance and pad locutions may vary.
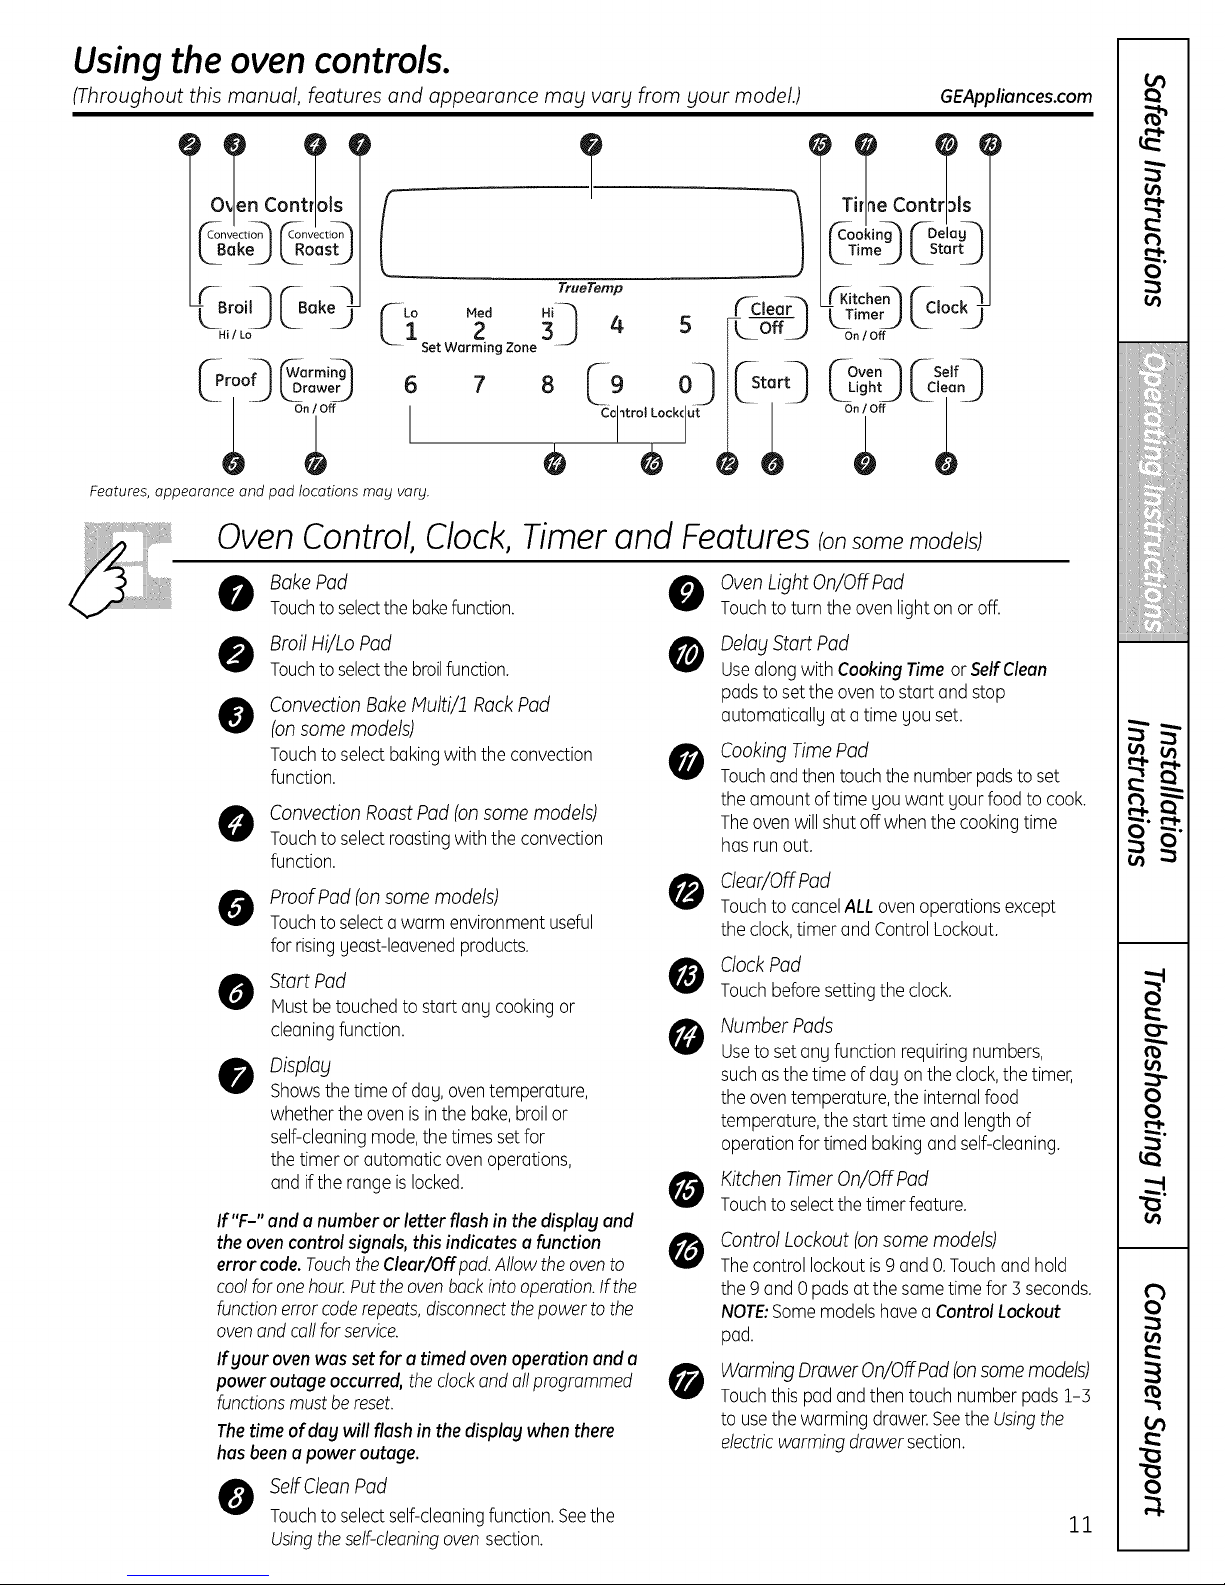
OvenControl,Clock,Timerand Featuresionsomemodels)
BakePad 0
Touchtoselectthe bakefunction.
0 Broil Hi/Lo Pod 0
Touchtoselectthe broilfunction.
Convection BakeMulti/1 Rock Pad
@
(on some models)
Touchto selectbakingwith the convection
function.
O ConvectionRoast Pad (onsome models)
Touchto selectroastingwith the convection
function.
Proof Pad (on some models)
Touchtoselecta warm environmentuseful
for risingueast-leavenedproducts.
Start Pod
Mustbetouched to start anUcookingor
cleaningfunction.
Disp!%l
Showsthetime ofdaU,oventemperature,
whetherthe oven isinthe bake,broilor
self-cleaningmode,the timessetfor
thetimer or automatic oven operations,
and ifthe range islocked.
If "F-" and a number or letter flash in the displag and
theovencontrolsignals,thisindicates a function
errorcode. Touchthe Clear/Off pad. Allow the oven to
cool for one hour. Putthe oven back into operation. Ifthe
function error code repeats, disconnect the power to the
oven and call for service.
Ifgour oven was set for a timed oven operation end u
power outage occurred, the clock and allprogrammed
functions must be reset.
The time of dug will flash in the displag when there
has been a power outage.
I
TrueTemp
2 3_ 4 5 bulb.
Set Warming Zone
L offJ
_-Stert]
e o
OvenLight On/Off Pad
Touchto turn theovenlightonoroff.
De!a_lStart Pad
Use along with Cooking Time or Self Cleon
pads to set the oven to start and stop
automaticallg at a time gou set.
Cooking TimePad
0
Touchandthentouchthenumberpadstoset
theamount oftime Uouwant uourfoodto cook.
Theovenwill shutoff when thecookingtime
hasrun out.
Clear/Off Pod
0
Touchto cancelALLoven operationsexcept
theclock,timer and ControlLockout.
ClockPod
Touchbeforesettingthe clock.
Number Pads
Useto set anUfunction requiringnumbers,
suchasthe time ofdaUon theclock,thetimer,
theoven temperature,the internal food
temperature,the start time and lengthof
operationfor timed bakingandself-cleaning.
Kitchen Timer On/Off Pad
Touchtoselectthetimer feature.
Control Lockout (on some models)
Thecontrol lockoutis9 and O.Touchand hold
the9 and 0 pads atthe sametime for 5 seconds.
NOTE:Somemodelshavea ControlLockout
pad.
Worming Drawer On/OffPod(onsomemodels)
Touchthis pad andthen touch number pads1-5
to usethe warming drawer.Seethe Usingthe
electricwarmingdrawer section.
T e Con Is
_ooi_n_¢Deia_
LTimoJLstorU
SelfClean Pad
Touchto selectself-cleaningfunction.Seethe
Usingtheself-cleaningovensection.
11
Page 12

Using the ovencontrols.
(Throughout this manual, features and appearance may vary from your model.)
NOTE: On models
with 8acktit touch pad
controls, they wilt
remain tit for many
minutes after they are
last touched.
Features, appearance and pod locations may vary.
Oven Control, Clock, Timer and Features ionsomemode sJ
CONTRO
BakePad 0
Touchtoselectthe bakefunction.
Broil Hi/Lo Pod
Touchtoselectthe broilfunction.
Convection BakeMulti/ff Rock Pad
@
(on some models)
Touchto selectbakingwith the convection
function.
O onvection Roost Pad (onsome models)
Touchto selectroastingwith the convection
function.
Start Pad
Mustbetouched to start anUcookingor
cleaningfunction.
Display
Showsthetime ofdaU,oventemperature,
whetherthe oven isinthe bake,broilor
self-cleaningmode,the timessetfor
thetimer or automatic oven operations,
and ifthe range islocked.
If "F-" and a number or letter flash in the displag and
theoven control signals,thisindicates a function
error code.Touchthe Clear/Off pad.Mow theovento
coolfor onehour.Puttheoven backintooperation.Ifthe
functionerror coderepeats,disconnectthepower to the
ovenand call forservice.
If your ovenwassetfor o timed ovenoperationand o
power outage occurred,thedock and allprogrammed
functionsmustbereset.
The time of dug willflash in the displag when there
has been a power outage.
Delay Start Pad
Use along with Cooking Time or SelfClean
padsto set theoven to start and stop
automaticallgat a time gou set.
Cooking TimePad
0
Touchandthentouchthenumberpadstoset
theamount oftime gou want gourfood to cook.
Theovenwill shutoff when thecookingtime
hasrun out.
Clear/Off Pad
0
Touchto cancelALLoven operationsexcept
theclock,timer and Gas/ControlLockoutor
ControlLockout(dependingonmodel).
ClockPod
Touchbeforesettingthe clock.
Number Pads
Useto set angfunction requiringnumbers,
suchasthe time ofdagontheclock,thetimer,
theoven temperature,the internal food
temperature,the start time and lengthof
operationfor timed bakingandself-cleaning.
Kitchen Timer On/Off Pad
Touchtoselectthetimer feature.
Probe Pad
Touchwhen usingthe probeto cookfood.
Gas/Control Lockout Pod (on some models)
@
Touchand holdthe Gas/Control Lockout
pad for ] secondsto lock/unlockthesurface
burners,ovenburnersand control panelso
thegcannot be activated.
SelfClean Pod
Touchto selectself-cleaningfunction.Seethe
Usingtheself-cleaningovensection.
OvenLight On/OffPad
Touchto turn the oven lighton or off.
12
Control Lockout (on some models)
Thecontrol lockoutis9 and O.Touchand hold
the9 and 0 pads atthe sametime for 5 seconds.
Worming Drawer On/OffPod(onsomemodels)
@
Touchthis pad andthen touch number pads1-5
to usethe warming drawer.Seethe Usingthe
electricwarmingdrawer section.
Page 13
Using the upper oven. OEAppliances.com
To avoid possible bums, _lace the racks in the desired position before you turn the oven on.
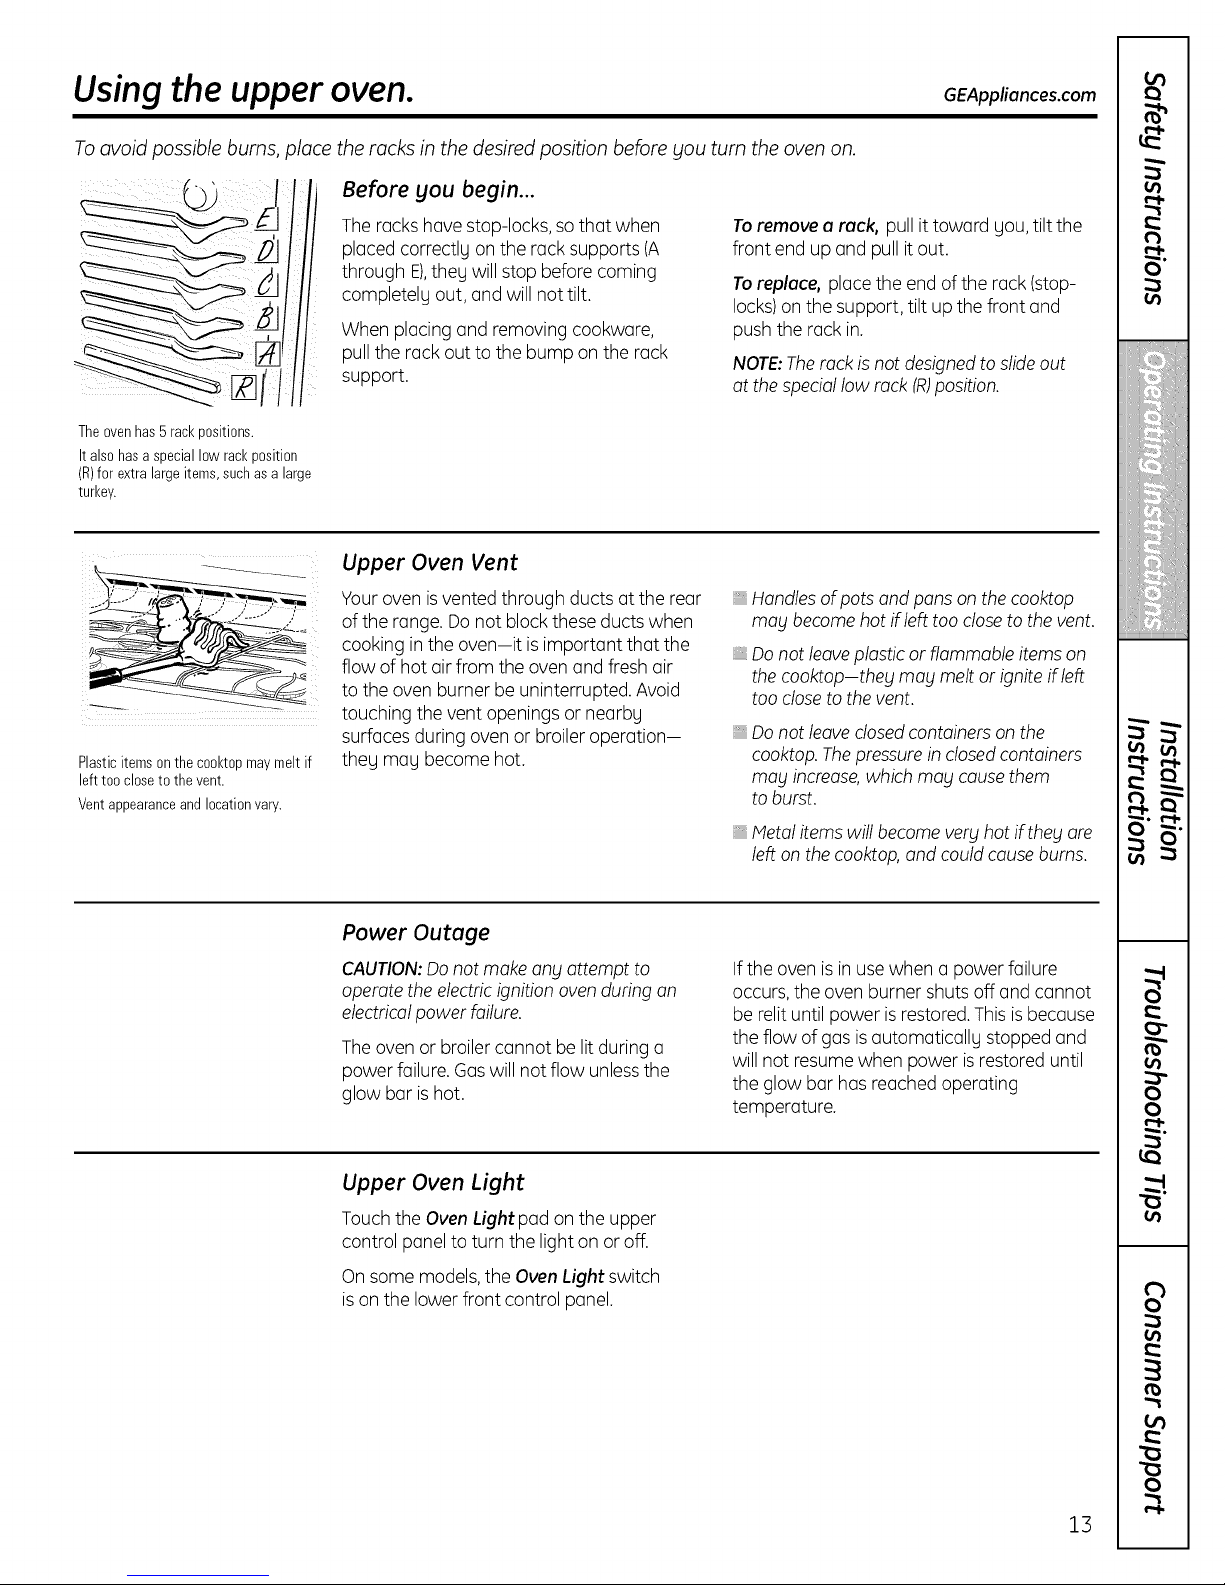
Before you begin...
Theovenhas5 rackpositions.
It alsohasaspeciallow rackposition
(R)for extralarge items,suchas a large
turkey.
Plasticitems onthecooktopmaymelt if
left too closeto the vent.
Vent appearance and location vary.
The rocks hove stop-locks,so that when
placed correctlg on the rock supports (A
through E),theg will stop before coming
completelg out, and will not tilt.
When placing and removing cookware,
pull the rock out to the bump on the rock
support.
Upper Oven Vent
Your oven is vented through ducts at the rear
ofthe range. Donot block these ducts when
cooking in the oven-it isimportant that the
flow of hot air from the oven and fresh air
to the oven burner be uninterrupted. Avoid
touching the vent openings or nearbg
surfaces during oven or broiler operation-
theg Tag become hot.
Toremove a rack, pull it toward gou,tilt the
front end up and pullit out.
Toreplace, placethe end of the rock(stop-
locks)on the support, tilt up the front and
push the rock in.
NOTE:The rack is not designed to slide out
at the special low rack (R)position.
, Handles of pots and pans on the cooktop
may becomehot if left too closeto the vent.
, Do not leaveplastic or flammable itemson
the cooktop-they mablmelt or ignite if left
too close to thevent.
Do not leave dosed containers on the
cooktop. The pressure in closed containers
Tag increase, which Tag cause them
to burst.
Metal items willbecome verg hot if theg are
left on the cooktop, and could cause bums.
Power Outage
CAUTION:Do not make any attempt to
operate the electric ignition oven during an
electrical power failure.
Theoven or broiler cannot be lit during a
power failure. Gaswill not flow unlessthe
glow bar ishot.
Upper Oven Light
Touch the Oven Light pad on the upper
control panel to turn the light on or off.
On some models,the Oven Light switch
ison the lower front control panel.
If the oven is in usewhen a power failure
occurs,the oven burner shuts off and cannot
be relit until power isrestored.This isbecause
the flow of gas isautomaticallg stopped and
will not resume when power isrestored until
the glow bar has reached operating
temperature.
13
Page 14
Using the upper oven.
If gour model has a door latch, do not lock the oven door with the latch during baking or roasting.
The latch is used for self-cleaning only.
\ JJ I
How to Set the Upper Oven for Baking or Roasting
The ovenhasa speciallow rack(R)
positionjust abovetheovenbottom.
Useit when extracookingspaceis
needed,for example,whencooking
alarge turkey.The rackis not designed
toslide out atthis position.
When bakingon a single rack,use
the rackpositionfrom thechart foryour
type offood.Bakingresultswill be
better if bakingpansarecenteredin
theovenas muchaspossible.
Yourovenis not designed for open-door
cooking.
[_ Touchthe BAKEpad.
[] Touch the number padsto setthe
desiredtemperature.
F31 Touch the STARTpad.
Theword ONand100°will be displaged.As
the oven heatsup,the displaywillshowthe
changingtemperature.When theoven reaches
thetemperature gou set,atone willsound.
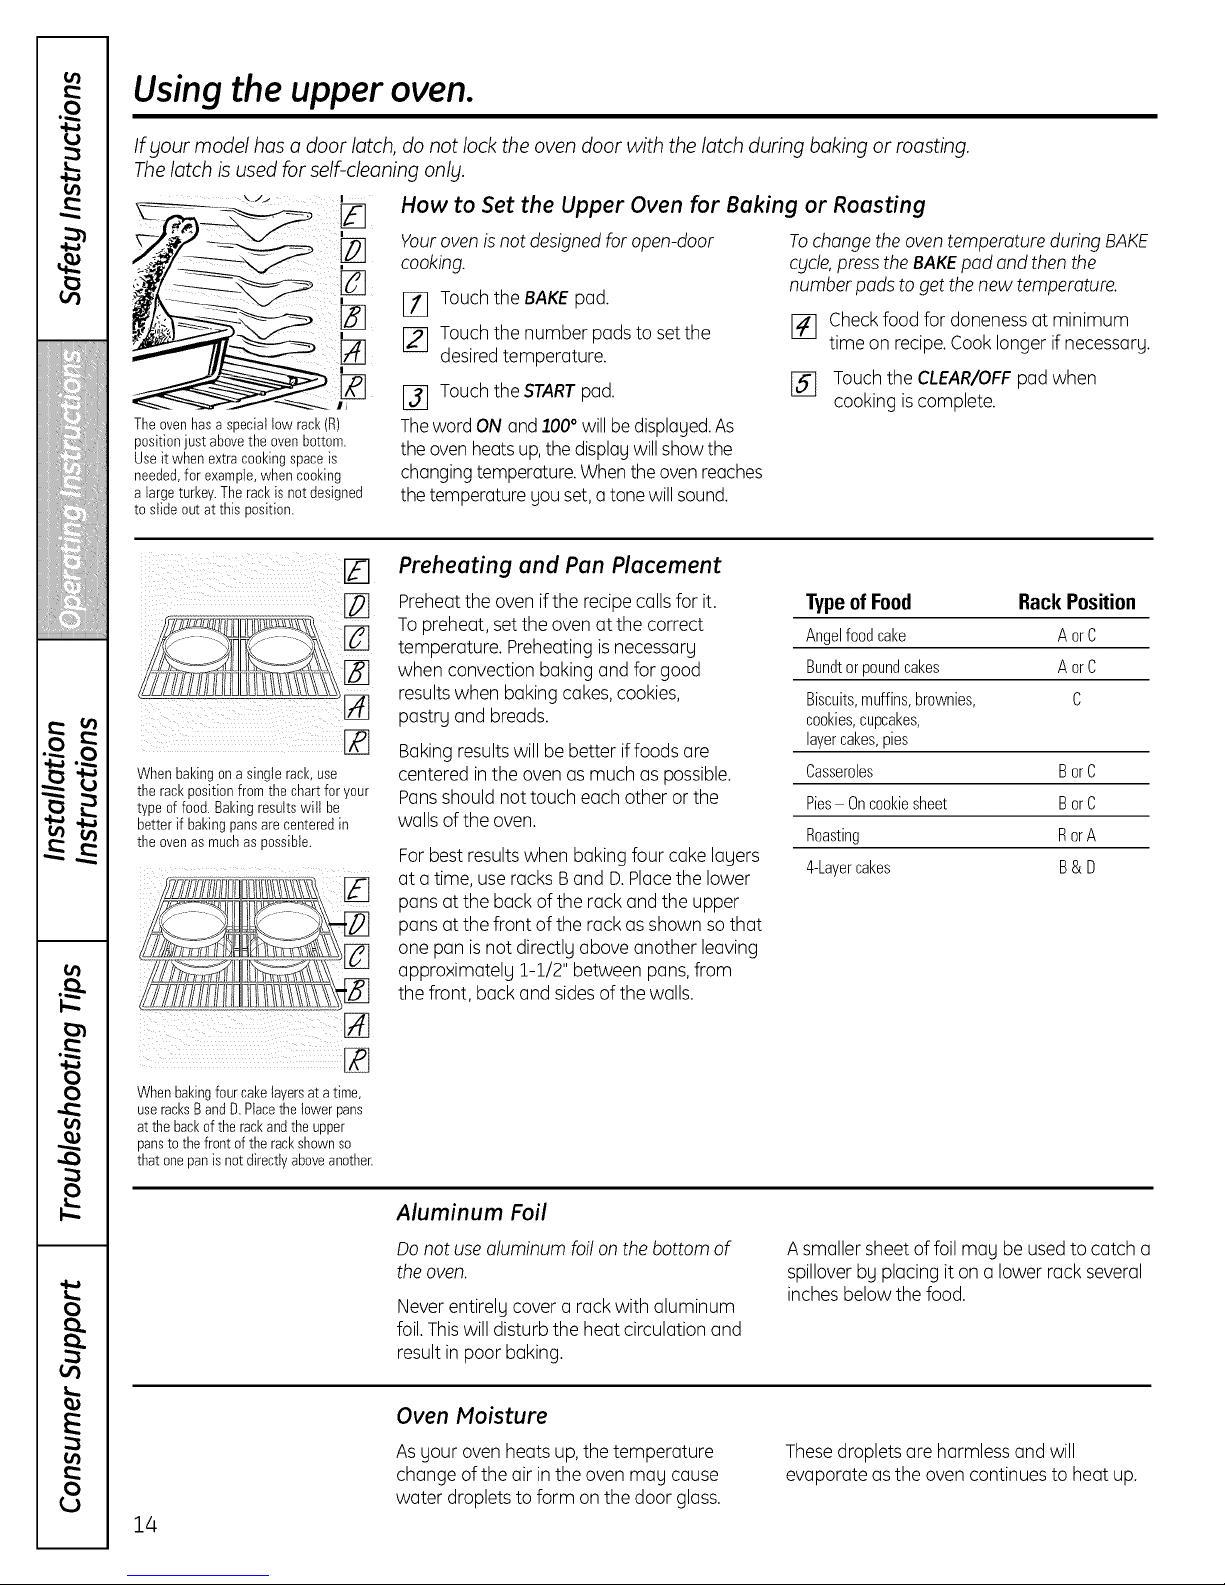
Preheating and Pan Placement
Preheatthe oven if the recipe callsfor it.
To preheat, set the ovenat the correct
temperature. Preheatingis necessary
when convection baking and for good
resultswhen baking cakes,cookies,
pastrg and breads.
Bakingresults will bebetter iffoods are
centered inthe oven as much as possible.
Pansshould nottouch each other or the
walls of the oven.
Forbest resultswhen baking four coke lagers
at a time, userocks Band D.Placethe lower
pans atthe back of the rack andthe upper
pans at the front of the rack as shown so that
one pan isnot directlg above another leaving
approximatelg 1-1/2" between pans,from
the front, back and sidesof the walls.
Tochange the oven temperature during BAKE
c£cle,pressthe BAKEpod and then the
number pods to get the new temperotura
F4] Checkfood for doneness at minimum
time on recipe.Cook longer if necessary.
FS] Touch the CLEAR/OFFpadwhen
cooking iscomplete.
Typeof Food Rack Position
Angelfoodcake AorC
Bundtor poundcakes AorC
Biscuits,muffins, brownies, C
cookies,cupcakes,
layer cakes,pies
Casseroles BorC
Pies- Oncookiesheet BorC
Roasting RorA
SLayer cakes B& D
Whenbakingfourcakelayersat atime,
useracksB andD.Placethelowerpans
at thebackofthe rackandthe upper
pansto thefrontofthe rackshownso
thatonepan isnotdirectlyaboveanother.
Aluminum Foil
Donot usealuminum foil on the bottom of
the oven.
Never entirely cover a rack with aluminum
foil.Thiswill disturb the heat circulation and
result in poor baking.
Oven Moisture
Asgour ovenheats up, the temperature
change of the air in the oven mag cause
water droplets to form on the door glass.
14
A smaller sheet of foil mag be usedto catch a
spillover bg placing it on a lower rock several
inches below the food.
Thesedroplets are harmless and will
evaporate as the oven continues to heat up.
Page 15
Using the clockand timer.
Not all features are on all models.
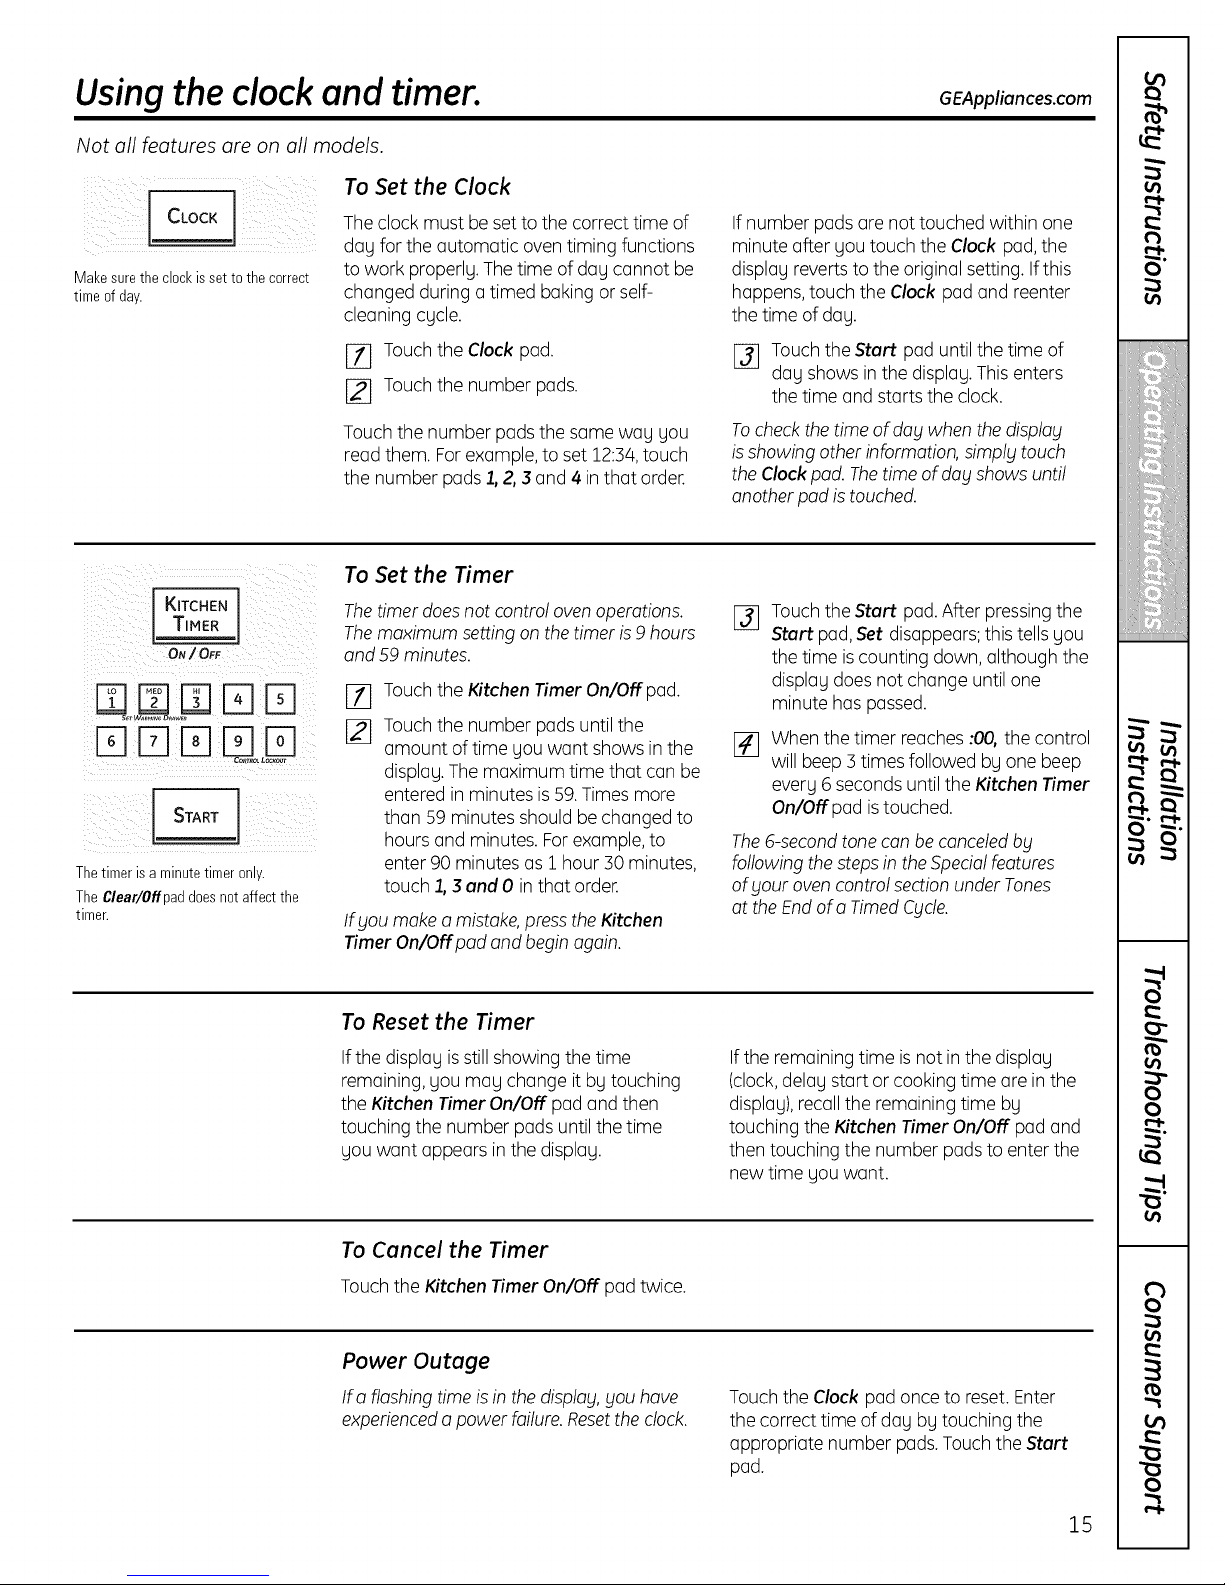
To Set the Clock
iiiiIiilI l ii
Makesurethe clock is set to the correct
time ofday,
Theclock must be set to the correct time of
dag for the automatic oven timing functions
to work properlg.The time of dag cannot be
changed during atimed baking or self-
cleaning cgcle.
GEAppliances.com
If number padsare not touched within one
minute after gou touch the Clock pad,the
displag reverts to the original setting.Ifthis
happens,touch the Clock pad and reenter
the time of dag.
t_
O"
o_
KITCHEN ]
TIMER j
ON/ OFF
Thetimer isa minutetimer only.
The Clear/Offpad doesnot affect the
timer.
[_ Touch the Clock pad.
[_ Touch the number pads.
Touch the number pads the same wag gou
read them. Forexample,to set 12:54,touch
the number pads l, 2,3 and 4 inthat order.
To Set the Timer
The timer does not control oven operations.
The maximum setting on the timer is 9 hours
and 59 minutes.
Touch the Kitchen Timer On/Off pad.
Touch the number pads until the
amount oftime you want shows in the
display.The maximum time that can be
entered in minutes is59.Times more
than 59minutes should be changed to
hours and minutes.Forexample,to
enter 90 minutes as 1 hour 30 minutes,
touch 1,3and 0 in that order.
Ifgou make a mistake, press the Kitchen
Timer On/Off pad and begin again.
[_ Touch theStart pad until the time of
dag shows in the displag.Thisenters
the time and starts the clock.
Tocheck the time of dag when the displag
is showing other information, simplg touch
the Clock pad. The time of dag shows until
another pad is touched.
Touch theStart pad. After pressingthe
%
Start pad,Set disappears; this tells gou
the time iscounting down, although the
displag does not change until one
minute has passed.
When the timer reaches :00othe control
[]
will beep3times followed bg one beep
everg 6 seconds until the Kitchen Timer
On/Off pad istouched.
The 6-second tone can be canceled bg
following the steps in the Special features
of gout oven control section under Tones
at the End of a Timed Cgde.
illiiiii'_'iiiiiiiiiiiiii
¢
To Reset the Timer
Ifthe displog isstillshowing the time
remaining, gou mag change it bg touching
the Kitchen Timer On/Off pad and then
touching the number pads untilthe time
gou want appears in the displag.
To Cancel the Timer
Touchthe Kitchen Timer On/Off pad twice.
Power Outage
If a flashing time isinthe displag,gou have
experienceda power failure.Resetthe clock.
Ifthe remaining time is not inthe displag
(clock,delag start or cooking time are in the
displag),recallthe remaining time bg
touching the Kitchen Timer On/Off pad and
then touching the number padsto enter the
new time gou want.
Touch the Clock pad once to reset. Enter
the correct time of dag bg touching the
appropriate number pads.Touchthe Start
pad.
v
o_
O
O
o_
on
o_
to
0
0
15
i
Page 16
Usingthe timed baking and roastingfeatures,upperovenonU)
If gour model has a door latch, do not lock the oven door with the latch during timed cooking. The latch is used for
self-cleaning only.
NOTE: Foods that spoil easily-such as milk, eggs, fish, stuffings, poultry and pork-should not be allowed to sit for
more than 1 hour before or after cooking. Room temperature promotes the growth of harmful bacteria. Be sure that
the oven light is off because heat from the bulb will speed harmful bacteria growth.
How to Set an Immediate Start and Automatic Stop
_!ill_i_i _ i_!i_ii_i_!_L_(ii_ii_i__I
ii i i
i [3 53
ii!fq fq fq ![qFqij(¸¸
COOKING
D U.:D
CLEAR
!j OFF
rqrq
:qFqmOLD
rqrq
:qmm LD
:qFqrqUD
J CLEARI
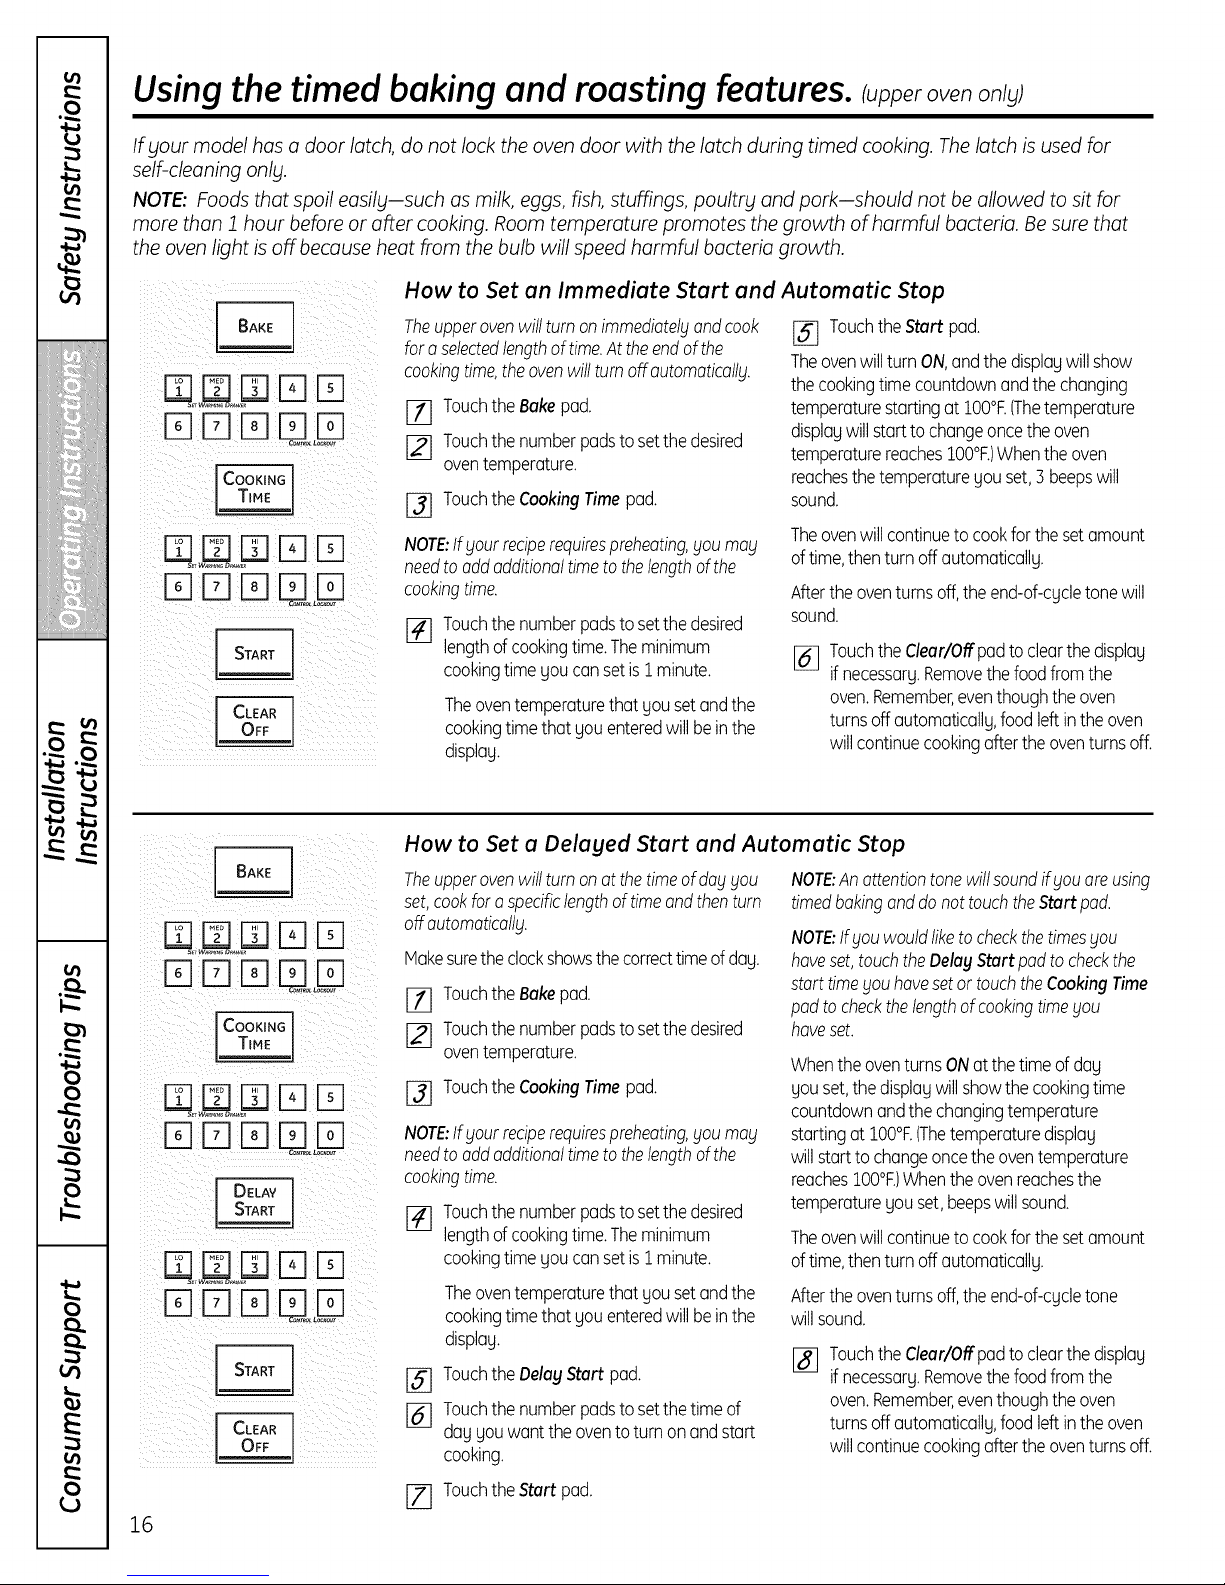
Theupperovenwillturnonimmediotel£andcook
foraselectedlengthoftime.Attheendofthe
cookingtime,theovenwillturnoffoutomoticoll£.
[_ Touchthe Bakepad.
[_ Touchthe numberpadstosetthedesired
oventemperature.
[_ Touchthe CookingTimepad.
NOTE:If£ourreciperequirespreheating,£oumo£
needto oddadditionaltimeto thelengthofthe
cookingtime.
[_ Touchthe numberpadstosetthedesired
lengthofcookingtime.Theminimum
cookingtime youcansetis1minute.
Theoventemperaturethat yousetandthe
cookingtimethat youenteredwillbeinthe
display.
[_ Touchthe Start pad.
TheovenwillturnON, andthedisplaywillshow
thecookingtimecountdownandthechanging
temperaturestartingat IO0°F.(Thetemperature
displaywillstartto changeoncetheoven
temperaturereachesIO0°F.)Whentheoven
reachesthetemperatureyouset,3 beepswill
sound.
Theoven will continue to cookfor the set amount
of time, then turn off automatically.
After the oven turns off,the end-of-%cle tone will
sound.
[_ Touchthe Clear/Offpadtoclearthedisplay
if necessary.Removethefoodfromthe
oven.Remember,eventhoughtheoven
turnsoffautomaticallg,food leftintheoven
willcontinuecookingafterthe oventurnsoff.
How to Set a Delaued Start and Automatic Stop
Theupperovenwillturnonatthetimeofdog_lOU
set,cookforaspecificlengthoftimeandthenturn
offautomoticollg.
Hakesuretheclockshowsthecorrecttimeofdog.
_] Touchthe Bakepad.
[_] Touchthenumberpadstosetthe desired
oventemperature.
[_ Touchthe CookingTimepad.
NOTE:If£ourreciperequirespreheating,£oumo£
needto oddadditionaltimeto thelengthofthe
cookingtime.
[_ Touchthe numberpadstosetthedesired
lengthofcookingtime.Theminimum
cookingtime youcansetis1minute.
Theoventemperaturethat yousetandthe
cookingtimethat youenteredwillbeinthe
display.
[_ Touchthe DelauStart pad.
[_ Touchthe numberpadstosetthetimeof
dog gouwanttheoventoturn onandstart
cooking.
NOTE:Anattentiontonewillsoundif_lOUoreusing
timedbakinganddonot touchtheStartpod.
NOTE:If_louwouldliketo checkthetimes_lou
haveset,touchtheDeloU Startpadto checkthe
starttime_louhavesetortouchtheCookingTime
podtocheckthelengthofcookingtimeyou
hoveset.
WhentheoventurnsONatthe timeofdag
gouset,thedisplagwillshowthecookingtime
countdownandthechangingtemperature
startingat IO0°F.(Thetemperaturedisplag
willstartto changeoncetheoventemperature
reachesIO0°F.)Whentheovenreachesthe
temperaturegouset,beepswillsound.
Theoven will continue to cookfor the set amount
of time, then turn off automaticallg.
Aftertheoventurnsoff,theend-of-cgcletone
willsound.
[_ Touchthe Clear/Offpadtoclearthedisplag
if necessarg.Removethefoodfromthe
oven.Remember,eventhoughtheoven
turnsoffautomaticallg,food leftintheoven
willcontinuecookingafterthe oventurnsoff.
[Z] TouchtheStartpad.
16
Page 17
Using the probe. (on some models) GEAppliances.com
If your model has a door latch, do not lock the oven door with the latch while cooking with the probe. The latch is used
for self-cleaning only.
For many foods, especially roasts and poultry, internal food temperature is the best test for doneness. The
temperature probe takes the guesswork out of cooking foods to the exact doneness you want.
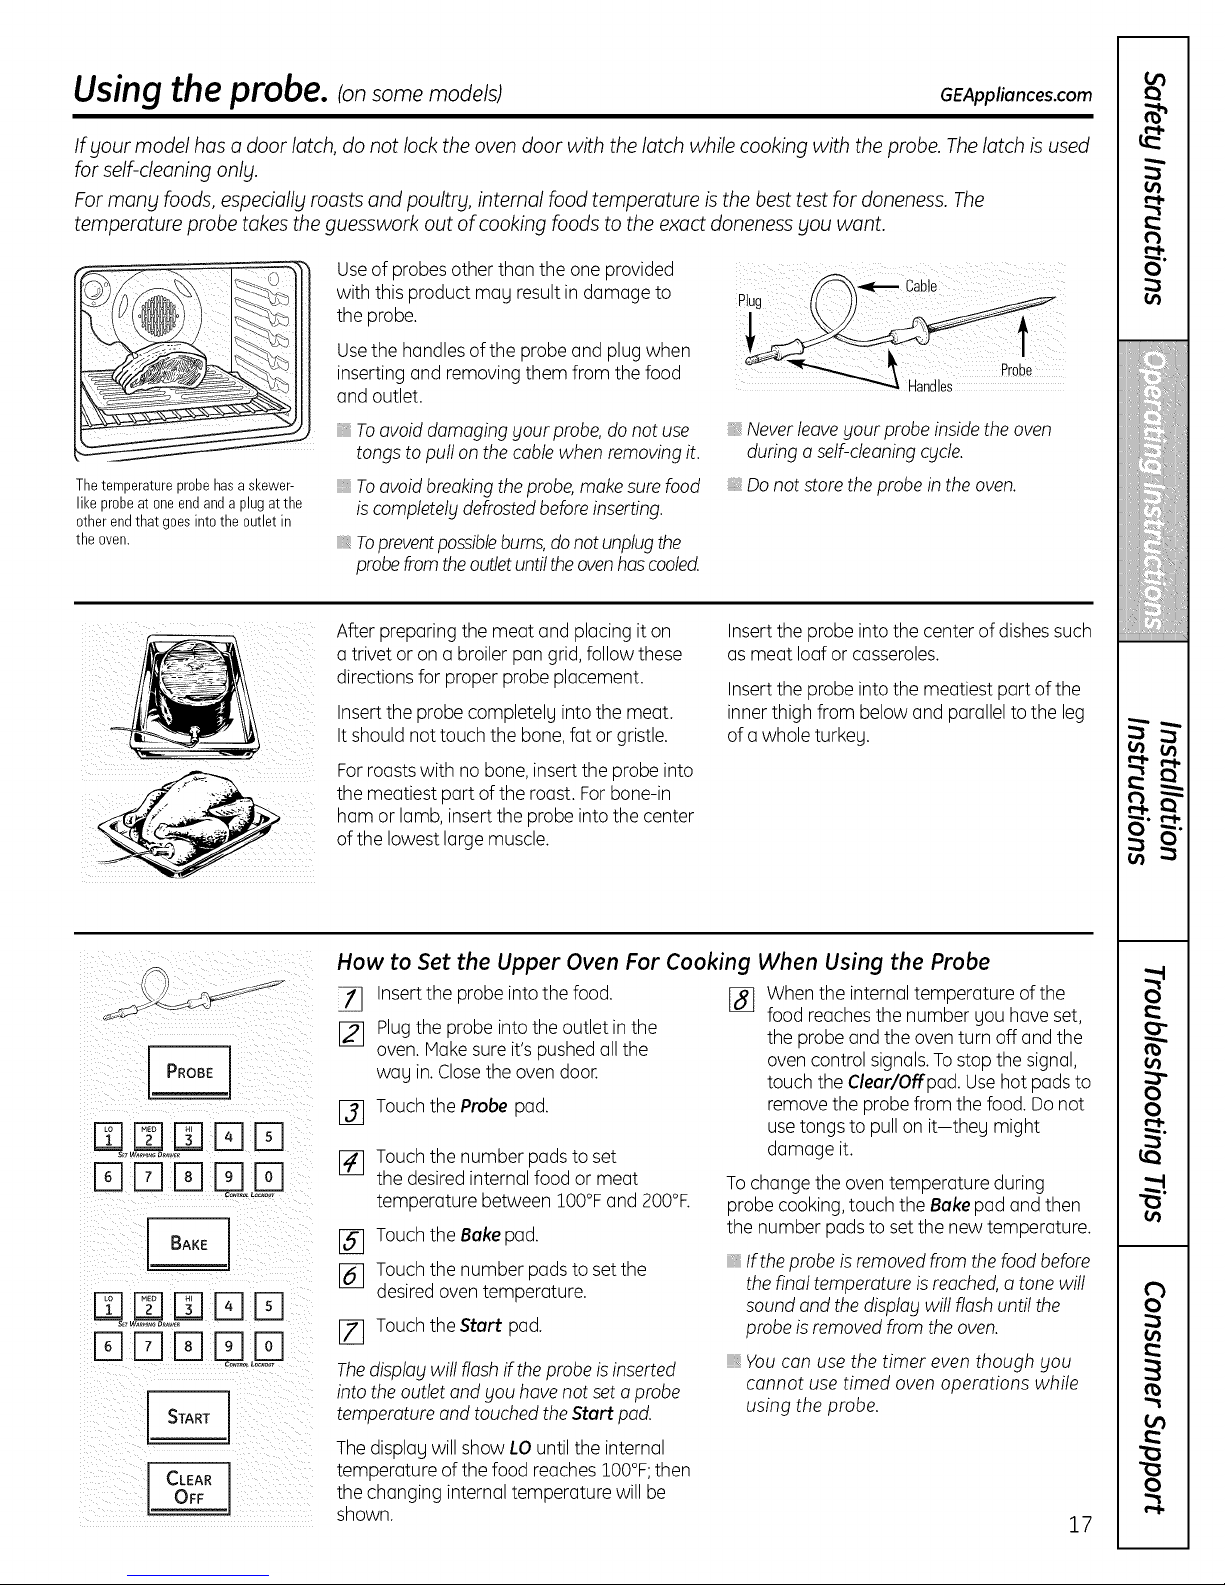
Thetemperatureprobehasa skewer-
like probeat oneendand a plugatthe
otherendthat goesintothe outlet in
the oven.
Useof probesother than the one provided
with this product may result in damage to
the probe.
Usethe handlesof the probeand plug when
inserting and removing them from the food
and outlet.
_,Toavoid damaging your probe,do not use
tongs to pull onthe cablewhen removing it.
_,Toavoid breakingthe probe,make surefood
iscompletely defrostedbeforeinserting.
Toprevent possible bums, do not unplug the
probe from the outlet until the oven has cooled.
After preparing the meat and placing it on
a trivet oron a broiler pan grid, follow these
directions for proper probe placement.
Insertthe probe completely into the meat.
It should not touch the bone,fat or gristle.
Forroasts with no bone,insert the probe into
the meatiest part of the roast. Forbone-in
ham orlamb, insert the probe into the center
of the lowest large muscle.
__ cab!e
Handles
Neverleaveyour probe insidethe oven
during a self-cleaningcycle.
_,Do not store the probe in the oven.
Insertthe probe into the center of dishessuch
as meat loaf or casseroles.
Insertthe probe into the meatiest part of the
inner thigh from below and parallelto the leg
of a whole turkey.
L
N N
How to Set the Upper Oven For Cooking When Using the Probe
Insertthe probe into the food.
Plugthe probe intothe outlet in the
[]
oven. Hake sureit's pushed all the
way in.Closethe oven door.
Touch the Probe pad.
%
Touch the number pads to set
the desired internal food or meat
temperature between Z00°Fand 200°F.
Touch the Bakepad.
Touch the number pads to setthe
%
desiredoven temperature.
Touch the Start pad.
The display will flash if the probe is inserted
into the outlet and you have not set a probe
temperature and touched the Start pad.
Thedisplay will show LO until the internal
temperature of the food reachesZ00°F;then
the changing internal temperature will be
snown.
j_j When the internaltemperature of the
food reachesthe number you have set,
the probe andthe oven turn off and the
oven control signals.Tostopthe signal,
touch the Clear/Offpad. Use hot pads to
remove the probefrom the food. Donot
usetongs to pull on it-they might
damage it.
To change the oven temperature during
probe cooking,touch the Bake pad and then
the number pads to set the new temperature.
Ifthe probe is removed from the food before
the final temperature is reached, a tone will
sound and the display willflash until the
probe is removed from the oven.
You can use the timer even though you
cannot use timed oven operations while
using the probe.
17
Page 18
Usingtheconvectionoven. somemode sJ
If gour model has a door latch, do not lock the oven door with the latch during convection cooking. The latch is used
for self-cleaning onlg.
The convection oven fan shuts off when the oven door isopened. DO NOTleave the door open for long periods of time
while using convection cooking.
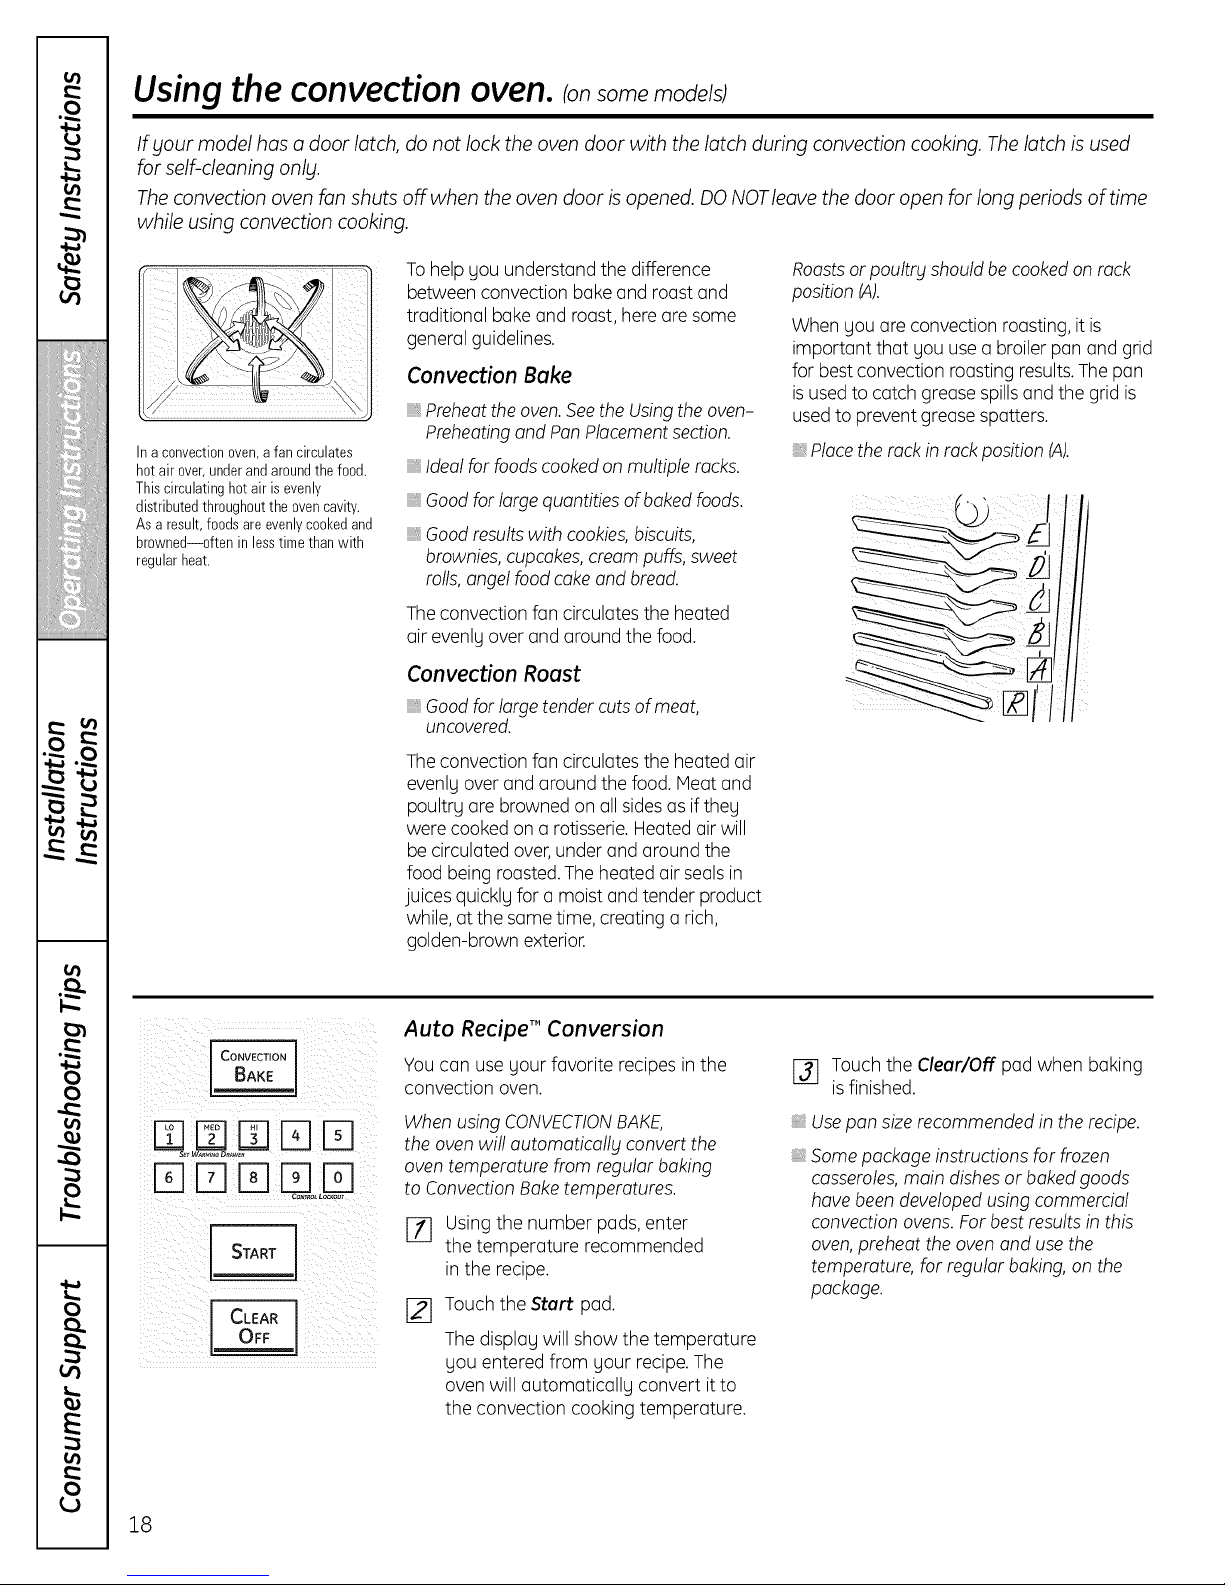
Ina convectionoven,afan circulates
hotair over,underandaroundthe food.
This circulatinghot air is evenly
distributedthroughoutthe ovencavity.
Asa result,foodsareevenlycookedand
browned--often in lesstime thanwith
regularheat.
Tohelp Uou understand the difference
between convection bake and roast and
traditional bakeand roast, here are some
general guidelines.
Convection Bake
Preheat the oven. See the Using the oven-
Preheating and Pan Placement section.
Ideal for foods cooked on multiple racks.
Good for large quantities ofbaked foods.
, Good results with cookies,biscuits,
brownies, cupcakes,cream puffs, sweet
rolls, angel foodcake and bread.
Theconvection fan circulates the heated
air evenly over and around the food.
Convection Roast
Good for large tender cutsof meat,
uncovered.
Theconvection fan circulates the heated air
evenlu over and around the food. Heat and
poultru arebrowned on allsidesas iftheu
were cooked on arotisserie.Heatedairwill
be circulated over,under and around the
food being roasted.Theheated air sealsin
juices quicklu for a moist and tender product
while, at the same time, creating a rich,
golden-brown exterior.
Roastsor poultrg shouldbe cooked on rack
position (A).
When you are convection roasting,it is
important that you usea broiler pan andgrid
for bestconvection roasting results.The pan
isused to catch grease spillsand the grid is
usedto prevent grease spatters.
_,Placethe rack in rack position (A).
Auto Recipe T"Conversion
I CONVECTION I
DDD o D
18
Youcan use gour favorite recipes in the
convection oven.
When using CONVECTIONBAKE,
the oven will automaticallg convert the
oven temperature from regular baking
to Convection Bake temperatures.
[_ Usingthe number pads,enter
[_ Touch the Start pad.
the temperature recommended
in the recipe.
The displaUwill show the temperature
you entered from your recipe.The
oven will automatically convert itto
the convection cooking temperature.
j-_ Touch the Clear/Off pad when baking
isfinished.
Use pan size recommended in the recipe.
, Somepackage instructions for frozen
casseroles,main dishes or baked goods
have been developed using commercial
convection ovens.Forbest results in this
oven,preheat the oven and use the
temperature, for regular baking, on the
package.
Page 19

Cookwore for Convection Cooking
GEAppliances.com
ICo,vEoT,O,I
Or ROAST
DDD o D
OF_]
Beforeusing your convection oven,check
to see ifyour cookware leavesroom for air
circulation inthe oven. If you are baking with
several pans,leave space between them.
Also,be surethe pans do not touch each
other orthe walls of the oven.
Metal and Glass
Any type of cookware willwork in your
convection oven. However, metal pans heat
the fastest and are recommended for
convection baking.
_,Darkened or matte-finished pans will bake
Paper and Plastic
Heat-resistant paper and plastic containers
that are recommended for use in regular
ovens can be usedin convection ovens.
Plasticcookware that is heat-resistant to
temperatures of 400°Fcan also be used,
when oven isbelow 400°E
faster than shinFpans.
Glassor ceramicpans cook more slowly.
When baking cookies,you will get the best
resultsif you usea flat cookie sheet instead
of a panwith low sides.
Forrecipes like oven-baked chicken,use a
pan with low sides.Hotaircannot circulate
well around food in a pan with high sides.
How to Set the Upper Oven for Convection Baking or Rousting
[7] Touch the Convection Bake
or Convection Roast pad.
I_1 Touch the number padsto setthe
desiredoven temperature.
[_] Touchthe Start pad.
Tochange the oven temperature, touch the
Convection Bake or Convection Roast pad
and then the number pads to set the new
temperature.
When the ovenstarts to heat, the changing
temperature, starting at Z00°F,will be
displayed.When the oven reachesthe
temperature you set, 3 beepswill sound.
_-] Touchthe Cleur/Offpad when finished.
NOTE:Youwill hear o fan while cookingwith
convection.The fan will stop when thedoor is
opened,but theheat will not turn off.
The fan will not start until the preheat
temperature is reached.
t_
O"
o_
illiiiii','iiiiiiiiiiiiii
I#
¢
Multi-Rock Baking
Thenumber of racksprovided depends
on Four model.
Because heated air is circulated evenly
throughout the oven, foods can bebaked
with excellent resultsusing multiple racks.
Multi-rack baking may increase cook times
slightly for some foods but the overall result
istime saved.Cookies,muffins, biscuitsand
When convectionbakingwith only
1rack,follow the rackpositions
recommendedin theUsingthe
Ovensection.
other quickbreads givevery good results
with multi-rack baking.
When baking larger foods on 3racks,place
one rack in the 2nd (A)position,one on the
4th (C)position and the third rack in the 6th (E)
position.
When baking cookies,placethe racks in the
4th (C),5th (D)and 6th (E)positions.
v
o_
O
O
i..., o
o_
on
o_
to
0
0
19
Page 20

Usingtheconvectionoven. somemode/sj
If £our model has a door latch, do not lock the oven door with the latch during convection cooking. The latch is used
for self-cleaning only.
How to Set the Upper Oven for Convection Roasting When Using the Probe
(on some models)
Forbestresultswhenroastinglarge
turkeysandroasts,werecommendusing
the probeincludedinthe convectionoven.
bOASTCONVECTION
1
ROBE
START I
OFF
CLEAR 1
Thedisplog willflash PROBEand the oven
control will signal if the probe is insertedinto
the outlet, and you hove not set o probe
temperature andtouched theStart pod.
Placethe rock inthe rock position (A).
%
Insertthe probe completely into thefood.
Plugthe probeinto the outlet in the
[]
oven. Makesure it is pushedoil the wag
in.Closethe oven door.
[_ Touch the Convection Roast pod.
[] Touch the number podsto set the
desiredoven temperature.
[_ Touch the Probe pod.
[_ Touch the number pods to set the
desiredinternal food temperature.
Tochange the oven temperature during
the Convection Roost cycle, touch the
Convection Roast pod and then touch the
number podsto set the new desired
temperature.
[Z] Touch the Start pod.
When the oven starts to heat, the word
LO will beinthe displog.
After the internal temperature of the food
reaches Z00°F,the changing internal
temperature will be shown inthe display.
When the internal temperature of the
%
food reachesthe number you hove set,
the probe andthe oven turn offond the
oven control signals.Tostopthe signal,
touch the Clear/Off pod. Usehot pods
to removethe probe from the food. Do
not usetongs to pull on it-they might
damage it.
CAUTION:Topreventpossibleburns,do not
unplug the probe from theoven outlet until
theoven hascooled.Donot store the probe
in the oven.
NOTE:
If theprobe isremoved from the food
beforethe final temperature is reached,a
tone will sound and the displab/will flash
until the probe isremovedfrom theoven.
_,Youwill hear o fan while cookingwith this
feature.Thefan will stop when the dooris
opened but the heatwill not turn off.
_,Youcan usethe timer even though gou
cannot usetimed ovenoperations while
usingthe probe.
20
Page 21

GEAppliances.com
Heats Minutes/Lb. OvenTemp. Internal Temp.
Beef Rib(3to SIbs.) Rarer 20-24 325°F 140°F
Medium 24-28 325°F 160°F
Well 28-32 325°F 170°F
BonelessRib,TopSirloin Rarer 20-24 325°F 140°F
Medium 24-28 325°F 160°F
Well 28-32 325°F 170°F
BeefTenderloin Rarel- 10-14 325°F 140°F
Medium 14-18 325°F 160°F
PotRoast(2i/2to 3 Ibs.)chuck,rump 35-45 300°F 170°F
Pork Bone-in(3to 5Ibs.) 23-27 325°F 170°F
Boneless(3to 5Ibs.) 23-27 325°F 170°F
PorkChops(W'to 1"thick) 2chops 30-35 total 325°F 170°F
4 chops 35-40 total 325°F 170°F
6chops 40-45 total 325°F 170°F
Ham Canned(3Ibs.fully cooked) 14-18 325°F 140°F
Butt(5Ibs.fully cooked) 14-18 325°F 140°F
Shank(5Ibs.fulILtcooked) 14-18 325°F 140°F
Lamb Bone-in(3to 5Ibs.) Medium 17-20 325°F 160°F
Well 20-24 325°F 170°F
Boneless13to 5 Ibs.) Medium 17-20 325°F 160°F
Well 20-24 325°F 170°F
Seafood Fish,whole 13to SIbs.) 30-40 total 400°F
LobsterTails16to 8 oz.each) 20-25total 350°F
Poultry WholeChicken121/2to 31/2Ibs.) 24-26 350°F 180°-185°F
CornishHensUnstuffed(1to 11/2Ibs.) 50-55 total 350°F 180°-185°F
CornishHensStuffed11to 11/2Ibs.) 55-60 total 3SO°F 180°-185°F
B"
I"t-
O"
iii!i{!!ii:_:iiiiii:i
!i_i_iiiiiiiiiiiiiiii
,,iiii#i_iiiiiil
:!!i!"::iii"i#
• r'
€
.€
• IP
Duckling14to 5 Ibs.) 24-26 325°F 180°-185°F
Turkey,whole*
Unstuffed(10to 16 Ibs.) 8-11 325°F 180°-185°F
Unstuffed(18to 24 Ibs.) 7-10 325°F 180°-185°F
TurkeyBreast14to 6 Ibs.) 16-19 325°F 170°F
* Stuffed birds generaffg require 50-/45 minutes additional roasting time. Shield legs and breast with foil to prevent
overbrowning and drging of skin.
"rTheU.S.Department of Agriculture sags "Rare beef is popular, but you should know that cooking it to only 140°F
means some food poisoning organisms may survive." (Source:Safe Food Book. Your Kitchen Guide. USDARev.
June 1985.)
0
0
R
0
21
Page 22

Usingthe timed convectionbaking features, ransome=ode/sj
You will hear a fan while cooking with this feature. The fan will stop when the door isopened but the heat will not turn off.
NOTE: Foods that spoil easily--such as milk, eggs, fish, stuffings, poultrg and porkishould not be allowed to sit for
more than J hour before or after cooking. Room temperature promotes the growth of harmful bacteria. Be sure that
the oven light is off because heat from the bulb will speed harmful bacteria growth.
How to Set an Immediate Start and Automatic Stop
i L/)I CLEARJib
!_Tqi!ili_i__ii_ _ii_iiii_i_i_i__
CONVECTION
BAKE
--I
rqD 5]
J DELAY l
DDDI D
ICLEARI
Theupperovenwillturn onimmediatelgandcook
fora selectedlengthoftime.Attheendofthe
cookingtime,theovenwillturnoffoutomoticollg.
_] TouchtheConvectionBakepad.
[] Touchthe numberpadstosetthe desired
oventemperature.
[_ TouchtheCooking Time pad.
NOTE:Ifyour reciperequirespreheating,youmay
needtooddadditionaltimetothelengthofthe
cookingtime.
[] Touch the number pads to setthe desired
length of cooking time. The minimum
cooking time you can set is 1minute.
Theoven temperature that gou set and the
cooking time that gou entered will be in the
display.
[] TouchtheStart pad.
TheovenwillturnON,andthedisplagwillshow
thecookingtimecountdownandthechanging
temperaturestartingat IO0°F.(Thetemperature
displaywillstarttochangeoncetheoven
temperaturereacheslO0°E)Whentheovenreaches
thetemperatureyouset,3beepswillsound.
Theovenwillcontinuetocookforthe setamount
oftime,thenturn off automaticallg,unlessthe
Cookand Holdfeaturewasset.SeetheSpecial
featuresofyourovencontrolsection.
Aftertheoventurnsoff,theend-of-cycletone
willsound.
[_ TouchtheClear/Offpadto clearthedisplag
if necessarg.Removethefoodfromthe
oven.Remember,eventhoughtheoven
turnsoffautomatically,foodleftinthe oven
willcontinuecookingafterthe oventurnsoff.
How to Set a Delaged Start and Automatic Stop
Theupperoven willturn on at the time of dog gou
set, cook fora specificlength of time and then turn
off automaticallg.
Hakesuretheclockshowsthecorrecttime
of day.
17] TouchtheConvectionBakepad.
Touchthenumberpadsto setthedesired
oventemperature.
131 Touchthe CookingTimepad.
NOTE:Ifgourreciperequirespreheating,gouTag
needtoaddadditionaltimetothelengthofthe
cookingtime.
[_ Touchthe number pads to set the desired
length of cookingtime.The minimum
cookingtime gou can set is 1minute.
Theoventemperaturethat gousetandthe
cookingtimethat gouenteredwillbeinthe
displag.
TouchtheDelagStartpad.
Touchthenumberpadsto setthetimeof
dagyouwantthe ovento turnonandstart
cooking.
NOTE:Ifgou would liketo check the times gou hove
set, touch the DelagStartpad tocheck thestart
timegou hoveset ortouch the Cooking Time pod
to checkthe length ofcookingtime gou hoveset.
WhentheoventurnsONatthetime ofdag
gouset,thedisplagwillshowthecookingtime
countdownandthechangingtemperature
startingat IO0°F.(Thetemperaturedisplag
willstartto changeoncethe oventemperature
reaches100°t:.)Whentheovenreachesthe
temperaturegouset,3 beepswillsound.
Theovenwillcontinuetocookforthe setamount
oftime,thenturn off automaticallg,unlessthe
Cookand Holdfeaturewasset.SeetheSpecial
featuresof goutovencontrolsection.
Aftertheoventurnsoff,theend-of-cgcletone will
sound.
[_] TouchtheClear/Offpadto clearthedisplag
ifnecessarg.Removethefoodfromtheoven.
Remember,eventhoughtheoventurnsoff
automatically,foodleftinthe ovenwill
continuecookingaftertheoventurnsoff.
2 2 [-_ TouchtheStartpad.
Page 23

Special features of your upper ovencontrol. GEAppliances.com
Your new touch pad control has additional features that gou mag choose to use. The following are the features and
how you may activate them.
The special feature modes can only be activated while the display is showing the time of day. Theg remain in the
control's memory until the steps are repeated.
When the display shows gour choice, touch the Start pad. The special features will remain in memory after
a power failure.
12 Hour Shut-Off
I-'t-
,,1.,.,
t_
O"
o_
Ht / LO
HI / Lo
HI/Lo
DELAYi
With this feature, should gou forget and leave
the oven on, the control willautomaticallg turn
off the oven offer 12 hours during baking
functions or after3 hours during a broilfunction.
If you wish to turn OFFthis feature,follow
the stepsbelow.
[Z] Touch the Bake and Broil Hi/Lo pads
at the same time for 3 seconds untilthe
Touch the Delay Start pad. Thedisplay
[]
will show 12shdn (12 hour shut-off).
Touch the Delay Start pad again
and the displaywill show no shdn
(noshut-off).
Touch the Start pad to activate the no
%
shut-off and leave the control set in this
specialfeatures mode.
display shows SF.
Fahrenheit or Celsius Temperature Selection
Youroven control is set to use the Fahrenheit
temperature selections, but gou mog change
this to use the Celsius selections.
E_ Touch the Bake and Broil Hi/Lo pads
at the same time for 3 seconds untilthe
display shows SF.
[_ Touch the Broil Hi/Lo and Cooking
Time pads at the same time. The display
will show F (Fahrenheit).
[_] Touch the Broil Hi/Lo and Cooking
Time pads again at the same time.
Thedisplay will show C (Celsius).
141 Touch the Start pad.
iii!i!!!ii_i_iiiiiiill
!i_i_iiiiiiiiiiiiiiii
,,iiiii_bl
i!!Fi!i!iii!
1-
.€
• IP
KITCHEN
IT''ER
Tones at the End of a Timed Cycle
At the end of a timed cgcle,3 short beepswill
sound followed bgonebeepeverg6 seconds
until the Clear/Off pod is touched.This
continual 6-secondbeep mog be canceled.
To cancel the 6-second beep:
E_ Touch the Bake and Broil Hi/Lo pads
at the same time for 3 seconds untilthe
display shows SF.
[_ Touch the Kitchen Timer On/Off
pad.The display shows CONBEEP
(continual beep)and BEEP.Touchthe
Kitchen Timer On/Off pad again. The
display shows BEER(Thiscancels the
one beep every 6 seconds.)
[_ Touch the Start pad.
23
o_
0
0
I"I-
•..,..
o_
R
0
Page 24

Special features of your upper ovencontrol.
Gas/Control Lockout (on some models)
GAs/CONTROL
Yourcontrol will allow you to lockout the
surfaceburners, oven burnersand control
panel sothey cannot be activated.
Tolock/unlock the controls:
[] Turn allsurface burnersoff.
[_ Touch and hold the Gas/Control
Lockout pad for 3 secondsuntil the
display shows LOCON.
[_ Tounlock the control,touch and holdthe
Gas/ControlLockout pad for 3 seconds
untilthe display showsLOCOFF.
Control Lockout (on some models)
When this feature ison and the touch pads
are touched, the control will beep and the
display will showLOCON.
The control lockout mode affects oil
controls. No controls will work when this
feature is activated.
Theadjustment will be retainedin memory
after o power failure.
CONTROL LOCKOUT
HI/Lo
START I
Yourcontrol will allow you to lockout the
touch pads so they cannot be activated when
touched or while cleaningthe glass panel.
Tolock the controls:
[_ Touch the 9 and 0 touch padsat the
same time for 3 secondsuntil the
control beepstwice.Thedisplay will
show LOCcontinuously and the time
of day if not blacked out.
12-Hour, 24-Hour or Clock Blackout
Yourcontrol isset to useo 12-hour clock.
If you would prefer to have a 24-hour
military time clock or blackout the clock
display,follow the steps below.
[_ Touch the Bake and Broil Hi/Lo
pads at the same time for 3 seconds
until the display shows SF.
[] Touch the Clock pad once.The display
will show .1.2hr. Ifthis isthe choice you
want, touch the Start pad.
NOTE:All cooking and timing functions will be
cancelledwhen locking out the control.
[_ To unlock the control, touch the
9 and 0 touch pads atthe same time
for 3 secondsuntil the control beeps
twice, and LOCwill be removed from
the display.
NOTE:Somemodels havea Control Lockout
pod. Touchend holdit for 3 secondsto
lock/unlock.
Touchthe Clock pad again to change
to the 24-hour military time clock.The
display will show24hr. Ifthis isthe choice
you want, touch the Start pad.
Touchthe Clock pad again to black out the
clock display. Thedisplay will show OFF.If
this isthe choice you want, touch the Start
pad.
NOTE:Ifthe clockisin the blackoutmode,
you will not be able to use the DelayStart
function.
24
Page 25

Usingthe Sabbath feature.
(Designed for use on the Jewish Sabbath and Holidays) GEAppliances.com
TheSabbath feature can be used for baking/roasting in the upper oven only. It cannot be used for convection, broiling,
self-cleaning or delay start cooking.
NOTE: The oven light comes on automatically (onsome models) when the door is opened and goes off when the door
is closed. The bulb may be removed. See the Oven Light Replacement section. On models with a light switch on the
control panel, the oven light may be turned on and left on.
How to Set for Regular Baking/Roasting
t_
O"
HI/Lo
E] D D o:D
When thedisplayshowsD the
ovenissetin Sabbath.Whenthe
displayshowsD C the ovenis
baking/roasting,
H_/Lo
I DELAY I
COOKING
TiME J
E3E3
When the display shows D the
oven is set in Sabbath. When the
display shows D G the oven is
baking/roasting,
Make sure the clock shows the correct time [_
of dog and the oven is off.
[_ Press and hold both the Bake and Broil
Hi/Lo pads, at the same time, until the
display showsSF.
[_ Tapthe Delay Start pad until
SAbbAtH appears in the display.
r_ Touchthe Start pad and D will appear
inthe display.
[_ Touchthe Bake pad.No signalwill
be given.
[_ Usingthe number pads, enterthe
desiredtemperature between 170°and
550°. Nosignalor temperature will
begiven.
Touch the Start pad.
After a random delay period of
approximately 30 seconds to 1minute,
D c will appear inthe display,indicating
that the oven is baking/roasting.IfD c
doesn't appear inthe display, start
again at Step4.
Toadjust the oven temperature, touch
the Bakepad, enterthe new temperature
usingthe number padsand touch the
Start pad,
NOTE:TheClear/Off and Cooking Time pads
are active during the Sabbath feature.
How to Set for Timed Baking/Roasting-Immediate Start and Automatic Stop
Hake sure the clock shows the correct time
of dog and the oven is off.
[_ Press and hold both the Bake and Broil
Hi/Lo pads, at the same time, until the
display showsSF.
[_ Tapthe Delay Start pad until
SAbbAtH appears in the display.
r_ Touchthe Start pad and D will appear
in the display.
[_] Touchthe Cooking Time pad.
[_ Touchthe number pads to set
the desired length of cooking time
between 1 minute and 9 hours and
99 minutes.Thecooking time that you
entered will be displayed.
r_ Touchthe Start pad.
_] Touchthe Bakepad. Nosignal will
be given.
[_ Usingthe number pads,enterthe
desiredtemperature. Nosignalor
temperature will be given.
Touch the Start pad.
%
After a random delay periodof
approximately 30 secondsto 1 minute,
D C will appear in the display,indicating
that the oven isbaking/roasting.IfD c
doesn't appear in the display,start again
at Step7.
Toadjust the oventemperature, touch
the Bake pad, enter the new temperature
usingthe number padsand touch the
Start pad.
When cooking isfinished,the display will
changefrom D c to D and 0:00 will appear,
indicating that the oven has turned OFF
but is still set in Sabbath. Removethe cooked
food.
iii!i!!!ii_i_iiiiiiill
!i_iiiiiiiiiiiiiiiiii
,,iiiii_bl
i!!i!%'i!i!iii!
• r'
£
• r'
O
O
8
O
25
Page 26

Usingthe Sabbath feature.
How to Exit the Sabbath Feature
I CLEAR I
H_/Lo
I DELAYI
[_ Touch the Clear/Offpad.
[_ Ifthe oven iscooking,wait for a random
delau period of approximatelu 30
secondsto I minute, until only D is
in the displau.
[_] Pressand hold both the Bake and Broil
Hi/Lo pads,at the same time, untilthe
display shows SF.
Tap the Delay Start pad until
[]
12shdn or no shdn appears inthe
display.12shctn indicates that the oven
will automatically turn off after 12
hours, no shctnindicates that the oven
will not automatically turn off.
[_ Touch the Start pad.
NOTE:Ira power outage occurredwhile
theoven was inSabbath, the oven will
outomaticoll_lturn off andstag off evenwhen
thepower returns.Theovencontrolmust
be reset.
26
Page 27

Adjust the upper oven thermostat--Do it yourselfl. GEAppliances.com
You may find that your new oven cooks differently than the one it replaced. Use your new oven for a few weeks to become
more familiar with it. If you still think your new oven is too hot or too cold, you can adjust the thermostat yourself
Do not use thermometers, such as those found in grocerg stores, to check the temperature setting of gour oven.
These thermometers mag varg 20140 degrees.
NOTE: This adjustment will not affect the broiling or the self-cleaning temperatures. The adjustment will be retained
in memorg offer o power failure.
To Adjust the Thermostat
t_
O"
o_
_+ BAKEI
H_/Lo
__ [_] Touch the Bake and Broil Hi/Lo pads [_]
at the same time for 3 seconds until the
display shows S_
[_ Touch the Bake pad.A two-digit number
shows in the displag.
Touch Bake once to decrease(-)
the oven temperature, or twice to
increase (+).
Theoven temperature can be adjusted
%
up as much as 35°For down as much
as35°F.Touchthe number padsthe
same wag gou read them. Forexample,
to change the oven temperature 15°F,
touch I and 5.
When gou have made the adjustment,
touch the Start pad to go back to the
time-of-dag displag.Use gour oven as
you would normally,
NOTE: The thermostat adjustment for Baking
will also affect Convection Baking or Convection
Roasting.
The type of margarine will affect baking performance!
Most recipes for baking hove been developed using high-fat products such us butter or margarine (80% fat).If gou
decrease the fat, the recipe mug not give the some results us with o higher fat product.
illiiiii'_'iiiiiiiiiHiii
¢
Recipe failure can result if cakes, pies, pastries, cookies or candies are mode with low-fat spreads. The lower the fat
content of o spread product, the more noticeable these differences become.
Federalstandards require products labeled "margarine" to contain at least80%fat bg weight. Low-fat spreads,on the
other hand,contain lessfat and morewater.The high moisture content of these spreads affects the texture and flavor
of baked goods. Forbestresultswith gour old favorite recipes,usemargarine, butter or stick spreads containing at least
70% vegetable oil.
v
o_
0
0
o_
on
o_
to
0
0
27
i
Page 28

Using the electric warming drawer, ransomemode/sj
The warming drawer will keep hot, cooked foods at serving temperature. Always start with hot food. Do not
use to heat cold food other than crisping crackers, chips or dry cereal.
To Use the Warming Drawer
WARM_NG
SET WARMING DRAWER
START l
[_ Touch the Warming Drawer pad.
"Warm" and "1"are liton the displag
and "Set" beginsto blink.
[_ Onthe number pad, press1 for Low,
2for Medium or 3 for High.
The display "1" changes corresponding
to the number pad selected.
[] Touch the Start pad.
"Warm" and the number remain lit.
"Set"stops blinking.
Tocancel, touch the Warming Drawer pad.
NOTE:Touchingthe Cleur/Off pod does not
turn the warming drawer off.
When Using the Warming Drawer
NumberPad Setting l
1 Lo(pies)
2 Med(casseroles)
3 Hi(meats)
NOTES:
Thewormingdrawercannotbeusedduringo
self-cleoncgcle.
iiiHiiiiii
Theworming drawer has threesettings:1,2 and
&These settingsmaintain differenttemperature
levelsinthe worming drawer.
iiiHiiiiii
Onsome models, ifusing the oven at the some
time as the worming drawer,onl_lthe oven
settings willbe displayed.
1
Thewarming drawer will keep hot, cooked
foods at servingtemperature, Alwags start
with hot food. Donot use to heatcold food
other than crisping crackers,chipsor drg
cereal.
Do not linethewarming drawer or pun
with aluminum foil. Foil is an excellent heat
insulator and will trap heat beneath it. This
will upset theperformance of the drawer
and coulddamage the interior finish.
Allow approximately 25 minutes for the
warming drawer to preheat.
Do not put liquid or water in the
warming drawer.
iiiiiiiii_
Formoist foods,coverthem with a lid
or aluminum foil.
Forcrisp foods, leavethem uncovered.
Foodshould be kept hot in its cooking
container or transferred to a heat-safe
serving dish.
.4LCAUTION: plasticcontainersor
plastic wrap will melt ifindirectcontact with
the drawer, pan orohot utensil.Melted plastic
moF not be removable and isnot covered
under Four worrontF.
Removeserving spoons, etc.,before
placing containers inwarming drawer.
28
Page 29

Temperature Selection Chart
GEAppliances.com
Tokeep severol different foods hot, set
the control to the food needing the highest
setting.
Thetemperoture, type ond omount of
food, ond the time held will offect the
quolity of the food.
Foodin heot-sofe gloss ond gloss-ceromic
utensilsmoy needo higher control setting
os compored to food in metol utensils.
Repeotedopening of the drower allows the
hotoir to escopeond the food to cool.
, Allow extro time for the temperoture inside
the drower to stobilizeoffer odding items.
With Iorge Ioodsit moy be necessory to
useo higher worming drower setting ond
cover some of the cooked food items.
Donot use plosticcontoiners or
plosticwrop.
FoodType ControlSetting
Bacon 3
Breads 2
Casserole 2
Chicken,fried 3
Eggs,scrambled 2
Fish 3
Gravy,sauces 3
Ham 3
Muffins 2
Onionrings 3
Pies 1
Pizza 3
Potatoes,baked 3
Potatoes,mashed 2
TortillaChips 1
CAUTION:oonotkeenfood
theworming drower for more thon two hours.
To Crisp Stale Items
Plocefood in low-sided dishes or pons.
Preheoton 1setting.
Checkcrispnessoffer 45 minutes. Add time
os needed.
To Warm Serving Bowls and Plates
Towarm serving bowls and plates, set the
control on 1.
Useonly heot-sofe dishes,
Ifyou wont to heot fine chino, pleose
check with the monufocturer of the dishes
for their moximum heot toleronce.
You moy worm empty serving dishes while
preheoting the drower.
CAUTION: isheswillbehot
Usepot holdersor mitts when removing hot
dishes.
29
Page 30

Using the lower oven drawer, ionsomer ode/sJ
The lower oven drawer may be used to bake foods using the same times and temperatures as a standard oven. Foods
ideal for baking in the lower oven drawer include pizza, frozen foods, casseroles, biscuits, rolls and many desserts.
To Use the Lower Oven Drawer
OFF
WEFIOVEN•
300 * 350 • 400
Push in and turn the lower oven
drawer knob to any desired setting.
[]_] Pushin ond turn the loweroven drower
knob to ong desiredsetting,
[_ Allowthe lower oven drawer to preheat.
:: TheONsignallight islocatedon the upper-
right side ofthe knoband glows when the
knobis inthe ON position. It remainsON
untilthe knob ismoved to the OFFposition.
: The "Heating"signal light islocated below
the ONsignal lightand glowswhen the
heating elements ore active. Preheatis
complete offerthe "Heating" signalhas
turned offfor the first time each use.
NOTES:
_,Alwags usethe includeddrawer rack when
usingthe lower oven drawer.
The lower oven drawer cannot be used
during o self-dean cgcle of the upper oven.
Do not put food, foilor cookwore directlg
on the bottom of the lower oven drawer.
Alwogs use the included drawer rack.
_, If foods requirea cover,useonly foil or lids
able to withstand baking temperatures.
Donot useplastic.
Maximum height of foods that con be
placed in the lower oven drawer is 4 ".
Donot put liquid or water in the lower
ovendrawer.
_,Neverplace plastics,paper, cannedfoods
or combustible material in the lower oven
drawer.
Thelowerovendraweruseslessenergythantheupperoven.
Allowthefollowingapproximatetimesforpreheating:
DesiredLower Preheat
OvenTemperature Time
WARM 10minutes
350°F 20minutes
425°F 30minutes
When Using the Lower Oven Drawer Warm Zone
TheWARMZONEof the lower oven drawer
will keep hot cooked foods at serving
temperatures.Alwags start with hot food.
Donot use theWARMZONEto heatcold food
other than crisping crackers, chips or drg
cereal.
Pushinand turn the control knob
%
to the desiredsetting within the worm
zone (indicated by the red line).
LO .......................... Pies
MEDIUM ................... Casseroles
Imid-position on the line)
HI ........................... Meats
30
Page 31

Usingthe self-cleaning upper oven. GEAppliances.com
If blour model has a door latch, never force the latch handle. Forcing the handle will damage the door lock mechanism.
The oven door must be closed and all controls set correctly for the cycle to work properly.
Before a Clean Cycle
Wipe up heavy soil on the oven bottom.
Forthe first self-cleancycle, we recommend
venting your kitchenwith an open window
or using a ventilation fan or hood.
Removeany broiler pan,broilergrid, all
cookware, probe and any aluminum foil
from the oven-they cannot withstand the
high cleaning temperatures.
NOTE:
If your oven isequipped with nickel oven
racks, remove them before you begin the
self-clean cycle.
If your oven isequipped with gray
porcelain-coated oven racks,they may be
left in the oven during the self-clean cycle.
Soilon the front frame of the range and
outside the gasket on the door will needto
be cleaned by hand.Cleanthese areaswith
hot water, soap-filled scouring pads or
cleanserssuch as SoftScrub? Rinsewell
with clean water and dry.
Do not clean the gasket. The fiberglass
material of the oven door gasket cannot
withstand abrasion. It isessentialfor the
gasketto remain intact. If you notice it
becoming worn or frayed, replace it.
Wipe up any heavy spillovers on the oven
bottom.
Make surethe oven light bulbcover isin
place and the oven light is off.
IMPORTANT:The health of some birds
isextremely sensitiveto the fumes given
off during the self-cleaningcycle of any
range. Move birds to another well-ventilated
room.
NOTE:Usecaution when opening theupper
ovenafter theself-dean cycle hasended.
Theoven may still behot.
I SE FI
z]rqr LL
J 1
How to Set the Upper Oven for Cleaning
rTj On models with Gas/Control Lockout, 16]
touch and hold the Gas/Control Lockout
pad for 3 secondsto turn it off.
NOTE:Thesurface burners must be turned
off prior to the self-dean start time.
[_ If your model hasa latch, latch the door.
J_ Touch the Self Clean pad.
r_ using the number pads, enterthe
desiredclean time, if a time other than
4 hours isneeded.
Cleancycle time is normally 4 hours.Youcan
change the cleantime to any time between
3 hoursand 5 hours,depending on how dirty
your oven is.
[_ Touch theStart pad.
On models without a door latch, the door
locksautomatically. Thedisplay will show
the clean time remaining. Itwill not be
possibleto openthe oven door untilthe
temperature drops below the lock
temperature and the LOCKEDDOOR
lightgoes off.
When the LOCKEDDOOR light isoff,
slidethe latch handle to the left as far
asit will go and open the door.If your
range does not havea latch,the door
will unlockautomatically,
Thewords LOCKDOORwill flash and
the oven control will signal if you set
the clean cycle and forget to closethe
oven door orforget to latchthe door
on models with a latch.
Tostop a clean cycle,touch the Clear/Off
pad.When the LOCKEDDOOR light goes
off, indicating the oven hascooled below
the locking temperature, unlatch the door
(onmodels with a latch)and open the door.
Theoven shutsoff automatically when the
clean cycle iscomplete.
B1
Page 32

Usingtheself-cleaningoven.
The oven door must be closed and all controls set correctly for the cycle to work properly.
How to Delay the Start of Cleaning
I SELF I Make suretheclockshows thecorrecttime
of day.
E_] on models with Gas/Control Lockout,
touch and hold the GaslControl Lockout
%FFlE]EEEE
C_L L_out
DELAY
START
pad for 3 secondsto turn itoff.
NOTE:The surface burners must be turned
off prior to the self-clean start time.
[_ Ifyour model has a latch, latch
the door.
When the LOCKEDDOORlight isoff,
%
slidethe latch handle to the left as far
as it will go and open the door.If your
range does not hove a latch,the door
will unlockautomatically.
Thewords LOCKDOORwill flash and the
oven control will signal ifyou set the cleon
cycle and forget to close the oven door or
forget to latch the door on models with
a latch.
FqD ITIF-ILD
[_] Touch the Self Clean pad.
E_] using the number pods,enter the
desiredclean time.
[] Touchthe Delay Start pad.The earliest
start time you can set will appear in the
display.
161 Using the number pads,enter the time
of day you want the clean cycle
to start.
[Z] Touchthe Start pad.
On models without a door latch,the door
locksautomatically. Thedisplay will show the
start time. Itwill not be possibleto open the
oven door until the temperature drops below
the lock temperature and the LOCKEDDOOR
light goes off.
The oven shutsoff automatically when the
cleon cycle iscomplete.
After a Clean Cycle
Youmay notice some white ash in the oven.
Wipe it up with a damp cloth offer the
oven cools.
, Tostop ocleon cycle, touch the Clear/Off
pad.When the LOCKEDDOOR light goes
off, indicating the oven has cooled below
the lockingtemperature, unlatch the door
(on models with a latch) and open the door.
Youcannot set the oven for cooking until
the oven iscool enough for the doorto
unlock.
If white spotsremain,removethemwith a
soap-filled scouringpod and rinse thoroughly
with o vinegarand water mixture.
Thesedepositsare usuallya salt residue
that cannot be removed by the cleon cycle.
Ifthe oven isnot cleon offer one cleon cycle,
repeat the cycle.
32
Whilethe oven isself-cleaning,you can
touch the Clock padto display the time
of day. To return to the cleon countdown,
touch the Cooking Time pad.
Ifthe rocks become hard to slide,apply a
small amount of vegetable oilor cooking oil
to apapertowelandwipe the edgesof the
oven rocks with the paper towel.
Page 33

Care and cleaning of the range.
Be sure electrical power is off and all surfaces are cool before cleaning ang part of the range.
-AWARNING: _fyourrangeisremovedforcleaning,servicingoranyreason,
be sure the anti-tip device is reengaged properly when the range is replaced. Failure
to take this precaution could result in tipping of the range and cause injury.
GEAppliances.com
(notremovab!e
onsideburners)
Side
grate
Burner Assemblies (on some models)
Turnall controls OFF before removing the
burner parts.
^_,,CAUTION: _onotoperatethe
cooktop without all burner parts and grates
Theround sideburner caps can be lifted off,
in place.
making them ease to clean. The burner bases
and electrodesare not removable.
Theoval center burner headand cap
assemble can be lifted off, making it ease
to clean.Theburner electrode is not
removable.
center
g!!d!!!
L j_ andcap
Sealed Burner Assemblies (onsome models)
Burnerhead
assembly
When one burner isturned to LIT& all
the burners spark. Donot attempt to
disassemble or clean around ang
burner while another burner ison. An
electric shock mag result,which could
cause you to knock over hot cookware.
Burne_
cad r
ease
Sidegrate
Frontrigh_burner
consomemodels)
Electrode
Cooktou
Turn all controls OFF before removing the
burner parts.
The round side burner caps and burner
headscan be lifted off, making them ease
to clean.Theelectrodes are not removable.
Theoval center burner headand cap
assemblecan be lifted off, making it ease
to clean.Theburner electrode isnot
removable.
il i ¸ L i
center
r"--_ Burnerhead
_ andcap
assembly
E,iliriii
^_CAUTION:oonotoperatethe
cooktop without all burner parts and grates
in place.
Electrode
or
Electrode
Frontrightbase
(on some models)
The electrode of the spark igniter is
exposedwhen the burner headis
removed.When one burner is turned
to LIT& all the burners spark.Do not
attempt to disassemble or clean
around ang burner while another
burner ison.An electric shock mag
result,which could cause gou to knock
over hot cookware.
33
Page 34

Care and cleaning of the range.
Burner Caps, Bases and Heads
Beforeremovingthe burnercaps and heads (on
some models),remembertheirsize and location.
Replacethem inthe same locationoffercleaning.
NOTE:Donotusesteelwoolorscouringpowders
to cleontheburnerports.
Burnercaps
Burner cap is Burnercap is NOT
properly seated, properly seated.
Liftoffwhencool.Washburnercapsinhot,soapy
waterandrinsewithcleanwater.Youmay scour
witha plasticscouringpadto removeburned-on
foodparticles.
Replacement Burner Heads (onsomemodels)
Replaceburnerheadsovertheelectrodeson
thecooktop,inthecorrectlocationsaccordingto
theirsize.Thereisonesmall,onemedium,one
largeandoneextralargeburnerhead.
M
Burnerbases(onsamemodels)
@
Theburnerbases(onsomemodels)arenot
removable:Onlythecapsmayberemoved
for cleaning.
Burnerheads(onsomemodels)
Theburnerheads(onSomemode!s)are
removablelSimplylift themoff therange
for €leaning.
Frontrighthead (on somemodels)
Burner
head
Make sure_heh0!eintheburnerheadis
positionedovertheelectrodeandthatthe
burnerheadisfullyinsertedinsidethe
burnerbase_Asmallgapbetweenthebase
andheadisnormal.
Frontrighthead(onsomemodels),front
left head,backrightheadandbackleft
Burner Bases (onsomemodels)
Theroundburnerbasesarenot removable.Only
thecapsmayberemovedforcleaning.
Tocleantheburnerbases,usesoapywateranda
plasticscouringpad.Wipecleanwitha dampcloth.
Makesurethatnowatergetsintotheburner
bases.Allowthemtodry fully beforeusing.
Burner Heads (onsomemodels)and Oval
(CenteflBurner Head/Cap Assembly
Theburnerheadsandtheovalburnerhead/cap
ossembl_loreremovable.Simptgliftthemoffthe
rangeforcleaning.
Forproperignition,makesurethesmallhole
inthesectionthatfitsovertheelectrodeiskept
open.Asewingneedleor wiretwist-tieworks
wellto unclogit.
Theslitsin theburnerheadsmustbekeptcleon
at alltimesforan even,unhamperedflame.
Cloggedordirty burnerportsor electrodes
willnotallowthe burnertooperateproperly.
Anyspillonor aroundanelectrodemust
becarefullycleaned.Takecaretonot hitan
electrodewith anythinghardor itcouldbe
damaged.
ronto rang
Extra-largeheac
Vlakesuretheslotorhole(dependingon model)in
theburnerheadis positionedovertheelectrode.
or
Electrode Slot
Oval (Center)Burner Head/Cap Assemblg
Replacetheoval Icenterlhead/capassemblyover
theelectrodeonthe cooktop.
Ovalheadandcap
assembly
Makesurethe slot inthe
uurnerheadis eositionedover
theelectrode.
Cleanthe burnerheadsroutinely,especiallyafter
badspillovers,whichcouldclogtheopenings.Lift
off whencool.
.,r-_i_'---_ needleortwist-tie
n (k _p._._..)) tounclogti)esmall
,_urner_ holeintileburner
ease Eectrode head.
Make sure the slot in the burner head is
positioned over the electrode:
Holein
-- burner
head
Toremoveburned-onfood,soakthe burnerheads
ina solutionof mildliquiddetergentandhot water
for20-30 minutes.Formorestubbornstains,use
a toothbrush.
Aftercleaning
Beforeputtingthe burnercaps,heads(onsome
models)andovalhead/capassemblyback,shake
outexcesswaterandthendrythemthoroughly
bysettingina warmovenfor 30minutes.
Theovalburnerhead/capassemblyisremovable.
Simplyliftit offtherangeforcleaning.Usea
sewingneedleortwist-tietOunclogthesmall
holeintheburnerheads.
34
Frontof range Electrode
Caps
Replacethe matching sizecaps onto the burner
bases or heads.
vlake sure that the heads _onsome models and
caps are replaced inthe correct locations.
Page 35

Griddle
GEAppliances.com
Appearancemayvary.
Thegratesmaybe cleanedin a
dishwasher.
Left Front Center RghtFront
NOTES:
The griddle is to be used over the center
burner onlg.
Do not clean the griddle in a dishwasher
Wash with hot, soapg water after each use
while using a sponge or dishcloth.
Ifoil or food residue is left on the griddle,
further cooking willharden the residue and
cause sticking over time. In this case, use a
nonabrasive cleanser such as Ban Ami ®or
one of the soft scrub cleansers. Applg with
a sponge, Scrunge® or other cleaning pad
labeled safe for nonstick pans.
Use onlg plastic, nylon or wooden utensils
or SilverStone®kitchen tools to prevent
marring of the coating.
Burner Grates
Yourrange hasthree professional-style
double grates.Thesegrates are position-
specific.For maximum stability, these grates
should only be used intheir proper position;
they cannot be interchanged left to right
or front to back. For convenience,the
undersides of the left and right grates are
marked "LEFTFRONT"and "RIGHTFRONT."
Hake surethe front portion of both grates is
in front. The middle grate hasa bow infront.
Hake surethe bowed portion istoward the
front of the range.
Cleaning
Lift out when cool. Gratesshould be washed
regularly and,of course,after spillovers.
Wash them in hot, soapy water and rinse
with clean water.When replacingthe grates,
be surethey are positioned securely over
the burners. Replacethe grates so that
continuous arcsareformed with the center
ribs of allthree grates.
Never use knives or cut food on the griddle.
Wash with hot, soap_l water offer each use.
Store carefullg to prevent scratching.
Griddle Precautions:
Ifsomething has spilled under the griddle,
it should be cleaned up as soon as possible
to prevent "baked on" food soil.
iiiiiiiii_
Do not allow grease to accumulate under
the griddle as it can be a firehazard. Clean
under the griddle as soon as it is cool. Clean
with hot soapy water
Do not place gour griddle in the microwave.
Alwablsturn offallsurface burnersbefore
removing thegriddle.Usecaution when
handling o hot griddle.
Donot operate a burner for an extended
period of time without cookware on the grate.
Thefinish onthe grate may chip without
cookware to absorb the heat.
Toget rid of burned-on food, place the grates
in a covered container.Add 1/4 cup ammonia
and letthem soak several hoursor overnight.
Wash,rinse well and dry.
Although they are durable,the grates will
gradually losetheir shine, regardlessof the
best care you can give them. This isdue
to their continual exposureto high
temperatures. Youwill notice this
soonerwith lighter color grates.
NOTE:Donot clean the grates in a self-
cleaning oven.
Cooktop Surface
To avoid damaging the porcelain-enamel
surface of the cooktop and to prevent it
from becoming dull, clean up spills right
away. Foods with a lot of acid (tomatoes,
sauerkraut, fruitjuices, etc.) or foods with
high sugar content could cause a dull spot
if allowed to set.
When the surface hascooled,wash and
rinse. Forother spillssuch asfat spatterings,
wash with soap and water once the surface
has cooled.Then rinseand polishwith a dry
cloth.
NOTE:Do not store flammable materials
in an oven, drawer or near the cooktop.
Do not store or use combustible materials,
gasoline or other flammable vapors and
liquids in the vicinitg of this or any other
appliance.
NOTE:Do not liftthe cooktop. Lifting the
cooktop con lead to damage and improper
operation of the range.
NOTE:Forstainless steel cooktops, refer
to the Stainless steel surfaces section.
B5
Page 36

Care and cleaning of the range.
Oven Air Vents
Vent appearance and location vary.
or
JG UCO.Td
! Lo ,ouTJ
Surfaceburnerknob
Lowerovendrawerknob
Never blockthe vents (airopenings)of the
range.They provide the air inletand outlet
that are necessaryfor the range to operate
properly with correct combustion.
Upper Control Panel
On models soequipped,/ock out the touch
pads before cleaning.
Seethe Gas/Control Lockoutor Control
Lockout information in the Specialfeaturesof
Four oven control section in this manual.
Clean up splatters with a damp cloth.
Lower Control Panel (Front Manifold
It'sagood idea to wipe the control panel
after each useof the oven. Usea damp cloth
to clean or rinse.Forcleaning, use mild soap
and water or a 50/50 solution of vinegar and
water. For rinsing,use clean water. Polishdry
with a soft cloth.
Donot useabrasivecleansers,strong liquid
cleaners,plastic scouring pads or oven
cleaners on the control panel-they will
damage the finish.
Donot try to bend knobs by pulling them up
or down or by hanging a towel or other such
loads.This can damage the gas valve shaft.
Thecontrol knobs may be removed for
easier cleaning.
Air openings are locatedat the rear of
the cooktop,at the top and bottom of the
ovendoor, and at the bottom of the range,
under the warming drawer or lower
ovendrawer.
You may alsousea glass cleaner.
Removeheavier soilwith warm soapy water.
Do not useabrasivesof any kind.
Unlockthe touch pads after cleaning.
Panel) and Knobs
Make surethe knobs are in the OFFpositions
and pullthem straight off the stems for
cleaning.
The knobs can be cleaned in a dishwasher
or they may also be washed with soapand
water. Makesurethe insidesof the knobs are
dry before replacing.
Replacethe knobsinthe OFFposition
to ensure proper placement.
Metal parts can be cleanedwith soap
and water. Do not usesteel wool, abrasives,
ammonia, acids or commercial oven
cleaners.Dry with a soft cloth.
NOTE:The loweroven drawer controlknob is
not interchangeablewith the sur@ceburner
knobs.Besure to reinstallthe lower oven
drawer knob to the original location.Thelower
ovendrawer knobroof be identified b£ the red
line.Surfaceburner knobshave a white line.
Oven Bottom
Theoven bottom has a porcelain-enamel
finish.To make cleaning easier,protect the
oven bottom from excessivespilloversby
placing a cookiesheetonthe rack below the
rack you are cooking on.Thisisparticularly
important when baking a fruit pieor other
foods with a high acid content. Hot fruit
fillings or other foods that are highly acidic
(suchas tomatoes, sauerkraut and sauces
with vinegar or lemonjuice)may cause
pitting and damage to the porcelain-enamel
surface and should be wiped up immediately.
36
Wedon't recommend usingaluminum foil
on the oven bottom. It can affect airflow if the
holesare blocked and it can concentrate heat
at the bottom of the oven, resultingin poor
baking performance.
Toclean up spillovers,usesoap and water,
an abrasive cleaner or soap-filled scouring
pad. Rinsewell to remove any soap before
self-cleaning.
Page 37

Lift thedoorstraight upand off the
hinges.
Thegasketisdesignedwith a gapat
the bottomto allow for properair
circulation.
Donotrub orcleanthe doorgasket--it
hasanextremelylow resistanceto
abrasion.
Ifyou noticethe gasketbecomingworn,
frayed or damagedin anyway or if it
hasbecomedisplacedon thedoor,you
shouldhaveit replaced.
Lift-Off Oven Door
Theoven door isremovable,but it is heovg.
Youmog need help removing and replodng
the door.
Toremove the door, open it a few inches
to the special stop position that will hold the
door open.Graspfirmlg on each sideand lift
the door straight up and offthe hinges.
NOTE:Becareful not to place hands between
the hinge and the ovendoor frame since the
hinge couldsnap back and pinch fingers.
Toreplace the door, make surethe hinges
are inthe special stop position.Positionthe
slots inthe bottom of the door squarelg over
the hinges.Then lowerthe door slowlgand
evenly overboth hinges at the same time. If
the hinges snap back against the oven frame,
pull them back out.
Toclean the insideof the doon
Donot allow excesswater to run into
ang holesorslots inthe door.
Becausethe area insidethe gasket is
cleanedduring the self clean cgcle,gou do
not need to cleanthis bg hand.Any soap
left on the linercausesadditional stains
when the oven isheated.
GEAppliances.com
Thearea outsidethe gasket can be
cleaned with a soap-filled plastic
scouring pad.
Toclean the outside of the door:
Usesoap and water to thoroughly clean
the top, sidesand front of the oven door.
Rinsewell.You mag also usea glass
cleaner to cleanthe glasson the outside
of the door.
Spillage of marinades, fruit juices,tomato
sauces and basting materials containing
acids mag cause discoloration and should
bewiped up immediately. When the
surface iscool,clean and rinse.
Donot useoven cleaners,cleansing
powders or harsh abrasiveson the
outside of the door.
Stainless Steel Surfaces tonsomemodels)
Do not use a steel wool pad; it will scratch
the surface.
IMPORTANT:APPLVA PROTECTIVECOAT
OFCERAMABRVTE®STAINLESSSTEEL
BRIGHTENERBEFOREUSING.Thiswill help
gou to maintain the brightnessand
appearance of gour stainless steelrange.
Inorder to avoid ang discolorations and/or
greasestains,we recommend cleaning
and removing ang spills,spots and grease
from the range offer use.
It isimportant to usea soft cloth orpaper
towel every time the range is cleanedto
ovoid ang scratches.
Readcarefully the instructions on the back
of the Brightenerfor better results.
Cleaning Instructions:
1. Removegrates.
2. Wash usingwarm, soapg water:
Wet soft cloth or paper towel (avoid using
excessivewater).
Wipe the surface in the direction of the
grain (following the steel lines).
Rinseand wring out asoft cloth or paper
towel and drg the range.
3. Applg a degreaserthat does not contain
sodium hgdroxideor StainlessSteel
Cleaner(follow instructions).
4. Applg Cerama Brgte®StainlessSteel
Brightener(follow instructions).
5. Repeatsteps 2-4 as mang times
as needed.
6. Putgrates backin place.
Followthese instructionsfor ang Stainless
Steelsurface on gour range.
DONOTUSEfor Cooktop or Stainless Steel
parts cleaning:
• Caustic Ige(sodium hgdroxide)or cleaners
containing this chemical
• Hardor steel wool pads
• Abrasive materials or chemicals
Toinquire about purchasing stainlesssteel
appliance cleaner or polish,or to find the
location of adealer nearest gou,please call
our toll-free number:
National Parts Center 800.626.2002(U.S.)
800.66:L:Z616(Canada)
GEAppfiances.com(U.SJ
www.GEAppliances.ca (Canada) 37
Page 38

Care and cleaning of the range.
Oven Racks and Drawer Racks
Wire coverholder.
If your oven isequippedwith nickel oven
racks,they should be removed from the oven
before beginning the self-cleancycle.
Toclean the nickel racks,usean abrasive
cleanser.After cleaning, rinse the racks with
cleanwater and dry with a clean cloth. If the
racksever become hard to slide,wipe the
rack edges or oven rack supports with
vegetable oil.
If your oven isequippedwith gray porcelain-
coated racks,they may becleaned in the
oven during the self-cleancycle.
Oven Light Replacement
CAUTION:Before replacing your oven light
bulb, disconnect the electrical power to the
range at the main fuse or circuit breaker
panel. Be sure to let the light cover and bulb
cool completelg.
Theoven light bulb iscoveredwith a
removable glass cover that is held in place
with a bail-shaped wire. Removethe oven
door,if desired,to reach cover easily.
To remove:
Holda hand under the coverso it
%
doesn't fall when released.With fingers
of the same hand, firmly push back the
wire coverholder.Liftoff the cover.
They may also be cleaned by using an
abrasive cleanser.After cleaning, rinse the
rackswith cleanwater and dry with a clean
cloth. Ifthe racksever become hard to slide,
wipe the rack edgesor oven rack supports
with vegetable oil.
Do not remove ang screws to remove
the cover.
[_ Do nottouch hot bulbwith a wet cloth.
Replacebulb with a 40-watt household
appliance bulb.
To replace cover:
r_ Placeit into the groove of the light
receptacle. Pullthe wire forward to the
center ofthe cover until itsnaps into
place.When in place,the wire holdsthe
cover firmly. Be certain the wire isin the
depression inthe center of the cover.
[_] Connect electricalpower to the range.
Removable Storage Drawer (onsome models)
The storage drawer is o good place to store
cookware and bakeware. Do not store plastics
and flammable material in the drawer.
Thestorage drawer may be removed
for cleaning under the range. Cleanthe
Thestoragedrawer mayberemoved
for cleaningunderthe range.
38
storage drawer with a damp cloth or sponge.
Never useharsh abrasives or scouring pads.
Toremove storage drawer:
[_ Pulldrawer straight out until it stops,
r_ Tiltthe front of the drawer up and free
of the range.
To replace storage drawer:
[_ Set the stops on the back of the drawer
over the stops in the range.
[_ Slidedrawer evenly and straight back,
so that the rails in the rangeare
engaged.
Page 39

Removable Drawer (Warming Drawer Models onlg)
GEAppliances.com
NOTE:Formodels with an electric warming
drawer, before performing any adjustments,
cleaning or service, disconnect the range
electrical power supply at the household
distribution panel by removing the fuse or
switching off the circuit breaker. Make sure
the warming drawer heating element is cool.
Most cleaning con be done with the drawer
in place. However,the drawer mog be
removed if further cleaning is needed.Use
soap and worm water to cleonthoroughlg.
Toremove the drawer:
__ [_ Pullthe drawer straight out until
it stops.
r_ Pressthe left rail releaseup and press
the right rail releasedown,while pulling
the drawer forward and free.
Removable Drawer (Lower Oven Drawer Models onlg)
NOTE:Formodels with an electric warming
drawer or lower oven drawer, before
performing any adjustments, cleaning or
service, disconnect the range electrical
power supplg at the household distribution
panel bg removing the fuse or switching off
the circuit breaker. Make sure the warming
drawer heating element is cool.
Most cleaning con be done with the drawer
in place. However,the drawer mog be
removed if further cleaning is needed.Use
soap and worm water to cleonthoroughlg.
To remove the drawer:
To replace the drawer:
[]i] Place the left drawer rail around the
inner left rail guide and slideit in
slightlg to hook it.
[_ Placethe right drawer rail around the
inner right rail guide and slideit in
slightlg to hook it.
r3] Slidethe drawer oil the wag in.
To replace the drawer:
rT] Place the left drawer rail around the
inner left rail guide and slideit in slightlg
to hook it.
[_ Placethe right drawer rail around the
inner right rail guide and slideit in
slightlg to hook it.
[_] Slidethe drawer oilthe wag in.
[_ Pullthe drawer straight out until
it stops.
[_ Pressthe tabs on both sides in while
pulling the drawer forward and free.
Removable Lower Oven Drawer Pan
NOTE:Formodels with an electric warming
drawer or lower oven drawer, before
9erforming any adjustments, deaning or
service, disconnect the range electrical
power supply at the household distribution
panel by removing the fuse or switching off
the circuit breaker. Make sure the drawer
heating element is cool.
NOTE:Allow lower ovendrawer to cool
beforeremoving pan.
NOTE:Wipe spillspromptly after eachuse.
Never place,useor self-cleonthe lower
oven drawer pan in the upper oven.
Lowerovendrowerhoso removoblepon
foreosycleoning.Cleonwithhotsoopy
water and o sponge or dish towel. Dry with
o cleon cloth.An oven cleaner,such as
Eosg-Off®,mog also be used. Besure to
follow the directions on the oven cleaner.
Replacethe pan inthe lower oven drawer.
39
Page 40

Installation
Instructions
Range
In the Commonwealth
of Massachusetts
• This product must be installed by a licensed plumber
or gas fitter.
• When using ball type gas shut-off valves, they shall
be the T-handle type.
• A flexible gas connector, when used, must not exceed
3 feet.
BEFORE YOU BEGIN
Read these instructions completely and carefully.
Installation of this range must conform with local
codes or, in the absence of local codes, with the
National Fuel Gas Code,ANSI Z223.1/NFPA.54, latest
edition. In Canada, installation must conform with
the current Natural Gas Installation Code, CAN/CGA-
B149.1 or the current Propane Installation Code,
CAN/CGA-B149.2, and with local codes where
applicable. This range has been design-certified bg
CSAInternational according to ANSI Z21.1, latest
edition, and Canadian Gas Association according
to CAN/CGA-I.1 latest edition.
As with any appliance using gas and generating heat,
there are certain safety precautions you should follow.
You will find these precautions in the Important Safety
Information section in the front of this manual. Read
them carefully.
FOR YOUR SAFETY
Do not store or use combustible materials, gasoline
or other flammable vapors and liquids in the vicinity
of this or any other appliance.
If you smell gas:
O Open windows.
Don't touch electrical switches.
Extinguish any open flame.
Immediately call your gas supplier.
TOOLS YOU WILL NEED
Phillips screwdriver
Flat-bladescrewdriver
Pencilandruler
Pipewrenches(2)
(onefor backup)
Open-endor
adjustablewrench
Level
Drill,awl or nail
• IMPORTANT - Savetheseinstructions
for local electrical inspector's use.
• IMPORTANT - Observe all governing
codes and ordinances.
• Note to Installer - Leave these instructions
with the appliance after installation is completed.
• Note to Consumer - Keepthis Owner's Manual
and Installation Instructions for future reference.
• Note - Thisappliance must be properly grounded.
• Servicer - Theelectrical diagram isin an envelope
attached to the back of the range.
• Skill level - Installation of this appliance requires
basic mechanical skills.
• Proper installation is the responsibility of the installer.
• Product failure due to improper installation is not
covered under the Warranty.
MATERIALS YOU MAY NEED
• Gasline shut-off valve
• Pipe-jointsealant or UL-approved pipe thread tape with
Teflon*that resistsaction of natural and LPgases
• Flexiblemetal appliance connector (1/2" I.D.)
A 5-foot length isrecommended for easeof installation
but other lengths are acceptable. Neveruse an old
connector when installing a new range.
• Flareunion adapter for connection to gas supply line
(3/4" or 1/2" NPTx 1/2" I.D.)
• Flareunion adapterfor connection to pressureregulator
on range (1/2" NPTx 1/2" I.D.)
• Liquidleak detector or soapy water.
• Lagbolt or1/2" O.D.sleeveanchor (forconcrete floors
only).
*Teflon: Registeredtrademark of DuPont
4O
Page 41

Installation Instructions
-AWARNING!
INSTALLATION SAFETY
INSTRUCTIONS
Read these instructions completely and carefully.
Improper installation, adjustment, alteration, service
or maintenance can cause injury or property
damage. Refer to this manual. For assistance or
additional information, consult a qualified installer,
service agency, manufacturer (dealer) or the gas
supplier.
Never reuse old flexible connectors. The use
of old flexible connectors con couse gos leoks ond
personol injury. Alwoys use NEW flexible connectors
when instolling o gos opplionce.
IMPORTANT - Remove ollpockingmoteriol
ond literoturefromovenbeforeconnectinggos ond
electricol supply to ronge.
CAUTION - Donotottempt to operote
the oven of this ronge during o power foilure (Electric
Ignition models only).
• Hove your ronge instolled by o quolified instoller.
• Your ronge must be electricolly grounded in
occordonce with Iocol codes or, in the obsence
of Iocol codes, in occordonce with the Notionol
Electricol Code (ANSI/NFPA70, Iotest edition).
In Conodo, electricol grounding must be in
occordonce with the current CSAC22.1Conodion
Electricol Code Port 1 ond/or Iocol codes. See
Electricol Connections in this section.
• Before instolling your ronge on linoleum or ony other
synthetic floor covering, moke sure the floor covering
con withstond 180°Fwithout shrinking, worping or
discoloring. Do not instoll the ronge over corpeting
unless o sheet of 1/4" thick plywood or similor
insulotor is ploced between the ronge ond corpeting.
• Moke surethewollcoveringsoroundtherongecon
withstondheotgenerotedby therongeup to200°F.
• Avoid plocing cobinets obove the ronge. To reduce
the hozord coused by reoching over the open flomes
of operoting burners, instoll o ventilotion hood over
the ronge thot projects forword ot leost 5" beyond
the front of the cobinets.
• The ventiloting hood must be constructed of sheet
metol not less thon 0.0122" thick. Instoll obove the
cooktop with o cleoronce of not less thon 1/4"
between the hood ond the underside of the
combustible moteriol or metol cobinet. The hood
must be ot leost os wide os the opplionce ond
centered over the opplionce. Cleoronce between the
cooking surfoce ond the ventilotion hood surfoce
MUSTNEVERBE LESSTHAN 24 INCHES.
EXCEPTION:Instollotion of o listed microwove oven or
cooking opplionce over the cooktop sholl conform to
the instollotion instructions pocked with thot opplionce.
If cobinets ore ploced obove the ronge, ollow o
minimum cleoronce of 30" between the cooking
surfoce ond the bottom of unprotected cobinets.
If o 30" cleoronce between cooking surfoce ond
overheod combustible moteriol or metol cobinets
connot be mointoined, protect the underside of the
cobinets obove the cooktop with not less thon 1/4"
insuloting millboord covered with sheet metol not less
thon 0.0122" thick. Cleoronce between the cooking
surfoce ond protected cobinets MUSTNEVERBE LESS
THAN 24 INCHES.
• The verticol distonce from the plone of the cooking
surfoce to the bottom of odjocent overheod cobinets
extending closer thon 1" to the plone of the ronge
sides must not be less thon 18". (Seethe Dimensions
ond Cleoronces illustrotion in this section.)
CAUTION - Itemsofinterestto
childrenshouldnotbe storedincobinetsoboveo
rongeoron thebocksploshofo ronge-children
climbingon therongetoreochitemscouldbe
seriously injured.
41
Page 42

Installation Instructions
DIMENSIONS AND CLEARANCES
Provide adequate clearances between the range and adjacent combustible surfaces. These dimensions must be
met for safe use of your range. The location of the electrical outlet and pipe opening (see Gas Pipe and Electric
Outlet Locations) may be adjusted to meet specific requirements.
The range may be placed with O" clearance (flush) at the back wall.
Minimum to I
cabinets on
either side 30"
of the range
18':
Minimum
clearance
to leftwall
30"
Plinimum
-1_ 6" Minimum
clearance to
right wall
Maximumdepth
for cabinets
above
countertops
_!- 0"
Tocabinets below
cooktop and at
the range back
Depthwith door closed(includesdoor handle:
29s/J '
Depthvaries dependingonmodel.
Seespecifications sheetfor your model.
]
Height
47314''
Depthwith door open
46/\ ,, ._
42
Page 43

Installation Instructions
- WARNING!
ANTI-TIP DEVICE
• All ranges can tip.
• BURNSor other SERIOUS
INJURIEScan result.
• INSTALL and CHECKthe
ANTI-TIP bracket following
the instructions supplied
with the bracket.
To reduce the risk of tipping the range, the range must be
secured bg a properlg installed anti-tip bracket. See
installation instructions shipped with the bracket for
complete details before attempting to install.
To check if the bracket is installed and engaged properly,
carefully tip the range forward. The bracket should stop the
range within 4 inches. If it does not, the bracket must be
reinstalled. If the range is pulled from the wall for any
reason, always repeat this procedure to verify the range
is properly secured by the anti-tip bracket.
For free-standing or slide-in ranges, never completely
remove the leveling legs or the range will not be secured
to the anti-tip device properly.
If gou did not receive an anti-tip bracket with gour
purchase, call 1.800.626.8774 to receive one at no cost
(in Canada, call 1.800.561.3544). For installation instructions
of the bracket, visit GEAppliances.com (in Canada,
GEAppliances.ca).
• For gour safetg, never use gour range for warming
or heating the room. Your oven and cooktop are not
designed to heat gour kitchen. Top burners should
not be operated without cookware on the grate. Such
abuse could result in fire and damage to gour range
and will void gour warrantg.
• Do not store or use combustible materials, gasoline
or other flammable vapors and liquids in the vicinitg
of this or ang other appliance. Explosions or fires
could result.
LOCATION
Do not locate the range where it mag be subject to
strong drafts. Ang openings in the floor or wall behind
the range should be sealed. Hake sure the openings
around the base of the range that supplg fresh air
for combustion and ventilation are not obstructed
bg carpeting or woodwork.
Your range, like mang other household items, is
heavg and can settle into soft floor coverings such as
cushioned vingl or carpeting. Use care when moving
the range on this tgpe of flooring. It is recommended
that the following simple and inexpensive instructions
be followed to protect gour floor.
The range should be installed on a sheet of plgwood
(or similar material). When the floor covering ends at the
front of the range, the area that the range will rest on
should be built up with plgwood to the same level or
higher than the floor covering.
This will allow the range to be moved for cleaning
or servicing. Also, make sure gour floor covering will
withstand 180°F.(Seethe Installation Safety Instructions
section.)
Make sure the wall coverings around gour range can
withstand the heat generated (up to 200°F)bg the
range. (Seethe Installation Safety Instructions section.)
IMPORTANT!
Remove all tape and packaging. Make sure the
burners are properlg seated and level.
Take the accessorg pack out of the oven and/or
drawer.
Check to be sure that no range parts have come loose
during shipping.
• Do not use oven for a storage area. Items stored
in the oven can ignite.
• Do not let cooking grease or other flammable
materials accumulate in or near the range.
43
Page 44

Installation Instructions
PROVIDE ADEQUATE GAS SUPPLY
Your range is designed to operate at a pressure of 5"
of water column on natural gas or, if designed for LP
gas (propane or butane), 20" of water column.
Hake sure you are supplying your range with the type
of gas for which it is designed.
This range is convertible for use on natural or propane
gas. If you decide to use this range on LPgas, conversion
must be made by a qualified LPinstaller before
attempting to operate the range on that gas.
For proper operation, the pressure of natural gas supplied
to the regulator must be between 5" and 13" of water
column.
For LP gas, the pressure supplied must be between
10" and 13" of water column.
When checking for proper operation of the regulator,
the inlet pressure must be at least r' greater than the
operating (manifold) pressure as given above.
The pressure regulator located at the inlet of the range
manifold must remain in the supply line regardless of
whether natural or LPgas is being used.
A flexible metal appliance connector used to connect the
range to the gas supply line should have an I.D.of 1/2"
and be 5 feet in length for ease of installation. In Canada,
flexible connectors must be single wall metal connectors
no longer than 6 feet in length.
CONNECT THE RANGE TO GAS
Shut off the main gas supply valve before
disconnecting the old range and leave it off until
the new hookup has been completed. Don't forget
to relight the pilot on other gas appliances when
gou turn the gas back on.
Because hard piping restricts movement of the range,
the use of a CSA International-certified flexible metal
appliance connector is recommended unless local codes
require a hard-piped connection.
Never use an old connector when installing a new range.
If the hard piping method is used, you must carefully
align the pipe; the range cannot be moved after the
connection is made.
To prevent gas leaks, put pipe-joint compound on, or
wrap pipe thread tape with Teflon* around, all male
(external) pipe threads.
A.
Install a manual gas line shut-off valve in the gas line
in an easily accessed location outside of the range.
Hake sure everyone operating the range knows where
and how to shut off the gas supply to the range.
a.
Install male 1/2" flare union adapter to the 1/2" NPT
internal thread at inlet of regulator. Use a backup
wrench on the regulator fitting to avoid damage.
When installing the range from the front, remove
the 90° elbow for easier installation.
C.
Install male 1/2" or 3/4" flare union adapter to the
NPTinternal thread of the manual shut-off valve,
taking care to back up the shut-off valve to keep it
from turning.
D. Connect flexible metal appliance connector to the
adapter on the range. Position range to permit
connection at the shut-off valve.
E.When all connections have been made, make sure
all range controls are in the off position and turn on the
main gas supply valve. Use a liquid leak detector at all
joints and connections to check for leaks in the system.
WARNING: DONOTUSEA
FLAME TO CHECK FOR GAS LEAKS.
When using test pressures greater than 1/2 psig to
pressure test the gas supply system of the residence,
disconnect the range and individual shut-off valve from
the gas supply piping. When using test pressures of 1/2
psig or less to test the gas supply system, simply isolate
the range from the gas supply system by closing the
individual shut-off valve.
*Teflon: Registered trademark of DuPont
44
Page 45

Installation Instructions
GAS PIPE AND ELECTRICAL OUTLET LOCATIONS
For models JGB500, PGB900, PGB908 and PGB910 onlg.
(Seethe below section for models
JGB605, PGB916, PGB918 and PGB975.) /,7
3F'
Recommendedarea for 120Voutlet
on rear wall and areafor through-
the-wall connection of pipestub
and shut-off valve.
\
Recommendedarea for
through-the-floor
connection of pipestub
and shut-off valve.
GAS PIPE AND ELECTRICAL OUTLET LOCATIONS
For models JGB605, PGB916,
PGB918 and PGB975 only.
(Seethe above section for models
JGB500, PGB900, PGB908 and PGB910.)
Recommendedarea for 120V
outlet on rear wall and area for
through-the-wall connection
of pipe stub and shut-off valve.
30"
Recommendedarea for "_
through-the-floor connection
of pipe stub andshut-off valve.
45
Page 46

Installation Instructions
FLEXIBLE CONNECTOR HOOKUP
Installer: Inform
the consumer of
the location of the
gas shut-off valve.
RIGID PIPE HOOKUP OPTIONS
45°Elbow .,,_._[]_ _ 90° Elbow
_ :!!Opres ,e U n -_ _t_l°anckpipe
"\ regulator @ _-_ Union
[jl _€-_ Nipple
Installer: Inform _ Gas
the consumer of I I_'i!.,dp-- shut-off
the location of the _._/ valve
gas shut-off valve. L,.g_ 1/2" or 3/4"
1/2" or 3/4" _-_ shut-off
Gaspipe _ L_- valve
Alternate Hookup
Installer: Inform the
Gaspipe
consumer of the
location of the gas
shut-off valve.
Gas
_,- Adapter
,, ow ,, ow
Nipple--_qt _" ....
Gas _ J_::_L_IC .... Pressure
shut-off'_ _ _ I 90° regulator
valve _ _ ./ E_bow1.
1/2G°: 3pf_: gO°Elbow .... __--_
J I _ / Nipple
I I I_ L_UICK connec_
_/or union
I _ Nipple , .
Adapter
46
Page 47

Installation Instructions
[] ELECTRICAL CONNECTIONS
Electrical Requirements
120-volt, 60 Hertz, properly grounded dedicated circuit
protected by a iS-amp or 20-amp circuit breaker or
time-delay fuse.
Extension Cord Cautions
Because of potential safety hazards associated
with certain conditions, we strongly recommend against
the use of an extension cord. However, if you still elect to
use an extension cord, it is absolutely necessary that it
be a UL-listed, 3-wire grounding-type appliance extension
cord and that the current carrying rating of the cord in
amperes be equivalent to, or greater than, the circuit
rating.
Grounding
IMPORTANT--(Please read carefully)
FORPERSONALSAFETY,THISAPPLIANCEMUSTBE
PROPERLYGROUNDED.
Preferred Method
131ELECTRICAL CONNECTIONS (CONT.)
A. Usage Situations Where Appliance Power Cord Will
Be Disconnected Infrequently.
An adapter may be used only on a iS-amp circuit.
Do not use an adapter on a 20-amp circuit. Where
local codes permit, a TEMPORARYCONNECTION
may be made to a properly grounded 2-prong wall
receptacle by the use of a UL-listed adapter, available
at most hardware stores. The larger slot in the adapter
must be aligned with the larger slot in the wall receptacle
to provide proper polarity in the
connection of the power cord.
Temporary Method
(Adopter plugs not permitted in Conodo)
Align large prongs/slots
Ensureproper
ground ond firm
connection before
use
Ensureproper ground
existsbefore use
The power cord of this appliance is equipped with a
3-prong (grounding) plug which mates with a standard
3-prong grounding wall receptacle to minimize the
possibility of electric shock hazard from this appliance.
The customer should have the wall receptacle and
circuit checked by a qualified electrician to make sure
the receptacle is properly grounded.
Where a standard 2-prong wall receptacle is encountered,
it isthe personal responsibility and obligation of the
customer to have it replaced with a properly grounded
3-prong wall receptacle.
DO NOT, UNDERANY CIRCUMSTANCES,CUT ORREMOVE
THE THIRD (GROUND)PRONGFROM THE POWERCORD.
A word about GFCIs- GFCIs are not required or
recommended for gas range receptacles.
Ground Fault Circuit Interrupters (GFCIs)are devices that
sense leakage of current in a circuit and automatically
switch off power when a threshold leakage level is
detected. These devices must be manually reset by the
consumer. The National Electrical Code requires the use of
GFCIsin kitchen receptacles installed to serve countertop
surfaces. Performance of the range will not be affected if
operated on a GFCI-protected circuit but occasional
nuisance tripping of the GFCIbreaker is possible.
CAUTION: Attaching the adapter
ground terminal to the wall receptacle cover
screw does not ground the appliance unless
the cover screw is metal, and not insulated,
and the wall receptacle is grounded through
the house wiring. The customer should have
the circuit checked by a qualified electrician to
make sure the receptacle is properly grounded.
When disconnecting the power cord from the adapter,
always hold the adapter with one hand. If this is not done,
the adapter ground terminal is very likely to break with
repeated use. Should this happen, DO NOT USE the
appliance until a proper ground has again been
established.
47
Page 48

Installation Instructions
[] ELECTRICAL CONNECTIONS (CONT.)
B. Usage Situations Where Appliance Power Cord Will
Be Disconnected Frequently.
Do not use an adapter plug in these situations because
disconnecting of the power cord places undue strain on
the adapter and leads to eventual failure of the adapter
ground terminal. The customer should have the 2-prong
wall receptacle replaced with a 3-prong (grounding)
receptacle by a qualified electrician before using the
appliance.
The installation of appliances designed for mobile home
installation must conform with the Manufactured Home
Construction and Safety Standard, Title 24 CFR,Part 3280
(formerlg the Federal Standard for Mobile Home
Construction and Safety, Title 24, HUD,Part 280) or,
when such standard is not applicable, the Standard
for Manufactured Home Installations, latest edition
(Manufactured Home Sites,Communities and Set-Ups),
ANSIA225.1, latest edition, or with local codes. In Canada,
mobile home installation must be in accordance with
the current CAN/CSAZ240/MH Mobile Home
Installation Code.
Electric Disconnect
• Locate disconnect plug on the range back.
• Pinch sides of connector and pull out of range back.
[] ASSEMBLE SURFACE BURNERS (CONT.)
Makesurethe slot inthe
burnerheadispositioned
overthe electrode.
or Hole
Electrode !
Electrode;_ Slot
[] Oval (Center} Burner Head/Cap Assembly
Placethe oval (center)head/cap assemblg over the
electrode on the cooktop.
Ovalheadandcap
assembly
Front right burner
(on some models)
Makesurethe slot inthe
burnerheadispositionedover
the electrode.
• ®
Frontof range
[] Caps
Placethe matching sizecaps onto the burner bases
or heads.
Electrode
I%-ISEAL THE OPENINGS
Sealang openings inthe wall behind the range and inthe
floor under the range when hookups are completed.
15]ASSEMBLE SURFACE BURNERS
r_J Burner Heads (on some models}
Placeburner heads overthe electrodes on the cooktop,
in the correct locations according to their size.There is
one small,
one
medium,
one large
and one
extra-large
burner
head.
Large bead __
_ron_OTrange (on s)
Extra-largehead
c
Frontof range
Makesure that the heads (on some models)and caps
are replacedin the correct locations.
[] Grates
Placethe left, right and centergrates on the cooktop.
Thesegrates are position specific.Theundersides of
the leftand right gratesare marked "LEFTFRONT"and
"RIGHTFRONT."Placethe middle grate with its bowed
front toward the front of the range.
LeftFront Center RightFront
CAUTION: Do not operate the burner
without all burner parts in place.
48
Page 49

Installation Instructions
[] CHECK IGNITION OF SURFACE
BURNERS
Operation of all cooktop and oven burners should be
checked after the range and gas supply lines hove been
carefully checked for leaks.
Electric Ignition Models
Select a top burner knob and simultaneously push in
and turn to LITE position. You will hear a clicking sound
indicating proper operation of the spark module. Once the
air has been purged from the supply lines, burners should
light within/4 seconds. After burner lights, rotate knob out
of the LITE position. Try each burner in succession until
all burners hove been checked.
Quality of Flames
The combustion quality of burner flames needs to be
determined visually.
(A) Yellow flames-
Call for service
(B) Yellow tips on
outer cones--
Normal for LP gas
[] CHECK IGNITION OF OVEN BURNER
Theoven isdesignedto operate quietly and automatically.
Tooperatethe oven,pressthe Bakepadandthen pressthe
numberpads until 350°appearsinthe display.Touchthe Start
pad.After BO-90seconds,the ovenburnerwill igniteandburn
untilthe settemperature isreached.Theovenburnerwill
continueto cycle on and off asnecessaryto maintainthe oven
atthe temperatureindicatedbythe display.
Tocheck ignitionof the broil burner,touch the Broil Hi/Lo pad
andthen the Start pad.After B0-90 seconds,the broil burner
willignite.
Electric ignition models requireelectricalpowerto operate.
Incaseof a poweroutage,the ovenburnerson these models
cannot be litmanually with amatch.Gaswill notflow unless
the glow bar ishot.
Ifthe oven isin usewhena poweroutage occurs,the burner
willshut off and cannot berentuntil poweris restored.
(C)Soft blue
flames--Normal
for natural gas
If burner flames look like (A),call for service. Normal
burner flames should look like (B)or (C),depending on
the type of gas you use.
With LPgas, some yellow tipping on outer cones
is normal.
49
Page 50

Installation Instructions
[] ADJUST BROIL AND OVEN BURNER
AIR ADJUSTMENT SHUTTERS IF
NECESSARY
Air adjustment shutters for the top and bottom burners
regulate the flow of air to the flames.
The air adjustment shutter for the top (broil) burner is in
the center of the rear wall of the oven.
adjustment
shutter
I-8-1ADJUST BROIL AND OVEN BURNER
AIR ADJUSTMENT SHUTTERS IF
NECESSARY (CONT.}
Oven bottor
To remove the oven bottom:
A. Remove the screws holding down the rear of the oven
bottom.
B. Grasp the oven bottom at finger slots on each side.
C. Lift the rear of the oven bottom enough to clear the lip
of the range frame, push it back, and then pull it up
and out.
i91 LEVELING THE RANGE
A. Install the oven racks in the oven and position the
range where it will be installed.
The shutter for the bottom (oven) burner is near the back
wall behind the warming drawer. Remove the drawer. See
the Core and cleaning of the range section.
To adjust the flow of air to either burner, loosen the
Phillips-head screw and rotate the shutter toward
open or closed position as needed.
The flames for the top (broil) burner should be steadg with
approximatelg 1" blue cones and should not extend out
over the edges of the burner baffle.
To determine if the bottom burner flames are burning
properlg, remove the oven bottom. Flames should have
approximatelg 1" blue cones and, if range is supplied
with natural gas, should burn with no gellow tipping.
(With most LPgas, small gellow tips at the end of outer
cones are normal.) Flames should not lift off burner ports.
If lifting is observed, graduallg reduce air shutter opening
until flames are stabilized.
lol I _ Raise Lower
range
(on some models) (on some models)
a.
Check for levelnessbu placing a spirit level or a cup,
Lower range range
range
partially filled with water, on one of the oven racks.
If using a spirit level, take two readings-with the level
placed diagonally first in one direction and then the
other.
C.
Remove the drawer. See the Core and cleaning of the
range section. The front leveling legs can be adjusted
from the bottom and the rear legs can be adjusted
from the top or the bottom.
D. Use an open-end or adjustable wrench to adjust the
leveling legs until the range is level.
E.After the range is level, slide the range away from the
wall so that the Anti-Tip device can be installed.
5O
Page 51

Installation Instructions
[] INSTALLING THE ANTI-TIP DEVICE
WARNING!
• Range must be secured with an approved Anti-Tip
device.
• Unless properlg installed, the range could be
tipped by you or o child standing, sitting or leaning
on an open door.
• After installing the Anti-Tip device, verifg that it is
in place bg carefullg attempting to tilt the range
forwa rd.
• This range has been designed to meet oil
recognized industrg tip standards for oil normal
conditions.
• The use of this device does not preclude tipping
of the range when not properlg installed.
• If the Anti-Tip device supplied with the range does
not fit this application, use the universal Anti-Tip
device WB2X7909.
INSTALLING THE ANTI-TIP DEVICE
(CONT.)
Wallboard
, Wood screw
Install the sleeve anchor into the drilled hole and then
install the log bolt through the device. The bolts must be
properlg tightened as recommended for the hardware.
E.Slide the range against the wall, and check for proper
installation bg grasping the front edge of the cooktop
and corefullg attempting to tilt the range forward.
The bracket should stop the rangewithin 4 inches.Ifit
doesnot, the bracket must be reinstalled.
Backof range
WHEN ALL HOOKUPS ARE COMPLETED
A. Mark the wall where the RIGHTEDGE of the range
is to be located. Besure to allow for the countertop
overhang if gou intend to install the range next to
cabinets.
Anti-Tip
device
Slottedhead
screw
Wallplate
Approx.20!
Markededge
2t_" ofrange
f
B. Locate the outside edge of the device 2Vs"toward the
center of the range from the marked edge of the range.
C. Using the device as o template, mark the position of
the hole for the screw.
D. For wood construction, drill a pilot hole at on angle
of 20 degrees from the horizontal. A nail or owl may
be used if o drill is not available.
Make sure all controls are left in the off position. Make
sure the flow of combustion and ventilation air to the
range is unobstructed.
CONVERTING TO LP GAS (or converting
beck to neturel ges from LP)
This range leaves the factory set for use with natural
gas. If you want to convert to LP gas, the conversion
must be performed by a qualified LP gas installer.
The conversion instructions and LP orifices con be found
attached to the range next to the pressure regulator.
Keep these instructions and the orifices in case gou wont
to convert back to natural gas.
Mount the Anti-Tip device with the screw provided.
For cement or concrete construction, you will need
o 1/4" x lY2" log bolt and o 1/2" O.D.sleeve anchor,
which ore not provided. Drill the recommended size
hole for the hardware.
51
Page 52

Lt}
.£
13
Lt}
m
Lt}
O
£J
Lt}
.Ca
Before you call for service...
Troubleshooting Tips
Save time and money! Review the charts on the following
pages first and you may not need to call for service.
Possible Causes What ToDo
Topburnersdo not light Plugon range is not completelg * Hake sureelectrical plug is plugged into a live,properly
or do not burnevenly, inserted in the electrical outlet, grounded outlet.
(Thefront-rightburneris Burner slitson the side of the * Removethe burners and cleanthem. Checkthe
designedto have slightly burner mog be clogged, electrode area for burned-on food or grease. See
smallerflamesbetween the Core and cleaning of the range section.
the 6 and9 o'clock
positions. ThisisnormalJ Improper burner assembly. • Hake sure the burner ports are installed correctly.
See the Core and cleaning of the range section.
Burner flames very Improper air to gas ratio. • If range isconnected to LPgas, contact the person
large orgellow who installed your range or mode the conversion.
Surface burners light The oven gas shut-off valve * To check the oven gas shut-off valve, remove the
but oven does not meg have accidentally been drawer (seethe Core and cleaning of the range
moved during cleaning or section). For lower oven drawer models, remove the
moving, rear access panel by unscrewing the thumbscrews
in the upper left and right corners. Look for the gas
shut-off lever at the back of the range.
- v
f
l I!
Control signals after You forgot to enter a bake * Touch the Bake pad and desired temperature
entering cooking time temperature or cleaning time. or the Self Clean pad and desired clean time.
or start time
iii_iii/iiiiii!li_i_i_!i
Fooddoes not bakeor Oven controlsimproperlg set. ° Seethe Usingthe upper ovensection.
roost properlg in the
upper oven Rackposition is incorrect. * Seethe Usingthe upper oven section.
;iiiiltiiiiiiiii!iiiii_iiiiii
iiiiii_iiIilIilIim
.Ca
1,..
0
Burners do not light Gas/Control Lockout feature ° Allowthe range to cool down and touch and holdthe
o'1
i,..
E
Leveris
shownclosed.
PULLTOOPEN.
Sealedburnermodels
Lowerovendrawermodels
Thumbscrews
Incorrect cookware or cookware * Seethe Usingthe upper ovensection.
of improper size being used.
Oven thermostat needs • See the Adjust the upper oven thermostat Do it
adjustment, gourself! section.
Clock not set correctlg. * Seethe Usingthe clock and timer section.
Aluminum foil used improperlg ° Seethe Coreand cleaning of the range section.
in the oven.
Oven bottom not securelg * See the Installation of the range section.
seated in position.
is activated. Gas/Control Lockout pad (on some models)for _ seconds
until the display shows LOCOFF.
Plug on range is not * Hake sureelectrical plug is plugged into a live,properly
completelg inserted in the grounded outlet.
electrical outlet.
0
Gassupplg not connected
or turned on.
52
• Seethe Installation Instructions that came with your
range.
Page 53

GEAppliances.com
Possible Causes What To Do
Burners do not light A fuse in gour home mag be • Replacethe fuse or reset the circuit breaker.
(contJ blownor the circuit breaker
tripped.
Burner parts not replaced • See the Care and cleaning of the range section.
correctlg.
Gas/Control Lockout • If LOC ON appears in the displag,the rangecontrol is
or Control Lockout locked.Turn this feature off to usethe range. Seethe
feature is activated Gas/Control Lockout or Control Lockout section.
Fooddoes not broil Ovencontrols improperlgset. • Hake sure gou touch the Broil Hi/Lo pad.
propedy in the upperoven Oven door not closed. • Seethe Usingthe upper oven section.
Improper rack position • Seethe Broiling Guide.
being used.
Food being cooked • For best results,usea pan designedfor broiling.
m a hot pan. Hake sure it iscool.
Cookware not suited • Forbest results,usea pandesignedfor broiling.
for broiling.
Oven bottom not securelg • Seethe Installationof the range section.
seated in position.
Upper oven temperature Oven thermostat needs • See the Adjust the upper oven thermostat Do it
too hot or too cold adjustment, yourself! section.
r3
O"
Lt}
O
r_
r3
o
Lt}
_t
C
,C
¢
Clockand timer Plug on range isnot completelg • Hake sureelectrical plug is plugged into a live,properlg
do not work inserted inthe electrical outlet, grounded outlet.
A fuse in gour home mag be • Replacethe fuse or resetthe circuit breaker.
blown or the circuit breaker
tripped.
Oven controls improperlg set. • Seethe Usingthe clockand timer section.
Upper oven light does Light bulb is loose or defective. • Tighten or replacethe bulb.
not work Plug on range is not completelg • Make sure electrical plug isplugged into a live,properlg
inserted in the electrical outlet, grounded outlet.
Upperoven will not Theoven temperature is too • Allow the range to cool to room temperature and
self-clean high to set a self-cleanoperation, reset the controls.
Oven controls improperlgset. • Seethe Usingthe self-cleaningupper oven section.
On models with a door latch, • Make sure gou move the door latch handle all the wag
the oven door is not in the to the right.
locked position.
"Crackling" or This is the soundof the • Thisisnormal.
"popping" sound metal heating and cooling
during both the cooking and
cleaning functions.
%?IIC
i_iiiilIilIi
r_
0
0
53
Page 54

Lt}
.o
13
Lt}
Before you call for service...
Troubleshooting Tips
i
Lt}
O
Lt}
- V
f
I I!
Excessivesmoking
Possible Causes
Excessivesoil.
What To Do
Touchthe Clear/Off pad. Openthe windows to
rid the room of smoke. Wait until the LOCKEDDOOR
light goes off.Wipe up the excesssoiland resetthe
clean cycle.
Ovendoor will not open
after a clean cycle
Oven too hot.
• Allowthe oven to cool below locking temperature.
Donot lock the door with the door latch except when
using the self-cleanfeature.
Ovennot clean after a Oven controlsnot properly set. • Seethe Usingthe self-cleaningupper oven section.
cleancycle Oven was heavily soiled. • Cleonup heavy spilloversbefore starting the cleon
cycle. Heavilysoiledovens may need to self-cleon
again or for o longer period of time.
"Door"appears in the Latch handlewas moved to the • Movethe latch handle to the right only when setting
display[onmodels right but a program other than the self-cleaning cycle.
with a door latch} self-clean was selected.
"LOCKDOOR"flashes
in thedisplay
Theself-clean cycle has been
selected but the door is not
• Closethe oven door and on models with a latch, move
the latch allthe way to the right.
closed and on models with a latch,
the latch was not moved all the
wag to the right.
LOCKEDDOORlight
ison when you wont
to cook
Theoven door is locked
because the temperature
inside the oven has not
* Touchthe Clear/Off pad.Allowthe ovento cool
and then, on models with a door latch,unlockthe door.
dropped below the
locking temperature.
"F--" and a number or On models with a door latch, • The latch may hove been moved,even if only slightly,
letterflash in thedisplay if a function error code appears from the locked position.Hake surethe latch is moved
iii_iii/iiiiii!li_i_i_!i
iiiiiltiiiiiiiii!iiiii_iiiiii
iiiiii_iiIilIilIim
i,...
0
Ovenracks are The nickel racks (ifsoequipped) • Apply a small amount of vegetable oil to a paper
difficult to slide were cleaned ina self-cleancycle, towel and wipe the edges of the oven rackswith
"Probe" appears in This is reminding gou to enter a * Entera probe temperature.
the display [somemodels} probe temperature after plugging
E
LOCshows inthe
display
0
54
during the self-cleaningcycle, to the right as far as itwill go.
check the oven door latch.
You have a function error code. • Touchthe Clear/Off pad. Allowthe ovento cool for
one hour.Putthe oven back into operation.
If the function code repeats. • Disconnectall power to the rangefor 5 minutes
and then reconnect power. Ifthe function error
code repeats, callfor service.
Thegray porcelain-coated racks the paper towel. Donot spray with Pam®or other
(if so equipped)were improperly lubricant sprays.
cleaned.
in the probe.
TheGas/Control Lockout feature • Besurethe surface burner controls are turned OFF.
is activated. Turnthis feature off to usethe range. Seethe Gas/Control
Lockoutsection.
Page 55

GEAppliances.com
Possible Causes What To Do
Display goes blank A fuse in gour home mug be • Replace the fuse or reset the circuit breaker.
blown or the circuit breaker
breaker tripped.
The clock is in the ° See the Special features of your oven control section.
blackout mode.
Displag flashes Power failure. ° Reset the clock.
Unable to get the Oven control pads were • The Bake and Broil Hi/Lo pads must be touched at
display to show "SF" not pressed properlg, the same time and held for 3 seconds.
t_
O"
o_
0
to
Power outage, Power outage or surge. • Resetthe clock. If the oven was in use, gou must reset
clock flashes it bg touching the Clear/Offpad, setting the clock
and resetting ang cooking function.
"Burning"or "oily" This is normal in a new oven ° To speed the process, set a self-clean cycle for a
odor emitting from and will disappear in time. minimum of 3 hours. See the Using the self-cleaning
the vent oven section.
Strong odor An odor from the insulation • This istemporary.
around the inside of the oven
is normal for the first few times
the oven is used.
Fannoise (somemodels) The convection fan mag turn on • This isnormal. The convection fan will run until the
and off automaticallg, function isover or the door is opened.
Convection fan not Preheat temperature ° Fanwill start automaticallg once the preheat
working (somemodels) not reached, temperature is reached.
Drawer does not slide The drawer is out of alignment. ° Fully extend the drawer and push it all the wag in.
smoothly or drags See the Care and cleaning of the range section.
Drawer is overloaded or load • Reduce weight. Redistribute drawer contents.
is unbalanced.
Lower oven drawer or Afuse in gour home mag be • Replace the fuse or reset the circuit breaker.
warming drawer will blown or the circuit breaker
not work tripped.
The oven is self-cleaning. • Wait for the self-clean cycle to finish and the oven
to cool.
Controls improperlg set. * See the Electric warming drawer or Lower oven
drawer section.
t_
0
o_
¢t
C
,C
¢
%111;?IIC
'IIII'LIIIII%:
i_iiiilIilIi
Excessivecondensation Liquid in drawer. • Remove liquid.
in the drawer
Uncovered foods. ° Cover food with lid or aluminum foil.
Temperature setting too high. ° Reduce temperature setting.
Food dries out in the Moisture escaping. ° Cover food with lid or aluminum foil.
lower oven drawer or
warming drawer Drawer not fullg closed. ° Pushdrawer in until latch engages.
on
o_
to
O
O
55
Page 56

Notes.
m
0
a_a
v A
w_ u
vl r_
a_a
0
0
v
a_a
L.
0
E
0
56
Page 57

Grates
SurfaceBurnerHeadsandCaps SurfaceElementsandDripPans
i(fl ¸ : iOiii;ii! i;iLi!
Knobs
ii_:i:
Griddle OvenRacks OvenElements
LightBulbs
Experience these other great products to keep your kitchen looking great!
z_A_,_#_T&"CeramicCo@top CeramicCooktop StainlessSteet
Includescleaner, Wipes
scraperandpad
__E CleaningKit: CleaningWipes AppliancePolish
WXlOX117GCS WXlOX305 WXlOXIO001
Appliance
Cleaner
StainlessSteel
PM10X311
Get the most out of your Broiler Pan! (Not for use with Broiler Drawer models.)
Use your panand grid cover to broil hamburgers,seafood, steaks,vegetables,bacon,chops and somuch
more! The pan below catches the excessfats andoils.
• EasyToClean
• GenuineGEPart
• One-YearWarranty _ ..
Limited Time Offe!! Free Shipping!
When you order your broiler pan within 30 days of purchasing your GEcooking product.
Small
U.S. Part # WB48XlO055
Canada Part # 222D2097GO01
Dimensions 8-3/4" W x 1-1/4" H x 13-1/2"D
Price US$10.50 t
Plusapplicable state soles tax (PST/HSTand GST)
* Thelarge (standard)broil pan does not fit in 20'724" ranges.
** The XL pan does not fit in 24" watt ovens, 27" drop-ins or 20"/24" ranges.
Toplaceyour order,call 800.626.2002 (U.S.),800.661.1616(Canada)or mail this form to:
In the U.S.:GEParts,t:!0. Box221027, Memphis, TN38122-1027. In Canada: GEParts, 1 Factory Lane,Moncton, N.B.EIC9M3
12-3/4"Wxl-1/4"Hx l_l/2"O 17"Wx 1-1/4"Hxlg-1/4"O
Large* XL**
WB48XlO056 WB48XlO057
222D2097GO02 N/A
US$14.50 t US$1&75 t
Quantity
Model Number Serial Number Brand
First Name Last Name
Address
Citg State
Phone E-Nail
Credit Card __ Check __ Money Order
Visa MasterCard Discover AmEx Credit Card #
Exp.Date: Month Year Signature:
Broiler Pan Order Form
Part Number
Date of Purchase
Zip Code
57
Page 58

GE Gas Range Warranty.iForcustomerstheunitedstates)
All warranty service provided by our Factory Service Centers,
or an authorized Customer Care®technician. To schedule
service, visit us on-line at GEAppliances.com, or call
800.GE.CARES (800./432.2737). Please have serial number and
model number available when calling for service.
GE Will Replace:
Any partof the range which foils due to o defect inmaterials or workmanship. Duringthis
Fromthedoteofthe
original purchase
Service trips to gour home to teach gou how to use
the product.
Improper installation, deliverg or maintenance.
Failure of the product if it is abused, misused,
or used for other than the intended purpose or
used commerciallg.
Replacement of house fuses or resetting of circuit
breakers.
limited one-year warranty, GEwill also provide,free of charge, oil lobar and in-home service
to replacethe defective port.
Staple Four receipt here.
Proof of the original purchase
dote is needed to obtain service
under the warrant F.
Damage to the product caused bg accident, fire, floods
or acts of God.
Incidental or consequential damage caused bg possible
defects with this appliance.
Damage caused after deliverg.
Product not accessibleto provide required service.
EXCLUSION OF IMPLIED WARRANTIES--Your sole and exclusive remedy is product repair as provided
in this Limited Warranty. Any implied warranties, including the implied warranties of merchantability
or fitness for a particular purpose, are limited to one year or the shortest period allowed by law.
This worrontLl is extended to the original purchaser and ong succeeding owner for products purchased for
home use within the USA. If the product is located in on area where service bg o GEAuthorized Servicer is
not available, you may be responsible for o trip charge or gou may be required to bring the product to on
Authorized GE Service Location for service. In Alaska, the worrontLl excludes the cost of shipping or service
calls to _lour home.
Some states do not allow the exclusion or limitation of incidental or consequential damages. This warranty
gives you specific legal rights, and you may also have other rights which vary from state to state. To know
what your legal rights ore, consult your local or state consumer affairs office or your state's Attorney General.
Warrantor: General Electric Compang. Louisville, KV 40225
58
Page 59

Service trips to gour home to teach gou how to use
the product.
Damage to the product caused bg accident, fire, floods
or acts of God.
installation, deliverg or maintenance.
Failure of the product if it is abused, misused,
or used for other than the intended purpose or
used commerciallg.
Incidental or consequential damage caused bg possible
defects with this appliance.
Damage caused after deliverg.
Product not accessible to provide required service.
Replacement of house fuses or resetting of circuit
breakers.
EXCLUSION OF IMPLIED WARRANTIES--Your sole and exclusive remedy is product repair as provided
in this Limited Warranty. Any implied warranties, including the implied warranties of merchantability
or fitness for a particular purpose, are limited to one year or the shortest period allowed by law.
This warranty is extended to the original purchaser and any succeeding owner for products purchased in
Canada for home use within Canada. In-home warranty service will be provided in areas where it is available
and deemed reasonable by Mabe to provide.
Some provinces do not allow the exclusion or limitation of incidental or consequential damages, so the above
exclusion may not apply to you. This warranty gives you specific legal rights, and you may also have other
rights which vary from province to province. To know what your legal rights are in your province, consult your
local provincial consumer affairs office.
Warrantor: Mabe Canada Inc.
Burlington, Ontario
59
Page 60

Consumer Support.
GEAppliances Website Inthe U.S.:GEApplionces.com
Have a question or need assistance with your appliance?Try the GEAppliancesWebsite 24 hours a day,
any day of the year! Forgreater convenience and faster service,you can now download Owner's Manuals,
order parts or even schedule service on-line. In Cenede: www,GEAppliences,ce
Schedule Service In the U.S.:GEApplionces.com
Expert GErepair service is only onestepaway from your door.Get on-line and schedule your serviceat your
convenience any day of the year! Orcall 800.GE.CARES(800.432.2737)during normal businesshours.
In Cenede, cell1.800.561.3344
Real Life Design Studio Inthe us:GEApplionces.com
GEsupports the UniversalDesignconcept-products, services and environments that can be usedby people of all
ages,sizesand capabilities.We recognizethe needto designfor a wide range of physical and mental abilitiesand
impairments. Fordetails of GE'sUniversalDesignapplications, including kitchen designideas for people with disabilities,
check out our Website today. Forthe hearing impaired, please call800.TDD.GEAC(800.833.4322).
In Cenede, contact: Manager,Consumer Relations,Habe Canada Inc.
Suite310, 1 Factory Lane
Honcton, N.B.EIC 9H3
Extended Warranties
Purchasea GEextended warranty and learn about special discounts that are available while your warranty is still
in effect. You can purchase it on-line anytime, or call 800.626.2224during normal businesshours. GEConsumer Home
Serviceswill still be there after your warranty expires.In Cenede,cull 1.888.261.2133
Ports and Accessories
Individualsqualified to servicetheir own appliances can have parts or accessoriessent directly to their homes (VISA,
HasterCard and Discovercards are accepted).Orderon-line today, 24 hours every day or by phone at
800.626.2002during normal businesshours.
Instructions conteined in this menuel cover procedures to be performed by eny user.Other servicing generelly
should bereferred to quolified service personnel Coution must be exercised,since improper servicing meg couse
unsofe operation.
Customers in Cenede should consult the yellow pages for the nearest Mabe servicecenter,or call 1.800.661.1616.
Contact Us
If you arenot satisfiedwith the service you receivefrom GE,contact uson ourWebsite with all the details including
your phone number,or write to: General Manager,Customer Relations
GEAppliances,Appliance Park
Louisville,KY40225
In Cenede: www.GEAppliences.ce, or write to: Director,ConsumerRelations,Habe Canada Inc.
Suite310, 1 Factory Lane
Honcton, N.B.EIC 9H3
In the U.S.: GEApplionces.com
In the U.S.: GEApplionces.com
In the U.S.: GEApplionces.com
Register gour new epplience on-line--et gour convenience! Timely product registration will allow for enhanced
Register YourAppliance IntheU.S.:GEApplionces.cam
communication and prompt service under the terms of your warranty, should the need arise.You may also mail
in the pre-printed registration card included in the packing material. In Cenede:www,GEAppliences,ce
Printed in Mexico
This book is printed on recycled paper.
 Loading...