

Page 1

0
GEAppliances.com
OI
-0
Safety Instructions ...... 2-6
OperatingInstructions
Convection Oven .......... 20-24
Roasting Guide .............. 23
Timed Convection Baking ...... 24
Griddle ....................... 7, 8
Restaurant-Quality Steak........ 8
Lower Oven Drawer ........... 29
Range Lockout ................. 26
Surface Units............... 9-12
Thermostat ............... 29, 30
Upper Oven ............... 13-31
Aluminum Foil............... 14
Baking or Roasting .......... 15
Broiling Guide ............... 16
Clock and Timer ............. 17
Oven Controls ............... 13
Preheating ................... 15
Probe ........................ 19
Sabbath Feature ............ 27
Self-Cleaning ............ 30, 31
Special Features ......... 25, 26
Timed Baking and
Roasting Features ........... 18
Installation
Instructions ............ 39-46
Anti-Tip Device ............ 39, 45
Dimensions and
Clearances .................... 40
Electrical Connections ...... 41-44
Level the Range ............... 45
Locution Guidelines ........... 40
Safety Instructions ............ 39
Troubleshooting
Tips ...................... 47-49
Accessories .................. 53
Consumer Support
Consumer
Support .............. Buck Cover
Ownership Registration
for Customers in
Canada only .............. 51, 52
Warranty for Customers
in Canada ..................... 55
Warranty for Customers
in the U.SA.................... 54
C5980
In Canada contact us at:
www. GEAppliances.ca
Care and Cleaning
Control Panel and Knobs...... 35
Glass Cooktop Surface .... 37, 38
Griddle ........................ 32
Lift-Off Oven Door............. 33
Lower Oven Drawer ........... 34
Oven Air Vents ................ 35
Oven Heating Elements ....... 33
Oven Light Replacement ...... 36
Oven Racks ................... 36
Self-Cleaning .............. 30, 31
Stainless Steel Surfaces ....... 32
Write the model and serial
numbers here:
Model #
Serial #
You can find them on c]label on the
front of the range behind the lower
oven drawer.
49-85198 05-11GE
Page 2
IMPORTANT SAFETYINFORMATION.
READ ALL INSTRUCTIONS BEFORE USING.
IAWARNINGi
Read all safety instructions before using the product. Failure to follow these instructions may result in fire, electric shock,
serious injury or death.
ANTI-TIP DEVICE
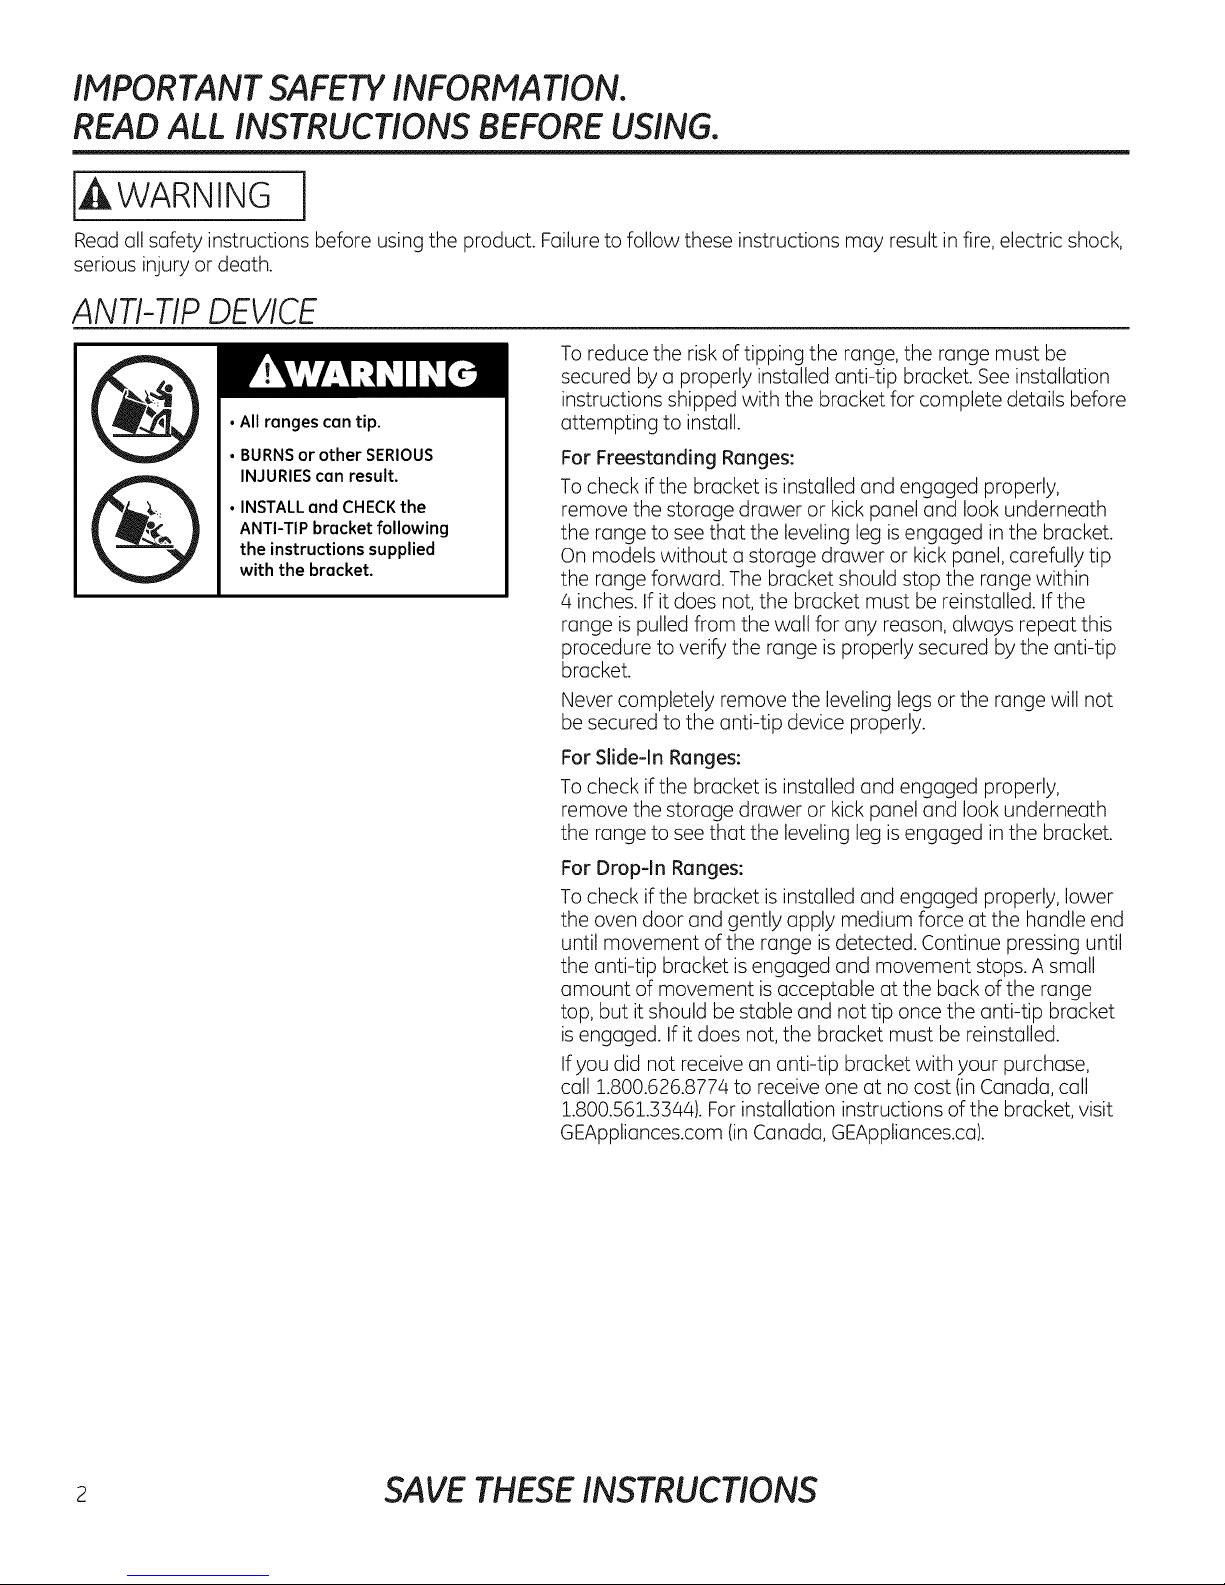
To reduce the risk of tipping the range, the range must be
secured by a properly installed anti-tip bracket. See installation
instructions shipped with the bracket for complete details before
• All ranges can tip.
• BURNS or other SERIOUS
INJURIES can result.
• INSTALL and CHECK the
ANTI-TIP bracket following
the instructions supplied
with the bracket.
attempting to install.
For Freestanding Ranges:
To check if the bracket is installed and engaged properly,
remove the storage drawer or kick panel and look underneath
the range to see that the leveling leg is engaged in the bracket.
On models without a storage drawer or kick panel, carefully tip
the range forward. The bracket should stop the range within
4 inches. If it does not, the bracket must be reinstalled. If the
range is pulled from the wall for any reason, always repeat this
procedure to verify the range is properly secured by the anti-tip
bracket.
Never completely remove the leveling legs or the range will not
be secured to the anti-tip device properly.
For Slide-In Ranges:
To check if the bracket is installed and engaged properly,
remove the storage drawer or kick panel and look underneath
the range to see that the leveling leg is engaged in the bracket.
For Drop-In Ranges:
To check if the bracket is installed and engaged properly, lower
the oven door and gently apply medium force at the handle end
until movement of the range is detected. Continue pressing until
the anti-tip bracket is engaged and movement stops. A small
amount of movement is acceptable at the back of the range
top, but it should be stable and not tip once the anti-tip bracket
is engaged. If it does not, the bracket must be reinstalled.
If you did not receive an anti-tip bracket with your purchase,
call 1.800.626.8774 to receive one at no cost (in Canada, call
1.800.561.3344). For installation instructions of the bracket, visit
GEAppliances.com (in Canada, GEAppliances.ca).
2 SAVE THESE INSTRUCTIONS
Page 3
JAWARNING I GENERAL SAFETYINSTRUCTIONS
GEAppliances.ca
Use this appliance for its intended purpose as described
in this Owner's Manual.
Be sure your appliance is properly installed and
grounded by a qualified installer in accordance with the
provided installation instructions.
Do not attempt to repair or replace any part of your
range unless it is specifically recommended in this
manual. All other servicing should be referred to a
qualified technician.
Before performing any service, unplug the range
or disconnect the power supply at the household
distribution panel by removing the fuse or switching off
the circuit breaker.
Do not leave children alone-children should not be left
alone or unattended in an area where an appliance is in
use. They should never be allowed to climb, sit or stand
on any part of the appliance.
CAUTION : Do not store items of interest to
children above a range or on the backguard of a
range-children climbing on the range to reach items
could be seriously injured.
Use only dry pot holders-moist or damp pot holders on
hot surfaces may result in burns from steam. Do not let
pot holders touch hot surface units or heating elements.
Do not use a towel or other bulky cloth in place of pot
holders.
iiiil}i
Do not touch the surface units, the heating elements
or the interior surface of the oven. These surfaces may
be hot enough to burn even though they are dark in
color. During and after use, do not touch, or let clothing
or other flammable materials contact the surface units,
areas nearby the surface units or any interior area of
the oven; allow sufficient time for cooling first. Other
surfaces of the appliance may become hot enough
to cause burns. Potentially hot surfaces include the
cooktop, areas facing the cooktop, oven vent opening,
surfaces near the opening and crevices around the
oven door.
iiiiiiili_
Do not heat unopened food containers. Pressure could
build up and the container could burst, causing an
injury.
iiiiiiili_
Do not use aluminum foil to line drip pans or anywhere
in the oven, except as described in this manual. Foil can
trap heat or melt, resulting in damage to the product
and a shock or fire hazard.
iiiiiiili_
Avoid scratching or impacting glass doors, cook tops or
control panels. Doing so may lead to glass breakage. Do
not cook on a product with broken glass. Shock, fire or
cuts may occur.
iiiiiiili_
Cook meat and poultry thoroughly-meat to at least an
internal temperature of 160°F and poultry to at least
an internal temperature of 180°F. Cooking to these
temperatures usually protects against foodborne illness.
Never use your appliance for warming or heating the
room.
j ,WARNING
Do not store or use flammable materials in an oven or
near the cooktop, including paper, plastic, pot holders,
linens, wall coverings, curtains, drapes and gasoline or
other flammable vapors and liquids.
Never wear loose-fitting or hanging garments while
using the appliance. These garments may ignite if they
contact hot surfaces causing severe burns.
1KEEPFLAMMABLE MATERIALSAWAY FROM THERANGE
SAVE THESE INSTRUCTIONS 3
Do not let cooking grease or other flammable materials
accumulate in or near the range. Grease in the oven or
on the cooktop may ignite.
Clean ventilating hoods frequently. Grease should not
be allowed to accumulate on the hood or filter.
Page 4
IMPORTANT SAFETYINFORMATION.
READ ALL INSTRUCTIONS BEFORE USING.
jAWARNING j IN THE EVENTOF A FIRE,TAKE THE FOLLOWING
STEPSTO PREVENTTHE FIREFROM SPREADING:
_:,Do not use water on grease fires. Never pick up a
flaming pan. Turn the controls off. Smother a flaming
pan on a surface unit by covering the pan completely
with a well-fitting lid, cookie sheet or flat tray. Use
a multi-purpose dry chemical or foam-type fire
extinguisher.
_:,Ifthere is a fire in the oven during baking, smother the
fire by closing the oven door and turning the oven off or
by using a multi-purpose dry chemical or foam-type fire
extinguisher.
If there is a fire in the oven during self-clean, turn the
oven off and wait for the fire to go out. Do not force
the door open. Introduction of fresh air at self-clean
temperatures may lead to a burst of flame from the
oven. Failure to follow this instruction may result in
severe burns.
jAWARNING j COOKTOP SAFETYINSTRUCTIONS
Never leave the surface units unattended at medium or
high heat settings. Boilovers cause smoking and greasy
spillovers that may catch on fire.
*:, Never leave oil unattended while frying. If allowed to
heat beyond its smoking point, oil may ignite resulting
in fire that may spread to surrounding cabinets. Use a
deep fat thermometer whenever possible to monitor oil
temperature.
':, Onlycertain types of glass,glass/ceramic,earthenware
orother glazedcontainers are suitable for cooktop
service;others may breakbecause of the sudden
change intemperature.
To minimize the possibility of burns, ignition of
flammable materials and spillage, the handle of a
container should be turned toward the center of the
range without extending over nearby surface units.
To avoid oil spillover and fire, use a minimum amount of
oil when shallow pan-frying and avoid cooking frozen
foods with excessive amounts of ice.
_:, Use proper pan size--select cookware having flat
bottoms large enough to cover the surface heating
element. The use of undersized cookware will expose
a portion of the surface unit to direct contact and may
result in ignition of clothing. Proper relationship of
cookware to surface unit will also improve efficiency.
When preparing flaming foods under a hood, turn the
fan on.
iiiiiil
If power is lost to an electric cooktop while a surface
unit is ON, the surface unit will turn back ON as soon
as power is restored. In the event of power loss, failure
to turn all surface unit knobs to the OFF position may
result in ignition of items on or near the cooktop, leading
to serious injury or death.
4 SAVE THESE INSTRUCTIONS
Page 5
GEAppliances.ca
iA WARNING i RADIANTCOOKTOPSAFETYINSTRUCTIONScsomemodelsI
Use care when touching the cooktop. The glass surface
of the cooktop will retain heat after the controls have
been turned off.
Do not cook on a broken cooktop. If glass cooktop
should break, cleaning solutions and spillovers
may penetrate the broken cooktop and create a
risk of electric shock. Contact a qualified technician
immediately.
Avoid scratching the glass cooktop. The cooktop can be
scratched with items such as knives, sharp instruments,
rings or other jewelry, and rivets on clothing.
Do not place or store items that can melt or catch fire
on the glass cooktop, even when it is not being used. If
the cooktop is inadvertently turned on, they may ignite.
Heat from the cooktop or oven vent after it is turned off
may cause them to ignite also.
iiiiiil
Use CERAHA BRYTE®ceramic Cooktop Cleaner and
CERAHA BRYTE®Cleaning Pad to clean the cooktop.
Wait until the cooktop cools and the indicator light goes
out before cleaning. Awet sponge or cloth on a hot
surface can cause steam burns. Some cleaners can
produce noxious fumes if applied to a hot surface. Note:
Sugar spills are an exception. They should be scraped
off while still hot using an oven mitt and a scraper. See
the Cleaning the glass cooktop section for detailed
instructions.
iiiiiiili_
Read and follow all instructions and warnings on the
cleaning cream label.
iAWARNING i OVEN SAFETYINSTRUCTIONS
Stand away from the range when opening the oven
door. Hot air or steam which escapes can cause burns
to hands, face and/or eyes.
} Keep the oven vent unobstructed.
Keep the oven free from grease buildup. Grease in the
oven may ignite.
Place oven racks in desired location while oven is cool.
If rack must be moved while oven is hot, do not let pot
holder contact hot heating element in oven.
When using cooking or roasting bags in the oven, follow
the manufacturer's directions.
iiiil}i
Pull the oven rack to the stop-lock position when
loading and unloading food from the oven. This helps
prevent burns from touching hot surfaces of the door
and oven walls.
_:, Do not leave items such as paper, cooking utensils or
food in the oven when not in use. Items stored in an
oven can ignite.
_:, Do not use aluminum foil to line the oven bottom.
Foil can trap heat or melt, resulting in damage to the
product and a shock or fire hazard.
SAVE THESE INSTRUCTIONS s
Page 6
IMPORTANT SAFETY INFORMATION.
READ ALL INSTRUCTIONS BEFORE USING.
[AWARNING j
The self-cleaning feature operates the oven at temperatures high enough to burn away food soils in the oven.
Follow these instructions for safe operation.
_:,Before operating the self-clean cycle, remove pans,
shiny metal oven racks and other utensils from the
oven. Only gray porcelain-coated oven racks may be
left in the oven. Do not use self-clean to clean other
parts, such as drip pans or bowls.
Beforeoperating the self-clean cycle,wipe grease and
food soilsfrom the oven.Excessiveamount of grease
may ignite leadingto smokedamage to your home.
If the self-cleaning mode malfunctions, turn the oven off
and disconnect the power supply. Have it serviced by a
qualified technician.
SELF-CLEANINGOVENSAFETYINSTRUCTIONS
(Some models)
Do not clean the door gasket. The door gasket is
essential for a good seal. Care should be taken not to
rub, damage or move the gasket.
Do not use oven cleaners. No commercial oven cleaner
or oven liner protective coating of any kind should be
used in or around any part of the oven.
[AWARNINGIWARMING DRAWER/LOWER OVEN DRAWER SAFETY
INSTRUCTIONS (Somemodels)
The purpose of the warming drawer isto hold hot
cooked foods at serving temperature. Bacteria will grow
in food while it is below I40°F. Do not put cold food in
warming drawer. Do not heat food for more than
2 hours. Failure to follow these instructions may result in
foodborne illness.
Do not leave paper products, plastics, canned food or
combustible materials in the drawer. They may ignite.
Do not touch the heating element or the interior surface
of the drawer. These surfaces may be hot enough to
cause burns.
Usecare when opening the drawer. Openthe drawer a
crack and let hot airor steam escape before removing
or replacing food. Hotair or steam that escapescan
cause burnsto hands, faceand/or eyes.
Do not use aluminum foil to line the lower drawer. The
foil will trap heat below, and upset the performance of
the oven. Foil can melt and permanently damage the
drawer bottoms.
READ AND FOLLOW THIS SAFETYINFORMATION CAREFULLY.
SAVETHESEINSTRUCTIONS
Page 7
Using the griddle. G ApUiancescom
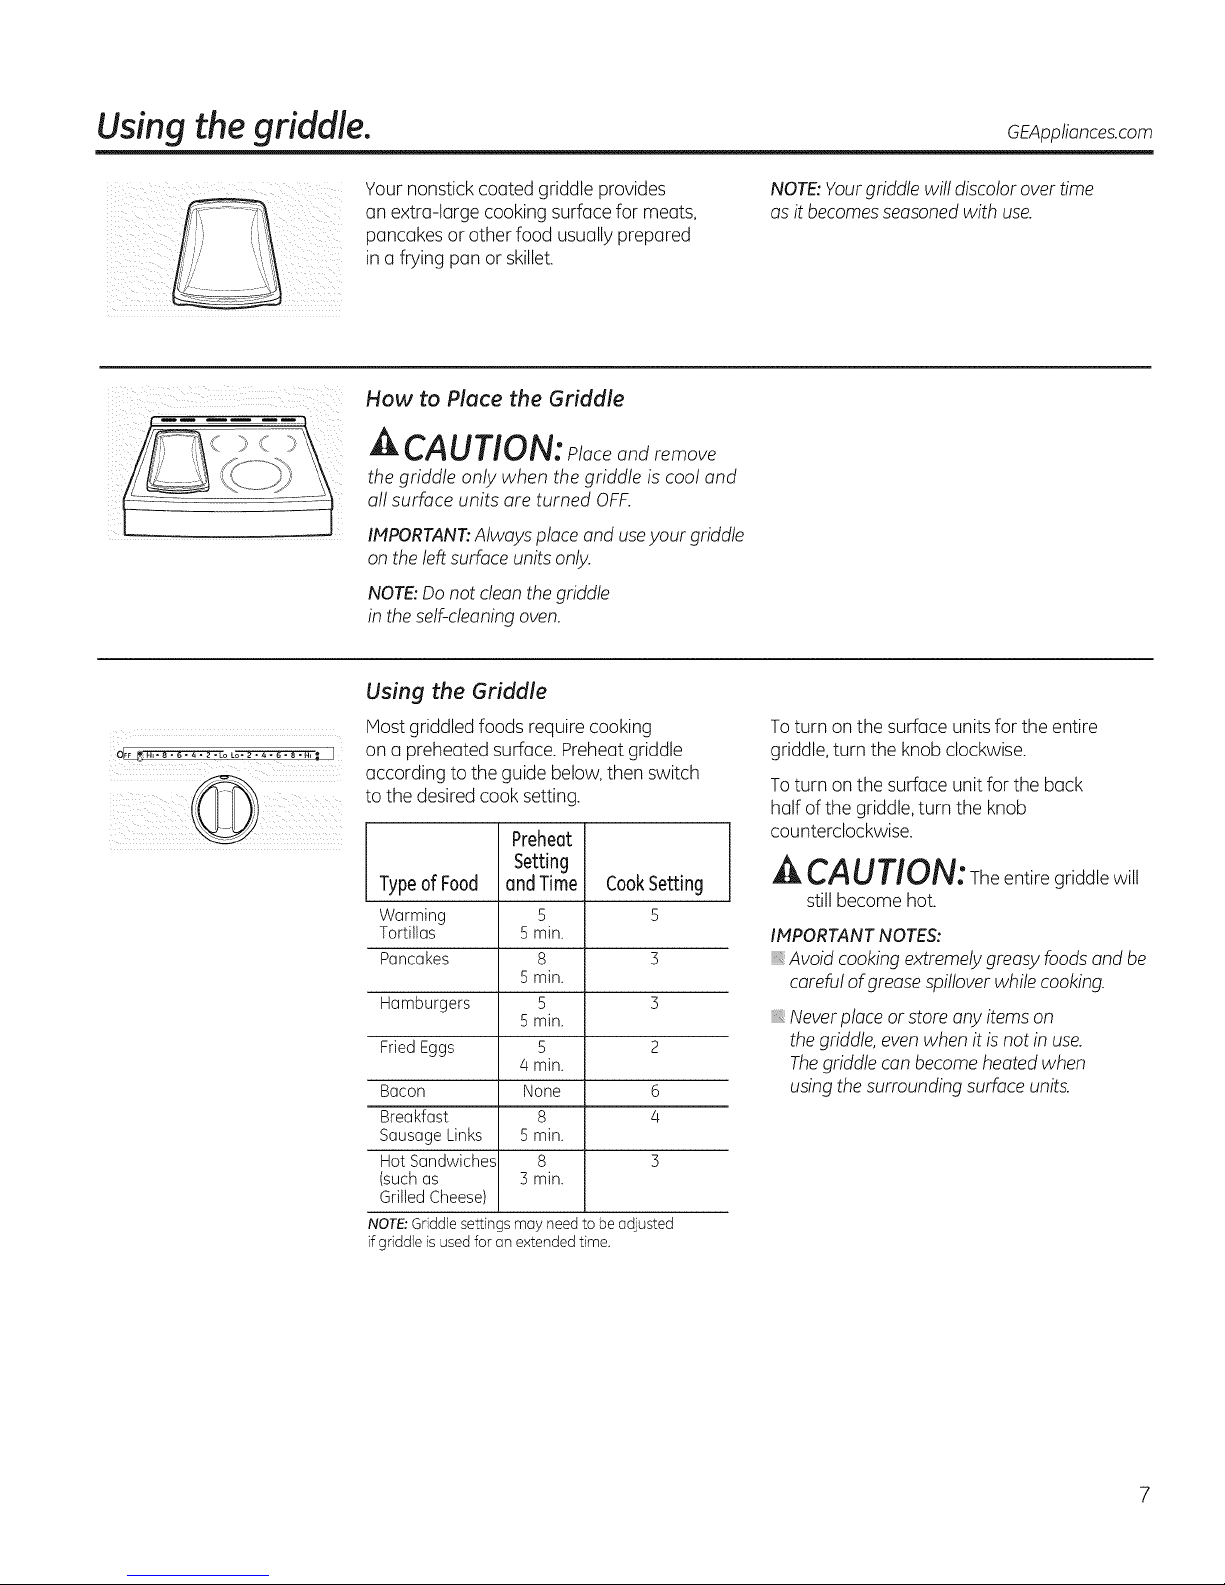
Your nonstick coated griddle provides
an extra-large cooking surfacefor meats,
pancakesor other food usually prepared
in afrying pun or skillet.
How to Place the Griddle
CAUTlON: loceandremove
the griddle only when the griddle is cool and
all surface units are turned OFF.
IMPORTANT:Always place and useyour griddle
on the leftsurfaceunits only.
NOTE:Donot cleanthegriddle
in theself-cleaningoven.
Using the Griddle
Host griddled foods require cooking
on a preheated surface. Preheatgriddle
according to the guide below,then switch
to the desired cooksetting.
Preheat
Setting
Typeof Food and Time CookSetting
Warming 5 5
Tortillas 5min.
Pancakes 8 3
Hamburgers 5 3
Fried Eggs 5 2
Bacon None 6
Breakfast 8 4
SausageLinks 5rain.
HotSandwiches 8 3
(suchas 3 min.
GrilledCheese)
NOTE:Griddle settings may need to be adjusted
if griddle isused for an extended time.
5min.
5 min.
/4min.
NOTE:Yourgriddle will discolorover time
asit becomesseasonedwith use.
Toturn on the surface units for the entire
griddle,turn the knob clockwise.
Toturn on the surface unitfor the back
half of the griddle,turn the knob
counterclockwise.
A CAUTION: Theentire griddle will
still become hot.
IMPORTANTNOTES:
Avoid cooking extremelygreasy foods and be
careful of greasespilloverwhile cooking.
B Never placeor store anyitems on
the griddle,evenwhen itis not in use.
Thegriddle can become heatedwhen
usingthesurrounding surfaceunits.
Page 8
Using the griddle,
Restaurant-Quality Steak
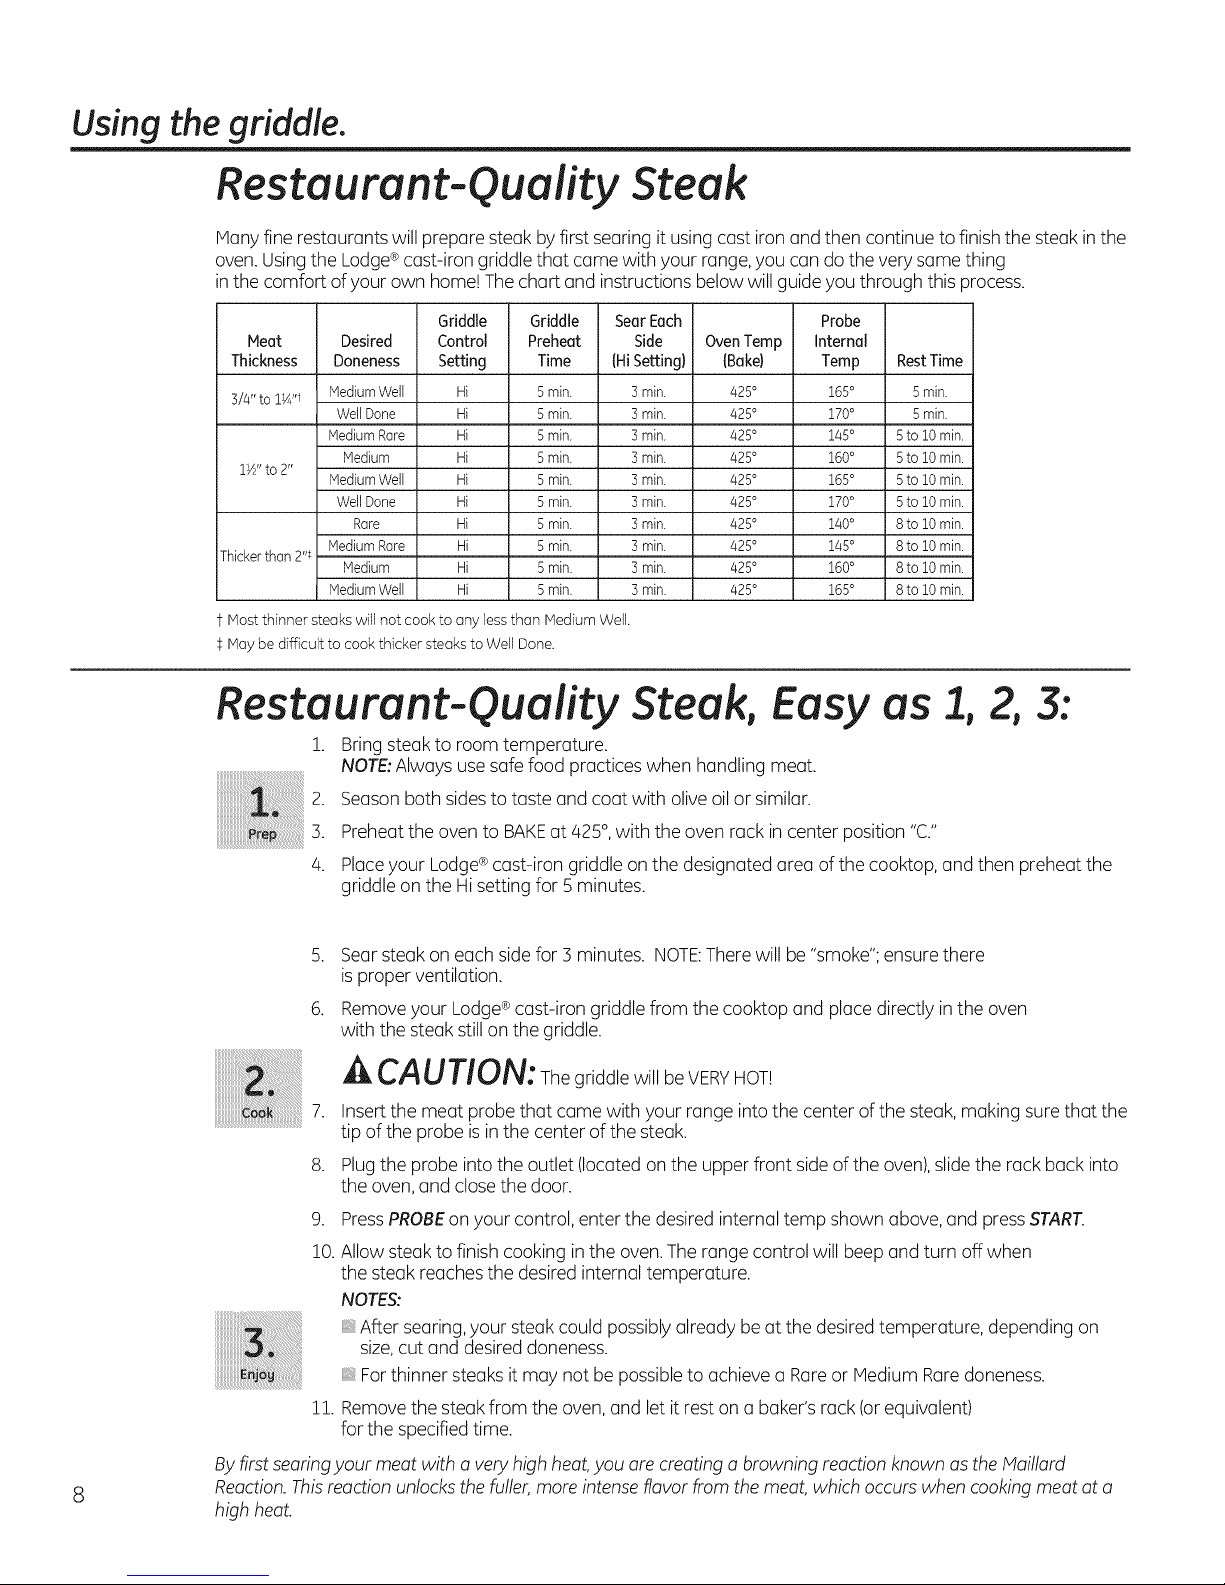
Manyfine restaurants will prepare steak byfirst searing it usingcast iron and then continue to finish the steak inthe
oven. Usingthe Lodge®cast-iron griddle that came with your range,you can do the very same thing
inthe comfort ofyour own home!The chart and instructions below will guideyou through this process.
Meat Desired Control Preheat Side Oven Temp Internal
Thickness Doneness Setting Time IHiSetting} IBake} Temp Rest Time
3/4" to 1_"_ MediumWell Hi 5min. 3min. 425° 165° 5 min.
1½"to 2"
Thickerthan2"_
Most thinner steaks will not cook to anyless than Medium Well.
May be difficult to cook thicker steaks to Well Done.
Griddle Griddle Sear Each Probe
WellDone Hi 5min. 3min. 425° 170° 5 min.
MediumRare Hi 5min. 3 min. 425° 145° 5to 10min.
Medium Hi 5 min. 3min. 425° 160° 5to 10min.
HediumWell Hi 5 min. 3 min. 425° 165° 5to 10min.
WellDone Hi 5 min. 3min. 425° 170° 5to 10min.
Rare Hi 5 min. 3 min. 425° 140° 8 to 10min.
HediumRare Hi 5 min. 3 min. 425° 145° 8to 10min.
Hedium Hi 5min. 3 min. 425° 160° 8to 10min.
HediumWell Hi 5 min. 3 min. 425° 165° 8to 10min.
Resta
urant-Quality Steak, Easy as 1, 2, 3:
!.
Bringsteak to room temperature.
NOTE:Always use safefood practices when handling meat.
Seasonboth sides to taste andcoat with oliveoil or similar.
3.
Preheatthe oven to BAKEat 425°,with the oven rack incenter position "C."
4.
Placeyour Lodge®cast-iron griddle onthe designated area of the cooktop, and then preheat the
griddle on the Hisetting for 5minutes.
5. Sear steakon each sidefor 3minutes. NOTE:There will be "smoke";ensure there
is proper ventilation.
6. Removeyour Lodge®cast-iron griddle from the cooktop and place directly in the oven
with the steakstill on the griddle.
A CAUTION: Thegriddle will beVERYHOT!
7. Insert the meat probethat came with your range intothe center of the steak, making sure that the
tip of the probe isin the centerof the steak.
8. Plugthe probe into the outlet (located on the upper front sideof the oven),slidethe rackback into
the oven,and close the door.
9. PressPROBEon your control, enter the desired internal temp shown above,and pressSTART.
10.Allow steakto finish cooking in the oven.The range control will beep andturn off when
the steak reachesthe desired internal temperature.
NOTES:
After searing,your steak could possiblyalready be at the desiredtemperature, depending on
size,cut and desireddoneness.
Forthinner steaks it may not be possibleto achieve a Rareor Medium Raredoneness.
11. Removethe steak from the oven,and let it reston a baker's rack (orequivalent)
for the specifiedtime.
Byfirst searingyour meat with a veryhigh heat,you are creating a browning reactionknown as theMaillard
Reaction.Thisreaction unlocksthe fuller, more intenseflavor from the meat, which occurswhen cookingmeat at a
high heat.
Page 9
Using the surface units. ++ApUiancescom
Throughout this manual, features and appearance may vary from your model.
How to Set
Besure you turn the control knob
to OFFwhen ou finish cooking.
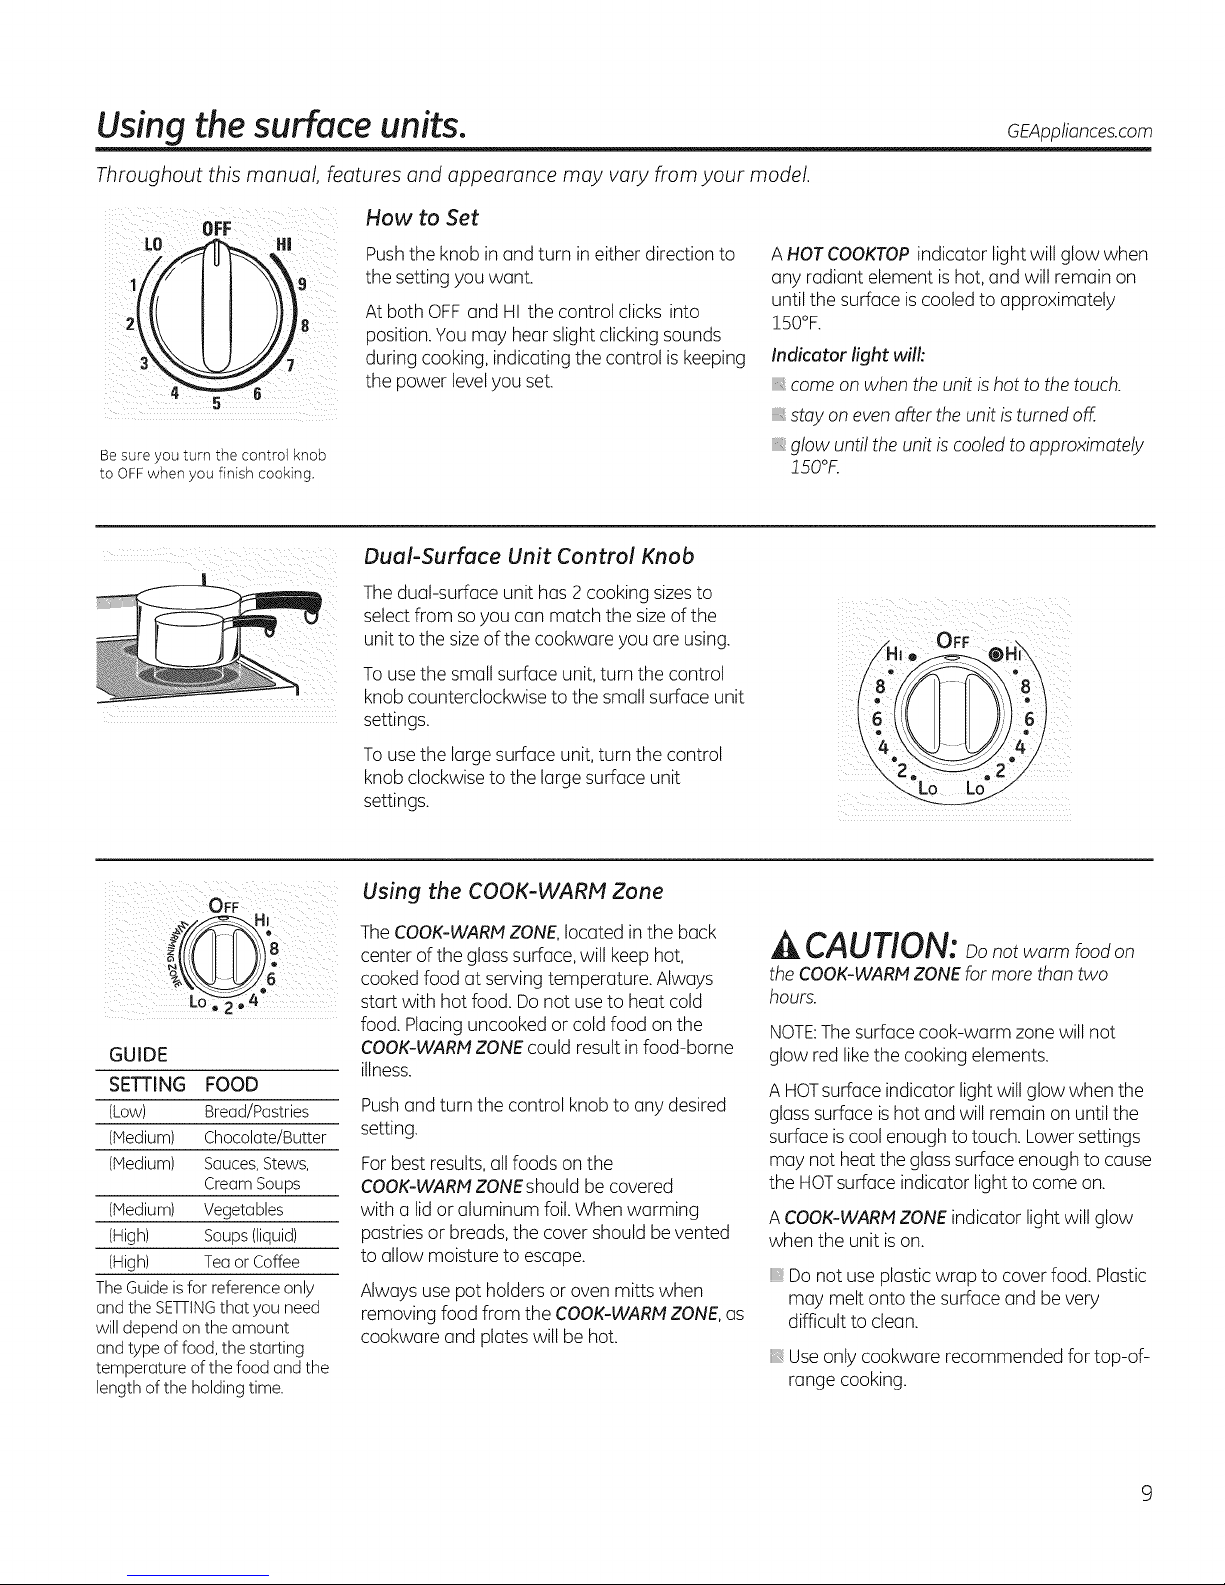
Pushthe knob in and turn in either direction to
the setting you want.
At both OFFand HIthe control clicks into
position.You may hear slightclicking sounds
during cooking, indicating the control iskeeping
the power levelyou set.
Dual-Surface Unit Control Knob
Thedual-surface unit has 2cooking sizesto
select from so you can match the sizeof the
unitto the sizeof the cookware you are using.
Touse the small surface unit,turn the control
knob counterclockwise to the smallsurface unit
settings.
Touse the large surface unit,turn the control
knob clockwiseto the large surface unit
settings.
A HOTCOOKTOPindicator lightwill glow when
any radiant element is hot, andwill remain on
until the surface iscooled to approximately
150°F.
Indicator light will:
come on when the unit ishot to thetouch.
stay on evenafterthe unit is turned off.
glow until the unit iscooledto approximately
150°K
HI
:%__8 ¸
LO + 2,R'
GUIDE
SETTING FOOD
(Low) Bread/Pastries
(Hedium) Chocolate/Butter
(Hedium) Sauces,Stews,
Cream Soups
(Hedium) Vegetables
(High) Soups (liquid)
(High) Teaor Coffee
TheGuideisfor reference only
and the SElq-INGthat you need
will depend on the amount
and type of food, the starting
temperature of the food and the
length of the holding time.
Using the COOK-WARM Zone
TheCOOK-WARMZONE,located in the back
center of the glass surface,will keep hot,
cooked food at serving temperature. Always
start with hot food. Donot useto heat cold
food. Placing uncookedor cold food on the
COOK-WARMZONEcould result in food-borne
illness.
Pushand turn the control knob to any desired
setting.
Forbest results,all foods on the
COOK-WARMZONEshould be covered
with a lidor aluminum foil. When warming
pastries or breads,the cover should bevented
to allow moisture to escape.
Always usepot holdersor oven mitts when
removing food from the COOK-WARMZONE,as
cookware and plates will be hot.
A CAUTION: oo not warm food on
the COOK-WARMZONEfor more than two
hours.
NOTE:Thesurface cook-warm zone will not
glow redlike the cooking elements.
A HOTsurface indicator light will glow when the
glass surfaceishot andwill remain on until the
surface iscool enough to touch. Lower settings
may not heatthe glass surface enough to cause
the HOTsurface indicator light to come on.
A COOK-WARMZONEindicator lightwill glow
when the unit ison.
Do not useplastic wrap to cover food. Plastic
may melt onto the surface and be very
difficult to clean.
Useonly cookware recommended for top-of-
range cooking.
Page 10
Using the surface units,
Throughout this manual, features and appearance may vary from your model.
Temperature Limiter
Everyradiant surface unit has atemperature
limiter.
Thetemperature limiterprotects the glass
cooktop from getting too hot.
Home Canning Tips
Be sure the canner is centered over the
surface unit.
Hake sure the canner is flat on the bottom.
To prevent burns from steam or heat, use
caution when canning.
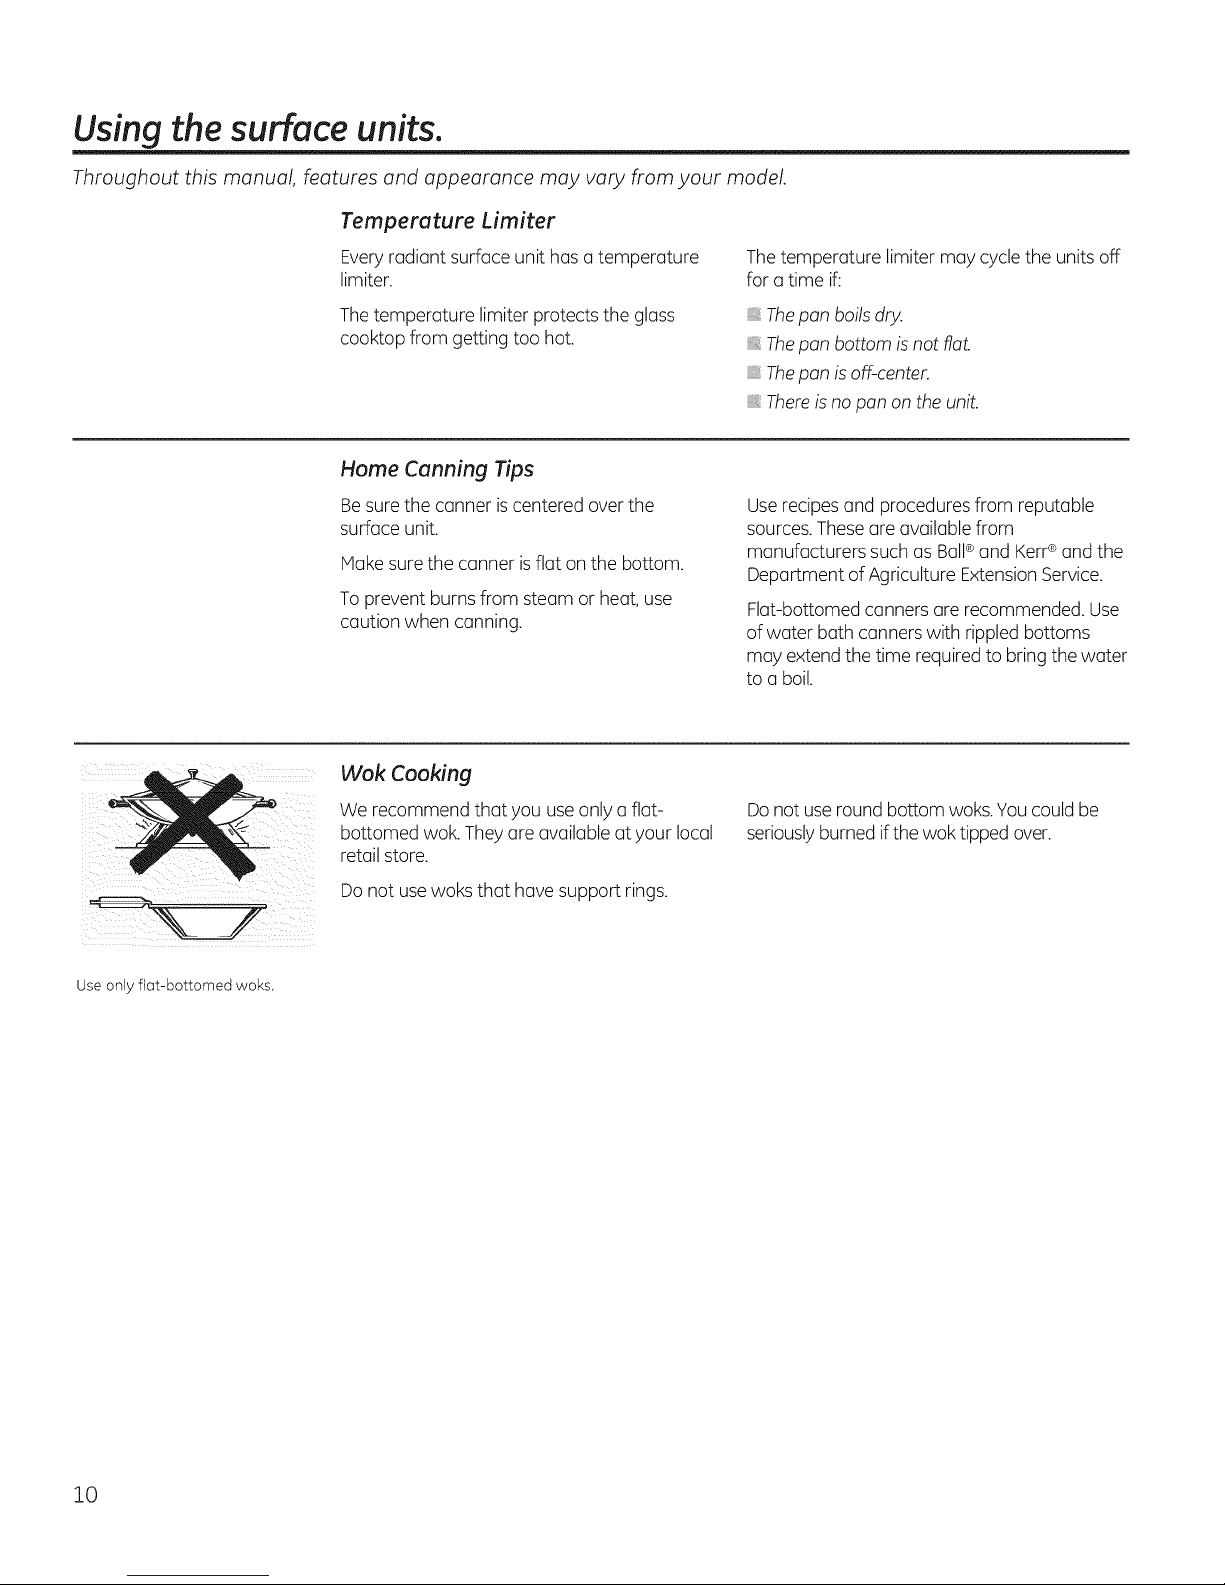
Wok Cooking
We recommend that you useonly a flat-
bottomed wok. Theyare available at your local
retail store.
The temperature limitermay cycle the unitsoff
for atime if:
Thepan boils dry.
The pan bottom is not fiat.
Thepan is off-center.
There is no pan on the unit.
Userecipesand proceduresfrom reputable
sources.Theseareavailable from
manufacturers suchas Ball®and Kerr®and the
Department of Agriculture ExtensionService,
Flat-bottomed cannersare recommended. Use
of water bath cannerswith rippled bottoms
may extend the time required to bringthe water
to u boil.
Donot useround bottom woks.Voucould be
seriouslyburned if the wok tipped over.
Use only flat-bottomed woks.
Do not usewoks that have support rings.
10
Page 11
Using the surface units, GEApUionces.com
The following information will help you choose cookware which will give good performance on glass cooktops.
k ¸ : _ k C k
i i il iiiii! d i!i il
!!!'i!
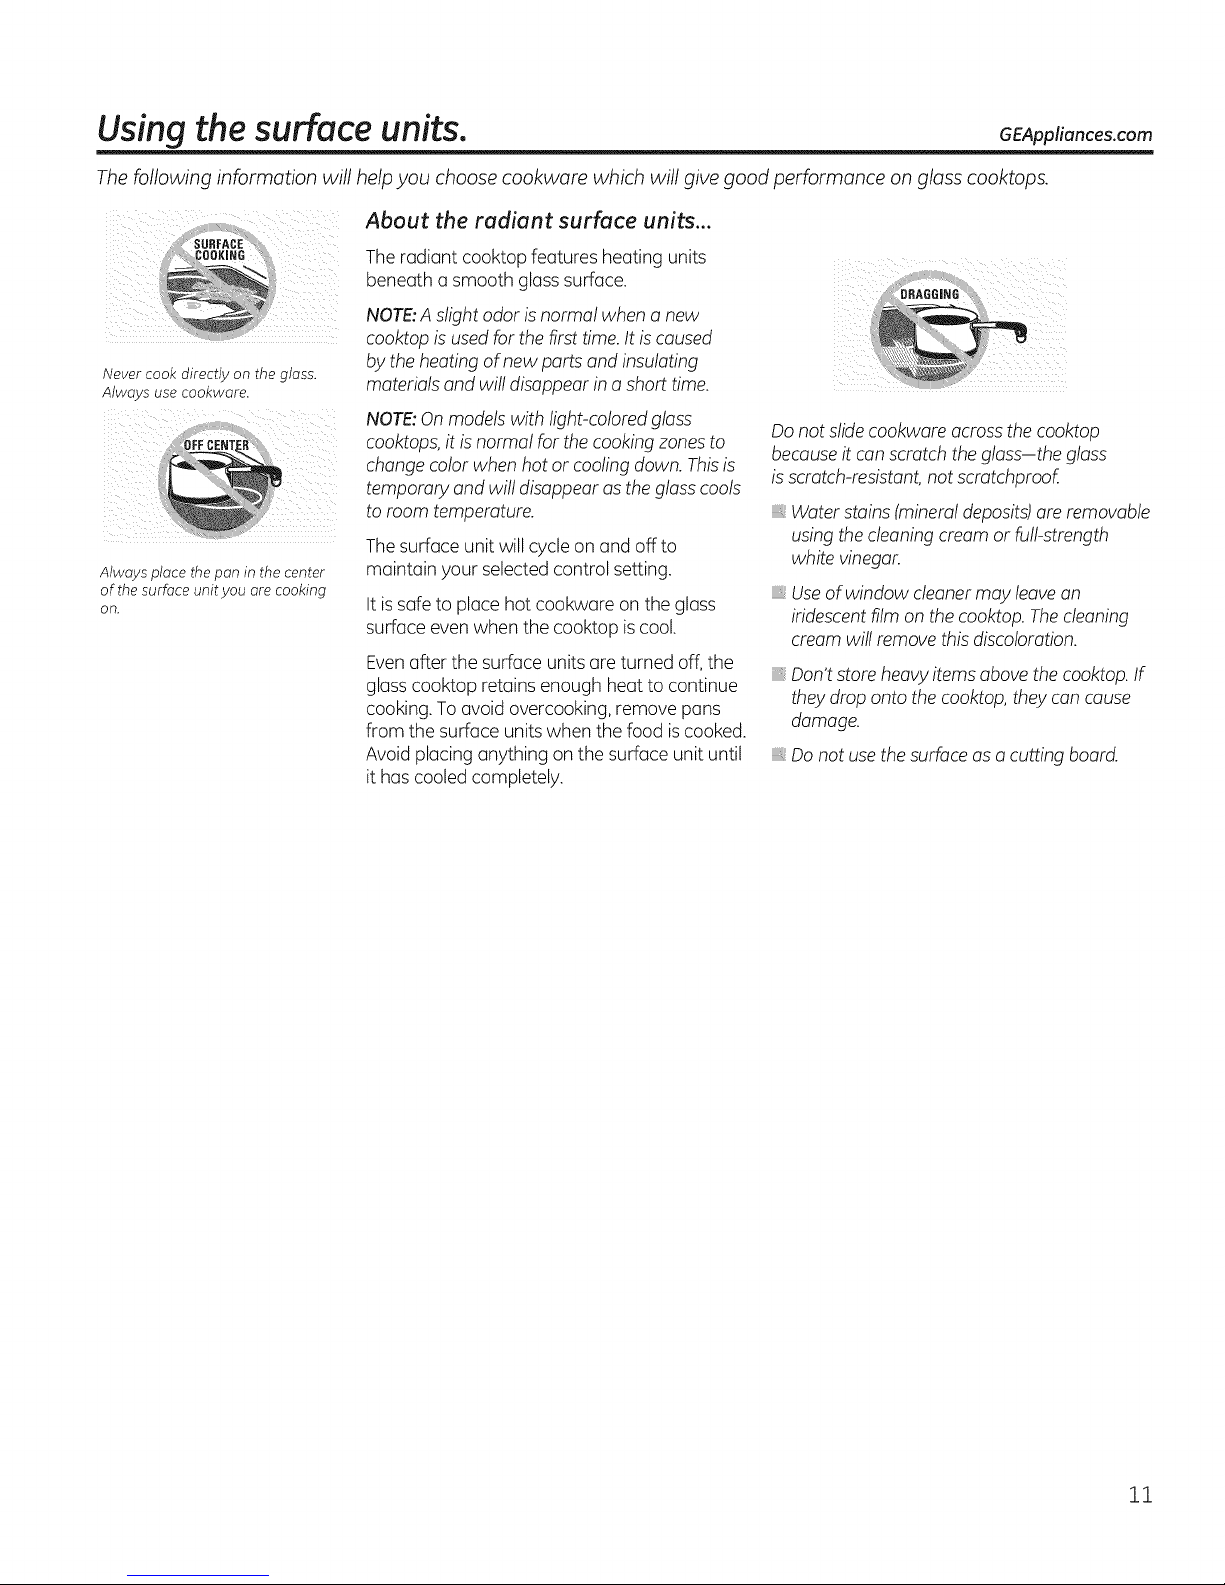
Never cook directly on the glass.
Always use cookware.
Always place the pan in the center
of the surface unit you are cooking
on.
About the rodiont surface units...
The radiant cooktop features heating units
beneath a smooth glass surface.
NOTE:A slight odor is normal when a new
cooktopis usedfor the first time.It iscaused
bythe heating of new parts and insulating
materials and will disappear ina short time.
NOTE:Onmodels with lighbcolored glass
cooktops,it is normal for the cooking zonesto
changecolor when hot or cooling down.Thisis
temporary and will disappear as the glasscools
to room temperature.
Thesurface unit will cycle on and off to
maintain your selectedcontrol setting.
It issafeto place hot cookware on the glass
surface evenwhen the cooktop iscool.
Evenafter the surface unitsare turned off, the
glasscooktop retains enough heat to continue
cooking.Toavoid overcooking, remove pans
from the surface units when the food is cooked.
Avoid placing anything on the surface unit until
it has cooledcompletely.
Do not slidecookware acrossthe cooktop
becauseit can scratchthe glass-the glass
isscratch-resistant,not scratchpraof.
Water stains (mineraldeposits)are removable
using thecleaning cream or fulhstrength
white vinegar.
Useof window cleanermay leavean
iridescentfilm on the cooktop. Thecleaning
cream will remove this discoloration.
Don't storeheavy itemsabove the cooktop.If
they drop onto the cooktop, theycan cause
damage.
Donot usethesurface asa cutting board.
11
Page 12
Selecting types of cookwure.
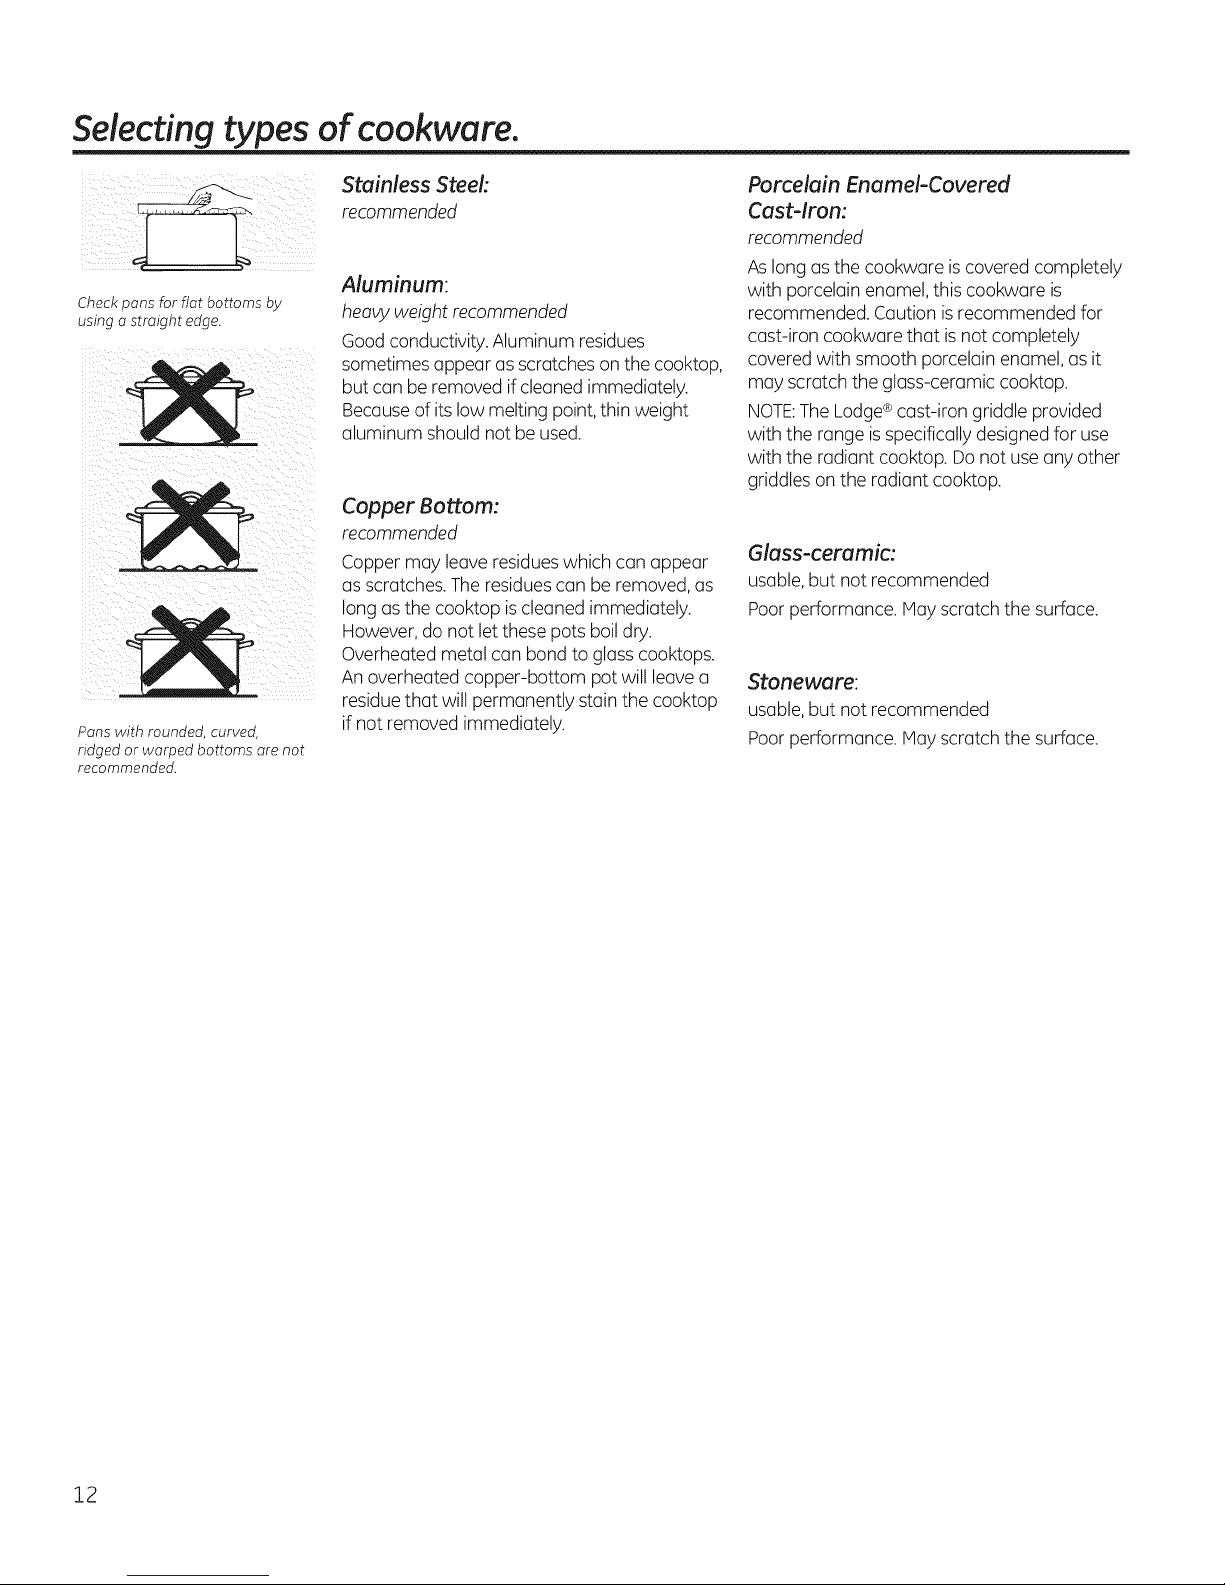
Checkpans for fiat bottoms by
using o straight edge.
Pans with rounded, curved,
ridged or warped bottoms are not
recommended.
Stainless Steek
recommended
Aluminum:
heavy weight recommended
Goodconductivity. Aluminum residues
sometimesappear as scratcheson the cooktop,
but can be removed if cleaned immediately.
Becauseof itslow melting point,thin weight
aluminum should not be used.
Copper Bottom:
recommended
Coppermay leave residueswhich can appear
asscratches. Theresiduescan be removed, as
long as the cooktop is cleaned immediately.
However, donot let these pots boil dry.
Overheated metal can bondto glass cooktops.
An overheated copper-bottom pot will leavea
residuethat will permanently stain the cooktop
if not removed immediately.
Porcelain Enamel-Covered
Cast-iron:
recommended
As long as the cookware is covered completely
with porcelain enamel, this cookware is
recommended. Caution is recommended for
castdron cookware that is not completely
covered with smooth porcelain enamel, as it
may scratch the glass-ceramic cooktop.
NOTE:The Lodge®castdron griddle provided
with the range is specifically designed for use
with the radiant cooktop. Do not use any other
griddles on the radiant cooktop.
Glass-ceramic:
usable,but not recommended
Poorperformance. May scratchthe surface.
Stoneware:
usable,but not recommended
Poorperformance. May scratchthe surface.
12
Page 13
Using the upper oven controls.
(Throughout this manual, features and appearance may vary from your model.) GEAppliances.com
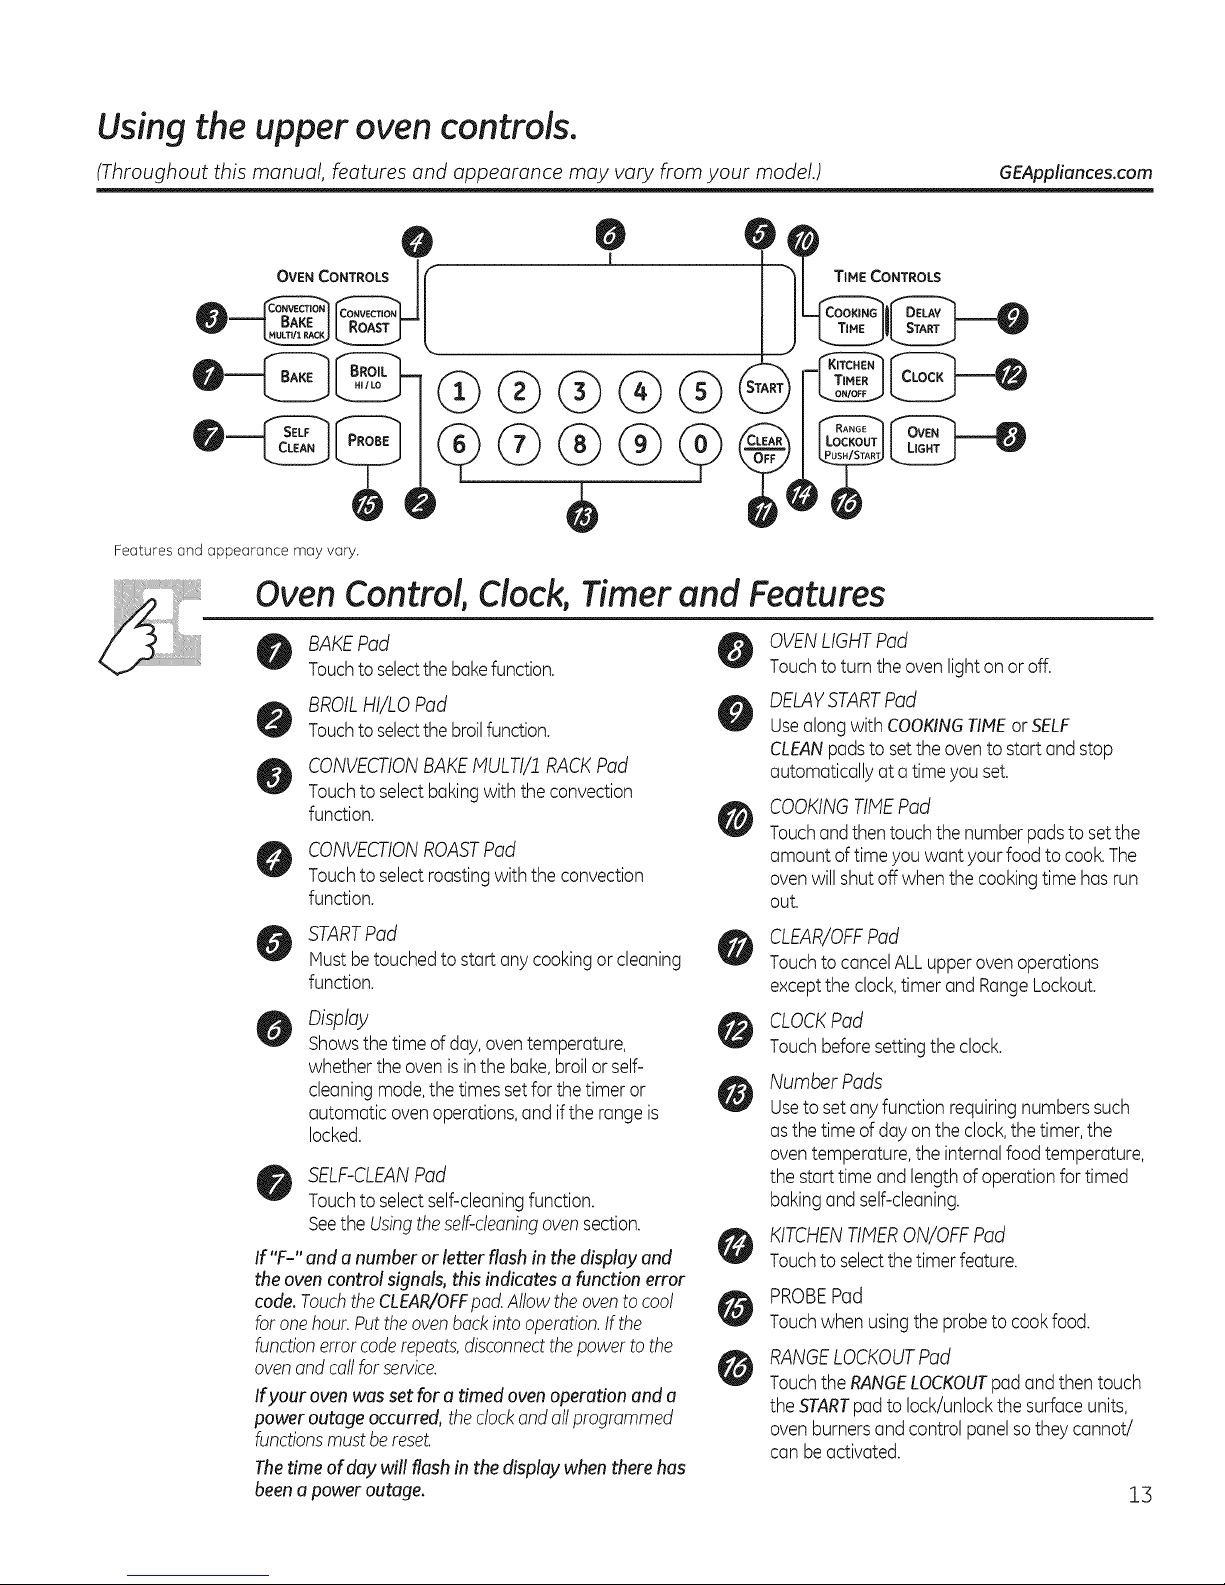
Features and appearance may vary.
Oven Control, Clock, Timer and Features
BAKEPad
Touchtoselectthebakefunction.
BROILHI/LO Pad
Touchtoselectthebroilfunction.
CONVECTIONBAKEMULTI/1RACKPad
Touchto selectbakingwith theconvection
function.
CONVECTIONROASTPad
Touchto selectroastingwiththe convection
function.
STARTPad
Mustbetouched to start anycookingorcleaning
function.
Display
Showsthe time ofday,oventemperature,
whether theovenisin the bake,broilor self-
cleaningmode,the timessetfor thetimer or
automatic ovenoperations,and ifthe rangeis
locked.
SELF-CLEANPad
Touchto selectself-cleaningfunction.
Seethe Usingtheself-cleaningovensection.
If "F-" and a number or letter flash in the display and
the ovencontrol signals, thisindicates a function error
code.TouchtheCLEAR/OFFpod.Allow the oventocool
forone hour.Puttheovenbackintooperation.Ifthe
functionerrorcoderepeats,disconnectthepower to the
ovenand calfforservice.
Ifyour oven wasset for a timed oven operation and u
power outage occurred, theclockandall programmed
functionsmustbe reset.
Thetime of day will flash in the display whenthere has
beenapower outage.
O
0
OVENLIGHTPad
Touchto turn theovenlighton oroff.
DELAYSTARTPad
Usealong withCOOKINGTIMEorSELF
CLEANpadsto setthe ovento start andstop
automaticallyat a timeyou set.
COOKINGTIMEPad
Touchandthentouchthe numberpadsto set the
amount of timeyou want yourfood to cook.The
ovenwill shutoffwhen the cookingtime hasrun
out.
CLEAR/OFFPad
Touchto cancelALLupperovenoperations
exceptthe clock,timer andRangeLockout.
CLOCKPad
Touchbeforesettingthe clock.
Number Pads
Useto setanyfunction requiringnumberssuch
asthe time of dayonthe clock,the timer,the
oventemperature,the internalfood temperature,
the starttime andlengthofoperation for timed
bakingand self-cleaning.
KITCHENTIMERON/OFFPad
Touchto selectthetimer feature.
PROBEPad
Touchwhen usingthe probeto cookfood.
RANGELOCKOUTPad
Touchthe RANGELOCKOUTpad andthen touch
the STARTpad to lock/unlockthesurfaceunits,
oven burnersand control panelso they cannot/
can be activated.
13
Page 14
Usingthe upper oven.
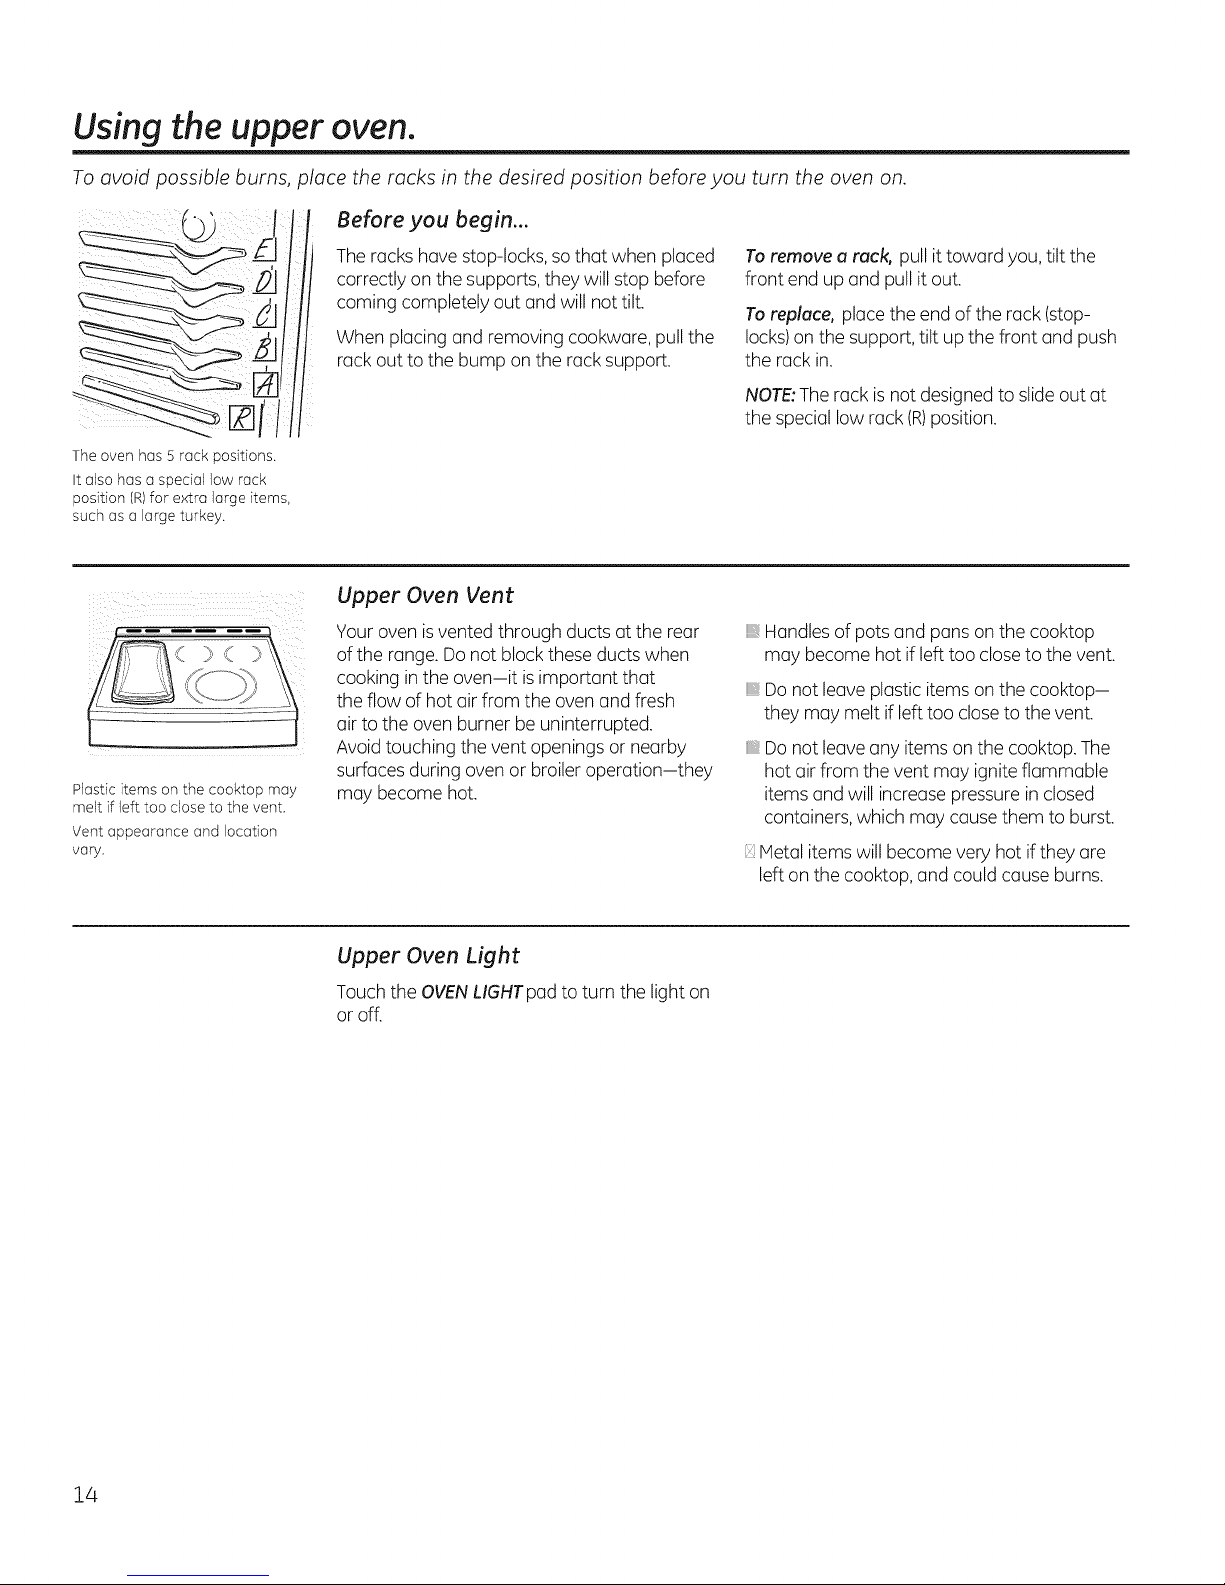
To avoid possible burns, place the racks in the desired position beforeyou turn the oven on.
Before you begin...
Theracks have stop-locks, sothat when placed
correctly on the supports,they will stop before
coming completely out and will not tilt.
When placing and removing cookware,pull the
rack out to the bump on the racksupport.
The oven has 5 rack positions.
It also has a special low rack
position (R)for extra large items,
such as a large turkey.
Upper Oven Vent
Toremove a reck, pull ittoward you,tilt the
front end up and pullit out.
Toreplace, place the end of the rack(stop-
locks)on the support, tilt up the front and push
the rackin.
NOTE:Therack isnot designedto slideout at
the special low rack (R)position.
Plastic items on the cooktop may
melt if left too close to the vent.
Vent appearance and location
vary.
Your oven isvented through ducts at the rear
of the range. Donot block these ducts when
cooking in the oven-it isimportant that
the flow of hot air from the oven and fresh
air to the oven burner be uninterrupted.
Avoidtouching the vent openings or nearby
surfaces during oven or broiler operation-they
may become hot.
Upper Oven Light
Touch the OVENLIGHTpad to turn the light on
or off.
Handles of potsand puns on the cooktop
may become hot if left too close to the vent.
Do not leave plasticitems on the cooktop-
they may melt if left too closeto the vent.
Do not leaveany items on the cooktop. The
hot air from the vent may ignite flammable
items and will increase pressure inclosed
containers, which may cause them to burst.
Metal items will become very hot ifthey are
left on the cooktop, and could cause burns.
14
Page 15
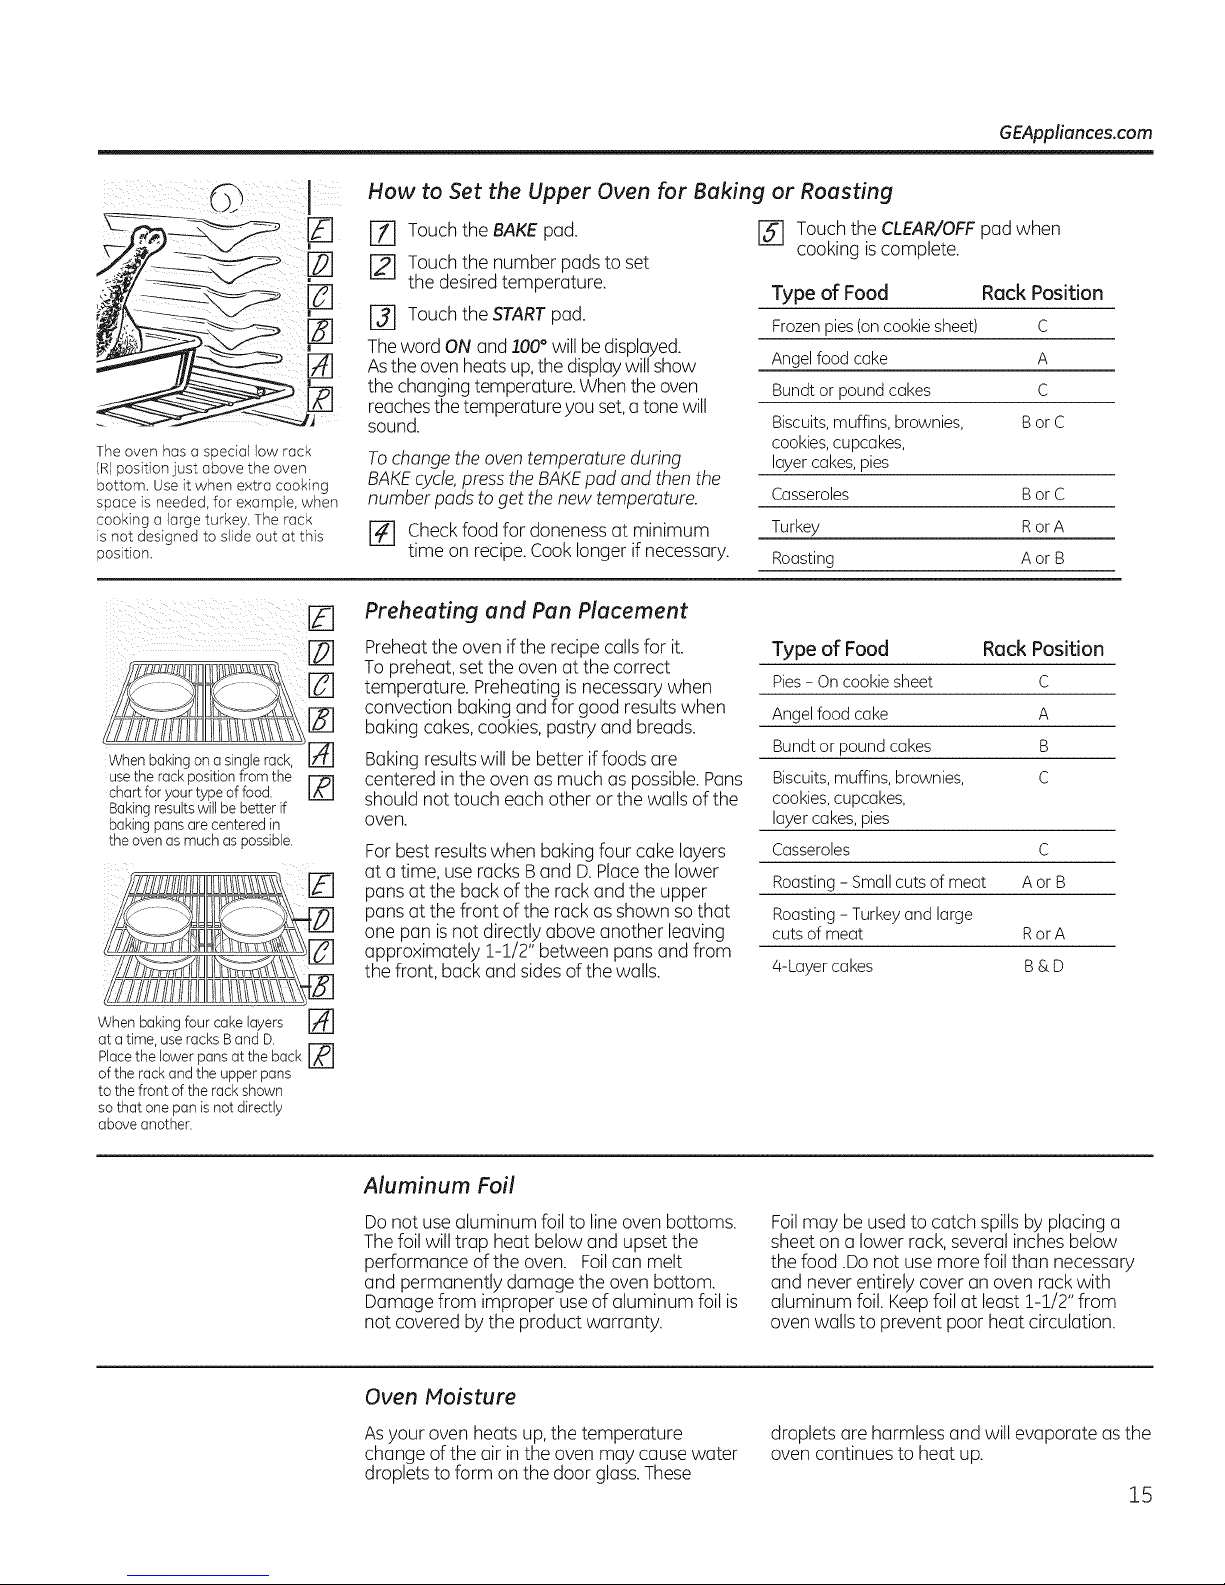
How to Set the Upper Oven for Baking or Roasting
GEAppliances.com
The oven has a special low rack
(R)position just above the oven
bottom. Useit when e×tra cooking
space is needed, for e×ample, when
cooking a large turkey. The rock
is not designed to slide out at this
position.
usethe rack position from the [--hq
chart for your type offood.
Baking resultswill be betterif
baking punsarecentered in
the ovenas muchas possible.
[Z] Touchthe BAKEpod. []
r_ Touchthe number pads to set
the desiredtemperature.
[] Touchthe STARTpad.
Theword ON and 100° willbedisplayed.
Asthe ovenheats up,the displaywillshow
the changing temperature.When the oven
reachesthe temperature you set,a tone will
sound.
To change the oven temperature during
BAKEcycle, press the BAKEpad and then the
number pads to get the new temperature.
[] Checkfood for doneness at minimum
time on recipe.Cooklonger if necessary.
Preheating and Pan Placement
Preheatthe oven ifthe recipe callsfor it.
To preheat, setthe oven at the correct
temperature. Preheatingis necessarywhen
convection baking and for good resultswhen
baking cakes, cookies,pastry and breads.
Baking resultswill be better iffoods are
centered in the ovenas much us possible. Puns
should not touch each other or the walls of the
oven.
For best resultswhen baking four cake layers
at a time, use racks Band D.Placethe lower
pans at the backof the rack and the upper
pans at the front of the rack as shown sothat
one pan isnot directly above another leaving
approximately 1-1/2" between pans and from
the front, backand sidesof the walls.
Touch the CLEAR/OFFpad when
cooking is complete.
Type of Food Rack Position
Frozenpies(oncookiesheet) C
Angelfoodcake A
Bundtorpoundcokes C
Biscuits,muffins,brownies, BorC
cookies,cupcakes,
layercokes,pies
Casseroles BorC
Turkey RorA
Roosting AorB
Type of Food Reck Position
Pies- Oncookiesheet C
Angelfoodcoke A
Bundtorpoundcokes B
Biscuits,muffins,brownies, C
cookies,cupcakes,
layercokes,pies
Casseroles C
Roosting- Smallcutsof meat Aor B
Roosting- Turkeyand large
cutsof meat RorA
4-Layercokes B&D
When baking four cake layers
at a time, use racks B and D.
Placethe lower pans at the back
of the rack and the upper pans
to the front of the rackshown
so that one pan isnot directly
above another.
%
Aluminum Foil
Do not usealuminum foil to line oven bottoms.
Thefoil will trap heat below and upset the
performance of the oven. Foilcan melt
and permanently damage the oven bottom.
Damage from improper useof aluminum foil is
not covered by the product warranty.
Oven Moisture
Asyour oven heats up,the temperature
change ofthe air in the oven may cause water
droplets to form on the door glass.These
Foilmay beused to catch spillsby placing a
sheet on a lower rack, severalinches below
the food .Do not use more foil than necessary
and never entirely cover an oven rack with
aluminum foil. Keepfoil at least !-!/2" from
oven walls to prevent poor heat circulation.
droplets are harmless and will evaporate as the
oven continues to heat up.
15
Page 16
Usingthe upper oven.
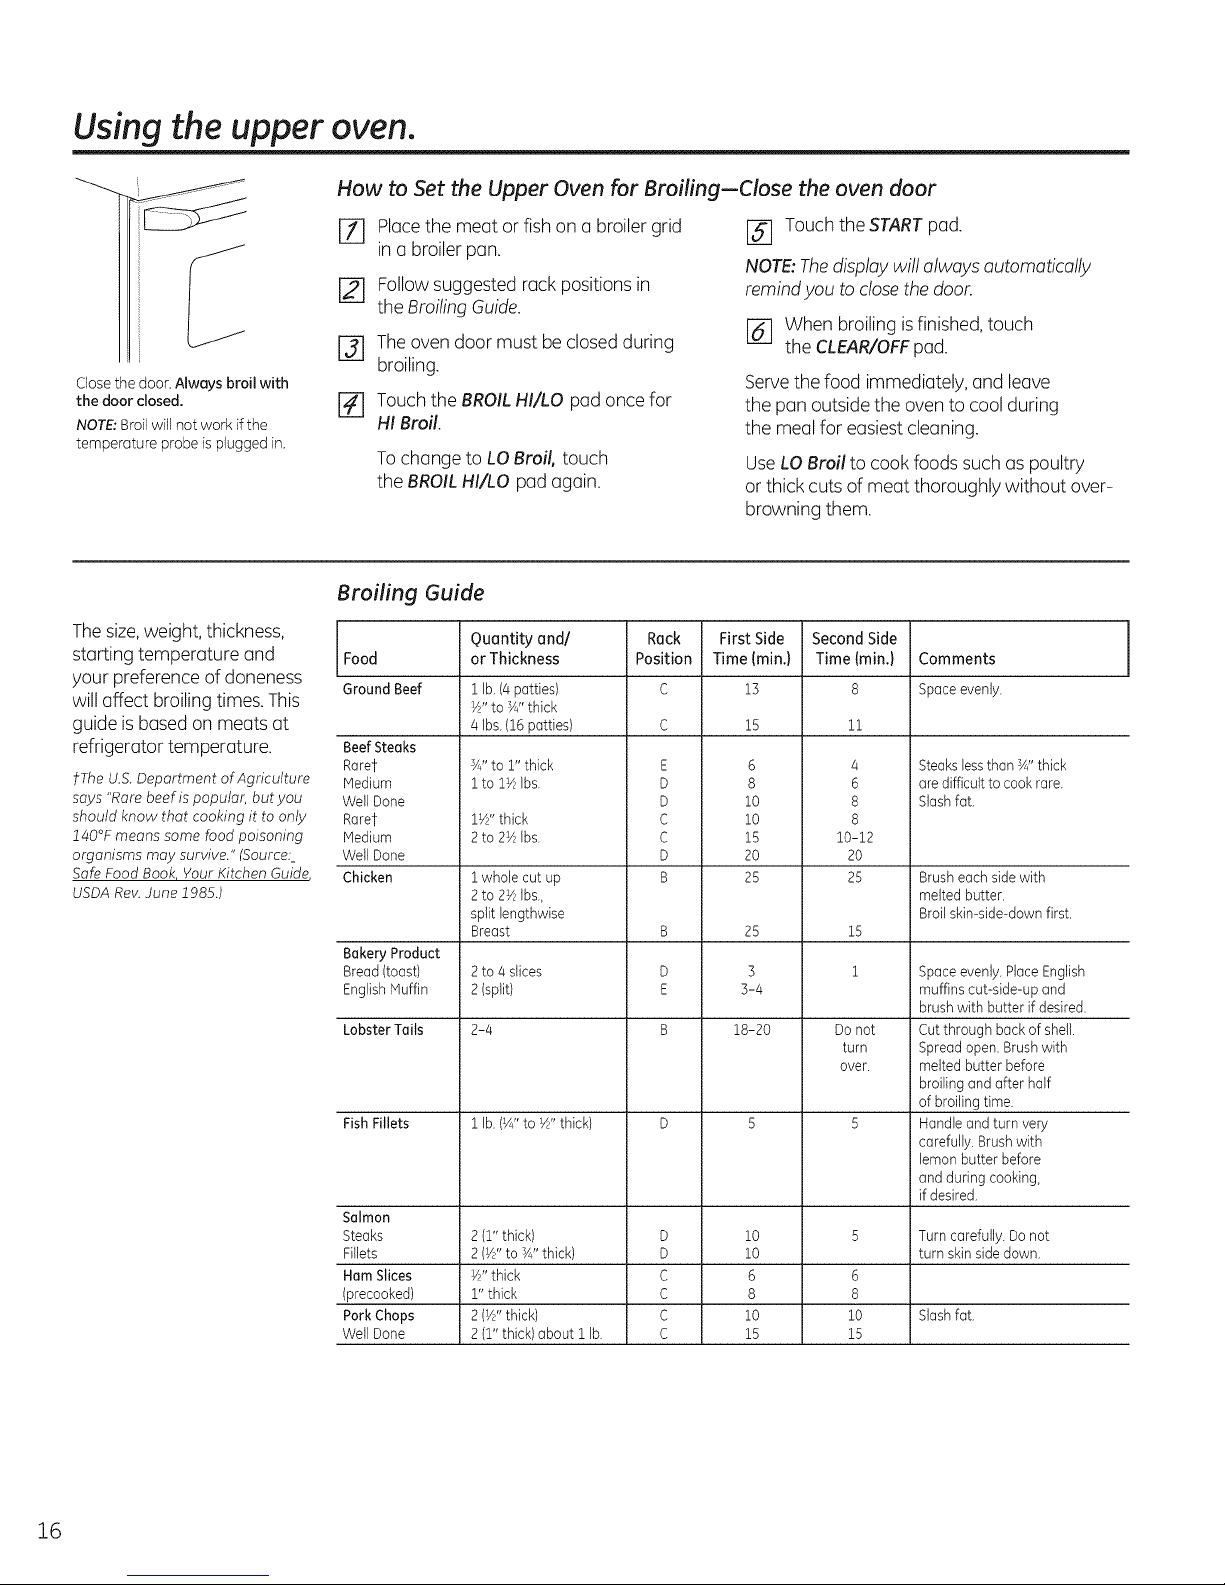
How to Set the Upper Oven for Broiling--Close the oven door
[] Placethe meat orfish on u broilergrid
in ubroiler pun.
[] Followsuggested rack positions in
the BroilingGuide.
[] Theoven door must be closedduring
broiling.
Closethe door, Always broil with
the door closed.
NOTE:Broil will not work if the
temperature probe is plugged in.
[] Touchthe BROILHI/LO pad once for
HIBroil.
To change to LO Broil, touch
the BROIL HI/LO pad again.
Broiling Guide
Thesize,weight,thickness,
starting temperature and Food
your preference of doneness
will affect broiling times.This
Ground Beef
guide is bused onmeats at
refrigerator temperature. Beef Steaks
f The U.S.Department of Agriculture Hedium
says "Rare beef is popular, but you WellDone
should know that cooking it to only Rarer
140°F means some food poisoning Hedium
organisms may survive." (Source:_ WeltDone
Safe Food Book, Your Kitchen Guide, Chicken
USDA Rev.June 1985.)
Rarer
Bakery Product
Bread(toast)
EnglishHuffin
Lobster Tails
Fish Fillets
Salmon
Steaks
Fillets
Ham Slices
(precooked)
Pork Chops
WellDone
Quantity and/
or Thickness
$ lb.(4 patties)
W' to Y#'thick
4Ibs.(16 patties)
sA"to 1" thick
i to l_/zIbs.
1W' thick
2to 2YzIbs.
i whole cut up
2to 2_/ztbs.,
split lengthwise
Breast
2to 4 slices
2(split)
2-4
1 lb.(1/_,,to '//' thick)
2(1" thick)
2(W' to Y#'thick)
W' thick
1" thick
2 (W' thick)
2(1" thick)about 1lb.
Rack
Position
E
D
D
C
C
D
B
B
D
E
B
D
D
C
C
C
C
[] Touchthe STARTpad.
NOTE:Thedisplaywill always automatically
remindyou to closethe door.
[] When broilingisfinished, touch
the CLEAR/OFFpad.
Servethe food immediately, and leave
the pun outside the oven to cool during
the mealfor easiestcleaning.
Use LOBroil to cookfoods suchus poultry
or thick cuts of meat thoroughly without over-
browning them.
First Side
Time(rain.)
13
15
6
8
10
10
15
2O
25
25
3
3-4
18-20
10
10
6
8
10
15
SecondSide
Time (min.)
11
4
6
8
8
10-12
20
25
15
1
Donot
turn
over.
6
8
10
15
Comments
Space evenly.
Steakslessthan _" thick
aredifficultto cook rare.
Slashfat.
Brusheachsidewith
melted butter.
Broilskin-side-downfirst.
Spaceevenly. PlaceEnglish
muffinscut-side-up and
brush with butter if desired.
Cutthrough back of shell.
Spreadopen. Brushwith
melted butter before
broilingand after half
of broilingtime.
Handleand turn very
carefully.Brushwith
lemon butter before
andduring cooking,
if desired.
Turncarefully. Donot
turn skin sidedown.
Slashfat.
16
Page 17
Using the clock and timer. GEAppliances.com
Not all features are on all models.
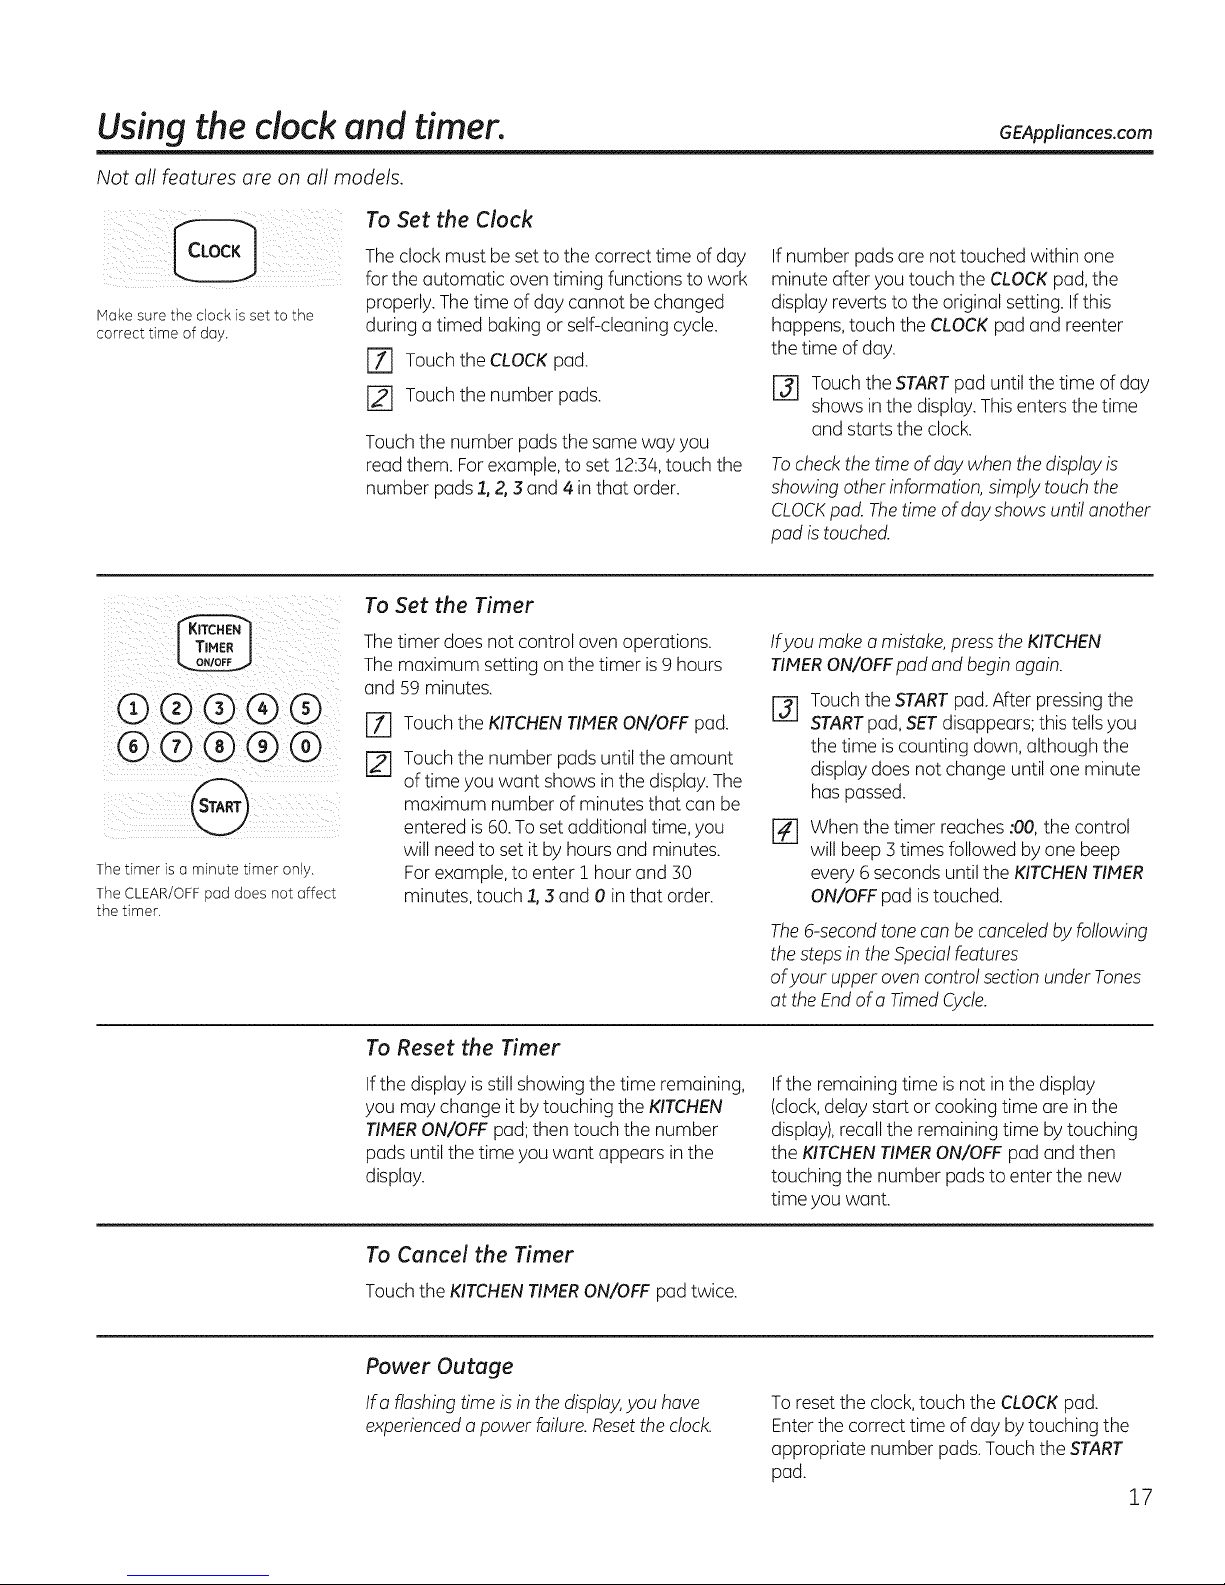
To Set the Clock
Make sure the clock is set to the
correct time of day.
®®®®®
®®®®®
The timer is a minute timer only.
The CLEAR/OFFpad does not affect
the timer.
Theclock must be setto the correct time of day
for the automatic oven timing functions to work
properly.Thetime of day cannot bechanged
during u timed baking or self-cleaning cycle.
[Z] Touch the CLOCKpad.
[] Touch the number pads.
Touch the number padsthe same way you
read them. Forexample, to set 12:34,touch the
number pads1,2,3 and 4 inthat order.
To Set the Timer
Thetimer does not control oven operations.
The maximum setting on the timer is9 hours
and 59 minutes.
Touch the KITCHENTIMERON/OFF pad.
Touch the number pads until the amount
of time you want shows inthe display. The
maximum number of minutes that can be
entered is 60.To setadditional time, you
will needto set it by hours and minutes.
Forexample,to enter 1 hourand 30
minutes, touch 1,3 and 0 inthat order.
If number pads are not touched within one
minute after you touch the CLOCKpad,the
display reverts to the original setting.Ifthis
happens, touch the CLOCKpadand reenter
the time of day.
[] Touch the STARTpad until the time of day
shows in the display. Thisenters the time
and starts the clock.
Tocheckthe time of day when thedisplayis
showing other information, simply touchthe
CLOCKpad. Thetime of dayshows until another
pad is touched.
Ifyou make a mistake,pressthe KITCHEN
TIMERON/OFFpad and beginagain.
Touch the STARTpad. After pressing the
@
STARTpad,SETdisappears;this tellsyou
the time is counting down, although the
display does not change until one minute
has passed.
When the timer reaches :00,the control
%
will beep 3times followed by one beep
every 6seconds until the KITCHENTIMER
ON/OFFpad istouched.
The6-secondtone can becanceledbyfollowing
thestepsin theSpecialfeatures
ofyour upper oven controlsection under Tones
at the Endof a TimedCycle.
To Reset the Timer
Ifthe displayisstill showing the time remaining,
you may change it by touching the KITCHEN
TIMERON/OFF pad; then touch the number
pads untilthe time you want appears inthe
display.
To Cancel the Timer
Touch the KITCHENTIMERON/OFF padtwice.
Power Outage
I1:aflashing time is in the display,you have
experienceda power failure. Resetthe clock.
Ifthe remaining time isnot inthe display
(clock,delay start or cooking time are inthe
display),recall the remaining time by touching
the KITCHENTIMERON/OFF padand then
touching the number pads to enter the new
time you want.
Toreset the clock,touch the CLOCKpad.
Enterthe correct time of day bytouching the
appropriate number pads.Touch the START
pad.
17
Page 18

Usingthe timed baking and
roasting features (upperovenonly).
NOTE: Foods that spoil easily-such as milk, eggs, fish, stuffings, poultry and pork-should not be allowed to sit for more
than 1hour before or after cooking. Room temperature promotes the growth of harmful bacteria. Be sure that the oven
light is off because heat from the bulb will speed harmful bacteria growth.
How to Set an Immediate Start and Automatic Stop
® ® ® ® @
®@ ®@®
® @®@
®®®@@
@®@®@
@
®@®®@
@®®®@
@
®@®®@
@®®®@
Theupper oven will turn on immediately and
cook for aselectedlengthof time. At the end
of the cooking time,the ovenwill turn off
automatically.
EZ] Touch the BAKEpad.
[] Usingthe number pads,enter
the desired temperature.
[] Touchthe COOKINGTINE pad.
NOTE:Ifyour reciperequires preheating,you
may need to add additional time to the length of
the cooking time.
r_ using the number pads,enter
the desired baking time. Theoven
temperature andthe cooking time
that you entered will be displayed.
[] Touchthe STARTpad.
How to Set a Delayed Start and Automatic Stop
Youcan setthe upper ovencontrol to delay-start
the oven,cookfor a specificlength of time and
then turn off automatically.
Make surethe clock showsthe correct time of
day.
Touch the BAKEpad.
%
Usingthe number pads,enter the desired
r21
temperature.
Touch the COOKINGTINE pad.
@
NOTE:Ifyour reciperequires preheating,you
may need to add additional time to the length of
the cooking time.
[] Usingthe number pads,enter the desired
baking time.
rE] Touch the DELAYSTARTpad.
Theword ON and 100° will be displayed.
Thecook time will begin to count down.
Asthe oven heats up,the displaywill show the
changing temperature. When the oven reaches
the temperature you set,3beeps
will sound.
At the end of timed baking,the oven will turn
off.Theend of cycle tone will sound.
Touch the CLEAR/OFFpad to clear
the display.
If you would like to check the times you have
set,touch the DELAYSTARTpadto checkthe
start time you have set ortouch the COOKING
TINE padto checkthe length of cooking time
you have set.
Theovenwill turn on automatically. Theword
ON and 100° will be displayed.The cook time
will begin to count down.
Asthe oven heats up,the displaywill show the
changing temperature. Theoven will cook for
the programmed cooking time and shut off
automatically.
At the end of timed baking,the oven will turn
off.Theend of cycletone will sound.
Touch the CLEAR/OFFpad to clear the display.
@
@
18
[] Usingthe number pads,enter the time of
day you want the oven to turn on and
start cooking.
[-7---]Touch the STARTpad.
NOTE:Anattention tone will sound ifyou are
using timed baking and do not touch the START
pad after entering the bakingtemperature.
Page 19

Using the probe. GEAppliances.com
For many foods, especially roasts and poultry, internal food temperature is the best test for doneness.
The temperature probe takes the guesswork out of roasting by cooking foods to the exact aloneness you want.
Useofprobesotherthan theone providedwith
Itl
The temperature probe has a
skewer-like probe at one end and a
plug at the other end that goes into
the outlet inthe oven.
Usethe handles ofthe probe and plug when
this productmay resultindamageto the probe, lug
inserting and removing them from the food and Pr!bI
outlet.
Toavoid damaging your probe,do not use
tongs to pull onthe cablewhen removing it. Neverleaveyour probe inside the oven
_i_!I
Toavoid breakingthe probe,make sure food during a self-cleaning cycle.
iscompletely defrosted before inserting. Donot storethe probe inthe oven.
Toprevent possibleburns, donot unplug the
probe from the outlet until the oven
has cooled.
After preparing the meat and placing it on
a trivet or on a broiler pan grid,follow these
directions for proper probe placement.
Insertthe probe completely into the meat.
It should not touch the bone,fat or gristle.
Forroasts with no bone, insertthe probe into
the meatiest part of the roast. Forbone-in ham
or lamb, insert the probe intothe center of the
lowest large muscle.
Insertthe probe into the center of dishessuch
as meat loaf or casseroles.
Insertthe probe into the meatiest part of the
inner thigh from below and parallel to the legof
a whole turkey.
.....
®@®@@
@®®®@
®®®@@
®®@®@
@
@
How to Set the Upper Oven For Roasting When Using the Probe
[Z] Insert the probe into the food.
[] Plugthe probe intothe outlet in the oven.
Make sure it'spushed all the way in. Close
the oven door.
r-_ Touch the PROBEpad.
r_ Touch the number pads to set the desired
internal food ormeat temperature.
[-_ Touch the BAKEpad.
[-_ Touch the number pads to setthe desired
oventemperature.
[_] Touch the STARTpad.
Thedisplay will flash if the probeisinserted
into theoutlet andyou have not set aprobe
temperature andtouched theSTARTpad.
After the internal temperature of the food
reaches IO0°F,the changing internal
temperature will beshown inthe display.
When the internal temperature of the food
%
reaches the number you have set,the
probe and the oven turn off and the oven
control signals.To stopthe signal, touch
the CLEAR/OFFpGd.Usehot pads to
remove the probe from the food. Do not
usetongs to pull on it-they might
damage it.
To change the oven temperature during the
Roastcycle,touch the BAKEpad and then the
number padsto setthe new temperature.
Ifthe probe isremoved from the food before
the final temperature is reached,a tone will
sound and the display will flash untilthe
probe is removedfrom the oven.
You can usethe timer eventhough you
cannot usetimed ovenoperations while
usingthe probe.
19
Page 20

Usingthe convectionoven.
Theconvectionovenfan shutsoff whenthe oven door is opened.DONOTleavethedoor openfor longperiodsof time
while using convection cooking.
In a convection oven, a fan
circulates hot air over, under and
around the food. This circulating
hot air is evenly distributed
throughout the oven cavity. As a
result, foods are evenly cooked
and browned-often in less time
than with regular heat.
NOTE:To maximize cooking
evenness, the fan is designed to
rotate in both directions with a
pause in between. This is normal.
Tohelp you understand the difference between
convection bake and roast and traditional bake
and roast, here are some general guidelines.
Convection Bake
Preheat the oven. See Preheating and Pan
Placement in the Using the upper oven
section.
Idealfor foods cooked on multiple racks,
Goodfor largequantities of baked foods,
Good resultswith cookies, biscuits,brownies,
cupcakes,cream puffs,sweet rolls,angel
food cakeand bread.
Theconvection fan circulates the heated
air evenlyover and around the food.
Convection Roast
Goodfor largetender cuts of meat,
uncovered.
Theconvection fan circulates the heated air
evenly over and around the food. Meatand
poultry are browned onall sidesasif they
were cooked on a rotisserie.Heated air will be
circulated over,under and around the food
being roasted. Theheated air seals injuices
quickly for a moist and tender product while,
at the same time, creating a rich golden brown
exterior.
Roastsorpoultry should becooked onrack
position (A).
When you areconvection roasting,it is
important that you usea broiler pan and grid
for bestconvection roasting results.The pan is
usedto catch grease spillsand the grid isused
to prevent greasespatters.
B Placethe rack inrack position(A).
Cookware for Convection Cooking
Beforeusing your convection oven,check
to seeif your cookware leavesroom for air
circulation inthe oven. If you are bakingwith
several pans,leave space between them.
Also, besurethe pansdo not touch each
other or the walls of the oven.
Paper and Plastic
Heat-resistant paper and plastic containers
that are recommended for use in regular
ovens can be usedin convection ovens.
Plasticcookware that is heat-resistant to
temperatures of 400°Fcan also be used,
when oven is below 400°F.
20
Metal and Glass
Anytype of cookware will work inyour
convection oven. However, metal pans
heat the fastest andare recommended for
convection baking.
Darkened ormatte-finished pans will bake
faster than shiny pans.
Glassor ceramic panscook more slowly.
When baking cookies,you will get the best
resultsif you use a flat cookie sheet instead
of a pan with low sides.
Forrecipes likeoven-baked chicken, usea
pan with low sides.Hot air cannot circulate
well around food in a pan with high sides.
Page 21

@@@@@
@®@®@
@
How to Set the Upper Oven for Convection Baking or Roasting
Touchthe CONVECTIONBAKEMULTI/
%
1RACKpad once for multi-rack
convection baking.This mode isusedfor
cooking food items on more than onerack
(i.e.,2,3 or more racks)at the same time in
convection bake. Seethe Multi-Rack
Bakingsection for more information.
Touchthe CONVECTIONBAKEMULTI/1
RACKpad twice for one rackconvection
baking.Thismode is usedfor cooking food
items on only one rack in convection bake.
Touch the CONVECTION ROAST pad for
convection roasting.
Touchthe number pads to set the desired
[]
oventemperature. Rememberto adjust
baking temperature accordingly.Seethe
Adapting Recipessection.
r3] Touchthe STARTpad.
To change the oven temperature, touch the
CONVECTIONBAKEor CONVECTIONROAST
pad and then the number pads to set the new
temperature.
When the oven starts to heat the changing
temperature, starting at IO0°F,will be
displayed.When the oven reaches the
temperature you set,3 beeps will sound.
r_ Touchthe CLEAR/OFFpad when finished.
NOTE:Youwill hear afan whilecooking with
convection.The fan will stop when the door is
opened but the heat will not turn off.
Thefan will not start until the preheat
temperature isreached.
Inconvection bake modes for maximum
cooking evennessthe fan is designedto rotate
in both directions,with apause in between.This
isnormal
NOTE:When convection boring, the oven
temperature will be25°F(14°C)lower than
the set temperature. SeeAuto RecipeTM
Conversion in the Special Features section for
more information. When convection roosting,
oven temperature will not auto convert.
GEAppliances.com
i/7!iTM
When convection baking with only
1 rack, follow the rack positions
recommended in the Using the
Oven section.
Multi-Rack Baking
Because heated air iscirculated evenly
throughout the oven,foods can be bakedwith
excellent resultsusing multiple racks.
Multi-rack baking may increasecook times
slightlyfor some foods but the overall result
istime saved.Cookies,muffins, biscuits,and
other quick breads give very good results with
multi-rack baking.
To cook food on more than one rack in
convection bake, use CONVECTION BAKE
MULTI.
When baking largerfoods on3 racks,place one
rack in the 2nd (A)position, oneon the ath (C)
position and the third rackin the 6th (E)position.
When baking cookies, placethe racks inthe
]rd (B),4th (C)and 5th (D)positions.
21
Page 22

Usingthe convection oven.
How to Set the Upper Oven for Convection Roasting when Using the Probe
For best results when roasting
large turkeys and roasts, we
recommend using the probe
included in the convection oven.
®®®®®
®®®®®
@
®®®@@
®®@®@
@
@
Thedisplay will flashPROBEand the oven
control will signal if the probe isinserted into
the outlet, and you have not set a probe
temperature andtouched the STARTpad.
Placethe rack inthe rack position(A).Insert
%
the probe completelyinto the food.
Plugthe probe into the outlet in the oven.
[]
Hake sure it is pushed allthe way in. Close
the oven door.
[] Touch the CONVECTIONROASTpad.
r_ Touch the number padsto set the desired
oven temperature.
[] Touch the PROBEpad.
r_ Touch the number padsto set
the desired internal food temperature. NOTE:
Tochange the oventemperature during
the Convection Roastcycle,touch the
CONVECTIONROASTpad and then touch
the number pads to setthe new desired
temperature.
[] Touch the STARTpad.
When the oven starts to heat,the word LOwill
be inthe display.
After the internal temperature of the food
reaches 100°F,the changing internal
temperature will be shown inthe display.
When the internal temperature of the
%
food reachesthe number you have set,
the probe and the oven turn off and the
ovencontrol signals.Tostop the signal,
touch the CLEAR/OFFpad, Usehot pads
to remove the probe from the food. Do
not usetongs to pull on it-they might
damage it.
CAUTION: Toprevent possible
burns,donot unplug the probefrom the
oven outlet until the ovenhas cooled.Do
not store the probein theoven.
If the proOeisremoved from thefood before
the final temperature isreached,a tone will
sound and the displaywill flash untilthe
probe is removedfrom the oven.
You will heara fan whilecooking with this
feature.Thefan will stop when the dooris
opened but the heat will not turn o£
Youcan usethe timer eventhough you
cannot use timed ovenoperations while
using theprobe.
22
Page 23

GEAppliances.com
Convection Roasting Guide
Heats Hinutes/Lb. Oven Temp. Internal Temp.
Beef Rib(5to 5 Ibs.) Rarer 20-24 525°F 140°F
Medium 24-28 525°F 160°F
Well 28-52 525°F 170°F
BonelessRib,TopSirloin Rarer 20-24 325°F 140°F
BeefTenderloin Rarer 10-14 525°F 140°F
PotRoast(2i/2to 3 Ibs.)chuck,rump 35-45 300°F 170°F
Pork Bone-in(3to 5Ibs.) 23-27 325°F 170°F
Boneless(3to 5 Ibs.) 23-27 525°F 170°F
PorkChops11/2"to 1"thick) 2chops 30-35 total 325°F 170°F
Hem Canned(3Ibs.fully cooked) 14-18 325°F 140°F
Butt(5Ibs.fully cooked) 14-18 325°F 140°F
Shank(5Ibs.fullycooked) 14-18 325°F 140°F
Lamb Bone-in(3to 5Ibs.) Medium 17-20 325°F 160°F
Boneless13to 5Ibs.) Medium 17-20 325°F 160°F
Seafood Fish,whole13to SIbs.) 30-40 total 400°F
LobsterTails16to 8oz.each) 20-25total 350°F
Poultry WholeChicken121/2to 31/2Ibs.) 24-26 3SO°F 180°-185°F
CornishHensUnstuffed(1to 11/2Ibs.) 50-55 total 550°F 180°-185°F
CornishHensStuffed11to 11/2Ibs.) 55-60 total 3SO°F 180°-185°F
Duckling14to SIbs.) 24-26 325°F 180°-185°F
Turkey,whole*
Unstuffed(10to 16 Ibs.) 8-11 525°F 180°-185°F
Unstuffed(18to 24 Ibs.) 7-10 525°F 180°-185°F
TurkeyBreast14to 6Ibs.) 16-19 325°F 170°F
* Stuffed birds generaffg require 50-45 minutes additional roasting time. Shield legs and breast with foil to prevent
overbrowning and drging of skin.
t TheU.S.Department of Agriculture says "Rare beef is popular, but you should know that cooking it to onlg 140°F
means some food poisoning organisms may survive." (Source:Safe Food Book. Your Kitchen Guide. USDARev.
June 1985.)
Medium 24-28 525°F 160°F
Well 28-32 325°F 170°F
Medium 14-18 325°F 160°F
4 chops 35-40 total 325°F 170°F
6chops 40-45 total 325°F 170°F
Well 20-24 325°F 170°F
Well 20-24 325°F 170°F
23
Page 24

Using the timed convection
baking features (upper oven only).
You will hear a fan while cooking with this feature. The fan will stop when the door is opened but the heat will not
turn off.
NOTE: Foods that spoil easily-such as milk, eggs, fish, stuffings, poultry and pork-should not be allowed to sit for
more than 1 hour before or after cooking. Room temperature promotes the growth of harmful bacteria. Be sure
that the oven light is off because heat from the bulb will speed harmful bacteria growth.
How to Set an Immediate Start and Automatic Stop
®®®®@
@®@®@
®®®®@
@®@®@
®®®@@
®®®®@
@
24
The upper oven will turn on immediately and
cook for a selected length of time. At the end
of the cooking time, the oven will turn off
automatically.
Touch the CONVECTION BAKE MULTI/
[_ 1 RACK pad once for multi-rack convection
baking. This mode is used for cooking food
items on more than one rack (i.e.,2,3 or
more racks) at the same time inconvection
bake. Seethe Multi-Rack Baking section for
more information. Touch the CONVECTION
BAKEMULTI/.1.RACK pad twice for one rack
convection baking. This mode is used for
cooking food items on only one rack in
convection bake.
Touch the CONVECTION ROAST pad
for convection roasting.
[] Touch the number pads to set the desired
oven temperature.
[-_ Touch the COOKING TIME pad.
NOTE:Ifyour recipe requires preheating, you
may need to add additional time to the length of
the cooking time.
[-_ Touch the number pads to set the desired
length of cooking time. The minimum
cooking time you can set is! minute.
The oven temperature that you set and the
cooking time that you entered will be in the
display.
I-5-1 Touch the START pad.
Thedisplay shows the oven temperature that
you set and the cooking time countdown. The
display starts changing once the temperature
reaches 100°F.
[] Atthe end oftimed convection bake the
oven will turn off.Theend of cycletone will
sound.Touch the CLEAR/OFFpad to clear
the display if necessary.
I-z-] Removethe food from the oven.
Remember,foods that areleft inthe oven
continue cooking after the controls are off.
How to Set a Delayed Start and Automatic Stop
You can set the upper oven control to delay-start
the oven, cook for a specific length of time and
then turn off automatically.
Make surethe clock showsthe correct time of
day.
Touch the CONVECTIONBAKEMULTI/1
RACKpad once for multi-rack convection
baking. Thismode isused for cooking food
items on more than one rack(i.e.,2,3 or
more racks)at the same time in
convection bake. Seethe Multi-Rack
Bakingsectionfor more information.
Touch the CONVECTIONBAKEMULTI/1
RACKpad twice for one rack convection
baking. Thismode isused for cooking food
items on only one rack in convection bake.
Touch the CONVECTIONROASTpad for
convection roasting.
Touch the number pads to set the desired
oven temperature.
Touch the COOKING TIME pad.
%
NOTE:Ifyour reciperequires preheating,you
may need to add additional time to the length of
the cooking time.
[] Touchthe number pads to set the desired
cooking time.
[] Touchthe DELAYSTARTpad.
[_ Touchthe number pods to setthe time of
day you wont the oven to turn on and
start cooking.
If you would like to check the times you have
set,touch the DELAYSTARTpadto checkthe
start time you have set ortouch the COOKING
TIME pad to check the length of cooking time
you have set.
JZ] Touch the START pad.
NOTE:An attention tone will sound ifyou are
usingtimed bakingand do not touchtheSTART
pad after enteringthe bakingtemperature.
When the oven turns on at the time of dayyou
have set,the display will show the changing
temperature (startingat 100°F)and the cooking
time countdown.
At the end of timed convection bake the oven
will turn off.Theend of cycletone will sound.
Touch the CLEAR/OFF pad to clear the
%
display if necessary.When baking is
finished,remove the food from the oven.
Remember,eventhough the ovenshuts
off automatically, foods continue cooking
after the controls are off.
Page 25

Special features ofyour upper ovencontrol. GEApp,oncoscom
Your new touch pad control has additional features that you may choose to use.The following are the features and how
you may activate them.
The special feature modes can only be activated while the display is showing the time of day. They remain in the control's
memory until the steps are repeated.
When the display shows your choice, touch the STARTpad. The special features will remain in memory after a power
failure,
12 Hour Shut-Off
With thisfeature,shouldyou forget and leavethe
ovenon,thecontrolwillautomatically turn offthe
ovenafter!2 hoursduringbaking functionsor
after5 hoursduringa broilfunction.
If you wish to turn OFFthis feature, follow the
steps below.
[Z] Touch the BAKEand BROILHI/LO pads at
the same time for 3 secondsuntil the
display shows SF.
F_ Touch the DELAYSTARTpad.The display
will show 12shdn (12 hour shut-off).Touch
the DELAYSTARTpad again and the
display will show no shdn (noshut-off).
F_ Touch the STARTpad to activate the no
shut-off and leavethe control set inthis
special features mode.
Fahrenheit or Celsius Temperature Selection
Your ovencontrol isset to usethe Fahrenheit [] Touch the BROILHI/LO and COOKING
temperature selectionsbut you may change TIMEpads at the same time. Thedisplay
this to use the Celsiusselections, will show F (Fahrenheit).
[Z] Touch the BAKEand BROILHI/LO pads at [-_
the same time for 3 secondsuntil
the display shows SF.
Touch the BROILHI/LO and COOKING
TIMEpadsat the same time again.
Thedisplay will show C (Celsius).
[-_ Touch the START pad.
Tones at the End of a Timed Cycle
At the end of a timed cycle, 3 short beepswill
sound followed by one beepevery 6 seconds
until the CLEAR/OFFpad is touched. This
continual 6-second beep may becanceled.
Tocancel the 6-second beep:
[Z] Touch the BAKEand BROILHI/LO pads at
the same time for 3 secondsuntil
the display shows SF.
[_ Touchthe KITCHENTIMERON/OFF
pad.The display shows CONBEEP
(continual beep).Touch the KITCHEN
TIHERON/OFFpad again.Thedisplay
shows BEEP.(Thiscancelsthe one beep
every 6 seconds.)
[] Touchthe STARTpad.
25
Page 26

Special features ofyour upper ovencontrol.
Range Lockout
Yourcontrol will allowyou to lock out the
surfaceunits,ovenburners and control panel so
they cannot be activated.
To lock/unlock the controls:
rf] Turn all surface units off.
r_ Touch the RANGELOCKOUTpad and
then the STARTpad.
r_ To unlock the control, touch the RANGE
LOCKOUTpad and then the STARTpad.
12 Hour, 24 Hour or Clock Black-Out
When this feature ison and the touch padsare
touched, the control will beep and the display
will show LOC.
Thecontrol lock-out mode affects all
controls. No controls will work when this
feature isactivated.
Theadjustment will be retained in memory
after a power failure.
26
I
Yourcontrol isset to usea !2-hour clock.
If you would prefer to have a 24-hour military
time clock or blackout the clock display,follow
the steps below.
[Z] Touch the BAKEand BROILHI/LO pads at
the same time for 3 secondsuntil the
display shows SF.
r_ Touch the CLOCKpad once.Thedisplay
will show 12hr. Ifthis isthe choice you
want, touch the STARTpad.
Auto Recipe'" Conversion
You can use your favorite recipes in the
convection oven.
When using CONVECTIONBAKE,the oven will
automatically convert the oven temperature
from regular baking to ConvectionBake
temperatures.
Thedisplay will show the actual converted
(reduced)temperature. For example,ifyou
enter a regular recipe temperature of 350°F
(! 77°C)and touch the STARTpad, the display
will show CON and the converted temperature
of 325°F(!63 °C).
NOTE:Thisfeature only converts cooking
temperatures, not cooking times. When
convection roasting, the oven temperature will
not auto convert.
Touch the CLOCKpad againto change to the
24-hour military time clock.Thedisplaywill
show 24 hr. Ifthis isthe choice you want, touch
the STARTpad.
Touch the CLOCKpad againto black out the
clock display.The display will show OFF.Ifthis is
the choice you want, touch the STARTpad.
NOTE: If the clock is in the black-out mode, you
will not be able to use the Delay Start function.
Toturn off this feature:
[Z] Touch the BAKEandBROILHI/LO pads at
the same time for 3 secondsuntil the
display shows SF.
Touch the CONVECTIONBAKEMULTI/1
RACKpad.The display will show
CONON.Touch the CONVECTIONBAKE
MULTI/1RACKpad again.Thedisplaywill
show CONOFF.
Touch the STARTpad.
@
Toturn on thisfeature, repeat steps 1-3 above
but touch the STARTpad when CONON isin
the display.
iiiilDii_,
Usepan size recommended in the recipe.
iiiilDiiii:,
Some package instructions for frozen
casseroles, main dishesor baked goods
have been developed using commercial
convection ovens. Forbest results in
this oven, preheat the oven and use the
temperature for regular baking onthe
package.
Page 27

Using the Sabbath Feature. (onsomemode/s
(Designedfor useon theJewishSabbathand Holidays) GEAppliances.com
The Sabbath feature can be used for baking/roasting in the upper oven only. It cannot be used for convection,
broiling, self-cleaning, or Delay Start cooking.
NOTE: The oven light comes on automatically when the door is opened and goes off when the door is closed.
The bulb may be removed. See the Oven Light Replacement section.
How to Set for Regular Baking/Roasting
@ ® ®®®
® @® ® @
When the display shows D the
oven is set in Sabbath. When the
display show D c the oven is
baking/roasting.
Make sure the clock shows the correct time of day
and the oven is o£
7] Pressand hold both the BAKE and BROILHI/LO
pads,at the same time, until the displayshows
SF.
[] Tap the DELAVSTARTpad until SAbbAtH
appears in the display.
Touch the STARTpad and D will appear in the
J-_ display.
[] Touch the BAKEpad. No signal will be given.
[_] Usingthe number pads,enter the desired
temperature between 170° and 550°.
No signal or temperature will be given.
[] Touch theSTARTpad.
JZ] After a random delayperiod of approximately
30 secondsto ! minute, D C will appear in the
display indicating that the oven is baking/
roasting.IfD C doesn't appear in the display,
start again at Step/4.
Toadjust the oven temperature, touch the BAKEpad,
enter the new temperature usingthe number pads,
and touch the STARTpad.
NOTE:The CLEAR/OFFand COOKING TIME pads are
active during the Sabbath feature.
When the display shows D the
oven is set in Sabbath. When the
display shows D c the oven is
baking/roasting.
How to Set for Timed Baking/Roasting--Immediate Start and Automatic Stop
Make surethe clock shows the correct time of day
and the oven isoff.
Z] Pressand hold both the BAKE and BROILHI/LO
pads,at the same time, until the displayshows []
SF.
Tap the DELAVSTARTpad until SAbbAtH r_
appears in the display.
[-_ Touch theSTARTpad and D will appear inthe
display.
[_ Touch the COOKINGTIME pad.
[] Touch the number pads to set the desired
length of cooking time between ! minute and 9
hours and 99 minutes. Thecooking time that
you entered will be displayed.
Touch the STARTpad.
-7-] Touch the BAKEpad. No signal will be given.
How to Exit the Sabbath Feature
7] Touch the CLEAR/OFFpad.
[-_ If the oven iscooking, wait for a random delay
period of approximately 30 seconds
to ! minute, until only D is in the display.
Usingthe number pads,enter the desired
temperature. No signal or temperature will
be given.
Touch the STARTpad.
After a random delay period of approximately
50 secondsto I minute, D C will appear in the
display indicating that the ovenis baking/
roasting. IfD C doesn'tappear in the display,
start again at Step7.
Toadjust the oven temperature, touch the BAKEpad,
enter the new temperature usingthe number pads,
and touch the STARTpad.
When cooking is finished, the displaywill change
from D C to D and 0:00 will appear, indicating that
the oven hasturned OFFbut is stillset in Sabbath.
Removethe cooked food.
12 shdn indicatesthat the oven will
automatically turn off after 12 hours.
no shdn indicates that the oven will not
automatically turn off.
[] Pressand hold both the BAKE and BROILHI/LO
pads,at the same time, until the displayshows
SF.
Tap the DELAVSTARTpad until 12shdn
or no shdn appears inthe display.
[_ Touch theSTARTpad.
NOTE:Ifapower outage occurred while the oven was
in Sabbath, the oven will automatically turn
off and stay off even when the power returns.
Theovencontrol must bereset. 27
Page 28

Adjust the upper oven thermostat--Do it yourself.!
You may find that your new oven cooks differently than the one it replaced. Useyour new oven for a few weeks to
become more familiar with it. If you still think your new oven is too hot or too cold, you can adjust the thermostat
yourself.
Do not use thermometers, such as those found in grocery stores, to check the temperature setting of your oven.
These thermometers may vary 20-40 degrees.
NOTE: This adjustment will not affect the broiling or the self-cleaning temperatures. The adjustment will be retained
in memory after a power failure.
To Adjust the Thermostat
When you have made the adjustment,
touch the STARTpadto go backto the
time of day display. Useyour oven asyou
would normally.
NOTE:Thethermostat adjustmentfor Baking
will also affect ConvectionBaking or Convection
Roasting.
q@
®@q)@@
@@@(2)@
@
[] Touchthe BAKEand BROILHI/LO pads at []
the same time for 3 secondsuntil the
display shows SF.
[] Touchthe BAKE pad.Atwo digit number
shows in the display.
Touch BAKEonce to decrease (-)the oven
temperature, or twice to increase(+).
Theoven temperature can be adjusted up
F41
as much as 35°For down as much as
35°F.Touch the number padsthe same
way you read them. Forexample, to
change the oven temperature 15°F,touch
i and 5.
The type of margarine will affect baking performance!
Most recipes for baking have been developed using high-fat products such as butter or margarine (80% fat). If you
decrease the fat, the recipe may not give the same results as with a higher fat product.
Recipe failure can result if cakes, pies, pastries, cookies or candies are made with low-fat spreads. The lower the fat
content of a spread product, the more noticeable these differences become.
Federalstandards require products labeled "margarine" to contain at least80% fat byweight. Low-fat spreads,on the other hand,
contain lessfat and more water. The high moisture content of these spreadsaffects the texture and flavor of baked goods. For best
resultswith your old favorite recipes,usemargarine, butter orstick spreads containing at least70% vegetable oil.
28
Page 29

Using the lower oven drawer. GEApplionces.com
The lower oven drawer may be used to bake foods using the same times and temperatures as a standard oven.
Foods ideal for baking in the lower oven drawer include pizza, frozen foods, casseroles, biscuits, rolls and many desserts.
To Use the Lower Oven Drawer
Push in and turn the lower oven
drawer knob to any desired
setting.
ry] Pushin andturn the lower oven drawer
knob to any desiredsetting.
r_ Allowthe lower ovendrawer to preheat.
TheONsignal light islocated on the upper
right sideof the knob and glowswhen the
knob isin the ONposition.It remainsONuntil
the knob ismoved to the OFFposition.
The"Heating"signal light is located below
the ONsignal light and glows when the
heating elementsare active.Preheatis
complete after the "Heating" signal has
turned offfor thefirst time with each use.
NOTES:
Always usethe included drawer rackwhen
Thelower oven drawer cannot be used
during a self-clean cycleof the upperoven.
Donot put food, foil orcookware directly on
the bottom of the lower oven drawer.Always
usethe included drawer rack.
iii}iDiiii;,
Iffoods require a cover,use onlyfoil or lids
able to withstand baking temperatures.
Donot useplastic.
Maximum height of foods that can be placed
in the lower oven drawer is4".
Donot put liquid or water in the lower oven
drawer.
Neverplace plastics,paper, canned foods
or combustible material in the lower oven
drawer.
usingthe Lower OvenDrawer.
The lower oven drawer useslessenergy than the upper oven.
Allow the following approximate times for preheating:
Desired Lower Preheet
Oven Tempereture Time
WARM 10 minutes
350°F 20 minutes
425°F 30 minutes
Adjust the lower oven thermostat--Do it yourself!
You may find that your new oven cooks differently than the one it replaced. Useyour new oven for a few weeks to
become more familiar with it. Ifyou still think your new oven is too hot or too cold, you can adjust the thermostat
yourself.
Do not use thermometers, such as those found in grocery stores, to check the temperature setting of your oven. These
thermometers may vary 20-40 degrees.
NOTE:This adjustment will not affect the broiling temperatures.
Back of Lower Oven Knob
(Appearance may vary.)
Pullthe OVENCONTROLknob off the
range and look at the backside.Tomake
an adjustment, loosen(approximately one
turn), but do not completely remove,the
two screws onthe back of the knob.
With the back of the knobfacing you, hold
the outer edgeof the knobwith one hand
and turn the front of the knob with the
other hand.
Toraisethe oventemperature, move the
top screwtoward the right. You'llhear a
clickfor each notch you move the knob.
To lower the temperature, move the top
screw toward the left.
Eachclick will change the oven temperature
approximately 10°F.(Rangeis_+60°F.from
the arrow.)Wesuggest that you make the
adjustment one clickfrom the original setting
and check oven performance beforemaking
any additional adjustments.
r_ After the adjustment ismade, retighten
screws so they are snug, but be careful not
to overtighten.
r_ Reinstallknob on range and check
performance.
29
Page 30

Usingthe self-cleaningupper oven.
The oven door must be closed and all controls set correctly for the cycle to work properly.
Before a Clean Cycle
Wipe up heavy soil on the oven
bottom.
@@@®@
®@®@@
Forthe first self-cleancycle, we recommend
venting your kitchenwith an open window or
using a ventilation fan or hood.
Removethe racks, any broiler pan,broiler grid,
probe, all cookware and any aluminum foil from
the oven.
Theoven rackscan be self-cleaned,but they
will darken, losetheir lusterand become hard
to slide.
Soilon the front frame of the range and
outside the gasket on the door will need to be
cleaned by hand. Cleanthese areas with hot
water, soap-filled scouring pads or cleansers
such as Soft Scrub1 Rinsewell with clean
water and dry.
How to Set the Upper Oven for Cleaning
Turnoff allsurface burners.
NOTE:The surface burners will not
function during the self-clean cycle.
[] Touchthe SELFCLEANpad.
r_ using the number pads,enter the desired
clean time, if a time other than 4 hours is
needed.
Cleancycletime isnormally 4 hours.Youcan
change the cleantime to any time between
3 hours and 5 hours,depending on how dirty
your oven is.
r_ Touchthe STARTpad.
NOTE:Thesurfaceunitsshould be turned
off during the self-cleancycle.
Thedoor and control will lock automatically.
Thedisplay will showthe clean time remaining.
It will not be possibleto open the oven door
until the temperature drops below the lock
temperature and the LOCKEDDOOR light
goes off.
Do not clean the gasket. Thefiberglass material
of the oven door gasket cannot withstand
abrasion. It isessentialfor the gasket to remain
intact. Ifyou notice it becoming worn orfrayed,
replace it.
Wipe up any heavy spilloverson the oven
bottom.
Make surethe oven light bulb cover is inplace
and the oven light isoff.
IMPORTANT:The health of some birds is
extremely sensitiveto the fumes given off
during the self-cleaning cycle of any range.
Move birds to another well-ventilated room.
NOTE:Usecaution when opening the upper
oven after the self-clean cycle has ended. The
oven may still be hot.
[] When the LOCKEDDOORlight is off,the
door will unlock automatically.
Thewords LOCKDOORwill flash and the
oven control will signal if you setthe clean
cycleand forget to closethe oven door.
Tostop a clean cycle,touch the CLEAR/OFF
pad.When the LOCKEDDOOR light goes
off indicating the oven has cooled below
the lockingtemperature, you may open the
door.
Donot usethe lower oven drawer during a
self-cleancycle.
Thewords ERRand TURNSURFACE
BURNERSOFFwill flashand the control will
signal ifyou set the clean cycleand forget to
turn the surface burners off.
Theoven shuts off automatically when the
clean cycle iscomplete.
30
Page 31

Usingthe self-cleaningupper oven.
The oven door must be closed and all controls set correctly for the cycle to work properly.
How to Delay the Start of Cleaning
LPUSH/STAR:
@
@@@®@
,
Hake sure the clock shows the correct time of
day.
[-71 Touchthe RANGELOCKOUTpad and then
the STARTpadto turn itoff. Seethe Range
Lockoutsection.
NOTE: The surface units must be turned off
prior to the self-clean start time.
[] Touch the SELFCLEAN pad.
[_ Using the number pads, enter the desired
clean time.
[_ Touch the DELAYSTARTpad.Theearliest
start time you can set will appear inthe
display.
[_ Usingthe number pads, enter the time of
day you want the clean cycle to start.
[] Touchthe STARTpad.
Thedoor locksautomatically. Thedisplay will
show the start time. Itwill not bepossible to
open the oven door untilthe temperature
drops below the locktemperature and the
LOCKEDDOORlight goes off.
Theoven shuts off automatically when the
clean cycle iscomplete.
JZ] When the LOCKEDDOORlight isoff, the
door will unlock automatically.
Thewords LOCKDOORwill flash and the
oven control will signal if you set the clean
cycle and forget to closethe oven door.
Tostop a clean cycle,touch the CLEAR/OFF
pad.When the LOCKEDDOOR light goes
off indicating the oven has cooled below the
locking temperature, you may open the door.
GEAppliances.com
After a Clean Cycle
You may notice some white ash in the oven.
Wipe it up with adamp cloth after the oven
cools.
If white spots remain, remove them with a
soap-filled scouring padand rinsethoroughly
with a vinegar and water mixture.
Thesedepositsare usually a salt residuethat
cannot be removed by the clean cycle.
If the oven is not clean after one clean cycle,
repeat the cycle.
iiiB,
You cannot setthe oven for cooking until the
oven iscool enough for the door to unlock.
While the oven isself-cleaning, you can
touch the CLOCKpad to displaythe time of
day. Toreturn to the clean countdown, touch
the COOKING TIME pad.
If the racks become hard to slide,apply a
small amount of vegetable oil or cooking oil
to a paper towel and wipe the edgesof the
oven rackswith the paper towel.
31
Page 32

Care and cleaning of the range,
Be sure electrical power is off and all surfaces are cool before cleaning any part of the range.
A WARNING: fyourrangeisremovedforcleaning,servicingoranyreason,
be sure the anti-tip device is reengaged properly when the range is replaced. Failure
to take this precaution could result in tipping of the range and cause injury.
Lodge ® Cast Iron Griddle
rT] Rinsewith hot water (do not use soap),and
dry thoroughly.
r_ Beforecooking, prepare the surface with
cooking spray or vegetable oil.
r_ After cooking,clean the griddle with a stiff
brush and hot water. Usingsoap isnot
recommended, and harshdetergents
should never be used.
r-_ Towel dry immediately and apply alight
coat of cooking sprayor vegetable oil
while the griddleis stillwarm.
Storeina cool,dryplace.
@
Do not wash in a dishwasher.
@
Griddle Precautions:
If something has spilled underthe griddle,
it should be cleaned up assoon as possible
to prevent "baked on" food soil.Seethe
Cleaningthe glass cooktop section.
Do not allow grease to accumulate under
the griddleas it can be afire hazard. Clean
under the griddle as soon as itis cool.Seethe
Cleaningthe glass cooktop section.
Do not placeyour griddle in the microwave
oven,
Always turn off all surface units before
removing the griddle. Usecaution when
handling a hot griddle.
32
Stainless Steel Surfaces
Protecting
Stainlesssteelhasa reputationfor withstanding
toughabusefor years.Thisisakeyreasonwhy it is
sopopularwiththe foodserviceindustry.
However,stainlesssteelappliances can
have surfaceimperfections,discolorationsor
blemishesthat consumerswith acritical eye
notice andfind unattractive inthe home.These
discolorationsor blemishescan be caused
by something assimple asleavingfingerprint
smudgeson the stainlesssteelsurface overnight.
Forstainless steelappliances
where blemishesare prone to show
on the surface,we recommend
APPLYINGACOATOFCERAMABRYTE®Stainless
SteelCleaningPolish&Conditioner (purchased
separately-follow instructions).
Thiswillhelpyouto maintainthe brightnessand
appearanceofyour stainlesssteelappliance.
Cleaning
Do not use a steel wool pad; it will scratch the
surface.
Inorder to avoid any discolorations and/or
greasestains,we recommend cleaning and
removing any spills,spots and greasefrom
the range after use.
It isimportant to usea soft cloth or paper
towel every time the range iscleaned to
avoid any scratches.
Readcarefully the instructions on the back
of the Brightener(includedwith your range) for
better results.
Cleaning Instructions:
r-f] Wash using warm, soapy water:
wet soft cloth or paper towel (avoid using
excessivewater).
Wipethe surface in the direction of the
grain (following the steel lines).
Rinseandwring out a soft cloth orpaper
towel and dry the range.
r_ Apply a degreaser that doesnot contain
sodium hydroxide orStainless Steel
Cleaner(follow instructions).
r_ Apply cerama Bryte®StainlessSteel
Brightener(follow instructions).
[] Repeatsteps2-4as manytimesasneeded.
Follow these instructions for any StainlessSteel
surface on your range.
DONOTUSEthe following products for cleaning
the Cooktop or StainlessSteelparts:
, CausticLye(Sodium Hydroxide)or cleaners
containing this chemical
, Hard or SteelWool Pads
Abrasive Materials or Chemicals
Toinquire about purchasing stainless steel
appliance cleaner or polish,or to find the
location of a dealernearest you, please callour
toll-free number:
National Parts Center 800.626.2002(U.S.)
800.661.1616 (Canada)
GEAppliances.corn (U.S.)
www.GEAppliances.ca (Canada)
Page 33

Thegasketisdesigned with agap
at the bottom to allowfor proper air
circulation.
Donot rubor clean the door gasket-it
has an extremely low resistanceto
abrasion.
Ifyou noticethe gasketbecoming
worn,frayed ordamaged in anyway
or if it hasbecomedisplacedon the
door,youshould haveit replaced.
Cleaning the Oven Door
Toclean the inside of the door:
iiiiiiiiiiii
Becausethe area insidethe gasket is
cleaned during the self-cleancycle,you do
not needto clean this by hand.
iiiiiiiiii
Thearea outsidethe gasket and the door
liner can be cleaned with a soap-filled
or plastic scouring pad,hot water and
detergent. Rinsewellwith a vinegar and
water solution.
To clean the outside of the door'.
Usesoap andwater to thoroughly clean the
top, sidesand front of the ovendoor. Rinse
well. Youmay also usea glass cleanerto
Lift-Off Oven Door
GEAppliances.com
clean the glass onthe outside of the door. Do
not letwater drip into the vent openings.
Ifany stainon the door vent trim is
persistent,use a soft abrasivecleaner and a
sponge-scrubber for bestresults.
Spillageof marinades,fruitjuices, tomato
sauces and basting materials containing
acids may cause discoloration and should be
wiped upimmediately. When surface iscool,
clean and rinse.
Donot use ovencleaners,cleaning powders
or harsh abrasives on the outside of the
door.
Hing_
Pull hinge locks down to unlock.
Removal position
The door is very heavv. Be careful when
removing and lifting the door.
Donot riftthe door by the handle.
To remove the door'.
r_ Fullyopen the door.
[] Pullthe hinge locksdown toward the door
frame, to the unlocked position.A tool,
such asa small flat-blade screwdriver,
may be required.
r_ Firmlygrasp both sidesof the doorat the
top.
r_ close door to the door removal position,
which ishalfway between the broilstop
position and fully closed.
[] Liftdoor upand out until the hinge arm is
clearof the slot.
To replace the door'.
[Z] Firmly grasp both sides of the door at the
top.
r_ With the door Bottom Hingearm
at the same edgeof
angle as the slot
removal
\
position,seat the
indentation of the
hinge arm into the
bottom edge ofthe
hinge slot.Thenotch in
the hingearm must be fullyseated into
the bottom of the slot.
Fullyopenthe door. Ifthe doorwill not
@
fully open, the indentation is not seated
correctly inthe bottom edgeof the slot.
Pushthe hinge locks upagainst the front
%
frame of the oven cavity to the locked
position.
Hin(
lock
Hint
arm
Push hinge locks up to lock.
Oven Heating Elements
Do not clean the bake element or the broil
element. Any soil will burn off when the
elements are heated.
Toclean the oven floor, gently lift the bake
element. Cleanwith warm, soapywater.
Closethe ovendoor.
@
33
Page 34

Care and cleaning of the range.
Oven Bottom
The oven bottom has a porcelain-enamel
finish. To make cleaning easier, protect the
oven bottom from excessive spillovers by
placing a cookie sheet on the rack below the
rack you are cooking on.This isparticularly
important when baking a fruit pie or other
foods with a high acid content. Hot fruit
fillings or other foods that are highly acidic
(such as tomatoes, sauerkraut and sauces
with vinegar or lemon juice) may cause pitting
and damage to the porcelain-enamel surface
and should be wiped up immediately.
Removable Lower Oven Drawer
NOTE:Beforeperforming any adjustments,
cleaningor service,disconnectthe range
electricalpower supply at the household
distribution panel by removing the fuseor
switching off thecircuit breaker.Makesure
the drawer heating elementis cooL
Host cleaning can bedone with the drawer in
place. However,the drawer may beremoved if
further cleaning isneeded.Usesoap and warm
water to thoroughly clean.
To remove the drawer'.
We don't recommend using aluminum foil on
the oven bottom. It can affect airflow if the
holes are blocked and it can concentrate heat
at the bottom of the oven, resulting in poor
baking performance.
Toclean up spillovers, use soap and water, an
abrasive cleaner or soap-filled scouring pad.
Rinsewell to remove any soap before self-
cleaning.
Toreplace the drawer'.
[Z] Placethe left drawer railaround the inner
left rail guide and slideit in slightly to hook
it.
Placethe right drawer rail around the
inner right rail guideand slide it inslightly
to hook it.
@
Slidethe drawer allthe way in.
E_ Pullthe drawer straight out until it stops.
[] Pressthe tabs onboth sides in,while
pulling the drawer forward and free.
Removable Lower Oven Drawer Pan
NOTE: Before performing any adjustments,
cleaning or service, disconnect the range
electrical power supply at the household
distribution panel by removing the fuse or
switching off the circuit breaker. Make sure
the drawer heating element is cool.
NOTE:Allow lower ovendrawer to cool before
removing pan.
NOTE: Wipespillspromptly aftereach use.
Glass Window
Tocleantheoutsideglassfinish,useaglass
cleaner.Rinseand polishwith adry cloth.
Never place,use or self-clean the lower oven
drawer pan inthe upper oven.
Loweroven drawer hasa removable pan for
easycleaning.Cleanwith hot,soapy water
and a sponge or dish towel. Drywith a clean
cloth.An oven cleaner,such as Easy-Off®,
may also be used.Besureto follow the
directions on the oven cleaner. Replacethe
pan inthe lower oven drawer.
34
Page 35

Vent appearance and location
vary.
GEAppliances.com
Oven Air Vents
Never blockthe vents (airopenings)of the
range.They provide the air inlet and outlet that
are necessaryfor the range to operate properly.
Air openings arelocated at the rear of the
cooktop, at the top and bottom of the oven
door, and at the bottom of the range,under the
lower oven drawer.
Oven Control Ponel
Surface unit knob
Lock out the touch pads before cleaning.
Seethe RangeLockout information inthe
Specialfeatures of your upper ovencontrol
section in this manual.
Cleanup splatterswith a damp cloth.
You mayalso usea glasscleaner.
Control Panel and Knobs
It'sa good idea to wipe the control panel after
each use ofthe oven. Cleanwith mild soap and
water or vinegar and water, rinsewith clean
water and polishdry with a soft cloth.
Do not use abrasive cleansers,strong liquid
cleaners,plastic scouring pads oroven cleaners
on the control panel-they will damage the
finish.A 50/50 solutionof vinegar and hot water
works well.
Removeheavier soilwith warm, soapywater.
Do not use abrasivesof any kind.
Unlockthe touch pads after cleaning.
Thecontrol knobsmay beremoved for easier
cleaning.
Make surethe knobsare inthe OFFpositions
and pull them straight off the stemsfor
cleaning.
Theknobs can bewashed with soapand water.
Make surethe insidesof the knobsare dry
before replacing.
NOTES:
Do not wash the knobs in an automatic
dishwasher.
Donot useany chemical or abrasive
substancesto clean theknobs-they could be
permanently damaged.
Replacethe knobsin the OFF position to ensure
proper placement.
Metal partscan be cleanedwith soap and water.
Donot usesteel wool,abrasives,ammonia, acids
or commercial ovencleaners.Drywith asoft
cloth.
NOTE:Thelower oven drawer control knob
is not interchangeable with the surface unit
knobs. Be sure to reinstall the lower oven drawer
knob to the original location. The lower oven
drawer knob may be identified by the increasing
numbers from "WM"to "450."
35
Page 36

Care and cleaning of the range,
Oven Racks and Drawer Racks
Wirecoverholder.
Cleanthe racks with an abrasive cleanser.
Theoven racks may becleaned in the
self-cleaning oven. However,the racks
will darken incolor, losetheir luster and
become hard to slide ifcleaned during
the self-cleaning cycle.
Oven Light Replacement
CAUTION: Beforereplacingyour
oven light bulb,disconnectthe electricalpower
to the range at the main fuseor circuit breaker
panel.Besure to letthe light cover and bulb cool
completely.
Theoven light bulb iscoveredwith a removable
glass coverthat is held in place with a
bail-shaped wire. Removethe oven door, if
desired,to reach covereasily.
To remove:
Holda hand under the cover so it doesn't
%
fall when released.With fingers of the
same hand, firmly push back the wire
cover holder. Liftoff the cover.
To make the racks slidemore easily,apply
a small amount of vegetable oilor cooking
oil to a paper towel and wipe the edges
of the oven racks with the paper towel.
Toreplace cover:
Placeit intothe groove of the light
%
receptacle. Pullthe wire forward to
the center of the cover until it snapsinto
place.When in place,the wire holdsthe
cover firmly. Be certainthe wire isin the
depression inthe center of the cover.
Connect electrical power to the range.
Do not remove any screws to remove
the cover.
[] Donot touch hot bulb with a wet cloth.
Replacebulbwith a/-tO-watthousehold
appliance bulb.
36
Page 37

Cleaning the glass cooktop. GEAppliances.com
Normal Daily Use Cleaning
ONLYuse CERAMABRYTE®Ceramic Cooktop
Cleaneron the glasscooktop. Other creams
may not be as effective.
r_ Shakethe cleaning cream well.Apply
a few drops of CERAMABRYTE®Ceramic
Cooktop Cleanerdirectlyto the cooktop.
I
I
Clean your cooktop after
each spill. Use CERAMA
BRYTE® Ceramic Cooktop
Cleaner.
Use a CERAMABRYTE®Cleaning
Pad for Ceramic Cooktops.
Tomaintain and protect the surface of your
glass cooktop,follow thesesteps:
[Z] Before using the cooktop for the first time,
clean it with CERAMABRVTE®Ceramic
Cooktop Cleaner.Thishelps protect the
top and makes cleanup easier.
[] Dailyuse of CERAMABRYTE®Ceramic
Cooktop Cleanerwill help keep
the cooktop looking new.
Burned-On Residue
A CAUTION: OAMAG toyour
glass surface may occur ifyou use scrub
pads other than those recommended.
r-f] Allow the cooktop to cool.
r2] spread a few drops of CERAiVlABRVTE®
CeramicCooktop Cleaneron the entire
burned residue area.
Using the included CERAMABRYTE®
[]
Cleaning Padfor Ceramic Cooktops,rub
the residue area, applying pressure as
needed.
r_ use a paper towel or CERAMABRYTE®
Cleaning Padfor Ceramic Cooktops
to clean the entire cooktop surface.
r_ use a dry cloth or paper towel
to remove all cleaning residue.
No need to rinse.
NOTE: It is very important that you DO NOT
heat the cooktop until it has been cleaned
thoroughly.
If any residue remains, repeat
%
the steps listed above as needed.
For additional protection, after all
@
residue has been removed, polish
the entire surface with CERAiVlABRYTE®
CeramicCooktop Cleaner
and a papertowel.
Heavy, Burned-On Residue
Allow the cooktop to cool.
F71
Use a single-edge razor blade scraper
at approximately a 45 ° angle against
the glass surface and scrape the soil. It
will be necessary to apply pressure to
the razor scraper in order to remove the
The CERAMABRYTE®Ceramic
Cooktop Scraper and all
recommended supplies are
available through our Parts
Center. See instructions under "To
Order Parts" section on next page.
NOTE: Do not use a dull or nicked
blade.
residue.
After scraping with the razor scraper,
@
spread afew drops of CERAIVlABRYTE®
CeramicCooktop Cleaneron the entire
burned residue area. Use the CERAIVlA
BRYTE®CleaningPad to remove any
remaining residue.
For additional protection, after all
%
residue has been removed, polish
the entire surface with CERAiVlABRYTE®
CeramicCooktop Cleaner
and a paper towel.
37
Page 38

Cleaning the glass cooktop.
Metal Marks and Scratches
Be careful not to slide pots and pans
F71
across your cooktop. It will leave metal
markings on the cooktop surface.
These marks are removable using
the CERAMABRYTE®Ceramic Cooktop
Cleanerwith the CERAMABRYTE®
Cleaning Padfor Ceramic Cooktops.
Cooktop Seal
To cleon the cooktop seal around the edges
of the glass, lay a wet cloth on it for a few
minutes, then wipe cleon with nonabrasive
cleaners.
[] If pots with a thin overlay of aluminum
or copper are allowed to boil dry, the
overlay may leave black discoloration
on the cooktop. This should be removed
immediately
before heating again or the
discoloration may be permanent.
CAUTION: Carefullycheck
the bottom of pans for roughness that would
scratch the cooktop.
Glass surface--potential for permanent damage.
Our testing shows that
if you ere cooking high
sugar mixtures such us
jelly or fudge and have
e spillover, it can cause
permanent damage to
the glass surface unless
the spillover is
immediately removed.
Damage from Sugary Spills and Melted Plastic
Turn off all surface units. Remove hot
%
pans.
Wearing an oven mitt:
o. Use a single-edge razor blade
scraper (CERAMABRYTE®Ceramic
Cooktop Scraper) to move the spill to
a cool area on the cooktop.
b. Remove the spill with paper towels.
To Order Parts
To order CERAMABRYTE®Ceramic Cooktop
Cleanerand the cooktop scraper, please call
our toll-free number:
National Parts Center .... 800.626.2002
CERAt4ABRYTE®Ceramic
Cooktop Cleaner .......... # WX!OXSO0
CERAMABRYTE®Ceromic
Cooktop Scraper ......... # WX!OX0302
Kit ........................ # WB64X5027
(Kit includes cream and cooktop scraper)
CERAMABRYTE®Cleaning Pads for Ceramic
Cooktops ................ # WX!OX350
I-_ Any remaining spillover should be left
until the surface of the cooktop has
cooled.
[] Don't use the surface units again until
all of the residue has been completely
removed.
NOTE:If pitting or indentation in the glass
surface has already occurred, the cooktop
glass will have to be replaced. In this case,
service will be necessary.
38
Page 39

stallatio
I
I s
structio
i
_ Questions? Call 800.GE.CARES (800.432.2737) or visit our Website at: GEAppliances.com ]
Free-Standing
Electric Renges
BEFORE YOU BEGIN
Read these instructions completely and carefully.
.IMPORTANT - Savetheseinstructions
for local inspector's use.
" IMPORTANT - Observe all governing
codes and ordinances.
. Note to Installer- Be sure to leave these
instructions with the Consumer.
, Note to Consumer - Keep these instructions for
future reference.
, Skilllevel- Installation of this appliance requires
basic mechanical skills.
, Completion time- 1to 3 hours
, Proper installation is the responsibility
of the installer.
• Product failure due to improper installation is not
covered under the Warranty.
WARNING - Thisappliancemust be
properlygrounded.
FOR YOUR SAFETY:
Be sure your appliance is properly installed
and grounded by a qualified technician.
Make surethe cabinets and wall coverings around
the rangecanwithstand the temperatures(up to 200°F)
generated by the range.
AWARNING!
ANTI-TIP DEVICE
•All ranges can tip.
• BURNS or other SERIOUS
INJURIES can result.
• INSTALLand CHECKthe
ANTI-TIP bracket following
the instructions supplied
with the bracket.
FOR YOUR SAFETY:
A WARNING - Beforebeginning the
installation, switch power off at service panel and lock
the service disconnecting means to prevent power
from being switched on accidentally. When the service
disconnecting means cannot be locked, securely
fasten a prominent warning device, such as a tag,
to the service panel.
All rough-in and spacing dimensions must be met for
safe use of your range. Electricity to the range can be
disconnected at the outlet without moving the range
if the outlet is in the preferred location (remove lower
drawer).
To reduce the risk of burns or fire when reaching over
hot surface elements, cabinet storage space above
the cooktop should be avoided. If cabinet storage
space is to be provided above the cooktop, the risk
can be reduced by installing a range hood that sticks
out at least 5" beyond the front of the cabinets.
Cabinets installed above a cooktop must be no deeper
than 13".
Toreduce the risk of tipping the range, the range must
be secured by a properly installed anti-tip bracket. See
installation instructions shipped with the bracket for
complete details before attempting to install.
To check if the bracket is installed and engaged properly,
carefully tip the range forward. The bracket should stop
the range within 4 inches. If it does not, the bracket must
be reinstalled. If the range ispulled from the wall for any
reason, always repeat this procedure to verify the range
is properly secured by the anti-tip bracket.
For free-standing or slide-in ranges, never completely
remove the leveling legs or the range will not be secured
to the anti-tip device properly.
If you did not receive an anti-tip bracket with your
purchase, call 1.800.626.8774 to receive one at no cost
(in Canada, call 1.800.561.3344). For installation
instructions of the bracket, visit GEAppliances.com
(in Canada, GEAppliances.ca).
39
Page 40

Installation Instructions
PREPARETO INSTALL THE RANGE
MATERIALS YOU
TinSnips LagBolts
IFor Anti-Tip Bracket Mounted on Concrete Floors Only)
(UL-Approved 40 AMP)
/4-Wire Cord OR 3-Wire Cord Squeeze Connector
/4'Long /4'Long Installations Only)
MAY NEED
Anchor Sleeves
(For Conduit
TOOLS YOU WILL NEED
Drill with 1/8" Bit
Adjustable Wrench
Pliers
Safety Glasses
Tape Measure
Pencil
PREPARE THE OPENING
Allow 1½" spacing from the range to adjacent
vertical walls above the cooktop surface.
Allow 30" minimum clearance between the
surface units and the bottom of unprotected
wood or metal top cabinet, and 15" minimum
between the countertop and adjacent cabinet
bottom.
EXCEPTION:Installation of a listed microwave
oven or cooking appliance over the cooktop
shall conform to the installation instructions
packed with that appliance.
If cabinet storage is installed, reduce the risk by
installing a range hood that projects horizontally
a min. of 5" beyond the bottom of the cabinets.
lake sure the wall covering, countertops and
cabinets around the range can withstand heat
generated by the range, oven or cooktop up
to 200°F.
'1
I I I /- Hood than the
/ .__ J_ ....... width of the
_ _i j_T_L.J _Min. range
so" ls"_ _ _ -
Iqin. Iqin.-7 <_v ....
I _X ......:- -->
_- / - _'/./_he outlet box
" / _/J_ within e""" ' ither shaded
Wall __
Not less
1/4" Nut Driver Level
Phillips Screwdriver
Flat-Blade Screwdriver
PARTS INCLUDED
Anti-Tip Bracket Kit
r_ REMOVE SHIPPING MATERIALS
Remove packaging materials. Failure to
remove packaging materials could result
in damage to the appliance.
7½" ,_
Install the
outlet box
on either
side of the CL
Flooring under the range
Your range, like many other household items,
is heavy and can settle into soft floor coverings
such as cushioned vinyl or carpeting.
When moving the range on this type of flooring,
it should be installed on a 1/4" thick sheet
of plywood (or similar material) as follows:
When the floor covering ends at the front
of the range, the area that the range will rest
on should be built up with plywood to the same
level or higher than the floor covering. This will
allow the range to be moved for cleaning or
servicing.
40
Page 41

Installation Instructions
ELECTRICAL CONNECTIONS
ELECTRICAL REQUIREMENTS
A CAUTION: Forpersonal safety, do
not use an extension cord with this appliance.
Remove house fuse or open circuit breaker before
beginning installation.
This appliance must be supplied with the proper
voltage and frequency, and connected to an
individual properly grounded branch circuit,
protected by a circuit breaker or fuse having
amperage as specified on the rating plate. The
rating plate is located behind the oven drawer
on the oven frame.
Location of
model rating
plate
We recommend you have the electrical wiring
and hookup of your range connected by a qualified
electrician. After installation, have the electrician
show you where your main range disconnect
is located.
Check with your local utilities for electrical codes
which apply in your area. Failure to wire your oven
according to governing codes could result in a
hazardous condition. If there are no local codes,
your range must be wired and fused to meet
the requirements of the National Electrical Code,
ANSI/NFPA No. 70--Latest Edition. You can get
a copy by writing:
National Fire Protection Association
Batterymarch Park
Quincy, HA 02269
ALL NEW CONSTRUCTIONS,
MOBILE HOMES AND
INSTALLATIONS WHERE
LOCAL CODES DO NOT ALLOW
GROUNDING THROUGH
NEUTRAL
Use only a 3-conductor or a 4-conductor UL-listed
range cord. These cords may be provided with ring
terminals on wire and a strain relief device.
A range cord rated at 40 amps with 125/250
minimum volt range is required. A 50-amp range
cord is not recommended but if used, it should
be marked for use with nominal 13A'' diameter
connection openings. Care should be taken
to center the cable and strain relief within
the knockout hole to keep the edge from
damaging the cable.
o Because range terminals are not accessible
after range is in position, flexible service conduit
or cord must be used.
NOTE: If conduit is being used, go to Step 3D and
then to Step 6 or 7.
o On some models, a filter capacitor may be
connected between the black and white leads
on the junction block.
Effective January I, 1996, the National Electrical
Code requires that new construction (not existing)
utilize a 4-conductor connection to an electric
range.
When installing an electric range in new
construction, follow Steps 3 and 5 for 8-wire
connection.
You must use a 3-wire, single-phase A.C. 208Y/120
Volt or 2/40/120 Volt, 60 Hertz electrical system. If
you connect to aluminum wiring, properly installed
connectors approved for use with aluminum wiring
must be used.
If the electrical service provided does not meet
the above specifications, have a licensed electrician
install an approved outlet.
41
Page 42

Installation Instructions
_] POWER CORD AND STRAIN RELIEF
INSTALLATION
Remove the wire cover (on the lower back
[]
of the range) by removing two (2) screws using
a 2/4" nut driver.
Do not discard these screws.
-_ ...... _Z- .........................
2 screws to
remove wire
cover
Retaining
tab
E1
For power cord installations only
(see the next step if using conduit), assemble
the strain relief in the hole. Insert the power
cord through the strain relief and tighten.
Allow enough slack to easily attach the cord
terminals to the terminal block. If tabs are
present at the end of the winged strain relief,
they can be removed for better fit.
NOTE: Do not install the power cord
without a strain relief. The strain relief
bracket should be installed before
reinstalling the rear range wiring cover.
Terminal block
Back of range
Wire cover
Remove the knockout ring (lSA") located
B]
on bracket directly below the terminal block.
To remove the knockout, use a pair of pliers
to bend the knockout ring away from
the bracket and twist until ring is removed.
Terminal block
J (appearance may
vary)
Knockout ring
in bracket
,o
Knockout ring
removed
Strain relief
Power cord Bracket
Skip to Step 4 or 5.
El
For conduit installations only, purchase a
squeeze connector matching the diameter of
your conduit and assemble it inthe hole. Insert
the conduit through the squeeze connector and
tighten. Allow enough slack to easily attach the
wires to the terminal block.
NOTE: Do not install the conduit without a
squeeze connector. The squeeze connector
should be installed before reinstalling the rear
range wiring cover.
Squeeze
connector
Conduit
\
_"- Terminal
block
Bracket
Skip to Step 6 or 7.
42
Page 43

Installation Instructions
ELECTRICAL CONNECTIONS (CONT.)
3-WIRE POWER CORD iNSTALLATiON
WARNING: The neutral or ground
wire of the power cord must be connected
to the neutral terminal located in the center
of the terminal block. The power leads must
be connected to the lower left and the lower
right terminals of the terminal block.
Remove the 3 lower terminal screws from
[]
the terminal block. Insert the 3 terminal screws
through each power cord terminal ring and
into the lower terminals of the terminal block.
Be certain that the center wire (white/neutral)
is connected to the center lower position of
the terminal block. Tighten screws securely
into the terminal block.
DO NOT remove the ground strap
connection.
!
block
____(appearance
may vary)
Ground plate
OUl
Neutral
terminal
Ground
strap
E_ 4-WIRE POWER CORD INSTALLATION
,A
WARNING:The neutral wire of the supply
circuit must be connected to the neutral
terminal located in the lower center of the
terminal block. The power leads must be
connected to the lower left and the lower right
terminals of the terminal block. The 4th
grounding lead must be connected to the frame
of the range with the ground plate and the
ground screw.
Remove the 3 lower terminal screws from the
terminal block. Remove the ground screw and
ground plate and retain them.
Cut and discard the ground strap.
DO NOT DISCARDANY SCREWS.
Insert the one ground screw into the power cord
ground wire terminal ring,through the ground
plate and into the frame of the range.
Insert the 3 terminal screws (removed earlier)
r-63
through each power cord terminal ring and into
the lower terminals of the terminal block. Be
certain that the center wire (white/neutral)is
connected to the center lower position of the
terminal block. Tighten screws securely into the
terminal block.
Before /A und strap
_4/----J
0
Power cord--------_
r_ Skip to step 8 and proceed with
the installation.
_rc_inalf _
Neutral
Ground strdp terminal
After
block
screw
r_ Skipto step 8 and proceed with the installation.
43
Neutral
terminal
Ground plate
(grounding
to ra_e)
Page 44

Installation Instructions
[]_] 3-WIRE CONDUIT INSTALLATION
Loosen the 3 lower terminal screws from
[]
the terminal block. Insert the center bare wire
(white/neutral) tip through the bottom center
terminal block opening. On certain models,
the wire will need to be inserted through
the ground strap opening and then into the
bottom center block opening. Insert the two side
bare wire tips into the lower left and the lower
right terminal block openings. Tighten the screws
until the wire is firmly secure (approximately
20 inch-lbsj.
NOTE: ALUMINUM WIRING:
Aluminum building wire may be used but it
must be rated for the correct amperage and
voltage to make connection. Connect wires
according to this Step 6 or Step 7 depending
on number of wires.
r_ 4-WIRE CONDUIT INSTALLATION
Loosen the three lower terminal screws from
the terminal block. Remove the ground screw
and ground plate and retain them. Cut and
discard the ground strap. DO NOT DISCARD
ANY SCREWS.
Insert the ground bare wire tip between the range
frame and the ground plate (removed earlier) and
secure it in place with the ground screw (removed
earlier). Insert the bare wire (white/neutral) tip
through the bottom center of the terminal block
opening. Insert the two side bare wire tips into
the lower left and the lower right terminal block
openings. Tighten the screws until the wire is firmly
secure (approximately 20 inch-lbs.).
Before "S
Terminal_l;l_l_ _
block t_
Ground strap
After
!_X_u_ strap
terminal
°r1
Wire used, location and enclosure of splices,
etc., must conform to good wiring practices
and local codes.
r_ Skip to step 8 and proceed with the
installation.
block Ground plate
(grounding
Wire ti to range)
screw
Bracket
Wire used, location and enclosure of splices,
etc., must conform to good wiring practices
and local codes.
r_ Proceed to step 8.
44
Page 45

Installation Instructions
INSTALL THE RANGE
REPLACE THE WIRE COVER
Bq
Replace the wire cover on the range back by
sliding its right edge under the retaining tab
and replacing the two screws removed earlier.
Make sure that no wires are pinched between the
cover and the range back.
2 screws
to replace
wire cover
| LEVEL THE RANGE
Install the oven racks in the oven and position
[]
the range where it will be installed.
Check for levelness by
placing a spirit level or a
cup, partially filled with Spiritlevel
water, on one of the oven
racks. If using a spirit level,
take two readings-with
the level placed diagonally
first in one direction and then the other.
E1 The rear leveling legs must be adjusted prior
to moving the range into position. They can
be adjusted from the bottom at the back
of the range.
\
ANTI-TIP DEVICE INSTALLATION
An Anti-Tip bracket is supplied with instructions
for installation in a variety of locations. The
instructions include all necessary information
to complete the installation. Read the Safety
Instructions and the instructions that fit your
situation before beginning installation.
Attachment to Wall or Floor
JScrew must ente_
__Jwood or concrete
Back of range
Bracket
Screw must enter wood
Wall Sill Plate
WARNING:
. Range must be secured with an approved Anti-Tip
device.
, Unless properly installed, the range could be tipped
by you or a child standing, sitting or leaning on an
open door.
. After installing the Anti-Tip device, verify that it is
in place by carefully attempting to tilt the range
forward.
, This range has been designed to meet all recognized
industry tip standards for all normal conditions.
, The use of this device does not preclude tipping
of the range when not properly installed.
, Ifthe Anti-Tip device supplied with the range does
not fit this application, use the universal Anti-Tip
device WB02K10254.
Adjust from
the bottom
back of range
drawer models)
(warming X
El
El
El
45
e , _ ® e
i_,:,_ _e _--_ _ 1range
i_ .j_ ,Leg ii°#j
__ rlevele r ',.1
--_-_range
Back of range
Use an open-end or adjustable wrench to
adjust the leveling legs until the range is level.
Replace the drawer or panel.
After the range is level, slide the range away
from the wall so that the Anti-Tip device can be
installed.
Lc_wer/
J
Page 46

Installation Instructions
IT_ FINAL INSTALLATION CHECKLIST
. Check to make sure the circuit breaker is closed
(RESET)or the circuit fuses are replaced.
, Be sure power is in service to the building.
, Note (on some models): If the clock flashes
"bAd" and then "LinE" with a loud tone, the
neutral connection to the range is not wired
correctly. Check the terminal block connections
and/or house wiring to correct.
. Check to be sure that all packing materials
and tape have been removed. This will include
tape on metal panel under control knobs
(if applicable), adhesive tape, wire ties, cardboard
and protective plastic. Failure to remove these
materials could result in damage to the appliance
once the appliance has been turned on and
surfaces have heated.
. Check to make sure that the rear leveling leg
is fully inserted into the Anti-Tip bracket and
that the bracket is securely installed.
OPERATION CHECKLIST
Turn on one of the surface units to observe that
the element glows within 60 seconds. Turn the
unit off when glow is detected. If the glow is not
detected within the time limit, recheck the range
wiring connections. If change is required, retest
again. If no change is required, have building
wiring checked for proper connections and
voltage.
Check to make sure the Clock (on models
so equipped) display is energized. If a series
of horizontal red lines appear in the display,
disconnect power immediately. Recheck the
range wiring connections. If change is made
to connections, retest again. If no change is
required, have building wiring checked for proper
connections and voltage. It is recommended that
the clock be changed if the red lines appear.
Be sure all range controls are in the OFF position
before leaving the range.
46
Page 47

Troubleshooting tips. GEAppliances.com
Possible Causes
Surface units will not
maintain a rolling boil
or cooking is not
fast enough
Surface units donot
work properly
Scratches [may appear
as cracks) oncooktop
glass surface
Areas of discoloration Food spillovers not cleaned • See the Cleaning the glass cooktop section.
on the cooktop before next use.
Improper cookware
being used.
Cooktop controls
improperly set.
Afuse in your home may be . Replace the fuse or reset the circuit breaker.
blown or the circuit breaker
tripped.
Incorrect cleaning
methods being used.
Cookware with rough bottoms
being used or coarse particles
(salt or sand) were between
the cookware and the surface
of the cooktop.
Cookware has been slid
across the cooktop surface.
What To Do
Use pans which are flat and match the diameter
of the surface unit selected.
Checkto seethe correct control is setfor the surface
unityou are using.
Scratches arenot removable.Tiny scratches will become
lessvisiblein time as a resultof cleaning.
Toavoid scratches, usethe recommended cleaning
procedures. Make surebottoms of cookware areclean
before use,and use cookware with smooth bottoms.
Hot surface on a model . This is normal. The surface may appear discolored
with a light colored glass when it is hot. This is temporary and will disappear
cooktop, as the glass cools.
Plastic melted to Hot cooktop came into _ Seethe Glass surface potential for permanent damage
the surface contact with plastic placed section in the Cleaning the glass cooktop section.
on the hot cooktop.
Pitting (or indentation) Hot sugar mixture spilled _ Call a qualified technician for replacement.
of the cooktop on the cooktop.
Frequent cycling Improper cookware , Useonly flat cookware to minimize cycling.
off and on of being used.
surface units
Control signals after You forgot to enter _ Press the BAKE pad and desired temperature
entering cooking time a bake temperature or the SELFCLEANpad and desired clean time.
or delay start or cleaning time.
_ake Oven controls improperly set. • See the Using the upper oven section,
or roast properly
Rack position is incorrect • See the Using the upper oven section.
OrlncorrecttheraCkcookwareiSnot level.or • See the Using the upper oven section.
cookware of improper
size being used.
Oven thermostat needs . See the Adjust the oven thermostat-Do ityourselfi
adjustment, section.
!'Close Door!' scrolls
in the display when
BROILis Set
The display will always
automatically remind you to
close the door.
This is a normal reminder to close the door when
broiling.
47
Page 48

Troubleshooting tips.
Possible Causes What To Do
Food d_s not Oven controls improperly set. . Make sure you touch the BROIL HI/LO pad.
broil properly'
in the upper oven Oven door not closed. • See the Using the upper oven section.
Improper rock position • See the Broiling Guide.
being used.
Food being cooked in • For best results, use a pan designed for broiling.
a hot pan. lake sure it is cool.
Cookware not suited • For best results, use a pan designed for broiling.
for broiling.
Oven bottom not securely . See the Installation Instructions.
seated in position.
Upper oven temperature Oven thermostat . See the Adjust the oven thermostat Do ityourselfi
too hot or too cold needs adjustment, section.
Clock and timer Plug on range is not completely . Hake sure electrical plug is plugged into a live,
do not work inserted in the electrical outlet, properly grounded outlet.
A fuse in your home may be • Replace the fuse or reset the circuit breaker.
blown or the circuit breaker
tripped.
Oven controls improperly set. . See the Using the clock and timer section.
Upper oven light Light bulb is loose or defective. . Tighten or replace the bulb.
does not work
Upper oven will not The oven temperature is too . Allow the range to cool to room temperature and
self-cleon high to set a self-cleon operation, reset the controls.
"Crackling" or This is the sound of the . This is normal.
"popping" sound metal heating and cooling
Excessive smoking Excessive soil. . Touch the CLEAR/OFF pad. Open the windows to rid the
Oven door will not open Oven too hot. . Allow the oven to cool below locking temperature.
after o cleon cycle
Oven not cleon ofter Oven controls not properly set. • See the Using the self-cleaning upper oven section,
o cleon cycle Oven was heavily soiled. . Clean up heavy spillovers before starting the clean cycle.
"LOCK DOOR" flashes The self-clean cycle has been • Close the oven door.
in the display selected but the door is not closed.
Plug on range is not completely . lake sure electrical plug is plugged into a live,
inserted in the electrical outlet, properly grounded outlet.
Oven controls improperly set. . See the Using the self-cleaning upper oven section.
during both the cooking
and cleaning functions.
room of smoke. Wait until the LOCKED DOOR light goes off.
Wipe up the excess soil and reset the clean cycle.
Heavily soiled ovens may need to self-clean again or
for u longer period of time.
LOCKED DOORlight The oven door is locked . Touch the CLEAR/OFF pad. Allow the oven to cool.
is on when you wont because the temperature
to cook inside the oven has not
dropped below the locking
48
temperature.
Page 49

GEAppliances.com
Possible Causes What To Do
"F--"and a number or You have a function error code. . Touch the CLEAR/OFFpad. Allow the oven to cool for
letter flash in the display one hour. Putthe oven back into operation.
If the function code repeats. . Disconnectall power to the range for 5minutes
and then reconnect power. Ifthe function error code
repeats,call for service.
"Probe" appears in This is reminding you to enter . Entera probetemperature.
the display a probe temperature after
plugging in the probe.
Display goes blank A fuse in your home may be • Replace the fuse or reset the circuit breaker.
tripped,blown or the circuit breaker
The clock is in the . See the Special features ofyour upper oven control section.
black-out mode.
Display flashes Power failure. . Reset the clock.
Unable to get the Oven control pads were . TheBAKEand BROILHI/LO pads must be touched at
display to show "SF" not pressed properly, the sametime and held for 3 seconds.
Power outege__ Power outage or surge. . Resetthe clock.Ifthe oven was in use,you must reset
clock flushes it by touching the CLEAR/OFFpad,setting the clock
and resetting any cooking function.
s, B " as ,1 " _,
urnmg or only This is normal ina new oven . Tospeedthe process,set a self-clean cycle for a
odor emitting from and will disappear in time. minimum of 3hours. Seethe Usingtheself-cleaning
the vent upper oven section.
Strong odor An odor from the insulation . Thisistemporary.
around the inside of the oven
is normal for the first few times
the oven is used.
LOCappears in The Range Lockout feature . Besurethe surface unit controls areturned OFF.
the display is activated. Turnthis feature offto usethe range.
Seethe RangeLockout section.
Fan noise The convection fan may turn . This is normal. To maximize cooking evenness,
on and off automatically, the fan is designed to operate in both directions
with a pause in between.
Convection fan Preheat temperature . Fanwill start automatically oncethe preheat
not working not reached, temperature isreached.
Drawer does not slide Thedrawer is out of alignment. • Fullyextend the drawer and push it all the way in.
smoothly or drugs Seethe Coreandcleaning of the range section.
Drawer is overloaded or load . Reduceweight. Redistributedrawer contents.
is unbalanced.
Lower oven drawer A fuse in your home may be • Replacethe fuseor resetthe circuit breaker.
will not work blown or the circuit breaker tripped.
The upper oven is self-cleaning. • Wait for the self-clean cycle to finishand the oven
to cool.
Controls improperly set. . Seethe Lower oven drawer section.
Excessivecondensation Liquid in drawer. • Removeliquid.
in the drawer
Uncovered foods. . Cover food with lidor aluminum foil.
Temperature setting too high. . Reduce temperature setting.
Food dries out in the Moisture escaping. • Cover food with lidor aluminum foil.
lower oven drawer
Oven drawer not fully closed. . Pushdrawer in until latch engages. /49
Page 50

Notes.
50
Page 51

Pleaseplacein envelopeand mail to:
Veuillezmettredans uneenveloppeetenvoyez_ :
OWHERSHIPREGISTRATIOH
P.O, BOX1780
MISSISSAUGA,OHTARJO
L4Y4G1
(FORCAHADIAHCOHSUMERSOHLY)
51
Page 52

T=
Pleaseregisteryourproducttoenableustocontactyou Veuillezenregis_erv_e produitaflndenouspermetb'ede
in the remote event a safety notice is issued for this product communiquer avec vous sijamais un avis de s6curit6 concemant
and to allow for efficient communicalJon under theterms ce produit 6tait 6mis et de communiquer facilement avec vous en
of your warrant_; should the need arise, vertu devotre garan_e, si le besoin sen fait serrdr.
REGISTERON-LINE: wvvvv.geappliances.ca MAILTO: RO. BOX 1780, MISSISSAUGA
ENREGISTREMENTSURINTERNET,_: vwvvv.electromenaqersqe.ca POSTER,_: ONTARIO,L4YdG1
For Canadian
Customers
Pour les
Consommateurs
Canadiens
[][] NISS/NLLE.MR'/M[][] Ms.MRS'/MME'FIRSTNAME/PRI_NOM LASTNAME/NOM
STREETNO/ NoRUE STREETNAME/RUE
CCI
CITY/VlLLE
ZI
<I
t.Lll
Zl
I
AREACODE/ IND.REG.[TELEPHONE LE-MAIL
F-:
DIDYOUPURCHASEA SERVICECONTRACTFORTHISAPPLIANCE?
AVEZ-VOUSACHETEUNCONTRATDESERVICEPOURCETAPPAREIL?
Zl
NAME OFSELLINGDEALER/ NOMDUMARCHAND
Y/A M D/J CORRESPONDENCE [] ENGUSH
INSTALLA]IONDATE/DATED'INSTALLATIONJ
[] Ido notwishtoreceiveanypromotionaloffersregardingthisproduct.
[] Jened6sirepasrecevoird'offrespromotionnellesconcemantceproduit.
CORRESPONDANCE [] FRAN_AIS SERIAL / S¢:RIE
APT.NO/APR/ RR#
PROVINCE POSTALCODE/ POSTAL
YES/OUI El IFYES/ SIOUI: EXPIRATION
NO/NON []
MODEL/MODI_LE
Y/A M D/J
52
Page 53

Accessories. GEApplJances.com
Looking For Something More?
You can find these accessories and many more at GEAppliances.com (U.S.) or
www.GEAppliances.ca (Canada), or call 800.626.2002 (U.S.) or 800.661.1616 (Canada)
(during normal business hours). Have your model number ready.
i¸ q
i_:__iiiiZZZZZZZZZZZZZZ
Oven Racks
Light Bulbs
Broiler Pan Oven Elements
Knobs Cleaner
Cleaning Pads Scraper
Tired of discolored racks? Wishing you had extra-heaw-duty oven racks?
GE'sinnovative, self-cleanable porcelain-coated oven racks!
Visit GEAppliances.com (U.S.)or www.GEAppliances.ca (Canada)
NOW AVAILABLE for your range:
,, Heavy Duty
,, Durable
,,Able to be cleaned in a self-cleaning oven
for more information.
53
Page 54

GE Electric Range Warranty. cForcustomersintheUnitedStates)
All warranty service provided by our Factory Service Centers,
or an authorized Customer Care ®technician. To schedule
service, visit us on-line at GEAppliances.com, or call 800.
GE.CARES(800.432.2737). Please have serial number
and model number available when calling for service.
GE Will Replace:
One Year Any part of the range which fails due to a defect in materials or workmanship. During this
From the date of the limited one-year warranty, GEwill also provide, free of charge, all labor and in-home service
original purchase to replace the defective part.
Five Years
From the date of the
original purchase
Service trips to your home to teach you how to use
the product.
Improper installation, delivery or maintenance.
Product damage or failure of the product if it is abused,
misused, modified, used for other than the intended
purpose, or used commercially.
Damage to the glass cooktopcaused by hardened
spills of sugary materials or melted plastic that
are not cleaned according to the directions in
the Owner's Manual.
A replacement glass coaktop if it should:crack due to thermal shock;discolor;crack at the
rubber seal between the glasscooktop and the porcelain edge,or ifthe pattern wears off.
A replacement radiant surface unit if itshould burn out.
Duringthis limited additional four-year warranty, you will be responsiblefor any labor or
in-home service.
Damage to the glass cooktop causedby useof cleaners
other than the recommended cleaning creams.
Replacement of house fuses or resetting of circuit breakers.
Damage to the product caused by accident, fire, floods
or acts of God.
Inddental or consequential damage caused by possible
defects with this appliance.
Damage caused after delivery.
Product not accessible to provide required service.
Staple your receipt here.
Proof of the original purchase
date is needed to obtain service
under the warranty.
EXCLUSION OF IMPLIED WARRANTIES--Your sole and exclusive remedy is product repair as provided in this Limited
Warranty. Any implied warranties, including the implied warranties of merchantability or fitness for a particular purpose,
are limited to one year or the shortest period allowed by law.
This warranty is extended to the original purchaser and any succeeding owner for products purchased for home use
within the USA. If the product is located in an area where service by a GE Authorized Servicer is not available, you may
be responsible for a trip charge or you may be required to bring the product to an Authorized GE Service location for
service. In Alaska, the warranty excludes the cost of shipping or service calls to your home.
Some states do not allow the exclusion or limitation of incidental or consequential damages. This warranty gives
you specific legal rights, and you may also have other rights which vary from state to state. To know what your
legal rights are, consult your local or state consumer affairs office or your state's Attorney General.
Warranton General Electric Company. Louisville, KY 40225
54
Page 55

GE Electric Range Warranty. Forcu tomer inCanada
All warranty service provided by our Factory Service Centres
or an authorized Customer Care®technician. To schedule
service, visit us on-line at www.GEAppliances.ca, or call
1.800.561.3344. Please have serial number and model
number available when calling for service.
Staple your receipt here.
Proof of the original purchase
date is needed to obtain service
under the warranty.
Mabe Will Replace:
One Year Any part of the range which fails due to a defect in materials or workmanship. During this
From the date of the limited one-year warranty, Mabe willalso provide, free of charge, all labor and in-home service
original purchase to replace the defective part.
Five Years
From the date of the
original purchase
Service trips to your home to teach you how to use
the product.
Improper installation, delivery or maintenance.
Product damage or failure of the product if it is abused,
misused, modified, used for other then the intended
purpose, or used commercially.
Damage to the glass cooktop caused by hardened
spills of sugary materials or melted plastic that
are not cleaned according to the directions inthe
Owners Manual.
A replacement glass cooktop ifit should: crack due to thermal shock; discolor; crack at the
rubber seal between the glass cooktop and the porcelain edge, or ifthe pattern wears off.
A replacement radiant surface unit if itshould burn out.
During this limited additional four-year warranty, you will be responsible for any labor or
in-home service.
Damage to the glass cooktop caused by use of cleaners
other than the recommended cleaning creams.
Replacement of house fuses or resetting of circuit breakers.
Damage to the product caused by occident, fire, floods
or acts of God.
Incidental or consequential damage caused by _ossible
defects with this appliance.
Damage caused after delivery.
Product not accessible to provide required service.
EXCLUSIONOFIMPLIEDWARRANTIES--Yoursole and exclusiveremedy is product repair as provided in this Limited
Warranty. Any implied warranties, including the implied warranties of merchantability or fitness for u particular
purpose, are limited to one year or the shortest period allowed by law.
This warranty is extended to the original purchaser and any succeeding owner for products purchased in Canada
for home use within Canada. In-home warranty service will be provided in areas where it is available and deemed
reasonable by Mabe to provide.
Some provinces do not allow the exclusion or limitation of incidental or consequential damages, so the above
exclusion may not apply to you. This warranty gives you specific legal rights, and you may also have other rights
which vary from province to province. To know what your legal rights are inyour province, consult your local or
provincial consumer affairs office.
Warranton Mabe Canada inc.,
Burlington, Ontario
55
Page 56

Consumer Support.
GEAppliances Website Inthe U.S.:GEAppliances.com
Have a question or need assistancewith your appliance?Try the GEAppliancesWebsite 24 hours aday, any day
of the year! For greater convenience and faster service,you can now download Owner's Manuals,order partsor even
schedule serviceon-line. InCanada:www.GEAppliances.ca
Schedule Service Inthe U.S.:GEApplionces.com
Expert GErepair service is only one step away from your door. Get on-line and schedule your service at your
convenience any day of the year! Or call 800.GECARES (800.432.2737) during normal business hours.
In Canada, call :1.800.58:1.3344
RealLifeDesignStudio Inthe U.S.:GEAppliances.com
GEsupports the Universal Designconcept-products, servicesand environments that can beused by people of
all ages,sizesand capabilities.We recognizethe need to design for awide range of physical and mental abilities
and impairments. Fordetails of GE'sUniversalDesignapplications,including kitchen design ideasfor peoplewith
disabilities,check out our Website today. Forthe hearing impaired, pleasecall 800.TDD.GEAC(800.833./4322).
In Canada,contact: Manager, Consumer Relations,Mabe Canada Inc.
Suite310, i FactoryLane
Moncton,N.B.EIC9M3
Extended Warranties
Purchase aGEextended warranty and learn about special discountsthat are available while your warranty isstill
in effect. Youcan purchase iton-line anytime, orcall 800.626.222/4during normal businesshours.GEConsumer Home
Serviceswill still be there after your warranty expires.In Canada, call :1.888.26:1.2:133
Partsand Accessories
Individuals qualified to servicetheir own appliances can have parts or accessoriessent directly to their homes
(VISA,MasterCard and Discovercards areaccepted).Order on-line today, 2/4hours every day or by phone at
800.626.2002during normal businesshours.
Instructions contained in this manual cover procedures to be performed by any user. Other servicing generally should be
referred to qualified service personnel Caution must be exercised, since improper servicing may cause unsafe operation.
Customers in Canada should consult the yellow pages for the nearest Mabe service center, or call 1.800.661.1616.
Contact Us
If you are not satisfied with the serviceyou receivefrom GE,contact uson our Website with all the detailsincluding
your phone number, orwrite to: GeneralManager, Customer Relations
GEAppliances,Appliance Park
Louisville,KY/40225
In Canada: www.GEAppliances.ca, or write to: Director, Consumer Relations,ivlabeCanada Inc.
Suite310, :1FactoryLane
Moncton, N.B.EIC9M3
In the U.S.:GEAppliances.com
In the U.S.:GEAppliances.com
In the U.S.:GEAppliances.com
Register your new appliance on-line--at your convenience! Timely product registration will allow for enhanced
communication and prompt service under the terms of your warranty, should the need arise. You may also mail
l Register Your Appliance Inthe U.S.:GEAppliances.corn
in the pre-printed registration card included in the packing material. In Canada: www.GEAppliances.ca
Printed in Mexico
This book is printed on recycled paper.
 Loading...