

Page 1
ge.com
Safety Instruotions ........... 2, 3
©
Operating Instruc_tions
About the Controls
on the Air Conditioner . ....... 4, 5
Drain Hose .................. 6
Remora Control ............. 4-6
*Ahter Bucket .................. 6
Care and Cleaning
Air Filter . .................... 7
Cleaning the Coil .............. 7
Grille and Case ................ 7
_\hter Bucket .................. 7
Installation Ins*ruc_ions ..... 8-13
Troubleshooting Tips ......... 14
Consumer Support
Consumer Support ............. 16
Warranty .................... 15
APE08
©
Write the model and serial
numbers here:
Model #
Serial #
You can lind them on a label on
the back of the air conditioner.
66126283 49-7538 11-05JR
Page 2
iMPORTANTSAFETYiNFORMATiON.
READALLiNSTRUCTiONSBEFOREUSING.
WARNING!
For your safe_ the information in this manual must be followed to minimize the risk of fire, electric shock
or personal injury.
SAFETYPRECAUTIONS
When using thisportable air conditioner, always follow basic safety precautions, including the following:
[] Use this appliance only for its intended [] Turn tile portable air conditioner OFFand
purpose as described in this Owner's
Manual.
[]
This portable air conditioner must be
properly installed as described in this
manual before it is used.
[]
Never unplug your portable air
conditioner by pulling on die power cord.
Always grip plug firmly attd pull straight
out f_om the receptacle.
[]
Replace immediately all elecf_dc service
cords that hm_e become flayed or oflterwise
damaged. A damaged pov_r supply cord
must be replaced with a new power supply
cord obtained from the manufi_cntrer and
not repaired. Do not use a cord that shows
cracks or abrasion damage along its length
or at eiflter rite plug or connector end.
unplug it be%re cleaning.
[]
GE does not support any servicing of the
air conditioner. _\_ strongly reconmlend
that volt do not attempt to service the air
con({ifioner yourself.
[]
For wmr safety, do not store or use
combustible materials, gasoline or other
flammable vapors or liquids in the vicinity'
of this or arty other appliance.
[]
All air conditioners contain refrigerants,
which trader fbderal law must be removed
prior to product disposal. If you are g>tfing
rid of an old product wifll refrigerants,
check with the company handling disposal
about what to do.
HOWTOCONNECTELECTRICITY
Do not, under any circumstances, cut or remove
the third (ground) prong from the power cord.
For personal safety, this appliance must be
properly grounded.
Use a ] 5 amp time delay fltse or circuit breaker.
The power cord of this appliance is equipped
with a 3-prong (grounding) plug which mates
with a standard 3-prong (grounding) wall
outlet to minimize tile possibility of electric
shock hazard flom this appliance.
Power cord includes a cunent intetTupter
device. A test and reset button is provided on
the plug case. The device should be tested on a
periodic basis by first touching tile rESrbutton
and then the RESKl'button. If the TESTbutton
does not trip or if file RESETbutton will not
stay engaged, discontinue use of the air
conditioner and contact a qualified
service technician.
Haxe the wall outlet and circuit checked by a
qualified electrician to make sure the outlet is
properly grounded.
_4]lere a 2-piong wall outlet is encountered,
it is your personal responsibility and obligation
to haxe it tei)laced with a properly grounded
3-prong wall outlet,
The air conditioner should always be
plugged into its own individual electrical
outlet, which has a xoltag> rating matching
the rating plate.
This provides the best per%m/ance and also
piexents oxerloading house wiring circuits,
which could cause a fire hazard from
oxerheated wires.
2
Page 3
USEOFEXTENSIONCORDS
ge.com
Because of potential safety hazards under
certain conditions, we strongly recommend
against the use of an extension cord.
USEOFADAPTERPLUGS
Because of potential safety hazards under
certain conditions, we strongly recommend
against the use of an adapter plug.
However, if yon must use an adapter,
where local codes permit, a temporary
connection may be made to a properly
grounded 9-prong wall outlet by use of
a Ui,-lismd adapter available at most
local hardware stores.
The larg>r slot in the adapter must be
aligned with the larger slot in tile wall
outlet to provide proper polarity in tile
connection of tile power cord.
However, if you must use an extension
cord, it is absolumly necessa_ T that it be
a Ui,-listed, 14 gauge, 3-wire grounding
type appliance extension cord having a
grounding type plug and outlet and that
the electrical rating of tile cord be
15 amperes (minimum) and 195 volts.
When disconnecting the power cord flom
tile adaptor, always hold the adaptor in place
with one hand while pulling the power cord
ping with the other hand. If this is not done,
the adapter ground terminal is very likely to
break with repeamd use.
If the adapter ground terminal breaks,
DO NOTUSE the air conditioner until a
proper ground has been established.
Attaching the adapter gmund terminal to a waft
outlet cover screw doesnot groundthe appfiance
unless the cover screw is metal, not insulated, and
the wall outlet is groundedthrough the house wiring.
Youshould have the circuit checkedby a qualified
electrician to make sure the outlet is properly
grounded.
READANDFOLLOWTHISSAFETYINFORMATIONCAREFULLY.
SAVETHESEINSTRUCTIONS
Page 4
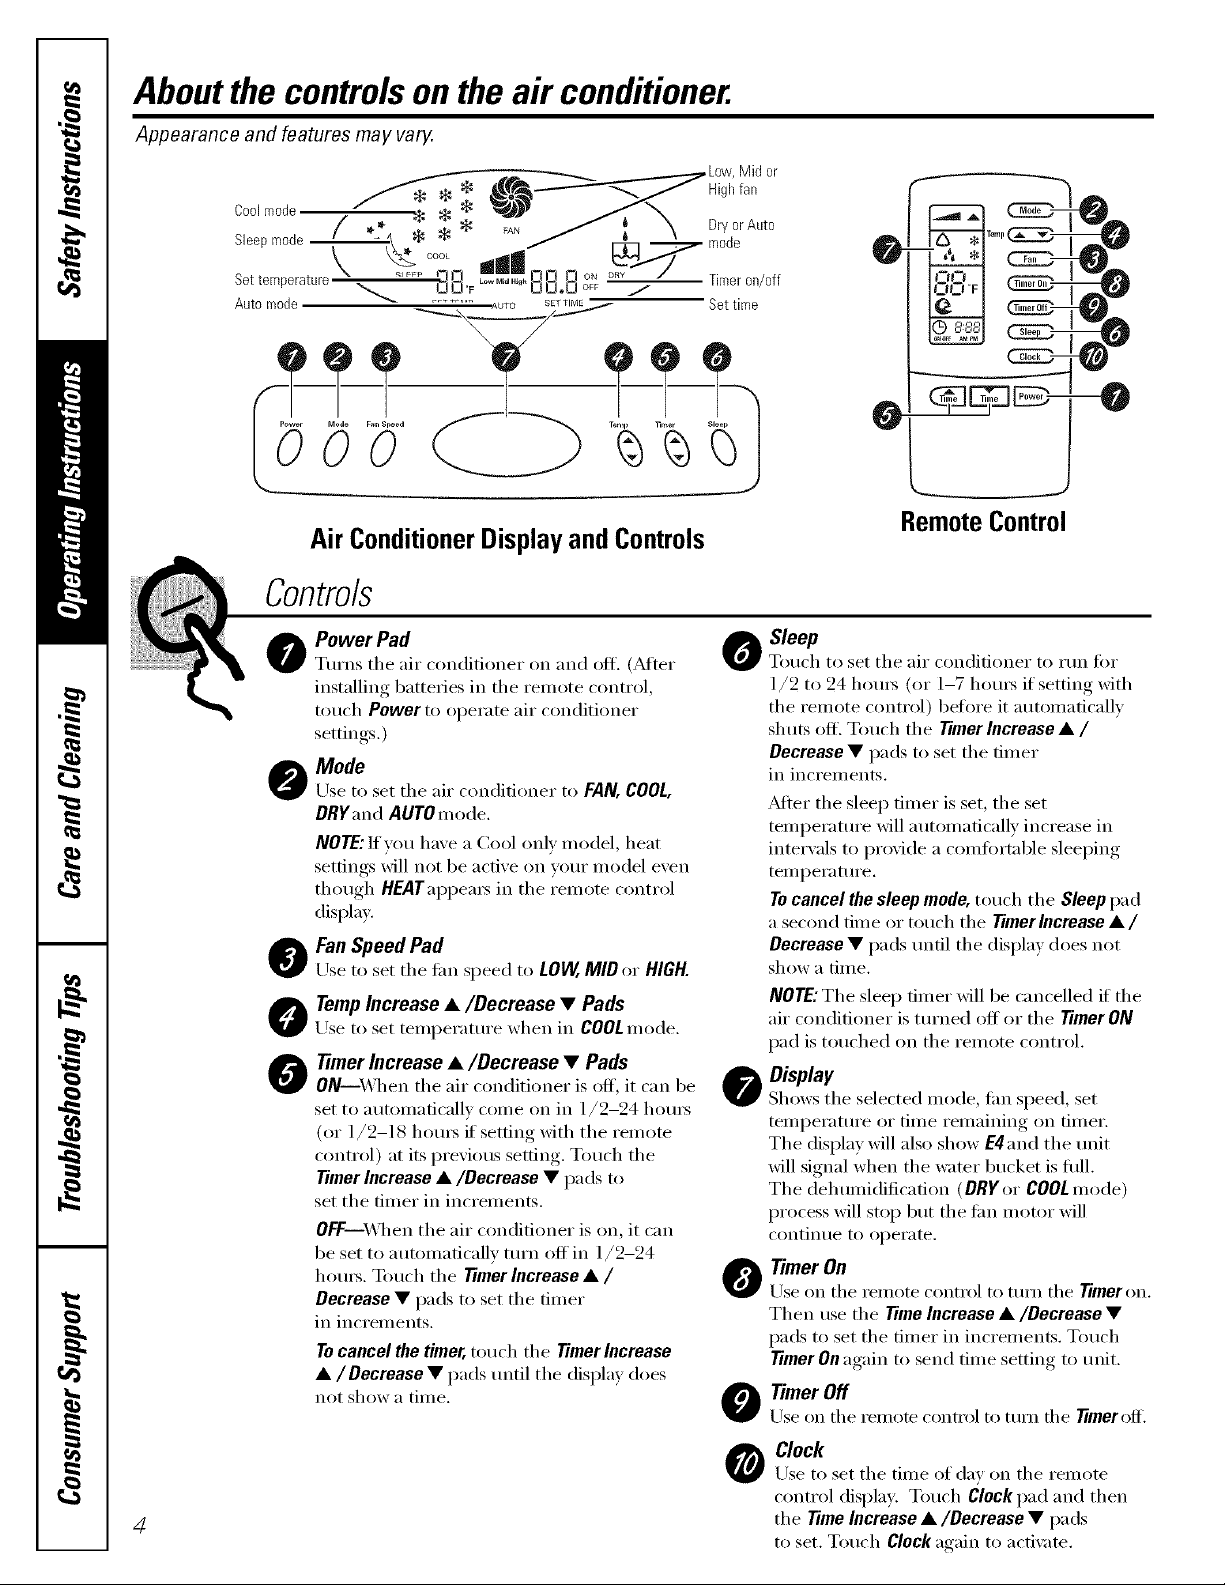
Aboutthe controlsontheair conditioner.
Appearance and features may vary.
Air ConditionerDisplayandControls
Controls
RemoteControl
O owerPad
Turns the air conditioner on and off. (_Mter
installing batteries in the remote control,
touch Power to operate air conditioner
settings.)
O Mode
Use to set the air conditioner to FAN, COOL,
DRYand AUTOm()de.
NOTE: If you have a Cool only model, heat
settings will not be active on your model even
though HEAYappeax5 in the remote control
display.
O Fan SpeedPad
Llseto set the tim speed to LOW,MIDor HIGH.
O TempIncrease •/Decrease • Pads
Use to set temperatm'e when in COOL mode.
0 77merIncrease •/Decrease • Pads
ONi\'_q/ell the air conditioner is off, it can be
set to automatically come on in 1/2-24 hom_
(or 1/9-18 hom_ if setting with the remote
control) at its previous setting. Touch the
Timer Increase •/Decrease • pads to
set the timer in increments.
OfF--When the air conditioner is on, it can
be set to automatically mrn off in l/2-24
hom_. Touch the Timer Increase •/
Decrease• pads to set the timer
in increments.
Tocancelthetimer,touch the Timerlncrease
•/Decrease • pads until the display does
not show a time.
_i Sleep
WTouch to set the air conditioner to run fi)r
1/9 to 94 hums (or 1-7 hums if setting with
the remote control) beflwe it automatically
shuts ofl_ Touch the TimerIncrease• /
Decrease • pads to set the timer
in increments.
Adter the sleep timer is set, the set
temperature will automatically increase in
intervals to provide a comfortable sleeping
teml) eratm'e.
To cancel the sleep mode, touch the Sleep pad
a second time or touch the Timerlncrease •/
Decrease • pads until the display does not
show a tin/e.
NOTE: The sleep timer will be cancelled if the
air conditioner is turned off or the Timer ON
pad is touched on the remote control.
O Display
Shows the selected mode, tim speed, set
temperature or time remaining on timer.
The display will also show E4 and the refit
will signal when the water bucket is fifll.
The dehumidification (DRY or COOL mode)
process will stop but the tim motor will
continue to operate.
O TimerOn
Use on the remote control to turn the Timeron.
Then use the Time Increase •/Decrease •
pads to set the timer in increments. Touch
Timer On again to send time setting to refit.
O TimerOff
Lrse on the remote control to turn the Timerofl.
O CIock
Use to set the time of day on the remote
control disl)la,v. Touch Clock pad and then
4
the TimeIncrease•/Decrease • pads
to set. Touch Clock again to actix Ke.
Page 5
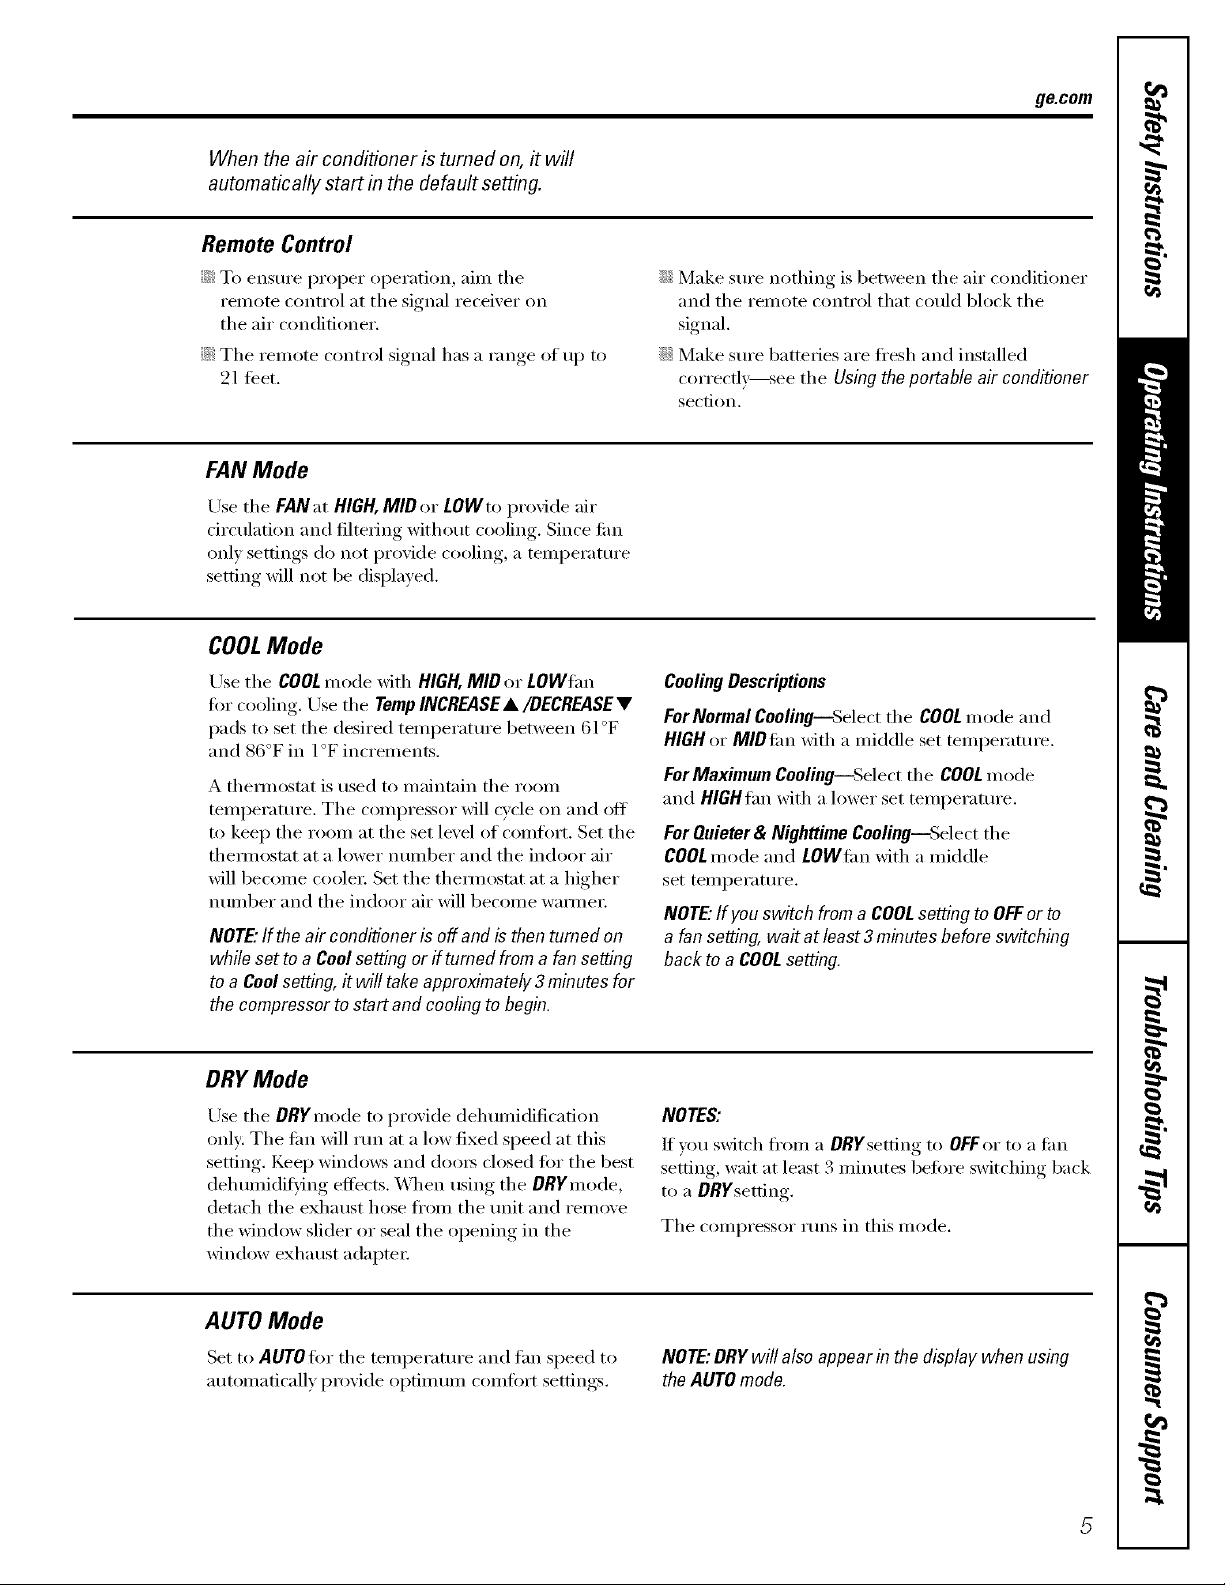
When the air conditioner is turned on, # will
automatically start in the default setting.
Remote Control
g_com
::Ji::To ensure proper operation, aim the
remote control at the signal receiver on
the air conditioner.
::Ji::The remote control signal has a range of up to
21 tibet.
FAN Mode
Use the FAN at HIGH,MID or LOW to provide air
drculation and filtering without cooling, Since tim
Olfly settings do not provide cooling, a temi)eramre
setting will not be displayed.
COOLMode
Use the COOLmode with HIGH,MID or LOWfim
fin" cooling. Use the TempINCREASEA/DECREASEV
pads to set the desired temperatm'e between 61°F
and 86°F in 1°F increments.
A them_ostat is used to maintain the room
temperature. The compressor will cycle on and off
to kee I) the room at the set level of comtort. Set the
them_ostat at a lower numl)er and the indoor air
will become coole_; Set the them_ostat at a higher
number and the indoor air will become wam_e_;
NOTE:ffthe air conditioneris off andisthenturned on
whileset toa Coolsettingorif turnedfroma fansetting
toa Coolsetting,#will takeapproximately3minutes for
thecompressorto startand coolingto begin.
::Ji::Make sm'e nothing is between the air conditioner
and the remote control that could block the
signal.
::Ji::Make sm'e batteries are fl'esh and installed
correctl}_see the Using the portableair conditioner
section.
CoolingDescriptions
For Normal Cooling--Select the COOL mode and
HIGH or MIDtim Mth a middle set temperature.
For Maximum Cooling--Select the COOL mode
and HIGHIan with a lower set temperature.
ForQuieter& NighttimeCooling--Select the
COOLmode and LOWflm with a middle
set temperatm'e.
NOTE:If youswitch from a COOLsettingto OFForto
a fan setting,war at least3 minutesbefore switching
back to a COOLsetting.
DRY Mode
Use the DRYmode to provide dehumidification
only: The tim will run at a low fixed speed at this
setting. Kee I) windows and do(n_ closed fi)r the best
dehumidit)'ing effects. When using the ORYmode,
detach the exhaust hose fl'om the refit and remove
the window slider or seal the opening in the
window exhaust adapte_;
AUTO Mode
Set to AUTOfor the temperature and tim speed to
automatically provide optimum comfi)rt settings.
NOTES:
If you sMtch fl'om a DRYsetting to OFFor to a tim
setting, wait at least 3 minutes beflwe switching back
to a DRYsetting.
The compressor runs in this mode.
NOTE:DRYwill also appearin the displaywhen using
theAUTOmode.
Page 6

Usingtheportable air conditioner.
Always make sure the water bucket is locked into place on the portable air conditioner.
Using the Water Bucket
Make sure the drain com_ector is capped and in
the up position. \._]_en the bucket is removed, the
unit will shut ot1_ Erupt' and replace the bucket,
making sure that it is flfllv seared in the trait.
Drain
connector
in up and
capped
Water
position
for water
bucketuse.
IMPORTANTWhenusingthe waterbucketto remove
collectedwater,make surethat thedrain connectoris
in the upposition andthatit iscapped,flit is not in the
uppositionwater will drainfromthe connectorontothe
floor
Using the Drain Hose
\,V_ter can be automatically emptied into a floor
drain by tmcal)ping the drain connector; tilting it
down and connecting the drain hose. Roum the
drain hose straight to a floor drain.
IMPORTANT'.When the drain connector is tilted down
the water will drain through the connector. Make sure
the hose is connected and that # is led straight to a
floor drain. Never tilt the drain connector down with #
capped because draining water will cause the un# to
malfunction.
\._]_en the water bucket is flfll, a signal will beep
and the display will show E4tmtil the water bucket
has been emptied.
NOTE: The tim will continue to operate even when
the water bucket is flfll. However; the Cooling or Dry
Inode will not work until the water bucket has been
emi)tied and replaced correctly.
To emi)ty the water bucket betore it is fifll, turn the
Ulfit off and wait for three nfilmtes fin" all water to
collect into the bucket.
Tilt down
and
connect
hoseto
drain.
Cap
Whentilting thedrain connectordown,always uncapit,attacbtbe drain
hoseandleaditstraight toa floor drain.
How to Insert the Batteries in the Remote Control
] Remove the batte_ 3' cover by sliding it
according to the arrow direction.
] Insert new batteries, making sm'e that the (+)
and (-) of battery are installed correcflx;
] Reattach the coxer by sliding it back
into position.
NOTES:
iJi::Use 2 "_%" (1.5 volt) alkaline batteries. Do not
_: Remove the batteries fl'om the remote control if
use recha_geable batteries.
the svsteln is not going to be used fin" a long dine.
Page 7

Careand cleaning oftheair conditioner, ge.com
Turnthe air conditioner off and remove the plug from the wall outlet before cleaning.
Grille and Case
To clean the case:
Use water and a mild detergent. Do not use
bleach or abrasives.
Air Filter
The air filter is on the back of the air conditionex;
It should be checked and cleaned at least every
30 days or more often if necessa_
NOTE:DO NOT rinse or put the filter in an automatic
dishwasher.
CAUTION:DONOToperate theair conditionerwithout
thefilter becausedirt andlint will clog itand reduce
performance.
To remove:
Pinch the two filter cover tabs and pull the filter
cover out and ofl_ ]{elnove the filter fl'oln the coveI;
_ash it in warm soapy water; Rinse and let the filter
(h y 1)eii)i'e replacing it.
Toreplace:
Hook the filter 1)ack onto the filter (ox'e_: Place the
bottom of the filter cover onto the lower edge ot
the filter compartment and close it.
Toclean thefront grille:
Use a vactnun am_chment or brush.
Tabs
Cleaning the Coil
_Mter removing the air filter cover, clean the coil
with a soft brush when the soil is soft and wet.
NOTE:Donot allow waterto enterthe
electrical/machinecompartmentthrough
thecircular openingbehind thecoil.
Donotspraythecoil withahose.
Water Bucket
E\'et T few weeks, cinse the inside of the water
1)u(ket with a mild detergent to prevent growth
ot mold, mildew and bacteria.
NOTE:DO NOTrinse or put the water bucket in an
automatic dishwasher.
7
Page 8

Installation instructions
TOOLS YOU WILL NEED
Pencil
Phillips head screwdriver
Scissors or knife
PARTS YOU WILL NEED
• Wood filler strip and wood screws (for
double-hung windows, to match inner
width of window and inner height of
window stool)
PARTS INCLUDED
Large Wood Screw (4) Window Locking Bracket Window Slider Bracket (2)
Flexible Exhaust Hose
Foam Seal
Small Wood Screw (4)
Washer (4)
Window Exhaust Adapter
Window Seal (2)
Rain Deflector Assembly
Bolt (4)
@
Nut (4)
Protective Screen
Adjustable Window Slider
(2 for Normal Window Opening,
3 for Long Window Opening)
©
Split-Ring Washer (4)
Page 9

Installation Instructions
Power cord includes a current interrupter
device. A test and reset button is provided
on the plug case. The device should be
tested on a periodic basis by first pressing
the TEST button and then the RESET button.
If the TEST button does not trip or if the
RESET button will not stay engaged,
discontinue use of the air conditioner and
contact a qualified service technician.
[] CHOOSE A LOCATION
• Place the air conditioner on a smooth,
level floor strong enough to support the
unit with a full bucket of water.
• Allow at least 12 inches (30 cm) of air
space on all sides of the unit for good
air circulation.
12" (30cm_) i(30 cm)
min. min.
[] ATTACH PROTECTIVE SCREEN TO
OUTSIDE OF EXHAUST ADAPTER
• Use two small wood screws on each
side to attach the protective screen onto
the outside of the exhaust adapter.
[] INSTALL RAIN DEFLECTOR
TO OUTSIDE OF ADJUSTABLE
WINDOW SLIDER
• Remove the appropriate plugs (save
for future use) from the window slider
and rain deflector to prepare for either a
double-hung window installation or a
slider window installation. Line up the
holes on the rain deflector and the
window slider. Use the four bolts, split-
ring washers and nuts to attach the rain
deflector onto the window slider.
Double-Hung Window Slider Window
Installation Installation
• Place the unit in an area where the
temperature will not fall below 65°F
(18°C). The coils can become covered
with frost at temperatures below 65°F,
which may reduce performance.
NOTE: The portable air conditioner has rollers
to aid placement, but it should only be rolled
on smooth, flat surfaces. Do not attempt to
roll the portable air conditioner on carpet or
over objects.
[] ATTACH EXHAUST ADAPTER TO
WINDOW SLIDER INSIDE OPENING
• Snap the exhaust adapter into the inside
opening of the window slider.
Leave these two bolts
in place for double-hung
window installations
Outside
Leave these two
in place for
sliding window
installations
Outside
[] INSTALL WATER BUCKET COVER
[] Remove the shipping tape from the side
of the unit and
remove the water
bucket.
Pull the cover
[]
from the bucket and
install it by inserting
its posts into the
holes.
into holes
Inside
Close the cover
[]
and insert bucket
into unit.
Page 10

Installation instructions
Instructions for installing the window slider in a double-hung window. If you have a sliding window,
see instructions on pages 12 and 13.
INSTALL WINDOW SLIDER
[]
IN WINDOW
To allow the window to close properly
[]
around the adjustable window slider, for
inclined window sill, attach a piece of
wood to the sill at the back of the window
stool. NOTE: For a flat sill, no wood is
needed.
WOOD PIECE-
WIDTH: 1"
LENGTH: Long enough to fit inside the
window frame.
THICKNESS: To determine the thickness,
place a piece of wood on the sill behind
the window stool to make it the same
height as the stool.
Attach securely with nails or screws
provided by the installer.
Wood (same height as stool)
Stool __,)
If the window slider is shorter than the
[]
width of the window, pull the sliding arm
out to the width of the window.
If the window slider is longer than the
width of the window, cut the slider arm
to the width of the window.
If the two-piece window slider is too short
for the width of the window, attach and
use the third piece of the slider.
Third piece of slider l__
for extra wide windows____
j _
,n o too,
Inside _ L
I Inside
[] Cut the window sash seal (adhesive-
backed) to the window width and stick the
adhesive side to the bottom of the sash.
Cut the window stool seal (non-adhesive
backed) to the window width and place
on the window stool.
sash seal
Window stool seal
Inside
[] Attach the slider to the stool through
one of its holes using a large wood screw,
Large
wood
screw
Window stool
Inside
[] Pull the window down against the top
of the window slider,
Window slider brackets
[] Hook the two window slider brackets
over the bottom edge of the window
slider and attach to the window stool
using two large wood screws.
10
Page 11

Installation Instructions
[] INSTALL TOP WINDOW GASKET
AND WINDOW LOCKING BRACKET
[] Cut the foam top window gasket to the
window width.
Stuff the foam between the glass and the
window to prevent air and insects from
getting into the room.
[] Attach the window locking bracket with
one large wood screw.
[] ATTACH EXHAUST HOSE
[] Insert the round end of the exhaust hose
into the exhaust adapter in the window
slider and turn it to lock it in place.
Adapter __
[] • The exhaust hose must be properly
installed to the back of the unit and to
the exhaust adapter, and exhausted to
the outside when using the unit in the
COOL mode by sliding it down in
position.
• Attach the unit end of the exhaust hose
to the back of the air conditioner.
Back of unit
11
O MPORTANT: To ensure propercooling, do not kink, pinch, shorten
or lengthen the exhaust hose. The
minimum length of the exhaust
hose is 20" (50 cm) and the
maximum length of the exhaust
hose is 78" (200 cm).
(
An excessive number of bends in the
exhaust hose may compromise the
cooling performance.
Page 12

Installation instructions
Instructions for installing the window slider in a sliding window. If you have a double-hung window,
see instructions on pages 10 and 11.
INSTALL WINDOW SLIDER
[]
IN WINDOW
If the window slider is shorter than the
[]
height of the window, pull the sliding arm
out to the height of the window.
If the window slider is longer than the
height of the window, cut the slider arm
to the height of the window.
If the two-piece window slider is too short
for the height of the window, attach and
use the third piece of the slider.
[] INSTALL WINDOW
LOCKING BRACKET
Attach the window locking bracket with
one large wood screw.
Inside
Third piece of slider
for extra long windows
[] Cut the window seal (adhesive-backed) to
the window height and stick the adhesive
side to the inner window sliding face, as
shown above.
[] Attach the top of the slider to the window
face using a large wood screw through one
of its holes.
Large wood screw
Window locking bracket
Inside
[] Slide the window against the edge of the
window slider.
[] If applicable, hook the two window slider
brackets over the side edge of the window
slider and attach to the inner window
sliding face using two large wood screws.
12
Page 13

Installation instructions
[] ATTACH EXHAUST HOSE
TO WINDOW SLIDER
[] Insert the round end of the exhaust hose
into the exhaust adapter in the window
slider and turn it to lock it in place.
Ada
[] • The exhaust hose must be properly
installed to the back of the unit and to
the exhaust adapter, and exhausted to
the outside when using the unit in the
COOL mode by sliding it down in
position.
• Attach the unit end of the exhaust hose
to the back of the air conditioner.
[] ATTACH EXHAUST HOSE
TO WINDOW SLIDER (CONT.)
O MPORTANT: To ensure propercooling, do not kink, pinch, shorten
or lengthen the exhaust hose. The
minimum length of the exhaust
hose is 20" (50 cm) and the
maximum length of the exhaust
hose is 78" (200 cm).
An excessive number of bends in the
exhaust hose may compromise the
cooling performance.
Back of unit
13
Page 14

Troubleshootingtips...
Save time and money!
PossibleCa.se,
E4appears inthe display Water bucket is full or not
installed correctly.
Water bucket was removed while
unit was operating.
What ToDo
• Remoxe, empty and replace the water bucket. See the
UsingtheWate'rBucket section and the [nstallation [nstructions ill
this manual.
• Replace the water bucket. See the Using the Water Buckotsection.
NOTE;Replace the water bucket immediately after emptying it
to catch _l]l} collde/ls_ltioll which may COllthltle to _lCCtlll/tl]_lte.
"HEAT"modeNselected If you have a Cool only model, • Set the unit to AUTO,COOL,DRYer FANmode. HEArmodeis not
butunitdoesnotheat heat settings will not be active a\ aJlable and will not operate on cool (.fly models.
on your model.
Airconditioner The air conditioner • Make Stlre the air conditioner plug is pushed coml)letely
does notstart is unplugged, into the outlet.
breaker is tripped, the fuse or reset the breaker.
The fuse is blown/circuit • Check the hotlse fi_se/circuh breaker box and replace
Power failure. • [fa power l'hJ]ure occtn% ttlyH the air conditioner OFF.X_lle.
The current interrupter • Press the RESETbutton h)cated on the power cord plug.
device is tripped. • If the RESETbutton will not stay engaged, discontinue use of
The remote control is • Try operating the control on the unit. See The remote controlis not
not working, workingbell);v.
Airconditionerhas Power interruption or • _'\]Jen the p()wer Is rest(n'e(t, wait .>mm utes to restart the air
stopped running power failure occurred, conditioner to pre',ent tripping of the compressor oxerload.
p()wer is rest(wed, wait 3 rain utes to restart the air c(nlditi(mer to
prexent tripping of tile compressor oxerloa(1.
the air conditioner and contact a qualified service technician.
• ' 9. '
Touch the Powerpad and reset the controls to the desired
settings.
Sleepmode or the _merOff • Set the air conditioner to the desh'ed setting.
pad has turned off the
air conditioner.
Airconditionerdoesnot Airflow is restricted. • Make Stl/'e there are no curtains, blinds or ftl/'I/ittlFe blocking
cool as it should the inlets l/)cated on the left and rear skles of the air c(m(titi(mer.
Make sure there are at least 12" of space on all sides of the unit.
_']_lke StlFe airflow through the \ent exhaust is not blocked.
The temp control may not •/n COOLmode, touch tile TempDecrease• pad.
be set correctly.
The air filter is dirty. • Clean tile filter at least exel)" 3(1 days. See tile Careandcleaning
The room may have been hot. • _\]Jen the air conditioner is thst turned on, you need to :dlow time
Cooling coils have iced up. See "Ak conditioner freezing up" bel )w.
section.
Ii)l" the l'OOIll [o cool dowlL
• (
Akconditioner Ice blocks the airflow and • Tile air conditioner will dei}'ost and return to operation on its ()_r]_.
freezingup stops the air conditioner • To deft'( )st the air conditioner more quJckl}, select the COOLmode
from cooling the room. and HIGHIimand set tile thermostat to a higher temperature.
The remote control The batteries are inserted • Check the position of the batteries. The)" should be
N not working incorrectly, inserted in the opposite (+) and (-) direction.
The batteries may be dead. • Replace tile batteries.
The remote control is too far • Operate the remote control closer to the air conditionec
from the air conditioner.
An object, such as furniture • Remove the ob.iect,
or a towel, is blocking the signal.
Unit does not work after The water bucket is full or the • Remove water fi'om tile water bucket and push the water
pressingthePowerpad water bucket is not properly bucket back ill place.
installed.
Noiseorvibration The floor is not level. • Place unit ()n a fiat, lex el surihce.
14
Page 15

GEAir ConditionerWarranty--One YearLimited Warranty.
Stapleyour receipthere.
Proofof theoriginalpurchase dateis
neededto makea warranty claim.
We Will Replace:
Replacement unit or refund of the original retail price fi)r any l)ro(luct which tifils due to a defect
Fromthedate of the
originalpurchase
in materials or workmanshil). If the unit is exchanged, the replacement trait is warranted fin"
the remainder of your i)roduct's original one-year warranty period. GE will, at its sole discretion,
replace the i)roduct with a i)roduct of the same or comparable flmctionali V and quali V or
reftmd the original retail price.
::Ji::Properly pack your unit. We recolnmend using the
original caxton mad packing materials.
_: Return the product to the retail location where it
was purchased.
::Ji::Repair of the unit.
)_:Service trips to your home.
iJi::Customer instruction. This owner's manual provides
information regmxthlg operating instructions mid
user controls.
_: hnproper h_staJlation, delivery or maintenance. If you
have an installation problem, or if the air conditioner is
of hnproper cooling capacity for the intended use,
contact your dealer or installer. You are responsible for
providing adequate electrical comlecthlg facilities.
::Ji::FaJhtre of the product resulting from modifications to
the product or due to mlreasonahle use including failure
to provide reasonable mad necessary maJntenmace.
iJi::Include in the package a copy of the sales receipt or other
evidence of date of orighmJ purchase. Also prhlt your
nmne m_d address mad a description of the defect.
iJi::Replacement of house fuses or resetting of circuit
breakers.
!i::Dmnage to the product caused by hnproper power supply
voltage, accident, fire, floods or acts of God.
!i_:Incidental or consequential dmnage caused by possible
defects with this air conditioner.
!i_:Dmnage caused after delivery.
This warranty is extended to the original purchaser and any succeeding owner for products purchased for home
use within the USA.
Some states do not allow the exclusion or limitation of incidental or consequential damages. This warranty gives
you specific legal rights, and you may also have other rights which vary from state to state. Toknow what your
legal rights are, consult your local or state consumer affairs office or your state's Attorney General.
Exclusion of implied warranties: Except where prohibited or restricted by law, there are no warranties, whether
express, oral or statutory which extend beyond the description on the face hereof, including specifically the
implied warranties of merchantability or fitness for aparticular purpose.
Warrantor: General Electric Company. Louisville, KY 40225
/5
Page 16

ConsumerSupport.
Have a question or need assistance _dth yam" appliance? Tr) the GE Appliances \'\ ebsite 24 hom_ a day,
q gEAppliancesWebsite ge.com
i _ da_ of the xear! For greater com'enience and fhster service, )on can m>w download Ox_ner's Mature}s,
oI" evell oFdel" });Ills alld catalogs on-line. YOu can also "_&skOur Team of Experts'"' )am" questions, and so
m uch m ore...
RealLifeDesignStudio ge.com
GE supports the Unive_a[ Design concept--products, services and enviromnents that can be used by
people (ff all ages, sizes and capabilities. We recognize the need to design tar a wide range of physical and
mental abilities and impaim_ents. For details of GE's Universal Design applications, including kitchen
design ideas %r people with disabilities, check out our Webs}re today. For the hearing impaired, [)lease call
800.TDD.GEAC (800.833.4322).
PartsandAccessories
Individuals qualified to service their own appliances can have parts or accessories sent direcdv to their
homes (VISA, Master( ard and Disco\ er cards are accepted). Order on-line to&l), 24 hom_ evel)' day or
by phone at 800.626.2002 dining normal business hours.
Instructions contained in this manual cover procedures to heperformed by any user. GEdoes not support
any servicing of theair conditioner. We strongly recommend that you do notattempt to service the air
conditioner yourself
ContactUs
If you are not satisfied with the service you receive fl'om GE, contact us on am" Website with all the details
including your phone numbe_; or write to: Genera[ Manage_; Customer Relations
GE Appliances, Appliance Park
I,ouisville,/<.Y 40225
ge.cam
ge.cam
/ _ Printed inChina
 Loading...