

Page 1
www.GEAppfiances.com
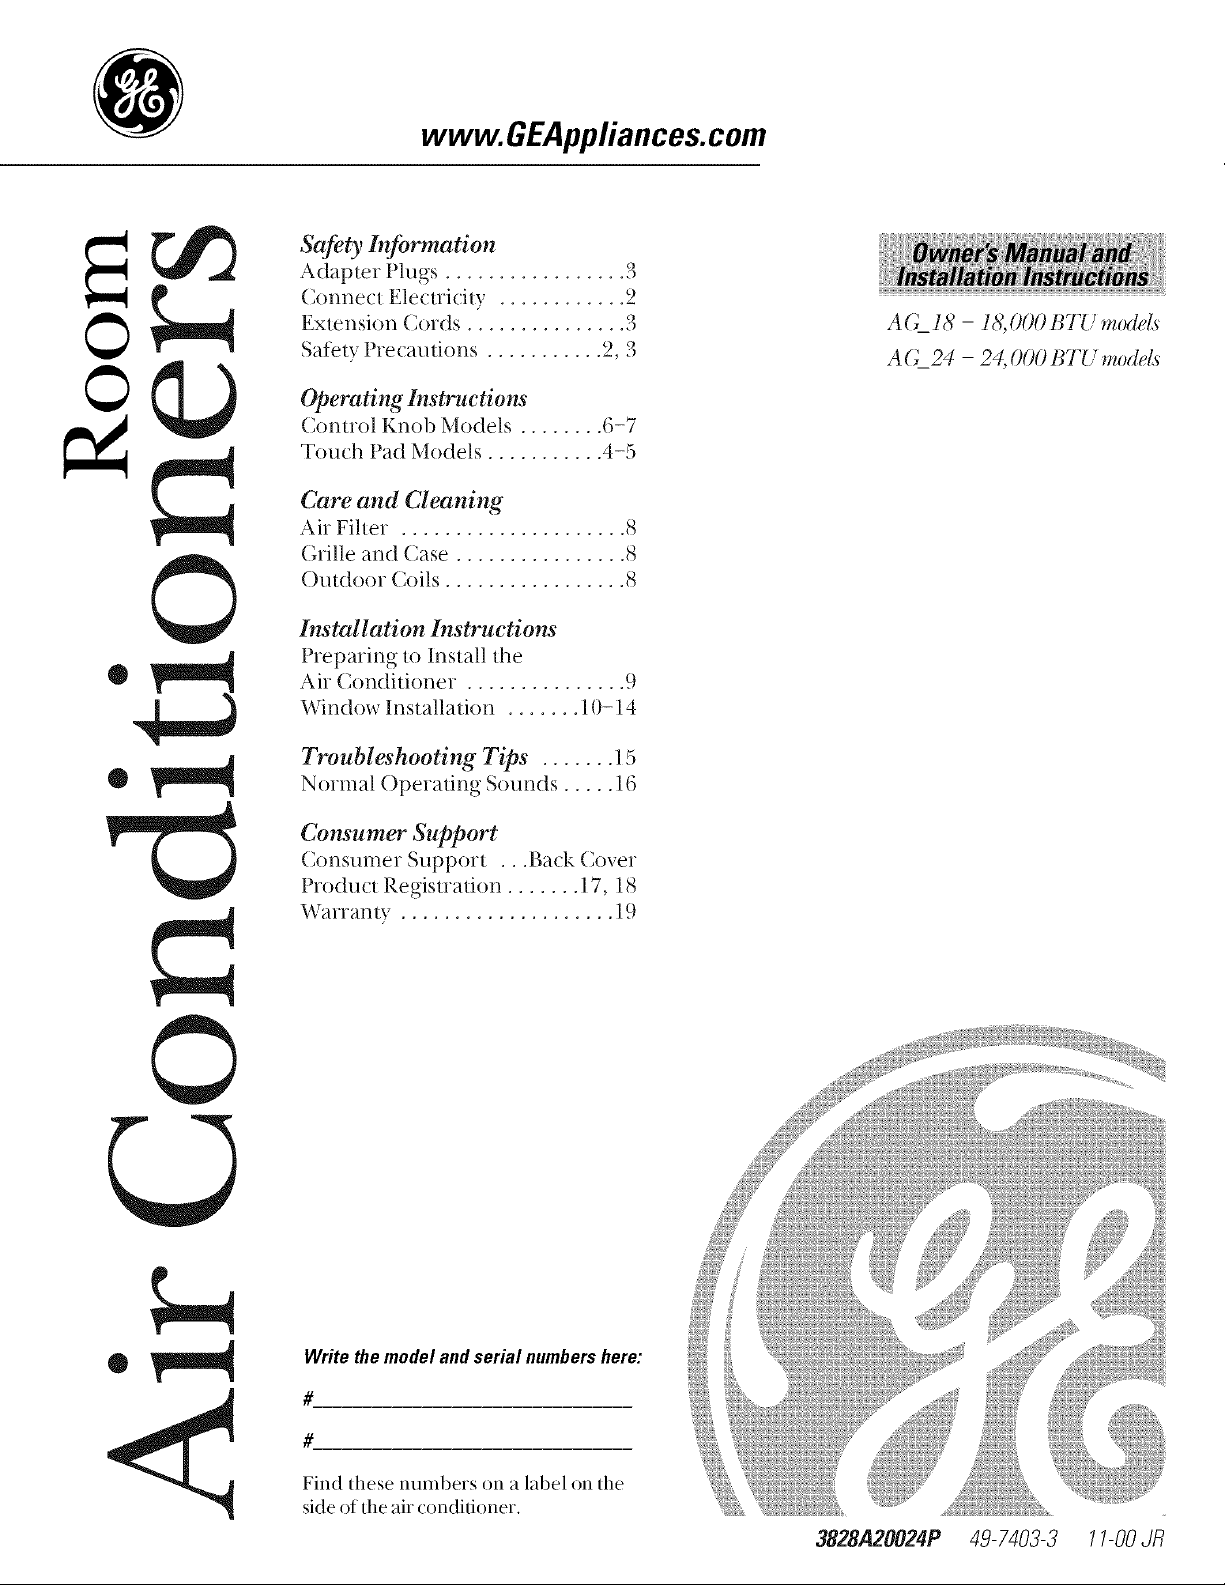
Safety Information
Adapter Plugs ................. 3
Connect Elecuici/y ............ 2
Extension Cords ............... 3
Safety Precautions ........... 2, 3
Operating Instructions
Conuol Knob Models ........ 6-
Touch Pad Models ........... 4-5
Care and Cleaning
Air Filter . .................... 8
(,nile and Case ................ 8
Outdoor Coils ................. 8
"7
AG_18 - l&O00 BTU mode£
A G_24 - 24, 000 BTU mode£
0
0
Installation Instructions
Preparing In Install the
Air Conditioner . .............. 9
Window Installation ....... 10-14
Troubleshooting Tips ....... 15
Norlnal Operating Sounds ..... 16
Consumer Support
Consumer Support ...Back Cover
Product Regisuafion ....... 17, 18
Warranty .................... 19
®
Write the model and serial numbers here:
#
#
Find these numbers on a label on the
side of the air conditioner.
3828A20024P 49-7403-3 11-OOJR
Page 2
iMPORTANTSAFETYiNFORMATiON.
READALLiNSTRUCTiONSBEFOREUSING.
A
For your safety, the information in this manual must be fo#owed to minimize the risk of fire, electric shock
or personal injury.
SAFETYPRECAUTIONS
_i::Use tiffs appliance only for its intended
purpose asdescribed in this Owner's
Manual.
iJ_i:;This air conditioner **lust be properly
installed in acc(mlance with the Installation
Insmlctions befbre it is used.
iJ_i::Nex>r unplug _xmr air conditioner by pulling
on the power coixl. Always gTip plug firmly
and pull straight out from the receptacle.
_ Repair or replace immediately all electric
service corxls that have become fiayed or
otherwise damaged. Do not use a cord that
shows cracks or abrasion damage along its
length or at either the plug or connector end.
iJ_i:;Turn tire nrode control to OR:and unplug
iJhi:;For }_)nr saf:ety...do not store or use
HOWTOCONNECTELECTRICITY
Do not, under any circumstances, cut or remove
the third (ground) prong from the power cord. For
personal safety, this appliance must be properly
grounded.
The air conditioner shouM ahvays be
plugged into its own indMdual electrical
outlet which has a voltage rating that matches
the rating plate.
your air conditioner befi)re making any
repairs or deaning.
NOTE:WesUongly recommend flrat any
serxicing be performed by a qualified
individual.
combustible materials, gasoline or odrer
flammable vapors or liquids in the vicinity
of this or any other appliance.
The power cot,1 of this appliance is equipped
with a 3-prong (g_mnding) plug which mates
with a standai,13-prong (g_mnding) wall
outlet m minimize tire possibility of electric
sho& hazai,l from this appliance.
Have tim wall outlet and circuit checked by a
qualified elecuician to make sure tile outlet is
properly gTounded.
V_qrere a 2-prong wall outlet is encountered,
it is _x)ur personal responsibility and obligation
to have it replaced with a properly g_mn(led
3-prong wall oudet.
This provides tire best pe_tbrmance and also
prevents overloading house wiring circuiLs
which could cause a fire hazai,l from
overheated wires.
See fire Installation hlsmlctions, Electrical
Requirements section for specific elecuical
connection requiremenLs.
2
Page 3
WARNING!
USEOFEXTENSIONCORDS-115-Voltmodelson/)/
Because of potential safety hazards under certain
conditions, we strongly recommend against the _ CAUTION:
use of an extension cord.
However, if you must use an extension col,l,
it is absolutely necessa U that it be a UL-listed,
14 gauge, 3-wire g_unding type appliance
extension cot,1 having a gTounding type plug
and outlet and that tile electrical rating of tile
cord be 15 amperes (minimum) and 125 volts.
USEOFADAPTERPLUGS-115-Voltmodelsonly
DO NOTuse an extension cord with any of
the 230/208 volt models.
vvww.GEAppliances.com
Because of potential safety hazards under certain
conditions, we strongly recommend against the use
of an adapter plug.
However, if}xm must use an adapter, where
local codes permit, a temporary connection mW
be **lade m a properly g_mnded 2-prong wall
outlet by use of a UL-listed adapter available at
most local hai,lware stores.
The larger slot in tim adapter must be aligned
with the larger slot in the wall outlet to provide
proper polarity in the connection of the power
cord.
V_qmn disconnecting tim power cot,1 from lhe
adapter, always hold the adapter in place wilh
one hand while pulling tim power cord plug
with the other hand. If tills is not done, the
adapter gTound temfinal is very likely to break
with repeated use.
If the adapter gTound temnnal breaks, DO NOT
USEtim air conditioner until a proper gTound
has been established.
Attachingthe adaptergroundterminalto a waftoutlet
coverscrewdoesnot groundtheapplianceunlessthe
coverscrewis metal,andnot insulated,andthe waft
outlet isgroundedthreughthe housewiring. Youshould
havethe circuit checkedbya qualifiedelectricianto
makesurethe outlet is properlygrounded.
READANDFOLLOWTHISSAFETYINFORMATIONCAREFULLY.
SAVETHESEINSTRUCTIONS
Page 4
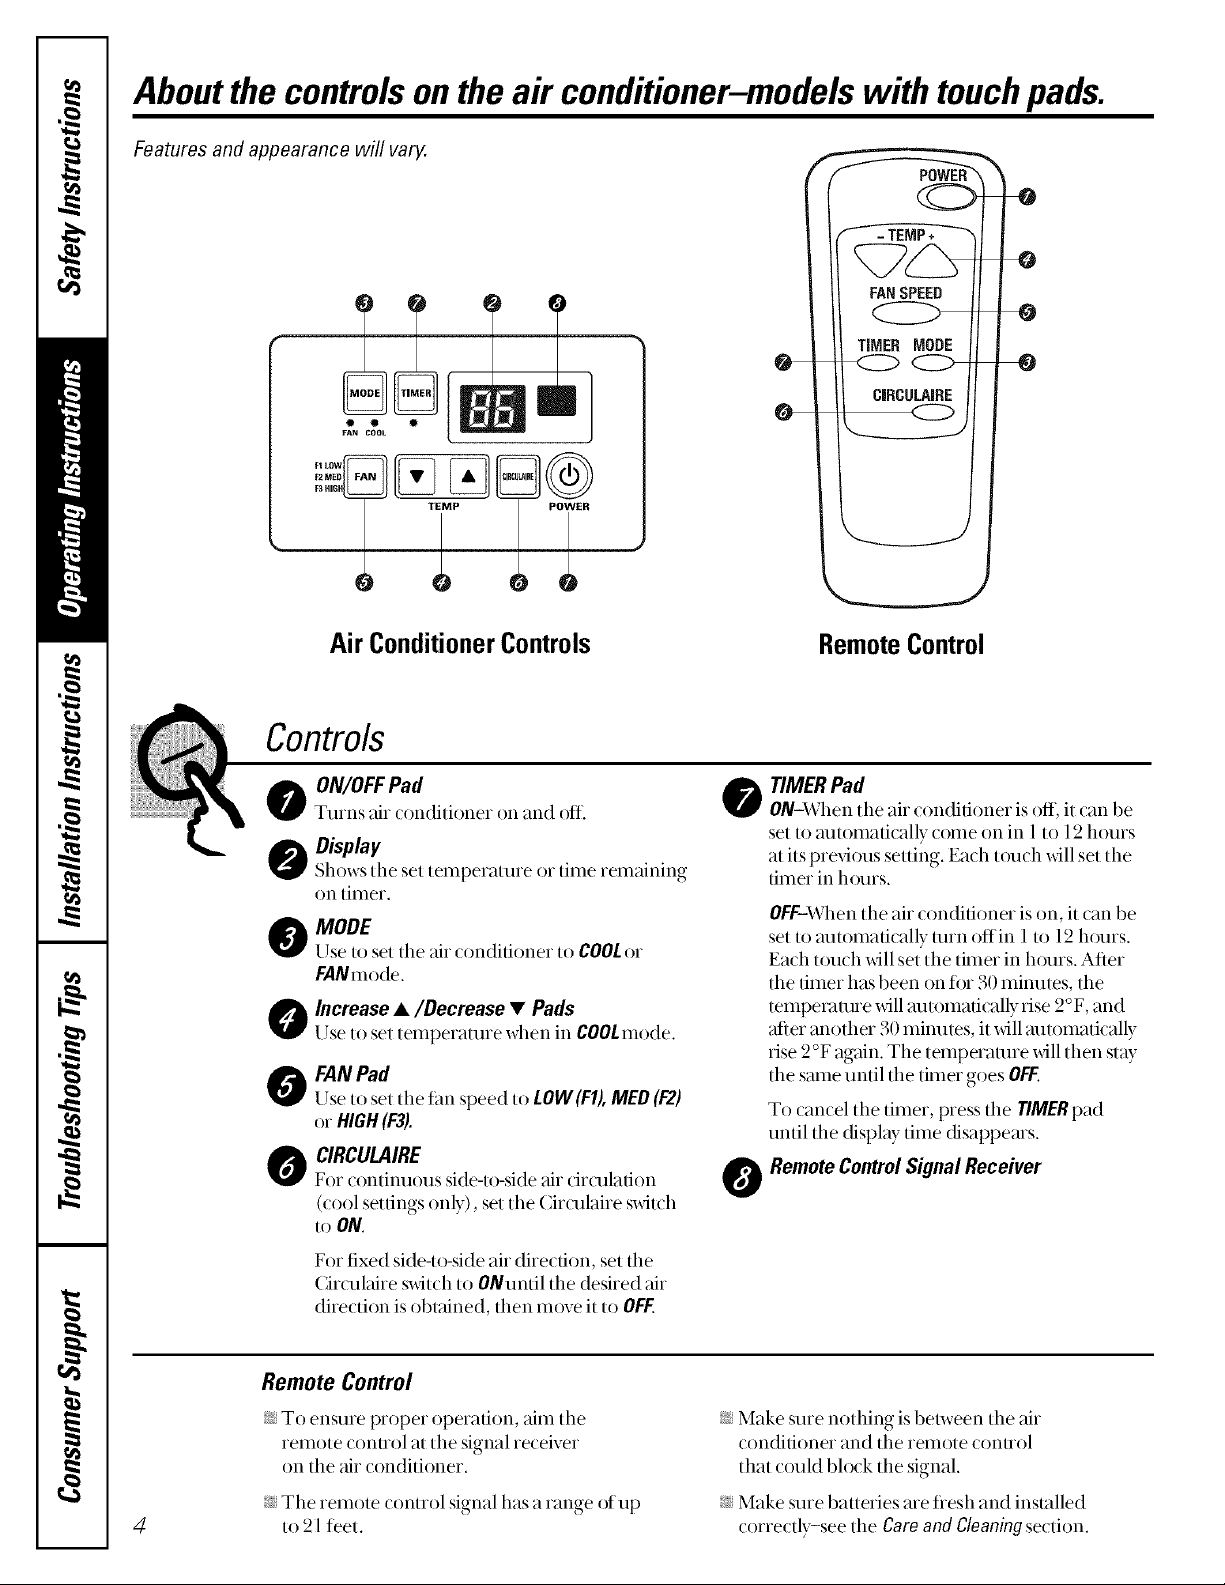
Aboutthe controlsontheair conditioner-modelswith touchpads.
Features and appearance will vary.
- TEMP+
FANSPEED
TIMER MODE
CJRCULAiRE
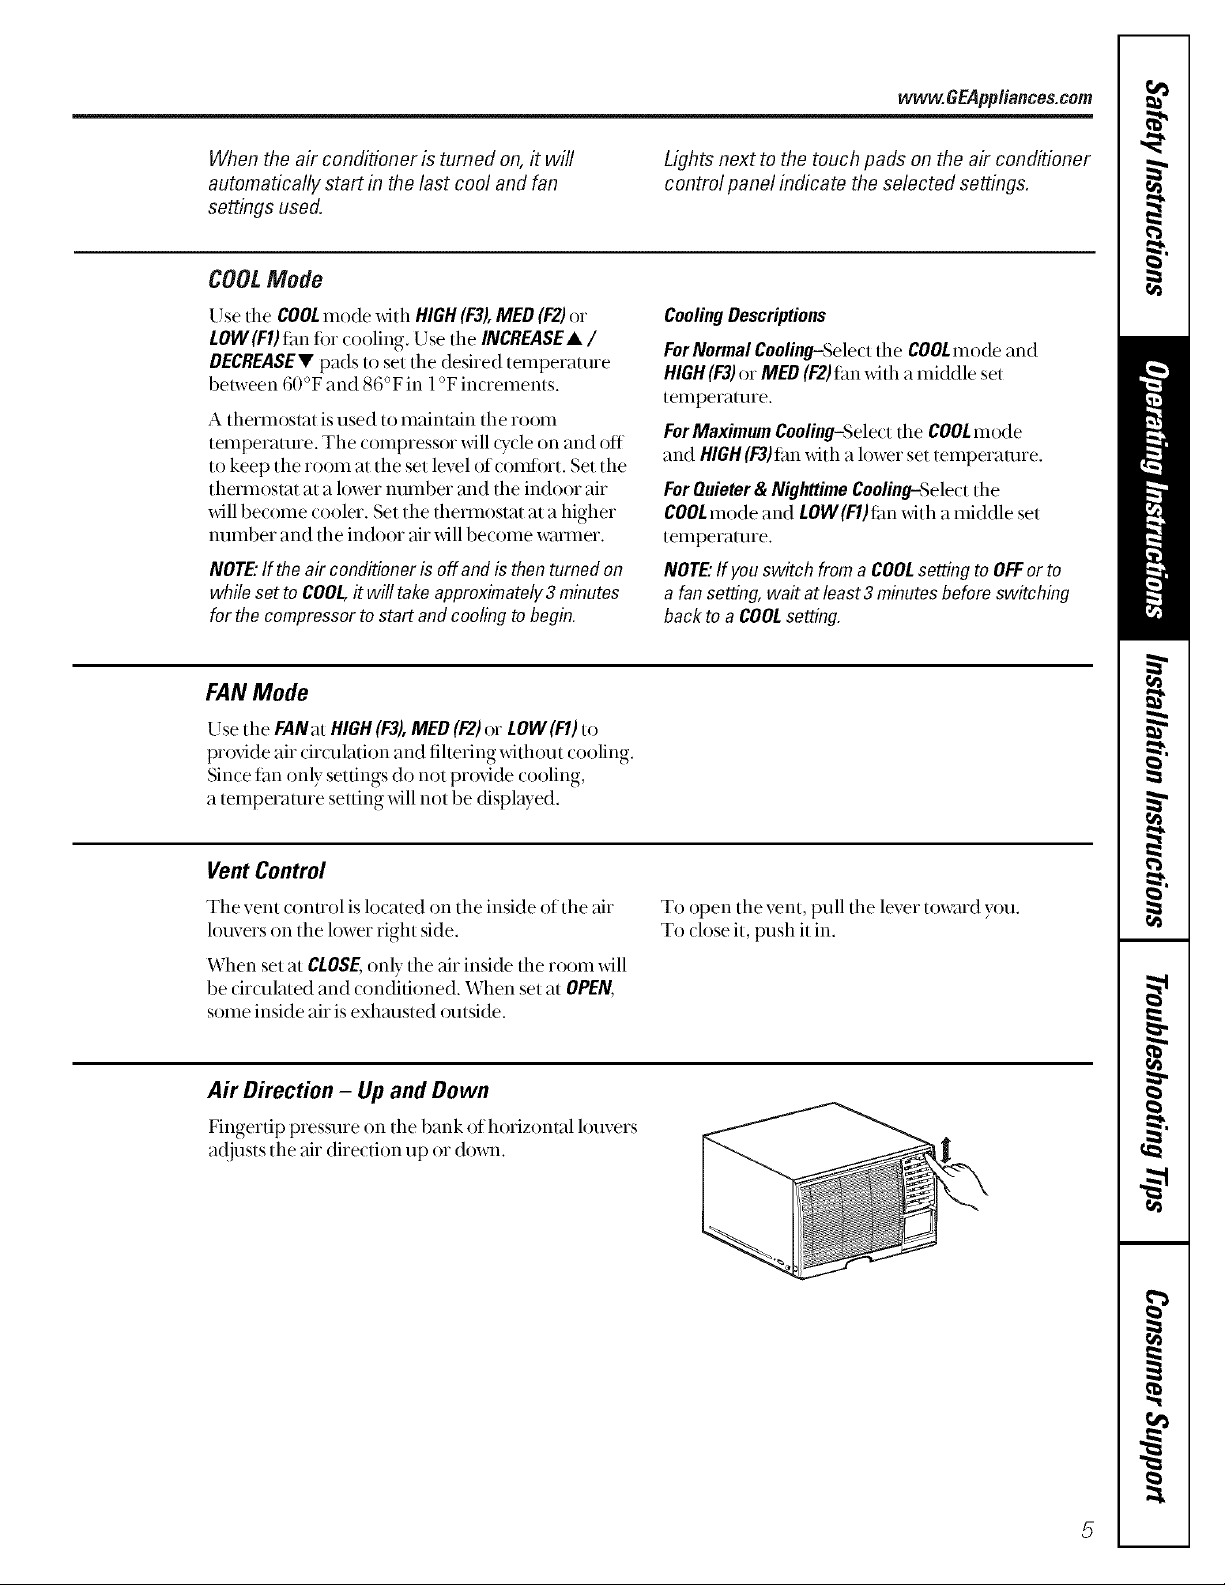
Air ConditionerControls
Controls
o ON/OFFPad
Ttnns air (onditioner on and ()ft_
Display
Shows the set temperature or time remaining
on timer.
O MODE
Use to set tile air (ondifioner to COOLor
FANmode.
Increase •/Decrease • Pads
Use to set temperature when in COOLmode.
O FANPad
Use to set the fan speed to LOW(F1),MED(P2)
or HIGH(F3!.
O IRCULAIRE
For continuous side-to-side_tircirculation
(cool settings only), set the ( irculaire s_dt(:h
to ON.
Remote Control
TIMER Pad
ON-When the air (onditioner is off, it can be
set to automatically come on in l to 12 houI's
at its previous setting. Each touch will set tile
time_ in horns.
OFF-When the air conditioner is on, it can be
set to mltomafically turn off in 1to 12 h{nns.
Each touch will set the timer in hours. After
the timer has been on fin 30 minutes, the
tempex'aune will mlmmafically rise 2°F, and
after another 30 minutes, it will mltomatically
rise 2 °F again. The temperaUne will then stW
the same until the timer goes OFF.
To cancel the timer, press the TIMERpad
until the display time disappears.
O RemoteControlSignal Receiver
For fixed side-to-side air direction, set the
Circulaire switch to ONuntil the desired air
direction is obtained, then move it to OFF.
Remote Control
i_:To ensure proper operation, aim the
remote conuol at the signal receiver
on the air conditioner.
i_:The remote control signal has a range ofup
4
to 21 feet.
i__Make sure nothing is between the air
conditioner and the remote (:ontiol
that (ould blo(k tile signal.
i__Make suie batteries are fiesh and installed
_orre_ tly-see the Care and Cleaningsection.
Page 5
www.GEAppliances.com
When the air conditioner is turned on, it will
automatically start in the last cool and fan
settings used.
COOLMode
Use the #00L mode _dth HIGH(F3),MED(F2)or
LOW(FIt tin1fi)r cooling. Use the INCREASE&/
OECREASEV pads to set the desired temperature
belween 60°F and 86°F in 1°F increments.
A thermoslat is used to maintain the room
temperature. The compressor will (ycle on and off
to keep the room at the set level of comfi)rt. Set the
thermostat at a lower number and the indoor air
will become cooler. Set the thermostat at a higher
number and the indoor air will become warmer.
NOTE."ff the air conditioneris off and isthenturnedon
whileset to COOL,it will takeapproximately3 minutes
for the compressorto startand coolingtobegin.
FAN Mode
Use the FANat HIGH(F3),MED(F2)or LOW(FI) to
pr_)dde air circulation and fihering without cooling.
Since tan only settings do not pro)vide cooling,
a temperature setting willnot be displayed.
Lights next to the touch pads on the air conditioner
control panel indicate the selected settings.
CoolingDescriptions
ForNormalCooling-Select the COOLmode and
HIGH(13)or MED(F2)tim with a middle set
temperature.
ForMaximum Cooling-Select the COOLmode
and HIGH(F3)tim with a lower set temperature.
ForQuieter& NighttimeCooling-Select the
COOLmode and LOW(FIttim with a middle set
temperature.
NOTE."If you switch from aCOOLsetting to OFForto
a fan setting,wait at least3 minutesbeforeswitching
back to a ¢00L setting.
Vent Control
The vent conuol is located on the inside of the air
louvers on the htwer right side.
When set at CLOSE,only the air inside the room _dll
be circulated and conditioned. When set at OPEN,
some inside air is exhm_sted outside.
A# Direction - Up and Down
Fingertip pressure on the bank of horizontal louvers
at!justs the air direction up or down.
To open the vent, pull the lever toward you.
To close it, D_sh it in.
5
Page 6
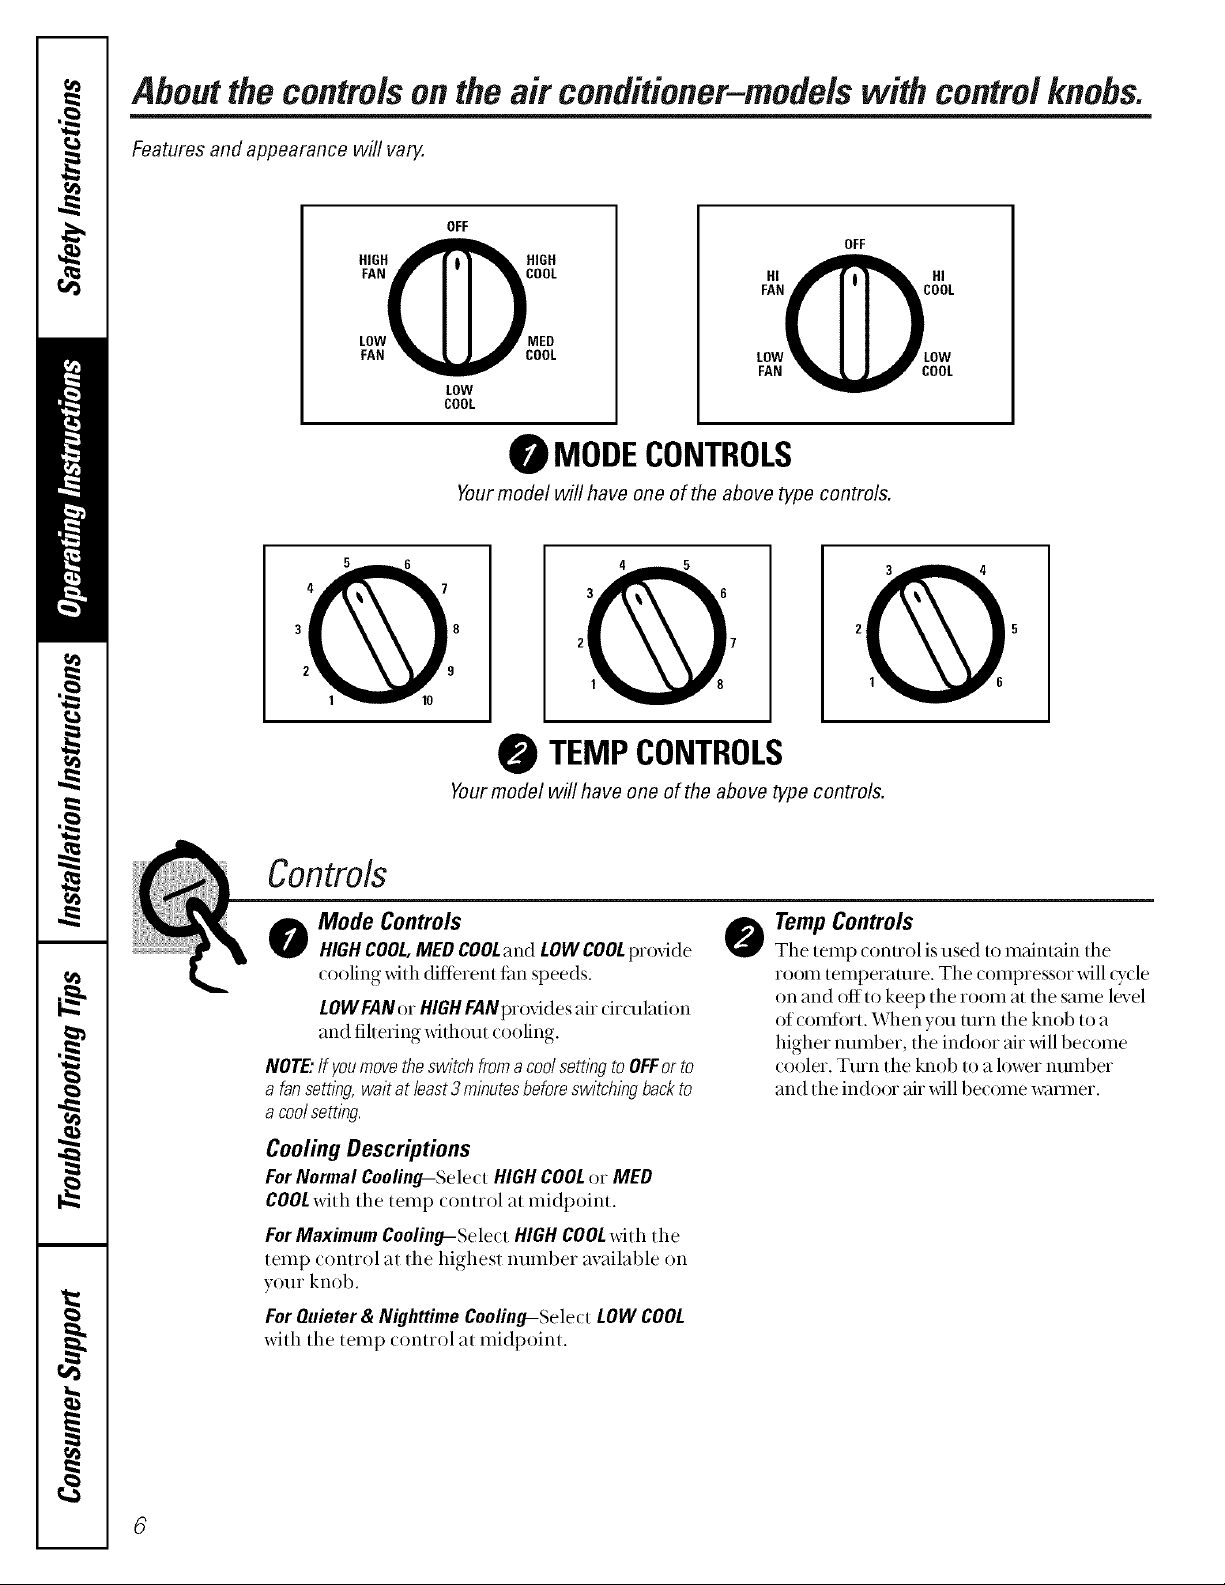
Aboutthecontrolson theair conditioner-models with controlknobs.
Features and appearance will vary.
OFF
FAN OOL
HIGHOIIGH
LOW _ED
FAN COOL
LOW
COOL
Yourmodel will have one of the above type controls.
Yourmodel will have one of the above type controls.
FAN OOL
HI OIHI
LOW .OW
FAN COOL
MODECONTROLS
TEMPCONTROLS
OFF
Controls
o Mode Controls
HIGHCOOL,MED COOLand LOWCOOLpro',4de @
(ooling wifll diflerem fire speeds.
LOWFANor HIGHFANprovides air circulation
and fihering _4fl_out cooling.
NOTE."If youmovetheswitchfromacoolsettlbgtoOFFor to
a fansettlbg,waitatleast3minutesbeforeswitchingbackto
a coolsetting.
Cooling Descriptions
ForNormal Cooling-Se]e( t HIGHCOOLor MED
COOLwith tile temp ( ontrol at midpoint.
ForMaximum Cooling-Select HIGH COOLwith the
temp (ontrol at tile highest number available on
your knob.
For Quieter & Nighttime Cooling-Select LOW COOL
with the temp control at midpoint.
TempControls
The temp conuol is used to maintain the
room temperature. The compressor will _ycle
on and offto keep the room at the same level
of comfort. When you unn the knob to a
higher number, the indoor air will become
cooler. Turn the knob to a lower number
and the indoor air will become winmet.
Page 7

Additional controls and important information.
EnergySaver(onsomemodels)
The energy saver sxdtch controls the fan.
0N-The fire and compressor (ycle on and off
together. This resuhs in xfider xvuiafions of room
temperature and humidi/y. Normally used when
the room is unoccupied.
Vent Control
wvvw.GEAppliances.com
OFF-The tim tuns all the time, while the
compressor _ycles on and off.
This sMtch nmst be set at OFFinorder/o use
the fan settings (on the mode control).
The vent (onuol is located above the conuol knobs.
When set at CLOSE,only the air inside the room _dll
be circulated and conditioned. When set at OPEN,
some inside air is exhm_smd outside.
Air Direction - Side-to-Side
CIRCULAIRE(onsomemodels)
For fixed side-to-side air direction, set the
Cir(ulaire swi[ch to 0Nuntil the desired air
direction is obtained, then move itto OFF.
For continuous side-to-side air circulation (cool
settings only), set the Ciwulaire switch to ON.
Air Direction - Up and Down
Fingertip pressure on the bank of horizon/al louvers
at!justs the air direction up or down.
To open the vent, pull the lever t_)ward you.
To close it, push it in.
CIRCULAIRE
OFF
ON
7
Page 8

Careandcleaningoftheair conditioner.
Grille and Case
Turn tile air (onditioner offand remove tile plug To (lean, use water and a mild detergent. Do not
fiom the wall outlet before _leaning, use blea_ h or abrasives.
OutdoorCoils
The coils on tile outdoor side of tile air conditioner
should be dm(ked regularly. Ifflmy are dogged
xfith cfirt or soot flmy may be prolessionally steam
cleaned, a se_xfce available flnough your (;E
sect4( e outlet.
Air Filter
The air tiller behind the tiont grille shouM be
checked and cleaned at least eve_y 30 days or more
often if necessal y.
Toremove:
_] Open tile inlet grille upward by pulling out tile
bottom oftim inlet grille.
[_ Using the tab, pull up slightly on tile fiher to
release it and pull it down.
Clean tile fiher wifll winm, soapy water. Rinse and
let tlle fiher dU before replacing it.
CAUTION:DONOToperatethe air condifioner without a
filter becausedirt and lintwill clogit and reduceperformance.
8
Page 9

Preparingto install theair conditioner.
Read these instructions completely and carefully.
BeforeYou
NOTE TOINSTALLER:Leave these instructions with
the air conditioner after installation is completed.
NOTE TOCONSUMER:Keep this Owner's Manual
and Installation Instructions for future use.
IMPORTANT NOTES:
For personal safe_ this air conditioner must be
properly grounded.
It is important to have the wall outlet and circuit
checked by a qualified electrician if there is any
doubt as to whether a proper ground exists.
Follow National Electric Codes (NEC)and/or local
codes and ordinances.
60 Hz grounded outlet protected with
Some models require 115/120-voh a.c.,
a 15-amp time delay fi_se or dr_uit breaker.
The 3-prong grounding plug minimizes the
possibili/y of electric shock hazard. If the w_dloutlet
y,)u plan to use is only a 2-prong outlet, it isy,)ur
responsibili/y to have it replaced with a properly
grounded 3-prong wall outlet.
CAUTIOn:
Do not, under any circumstances, cut or
remove the third (ground) prong from the
power cord.
Do not change the plug on the power cord
of this air conditioner.
Aluminum house wiring may present
special problems--consult a quaflfied
electrician.
prote_ ted _dtll a time delay fl_se or dr_uit
Some models require 230/208-voh a.c.,
breaker. These models should be installed
on their own single brandl cir(uit fi)r best
performance and to prevent overloading
house or ap_ntment wiring (ir(uits, whi(h
(ouM cause a possible fire hazard fiom
(n,erheating _dres.
ToolsYouWillNeed
_:;_l'hillips-head s( rewdfiver
_';Fla/-blade screw&iver
i_?Ruler or/ape measure
>: Sdssors or knite
Pencil
i_?I,evel
i;_?Hammer
Page 10

Window Installation Instructions.
Parts Included
Top mounting rail Window
X _'_ _ sashseal
Left __._'_> ___
aCpOrdion /_JJJ_ . Foam top /__. __
an__ window__
Frame guide (2) '___ : jj accRighlon
_" _ Sill bracket (2}_ __ panel
Wi__king _ [_ Support bracket (2) _. _
Type A (14) Type B (7)
Type C (5) Type D (2)
Carriage Bolt (2) Lock Nut (4)
@
5"
l
'i
10
Page 11

Read completely, then follow step-by-step.
Window Requirements
_; These instm( tions are fi)r a standard (h)uble-
hung xdnd()w. You will need to mo(fi_ them tin
other types of_@_dows.
_; The air conditioner can be installed without the
accordion panels if needed to fit in a nmrow
win&)w. See the window opening dimensions to
the right.
_; All supporting parts nmst be se(ured to firm
w()od, mason U or metal.
)_;The electrical {>utletmust be within reach of the
p()wer cord.
Storm Window Requirements
A storm wind()w fiame _fillnot allow the air
conditioner to tilt towmds the ou/side and _dll keep
it flom (haining properly. To at!just lot this, attach
a piece of wood to the stool.
1/2" higher
thanframe
t Stool
D===8
18"rain.
29" to41"
(Withaccordionpanels)
m
[
26¼"min.
(Withoutaccordionpanels)
Window opening dimensions are for a standard double-hung
window.
WOODPIECES--
WIDTH:2"
LENGTH:Ix)ng enough to fit inside the window
tiame.
/ Wood
THICKNESS'.To determine the thickness, place a
pie(e of wood on the stool to make it 1/2" higher
than the top of the storm windowfiame.
frame
Attach securely xdth nails or screws provided by
the installer.
11
Page 12

Window InstallationInstructions.
Remove the Air Conditioner From the Case
[_] Remove tile 2 shipping s(rews fiom tile ba(k of
the case.
] Remove tile 2 screws on each side of the case.
Keep these for later use.
Shipping screws
Prepare the Window and the Case
[_] (;ut tile window sash seal to tile proper length.
Peel offthe backing and attach tile seal to tile
underside of the window sash.
[_] Slide tile air conditioner fiom tile case by
gripping tile base pan handle and pulling
ti)iward while bracing tile case.
[_ Remove the backing tiom the top mounting
rail seal strip and attach the seal to the bottom
of the top mounting rail.
12
Bottomofcase
[] (;areftflly insert the pl_tstic fiame guides into
tile bottom of the case on each side.
tuide
[_] Install tile top mounting r_filwith 5 type A
screws on the inside of the case. Insert the
fiames fin the accordion panels into the top
mounting rail and the ti_une guides. Attach
the accordion panels/o the side of the case
using 5/ype A screws.
Topmountingrail
c_
G_
Frameguides 12
Page 13

Prepare the Window
_] I,oosely attach tile sill brackets to the support
bra(kets using tile 2 (aniage bohs and 2
h)ck nuts.
Supportbracket
Carriage I
belt
Locknut
Sill bracket
Install the Case in the Window
_] Align the inside edge of din sill brackets xdth
the 11" marks fiom the centerline and attach
them to the window sillusing 2 type B screws
on each side.
_] Carefiflly place dm case on the window stool
aligning the center front on the bottoln with
the centerline marked on the window stool.
Close tlle xdndow making sure the xdndow sash
isbehind tlle top mounting rail.
[_ Open the window and mark the centerline of
the xdndow stool. Measure and mark l 1" to the
left and right of the centerline.
Centerline
:
[_] Securethe case to the window stool by
using 3 type Bs(rews.
i
[_ Using the larger diameter hole in the case, attach
tl_ebra( kets to tl_e (ase using two type D s(rews
and 2 lock nuts on each side.
_] A({justthe cmriage bohs andthe lock nuts in
each support so that the case isinstalled with a
slight tilt to the outside. Use a level; about 1/3
bubble will be the correct case slant to the
outside. Tighten the bolts.
CAUTION:DONOTdrilla holein thebasepan.Theunitis
desliTnedtooperatewithapproximately1/2" ofwaterin the
basepan.
[] Pull dm accordion panels to each xdndow
sash ml(k. Atta(h dram on ea(h side to tile
window sash and the _dndow stool using
4 type ( s(rews.
Y
13
Page 14

Window InstallationInstructions.
Install the Window Locking Bracket and the Foam TopWindow Gasket
[] Aua(h the window lo(king bra(ket _dth a [] _idth.
type C s(rew.
j [] Sttflfthe foam between the glass and the
Cut the ibam top window gasket to tile window
window to prevent air and insects floin getting
into the rooln.
Install the Air Conditioner in the Case
[_ Slide the air conditioner into tl_ecase.
Reinstall dm 2 screws removed earlier on each
side of tl,e case.
_] Befi)re installing the flonl grille, pull om ll_e
xen[ (otl[l;ol lever lo1aled above II,e uni[
(ontrol knobs, as shown.
[] Auach tl_efiont grille to tl_e case by inserting the
labs on the grille into tim slots on the front of din
case. Push the grille in until it snaps into place.
/
/ _---_-7,,i(,:!Y I
• • C::D@
Guidethe lever carefully
through the grille as you
push it in.
_]Lifl the inlet grille and secure the fiont fl_une
widl a type A s( few. I_ower the inlet grille into
pla( e.
14
Page 15

Beforeyoucall forservice...
Troubleshooting tips
Save time and money/. Review the chart below first
and you may not need to call for service.
Possible Causes What ToDo
Airconditioner
doesnotstart
Air conditioner does not Airflow is restricted. • Make sure there m'e no curtains, blinds or fin'nimre
coolasit should blocking tile fiont of tile air con(htioner.
The air conditioner
is unplugged.
The fuse is blown/circuit ° Check tile house fllse/drcuit breaker box and replace
breaker is tripped, tile filse or reset the breaker.
Power failure. • If power thilure occurs, turn tile air conditioner OFF.
The temp controlmay • On models with touch pads: In COOLmode, press tile
not be set correctly. DECREASE'_'pad.
The air filter is dirty. • Clean tile fiher at least evely 30 (la}:s.
The room may have been hot. • When tile _firconditioner is first turned on you need to
° Make sure the air conditioner plug is pushed completely
into the outlet.
When power is restored, wait 3 minutes to restart tile
air conditioner to prevent tripping of tile compressor
)verload.
• On models widl conrad knobs, turn tile temperature
knob to a higher number.
See tile OperatingInstructionssection.
allow time ti)r tile room to cool down.
Cold air is escaping. • Check ti)r open finnace floor registers and cold air reunns.
• Set tile air conditioner's vent to tile closed position.
Cooling coils have iced up. • See "Air conditioner freezing up"below.
Aft conditioner
freezingup
Theremotecontrol The batteries are inserted "Check tile position of the batteries. Tile}" should be
isnotworking incorrectly, inserted in tile opposite (+) and (-) direction.
Water drips outside Excessively hot and • This is normal.
Water drips indoors The air conditioner is not • For proper water disp_)sal, make sure tile air conditioner
Water collectsin
basepan
Ice blocks the air flow
and stops the air conditioner
from cooling the room.
The batteries maybe dead. • Replace tile batteries.
humid weather.
tilted to the outside, slants slightly flom tile case flont to tile rein.
Moisture is removed from
indoor air and drains into
rear of a cabinet where a fan
blows it against the outdoor
condenser coil.
• On inodels with control knobs, set tile inode control at
HIGHFANor HIGHCOOLwith tile temp at Ior 2.
• On models xOth toudl pads, set tile (ontrols at
HIGH(F3)FANor HIGH(1:3)COOLand settile thermostat
to a higher temperature.
• This is normal ti)r a short period ill areas with little
humidity; normal for a longer period in veU humid meas.
15
Page 16

Beforeyoucall forservice...
Troubleshooting -tips
Normal Operating Sounds
i2 Y_m may hema pinging noise caused by water
being picked up and thrown ag_dnst the
condenser on rainy days or when the humidity is
high. This design tbamre helps rem_ve moisture
and impr_ _veeflicien_ T.
>:Y{)u may hear the thermostat click when the
compressor _Tcles on and oil
i2 Water will collect in the base pan during
high humidity or on rainy days. The water
may oveffh)w and drip flom the outdoor side
of the unit.
>: The tim may run even when the compressor
does not.
/6
Page 17

GE Service Protection Plus '_'
GE, a name recognized worldwide %r quality and dependability, oKbrs you
SaMce Protection Plus'"-comprehensive protection on all your appliances-
No Matter What Brand!
Benefits Include:
• Backed by GE
• All brands covered
• Unlimited service calls
• All parts and labor costs included
• No out-of-pocket expenses
• No hidden deductibles
• One 800 number to call
You will be completely satisfied with our service protection or you may request your money back
on the remaining value of your ( ontra(t. No questions asked. It's that simple.
Protect your refligerator, dishwasher, washer and dryer, range, TV, VCR and nmch more-anybrand!
Plus there's no extra charge fi)r emergenq, service and low monthly financing is available. Even icemaker
(:overage and food spoilage protedion is offered. You can rest easy, knotting tl_at all your valuable
household produds are protected against expensive repairs.
Place your ( onfiden(e in GE and tall us in d_e U.S. toll-flee at 800-626-2224
for more infi)rmafion.
_AII I)13nds (overed, up Io 20 yeals old, ill I]le (olqlh]elll31 U.S.
We TI Cover Any Appliance.
Anywhere. Anytime.
._ Cut here
Please place in envelope and mail to:
General Electric Company
Warranty Registration Department
P.O. Box 32150
Louisville, KY 40232-2150
/7
Page 18

Consumer Product Ownership Registration
[)ear Customer:
Thank you for purchasing our product.... and thank vou_for placing your confidence in us.
We are proud to have you as a customer!
Follow these three steps to protect your new appliance investment:
Complete and mail
your ConstmTer
Product Ownership
Registration today.
Have/he peace
mind of knowing w{
call co{llact you in Ill{
unlikely even lof a
sal>ty modiiicalion.
Al_er mailing the
registration I)elow,
store Ibis doctlmelll
in a sati' place. It
co{l[ains inlbrmadon
you will need should
you require service.
Our service number is
800 GE (ARES
(800-432-2737).
Model Number Serial Number
I I
Important: If you did not get a registration card with your
product, detach and return the form below to
ensure that your product is registered, or register
online at www.GEAppliances.com.
Consumer Product Ownership Registration
Read your Owner's
Manual carelully.
It will help you
operale yollF new
appliance properly.
, I
._ Cul hcrc
I I I
Mr. ?,Is. Mrs. Miss
First[ [ Last[
Name I I I I I I I I I Name I I I I I I I I I I I I
Nil-eel [
Address I I I I I I I I I I I I I I I I I I I I I I I I
Apt. # [ I I I I I I I [ E-mail Address
1)alePlaced
Nitml 1-1 1)a_,
Occasionally, we ma} allow selected companics to scnd 3ou inibrmadon.
Check here it)ou do nol want Ibis inlormalion.
GEAppliances
General Electric Company
Looisville, Kentocky
ww_GEAppliances, com
Model Number Serial Number
zip
18
Page 19

Air ConditionerWarranty
All warranty service provided by our Factory Service Centers,
or an authorized Customer Care®technician. To schedule service,
on-line, 24 hours a day, contact us at www.GEAppliances.com, or
call 800-GE-CARES.
GE Will Replace:
Fromthedate Ofthe
origina!purchase
Five]Fears
From the date of the
original purchase
i;_?Service trips to your home to teach you how to use the
product.
>: Improper installation. If you have an installation problem,
or if the air conditioner is of improper cooling capacity
for the intended use, contact your dealer or installer. You
are responsible for providing adequate electrical
connecting facilities.
>:Failure of the product resulting from modifications to the
product or due to unreasonal)le use including failure to
provide reasonable and necessary maintenance.
Any part of tile _firconditioner which filils due to a detect in materials or workmanship.
I)uring this full one-year warranty, GE will also prox4de, free of charge, all labor
and in-home servi(e to repla(e the (lefe(tive part.
Anypartofthe sealedrefrigeratingsystem (the compressor, condenser, evaporator
and all connecting robing) which fitils (hm to a det_ectin materials or workmanship.
During this five-year warranty,GE will also pr(Mde, free of charge, all labor and
in-home service to replace the detective pmt.
Staple your receipt here.
Proof of the original purchase
date is needed to obtain service
under the warranty.
i;_):Replacement of house fuses or resetting of circuit
breakers.
>: Failure due to corrosion on models not corrosion-
protected.
i_yDamage to the product caused byimproper power supply
voltage, accident, fire, floods or acts of God.
>: Incidental or consequential damage caused by possible
defects with this air conditioner.
>: In commercial locations labor necessary to move the unit
to a location where it is accessible for service by an
individual technician.
This warranty is extended to the original purchaser and any succeeding owner for products purchased for home
use within the USA. In Alaska, the warranty excludes the cost of shipping or service calls to your home.
Some states do not allow the exclusion or limitation of incidental or consequential damages. This warranty gives
you specific legal rights, and you may also have other rights which vary from state to state. Toknow what your
legal rights are, consult your local or state consumer affairs office or your state's Attorney General.
Warrantor: General Electric Company. Louisville, KY 40225
19
Page 20

ConsumerSupport.
GEAppliancesWebsite
Have a question or need assistance xdth }_mr appliance? TU tile GE Appliances Website 24 hours a day,
]
any d W of tile year! Fox greater convenience and thster service, you can now d(x_llload O_ller's Mamlals,
or(Dr parts, catalogs, or even sche(hlle service on-line. You can also "Ask Our Temn of Experts ......
y(nn"questions, and so much more...
ScheduleService
Expert GE repair sexx,ice is only one step away fiom your door. Get on-line and schedule your sexx,ice at
VOtlX(onvenien(e _ ...... " ..... _ ' ' _ ' _ _ " _ "" " "
• 24 horn s an). da) ot tile ).eax _Ox (all 800-(,E-(;ARES (800-432-2131) (hH mg nox real
business hours.
RealLifeDesignStudio
GE supports tile Universal Design concept-products, sex_-icesand environments that can be used by
people of all ages, sizes and capabilities. We recognize the need to design fi)r a wide range of phFsical and
mental abilities and impairments. Fox details of GE's Universal Design applications, including kiwhen
design ideas fl)r people with disabilities, check out our Website tod W. Fox the heming impaired, please call
800-TDD-GIL_kC (800-833-4322).
ExtendedWarranties
wwvv.GEAppliances.com
wwvv.GEAppliances.com
wwvv.GEAppliances.com
wwvv.GEAppliances.com
Purchase a GE extended warranty and learn about special discounts that are available while your warranty
is still in efle(t. You (an purchase it on-line anytime, or (all 800-626-2224 during normal business hours.
(;E Consumer Home Ser_4ceswill still be there after your waFiantv expires.
gr
PartsandAccessories
lndixfduals qualified to service their o_l appliances can have parts or accessories sent (firectly to their homes
]
(VISA, MasterCard and Dis(over (ards are a((epted). Order on-line today, 24 hours m_exy day or by phone at
800-626-2002 during normal business hours.
Instructions contained in this manual cover procedures to beperformed by any user. Otherservicing generally
should be referred to qualified service personnel Cautionmust be exercised, since improper servicing may cause
unsafe operation.
ContactUs
If you me not satistied with tile service you receive flom GE, contact us on our Website with all tile details
including your phone number, or _Tite to: General Manager, Customer Relations
GE Appliances, Appliance Park
I.ouisville, KY 40225
wwvv.GEAppliances.com
wvvvv.GEAppliances.com
RegisterYourApplbnce wwvv.GEAppliances.com
! ]
Register your new appfiance on-line--at your convenience! Timely product regisuation will allow fi)r
enhan(ed (ommuni(ation and prompt sev_d(e under tile terms of your warranty, should tile need arise.
You may also mail in tile pre-pfinted regisuation card included in tile packing material, or detach and
use tile form in this Owner's Manual.
Printed in Korea
 Loading...