

GE Profile Advantium PSA1200, Profile Advantium PSA1201, Advantium CSAI201, Cafe Advantium CSA1201 Owner's Manual
Page 1
GEAppliances.c0m
Advantium
Cooking controls .....................................12
Getting to know the Advontium .........10
Oven features ...........................................1!
Safety ........................................................2-9
U
-0
0
L. @
LLJ
L9
_ Cooking tips ..............................................23
• _ Micro 30 Secs...........................................25
C_ Sensor cooking ................................27, 28
Speedcooking
Cooking tips ..............................................14
Custom speedcook ................................17
My Recipes.........................................18, 19
Power level ................................................16
Speedcook cookware ...........................14
Speedcook-safe cookware ...................7
Things that are normal ........................13
Using the pre-set
speedcook menu ....................................15
Other Cooking Functions
Broiling and toasting ............................21
Convection baking .................................20
Warming and proofing ........................22
Microwaving
Cook by time .............................................24
Defrost by food type .............................26
Defrost by time ........................................25
Defrosting tips..........................................25
Microwave power level(s)...................24
My Recipes.................................................25
Microwave-safe cookware ...................6
exposure to excessive
Precautions to avoid possible
microwave energy ....................................2
Things that are normal ........................23
Using pre-set
microwave selections ...........................24
Other Features
Automatic fans ........................................31
Automatic Night Light..........................30
Auto Conversion......................................29
Beeper volume .........................................29
Control lockout ........................................3!
Clock.............................................................29
Cooking Complete..................................28
Delay Start .................................................30
Display ON/OFF.......................................29
Help...............................................................3!
Reminder ....................................................29
Repeat last.................................................28
Resume feature .......................................29
Surface Light ............................................32
Temperature Units.................................30
Timer.............................................................3!
Turntable On/Off .....................................30
Vent Fan......................................................32
Care and Cleaning
Cleaning the inside................................32
Cleaning the outside .............................34
Cooking trays and
wire oven rack .........................................33
Removable turntable ............................33
Replacing the cavity light ...................35
Replacing the surface light................35
Troubleshooting
Problem Solver.................................37, 38
Consumer Support
Consumer Support ..............Back Cover
Warranty ....................................................39
PSA1200
PSA1201
CSAI201
>
-0
Model#
Write the model and serial numbers here:
Serial#
Findthese numbers on a label inside
the oven.
PIFL38211612 49-40624 03-10 GE
Page 2
IMPORTANT SAFETY INSTRUCTIONS
READ ALL INSTRUCTIONS BEFORE USING
Advantium Oven
When using electrical appliances basic safety precautions should be followed, including the following:
,AWARNiNG: To reduce the risk of burns, electric shock, fire, injury to persons, or exposure to excessive
microwave energy:
PRECAUTIONS TO AVOID POSSIBLE EXPOSURE
TO EXCESSIVE MICROWAVE ENERGY
(a) Do Not Attempt to operate this oven with (c)
the door open since open-door operation
can result in harmful exposure to microwave
energy. It is important not to defeat or
tamper with the safety interlocks.
(b_
Do Not Place any object between the oven
front face and the door or allow soil or
cleaner residue to accumulate on sealing
surfaces.
[]
Read all instructions before using
this appliance. When using electrical
appliances, basic safety precautions should be
followed, including the following:
[]
Read and follow the specific precautions in the
Precautions to Avoid Possible Exposure to Excessive
Microwave Energy section above.
[]
This appliance must be grounded. Connect only
to a properly grounded outlet. See the Grounding
Instructions section on page 8.
[]
This microwave oven is ULlisted for installation over
both gas (less than 60,000BTU) and electric ranges.
[]
This over-the-range oven is designed for use over
ranges no wider than 36:' It may be installed over
both gas and electric cooking equipment.
[]
Do not operate this appliance ifit hasadamaged
power cord or plug,if it is notworking properly, or if
it has been damaged or dropped. Ifthe power cord
isdamaged, it must be replaced by GeneralElectric
Serviceor an authorized serviceagent using a power
cord available from General Electric.
Do Not Operate the oven if it is damaged.
It is particularly important that the oven
door close properly and that there is no
damage to the:
(1) door (bent),
(2) hinges and latches (broken or loosened),
(3) door seals and sealing surfaces.
The Oven Should Not be adjusted or
repaired by anyone except properly qualified
service personnel.
[]
To reduce the risk of fire in the oven cavity:
Do not overcook food. Carefully attend appliance
when paper, plastic or other combustible materials
are placed inside the oven while cooking.
Remove wire twist-ties and metal handles from
paper or plastic containers before placing them in
the oven.
Do not use the oven for storage purposes. Do not
leave paper products, cooking utensils or food in the
oven when not in use.
Do not pop popcorn in your microwave oven unless
in a special microwave popcorn accessory or unless
you use popcorn labeled for use in microwave ovens.
If materials inside the oven ignite, keep the oven door
closed, turn the oven off and disconnect the power
cord, or shut off power at the fuse or circuit breaker
panel. If the door isopened, the fire may spread.
Do not use the Sensor Features twice in succession
on the same food portion. If food is undercooked
after the first countdown, use COOK BY TIHE for
additional cooking time.
SAVE THESE INSTRUCTIONS
Do not use the oven to dry newspaper.
Page 3
IMPORTANT SAFETY INSTRUCTIONS
READ ALL INSTRUCTIONS BEFOREUSING
IMPORTANT SAFETY INSTRUCTIONS
Advantium Oven
[] Be sure your appliance is properly installed []
and grounded by a qualified technician in
accordance with the provided installation
instructions.
[] Install or locate this appliance only []
in accordance with the provided installation
instructions.
[]
Some products such as whole eggs and
sealed containers-for example, closed
jars-are able to explode and should not be
heated in this oven. Such use of the oven
could result in injury.
[]
Do not mount this appliance over a sink.
[]
This oven is not approved or tested for
marine use.
[]
This oven is UL listed for standard wall
installation above 36 inches.
[]
Do not operate this appliance if it has
been damaged or dropped.
[]
As with any appliance, close supervision
is necessary when used by children.
[]
Use this appliance only for its intended use
as described in this manual.
[]
Do not use corrosive chemicals or vapors
in this appliance.
[]
This oven is specifically designed to heat,
dry or cook food, and is not intended for
laboratory or industrial use.
This appliance must only be serviced by
qualified service personnel. Contact nearest
authorized service facility for examination,
repair or adjustment.
Do not cover or block any openings on the
appliance.
[]
Do not store this appliance outdoors.
Do not use this product near water-
for example, in a wet basement, near a
swimming pool, near a sink or in similar
locations.
[]
See door surface cleaning instructions in the
Care and Cleaning of the Oven section
of this manual.
[]
If materials inside the oven ignite, keep the
oven door closed, turn the oven off and
shut off power at the fuse or circuit breaker
panel. If the door is opened, the fire may
spread.
[]
The wire oven rack should not be used for
speedcook or microwave cooking to prevent
arcing.
[]
Do not cover racks or any other part of
the oven with metal foil. This will cause
overheating of the oven.
[]
Oversized foods or oversized metal utensils
should not be used in oven as they may
create a fire or risk of electric shock.
[]
Do not use paper products when appliances
is operated in modes other than microwave.
SAVE THESE INSTRUCTIONS
Page 4
IMPORTANT SAFETY INSTRUCTIONS
READ ALL INSTRUCTIONS BEFOREUSING
IMPORTANT SAFETY INSTRUCTIONS
[]
Thermometer--Do not use regular cooking
or oven thermometers when cooking by
microwave. The metal and mercury in these
thermometers could cause arcing and
possible damage to the oven. Do not use a
thermometer in food you are microwaving
unless the thermometer isdesigned or
recommended for use in the microwave
oven.
[]
Do not clean with metal scouring pads.
Pieces can burn off the pad and touch
electrical parts involving risk of electric
shock.
[]
Do not store any materials, other than our
recommended accessories, in this oven
when not in use.
[]
Do not let cord hang over edge of table or
counter.
[]
Keep power cord away from heated
surfaces.
[]
Do not immerse power cord or plug in
water.
[]
Do not operate the oven without
the turntable in place. The turntable must
be unrestricted so it can turn.
Advantium Oven
[] During and after use, do not touch, or
let clothing or other flammable materials
contact any interior area of the oven;
allow sufficient time for cooling first.
[] Potentially hot surfaces include the
oven door, floor, walls, oven rack and
turntable.
[]
It is important to keep the area clean where
the door seals against the microwave. Use
only mild, non-abrasive detergents applied
with a clean sponge or soft cloth. Rinse well.
[]
Do not store anything directly on top of
the microwave oven surface when the
microwave oven is in operation.
[]
Keep the oven free from grease buildup.
[]
Per USDA, cook meat to an INTERNAL
temperature of at least 160°F, and
poultry to an INTERNAL temperature
of at least 180°F. Cooking to these
temperatures usually protects against
foodborne illness. For more information,
see www.foodsafety.gov.
ARCING
Arcing can occur during both speedcooking and microwave cooking. Ifyou seearcing,
press the CLEAR/OFFpad and correct the problem.
Arcing is the microwave term for sparks
Do not store rack in
microwave. Rack is
ONLY to be used for
Convection Bake,
Warm and Proof.
in the oven. Arcing is caused by:
[] Metal or foil touching the side of
the oven.
[]
Foil not molded to food (upturned edges
act like antennas).
[]
Use foil only as recommended in
this manual.
SAVE THESE INSTRUCTIONS
[]
Metal, such as twist-ties, poultry pins,
or gold-rimmed dishes, in the oven.
[]
Metal cookware or the wire oven
rack used during either speedcook or
microwave cooking (except for the pans
provided with the oven).
[]
Recycled paper towels containing small
metal pieces being used in the oven.
Page 5
IMPORTANT SAFETY INSTRUCTIONS
READ ALL INSTRUCTIONS BEFOREUSING
Advantium Oven
FOODS
[]
When microwaving, place all foods and
containers on the clear glass tray.
[]
Do not pop popcorn in your oven unless in
a special microwave popcorn accessory or
unless you use popcorn labeled for use in
microwave ovens.
[]
Do not boil eggs inthis oven. Pressure will
build up inside egg yolk and will cause it to
burst, possibly resulting in injury.
[]
Do not operate oven without food inside.
This may cause damage to the oven. It
increases the heat around the magnetron
and can shorten the life of the oven.
[]
Foods with unbroken outer "skin"
such as potatoes, hot dogs, sausages,
tomatoes, apples, chicken livers and other
giblets, and egg yolks should be pierced to
allow steam to escape during cooking.
[]
Don't defrost frozen beverages in
narrow-necked bottles (especially
carbonated beverages). Even if the
container is open, pressure can build up.
This can cause the container to burst,
possibly resulting in injury.
[]
Foods cooked in liquids (such as
pasta) may tend to boil more rapidly
than foods containing less moisture.
Should this occur, refer to the Care
and Cleaning of the oven section for
instructions on how to clean the
inside of the oven.
[]
Hot foods and steam can cause
burns. Be careful when opening any
containers of hot food, including popcorn
bags, cooking pouches and boxes.
To prevent possible injury, direct steam
away from hands and face.
[]
Do not overcook potatoes. They could
dehydrate and catch fire, causing
damage to your oven.
[]
Avoid heating baby food in glassjars,
even with the lid off. Make sure all infant
food is thoroughly cooked. Stir food to
distribute the heat evenly. Be careful to
prevent scalding when warming formula.
The container may feel cooler than the
formula really is. Always test the formula
before feeding the baby.
[]
Do not attempt to deep fry in the oven.
[]
SUPERHEATED WATER
Liquids,such as water, coffee or tea, are able to
be overheated beyond the boiling point without
appearing to be boiling.Visble bubbling or
boiling when the container isremoved from
the microwave oven isnot always present
THISCOULDRESULTIN VERYHOTLIQUIDS
SUDDENLYBOILINGOVERWHEN THE
CONTAINERISDISTURBEDORA SPOONOR
OTHERUTENSILISINSERTEDINTOTHELIQUID.
To reduce the risk of injury to persons:
- Do not overheat the liquid.
- Stir the liquid both before and halfway
through heating it.
- Do not use straight-sided containers
with narrow necks.
- After heating, allow the container
to stand in the microwave oven for
a short time before removing the
container.
-- Use extreme care when inserting
a spoon or other utensil into the
container.
SAVE THESE INSTRUCTIONS
Page 6
IMPORTANT SAFETY INSTRUCTIONS
READ ALL INSTRUCTIONS BEFOREUSING
Advantium Oven
Microwave-
safe
cookwure
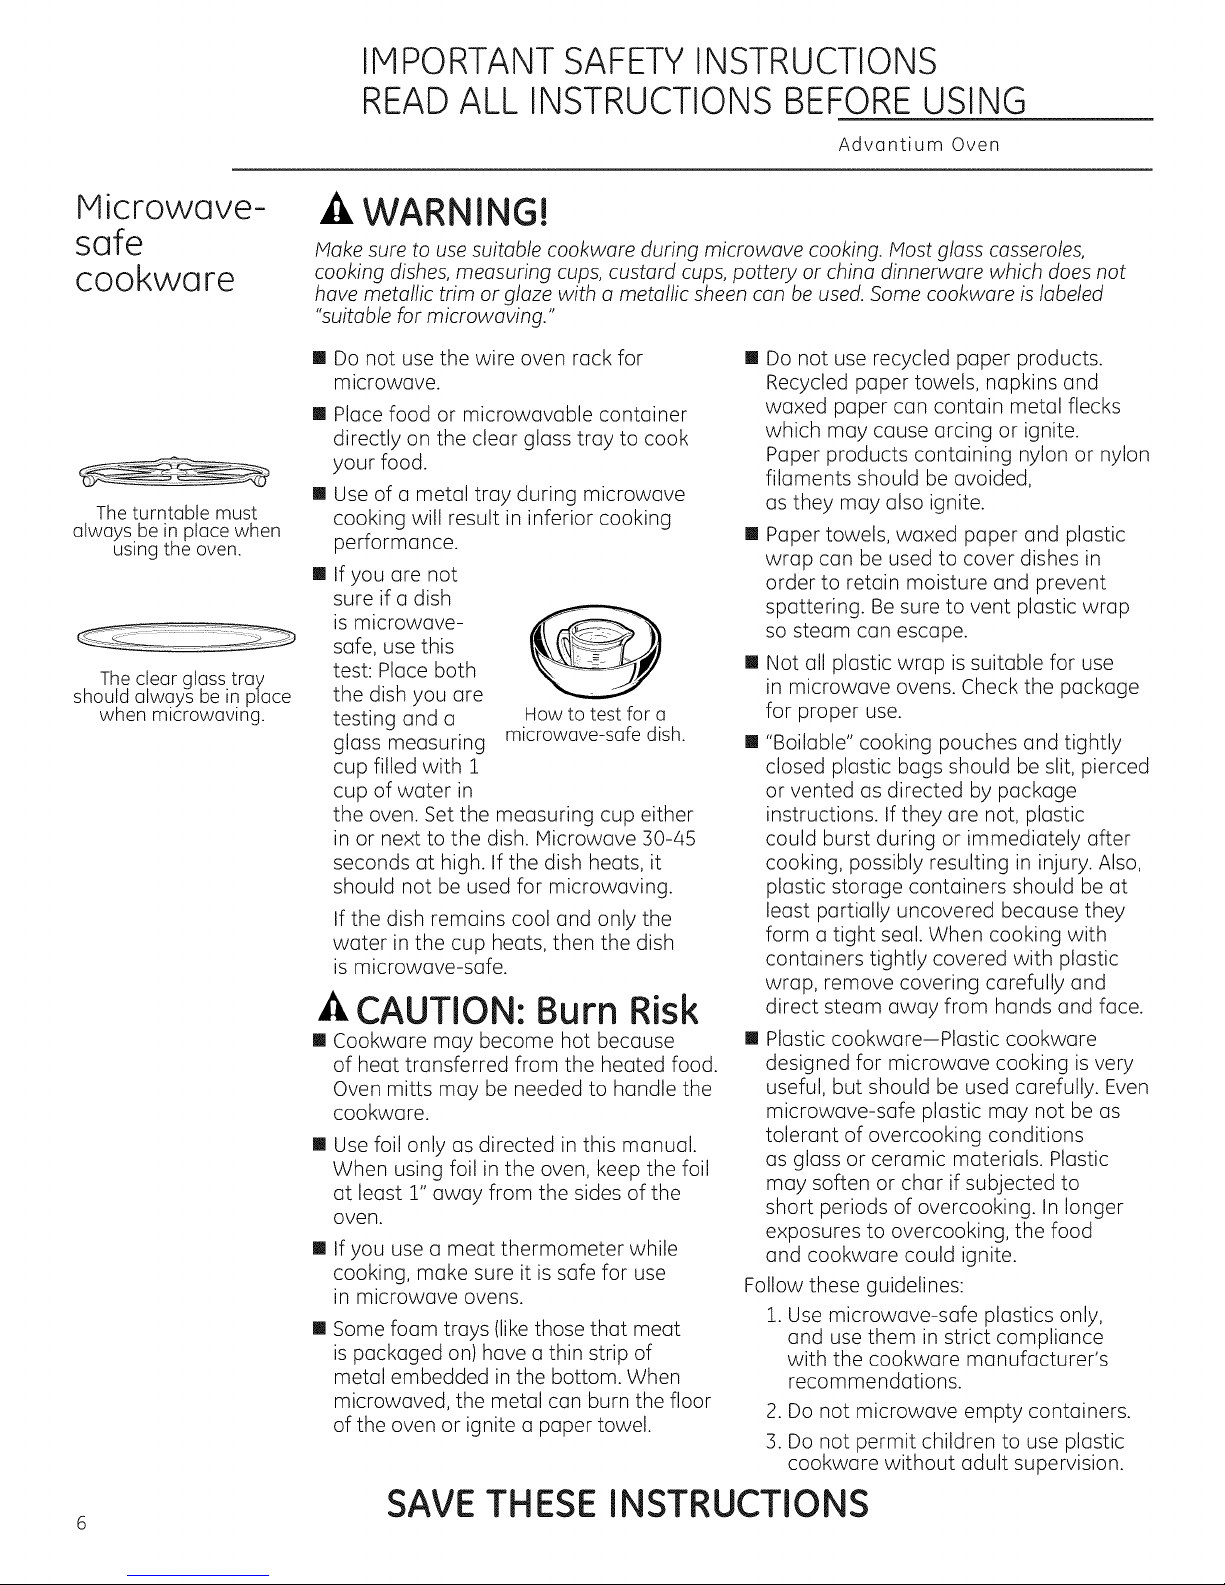
The turntable must
always be in place when
using the oven.
The clear glass tray
should alwgys be in place
when mlcrowawng.
_AWARNING!
Make sure to use suitable cookware during microwave cooking. Most glass casseroles,
cooking dishes, measuring cups, custard cups, pottery or china dinnerware which does not
have metallic trim or glaze with a metallic sheen can be used. Some cookware is labeled
"suitable for microwaving."
[] Do not use the wire oven rack for
microwave.
[] Place food or microwavable container
directly on the clear glass tray to cook
your food.
[] Use of a metal tray during microwave
cooking will result in inferior cooking
performance.
[]
If you are not
sure if a dish
is microwave-
safe, use this
test: Place both
the dish you are
testing and a How to test for a
glass measuring microwave-safe dish.
cup filled with 1
cup of water in
the oven. Set the measuring cup either
in or next to the dish. Microwave 50-45
seconds at high. If the dish heats, it
should not be used for microwaving.
If the dish remains cool and only the
water in the cup heats, then the dish
is microwave-safe.
-ACAUTION: Burn Risk
[] Cookware may become hot because
of heat transferred from the heated food.
Oven mitts may be needed to handle the
cookware.
[]
Use foil only as directed in this manual.
When using foil in the oven, keep the foil
at least 1" away from the sides of the
oven.
[] If you use a meat thermometer while
cooking, make sure it is safe for use
in microwave ovens.
[]
Some foam trays (like those that meat
is packaged on) have a thin strip of
metal embedded in the bottom. When
microwaved, the metal can burn the floor
of the oven or ignite a paper towel.
[]
Do not use recycled paper products.
Recycled paper towels, napkins and
waxed paper can contain metal flecks
which may cause arcing or ignite.
Paper products containing nylon or nylon
filaments should be avoided,
as they may also ignite.
[]
Paper towels, waxed paper and plastic
wrap can be used to cover dishes in
order to retain moisture and prevent
spattering. Be sure to vent plastic wrap
so steam can escape.
[]
Not all plastic wrap is suitable for use
in microwave ovens. Check the package
for proper use.
[]
"Bailable" cooking pouches and tightly
closed plastic bags should be slit, pierced
or vented as directed by package
instructions. If they are not, plastic
could burst during or immediately after
cooking, possibly resulting in injury. Also,
plastic storage containers should be at
least partially uncovered because they
form a tight seal. When cooking with
containers tightly covered with plastic
wrap, remove covering carefully and
direct steam away from hands and face.
[] Plastic cookware-Plastic cookware
designed for microwave cooking is very
useful, but should be used carefully. Even
microwave-safe plastic may not be as
tolerant of overcooking conditions
as glass or ceramic materials. Plastic
may soften or char if subjected to
short periods of overcooking. In longer
exposures to overcooking, the food
and cookware could ignite.
Follow these guidelines:
1. Use microwave-safe plastics only,
and use them in strict compliance
with the cookware manufacturer's
recommendations.
2. Do not microwave empty containers.
3. Do not permit children to use plastic
cookware without adult supervision.
6 SAVE THESE INSTRUCTIONS
Page 7
IMPORTANT SAFETY INSTRUCTIONS
READ ALL INSTRUCTIONS BEFOREUSING
Advantium Oven
Oven-safe
cookware for
Speedcooking
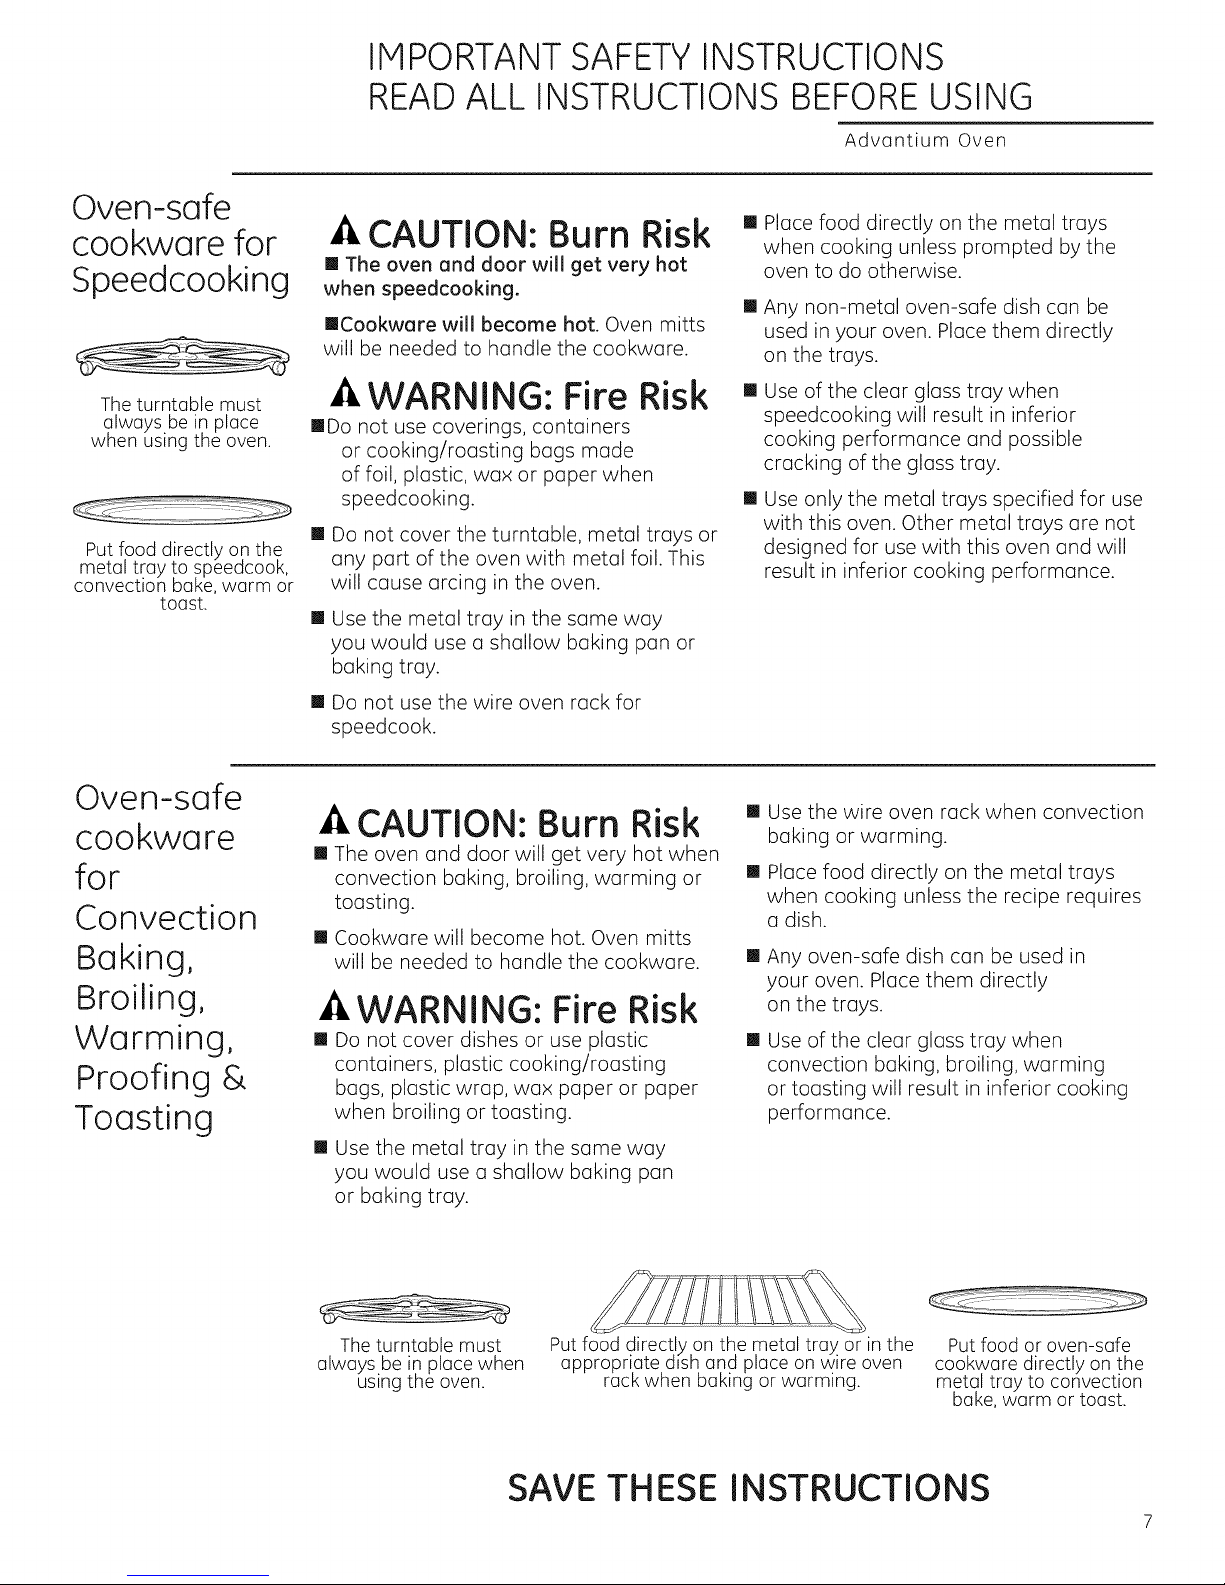
The turntable must
always be in place
when using the oven.
Put food directly on the
metal tray to speedcook,
convection bake, warm or
toast.
-&CAUTION: Burn Risk "
[] The oven and door will get very hot
when speedcooking.
mCookware will become hot. Oven mitts
will be needed to handle the cookware.
A WARNING: Fire Risk []
[]Do not use coverings, containers
or cooking/roasting bags made
of foil, plastic, wax or paper when
speedcooking. []
[]
Do not cover the turntable, metal trays or
any part of the oven with metal foil. This
will cause arcing in the oven.
[]
Use the metal tray in the same way
you would use a shallow baking pan or
baking tray.
[]
Do not use the wire oven rack for
speedcook.
Place food directly on the metal trays
when cooking unless prompted by the
oven to do otherwise.
[]
Any non-metal oven-safe dish can be
used in your oven. Place them directly
on the trays.
Use of the clear glass tray when
speedcooking will result in inferior
cooking performance and possible
cracking of the glass tray.
Use only the metal trays specified for use
with this oven. Other metal trays are not
designed for use with this oven and will
result in inferior cooking performance.
Oven-safe
cookware
for
Convection
Baking,
Broiling,
Warming,
Proofing &
Toasting
-&CAUTION: Burn Risk "
[] The oven and door will get very hot when
convection baking, broiling, warming or []
toasting.
[] Cookware will become hot. Oven mitts
will be needed to handle the cookware. []
-&WARNING: Fire Risk
[] Do not cover dishes or use plastic
containers, plastic cooking/roasting
bogs, plastic wrap, wax paper or paper
when broiling or toasting.
[] Use the metal tray in the same way
you would use a shallow baking pan
or baking tray.
The turntable must
always.be in place when
using the oven.
Putfood directly on the metal tray or in the
appropriate d_shand place on wire oven
rack when baking or warming.
Use the wire oven rack when convection
baking or warming.
Place food directly on the metal trays
when cooking unless the recipe requires
a dish.
Any oven-safe dish can be used in
your oven. Place them directly
on the trays.
[]
Use of the clear glass tray when
convection baking, broiling, warming
or toasting will result in inferior cooking
performance.
Put food or oven-safe
cookware directly on the
metal tray to convection
bake, warm or toast.
SAVE THESE INSTRUCTIONS
Page 8
IMPORTANT SAFETY INSTRUCTIONS
READ ALL INSTRUCTIONS BEFOREUSING
Adv(]ntium Oven
Grounding
Instructions
WARNING!
Improper use of the grounding plug con result in o risk of electric shock.
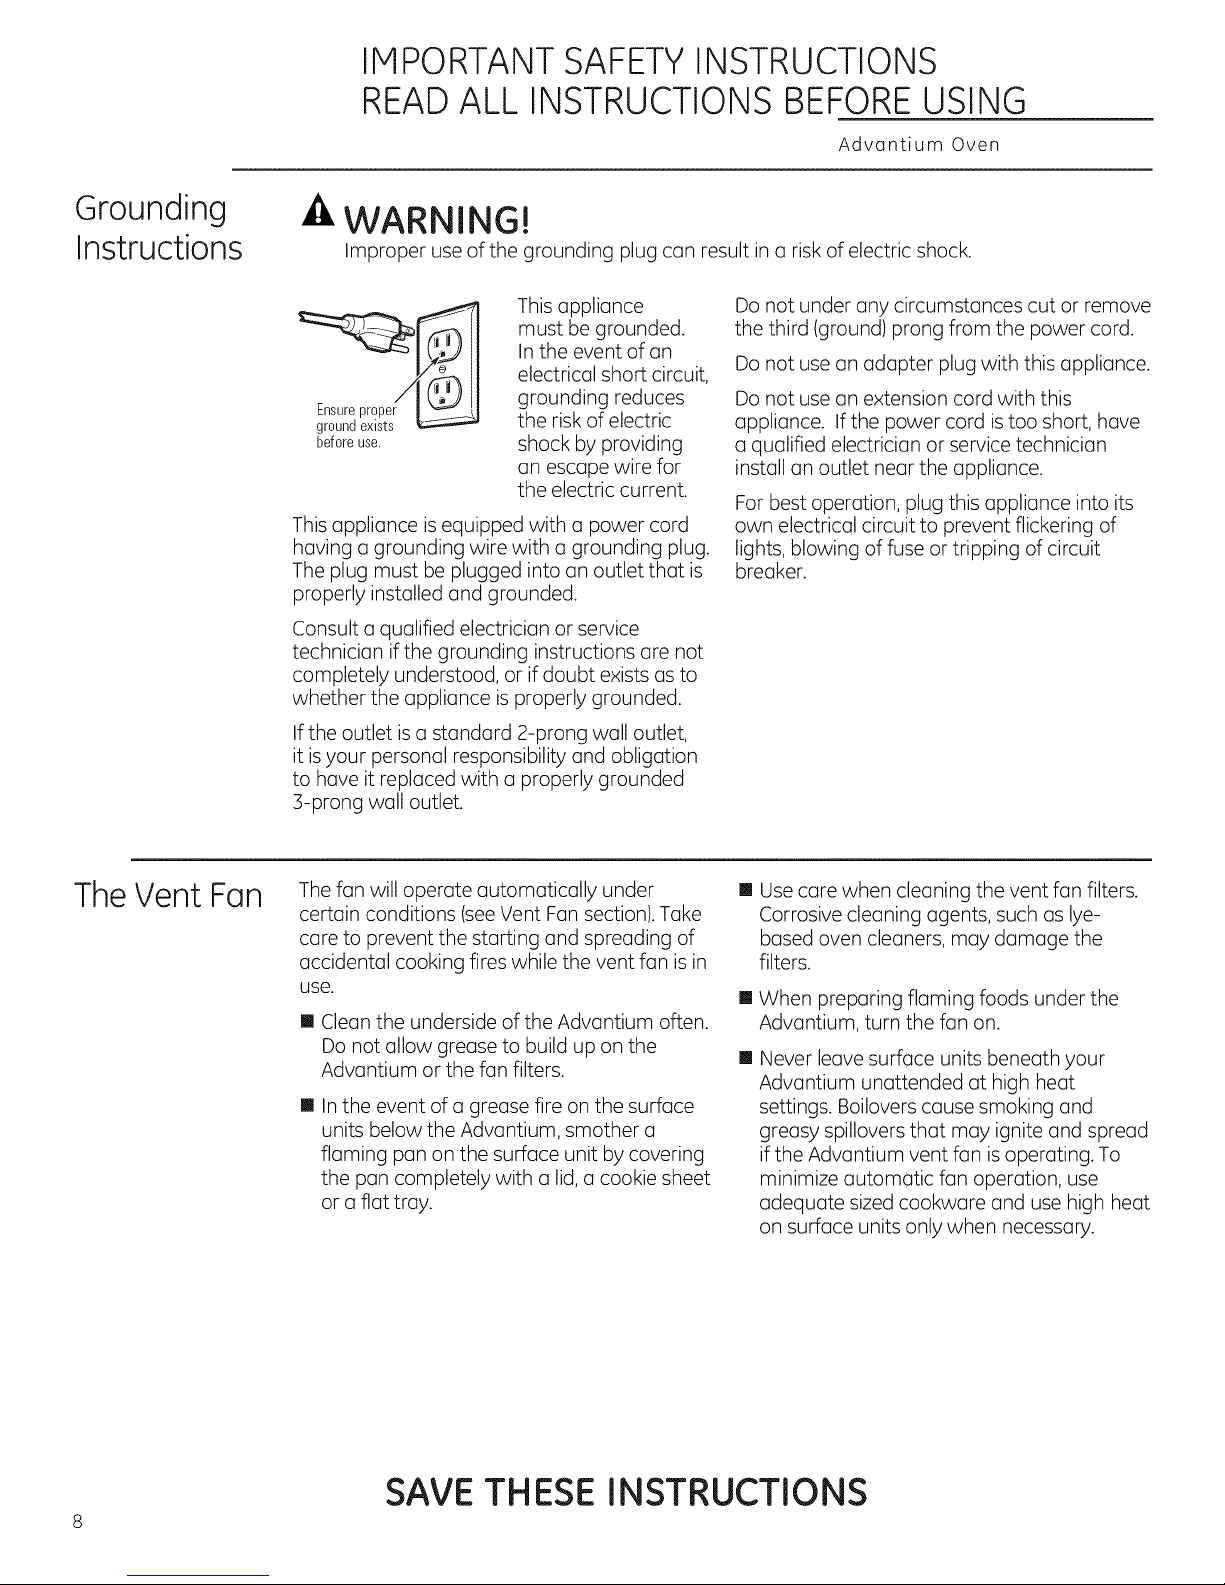
This upplionce
must be grounded.
In the event of on
electrical short circuit,
grounding reduces
the risk of electric
beforeuse.
This opplionce is equipped with o power cord
hoving o grounding wire with o grounding plug.
The plug must be plugged into on outlet thot is
properly instolled ond grounded.
Consult o quolified electricion or service
technicion if the grounding instructions ore not
completely understood, or if doubt exists os to
whether the opplionce is properly grounded.
If the outlet is o stondord 2-prong woll outlet,
it isyour personol responsibility ond obligation
to hove it reploced with o properly grounded
3-prong woll outlet.
shock by providing
on escope wire for
the electric current.
Do not under ony circumstances cut or remove
the third (ground) prong from the power cord.
Do not use on odopter plug with this opplionce.
Do not use on extension cord with this
opplionce. If the power cord is too short, hove
o qualified electricion or service technicion
instoll on outlet neor the opplionce.
For best operotion, plug this opplionce into its
own electricol circuit to prevent flickering of
lights, blowing of fuse or tripping of circuit
breoker.
The Vent Fon
The fon will operote outomoticolly under
certoin conditions (see Vent Fon section). Toke
core to prevent the storting ond spreoding of
occidentol cooking fires while the vent fon is in
use.
[] Cleon the underside of the Advontium often.
Do not ollow greose to build up on the
Advontium or the fort filters.
[] In the event of o greose fire on the surfoce
units below the Advontium, smother o
floming pon on the surfoce unit by covering
the pon completely with o lid, o cookie sheet
or o riot troy.
[]
Use core when cleoning the vent fon filters.
Corrosive cleoning ogents, such os lye-
bosed oven cleoners, moy domoge the
filters.
[]
When preporing floming foods under the
Advontium, turn the fon on.
[]
Never leove surfoce units beneoth your
Advontium unottended ot high heot
settings. Boilovers couse smoking ond
greosy spillovers thot moy ignite ond spreod
if the Advontium vent fon is operoting. To
minimize outomotic fon operotion, use
odequote sized cookwore ond use high heot
on surfoce units only when necessory.
SAVE THESE INSTRUCTIONS
Page 9
IMPORTANT SAFETYINSTRUCTIONS
READ ALL INSTRUCTIONS BEFOREUSING
Advantium Oven
-&WARNING
PACEMAKERS
Most pacemakers are shieldedfrom interferencefrom electronicproducts,includingmicrowaves.
However, patientswith pacemakers may wish to consulttheirphysiciansifthey have concerns.
READAND FOLLOWTHISSAFETYINFORMATIONCAREFULLY.
SAVETHESEINSTRUCTIONS
Optional kits
Available at extra cost from your GE supplier.
Filler Panel Kits Filter Kits
[] JXf2WH--White
[] JXS2BL--Block
When replacing a 36" range hood, filler
panel kits fill in the additional width to
provide a custom built-in appearance.
For installation between cabinets only;
not for end-of-cabinet installation.
Each kit contains two 3" wide filler
panels.
[] JX81D--Recirculating Charcoal
Filter Kit
Filter kits are used when the oven
cannot be vented to
the outside.
See back cover to order by phone or
at ge.com.
Page 10
Getting to Know the Advantium
Advantium Oven
Getting to know
the Advantium
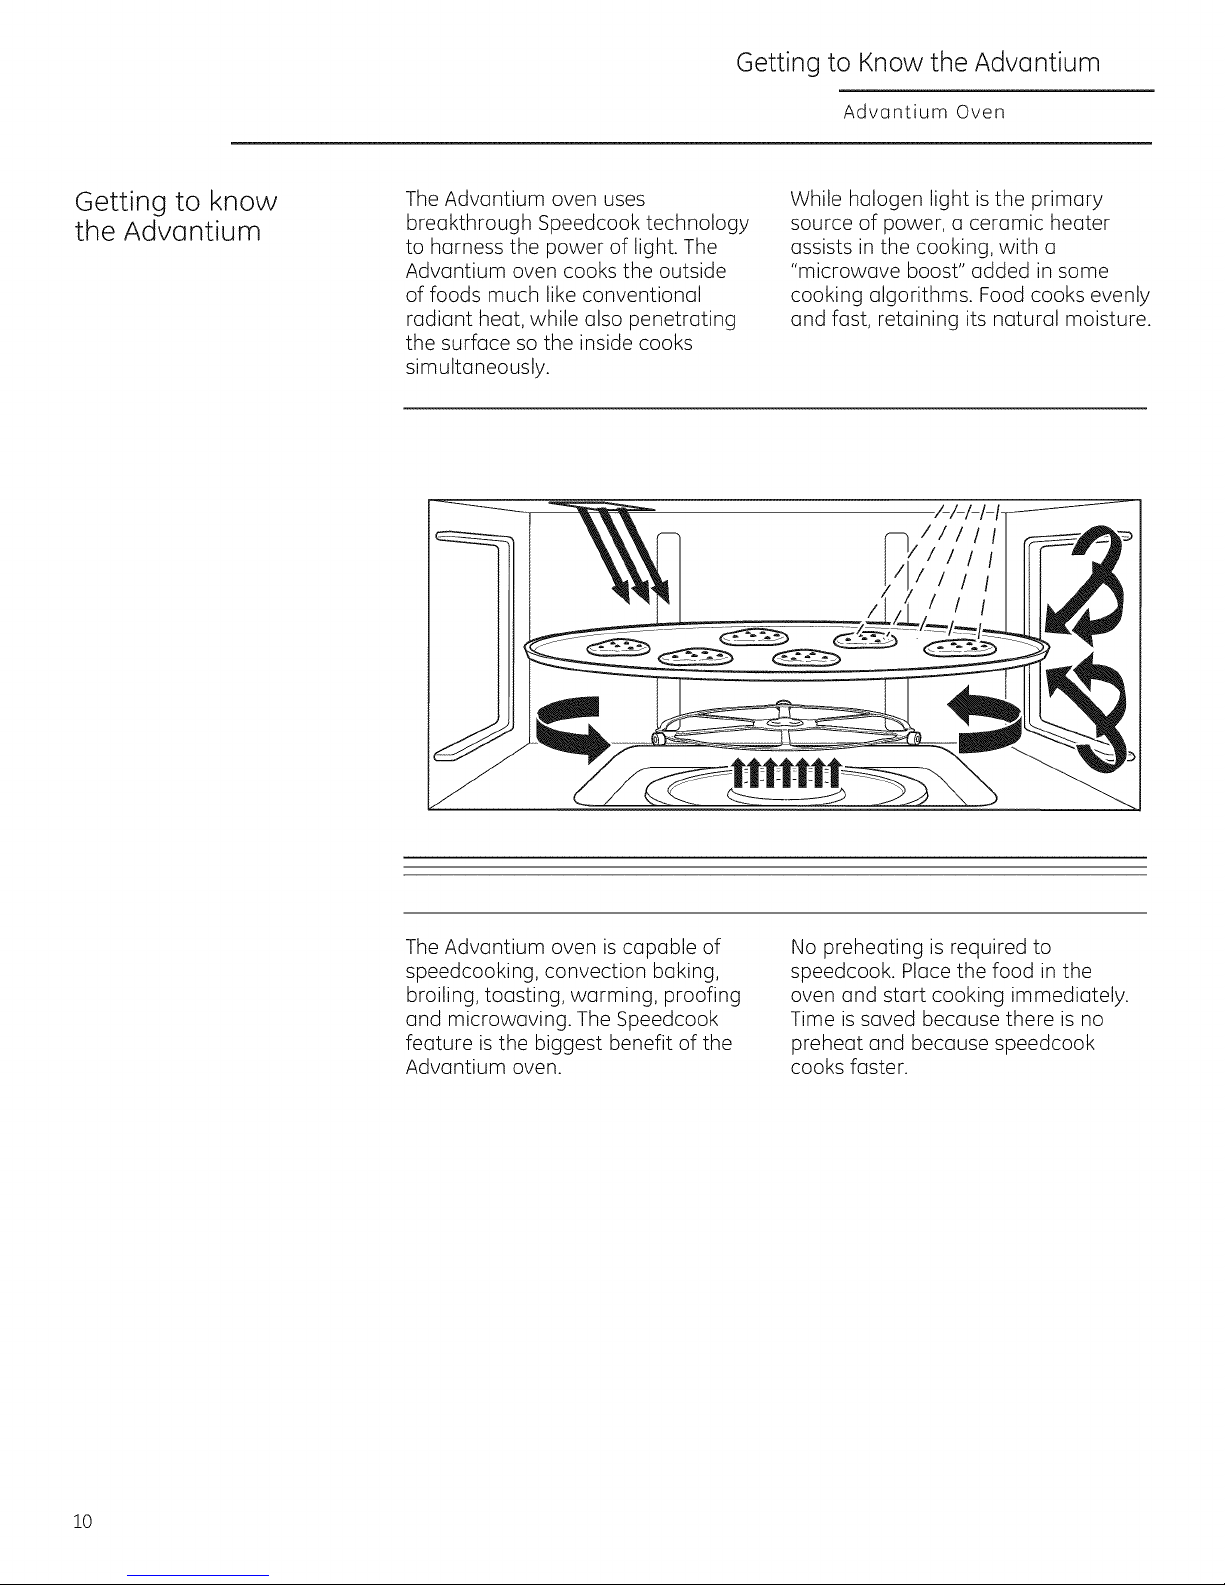
The Advantium oven uses
breakthrough Speedcook technology
to harness the power of light. The
Advantium oven cooks the outside
of foods much like conventional
radiant heat, while also penetrating
the surface so the inside cooks
simultaneously.
While halogen light is the primary
source of power, a ceramic heater
assists in the cooking, with a
"microwave boost" added in some
cooking algorithms. Food cooks evenly
and fast, retaining its natural moisture.
10
The Advantium oven is capable of
speedcooking, convection baking,
broiling, toasting, warming, proofing
and microwaving. The Speedcook
feature is the biggest benefit of the
Advantium oven.
No preheating is required to
speedcook. Place the food in the
oven and start cooking immediately.
Time is saved because there is no
preheat and because speedcook
cooks faster.
Page 11

Oven Features
Advantium Oven
Oven
features
Throughout this manual, features and appearance may vary from your model.
Turntable
The turntable must always be
in place, on the oven floor, for all
cooking. Be sure the turntable is
seated securely over the spindle
in the center of the oven.
Metal Tray
Put food directly on the metal tray and
place on the turntable when using the
speedcook, broil, and toast.
Wire Oven Rack
Put food directly on a metal tray or
in an oven-safe dish on the wire oven
rack only when convection baking or
warming.
Clear Glass Tray
Place on turntable when using microwave
features. Place food or microwave-safe
cookware directly on tray.
Upper Halogen Lamp &
Ceramic Heater
A 500W halogen lamp and 700W
ceramic heater cook food from above in
speedcook, broil and toast.
Window
Allows food to be viewed during
cooking.
Door Handle
Pull to open the door.
Door Latches
The door must be securely latched for
the oven to operate.
Lower Ceramic Heater
One 375W ceramic heater cooks food
from the bottom in speedcook, broil
and toast.
Control Panel
The pads used to operate the oven
are located on the control panel.
Convection System
One 1550W heating element cooks
food with a convection fan circulating
the hot air throughout the cavity in
convection bake and warm.
!1
Page 12
Controls
Advantium Oven
Cooking
controls
Withyour Advantium oven,you can cookwith high-intensityhalogen lights,ceramicheaters convection heating
element,and/or conventional microwave energy.
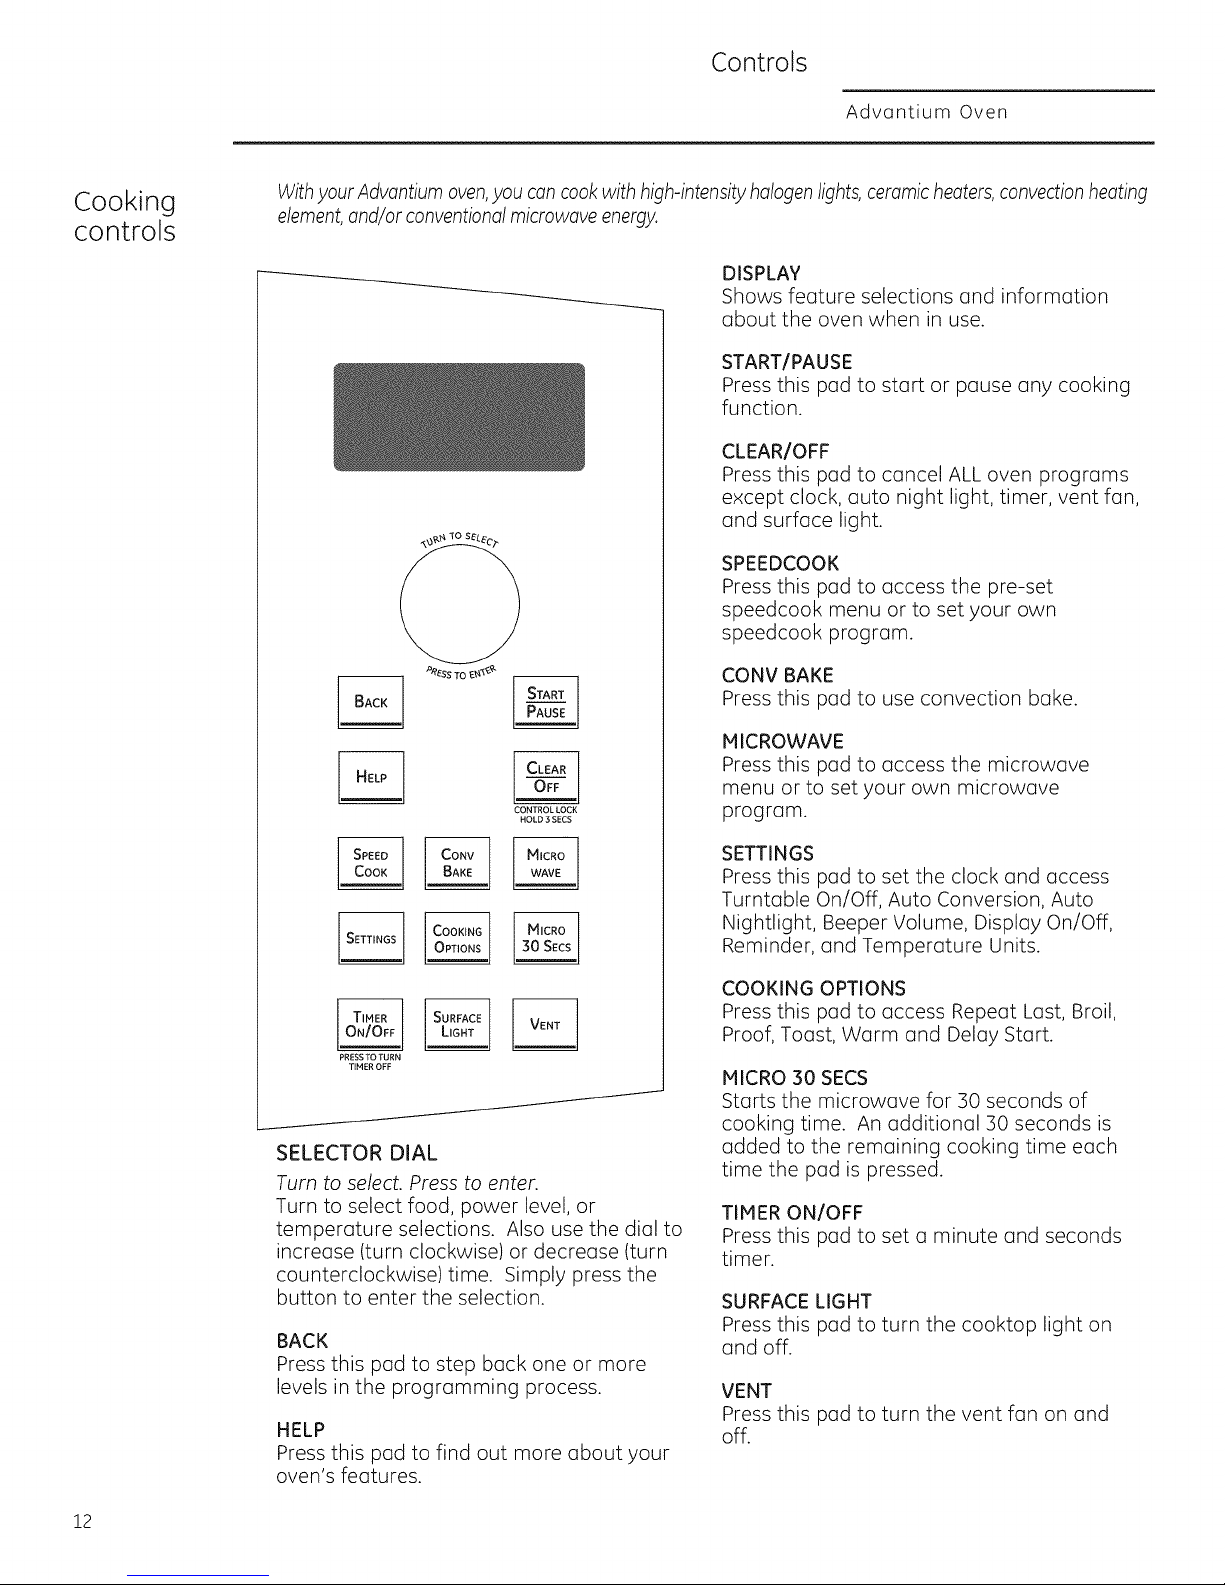
DISPLAY
Shows feature selections and nformation
about the oven when in use.
START/PAUSE
Press this pad to start or pause any cooking
function.
CLEAR/OFF
Press this pad to cancel ALL oven programs
except clock, auto night light, timer, vent fan,
and surface light.
SPEEDCOOK
Press this pad to access the pre-set
C}
_Ess TO_ 1_
CONTROL LOCK
HOLD 3 SECS
speedcook menu or to set your own
speedcook program.
CONV BAKE
Press this pad to use convection bake.
MICROWAVE
Press this pad to access the microwave
menu or to set your own microwave
program.
PRESS TO TURN
TIMER OFF
SELECTOR DIAL
Turn to select. Press to enter.
Turn to select food, power level, or
temperature selections. Also use the dial to
increase (turn clockwise) or decrease (turn
counterclockwise) time. Simply press the
button to enter the selection.
BACK
Press this pad to step back one or more
levels in the programming process.
HELP
Press this pad to find out more about your
oven's features.
SETTINGS
Press this pad to set the clock and access
Turntable On/Off, Auto Conversion, Auto
Nightlight, Beeper Volume, Display On/Off,
Reminder, and Temperature Units.
COOKING OPTIONS
Press this pad to access Repeat Last, Broil,
Proof, Toast, Warm and Delay Start.
MICRO 30 SECS
Starts the microwave for 30 seconds of
cooking time. An additional 30 seconds is
added to the remaining cooking time each
time the pad is pressed.
TIMER ON/OFF
Press this pad to set a minute and seconds
timer.
SURFACE LIGHT
Press this pad to turn the cooktop light on
and off.
VENT
Press this pad to turn the vent fan on and
off.
12
Page 13
Speedcooking
Advantium Oven
Using
speedcook
features
Things that
are normal
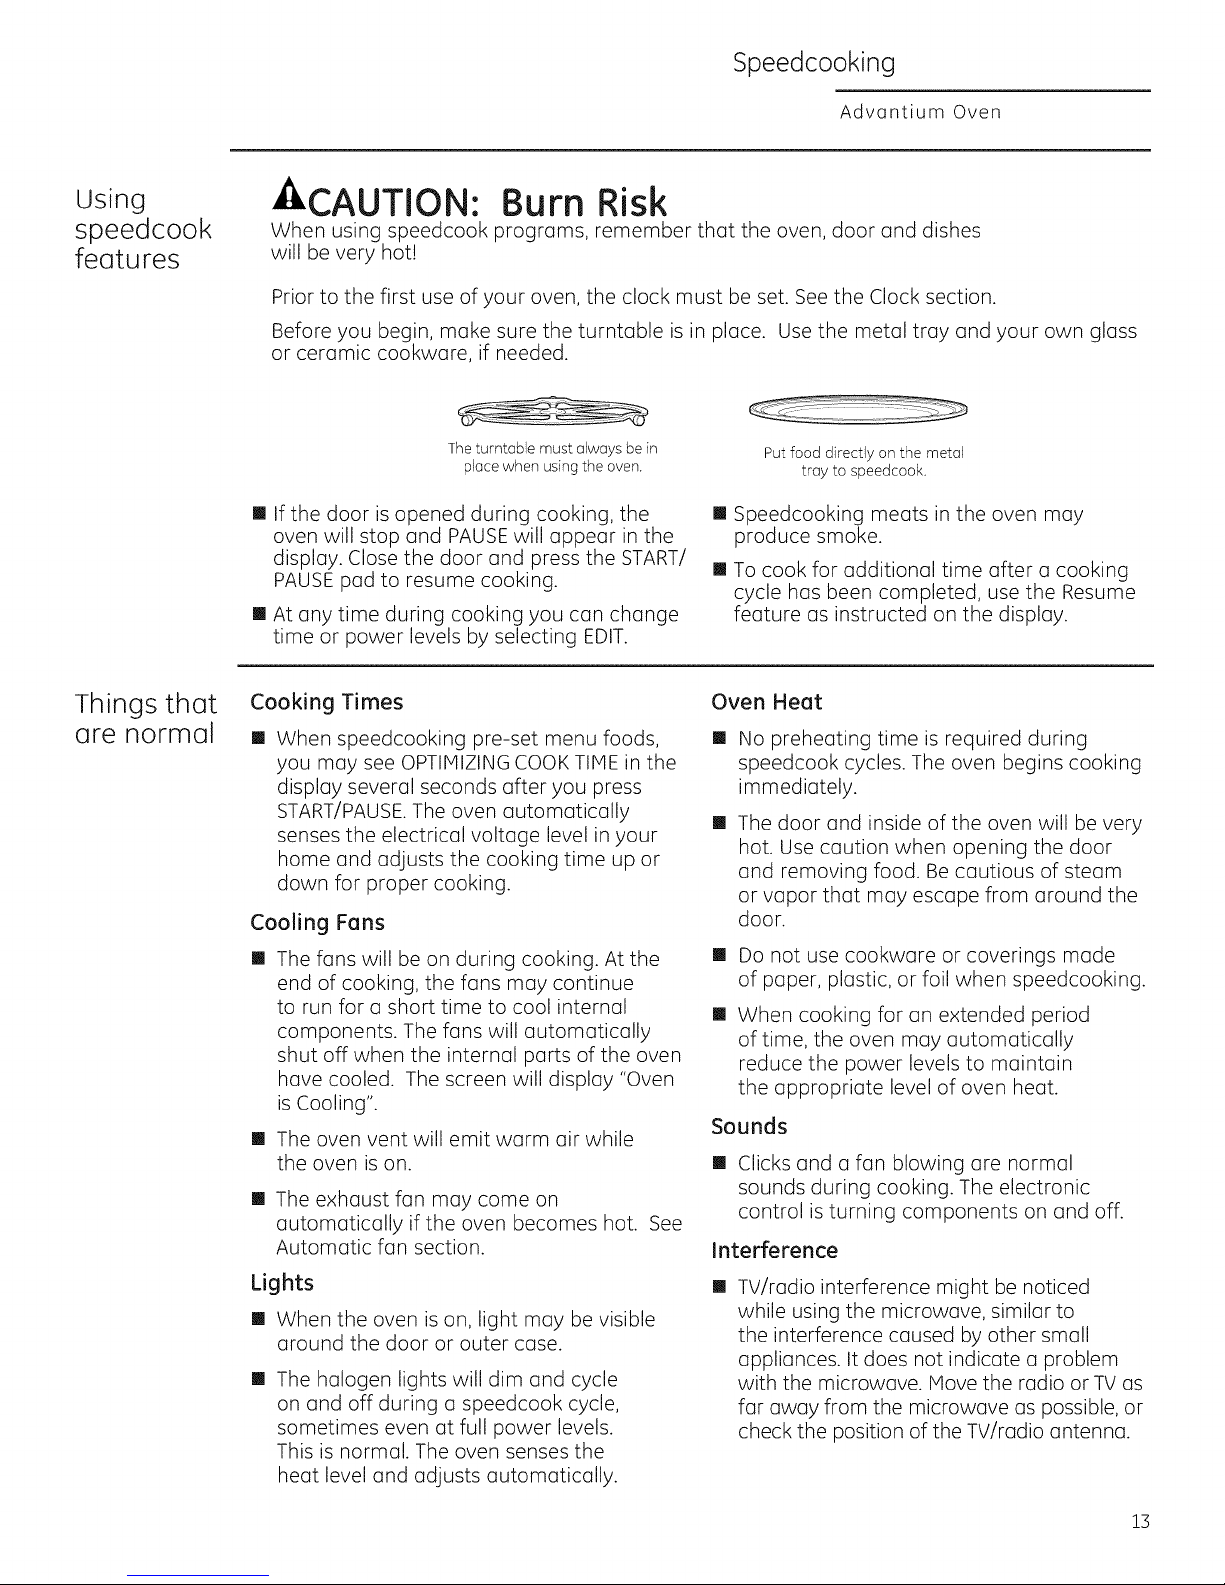
CAUTION: Burn Risk
When using speedcook programs, remember that the oven, door and dishes
will be very hot!
Prior to the first use of your oven, the clock must be set. See the Clock section.
Before you begin, make sure the turntable is in place. Use the metal tray and your own glass
or ceramic cookware, if needed.
The turntable must always be in
place when using the oven.
[] If the door is opened during cooking, the
oven will stop and PAUSEwill appear in the
display. Close the door and press the START/
PAUSE pad to resume cooking.
[] At any time during cooking you can change
time or power levels by selecting EDIT.
Cooking Times
[]
When speedcooking pre-set menu foods,
you may see OPTIMIZING COOK TIME in the
display several seconds after you press
START/PAUSE The oven automatically
senses the electrical voltage level in your
home and adjusts the cooking time up or
down for proper cooking.
Cooling Fans
[]
The fans will be on during cooking. At the
end of cooking, the fans may continue
to run for a short time to cool internal
components. The fans will automatically
shut off when the internal parts of the oven
have cooled. The screen will display "Oven
is Cooling".
[]
The oven vent will emit warm air while
the oven is on.
[] The exhaust fan may come on
automatically if the oven becomes hot. See
Automatic fan section.
Put food directly on the metal
tray to speedcook.
[] Speedcooking meats in the oven may
produce smoke.
[] To cook for additional time after a cooking
cycle has been completed, use the Resume
feature as instructed on the display.
Oven Heat
[]
No preheating time is required during
speedcook cycles. The oven begins cooking
immediately.
[]
The door and inside of the oven will be very
hot. Use caution when opening the door
and removing food. Be cautious of steam
or vapor that may escape from around the
door.
[]
Do not use cookware or coverings made
of paper, plastic, or foil when speedcooking.
[]
When cooking for an extended period
of time, the oven may automatically
reduce the power levels to maintain
the appropriate level of oven heat.
Sounds
[] Clicks and a fan blowing are normal
sounds during cooking. The electronic
control is turning components on and off.
Interference
Lights
[] When the oven is on, light may be visible
around the door or outer case.
[]
The halogen lights will dim and cycle
on and off during a speedcook cycle,
sometimes even at full power levels.
This is normal. The oven senses the
heat level and adjusts automatically.
[]
TV/radio interference might be noticed
while using the microwave, similar to
the interference caused by other small
appliances. It does not indicate a problem
with the microwave. Move the radio or TV as
far away from the microwave as possible, or
check the position of the TV/radio antenna.
13
Page 14
Speedcooking
Advantium Oven
Cooking
tips for best
results
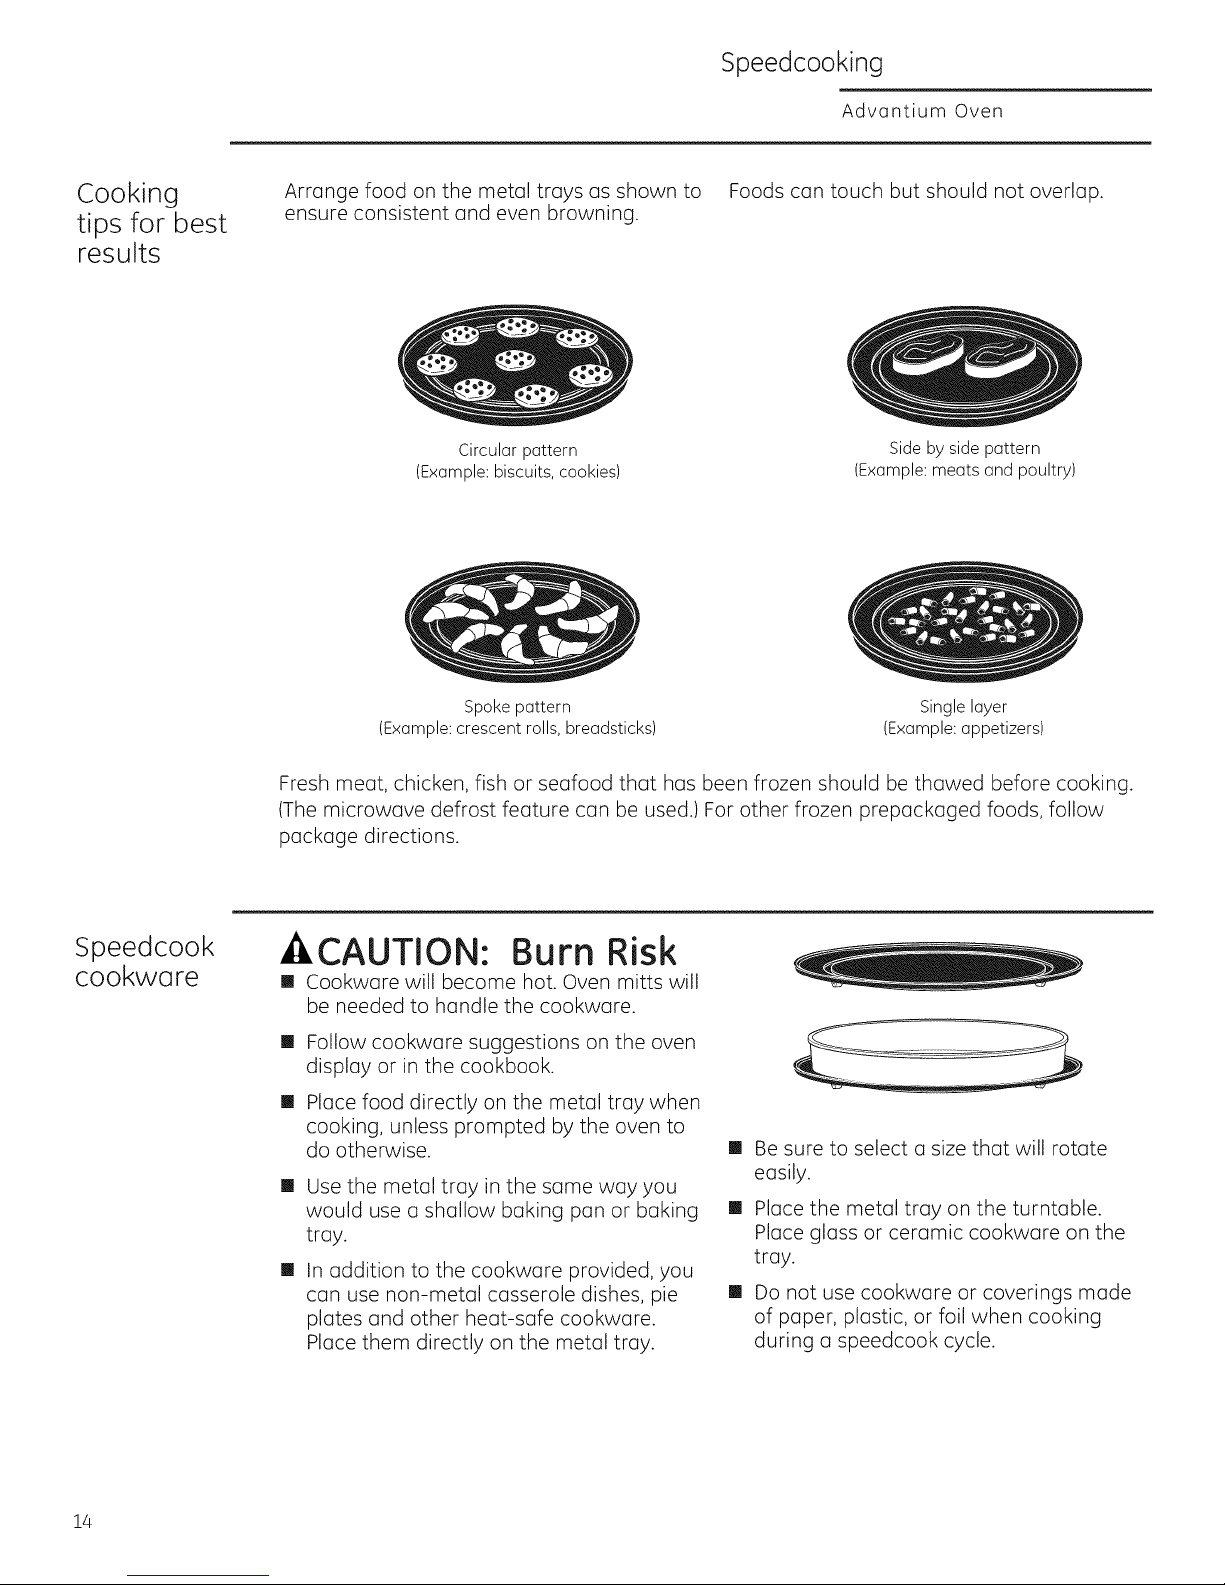
Arrange food on the metal trays as shown to
ensure consistent and even browning.
Circular pattern
(Example: biscuits, cookies)
Spoke pattern
(Example: crescent rolls, breadsticks)
Foods can touch but should not overlap.
Side by side pattern
(Example: meats and poultry)
Single layer
(Example: appetizers)
Speedcook
cookwore
Fresh meat, chicken, fish or seafood that has been frozen should be thawed before cooking.
(The microwave defrost feature can be used.) For other frozen prepackaged foods, follow
package directions.
CAUTION: Burn Risk
[] Cookware will become hot. Oven mitts will
be needed to handle the cookware.
[]
Follow cookware suggestions on the oven
display or in the cookbook.
[]
Place food directly on the metal tray when
cooking, unless prompted by the oven to
[]
do otherwise.
[]
Use the metal tray in the same way you
would use a shallow baking pan or baking
tray.
[]
In addition to the cookware provided, you
can use non-metal casserole dishes, pie
plates and other heat-safe cookware.
Place them directly on the metal tray.
Be sure to select a size that will rotate
easily.
[]
Place the metal tray on the turntable.
Place glass or ceramic cookware on the
tray.
[]
Do not use cookware or coverings made
of paper, plastic, or foil when cooking
during a speedcook cycle.
14
Page 15
Speedcooking
Advontium Oven
Using the
pre-set
speedcook
menu
Pre-set
speedcook
menu selections
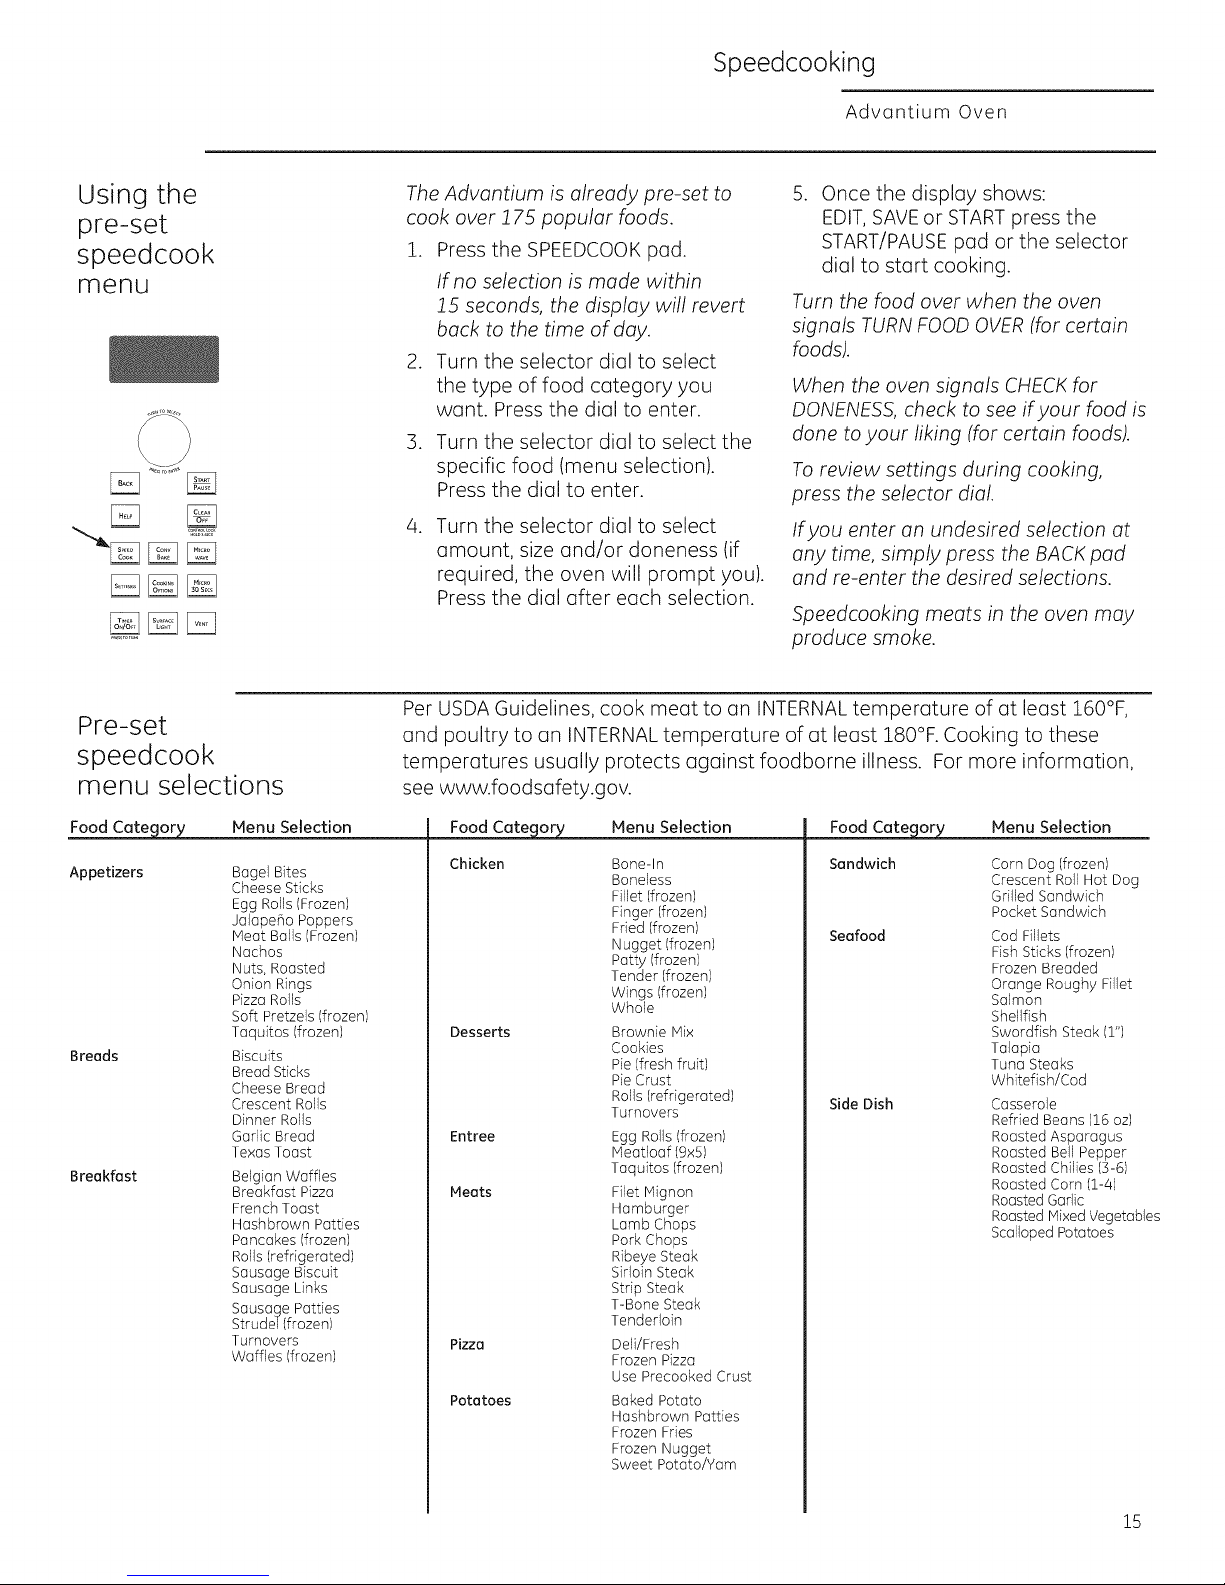
The Advantium is already pre-set to
cook over 175 popular foods.
1. Press the SPEEDCOOK pad.
If no selection is made within
15 seconds, the display will revert
back to the time of day.
2. Turn the selector dial to select
the type of food category you
want. Press the dial to enter.
3. Turn the selector dial to select the
specific food (menu selection).
Press the dial to enter.
It. Turn the selector dial to select
amount, size and/or doneness (if
required, the oven will prompt you).
S.
Once the display shows:
EDIT, SAVEor STARTpress the
START/PAUSE pad or the selector
dial to start cooking.
Turn the food over when the oven
signals TURN FOOD OVER (for certain
foods).
When the oven signals CHECK for
DONENESS, check to see if your food is
done to your liking (for certain foods).
To review settings during cooking,
press the selector dial.
If you enter an undesired selection at
any time, simply press the BACK pad
and re-enter the desired selections.
Press the dial after each selection.
Speedcooking meats in the oven may
produce smoke.
Per USDA Guidelines, cook meat to an INTERNAL temperature of at least 160°F,
and poultry to an INTERNAL temperature of at least 180°F. Cooking to these
temperatures usually protects against foodborne illness. For more information,
see www.foodsafety.gov.
Appetizers
Breads
Breakfast
Menu Selection
Bagel Bites
Cheese Sticks
Egg Rolls (Frozen)
JalapeF_oPoppers
Meat Balls (Frozen)
Nachos
Nuts, Roasted
Onion Rings
Pizza Rolls
Soft Pretzels (frozen)
Taquitos (frozen)
Biscuits
Bread Sticks
Cheese Bread
Crescent Rolls
Dinner Rolls
Garlic Bread
Texas Toast
Belgian Waffles
Breakfast Pizza
French Toast
Hashbrown Patties
Pancakes (frozen)
Rolls(refrigerated)
Sausage Biscuit
Sausage Links
Sausage Patties
Strudel (frozen)
Turnovers
Waffles(frozen)
Chicken
Desserts
Entree
Meats
Pizza
Potatoes
Menu Selection
Bone-In
Boneless
Fillet (frozen)
Finger (frozen)
Fried (frozen)
Nugget (frozen)
Patty (frozen)
Tender (frozen)
Wings (frozen)
Whole
Brownie Mix
Cookies
Pie(fresh fruit)
PieCrust
Rolls(refrigerated)
Turnovers
Egg Rolls (frozen)
Meatloaf (9x5)
Taquitos (frozen)
Filet Mignon
Hamburger
Lamb Chops
Pork Chops
Ribeye Steak
Sirloin Steak
Strip Steak
T-Bone Steak
Tenderloin
Deli/Fresh
Frozen Pizza
Use Precooked Crust
Baked Potato
Hashbrown Patties
Frozen Fries
Frozen Nugget
Sweet Potato/Yam
Sandwich
Seafood
Side Dish
Menu Selection
Corn Dog (frozen)
Crescent Roll Hot Dog
Grilled Sandwich
Pocket Sandwich
Cod Fillets
Fish Sticks (frozen)
Frozen Breaded
Orange Roughy Fillet
Salmon
Shellfish
Swordfish Steak (1")
Talapia
Tuna Steaks
Whitefish/Cod
Casserole
Refried Beans (16 oz)
Roasted Asparagus
Roasted Bell Pepper
Roasted Chilies (3-6)
Roasted Corn (1-4)
Roasted Garlic
Roasted Mixed Vegetables
Scalloped Potatoes
15
Page 16

Speedcooking
Advantium Oven
Speedcook
power level
[]
The Advantium uses power from high 1.
intensity halogen lamps, a ceramic
heater, and microwaves to cook food
from the top, bottom and interior
simultaneously to seal in moisture and
flavor. 2.
When using the pre-set menu foods,
the power levels are already selected
for you. However, power levels can
be adjusted when using pre-set menu
foods and MY RECIPE.
3. Press the dial if you do not want to
Each power level gives you halogen
lamp or ceramic heater power and
4. Turn the dial clockwise to increase
microwave energy for a certain
percentage of the time.
For example:
U-07 Upper halogen lamp and
ceramic heater on
70% of the time.
L-07 Lower ceramic heater on
70% of the time.
M-03 Microwave on 30% of the
time.
NOTE: Be careful when adjusting
power levels so that you do not
overcook or undercook food.
Press the SPEEDCOOK pad and
select your food (follow instructions
from Using the pre-set speedcook
menu).
When display shows EDIT, SAVE or
START,turn the dial to select EDIT.
If you do not want to change one
of the settings, just press the dial to
move to the next selection.
adjust cooking time.
or counterclockwise to decrease
the upper power level. Press the
dial to enter.
S.
Turn the dial to change the lower
power level. Press the dial to enter.
.
Turn the dial to change the
microwave power level. Press the
dial to enter.
Note that the upper and lower level
settings limit the microwave power
level. For example, if the upper or
lower power level is set to a 7, the
microwave can be set no higher
than a 3.
16
.
Press the START/PAUSE pad or the
selector dial to start cooking.
Follow these general guidelines when selecting the best U=, L=, and M= settings
for your favorite recipes:
U z
Select a higher setting for thin
foods requiring a golden brown
top (example: fish fillets, toast,
boneless chicken breasts). Select
a lower setting for thicker foods
and foods with high sugar or fat
content (example: muffins, roasts,
casseroles) or that require a longer
M = Select a higher setting to shorten
cooking time for dense or heavy
foods (example: casseroles, whole
chicken). Select a lower setting for
delicate foods (example: breads)
or foods requiring longer cook
times for tender results (example:
stew, pot roast).
cook time.
Cz
Select a higher setting for thick or
dense foods that may not cook
quickly in the center (example:
steaks, casseroles). Select a lower
setting for thin foods (example:
cookies).
Page 17

Speedcooking
Advantium Oven
My Recipe -
Custom
speedcooking
[]
The Advantium gives you the flexibility
to cook your favorite dishes.
If you want to cook a food item that is
not among the pre-set selections, use
Hy Recipe to custom speedcook.
1. Press the SPEEDCOOK pad and
select MY RECIPE. Press the dial to
enter. Select NEW RECIPE.
If no entries are made within 1£
seconds, the display will revert
back to the time of day.
.
Turn the selector dial to select
the cooking time. Press the dial
to enter.
The display will prompt you to
select the power level(s).
.
Turn the dial to select the upper
power level. Turn the dial clockwise
to increase or counterclockwise to
decrease the upper power level.
Press the dial to enter.
4. Turn the dial to select the lower
power level. Press the dial to enter.
5. Turn the dial to select the
microwave power level. Press the
dial to enter.
6. Press the START/PAUSE pad or
press the selector dial to start
cooking.
For power level and cooking time
suggestions, use your cooking guide,
cookbook and the pre-set speedcook
menu selections.
17
Page 18
Speedcooking
Advantium Oven
IVly Recipe--
to enter
and save
IVly Recipe--
to find
and use
Add and save up to 30 of your own
Speedcook or microwave recipes, or
pre-set Speedcook menu recipes as
a favorite recipe. Once it's done, you
can quickly recall your favorite so
that your food cooks just the way you
want it every time!
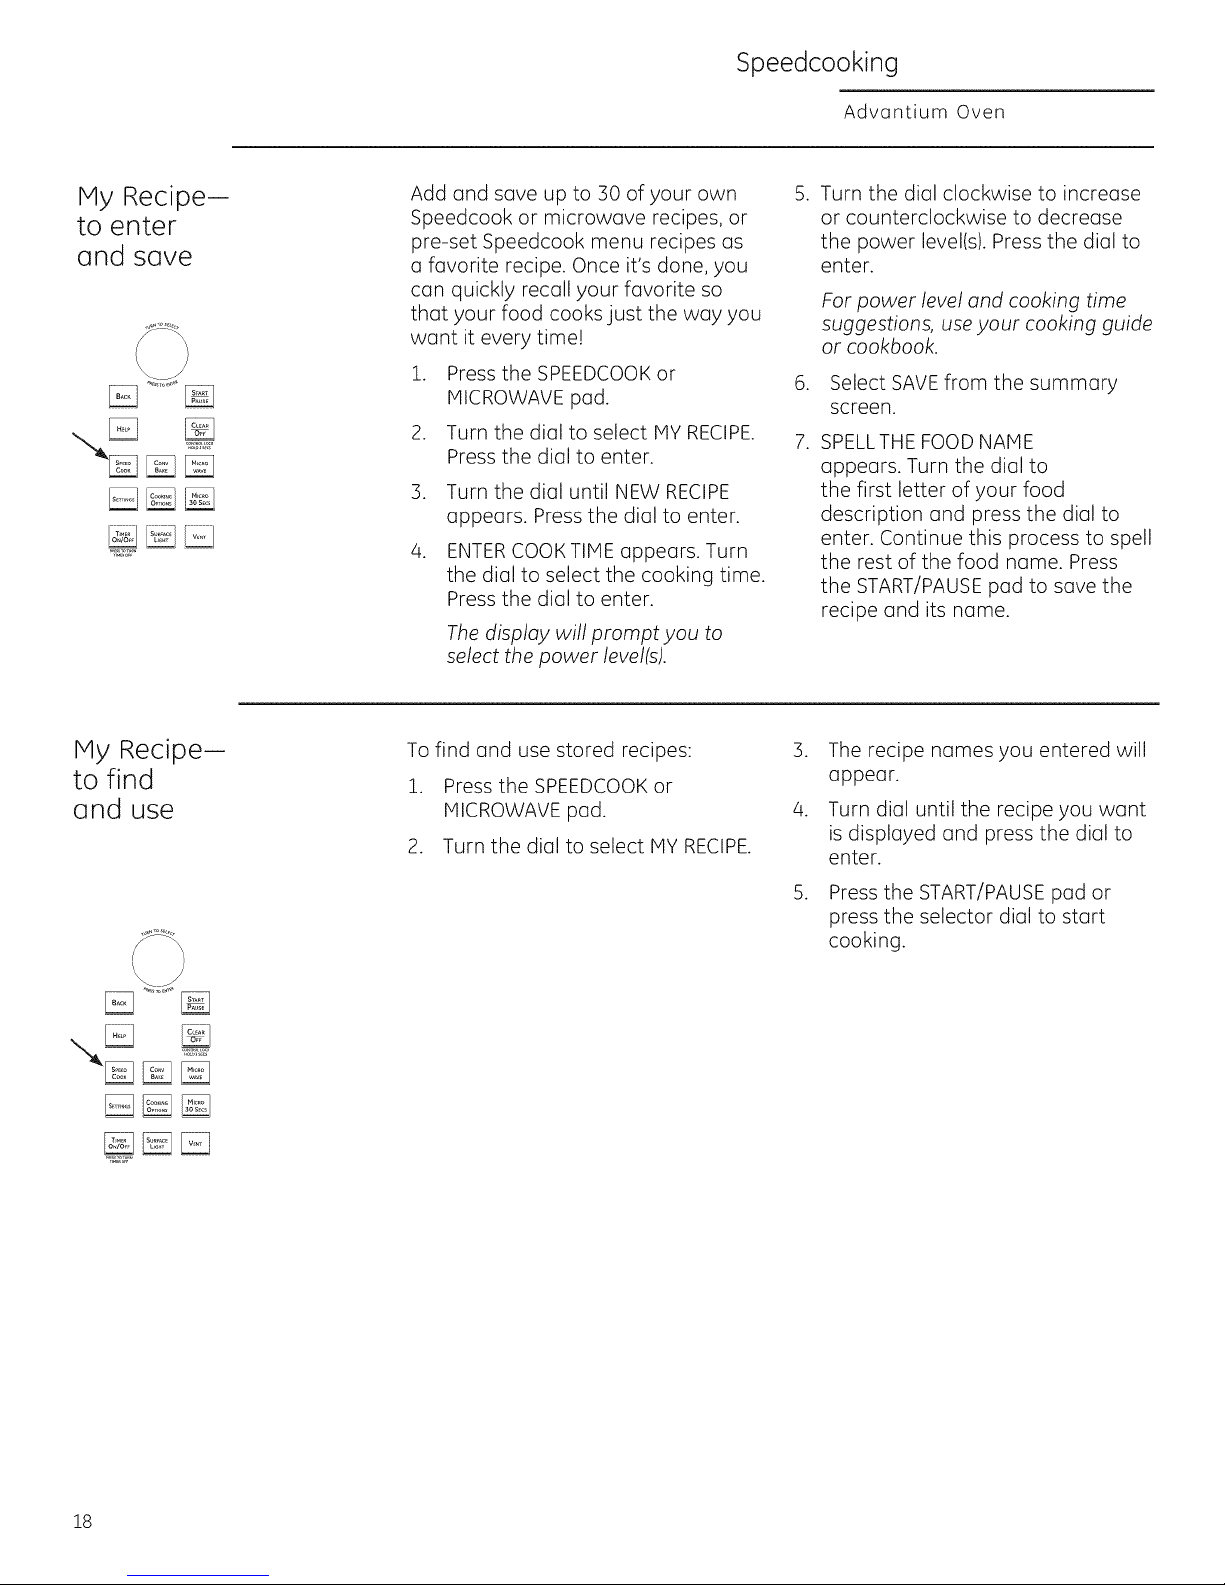
1. Press the SPEEDCOOKor
MICROWAVE pad.
2. Turn the dial to select MY RECIPE.
Press the dial to enter.
.
Turn the dial until NEW RECIPE
appears. Press the dial to enter.
.
ENTERCOOK TIME appears. Turn
the dial to select the cooking time.
Press the dial to enter.
The display will prompt you to
select the power level(s).
To find and use stored recipes:
1. Press the SPEEDCOOKor
MICROWAVE pad.
2. Turn the dial to select MY RECIPE.
5. Turn the dial clockwise to increase
or counterclockwise to decrease
the power level(s). Press the dial to
enter.
For power level and cooking time
suggestions, use your cooking guide
or cookbook.
6. Select SAVE from the summary
screen.
. SPELLTHE FOOD NAME
appears. Turn the dial to
the first letter of your food
description and press the dial to
enter. Continue this process to spell
the rest of the food name. Press
the START/PAUSE pad to save the
recipe and its name.
3. The recipe names you entered will
appear.
4. Turn dial until the recipe you want
is displayed and press the dial to
enter.
S.
Press the START/PAUSE pad or
press the selector dial to start
cooking.
18
Page 19
Speedcooking
Adv(]ntium Oven
IVly Recipe--
to adjust
or change
My Recipe--
to delete
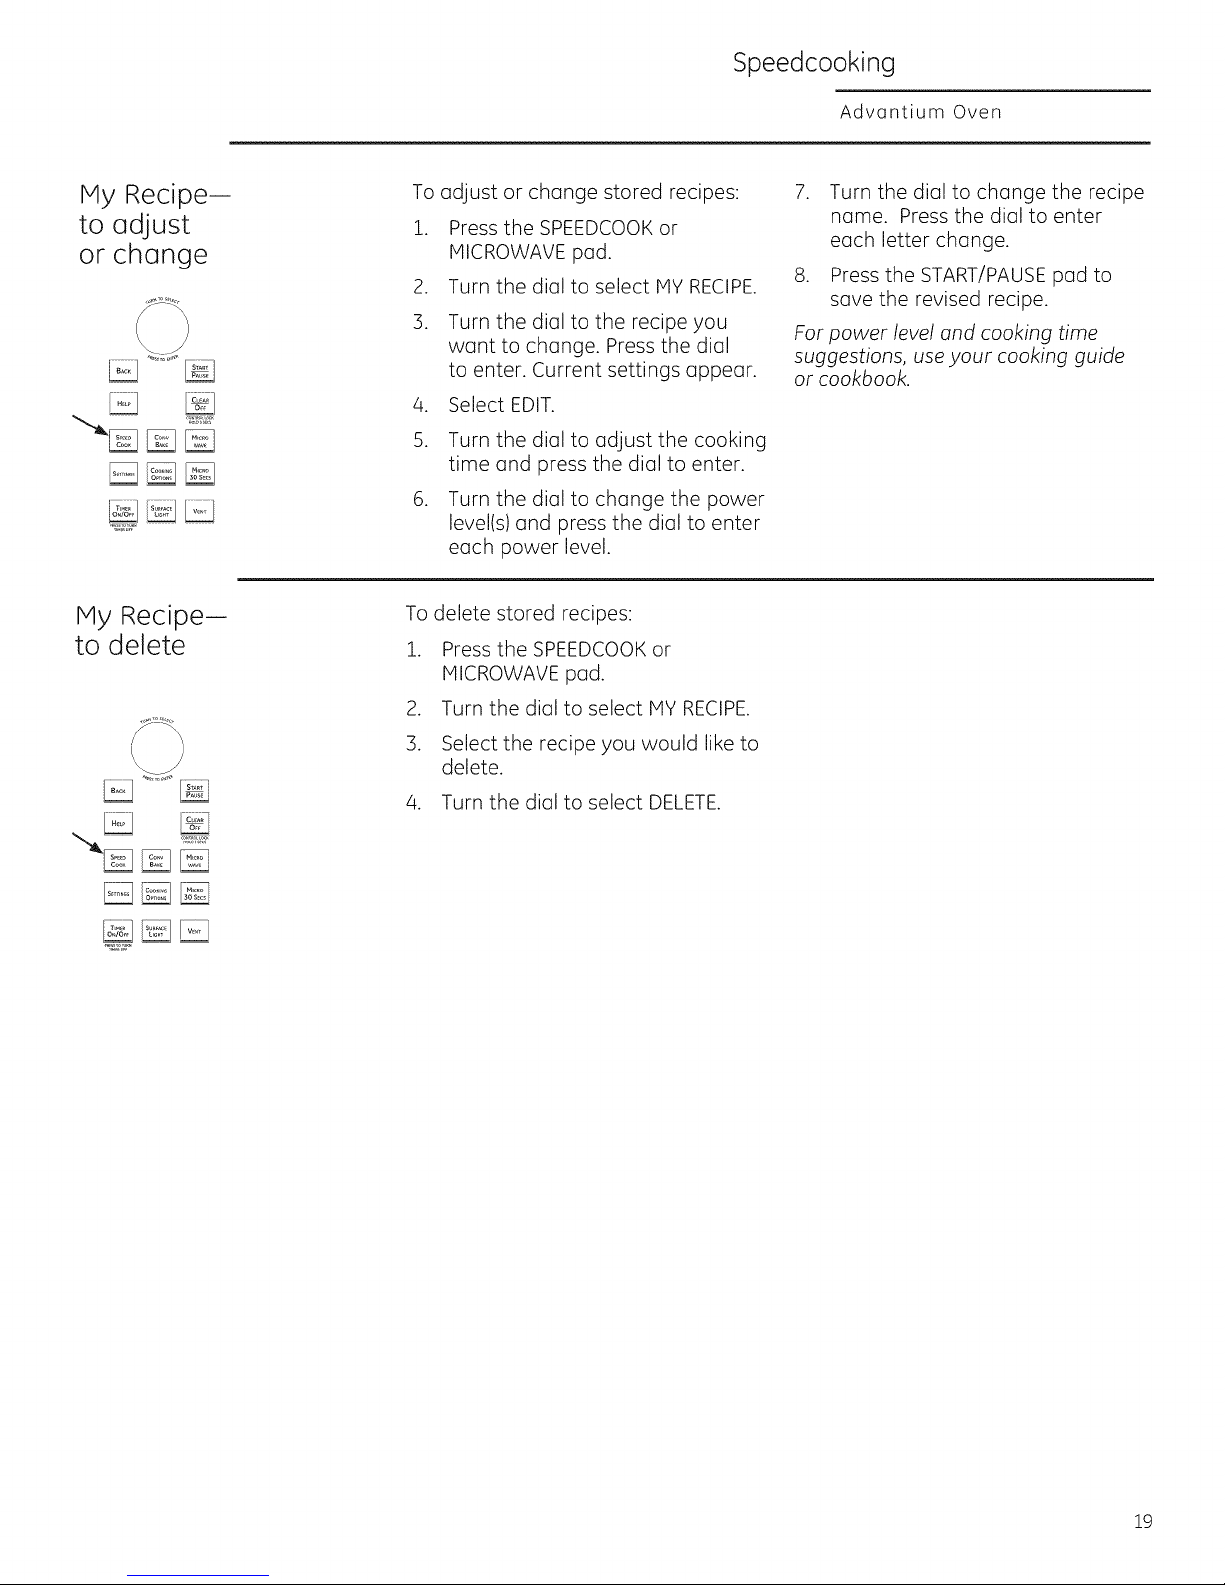
To adjust or change stored recipes:
Z. Press the SPEEDCOOKor
MICROWAVE pad.
2. Turn the dial to select MY RECIPE.
.
Turn the dial to the recipe you
want to change. Press the dial
to enter. Current settings appear.
Select EDIT.
S.
Turn the dial to adjust the cooking
time and press the dial to enter.
.
Turn the dial to change the power
level(s) and press the dial to enter
each power level.
To delete stored recipes:
1. Press the SPEEDCOOKor
MICROWAVE pad.
2. Turn the dial to select MY RECIPE.
3. Select the recipe you would like to
delete.
7. Turn the dial to change the recipe
name. Press the dial to enter
each letter change.
8. Press the START/PAUSE pad to
save the revised recipe.
For power level and cooking time
suggestions, use your cooking guide
or cookbook.
4. Turn the dial to select DELETE.
19
Page 20
Convection baking
Advantium Oven
Convection
Baking
How to
Convection
Bake
\
Convection baking allows you to cook foods
the same way as a conventional oven, using an
element to heat the air inside the oven. Any oven
temperature from 250% to 450% may be set.
A fan gently circulates heated air throughout the
oven, over and around the food. Because the
heated air is kept constantly moving, some foods
cook slightly faster than in regular oven cooking.
Before you begin, make sure the metal rack is
in place. Both racks may be used for two level
cooking.
2. Press CONV BAKE pad.
2. Turn the dial to set the temperature
and press the dial to enter.
3. Press the dial to enter and confirm
the selection.
To start immediately without setting
a cook time, select STARTor press the
START/PAUSEpad:
To set a cook time:
1. Turn the dial and select COOKTIME.
.
Turn the dial to set the cook time
and press the dial to enter.
3.
To start the cook time immediately,
place the food in the oven and select
STARTCOOK TIME. Then press the
dial or the START/PAUSEpad to start.
The cook time will immediately start
to count down.
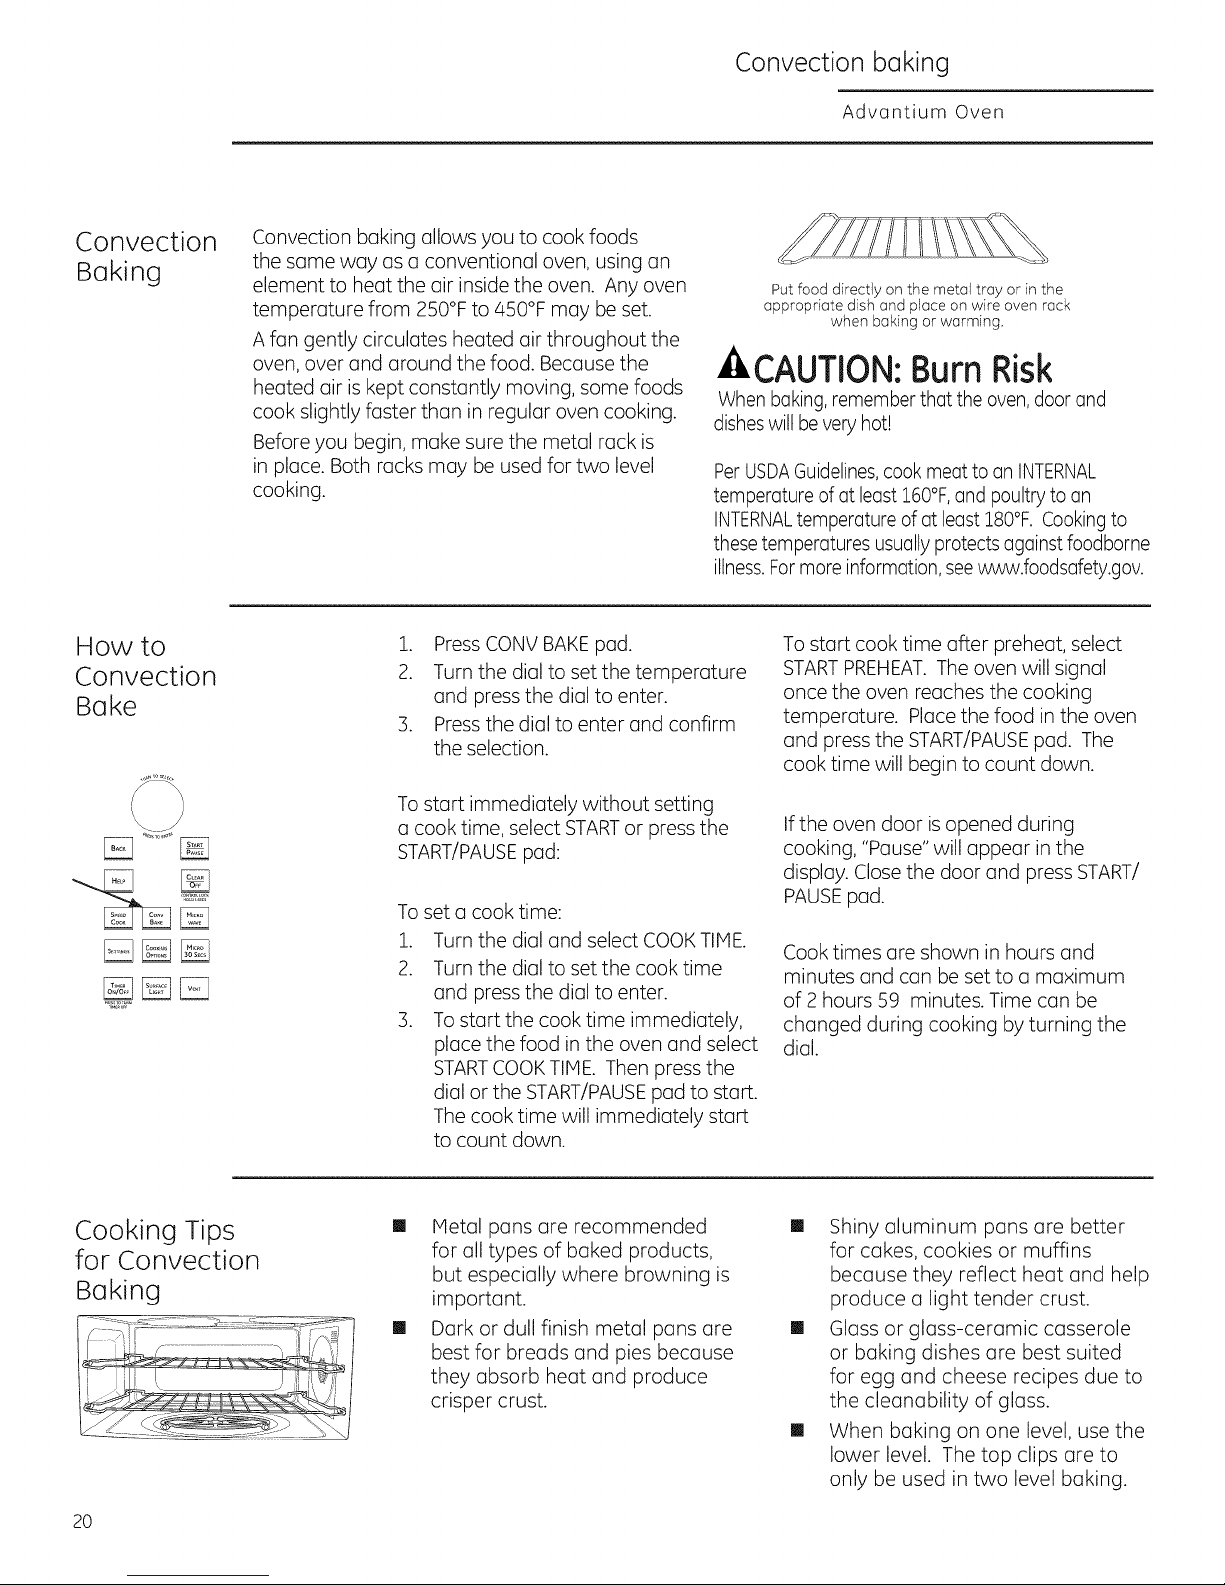
Put food directly on the metal tray or in the
appropriate dish and place on wire oven rack
when baking orwarming.
-ACAUTION:BurnRisk
When baking, remember that the oven,door and
dishes will be very hot!
PerUSDAGuidelines,cook meat to an INTERNAL
temperature of at least 160%,and poultry to an
INTERNALtemperature of at least 180%. Cookingto
these temperatures usually protects against foodborne
illness.Formore information, seewww.foodsafety.gov.
To start cook time after preheat, select
STARTPREHEAT. The oven will signal
once the oven reaches the cooking
temperature. Place the food in the oven
and press the START/PAUSEpad. The
cook time will begin to count down.
If the oven door is opened during
cooking, "Pause" will appear in the
display. Close the door and press START/
PAUSEpad.
Cook times are shown in hours and
minutes and can be set to a maximum
of 2 hours 59 minutes. Time can be
changed during cooking by turning the
dial.
Cooking Tips
[] Metal pans are recommended
for Convection
Baking
[] Dark or dull finish metal pans are
20
for all types of baked products,
but especially where browning is
important.
best for breads and pies because
they absorb heat and produce
crisper crust.
[] Shiny aluminum pans are better
for cakes, cookies or muffins
because they reflect heat and help
produce a light tender crust.
[] Glass or glass-ceramic casserole
or baking dishes are best suited
for egg and cheese recipes due to
the cleanability of glass.
[] When baking on one level, use the
lower level. The top clips are to
only be used in two level baking.
Page 21
Broiling and Toasting
Advantium Oven
Broiling
and
Toasting
How to
Broil
_[__._,_ I V_T,_]
Broil and toast use the upper lamps and lower heater
to broil or toast food similar to a conventional oven.
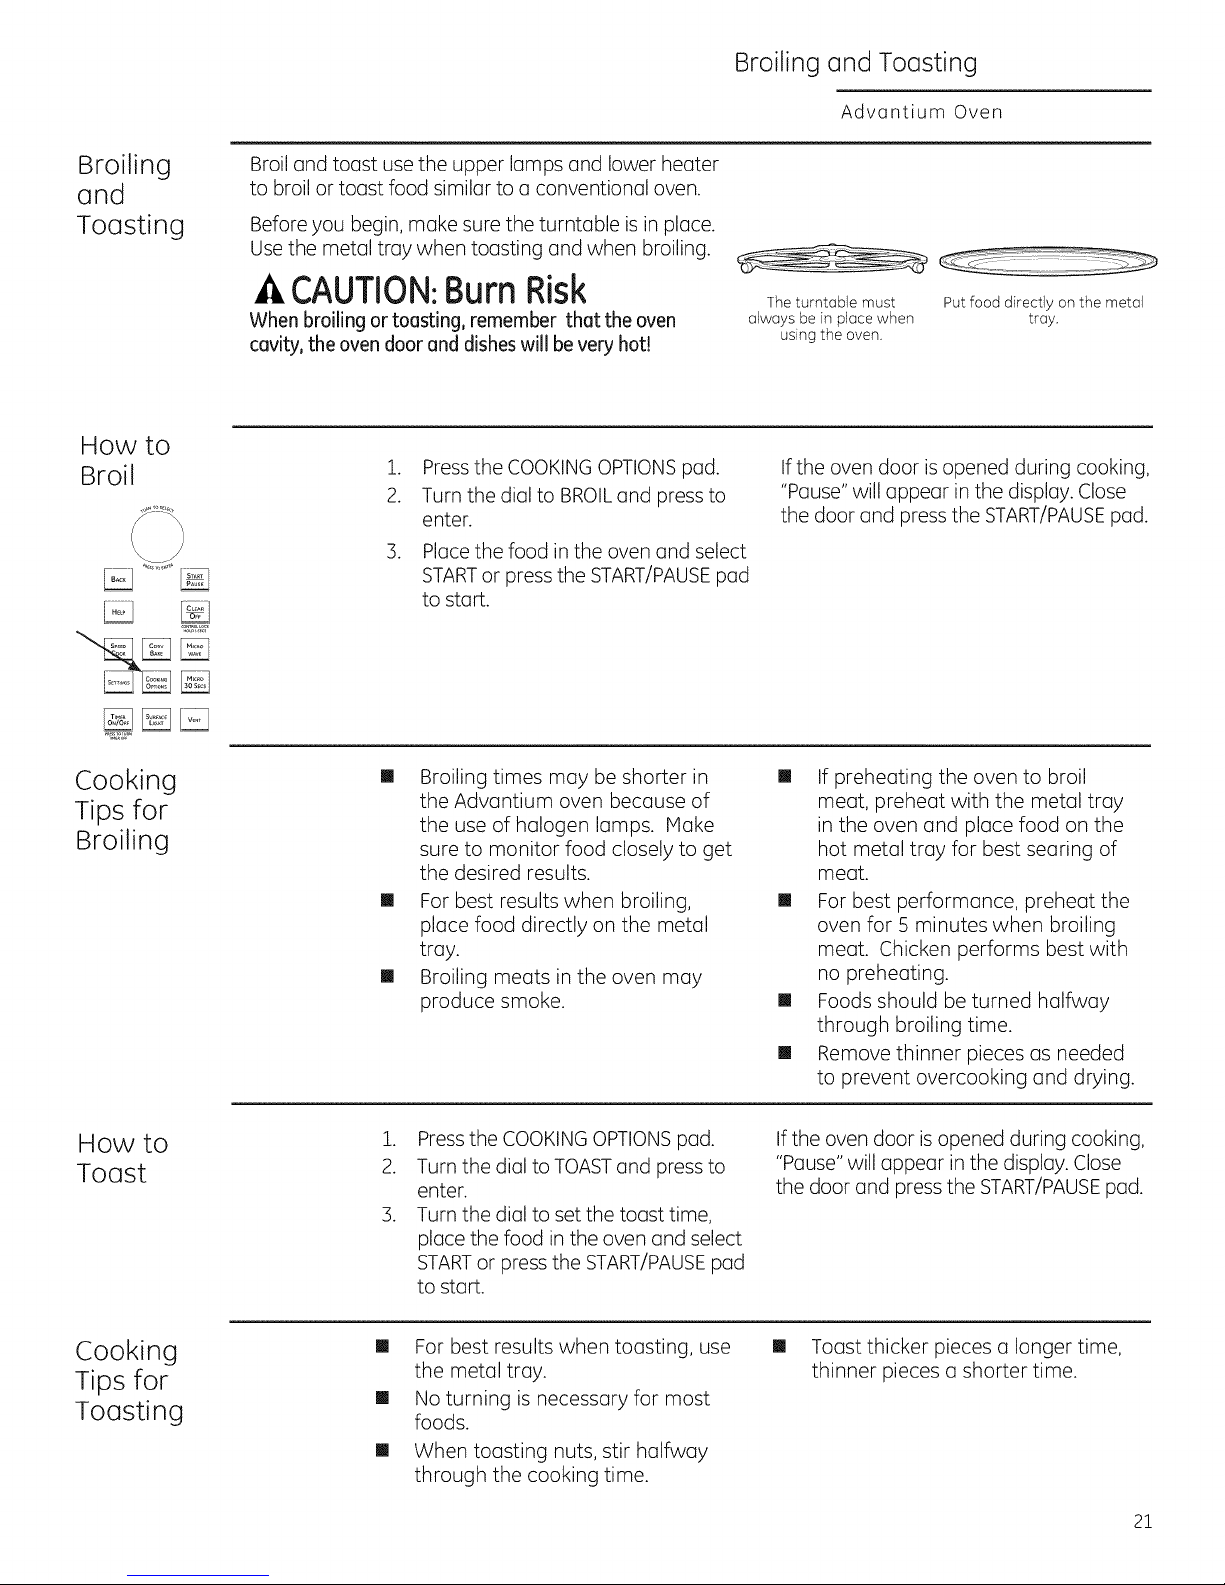
Before you begin, make sure the turntable is in place.
Use the metal tray when toasting and when broiling.
_ACAUTION:Burn Risk
When broiling or toasting, remember that the oven
cavity, the oven door and dishes will be very hot!
1. Press the COOKING OPTIONS pad.
2. Turn the dial to BROILand press to
enter.
. Place the food in the oven and select
STARTor press the START/PAUSEpad
to start.
The turntable must Put food directly on the metal
always be in place when tray.
using the oven.
If the oven door is opened during cooking,
"Pause" will appear in the display. Close
the door and press the START/PAUSEpad.
[]
Cooking
Tips for
Broiling
How to
Toast
Cooking
Tips for
Toasting
[]
Broiling times may be shorter in
the Advantium oven because of
the use of halogen lamps. Hake
sure to monitor food closely to get
the desired results.
[] For best results when broiling,
place food directly on the metal
tray.
[] Broiling meats in the oven may
produce smoke.
1. Press the COOKING OPTIONS pad.
2. Turn the dial to TOAST and press to
enter.
3. Turn the dial to set the toast time,
place the food in the oven and select
STARTor press the START/PAUSEpad
to start.
[] For best results when toasting, use
the metal tray.
[] No turning is necessary for most
foods.
[]
When toasting nuts, stir halfway
through the cooking time.
[]
If preheating the oven to broil
meat, preheat with the metal tray
in the oven and place food on the
hot metal tray for best searing of
meat.
[] For best performance, preheat the
oven for 5 minutes when broiling
meat. Chicken performs best with
no preheating.
[] Foods should be turned halfway
through broiling time.
[] Remove thinner pieces as needed
to prevent overcooking and drying.
If the oven door is opened during cooking,
"Pause" will appear in the display. Close
the door and press the START/PAUSEpad.
[]
Toast thicker pieces a longer time,
thinner pieces a shorter time.
21
Page 22
Warming and Proofing
Advantium Oven
Warming
\\
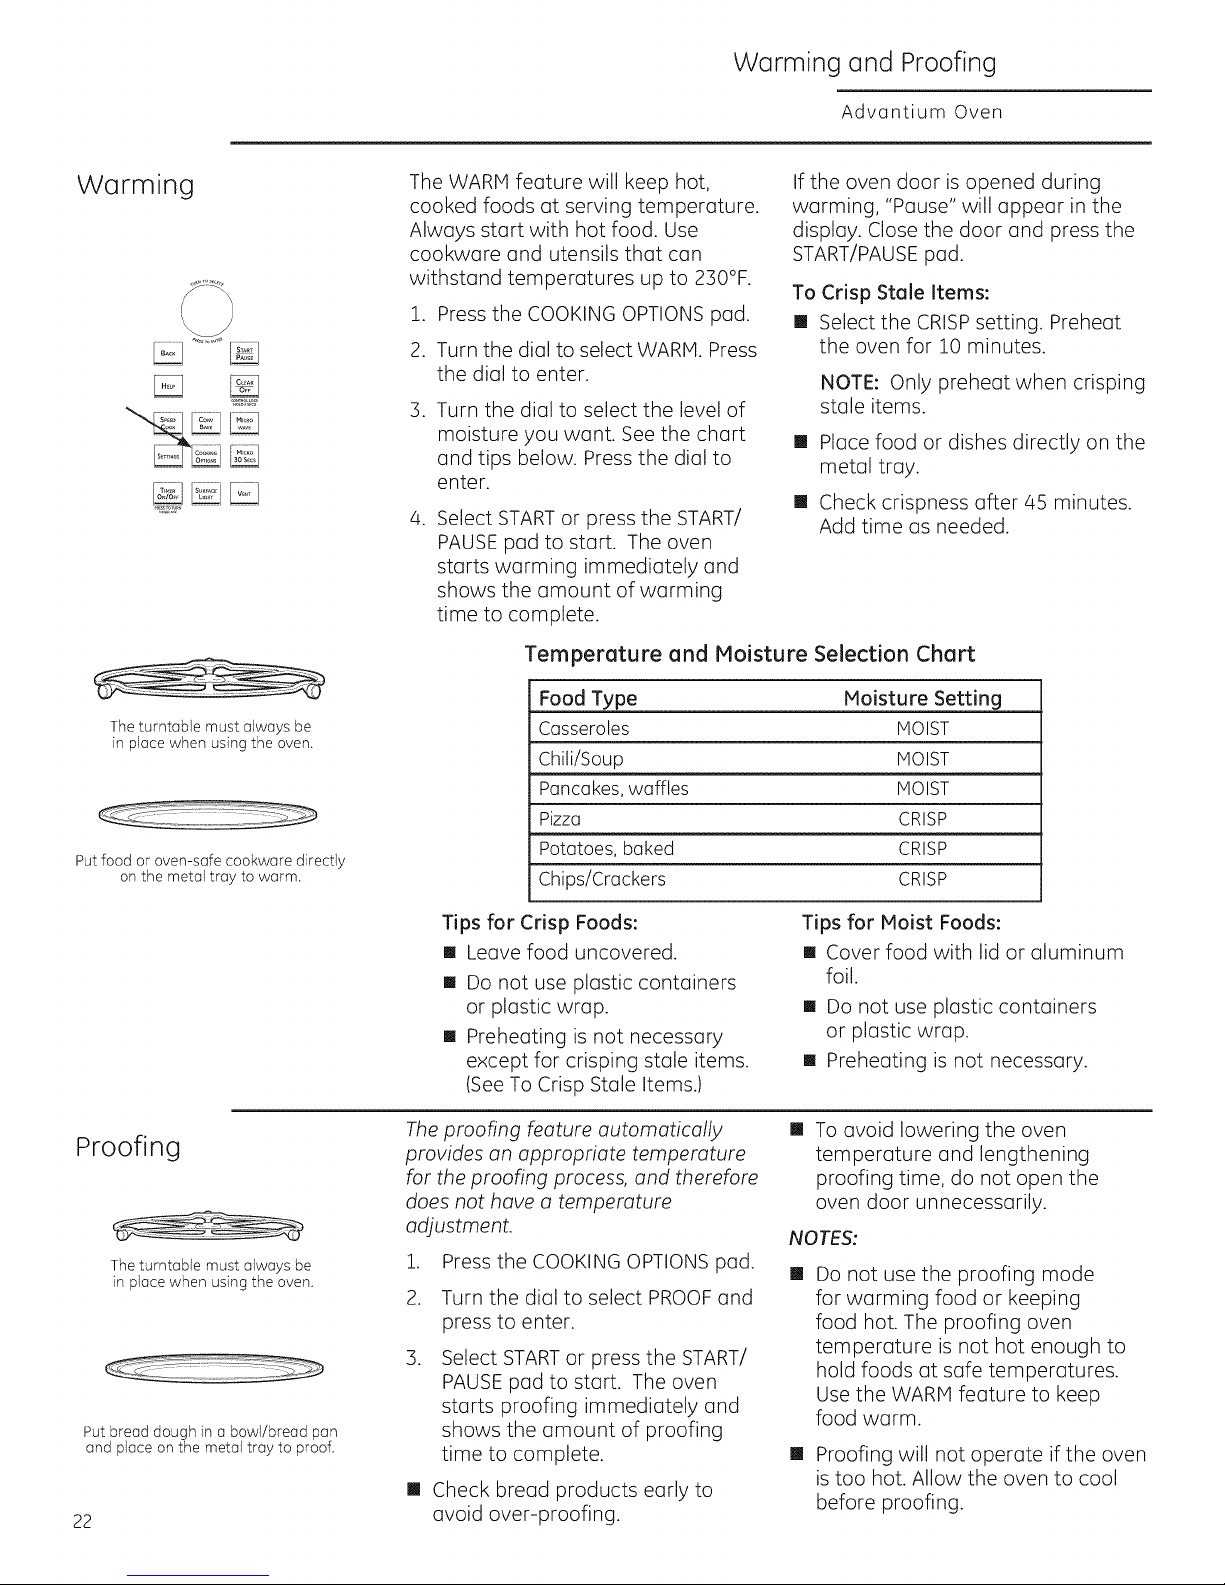
The turntable must always be
in place when using the oven.
Put food or oven-safe cookware directly
on the metal tray to warm.
The WARM feature will keep hot,
cooked foods at serving temperature.
Always start with hot food. Use
cookware and utensils that can
withstand temperatures up to 230°F.
1. Press the COOKING OPTIONS pad.
2. Turn the dial to select WARM. Press
the dial to enter.
. Turn the dial to select the level of
moisture you want. See the chart
and tips below. Press the dial to
enter.
It.
Select STARTor press the START/
PAUSE pad to start. The oven
starts warming immediately and
shows the amount of warming
time to complete.
Temperature and Moisture Selection Chart
Food Type Moisture Setting
Casseroles MOIST
Chili/Soup HOIST
Pancakes, waffles HOIST
Pizza CRISP
Potatoes, baked CRISP
Chips/Crackers CRISP
If the oven door is opened during
warming, "Pause" will appear in the
display. Close the door and press the
START/PAUSE pad.
To Crisp Stale Items:
[] Select the CRISP setting. Preheat
the oven for 10 minutes.
NOTE: Only preheat when crisping
stale items.
[]
Place food or dishes directly on the
metal tray.
[]
Check crispness after 45 minutes.
Add time as needed.
Proofing
The turntable must always be
in place when using the oven.
Put bread dough in a bowl/bread pan
and place on the metal tray to proof.
22
Tips for Crisp Foods:
[] Leave food uncovered.
[] Do not use plastic containers
or plastic wrap.
[] Preheating is not necessary
except for crisping stale items.
(See To Crisp Stale Items.)
The proofing feature automatically
provides an appropriate temperature
for the proofing process, and therefore
does not have a temperature
adjustment.
1. Press the COOKING OPTIONS pad.
.
Turn the dial to select PROOF and
press to enter.
.
Select STARTor press the START/
PAUSE pad to start. The oven
starts proofing immediately and
shows the amount of proofing
time to complete.
[] Check bread products early to
avoid over-proofing.
Tips for Moist Foods:
[] Cover food with lid or aluminum
foil.
[] Do not use plastic containers
or plastic wrap.
[] Preheating is not necessary.
[]
To avoid lowering the oven
temperature and lengthening
proofing time, do not open the
oven door unnecessarily.
NOTES:
[]
Do not use the proofing mode
for warming food or keeping
food hot. The proofing oven
temperature is not hot enough to
hold foods at safe temperatures.
Use the WARM feature to keep
food warm.
[] Proofing will not operate if the oven
is too hot. Allow the oven to cool
before proofing.
Page 23
Using the
microwave
features
Hicrowaving
Advantium Oven
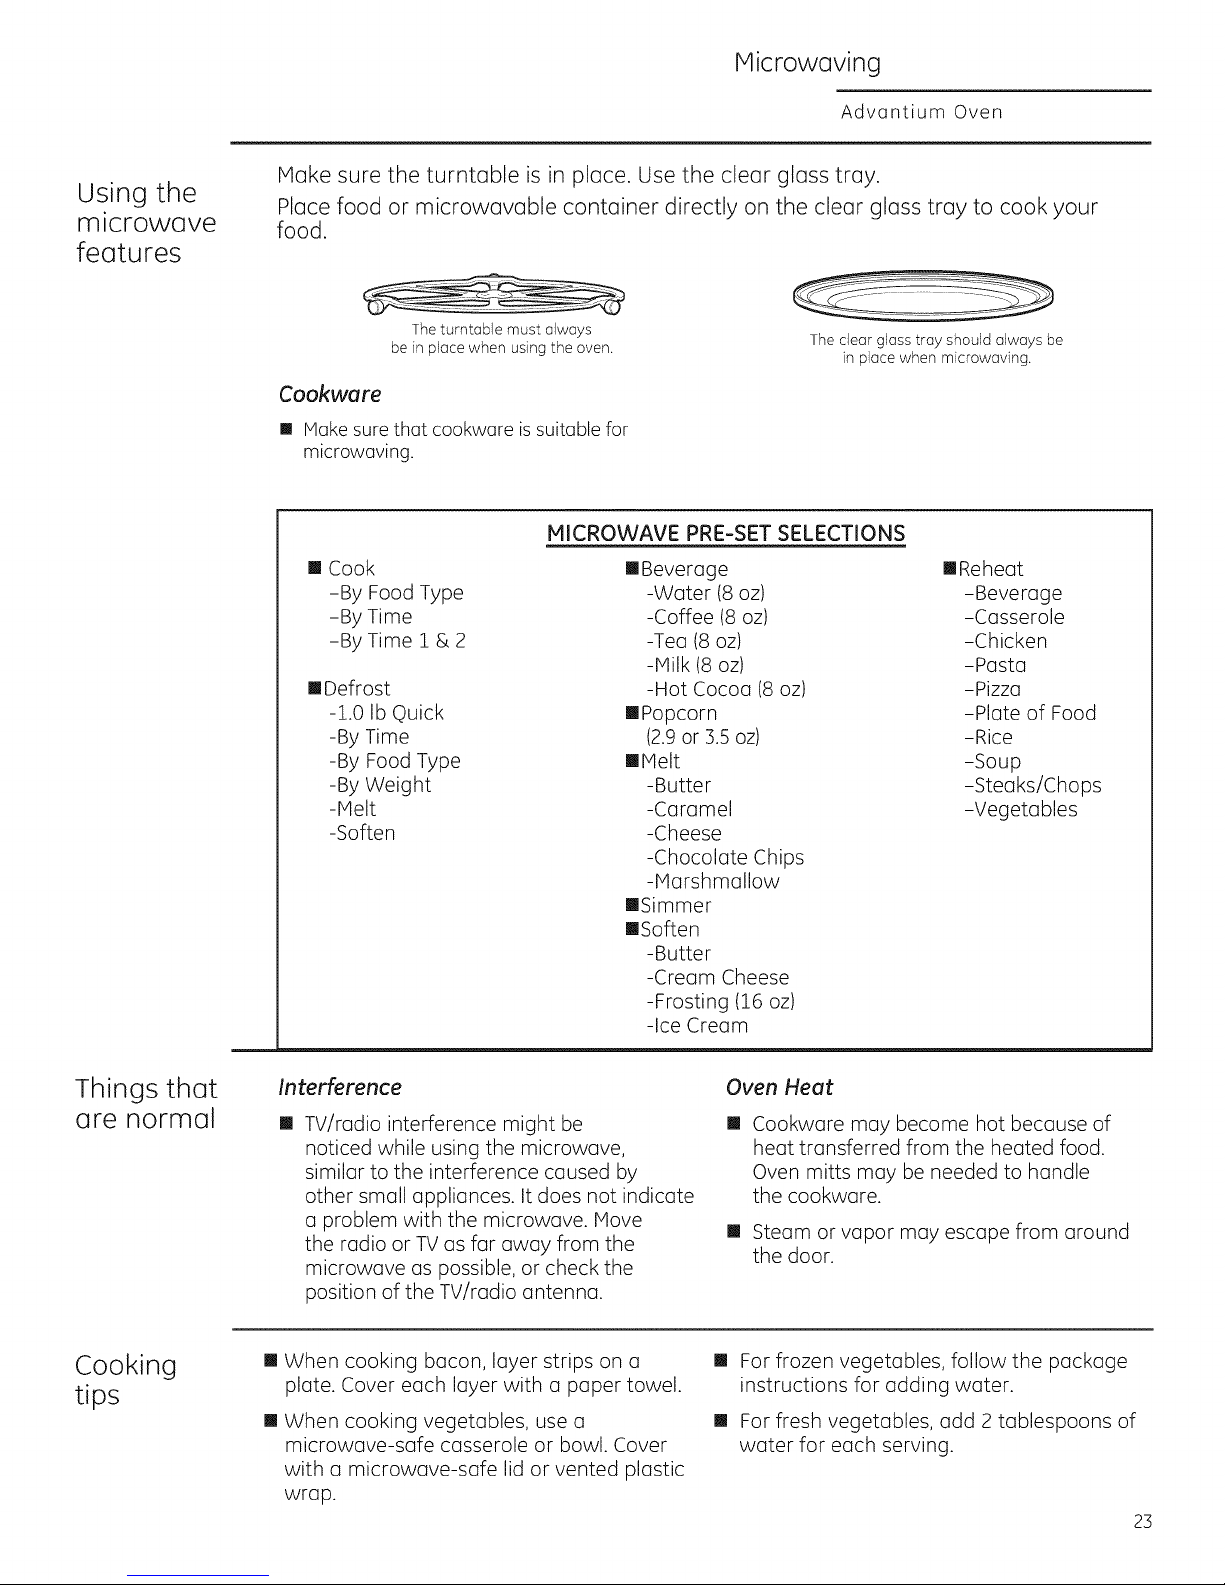
Make sure the turntable is in place. Use the clear glass tray.
Place food or microwavable container directly on the clear glass tray to cook your
food.
The turntable must always
be in place when using the oven.
Cookwure
[] Hake sure that cookware is suitable for
microwaving.
MICROWAVE PRE-SET SELECTIONS
[] Cook
-By Food Type
-By Time
-By Time 1 & 2
[]Defrost
-1.0 Ib Quick
-By Time
-By Food Type
-By Weight
-Melt
-Soften
[]Beverage
-Water (8 oz)
-Coffee (8 oz)
-Tea (8 oz)
-Milk (8 oz)
-Hot Cocoa (8 oz)
[]Popcorn
(2.9or 3.5 oz)
[]Melt
-Butter
-Caramel
-Cheese
-Chocolate Chips
-Marshmallow
[]Simmer
•Soften
-Butter
-Cream Cheese
-Frosting (16 oz)
-Ice Cream
The clear glass tray should always be
in place when microwaving.
[]Reheat
-Beverage
-Casserole
-Chicken
-Pasta
-Pizza
-Plate of Food
-Rice
-Soup
-Steaks/Chops
-Vegetables
Things that
are normal
Cooking
tips
Interference
[]
TV/radio interference might be
noticed while using the microwave,
similar to the interference caused by
other small appliances. It does not indicate
a problem with the microwave. Move
the radio or TV as far away from the
microwave as possible, or check the
position of the TV/radio antenna.
[] When cooking bacon, layer strips on a
plate. Cover each layer with a paper towel.
[] When cooking vegetables, use a
microwave-safe casserole or bowl. Cover
with a microwave-safe lid or vented plastic
wrap.
Oven Heut
[]
Cookware may become hot because of
heat transferred from the heated food.
Oven mitts may be needed to handle
the cookware.
[] Steam or vapor may escape from around
the door.
[] For frozen vegetables, follow the package
instructions for adding water.
[] For fresh vegetables, add 2 tablespoons of
water for each serving.
23
Page 24
Hicrowaving
Advantium Oven
Microwave
power
level(s)
How to
use pre-set
microwave
selections
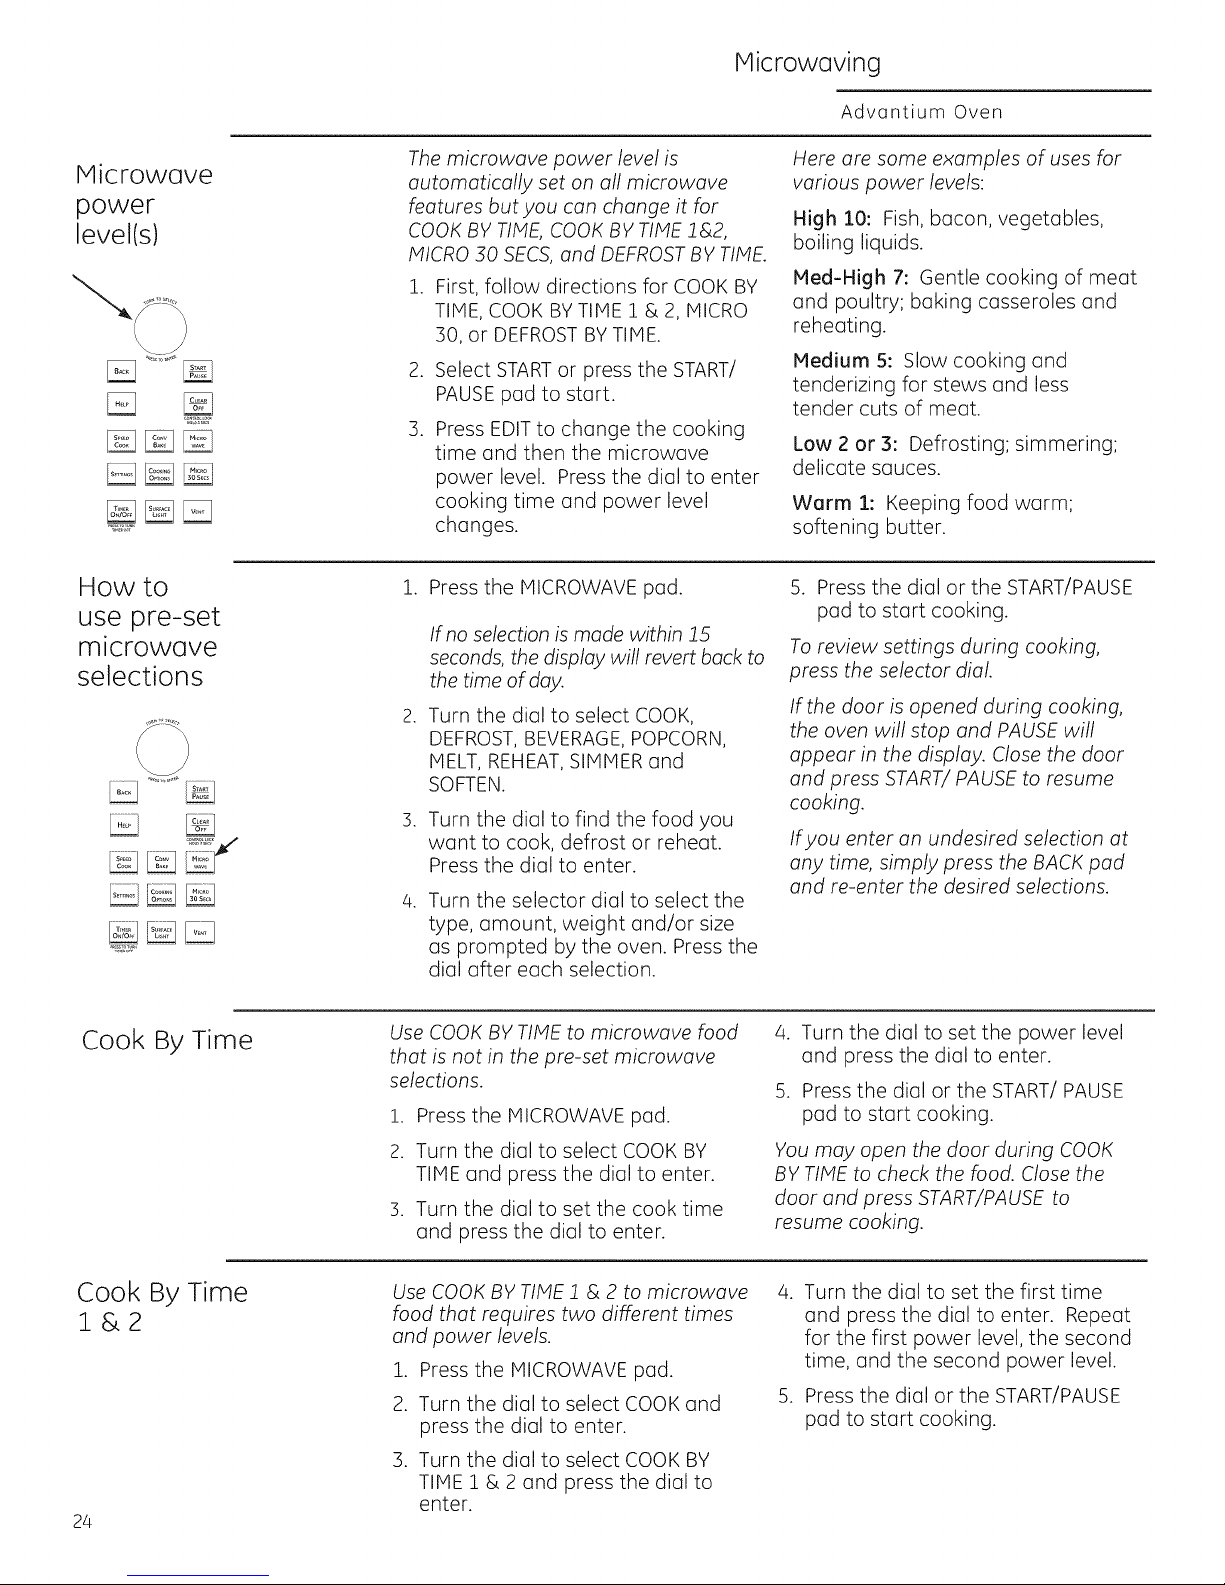
The microwave power level is
automatically set on all microwave
features but you can change it for
COOK BY TIME, COOK BY TIME 2&2,
MICRO 30 SECS, and DEFROST BY TIME.
1. First, follow directions for COOK BY
TIME, COOK BYTIME 1 & 2, MICRO
30, or DEFROST BY TIME.
.
Select STARTor press the START/
PAUSEpad to start.
.
Press EDIT to change the cooking
time and then the microwave
power level. Press the dial to enter
cooking time and power level
changes.
1. Press the HICROWAVE pad.
If no selection is made within 15
seconds, the display will revert back to
the time of day.
.
Turn the dial to select COOK,
DEFROST,BEVERAGE,POPCORN,
HELT, REHEAT,SIHHER and
SOFTEN.
3.
Turn the dial to find the food you
want to cook, defrost or reheat.
Press the dial to enter.
4.
Turn the selector dial to select the
type, amount, weight and/or size
as prompted by the oven. Press the
dial after each selection.
Here are some examples of uses for
various power levels:
High 10: Fish, bacon, vegetables,
boiling liquids.
Med-High 7: Gentle cooking of meat
and poultry; baking casseroles and
reheating.
Medium 5: SIowcooking and
tenderizing for stews and less
tender cuts of meat.
Low 2 or 3: Defrosting; simmering;
delicate sauces.
Warm 1: Keeping food warm;
softening butter.
5. Press the dial or the START/PAUSE
pad to start cooking.
To review settings during cooking,
press the selector dial.
If the door is opened during cooking,
the oven will stop and PAUSE will
appear in the display. Close the door
and press START/PAUSE to resume
cooking.
If you enter an undesired selection at
any time, simply press the BACK pad
and re-enter the desired selections.
Cook By Time
Cook By Time
l&2
24
Use COOK BY TIME to microwave food
that is not in the pre-set microwave
selections.
!. Press the MICROWAVE pad.
2. Turn the dial to select COOK BY
3. Turn the dial to set the cook time
Use COOK BY TIME 2 & 2 to microwave
food that requires two different times
and power levels.
1. Press the MICROWAVE pad.
2. Turn the dial to select COOK and
3. Turn the dial to select COOK BY
TIHE and press the dial to enter.
and press the dial to enter.
press the dial to enter.
TIME 1 & 2 and press the dial to
enter.
4. Turn the dial to set the power level
and press the dial to enter.
5. Press the dial or the START/PAUSE
pad to start cooking.
You may open the door during COOK
BY TIME to check the food. Close the
door and press START/PAUSE to
resume cooking.
4. Turn the dial to set the first time
and press the dial to enter. Repeat
for the first power level, the second
time, and the second power level.
5. Press the dial or the START/PAUSE
pad to start cooking.
Page 25

Hicrowaving
Advantium Oven
Micro :30
Secs
My
Recipes
Defrosting
tips
Press MICRO 30 SECS repeatedly for
30 second increments of microwave
cooking time. Oven starts immediately.
See the MY RECIPEsections in the
Speedcook section of this book for
instructions on how to save, use,
change or delete a microwave custom
recipe.
Use DEFROST BY FOOD TYPEfor meat,
poultry, fish, and bread. Use DEFROST
BY TIME for most other frozen foods.
[]
Foods frozen in paper or plastic
can be defrosted in the package
when using DEFROSTBYTIME. Meats
should be taken out of the package
when using DEFROST BY FOOD
TYPE.Closed packages should be
slit, pierced or vented after food has
partially defrosted. Plastic storage
containers should be partially
uncovered.
[]
Family-size, prepackaged frozen
dinners can be defrosted and
microwaved. If the food is in a
foil container, transfer it to a
microwave-safe dish.
The power level is automatically set at
high, but you can change it for more
flexibility. See Microwave power levels
section for instructions.
[]
Foods that spoil easily should not
be allowed to sit out for more than
one hour after defrosting. Room
temperature promotes the growth
of harmful bacteria.
[] When defrosted, food should be
cool but softened in all areas.
If still slightly icy, return to the
microwave very briefly, or let
it stand o few minutes.
[] When defrosting 3 or more pounds
of ground or cubed meat, remove
defrosted portions at the turn
signals.
Defrost by
time
Use DEFROST BY TIME to defrost for a
selected length of time.
1. Press the MICROWAVE pad.
2. Turn the selector dial to DEFROST.
3. Turn the dial to DEFROST BY TIME.
4. Turn the dial to select the time you
5. Press the dial or START/PAUSE pad
6. Turn the food over when the oven
Press the dial to enter.
Press the dial to enter.
want. Press the dial to enter.
to start defrosting.
signals TURN FOOD OVER.
Power level is automatically set
at 3, but can be changed. To change
the power levels, see Microwave
power levels for instructions.
You can defrost small items quickly by
raising the power level after entering
the time. Power level 7 cuts the total
defrosting time in about half; power
level 10 cuts the total time to about
1/3. When defrosting at high power
levels, food will need more frequent
attention than usual and may have
some cooking.
25
Page 26

Hicrowaving
Advantium Oven
Defrost by
food type
DEFROST BY FOOD TYPEautomatically []
sets the defrosting times and power
levels to give even defrosting results
for meats, poultry and fish weighing []
up to 6 pounds.
.
Remove meat from the package
and place it on a microwave-safe
dish. Bread should be left in the
package with any metal twist-ties
removed.
2. Press the MICROWAVE pad.
3. Turn the dial to DEFROST.Press the
dial to enter.
4. Turn the dial to DEFROST BY FOOD
TYPE. Press the dial to enter.
5. Turn the dial to select food type.
Press the dial to enter.
.
Turn the dial to the food weight,
using the Conversion Guide
at right. For example, dial 1.2 for
1.2 pounds (1 pound, 3 oz.)
Press the dial to enter.
.
Press the dial or START/PAUSE pad
to start defrosting.
.
Turn the food over when the oven
signals TURN FOOD OVER.
Remove defrosted meat or shield
warm areas with small pieces of
foil for even defrosting.
After defrosting, most meats need
to stand 5 minutes to complete
defrosting. Large roasts should
stand for about 30 minutes.
Conversion Guide
If the weight of food is stated in pounds
ond ounces, the ounces must be
converted to tenths (2) of o pound.
Weight of Food Enter Food Weight
in Ounces (tenths of a pound}
1-2 .!
3 .2
4-5 .3
6-7 .4
8 .5
9-10 .6
11 .7
12-1:3 .8
14-15 .9
26
Page 27

bdicrow(]ve
sensor
cooking tips
The Advantium's microwave mode
features sensor cooking and
reheating. The oven automatically
senses when food is done and shuts
itself off-eliminating the need to
program cook times and power levels.
The sensor feature detects the
increasing humidity released during
cooking. The oven automatically
adjusts the cooking time to various
types and amounts of food.
WARNING:
Fire Risk
Do not use the sensor features twice in
succession on the same food portion-
it may result in severely overcooked or
burnt food. If food is undercooked after
the first countdown, use COOK BY TIME
for additional cooking time.
Hicrowaving
Advantium Oven
\ /
Covered
Vented
The proper containers and covers are
essential for best sensor cooking.
[]
Always use microwave-safe
containers and cover them with lids
or vented plastic wrap.
Never use tight sealing plastic
containers-they can prevent
steam from escaping and cause
food to overcook.
[]
Be sure the outside of the cooking
containers and the inside of the
oven are dry before placing food
in the oven. Beads of moisture
turning into steam can mislead
the sensor.
[] Popcorn and Potatoes are best
heated uncovered.
MICROWAVE SENSOR PROGRAMS
[] Ground Meat
[] Popcorn
(Prepackaged microwave
popcorn, 2.9 oz. to 3.5 oz.)
[] Potato
[] Rice
[] Soup
[] Vegetables (Canned, Fresh,
Frozen)
Dry off dishes so they don't
mislead the sensor.
[] Chicken Reheat
[] Pasta Reheat
[] Plate of Food Reheat
[] Soup Reheat
[] Vegetable Reheat
[] Simmer
27
Page 28

Hicrowaving and Other Advantium Features
Advantium Oven
To use all
sensor
programs
[]
To use the sensor features:
!. Press the MICROWAVE pad.
2. Turn the dial to select COOK BY FOOD
(located under COOK), REHEAT, or SIHHER.
.
For COOK BYFOOD and REHEAT,select
a food and press the dial to enter. For
SIHHER, set the time to simmer after the
soup, sauce or stew has come to a boil.
4. Press the dial or press the START/PAUSE
pad to start cooking.
Do not open the oven door until time is
counting down on the display. If you open
the door while sensor cooking, "Sensor Error
- Close door and press START"will appear.
Close the door immediately and press the
START/PAUSE pad to begin again.
WARNING:
Fire Risk
Do not use a sensor feature twice in
succession on the same food portion-it may
result in severely overcooked or burnt food. If
the food is not done enough at the end of the
sensor cook time, use COOK BY TIHE in the
microwave selector to cook for more time.
[]
If you have been cooking and the oven is
hot, it may indicate that it is too hot for
sensor cooking. In that case, the oven will
automatically change to time cooking and
may prompt for weights or amounts of
food.
[]
To shorten or lengthen the
cook time, wait until the time countdown
shows in the display. Then turn the dial to
add or subtract time.
Notes about the Reheat program:
Reheated foods may have wide variations in
temperature. Some areas may be extremely
hot.
It is best to use COOK BYTIHE and
not REHEAT for these foods:
[] Bread products
[] Food that must be reheated uncovered
[] Foods that need to be stirred
or turned
[] Foods calling for a dry look or crisp
surface after reheating
How to adjust the oven's automatic COOK
BY FOOD and REHEATsettings for a shorter
or longer cook time (not available for all food
types):
To reduce the automatic cooking times:
Right after the oven starts, turn the dial
counterclockwise until a minus ("-") sign
or a double minus ("--") sign appears and
press the dial to enter. A minus ("-") sign
is a 10% reduction of cooking time and a
double minus ("--") sign is a 20% reduction of
cooking time.
To increase the automatic cooking times:
Right after the oven starts, turn the dial
clockwise until a plus ("+") sign or a double
plus ("++") sign appears and press the dial to
enter. A plus ("+") sign is a 10% increase of
cooking time and a double plus ("++"1sign is
a 20% increase of cooking time.
Cooking
Complete
Repeat lost
[]
To remind you that you have food
in the oven, the oven will display the cooking
mode and COOKING COHPLETE and beep
Use this time saving feature for cooking
repetitive items like cookies or appetizers. This
feature will repeat the last cooking cycle used,
including time, temperature, power levels, and
turntable settings
. Press COOKING OPTIONS and select
REPEATLAST.
[]
2. The last cooking cycle will be displayed.
28
once a minute until you either open the oven
door or press the CLEAR/OFF pad.
NOTE: The last program used is stored for two
hours.
3. Press the START/PAUSE pad or the selector
dial to start cooking.
Page 29

Other Advantium Features
Advantium Oven
Resume
feature
Clock
Auto
Conversion
1. If your food needs to cook a bit longer,
you can restart the oven by pressing the
START/PAUSE pad or selector dial.
2. RESUME COOKING will be displayed and
the oven will restart immediately at 10%
of the original time.
The clock must be set before you can use
your oven for the first time. When setting the
clock time for the first time go directly to step
two.
Auto conversion automatically reduces the
convection baking temperature. You still
input the recipe temperature and the oven
control does the rest.
The program stays in memory for 5 minutes.
After that you will need to begin the
program again.
.
To change the clock time, press the
SETTINGS pad and turn the dial to CLOCK
SETTINGS.SelectSET TIME.
2. Turn the dial to set hours. Press the dial to
enter. Note: Setting hours sets AM/PM.
3. Turn the dial to set minutes. Press the dial
to enter.
To change the setting, press the SETTINGS
pad and turn the dial to AUTO CONVERSION.
Press the dial to enter. Turn the dial to
change the setting to CONVERSION ON or
CONVERSION OFF. Press the dial to enter.
Display
Use this feature to turn your clock display on
or off.
On/Off
Beeper
Volume
Reminder Use this feature to set an alarm beep to
Use this feature to adjust the volume of the
beeper. You can even turn it off.
sound at a specific time of day.
1. Press the SETTINGSpad, turn the dial to
select REMINDERand press the dial to enter.
2. Select SET REMINDER and press the dial to
enter.
3. Turn the dial to set the time hour and
minutes, press the dial to enter. NOTE:
Setting the hours set AM/PM.
Press the SETTINGS pad, turn the dial to
select DISPLAY ON/OFF. Turn the dial to
select CLOCK DISPLAY ON or CLOCK DISPLAY
OFF. Press the dial to enter.
Press the SETTINGS pad, turn the dial to
select BEEPERVOLUME, press the dial to
enter. Select the beeper volume, press the
dial to enter.
To turn off the Reminder, press the SETTINGS
pad, turn the dial to select REMINDER and
press the dial to enter. Turn the dial to select
CLEAR REMINDER and press the dial to enter.
To check the Reminder time, press the
SETTINGS pad, turn the dial to select
REMINDER and press the dial to enter. Turn
the dial to select REVIEW REMINDER and
press the dial to enter. The display will show
the Reminder time.
29
Page 30

Other Advantium Features
Advantium Oven
Turntable
On/OFF
Auto Night
Light
Use this feature to keep the turntable from
turning when using a dish is too large to
rotate in the cavity.
TURNTABLE ON/OFF is not a permanent
setting.
Press the SETTINGS pad, turn the dial to
select TURNTABLE ON/OFF and press the dial
to enter. Turn the dial to select TURNTABLE
ON or TURNTABLE OFF, press the dial to
enter.
Use this feature to set the surface light to
come on and go off at a certain time.
.
Press the SETTINGS pad, turn the dial to
select AUTO NIGHT LIGHT and press the
dial to enter.
.
Select SETON TIME and press the dial to
enter.
3.
Turn the dial to set on time hour and
minutes, press the dial to enter. Turn the
dial to set off time hour and minutes, press
the dial to enter. Note: Setting the hours
setsAH/PH.
To disable the Auto Night Light feature, press
the SETTINGS pad, turn the dial to select
AUTO NIGHT LIGHT and press the dial to
enter. Turn the dial to select DEACTIVATE and
press the dial to enter.
Note:
. The turntable will not turn off in Speedcook,
Broil, Toast, or Microwave Sensor modes.
A cooking cycle must be started within 5
minutes of turning the turnable off, or the
turntable will reset to the on setting.
The turntable will also remain off for
cooking cycles started within 5 minutes of
the end of any cooking cycle for which the
turntable was off.
To check the Auto Night Light on and off
times, press the SETTINGS pad, turn the dial
to select AUTO NIGHT LIGHT and press the
dial to enter. Turn the dial to select REVIEW
ON/OFF TIMES and press the dial to enter.
The display will show the on and off time for
the Auto Night light.
Note:
. Auto Night Light will turn on the surface
light to the night setting, when the clock
time matches the Auto Night Light on time,
even if the surface light is on the bright
setting.
Auto Night Light will always turn the
surface light off when the clock time
matches the Auto Night Light off time if the
surface light is turned on.
Temperature
Units
Delay Start
3O
To change temperature units, press the
SETTINGS pad and select TEMPERATURE
UNITS. Turn the dial to select For C and press
the dial to enter.
Use this feature to delay when the oven will
start cooking in CONV BAKE, COOK BY TIME,
COOK BY TIME l&2, DEFROST BY TIME, or
DEFROST BY WEIGHT.
1. Press the COOKING OPTIONS pad.
2. Turn the dial to select DELAY START and
press the dial to enter.
3. Turn the dial to set the start time hour
and minutes, press the dial to enter.
NOTE: Setting the hours sets AH/PH.
4. Set the cooking mode.
The oven will start the programmed cooking
mode when the clock time and the delay
start time ore the same.
Page 31

Other Advantium Features
Advantium Oven
Help
Use this feature to find out more about
your oven and its features.
1. Press the HELP pad.
2. Turn the dial to select the feature
name. Press the dial to enter.
Features found in the HELP function.
Adding Time
Auto Conversion
Auto Night Light
Back
Beeper Volume
Beverage
Broil
Clear/Off
Clock
Control Lockout
Conv Bake
Cook by Food Type
Cook by Time
Cook by Time 1 & 2
Cooking Options
Defrost
Defrost by Food
Defrost by Time
Defrost by Weight
Delay Start
Display ON/OFF
Edit
Help
Melt
Micro 30 Secs
Microwave
My Recipes
Proof
Reheat
Reminder
The display will show a description
for the program you have chosen.
Use the dial to scroll up or down to
read the description.
Repeat Last
Resume
Sensor Cooking
Simmer
Soften
Speed Cook
Start/PAUSE
Temperature Units
Timer On/Off
Turntable ON/OFF
Toast
Warm
Control
lock-out
Timer
Automatic
fans
You may lock the control panel
to prevent the oven from being
accidentally started during cleaning or
being used by children.
Press and hold CLEAR/OFF for
3 seconds to lock and unlock.
Use this feature anytime you need a
general purpose timer. It can even be
used while cooking in the oven.
1. Press the TIMER pad.
2. Turn the dial to select the minutes.
Press the dial to enter.
Cooling fans automatically turn on
as required to keep the internal
oven components and control from
overheating.
When the control panel is locked,
CONTROL IS LOCKED will be displayed
briefly anytime a pad or dial is
pressed.
3. Turn the dial to select the seconds.
Press the dial to enter.
To cancel, press the TIMER pad.
The vent fan may come on
automatically if the oven gets too hot,
even if the oven isn't running. The
screen will display: "Normal Operation.
Fan is on due to high heat. Fan will
shut off automatically."
31
Page 32

Careand Cleaning
Advantium Oven
Surface
Light
Vent Fan
How to clean
the inside of
the oven
Use to light your cooktop.
Press the SURFACE LIGHT pad to
change from bright to night to off.
The vent fan removes steam and
other vapors from surface cooking.
Press the VENT FAN pad to change
from high to medium to low to off.
Be certain the oven control is turned
off and the oven is warm or cool to
the touch before cleaning any part of
this oven.
Clean the inside of the oven often for
proper heating performance.
The vent fan may come on
automatically if the oven gets too hot,
even if the oven isn't running. The
screen will display: "Normal Operation.
Fan is on due to high heat. Fan will
shut off automatically."
Some spatters can be removed with
a paper towel, others may require
a warm soapy cloth. Remove greasy
spatters with a sudsy cloth, then
rinse with a damp cloth.
If the dirt and spatter do not come off If
easily with a warm sudsy cloth, place
a medium sized bowl full of water in
the unit on the metal tray and press the
SPEEDCOOK pad. Select MY RECIPEand
set for 10 minutes at U=3, L=3, M=7.
This should loosen the dirt in the oven
so that it can be removed with a warm
sudsy cloth.
If you notice yellowing on the metal
inside the oven that cannot be
removed with a warm sudsy cloth, use
a stainless steel cleaner that removes
heat discoloration and/or tarnishing.
You can then clean the inside of the
oven as you normally do.
Do not use abrasive cleaners or sharp
utensils on oven walls.
Never use a commercial oven cleaner
on any part of your oven.
Do not clean the inside of the oven
with metal scouring pads. Pieces can
break off the pad inside the oven,
causing electrical shock as well as
damaging the inside surface finish of
the oven.
32
Page 33

Care and Cleaning
Advantium Oven
Removable
turntable
Cooking trays
and wire
oven rack
The area underneath the turntable should
be cleaned frequently to avoid odors and
smoking during a cooking cycle.
The turntable can be broken if dropped.
Wash carefully in warm, sudsy water.
Dry completely and replace.
To replace the turntable, place its
center over the spindle in the center of
the oven and turn it until it seats into
place.
To prevent breakage, allow the trays to
cool completely before cleaning. Wash
carefully in hot, sudsy water or in the
dishwasher.
Turntable
Do not use the oven without the
turntable in place.
Do not use abrasives to clean the glass
tray or wire oven rack, as they may
damage the finish.
A plastic scrubbing pad may be used
to clean the metal trays.
Clear glass tray
Metaltray
Wire oven rack
33
Page 34

Care and Cleaning
Advantium Oven
Mica sheet
How to clean
the outside of
the oven
Do not remove the mica sheet.
To clean the mica sheet: Allow the
oven to cool completely. Wipe clean
with a warm soapy cloth.
We recommend against using
cleaners with ammonia or alcohol,
as they can damage the appearance
of the oven. If you choose to use a
common household cleaner, first
apply the cleaner directly to a clean
cloth, then wipe the soiled area.
Case
Cleon the outside of the microwave
with a sudsy cloth. Rinse and then dry.
Wipe the window clean with a damp
cloth.
o
Mica Sheet
Stainless Steel Surfaces
Ion some models)
The stainless steel panel can be
cleaned with Stainless Steel Magic or
a similar product using a clean, soft
cloth. Apply stainless cleaner carefully,
avoiding the surrounding plastic or
glass parts. Do not use appliance wax,
polish, bleach or products containing
chlorine on stainless steel.
Plastic Color Panels
Ion some models)
Control Panel
Wipe with a damp cloth. Dry
thoroughly. Do not use cleaning
sprays, large amounts of soap and
water, abrasives or sharp objects on
the panel - they can damage it. Some
paper towels can also scratch the
control panel.
Use a clean, soft, lightly dampened
cloth, then dry thoroughly.
Door Seal
It's important to keep the area
clean where the door seals against
the oven. Use only mild, non-abrasive
detergents applied with a clean
sponge or soft cloth. Rinse well.
Bottom
Clean off the grease and dust on the
bottom often. Use a solution of warm
water and detergent.
34
Page 35

Care and Cleaning
Advantium Oven
Replacing the
surface light
Removing
and cleaning
the filters
1. To replace the surface light, first
disconnect the power at the main fuse
or circuit breaker panel or unplug the
oven.
2. Remove the screw from the side of
the light compartment cover and lower
the cover until it stops.
3. Be sure the bulb to be replaced is
cool before removing. Gently pull the
bulb from the receptacle.
Replace with a 130 volt, 50-watt
halogen bulb. Order WBO8XIOOgl
from your GE supplier.
4. Raise the light cover and replace
the screw. Connect electrical power to
the oven.
.
The metal filters trap grease
released by foods on the cooktop.
They also prevent flames from
foods on the cooktop from
damaging the inside of the oven.
.
For this reason, the filters must
always be in place when the hood
is used. The vent filters should
be cleaned once a month, or as
needed.
Remove screw
S.
Rinse, shake and let dry before
replacing.
.
To replace, slide the filters into the
frame slots on the back of each
opening. Press up and to the front
to lock into place.
Replacing the
oven cavity
lamp
.
To remove, slide them to the rear
using the tabs. Pull down and out.
It.
To clean the vent filters, soak them
and then swish around in hot water
and detergent. Don't use ammonia
or ammonia products because
they will darken the metal. Light
brushing can be used to remove
embedded dirt.
.
Disconnect power at the main fuse
or circuit breaker panel.
2.
Remove the top grill by removing
the two screws that hold it in place.
.
Remove charcoal filter if present. 6.
Slide the filter toward the left and
pull toward the front to remove.
NOTE: Charcoal filter is an optional
kit, you may not have one. 7.
it.
Remove the screw holding the lamp
shield in place.
S.
Pull the lamp shield out. Pull the
light bulb out and replace with the
120V-130V, 20-watt halogen bulb.
Order WB25XlO019 from your GE
supplier.
Return the lamp and lamp shield to
original position and replace screw
and charcoal filter.
Replace the grill and 2 screws.
Reconnect power to the oven
35
Page 36

Care and Cleaning
Advantium Oven
Charcoal
filter UX81D -
optional kit)
To install
the charcoal
filter
If the model is not vented to the
outside, the air will be recirculated
through a disposable charcoal filter
that helps remove smoke and odors.
The charcoal filter cannot be cleaned.
It must be replaced. Order Part No.
WB2X9883 from your GE supplier.
To install a new filter:
i. Remove plastic and other outer
wrapping from the new filter.
2. Remove the top grill by removing
the two screws that hold it in place.
3. Insert the filter into the top opening
of the oven as shown.
4. It will rest at an angle on two back
support tabs and in front by two tabs.
5. Replace the grill and two screws.
To remove the filter, repeat step 2
above, remove the filter and repeat
step 5.
The charcoal filter should be replaced
when it is noticeably dirty
or discolored (usually after 6 to
12 months, depending on usage).
36
Page 37

Troubleshooting
Advuntium Oven
Questions?
Use this
problem
solver
Problem Possible Causes What To Do/Explanation
LIGHTS
Light during a
speedcook cycle
dims and cycles on
and off, even at full
power levels.
Light visible around
the door and outer
case while
speedcooking.
FAN
Fancontinues to run
cooking stops.
Oven vent emits warm This is normal.
air while oven is on.
Vent fan comes on
automatically when
oven not in use.
Fancomes on
automatically when
using the microwave.
This is normal,
Power level has been
automatically reduced
because the oven is hot.
This is normal.
The oven is cooling. , The fan will automatically shut off after
This is normal.
This is normal. If the microwave is used after
, This is normal. The oven senses the
heat level and adjusts automatically.
, When the oven is on, light may
be visible around the door and
outer case.
when the internal parts of the oven
have cooled.
. If the cooktop or oven gets hot
enough the vent fan comes on.
(seeAutomatic Fan section.)
speedcook and the oven senses
that it istoo hot, the vent fan comes
on to cool the oven.
The oven makes
unusualsounds
while cooking.
Fansound changes
while cooking.
COOKING
Smoke comes out of
oven when
the door is opened.
Food is not fully
cooked or browned
at the end of a
cooking program.
Oven has turned off.
in Warm, Proof, or
Convection Bake
Clicks and fans blowing
are normal. The relay
board isturning the
components on and off.
This is normal.
Food is high in fat
content. Aerosol spray
used on the pans.
Programmed times
may not match the size
or amount of food you
are cooking.
The maximum cooking
time of 179 minutes has
been reached
A cooking time was set for
Convection Bake to start
after preheat and the door
was not opened at the end
of preheat.
These sounds are normal.
, Fan may turn on or off during
cooking to maintain cooking
temperature.
Smoke is normal when cooking high-the
fat foods. Usevegetable oil or olive
oil on the meat itself instead of
coating the entire pan.
Increase or decrease time for
doneness or adjust the upper or
lower lamps for browning.
This is normal. The control will
automatically turn off the oven and
indicate that cooking is complete
when the maximum cooking time is
reached. The cooking time is not always
displayed.
This is normal. The control will auto-
matically turn off the oven after one hour
and idicate that cooking is complete if the
door is not opened after preheat.
37
Page 38

Troubleshooting
Advantium Oven
Questions?
Use this
problem
solver
Problem Possible Causes What To Do/Explanation
DISPLAY
The display is blank. The display has . Check the SETTINGSmenu for clock
been turned off. display settings. Turn the display on.
"ControlPanel The control has • Pressand hold CLEAR/OFFfor about
LOCKED"appears been locked. 3 seconds to unlock the control.
in display. See Other Features Section.
Control display is Clock is not set. • Follow prompts to set the clock.
lighted yet oven
will not start. • Open the door and close securely.
Door not securely closed.
START/PAUSEpad
not pressed after entering
cooking selection.
Delay Start was • PressCLEAR/OFFand reset.
accidentally set.
Oven is in DEMOMlode . Unplug the oven for 1 minute, plug
CLEAR/OFFwas pressed . Reset cooking program and press
accidentally. START/PAUSE
• Follow prompts
the oven back into the wall DO NOTset
the oven clock, press and hold the HELP
and START/PAUSEpads for 3 seconds.
The control should exit DEMOmode.
Set clock and continue.
OTHER PROBLEMS
The door and inside
of the oven feels hot.
FIoor ofthe ovenis
warm, even when
the oven has not
been used.
Oven will not start.
Glass microwave
tray does not lock
into center hub.
The oven
produces intense heat
in a small space.
The cooktop light is
located below the oven
floor. When the light
ison, the heat it produces
may make the oven floor
get warm.
A fuse in your home
may be blown or the
circuit breaker tripped.
Power surge. • Unplug the oven, then plug it back in.
Plug not fully inserted
into wall outlet.
• This is normal.
• Useoven mitts to remove food when
when ready.
• This is normal.
• Replacefuse or reset circuit breaker.
. Miakesure the plug on the oven is
fully inserted into wall outlet.
. Align the protrusions on the bottom of
the glass microwave tray with the
indentation in the turntable. This fit is
not tight, some movement is normal.
38
Page 39

Advantium Oven Warranty
Advantium Oven
All warranty service provided by our Factory Service Centers,
or an authorized Customer Care®technician.
To schedule service, online, contact us at GEAppliances.com,
or call 800.GE.CARES(800./432.2737). Please have serial and
model numbers available when coiling for service.
For The Period Of:
GE Will Replace:
Staple your receipt here.
Proof of the original
purchase date is needed
to obtain service under
the warranty.
One Year Any part of the oven which fails due to a defect in materials or
From the date of the workmanship. During this limited one-year warranty, GEwill also
original purchase provide, free of charge, all labor and related service costs to
replace the defective part.
Five Years The magnetron tube, if the magnetron tube fails due to a
From the date of the defect in materials or workmanship. During this five-year limited
original purchase warranty, you will be responsible for any labor or in-home service costs.
What GE Will Not Cover:
[] Service trips to your home to teach you how
to use the product.
[] Improper installation, delivery or
maintenance.
[] Product not accessible to provide required
service.
[] Failure of the product or damage to
the product if it is abused, misused (for
example, cavity arcing from wire rack
or metal/foil), or used for other than the
[] Replacement of house fuses or resetting
of circuit breakers.
[]
Replacement of the cooktop light bulbs.
[]
Damage to the product caused by
accident, fire, floods or acts of God.
[]
Incidental or consequential damage
caused by possible defects with this
appliance.
[] Damage caused after delivery.
intended purpose or used commercially.
EXCLUSION OF IMPLIED WARRANTIES--Your sole and exclusive remedy is product
repair as provided in this Limited Warranty. Any implied warranties, including the
implied warranties of merchantability or fitness for a particular purpose, are limited
to one year or the shortest period allowed by law.
This warranty is extended to the original purchaser and any succeeding owner for products
purchased for home use within the USA. If the product is located in an area where service by
a GEAuthorized Servicer is not available, you may be responsible for a trip charge oryou may
be required to bring the product to an Authorized GE Service Location for service. In Alaska,
the warranty excludes the service calls to your home.
Some states do not allow the exclusion or limitation of incidental or consequential damages.
This warranty gives you specific legal rights, and you may also have other rights which vary
from state to state. To know what your legal rights are, consult your local or state consumer
affairs office or your state's Attorney General.
Warrantor: General Electric Company. Louisville, KV40225
39
Page 40

Consumer Support
GE Appliances Web site
Have a questionor need assistancewith your appliance? Try the GEAppliancesWeb site any day of the year!
Forgreater convenience and faster service,you can now download Owner's Manuals,order parts or even
schedule serviceon-line.
GEAppliances.com
Schedule Service GEAppliances.com
Expert GErepair serviceisonly one step away from your door. Get on-line and schedule your serviceat
your convenience any day of theyear! Or call 800.GE.CARES(800./432.2737)during normal businesshours.
RealLife Design Studio GEAppliances.com
GEsupports the Universal Designconcept-products, services,and environments that can be used by
people of all ages,sizes,and capabilities.We recognizethe need to design for a wide range of physicaland
mental abilities and impairments. Fordetails of GE'sUniversalDesignapplications, including kitchen design
ideasfor people with disabilities,check out our Web sitetoday. Forthe hearing impaired, please
call 800.TDD.GEAC(800.833./4322).
Extended Warranties
GEAppliances.com
Purchase a GEextended warranty and learn about special discounts that are available while your warranty
isstill ineffect. You can purchase it on-line anytime or call 800.626.2224durinc normal business hours.
GEConsumer Home Serviceswill still be there after your warranty expires.
Parts and Accessories
Individuals qualified to servicetheir own appliances can have parts or accessoriessent directly to their homes
(VISA,iVlasterCard,and Discovercards are accepted).Order on-line today, 24 hours every day, or by phone at
800.626.2002during normal business hours.
Instructions contained in this manual cover procedures to be performed by any user. Other servicing
generally should be referred to qualified service personnel. Caution must be exercised, since improper
servicing may cause unsafe operation.
Contact Us
If you are not satisfied with the serviceyou receivefrom GE,contact uson our Web site with all the details,
including your phone number,or write to: General Manager, Customer Relations
GEAppliances,Appliance Park
Louisville,KY40225
GEAppliances.com
GEAppliances.com
Register Your Appliance GEAppliances.com
Registeryour new appliance on-line--at your convenience! Timely product registration will allow for enhanced
communication and prompt service under the terms of your warranty, should the need arise.You may also mail
in the preprinted registration card included in the packing material.
Printed in Korea
Page 41

@
I--
U
C
Z
eL)
O
":C:C
O
E
GEAppliances.c0m
Advantium
Controles de Cocimiento ...................12
Conociendo su Homo Advantium.....10
Coracter[sticas del Homo ...................1!
Seguridad ................................................2-9
Cocimiento Rapido
Consejos de Cocimiento......................14
Cocimiento rc_pidopersonolizado ..17
His Recetas .........................................!8,!9
Nivel de Potencio ..................................16
Recipientes para cocimiento rc_pido!4
Recipientes seguros
poracocimiento rapido ...........................8
Lo que es normal ....................................13
Uso del menO predeterminodode
cocimiento rapido ..................................15
Otros funciones de
cocimiento
Asar y tostar .............................................21
Horneur con convecci6 .......................20
Calentur y fermentur ............................22
Cocinor en el Microondo
Cocinor con tiempo ...............................24
Consejos de cocimiento ......................23
Descongelor por tipo de comida....26
Descongelar con tiempo ....................25
Consejos de descongeloci6n ............25
Micro 30 segundos ................................25
Mis Recetus ...............................................25
Niveles de potencio de microond6 24
Precauciones pur6 evitar
unoposible exposici6n a
excesivaenergfo de microonda .........2
Cocimiento con sensor ...............27, 28
Lo que es normal ....................................23
Uso de selecciones predeter-
minadas de microonda ......................23
Otros co rocter[sticos
Ventilador automcXico .........................31
Luznocturna automc_tica .................30
Conversi6n automcXica ......................29
Volumen del pito .....................................29
Bloqueo del control ...............................31
Reloj..............................................................29
Cocimiento completo ...........................28
Inicio retardado .......................................30
Pantallo ON/OFF.....................................29
Ayuda ...........................................................3!
Recordotorio .............................................29
Repite Io Oltima funci6n ......................29
Reanuda Io funci6n ...............................29
Luzde la superficie ................................32
Unidades de temperatura ..................30
Cron6metro ...............................................31
Plato giratorio On/Off ...........................30
Ventilador del respirador ....................32
Cuidudo y Limpiezu
Limpieza del interior ..............................32
Limpieza del exterior ............................34
Bandejas de cocimiento
y parrilla de alambre del homo .......33
Plato giratorio removible ....................33
C6mo reemplozar Io luz de
la cavidod ...................................................35
C6mo reemplazar la luz
de superficie ............................................34
BOsquedu de Problemus
Solucionador de Problemas ........36,37
Soporte puru el Cliente
Soporte para
el cliente ........................Cubierta Trasera
Garant[a ......................................................39
PSA1200
PSA1201
CSAI201
b
O
Anote aqu[ el nOmerodemodelo y serie:
Modelo #
Serie#
Encontrarc_estos nOmerosen la
etiquetaodentro del horno.
MFL38211612
49-40624 03-10 GE
Page 42

INSTRUCCIONES IMPORTANTES DE SEGURIDAD
LEA TODAS LAS INSTRUCCIONES ANTES DE USAR
Horno Advantium
Cuando se usen aparatos eldctricos, siempre deben seguirse precauciones bdsicas de seguridad, incluyendo las
siguientes:
A gv E RT E N C JA: Para reducir el riesgo de quemaduras, descargas el4ctricas, incendio, lesiones a
personas o una exposici6n excesiva a energia de microondas:
PRECAUCIONESQUE DEBETENER PARAEVITAR UNAPOSIBLE
EXPOSlCI6N A UNA EXCESlVAENERGJADE MICROONDA
(a) No trate de operar este horno con la puerta (c)
abierta, ya que el funcionamiento con
la puer-ta abierta puede resultar en una
exposici6n daSina de energia de microonda.
Es impor-tante que nadie altere ni juegue
con los cierres de seguridad.
No coloque ningOn objeto entre la parte
fron-tal del homo y la puerta, tampoco
permita que se acumulen en las superficies
de sello resi-duos de sucio o de limpiadores.
[]
Lea todas las instrucciones antes de utili-zar
este aparato. AI utilizar aparatos el_c-tricos,
se deben seguir precauciones b6-sicas de
seguridad, incluyendo los si-guientes:
[]
Leay sigalas precauciones espedficas de la secci6n
Precaucionespara evitar una posibleexposici6na
excesivaenergia de microondas
[]
Esteaparato debe contar con una conexi6n a tierra.
Conectes61oa un tomacorriente con adecuada
conexi6na tierra. Ver la secci6n Instruccionesde
conexi6na tierra de la p6gina 8.
[]
Este horno de microondas se encuentra aprobado
por ULpara la instalaci6n sobre cocinas a gas
(menos de 60,000BTU) y el6ctricas.
[]
Estehorno para usar sobre la estufa est6diseflado
para usarse sobreestufasde un ancho no superior
a 36". Puedeinstalarse sobre equipamientos de
cocci6na gas y el6ctricos.
[]
No utilice este aparato sitiene el cable el6ctrico o el
enchufe da_ados, si no funciona bien o si ha sufrido
una averia o una caida. Si se da_a el cable el6ctrico,
debe reemplazarlo el Servicio T6cnico de General
Electric o un agente de servicio autorizado utilizando
un cable el6ctrico de General Electric.
No opere el homo si est6 daSado. Es
particu-larmente importante que la puerta
del homo cierre adecuadamente y que no
exista da_o en:
(2) La puerta (doblada)
(2) Bisagras y aldabas (quebradas o flojas),
(3) Sellos de la puerta y superficies de sello.
El horno no debe ser ajustado o reparado
pot cualquier persona a excepci6n del
personal de servicio calificado.
[]
Parareducir el riesgode incendio en la cavidad del
homo:
No cocine de m6s los alimentos. Preste atenci6n al
aparato cuando se coloquen papel, pl6stico u otros
materiales combustibles dentro del homo durante la
cocci6n.
Quitelosganchitos de alambre y las manijas de
metal delos recipientesde papel o de pl6sticoantes
decolocarlos en el horno.
No utilice el homo para almacenar elementos. No
deje productos de papel, utensilios de cocina o
alimentos en el homo cuando no Io est6 usando.
No cocine palomitas de maiz en el homo de
microondas a menos que cuente con un accesorio
especial para microondas o que utilice palomitas de
maiz especialespara hornos de microondas.
Silos materiales ubicados dentro del horno se
prenden fuego, mantenga cerrada la puerta del
homo, ap6gueloy desconecte el cable el6ctrico,
o corte la energia desde el panelde fusibleso del
interruptor de circuitos. Sise abre la puerta, elfuego
puede propagarse.
No utilice las funciones del sensordos veces
seguidasenla misma porci6n de comida. Si los
alimentos nose cocinaron despu6s de la primera
cuenta regresiva,utilice COOKBYTIME (cocinarpor
tiempo) para obtener tiempo decocci6n adicional.
No use el homo para secar peri6dicos..
GUARDE ESTAS INSTRUCCiONES
Page 43

INSTRUCCIONES IMPORTANTES DE SEGURIDAD
LEA TODAS LAS INSTRUCCIONES ANTES DE USAR
PRECAUCIONES DE SEGURIDAD
[]
Aseg0rese que su aparato est@debida-
mente instalado y puesto a tierra por un
t6c-nico calificado de acuerdo con las
instruccio-nes de instalaci6n suministradas.
[]
Instale y coloque este aparato de acuerdo
con las Instrucciones de Instalaci6n
suministradas.
[]
Algunos productos como huevos enteros
yrecipientes sellados - por ejemplo, botes
sellados - pueden explotar y no deben
ca-lentarse en este horno. Si Io utiliza de
esta ma-nera puede resultar en una lesi6n.
[]
No monte este aparato arriba del fregadero.
[]
Este homo no estd aprobado ni probado
parauso marino.
[] Este homo est6 aprobado UL para una
insta-laci6n de pared est6ndar, arriba de 36
pulg.
[] No opere este aparato si est6 da_ado o si Io
han dejado caer.
[] Como con cualquier otro aparato, se
requie-re una cercana supervisi6n cuando
seautilizado pot ni_os.
[] Utilice este aparato s61opara los fines des-
critos en este manual.
[]
No utilice quimicos corrosivos o vapores en
este aparato.
[] Este homo estd especificamente diseBado
para calentar, deshidratar y cocinar alimen-
tos, no se dise_6 para uso en laboratorios o
para uso industrial.
[] Esteaparato s61odebe ser reparado por
per-sonal de servicio calificado. Contacte
a la em-presa de servicio autorizada para
la revisi6n, reparaci6n o ajuste de este
aparato.
Homo Advantium
[]No cubra ni bloquee ninguna abertura
delaparato.
[]No guarde este aparato en el exterior. No
Ioutilice cerca del agua - por ejemplo, en un
s6tano mojado, cerca de una piscina, cerca
de un grifo o en ubicaciones similares.
[]Vea las instrucciones de limpieza de la
super-ficie de la puerta en la secci6n de
Cuidado y Limpieza del Homo, en este
manual.
[]Si agarran fuego los materiales adentro
del homo, mantenga la puerta del homo
cerrada, apague el homo y apague el
fusible o interrup-tor automdtico del
panel. Si abre la puerta, el fuego se puede
propagar.
[]Para evitar chispas no se debe utilizar
la parrilla de alambre del homo para
el cocimiento r6pido o cocimiento con
microonda.
[] No cubra las parrillas u otra parte del
horno con papel met_lico. Estopuede
sobrecalentar el horno.
[]
No deben utilizarse alimentos o utensilios
metc_licos de grandes dimensiones en este
horno porque pueden crear un incendio o
un riesgo de descarga el@ctrica.
[]
No utilice productos de papel cuando el
aparato se utiliza en modos diferentes al
microondas.
GUARDE ESTAS INSTRUCCiONES
Page 44

INSTRUCCIONES IMPORTANTES DE SEGURIDAD
LEATODAS LAS INSTRUCCIONES ANTES DE USAR
IMPORTANT SAFETY INSTRUCTIONS
[]
Term6metro--No utilice term6metros
comunes de cocina u homo cuando
cocine mediante el microondas. El
metal y mercurio de estos term6metros
pueden provocar una formaci6n de arco
el6ctrico y generar posibles datos al
horno. No utilice un term6metro en los
alimentos que coloca en el microondas a
menos que el term6metro est6 disetado
o recomendado para usarse en el homo
de microondas.
[]
No limpie con esponjillas de metal.
Pueden desprenderse pedazos de la
esponjilla y tocar partes el6ctricas,
provocando un riesgo de descarga
el6ctrica.
[]
No almacene materiales que no sean
nuestros accesorios recomendados en
este homo cuando no se encuentre en
USO.
[]
No permita que el cable el6ctrico
cuelgue sabre el borde de la mesa o del
mostrador de encimera..
[]
Plantenga el cable alejado de superficies
calientes.
[]
No sumerja el cable el6ctrico o el
enchufe en agua.
[]
No haga funcionar el horno sin el plato
giratorio en su lugar. Elplato giratorio
no debe tenet ninguna clase de bloqueo
para que pueda girar.
Horno Advantium
[] Durante y despu6s del usa, no toque
o deje que su vestimenta u arras
materiales inflamables entren en
contacto con cualquier 6tea interior del
homo; deje pasar un tiempo prudencial
para que se enfrfen.
[] Las potenciales superficies calientes
incluyen la puerta, el piso, las paredes y
la parrilla del homo y el plato giratorio.
[]
Esimportante mantener limpia el
6rea donde la puerta se sella contra
el microondas. $61ouse detergentes
suaves no abrasivos aplicados con
una esponja limpia o un patio suave.
Enjuague bien.
[]
No almacene ning0n elemento
directamente sabre la superficie del
horno de microondas cuando 6ste se
encuentre en funcionamiento.
[]
Mantenga el horno libre de
acumulaciones de grasa.
[]
En cumplimiento con USDA, cocine
la came de res hasta alcanzar una
temperatura INTERNA de par Io menos
160°F y las carnes de ave a una
temperatura INTERNA de par Io menos
180°F. La cocci6n a estas temperaturas
generalmente protege de enfermedades
transmitidas par los alimentos. Para m6s
informaci6n, consulte www.foodsafety.
gov.
FORMACIONDE
ARCO
El arco puede ocurrir durante el cocimiento rdpido y el de microondas. Si observa
chispas,presione la tecla CLEAR/OFFy corrija el problema.
Formaci6n de arco, es el t@mino de micro-
ondas, utilizado para chispas en el homo.
No guarde la parrilla
enel microonda.
La parrilla SOLO
debe utilizarsepara
Hornear con Con-
vecci6n, Calentar y
Fer-mentar.
Laschispas pueden ser causadas par:
[] Contacto de metal o aluminio en los
la-dos del homo.
[] Aluminio no moldeado al alimento (las
orillas que no est6n dobladas actOan
coma antenas).
[] Utilice el aluminio de la manera en quese
recomienda en este manual.
SAVE THESE INSTRUCTIONS
[]Metales, coma amarres, grapas en aves o
platos con orillas de oro colocados en el
homo.
[]Los recipientes de metal o la parrilla de
alam-bre del homo utilizada durante el
cocimientor6pido o el de microonda (con
excepci6nde las panas suministradas
con el homo).
[] Toallas de papel recicladas que
contengan pequetos pedazos de metal
utilizados en el homo.
Page 45

INSTRUCCIONES IMPORTANTES DE SEGURIDAD
LEATODAS LAS INSTRUCCIONES ANTES DE USAR
Horno Advantium
ALIMENTOS
[] AI cocinar con microonda, coloque los []
ali-mentos y recipientes sabre la bandeja
devidrio clara.
[]
No haga palomitas de maizen el horno
mi-croonda a menos de que utilice
unaccesorio especialpara hacerlo o
que utilice uno mar-cado para homo
microonda.
[] No hierva huevos en este homo. La presi6n
que se acumula adentro de la yema del
huevo bar6 que expiate, resultando en una
posible lesi6n.
[]No opere el horno sin alimentos adentro,
yaque Io puede da_ar. Incrementa el calor
al-rededor del magnetr6n y acorta la vida
del horno.
[]
Alimentos con la piel externa intacta
coma las papas, salchichas, embutidos,
tomates,manzanas, higados de polio y
otros menu-dos y las yemas de huevo
deben set pin-chadas para permitir que el
vapor salga du-rante el cocimiento.
[]
No descongele bebidas congeladas
concuellos de botellas estrechos
(especial-mente bebidas carbonatadas).
Aunque el recipiente est6 abierto, la
presi6n se puede acumular. Esto puede
causar que el recipiente expiate, dando
coma resul-tado una posible lesi6n.
[]
Los alimentos que se cocinan en
liquido(como la pasta) tienden a hervir
m6s r6-pido que los alimentos que
contienenmenos humedad. Si esto
ocurre, yea lasecci6n de Cuidado
y Limpieza del Hor-no para ver las
instrucciones de c6mo limpiar el interior
del horno.
[]
Losalimentos calientes y el vapor pue-
den causar quemaduras. Tenga cuidado
al abrir cualquier recipiente de comida
caliente, incluyendo balsas de palomitas
de maiz, balsas de cocimiento y cajas.
para evitar una posible lesi6n, dirija el
vapor lejos de sus manos y cara.
No cocine demasiado las papas. Se
pue-den deshidratar y agarrar fuego,
causando daho al horno.
[]
Evite calentar alimentos para beb6s
en bates de vidrio, aunque est6n
destapados. Aseg0rese que toda comida
para beb6 se cocine par completo.
IVlezcle la comida para distribuir el
calor de forma pareja. Sea cuidadoso y
evite hervir la formula al mo-mento de
calentarla. El recipiente se puede sentir
m6s frio de Io que la formula real-mente
est6. Siempre pruebe la formula antes de
alimentar al beb6.
[]
No trate de freir en el homo.
[]
AGUA SOBRECALENTADA
LosIfquidos,coma el agua, cold o tdpue-den
calentarse arriba del punto de hervor sinque
aparenten que estdn hirviendo. No siempre
existen burbujas visbles o hervor cuando
retira el recipiente del homo micro-onda.
ESTOPUEDERESULTAREN LIOUI-DOSMUY
CALIENTESQUEHIERVENREPENTINAMENTE
CUANDOSEMUEVEELRECIPIENTE0
INTRODUCEUNA CU-CNARAUOTRO
UTENSILIOENELLI-QUIDO.
Para reducir el riesgo de una lesi6n
personal:
- No sobrecaliente el liquido.
- Mueva el liquido antes y a la mitad del
ca-lentamiento.
-- No utilice recipientes rectos con
cuellos angostos.
-- Despu6s de calentar, permita que
el reci-piente descanse en el horno
microonda par un periodo corto de
tiempo, antes de reti-rar el recipiente.
- Tenga mucho cuidado cuando inserte
una cuchara u otro utensilio adentro
del recipiente.
GUARDE ESTAS INSTRUCCiONES
Page 46

INSTRUCCIONES IMPORTANTES DE SEGURIDAD
LEATODAS LAS INSTRUCCIONES ANTES DE USAR
Horno Advantium
Recipientes
de cocina
seguros para
el microonda
Cuando utilice el hornoel
plato giratoriosiempre
debe estarcolocado en
su lugar.
Cuando cocine
en elmicroonda la
bandejade vidrio clara
siempredebe estar
colocadaen su lugar.
iADVERTENCIA!
Cuando cocine en el microonda ssegOresequetodos los recipientes sean convenientes para dicho
usa. Puede utilizar la mayorfa de las cacerolas de vidrio, platos de cocimiento, tazas medidoras, tazas
para natillas, platos de cerdmica o de china que no tengan hordes de metal o de vidrio con un brillo
metdlico. Algunos recipientes estdn marcadas "apropiado para microonda"
[]No utilice la parrilla de alambre del []
hornopara cocinar con microonda.
[] Para cocinar sus alimentos coloque el
re-cipiente para microonda directamente
sobre la bandeja de vidrio claro.
[] Eluso de la bandeja de metal durante
elcocimiento con microonda dard coma
resul-tado un rendimiento de cocimiento []
inferior.
[]Si no estd seguro que el plato es
seguro para el
microonda, reali-
ce la siguiente
prueba: Coloque
en el homo el
plato que desea C6moprobar si elplato []
probar y una esseguroparael
taza medidora microondas.
de vidrio Ilena
de agua.
Coloquela taza medidora encima o cerca
del plato. Cocine en el microondas de
30-45 segun-dos en high (alto).Si el plato []
se calienta, 6ste no debe usarse en el
microonda.
Siel plato se mantiene frio y s61ose
calien-ta el agua de la taza, entonces el
plato puede usarse en el microonda.
-APRECAUCi6N:
Riesgo de fuego
[]Los recipientes se pueden caFentar
debido al calor transferido par los
alimentos calien-tes. Debe utilizar
guantes para manipular los recipientes.
[] Utilfcelo coma se indica en este manual,
al utilizarlo en el homo, mant6ngalo a 1"
de distancia de los lados del homo.
[]
ISi utiliza un term6metro para came al
co-cinar, asegQrese que sea seguro
para uso en el microonda.
Algunas bandejas de espuma de polies-
tireno (como los que se utilizan para
em-pacar came) tienen una capa fina
de me-tal incrustada en la parte de
abajo. AI uti-lizarlas en el microonda, el
metal puede quemar el piso del homo o
incendiarel papel toalla.
No utilice productos de papel reciclados.
Lastoallas de papel, servilletas y papel
en-cerado reciclados pueden contener
pedazos de metal que generen chispas
y se encien-dan. Se debe evitar utilizar
productos de papel que contengan nylon
o filamentos de nylon, ya que se pueden
encender.
Se puede utilizar papel toalla, papel
encera-do o envoltorio pldlstico
para cubrir los pla-tos y asi retener
la humedad y evitar salpi-caduras.
AsegOresede ventilar la envoltura
pl6stica para que pueda escapar el
vapor.
No todas las envolturas pl_sticas son
con-venientes para el horno microonda.
Reviseelempaque para utilizarlo
adecuadamente.
[]Las bolsas de cocimiento para hervir
y las bolsas pldsticas herm@icas
deben cortarse, pincharse o ventilarse
siguiendo las instruccio-nes del paquete.
Si no se hace, el pldstico puede explotar
durante o inmediatamente despu6s del
cocimiento, resultando en una posible
lesi6n.Asi mismo, los recipientes de
pldstico deben estar parcialmente abier-
tos, ya que forman un sello herm@ico.
Cuan-do cocine con recipientes que
est6n herm6-ticamente sellados
por una cubierta de plds-tico, retire
cuidadosamente la cubierta y dirija el
vapor lejos de sus manos y cara
GUARDE ESTASINSTRUCCiONES
Page 47

INSTRUCCIONES IMPORTANTES DE SEGURIDAD
LEATODAS LAS INSTRUCCIONES ANTES DE USAR
Horno Advantium
Recipientes
de cocina
seguros para
el microonda
(continuaci6n)
Recipientes
seguros
para el
horno, para
Hornear con
Convecci6n,
Asar,
Calentar,
Fermentar y
Tostar
mRecipientes pl6sticos- Los recipientes
pl6s-ticos diseflados para microonda
son muy t]tiles, pero deben ser utilizados
cuidadosa-mente. Aun los recipientes
pl6sticos que son seguros para el
microonda pueden no set ton tolerantes
a condiciones de sobre cocimiento como
el vidrio o materiales de cer6mica y se
pueden ablandar o carboni-zar si se
someten a perfodos cortos de so-bre
cocimiento. En exposiciones m6s lot-gas
de sobre cocimiento, se puede incen-diar
Io comida y el recipiente..
J
A PRECAUCION:
Riesgo de quemaduras
[] El homo y Io puerto se calentar6n el
hor-near con convecci6n, asar, calentar
otostar..
[]Los recipientes se calentar6n. Necesitar6
guantes para manipular los recipientes.
J
A PRECAUCION:
Riesgo de fuego
[] AI user o roster no cubra los platos ni
los recipientes pl6sticos, bolsas pl6sticas
pa-ro cociner/rostizar, envolturas
pl6sticas, papel encerado ni papel.
[] Utilice la bandeja de metal de la misma
manera en que usaria una pana
parahornear baja o una bandeja para
hornear.
Siga los siguientes consejos
Z.Solamente utilice pl6sticos seguros
para el microonda y utilicelos en
estricto cum-plimiento con los
recomendaciones del fabricante del
recipiente.
2. No cocine en el microonda con los
reci-pientes vacios.
3. No permita que los niBos utilicen
recipientespl6sticos sin la supervisi6n
de un adulto.
[] Utilice la parilla de alambre del homo
cuan-do hornee con convecci6n o para
calentar.
[] Cuando cocine coloque la comida
directa-mente sobre los bandejas
de metal a memos de que la receta
requiera un plato.
[]En este homo puede utilizar
cualquierplato seguro para el homo.
Col6quelodirectamente sobre los
bandejas.
[]
Siutiliza la bandeja de vidrio claro
cuando hornee con convecci6n, ase,
caliente otoste obtendr6 resultados
inferiores en elrendimiento de
cocimiento..
Cuando utilice el hornoel
plato giratorio siempre
debe estar colocado en su
lugar.
GUARDE ESTAS INSTRUCCIONES
Para niveles de hornear o calentar coloque Parahornear con
la comida directamente sobre la bandeja de convecci6n, calentar o
metal o en el plato aproRiado y col6quelo tostar coloquela comida
en la parrilla de alambre del homo directamenteen la bandeja
de metal.
Page 48

INSTRUCCIONES IMPORTANTES DE SEGURIDAD
LEA TODAS LAS INSTRUCCIONES ANTES DE USAR
Horno Advantium
Recipientos se-
guros poro el
homo, puru
cocimiento
r6pido
Cuundo utilice el hornoel
pluto girutoriosiempre
debe esturcolocudo en
su lugur.
Paracocinor
rc_pido,convecci6n,
hornear, ca-lentar o
tostar coloquela comida
directamenteen la
bandeja de metal.
-_ PRECAUCi6N:
Riesgo de quemaduras
[] El horno y la puerta se calentardn
cuan-do utiliza el cocimiento r6pido.
•Los recipientes se calentar6n. Nece-
sitar6 guantes para manipularlos.
-APRECAUCi6N:
Riesgo de fuego
mCuando cocine rdpido no utilice cubiertas,
recipientes o balsas pare cocinar/rostizar
fabricadas de aluminio, pl6stico, care o
papel
[]
No cubra con aluminio el plato giratorio,
las bandejas de metal ni ninguna parte
del horno. Esto causarc_ chispas en
elhorno.
[]
Utilice la bandeja de metal de la
mismamanera en que utilizaria una pana
parahornear plana o una bandeja para
hot-near.
[] No utilice la rejilla de alambre del
hornopara cocinar rdpido.
[] Cuando cocine coloque la comida
directa-mente en las bandejas de metal
a menosque el homo le indique que haga
Io con-trario.
IPuede utilizar en su homo cualquier
platoque no sea de metal y que
sea seguro enel homo. Col6quelos
directamente sobrelas bandejas.
[]
Si utiliza la bandeja de vidrio clara
cuandococine rdpido obtendrd resultados
de co-cimiento inferiores y posiblemente
rajard la bandeja de vidrio.
[]
Utilice las bandejas de metal
especificadaspara usa en este homo.
Lasotras bande-jas de metal no est6n
diseBadas para este homo y dard]n
resultados de cocimiento in-feriores.
Instrucciones
de conexi6n a
tierra
-A iADVERTENCIA!
Elusa inadecuado del enchufe de conexi6n a tierra puede provocar un riesgo de descarga
el6ctrica.
Tste aparato debe
contar con una
conexi6n a tierra.
En caso de un
cortocircuito, la
conexi6n a tierra
tierra adecuadaantes
de usar.
un cable de escape para
Este aparato se encuentra equipado con
un cable el6ctrico que contiene un cable de
conexi6n a tierra con un enchufe de conexi6n
a tierra. Elenchufe debe conectarse en un
tomacorriente con adecuada instalaci6n y
conexi6n a tierra.
Consulte a un electricista o t6cnico
calificado si no comprende par completo las
instrucciones de conexi6n a tierra, o si no
sabe si el aparato cuenta con una adecuada
conexi6n a tierra.
reduce el riesgo
de una descarga
el6ctrica al brindar
la corriente el6ctrica.
Para el usa de este aparato, es su
responsabilidad y obligaci6n cambiar un
tomacorriente de pared est6ndar de 2 clavijas
par uno de 3 clavijas con adecuada conexi6n
a tierra.
Bajo ninguna circunstancia carte o quite la
clavija a tierra del cable el6ctrico.
No utilice un enchufe adaptador con este
aparato.
No utilice un cable de extensi6n con este
aparato. Si el cable el6ctrico es demasiado
corto, solicite a un electricista o t6cnico
calificado la instalaci6n de un tomacorriente
cerca del aparato.
Paraun mejor funcionamiento, enchufe este
aparato en su propio circuito el6ctrico para
evitar que las lucesparpadeen, que el fusible
sequeme o que el interruptor de circuitos
salte.
GUARDE ESTASINSTRUCCIONES
Page 49

INSTRUCCIONES IMPORTANTES DE SEGURIDAD
LEATODAS LAS INSTRUCCIONES ANTES DE USAR
Horno Advantium
Elventilador
MARCA PASOS
El ventilador funciona autom6ticamente en
ciertas condiciones (ver la secci6n Ventilador).
Evite el inicio y propagaci6n de incendios
accidentales de cocci6n mientras el ventilador
se encuentra en uso
[]
Limpie a menudo la parte inferior del
microondas. No permita que la grasa se
acumule en el microondas o en los filtros del
ventilador.
[]
En caso de un incendio de grasa en las
unidades de superficie debajo del homo de
microondas, apague el recipiente en llamas
sobre la unidad de superficie cubriendo el
recipiente pot completo con una tapa, una
plancha para galletas o una bandeja plana.
ADVERTENCIA
[]
Tenga cuidado al limpiar los filtros del
ventilador. Los agentes de limpieza
corrosivos, como los limpiadores de homo
basados en lejia, pueden daflar los filtros.
[]
Siflambea alimentos debajo del homo de
microondas, encienda el ventilador
[]
Nunca deje unidades de superficie
desatendidas debajo de su homo de
microondas en configuraciones de
calor altas. Los alimentos que hierven
y se derraman pueden provocar humo
y derrames grasosos que pueden
prenderse fuego y propagarse si el
ventilador del microondas se encuentra
en funcionamiento. Para minimizar el
funcionamiento del ventilador autom6tico,
utilice recipientes de cocci6n del tama_o
adecuado y use calor alto en las unidades
de superficie s61o cuando sea necesario.
La mayoria de Ioas marca pasos est6n protegidos contra la interferencia de aparatos electr6nicos,
incluyendo los microondas. Sin embargo, cuando tengan alguna duda, los pacientes con marca
pasos deben consutar con su m6dico.
Kits opcionales
READAND FOLLOWTHISSAFETYINFORMATIONCAREFULLY.
GUARDE ESTAS INSTRUCCiONES
Disponible en su distribuidor GE, a un costo adicional:
Kits de paneles de relleno:
[] JX52WH--Blonco
[] JX52BL--Negro
AI colocar un extractor de estufa
de 36",1os kits de paneles rellenan
el ancho adicional para darle una
apariencia empotrada personalizada.
Solamente para una instalaci6n
entre los gabinetes; no son para
instalaciones al final de los gabinetes.
Cada kit contiene:dos paneles de
relleno de 3" de ancho
Kits de Filtros
[] JX81D--Kit de Filtro de Carb6n para
Recirculaci6nt
Los kits de filtros son utilizados cuando
el homo no puede ser ventilado hacia
el exterior.
Vea la cubierta trasera para ordenar
pot tel6fono o en GEAppliances.com.
Page 50

Conociendo su Horno Advantium
Horno Advantium
Conociendo su
homo Advantium
Elhomo Advantium utiliza
tecnologiaavanzada de Cocimiento
r6pido paraaprovechar la energia de
la luz. Elhorno Advantium cocina el
exterior delos alimentos muy parecido
al calor ra-diante convencional, al
mismo tiempoen que penetra la
superficie para coci-nar el interior
simult6neamente.
La luz hal6gena es la fuente
primariade energia, un sistema
de convecci6ny un calentador de
cer6mica ayudan alcocimiento, con
un "refuerzo de micro-onda" agregado
en algunos algoritmosde cocimiento.
Losalimentos se coci-nan parejos
y r6pido, al mismo tiempoen que
retienen su humedad natural.
/-!-I-I-I-
IIIII
III
III
I I
El homo Advantium es capaz de coci-
nat r6pido, hornear con convecci6n,
asar, tostar, calentar, fermentar y
co-cinar con microonda. La funci6n
de cocimiento r6pido es el mayor
benefi-cio del homo Advantium.
10
Para cocinar r6pido no se requiere
pre-calentar. Coloque los alimentos
en elhorno y comience a cocinar
inmediata-mente. Seahorra tiempo
ya que nopre-calienta y debido a que
6ste cocinam6s r6pido.
Page 51

Caracteristicas del Horno
Horno Advantium
Caraceristicas
del homo A trav6s de este manual, los caracteristicas y apariencia pueden variar de los de su modelo
Plato Giratorio
Para todos los tipos de cocimiento
el plato giratorio siempre debe estar
en su lugar, en el piso del horno.
AsegGresede que est6 colocado seguro
sabre eleje en el centro del horno.
Bandeja de Metal
AI cocinar r(_pido, asar y tostar coloque
los alimentos directamente en la
bandeja de metal y coloque el plato
giratorio.
Parrilla de Alambre del Horno
AI hornear con convecci6n o calentar
co-loque los alimentos directamente en
labandeja de metal o plato seguro para
elhorno sabre la parilla de alambre del
horno.
Bandeja de Vidrio Clara
Coloque el plato giratorio cuando utilice
los funciones de microonda. Coloque
los alimentos o el recipiente seguro
paramicroondas directamente en la
bandeja.
Ldmparos HalOgena Superior y
Calentador Cerdmico
Una I(_mpara hal6gena de 500W y un
calentador cer6mico de 700W cocinan
la comida desde arriba al cocinar r6pido,
asar y tostar.
Ventana
Permite que se yea la comida durante
la cocci6n
Manilleta de la Puerta
Hale para abrir la puerta.
Aldabos de la Puerto
Para que el homo funcione la puerta
debe estar cerrada con la aldaba.
Calentador de Cerdmica Inferior
Un calentador de cercimica de 375W
cocina los alimentos par la porte
deabajo, al cocinar r6pido, asar otostar.
Panel de Control
Las teclas utilizadas para operar
elhorno est(_n ubicadas en el panel
decontrol.
Sistema de ConvecciOn
Un elemento de calentamiento
de 1550W cocina los alimentos
con unventilador de convecci6n
haciendocircular el aire caliente a
trav6s dela cavidad para hornear
con convecci6n y calentar.
1!
Page 52

Controles
Horno Advantium
Controles de
Cocimiento
Consuhomoadvantiumustedpodrdcocinarcon/uceshal6genasdealta-intensidad,calentadoresdecerd-
mica,@mentodecalentamientodeconvecci6ny/o conenergiademicroondaconvencional.
DISPLAY{pantalla)
JVluestralas selecciones de las funciones
e informaci6n sobre el homo cuando se
encuentra en uso.
START/PAUSE {inicio/pausa)
Presione esta tecla para iniciar o detener
cual-quier funci6n de cocimiento.
CLEAR/OFF {borrar/apagar)
Presione esta tecla para cancelar TODOS
Iosprogramas del homo, con excepci6n
del reloj,la luz autom6tica nocturna, el
cron6metro, elventilador del respirador y la
luz de superficie.
C}
#?_ss TO_ lr_"
SPEEDCOOK {cocimiento r6pido)
Presione este bot6n para acceder al men0
predeterminado de cocci6n rapida o para
configurar su propio programa de cocci6n
CONV BAKE {hornear con convecci6n)
Presione esta tecla para hornear con
convecci6n.
CONTROL LOCK
HOLD 3 SECS
MICROWAVE{microonda)
Presione esta tecla para accesar el menLi
delmicroonda o para ajustar su propio
programade microonda.
SETTINGS{ajustes)
Presione esta tecla para programar el
reloj yaccesar al plato giratorio on/off,
conversi6n automatica, luz nocturna
autom6tica, volumendel pito, pantalla on/off,
recordatorio y unidadesde temperatura.
PRESS TO TURN
TIMER OFF
COOKING OPTIONS {opciones de coc.)
Presione este bot6n para acceder a repetir el
t]ltimo, asar, leudar, tostar, calentar e inicio
retardado.
SELECTOR DIAL (dial selector)
Girepara seleccionar. Presionepara ingresar.
Gire para seleccionar alimentos, nivel de
energia o selecciones de temperatura.
Tambi6n utilice el dial para aumentar (gire
en sentido de las agujas del reloj) o disminuir
(gire en sentido contrario alas agujas del
reloj) el tiempo, simplemente presione el
bot6n para ingresar laselecci6n.
BACK {regreso)
Presione este bot6n para retroceder uno o
m6s niveles del proceso de programaci6n.
HELP {ayuda)
Presione este bot6n para averiguar m6s
sobre las funciones del horno.
12
MICRO 30 SECS{micro 30 segundos)
Inicia el microondas durante 30 segundos
de cocci6n. Se agregan 30 segundos
adicionales al tiempo de cocci6n restante
cada vez que se presiona el bot6n.
TIMER ON/OFF {cron6metro on/off)
Presione esta tecla para programar el cron6-
metro para minutos y segundos.
SURFACE LIGHT {luz de la superficie)
Presione esta tecla para encender y
apagarla luz de la plancha.
VENT {ventilador)
Presione esta tecla para encender y
apagarel ventilador del respirador.
Page 53

Cocimiento R6pido
Homo Advantium
Usa de las
funciones de
cocimiento
r6pido
Lo que es
normal
-APRECAUCI6N: Riesgo de quemaduras
Cuando utilice los programas de cocimlento r6pido, recuerde que el homo, la puerto y los
platos estar6n muy calientes.
Debe programar el reloj antes de utilizar su horno par primera vez. Vea la secci6n Reloj.
Antes de comenzar, aseg0rese que el plato giratorio est6 en su lugar. Utilice la bandeja
de metal o la bandeja de metal para asary su propio recipiente de vidrio o cer6mica, si es
necesario.
Elplato giratorio debe estar
colocadoen su lugar siempre que
utiliza el homo..
[]El homo se detendr6 si abre la puerto
du-rante el cocimiento y aparecer6 PAUSE
enla pantalla. Para reanudar el cocimiento
cierre la puerte y presione START/PAUSE.
[]Seleccione EDIT para cambiar el tiempo alas
niveles de potencia en cualquier momen-to
durante el cocimiento.
Tiempos de cocimiento
[] AI cocinar r6pido con el men0
predeterminadode alimentos, podr6 vet
en la pantalla OPTI-MIZING COOK TIME
(optimizando el tiempo de cocimiento)
varios segundos despu6s de presionar
STAR/PAUSE. El homo detecta
autom6ticamente el nivel del voltaje
el6ctrico de su casa y ajusta el tiempo de
cocimiento hacia arriba o hacia abajo para
un cocimiento adecuado.
Ventiladores de Enfriamiento
[]
Los ventiladores se encender6n durante
elcocimiento. AI final, 6stos continuar6n []
du-rante un tiempo corto para enfriar los
com-ponentes internos. Los ventiladores
se apagar6n autom6ticamente cuando
los piezas internas del homo est6n frias.
Lapantalla mostrar6 "Oven is Cooling" (el
bar-no se est6 enfriando).
[]
Mientras el homo est6 encendido el respira-
dor emitir6 un aire caliente.
[]
Cuando el homo est6 caliente el ventilador
de escape se enciende autom6ticamente.
Vea la secci6n del Ventilador Autom6tico.
Luces
[]
Cuando el homo est6 encendido, la luz
es-tar6 visible alrededor de la puerto o de
lacaja exterior.
[]
Las luces hal6genas se opacar6n y se
en-cender6n y apagar6n durante el ciclo de
co-cimiento r6pido, algunas veces a niveles
de potencia completa. Esto es normal. El
hornodetecta el nivel de color y se ajusta
autom6ti-camente.
Para cocinar r6pido coloque los
alimentos directamente en la
bandeja de metal.
[] Se produce humo al cocinar r6pido carnes
en el horno.
[]Para cocinar un tiempo adicional despu6s
deque termin6 el ciclo de cocimiento, utilice
lafunci6n para Reanudar, coma se le indica
enla pantalla.
Color del Horno
[]
Los ciclos de cocimiento r6pido no
requieren un tiempo de precalentamiento.
El horno comienzaa cocinar
inmediatamente.
[] La puerto y el interior del horno estar6n
muy ca-lientes. Tenga cuidado al abrir
la puerto y retirarlos alimentos. Tenga
cuidado del vapor quese puede salir
alrededor de la puerto.
[] Cuando cocine r6pido no utilice recipientes
ni cubiertas hechas de papel, pl6stico o
aluminio.
Cuando cocine par un perido largo
de tiempo,el homo puede reducir
autom6ticamente los niveles de potencia
para mantener el nivelapropiado de color
en el horno.
Sonidos
[]
Es normal escuchar durante el cocimiento
chas-quidos y el soplador del ventilador.
El controlelectr6nico enciende y apaga los
componentes.
Interferencia
[] Se puede observar interferencia de TV/
radiocuando utiliza el microonda, similar a
la interfe-rencia causada par otros aparatos
peque_os.Esto no indica un problema con el
microonda.Mueva el radio o la TV Io m6s lejos
posible delmicroonda o revise la posici6n de
la antena dela TV/radio.
13
Page 54

Cocimiento R6pido
Horno Advantium
Consejos
para mejores
resultados de
cocimiento
r6pido
Disponga los alimentos sobre las bandejas
met61icas como se indica para asegurar un
dorado consistente y parejo.
Patr6n circular
(Ejemplo, biscochos, galletas)
Patr6n de rayo Una capa
(Ejemplo, croissants, palitos de pan) (Ejemplo, aperitivos)
Los alimentos pueden tocarse pero no deben
estar montados unos sobre otros.
Patr6nladoa lado
(Ejemplo,carnesy pollos)
Recipientos
para
cocimiento
r6pido
14
La came, polio, pescado o mariscos frescos que est6n congelados deben descongelarse
antesde cocinarlos. (Puede utilizar la funci6n de descongelaci6n del microonda). Siga las
instruccionesdel paquete para otros alimentos congelados empacados.
-APRECAUCi6N:
Riesgode quemaduras
[] Los recipients se calentar6n.
Necesitar6guantes pare manipular los
recipientes.
[] Siga las sugerencias para el recipienteque
aparecen en la pantalla del homo oen el
Libro de Recetas.
[]
Cuando cocine coloque los alimentos
di-rectamente en la bandeja de metal
o en la bandeja de metal para asar, a
menos de que el homo le indique Io
contrario.
[]
Utilice la bandeja de metal de la misma
manera en que utilizarfa una pana
parahornear baja o una bandeja para
homear.
[]
Ademas de los utensilios
suministrados,usted puede utilizar platos
de cacerolasque no sean de metal, platos
para tartasy otros recipientes seguros
para el calor.Col6quelos directamente en
la bandejade metal.
[] Aseg0rese de seleccionar un tamaflo
querote f6cilmente.
[]
Coloque la bandeja de metal o la
bandeja de metal para asar en el plato
giratorio. Coloque el recipiente de vidrio o
cer6micaen la bandeja.
[] Cuando cocine r6pido no utilice
recipientes ni cubiertas hechas de papel,
pl6stico o aluminio.
Page 55

Cocimiento R6pido
Advuntium Oven
Utilice el men0
predeterminado
de cocimiento
r6pido
Selecciones
del men0
predeterminado de
coci-miento r6pido
Categoria Alimento
Aperitivos Bocadillos de Bagel
Panes Biscochos
Desayumo Waffles Belgas
Selecci6n del MenLi Categoria Alimento Selecci6n del MenLi Categoria Alimento Selecci6n det Mere1
Palitos de ©ueso
Rollos (congelados)
Jalapeflo Poppers
Bolitas de Came (cong.)
Nachos
Nueces, Rostizadas
Aros de Cebolla
Rollos de Pizza
Pretzels Suaves (cong.)
Taquitos (congelados)
Palitosde Pan
Pan de Queso
Rollos
Rollos para la cena
Pan de ajo
Tostadas Te×anas
Pizza de Desayuno
Tostadas a la Francesa
Tortitas de Papa
Panqueques (congelados)
Rollos (refrigerados)
Biscocho con Salchicha
Chorizos
Tortitas de Salchicha
Strudel (congelados)
Empanadas
Waffles (congelados)
El Advantium estd preconfigurado
para cocinar mds de J_75 comidas
populares.
1. Presione la tecla SPEEDCOOK.
5.Una vez que la pantalla muestre:
EDIT (editar), SAVE (guardar) o
START (ini-ciar), presione la tecla
START/PAUSE o el dial selector para
comenzar a co-cinar.
Si no se hace ninguna selecci6nen
15 segundos, la pant:alia regre-sard
a la hora del dia.
.
Gire el dial selector para seleccio-
nar la categofia del tipo de ali-
mento que desea. Presione eldial
para seleccionar.
.
Gire el dial selector para seleccio-
nor el alimento especifico
(selecci6nde men0). Presione el dial
paraseleccionar.
4. Gire el dial selector para seleccio-
nor la cantidad, tamafio y/o
coci-miento (si Io requiere, el
Volt:ee la comida cuando el horno
le in-dique TURN FOOD OVER (para
ciert:ot:ipo de comida).
Cuando el homo indique CHECK
ForDONENESS,revise para ver sila
comi-da est:d cocinada a su gusto
(para ciert:osaliment:os).
Sidesea revisor los ajust:esdurant:eel
co-comient:opresione el dial selector.
Si entr6 una selecci6n no deseada,
simple-mente presione en cualquier
momenta latecla BACK y vuelva a
entrar los seleccio-nes deseadas.
homo leindicar6). Presione el dial
despu6sde coda selecci6n.
Se puede producir humo cuando
cocinardpido came en el homo.
De acuerdo con la Guia de la USDA, se debe cocinar la came a una temperatura
INTERNA de par Io menos 160°Fy el polio a una tempreatura INTERNA de par
Io me-has 180°F. Cocinar a estas temperaturas generalmente protege contra
enfermeda-des producidas par los alimentos. Para m6s informaci6n visite la
p6gina www.foosafety.gov.
Polio
Postres
Entradas
Carnes
Pizza
Papas
Con hueso
Sin Hueso
Filete (congelado)
Dedos (congelado)
Frito (congelado)
Nugget (congelado)
Tortita (congelado)
Tierno (congelado)
Alas (congelado)
Entero
Mezcla de Brownie
GaJletas
Tartas (fruta fresca)
Cubierta para Tartas
Rollos (refrigerados)
Empanadas
Rollos (congelados)
Pan de came (gxs)
Taquitos (congelados)
Filet Mignon
Hamburguesas
Chuletas de Cordero
Chuletas de Cerdo
Ribeye Steak
Sirloin Steak
Strip Steak
T-Bone Steak
Tenderloin
Deli/Fresca
PizzaCongelada
Utilicecorteza pre-cocida
Papa horneada
Tortitas de papa
Papas congeladas
Nugetts congelados
Camote/JTcama
Sandwich
Mariscos
Guarnici6n
Banderillas (congelados)
Rollo de Hot Dog
Sandwich a la Parrilla
Sandwich relleno
Filetes de BacaJao
Palitos de pescado (cong.)
Empanizado congelado
Filete de pescado reloj
Salm6n
Mariscos
SteakdePescadoEspada(1")
Talapia
Steaks de At6n
Pescado blanco/Bacalao
Cacerola
FrUoles Fritos (16 oz)
Esp6rragos rostizados
Piment6n rostizado
Chiles rostizados (5-6)
Maiz rostizado (1-4)
Ajo rostizado
Vegetalesmixtos rostizados
Escalopas de papas
15
Page 56

Cocimiento R6pido
Homo Advuntium
Niveles de
potencia de
cocimiento
r6pido
[]
ElAdvantium utiliza energia de 1.
las 16m-parashal6genas de alta
intensidad, delcalentador de cer6mica,
y de microondas para coci-nar
simult6neamente los alimentos
porarriba, abajo yen el interior, y sellar 2.
lahumedad y el sabor.
Cuando utilice el men0
predeterminado dealimentos,
los niveles de potencia yaest6n
seleccionados para usted. Sin
em-bargo, estos se pueden ajustar al
utili-zar el men0 predeterminado de
alimentosy MY RECIPE(mi receta).
Carla nivel de potencia leofrece
energiade la 16mpara hal6gena o
del calentadorde cer6mica y de
microonda durante cier-to porcentaje
detiempo o le ofrece calen-tamiento
para el sistema de convecci6n.
Por ejemplo:
U-07 L6mpara hal6gena superiory
Calentador Cer6mico
encendida el 70% del tiempo.
L-07 Calentadorde cer6mica
inferiorencendido el 70% del
tiempo.
M-03 Microonda encendido el 30%
del tiempo.
NOTA: Tenga cuidado al ajustar los
niveles de laotencia de manera que no
cocinelos alimentos demasiado o muy
poco.
Presione la tecla SPEEDCOOK y
seleccione su comida (siga las ins-
trucciones de uso del men_ pre-
determinado de cocimiento r6pido).
Cuando la pantalla muestre
EDIT,SAVEo START,gire el dial
paraseleccionar EDIT (editar).
Si no desea cambiar ninguno de
Iosajustes, simplemente presione
eldial y pase a la siguiente
selecci6n.
.
Presione el dial si no desea ajustar
el tiempo de cocimiento.
it.
Gireel dial en direcci6n de las
ma-necillas de reloj para aumentar
o al contrario para disminuir el
nivelde potencia superior. Presione
eldial para seleccionar.
S.
Gire el dial para cambiar el nivel
depotencia inferior. Presione el dial
para seleccionar.
.
Gire el dial para cambiar el nivel de
potencia de microonda. Presione el
dial para seleccionar.
Note que la selecci6n de niveles
superior e inferior limitan el nivel
de potencia de microonda. Pot
ejemplo, si el nivel de potencia
superior o inferior se ajusta a 7,
el microonda no se podr6 ajustar
m6s alto que 3.
.
Presione la tecla START/PAUSEo
el dial selector para comenzara
cocinar.
16
Sigaestas gufas generales cuando seleccione los mejores ajustes de U=, L=, y M=
para sus recetas favoritas.
U= Seleccione un ajuste m6s alto
paraalimentos delgados que
requierenun car6 dorado en la
parte de arriba(por ejemplo: filetes
de pescado, tos-tadas, pechugas
de polio deshuesa-das). Seleccione
un ajuste m6s bajopara alimentos
gruesos o con muchocontenido
de az0car o grasa (porejemplo:
muffins, rostizados, cacero-
las)o que requieran un tiempo
decocimiento m6s largo.
Lz
Seleccione un ajuste m6s alto
paraalimentos gruesos o densos
que norequieren un cocimiento
r6pido en elcentro (por ejemplo:
steaks, cacero-las). Seleccione un
ajuste m6s bajopara alimentos
delgados (por ejemplo:galletas).
jV_ z
Seleccione un ajuste m6s
alto paraacortar el tiempo de
cocimiento pa-ra alimentos
densos o pesados (porejemplo:
cacerolas, pollos enteros).
Seleccione un ajuste m6s bajo
para alimentos delicados (por
ejemplo:panes) o alimentos
que requierenun periodo de
cocimiento m6s largopara
obtener resultados suaves (pot
ejemplo: steaks, came para asar).
Page 57

Cocimiento R6pido
Homo Advantium
Mi Receta
-cocimiento
r6pido
personalizado
ElAdvantium le ofrece flexibilidad
alcocinar sus platos favoritos.
Si desea cocinar una comida que nose
encuentra entre nuestras seleccio-nes
predeterminada, utilice My Recipepara
personalizar el cocimiento r6pido.
.
Presione la tecla SPEEDCOOK y
seleccione MY RECIPE (mi receta).
Luego presione el dial para
se-leccionar. Seleccione NEW
RECIPE(receta nueva).
Si no realiza ninguna entrada
du-rante J_5segundos, Io pontolla
re-gresard a la hora del dfo.
.
Gire el dial selector para seleccio-
nar el tiempo de cocimiento. Pre-
sione el dial para seleccionar.
Lo pantalla le indicard que debe
se-leccionar el nivel o niveles de
po-tencia.
.
Gire el dial para seleccionar el
nivelde potencia superior. Gireel
dial en direcci6n de las manecillas
del relojpara aumentar o en
direcci6n contrariapara disminuir
el nivel de potencia su-perior.
Presione el dial para se-leccionar..
4. Gire el dial para seleccionar el nivel
depotencia inferior. Presione para
seleccionar.
S.
Gire el dial para seleccionar el
nivel depotencia de microonda.
Presione paraseleccionar.
.
Presione la tecla START/PAUSE
o pre-sione el dial selector para
comenzara cocinar.
Para sugerencias sobre el nivel de
poten-cia o tiempo de cocimiento,
utilice la guiade cocimiento, libro de
recetas o las selecciones del menO
predeterminado de co-cimiento
r6pido.
17
Page 58

Cocimiento R6pido
Homo Advantium
Hi Receta -
para entrar
y salvor
........../}ii;iil
Agrega y guarda basra 30 de sus
re-cetas para cocimiento r6pido o
micro-onda, o las recetas del menO
predeter-minado de cocimiento
r6pido como una receta favorita.
Una vez realizada, puedellamar
r6pidamente yen cualquier momento
su receta favorita para cocinar la
comida como a usted le gusta!
1. Presione la tecla SPEEDCOOK o
MICROWAVE.
.
Gire el dial para seleccionar MY
RECIPE(mi receta). Presione el dial
para se-leccionar.
3.
Gire el dial basra que aparezca
NEW RECIPE(nueva receta). Pre-
sione el dial para seleccionar.
4.
Aparecer6 ENTERCOOK TIME(entre
el tiempo de cocimiento).Gire el
dial para escoger eltiempo de
cocimiento. Presione el dial para
seleccionar.
La pantalla le indicard que
debe se-leccionar los niveles de
potencia.
5. Gire el dial en direcci6n de las
mane-cillas de reloj para aumentar
o al con-trario para disminuir
el nivel de poten-cia superior.
Presione el dial para seleccionar.
Utilice la gufa de cocimiento o libro
de recetas para ver sugerencias del
nivel de potencia y del tiempo de
cocimiento.
.
Seleccione SAVE (guardar) del
re-sumen de la pantalla.
7.
Aparecerd SPELLTHE FOOD
NAME(deletree el nombre de
la comida).Gire el dial basra la
primera letra dela descripci6n
de su comida y presioneel dial
para seleccionar. Contin0eeste
proceso basra deletrear el
restodel nombre. Presione la
tecla START/PAUSE para guardar
la receta y sunombre.
Mi Receta-
encontrar y
utilizar
Para encontrar y utilizar las recetas
guar-dadas:
1. Presione la tecla SPEEDCOOK o
MICROWAVE.
2. Gire el dial para seleccionar MY
RECIPE(mi receta).
.
Aparecerc_n en la pantalla los
nombresde las recetas que ha
guardado.
it.
Gire el dial basra que aparezca
lareceta que desea y presione el
dialpara seleccionar.
S.
Presione la tecla START/PAUSE
oel dial selector para comenzar el
cocimiento.
18
Page 59

Cocimiento R6pido
Homo Advantium
Mi Receta-
para ajustar
o cambiar
Mi Receta-
para
eliminar
Para ajustar o cambiar las recetas
guardadas: "
1. Presione los botones SPEEDCOOK
(cocci6n r6pida) o MICROWAVE
(microondas).
2. Gire el dial para seleccionar MY
RECIPE(mi receta).
.
Gire el dial hasta la receta que
desea cambiar. Presione el dial
para ingresar. Aparecer6n las
configuraciones actuales.
it.
Elija EDIT (editar).
5.
Gire el dial para ajustar el tiempo
de cocci6n y presione el dial para
ingresar.
Para eliminar las recetas guardadas:
1. Presione la tecla SPEEDCOOK o
MICROWAVE.
2. Gire el dial para seleccionar MY
RECIPE(mi receta).
3. Seleccione la receta que desea
eliminar.
.
Gire el dial para cambiar los
niveles de energia y presione el
dial para ingresar cada nivel de
energia.
.
Gire el dial para cambiar el
nombre de la receta. Presione el
dial para ingresar cada cambio de
letra
8. Presione el bot6n START/PAUSE
(iniciar/pausa) para guardar la
receta modificada.
Para nivel de energia y sugerencias de
tiempo de cocci6n, utilice su gufa de
cocci6n o recetario.
,._
4. Gire el dial para seleccionar
DELETE(eliminar).
19
Page 60

Horneor con Convecci6n
Homo Advuntium
Horneur
con
Convecci6n
C6mo se
Horneo con
Convecci6n
\\
Horneor con convecci6n le permite cocinar
los alimentos de la misma manera que un
homo convencional, utiliza un elemento para
calentar el aire adentro del horno. Se puede
programar cualquier temperatura entre 250°F
a 450°F.
Elventilador circula suavemente el aire
caliente a trav#s del homo, sabre y alrededor
de los alimentos. Debido a que el aire caliente
se mantiene en constante movimiento,
algunos alimentos se cocinan un poco
m6s r6pido, a diferencia de los hornos de
cocimiento regular.
Antes de comenzar, aseg0rese que la parrilla
de metal est6 en su lugar. Se pueden
utilizar ambas parrillas en los dos niveles de
cocimiento.
1. Presione el bot6n CONV BAKE
(hornear par convecci6n).
2. Gire el dial para configurar la
temperatura y presione el dial para
ingresar
3. Presione eldial para ingresar y
confirmar la selecci6n.
Para iniciar de inmediato sin configurar
un tiempo de cocci6n, seleccione START
(iniciar) o presione el bot6n START/PAUSE
(iniciar/pausa).
Para configurar un tiempo de cocci6n:
1. Gire el dial y seleccione COOKTIME
(tiempo de cocci6n).
2. Gire el dial para configurar el tiempo
de cocci6n y presione el dial para
ingresar.
3. Para iniciar el tiempo de cocci6n de
inmediato, coloque los alimentos en
el horno y seleccione STARTCOOK
TIME (iniciar tiempo de cocci6n).
Luego presione el dial o el bot6n
Cuando homee o caliente en los dos niveles
coloque el alimento en la bandeja de metal o en
elplato apropiado y col6quelo sabre la parrilla
dealambre del homo.
PRECAUCI6N:
RIESGODEQUEMADURAS
Cuandohornee,recuerdequeelhomo,lapuertay
Iosplatosestanmuycalientes.
Deacuerdoconla USDA,cocinelacamea unatempe-
raturaINTERNAdeparIo menosi60°F,elpolioa una
tempreaturaINTERNAdeparIomenosi80°F. Cocinar
aestastemperaturasgeneralmenteprotegecontra
en-fermedadesproducidasparlosalimentos.Para
masinformaci6nvisitela paginawww.foosafety.gov.
START/PAUSE(iniciar/pausa)para
iniciar. Eltiempo de cocci6n iniciar6
de inmediato la cuenta regresiva.
Parainiciar eltiempo de cocci6n
despu6s del precalentamiento,
seleccione STARTPREHEAT(iniciar
precalentamiento). Elhomo emitir6 una
sepalcuando alcance latemperatura
de cocci6n. Coloquelosalimentos en el
homo y presioneel bot6n START/PAUSE
(iniciar/pausa). Eltiempo decocci6n
iniciar6 la cuenta regresiva.
Sila puerta del homo se abre durante la
cocci6n, "Pause"(pausa)aparecer6 en
la pantalla.Cierrela puerta y presione el
bot6n START/PAUSE(iniciar/pausa).
Lostiempos de cocci6n se muestran en
horas y minutos y pueden configurarse
hasta un m6ximo de 2 horas 59 minutos.
Eltiempo puede cambiarse durante la
cocci6n girando el dial.
Consejos de
[] Se recomiendan panas de metal
cocimiento para
hornear con
convecci6n
[] Las panas de metal oscuras o
[] Las panas de aluminio brillante
20
para todos los tipos de productos
horneados, pero especialmente
cuando es importante dorar.
con acabado mate son mejores
para panes y tartaletas, ya que
absorben el calory producen
cortezas m6s crujientes.
son mejores para pasteles,
galletas o muffins, ya que reflejan
el calor y ayudan a producir una
corteza ligeramente suave.
[] Las cacerolas de vidrio o de
aleaci6n de cer6mica y vidrio o los
platos para hornear son mejores
para recetas con huevo y queso
debido a la f6cil limpieza del vidrio.
[] AI hornear en un solo nivel,
utilice el inferior. Lossujetadores
superiores s61odeben utilizarse
para hornear en los dos niveles.
Page 61

Asa r y Tosta r
Horno Advantium
Asar y
Tostar
C6mo asar
Asar y tostar utilizan las 16mparas superiores
y el ca-lentador inferior para asar o tostar los
alimentos similar al homo convencional.
Antes de comenzar aseg0rese que el plato
giratorio est6 en su lugar. AI tostar utilice la
bandeja de me-tal y al asar utilice la bandeja
de metal o la bandejade metal para asar
1. Presione el bot6n COOKING OPTIONS
(opciones de cocci6n).
2. Gire el dial a BROIL(asar) y presione
para ingresar.
3. Coloque los alimentos en el homo y
seleccione START(iniciar) o presione
el bot6n START/PAUSE(iniciar/pausa)
para iniciar.
PRECAUCION:
Riesgode quemaduras
When broiling or toasting, remember that the oven
cavity, the oven door and dishes will be very hot)
Cuando uti(ice el homo el
plato giratorio debeestor
siempre ensu lugar.
Si la puerta del homo se abre durante la
cocci6n, "Pause" (pausa) aparecerc] en
la pantalla. Cierre la puerta y presione el
bot6n START/PAUSE(iniciar/pausa).
Coloque los aJimentos
directamente.
Consejos de
cocimiento
para asar
C6mo
tostar
[] Los tiempos de asar pueden ser
m(_scortos en el horno Advantium
ya queutiliza Idmparas hal6genas.
AsegOre-se de monitorear de cerca
los alimen-tos para obtener los
resultados de-seados.
[] Para mejores resultados al
asar, coloque los alimentos
directamente en la bandeja de
metal para asar
[] Se produce humo al asar came en
elhomo.
[] Si precalienta el homo para asar
car-ne, precaliente con la bandeja
1. Presione el bot6n COOKING OPTIONS
(opciones de cocci6n).
2. Gire el dial a TOAST(tostar) y presione
para ingresar.
3. Gire el dial para configurar el tiempo
de tostado, coloque los alimentos en
el homo y seleccione START(iniciar)
o presione el bot6n START/PAUSE
(iniciar/pausa) para iniciar.
de metal para asar enel horno
y para una mejor brasa en la
came col6quela so-bre la bandeja
caliente.
[] Para un mejor rendimiento,
cuandoase came precaliente
el homo durante 5 minutos. El
polio tiene mejores resultados sin
precalentar el homo.
[] Se deben voltear los alimentos a
lamitad del tiempo de asado.
[] Retire las piezas mds finas, para
evitar que se cocinen demasiado y
que se sequen.
Si la puerta del homo se abre durante la
cocci6n, "Pause" (pausa) aparecerd en
la pantalla. Cierre la puertay presione el
bot6n START/PAUSE(iniciar/pausa).
Consejos de
cocimiento
[] Utilice la bandeja de metal para
[] No necesita darle vuelta a la
para tostar
[] AItostar nueves,mOevalosa la
mejores resultados al tostar.
mayoria de los alimentoss.
mitad del tiempo de cocimiento.
[]
Tueste las piezas mds gruesas por
mds tiempo, las piezas delgadas
menos tiempo.
21
Page 62

Calentary Fermentar
Horno Advantium
Calentar
\\
Cuando utilice el homo el plato giratorio
debe estar siempre en su lugar.
Para caJentar coloque los alimentos
o el redpiente seguro para el homo
directamente en la bandeja de metal..
La funci6n WARM mantendr6
calientelas comidas cocinadas a
temperaturas de servicio. Siempre
comience con la comida caliente.
Utilice recipientes y utensilios que
puedan soportar temperaturas hasta
230°F.
!. Presione la opci6n COOKING
OPTIONS(opciones de cocimiento).
2. Gire el dial para seleccionar WARM.
Presione el dial para seleccionar
B. Gire el dial para seleccionar el nivel
de humedad que desea. Vea el
cuadro y consejos a continuaci6n.
presione el dial para seleccionar.
4. Seleccione START(iniciar) o presione
el bot6n START/PAUSE(iniciar/
pausa) para iniciar. El homo
comienza a calentar de inmediato
e indica la cantidad de tiempo
de calentamiento que se debe
completar.
Cuadro de Seleccl6n de Temperatura y Humedad
Tipo de Comida
Cacerolas
Chili/Sopa
Panqueques, waffles
Pizza
Papas, horneadas
Papalinas/Galletas
Consejos para alimentos crujientes:
m No cubra los alimentos.
m No utilice recipientes pl6sticos ni
envoltorios pl6sticos.
m No es necesario precalentar a menos
que desee hacer crujiente alimentos
viejos. (Vea Hacer crujiente los
alimentos viejos))
Si la puerta del homo se abre durante
el calentamiento, "Pause" (pausa)
aparecer6 en la pantalla. Cierre la
puertay presione el bot6n START/PAUSE
(iniciar/pausa)..
Para hacer crujiente los alimentos
viejos:
m Seleccione el ajuste de CRISP.
Precaliente el homo durante !0
minutos.
NOTA: $61o precalientecuando
desee hacer crujiente los alimentos
viejos.
m Coloque la comida o los platos
directamente en la bandeja de
metal.
m Revise para ver si est6 crujiente
despu6s de 45 minutos. Si es nece-
sario, agregue m6s tiempo.
Ajuste de Humedad
HOmedo
HOmedo
HOmedo
Crujiente
Crujiente
Crujiente
Consejos para alimentos h imedos:
m Cubra los alimentos con una tapa o
con papel de aluminio.
m No utilice recipientes pl6sticos ni
envoltorios pl6sticos.
m No es necesario precalentar.
Fermentar
La funci6n para fermentar suministra
automdticamente la temperatura
apropiada para el proceso de
fermentaci6n, por Io tanto, no necesita
ajustar la temperatura.
I. Presione la opci6n COOKING
Cuando utilice el homo el plato giratorio
debe estar siempre en su lugar.
2. Gire el dial para seleccionar PROOF
3. Seleccione START(iniciar) o presione
Para fermentar coloque la masa en un
taz6n/pana para pan y col6quela en la
bandeja de metal
m Para evitar bajar la temperatura
22
OPTIONS(opciones de cocimiento)
(leudar) y presione para ingresar.
el bot6n START/PAUSE(iniciar/
pausa) para iniciar. El homo
comienza a leudar de inmediato
e indica la cantidad de tiempo de
leudado que se debe completar.
del homo y prolongar el tiempo de
fermentaci6n, no abra la puerta del
homo sin necesidad.
m Revise los productos de pan antes,
para evitar sobre-fermentarlos.
NOTAS:
m No utilice el modo de fermentaci6n
para calentar alimentos o para
mantener caliente la comida. La
temperatura de fermentaci6n no
es Io suficientemente caliente para
mantener la comida a temperaturas
seguras. Utilice la funci6n WARM
para mantener la comida caliente
m La funci6n de fermentaci6n no
operar6 si el homo est6 demasiado
caliente. Permita que el homo se
enfrie antes de fermentar
Page 63

Cocinondo en el Microonda
Homo Advontium
Usa de las
funciones de
microonda
Aseg0rese que el plato girotorio est6 en su lugor. Utilice Io bondejo de vidrio clara.
Coloque los alimentos o el recipiente para microondas directamente en la bandeja
devidrio clara, para cocinar los alimentos.
Cuondo utiHce el homo el plato girotorio
debe estor siempre en su lugor.
Recipientes de cocimiento
[] AsegOreseque todos los recipientes sean
adecuados para cocinar en microondas.
SELECCIONES PREDETERMINADAS PARA EL MICROONDAS
[] Cocimiento
-Par tipo de comida
-Par tiempo
-Par tiempo Zy 2
[]Descongelaci6n
-1.0 Ib r6pido
-Par tiempo
-Par tipo de comida
-Par peso
-Derretir
-Ablandar
[]Bebidas
-Agua (8 oz)
-Caf6 (8 oz)
-T6 (8 oz)
-Leche (8 oz)
-Cocoa caiiente (8oz)
[]Palomitas de Maiz
(2.9a ].5 oz)
[] De rretti r
-Mantequilla
-Caramelo
-Queso
-Chispasde
Chocolate
-Malavaviscos
[]CocimientoLento
[]Ablandar
-Mantequilla
-Queso Crema
-Glaseados116oz)
-Helado
Cuondo cocine en el microondos Io
bondejode vidrio dora siempre debe
estoren su lugor.
[]Recalentar
-Bebidas
-Cacerolas
-Polio
-Pasta
-Pizza
-Plato de comida
-Arroz
-Sopa
-Filetes/Chuletas
-Vegetales
Lo que es
normal
consejos
de
cocimiento
Interferencia
[]
Se puede observar interferencia de TV/
radio cuando utiliza el microonda, similar a
la interferencia causada par otros apara-
tos pequeflos. Esto no indica un problema
con el microonda. Mueva el radio o la TV Io
m6s lejos posible del microonda o revise la
posici6n de la antena de la TV/radio.
[]
Cuando cocine tocino, coloque la tiros en
capas sabre el plato. Cubra coda capa
con papel toalla.
[]
Cuando cocine vegetales, utilice una cace-
rola o taz6n seguro para el microondas.
CQbraloscon una tapa seguro para el
micro-ondas o con un envoltorio pl6stico
ventilado.
Calor del Homo
[]
Los recipientes se pueden calentar
debidoa la transferencia de color de los
alimentoscalientes. Utilice guantes para
manipularlos
[] Elvapor se puede salir alrededor de la
puerto.
[] Para vegetales congelados, agregue
agua de acuerdo con los instrucciones del
paquete
[] Para vegetales frescos, agr6guele 2
cucharadas de agua a coda porci6n.
23
Page 64

Cocinondo en el Microonda
Homo Advantium
Niveles de
potencia de
microondo
C6mo utilizar
lasselecciones
predetermi-
nadas de
microonda
El nivel de energia del microondas se
configura automdticamente en todas
los funciones del microondas pero usted
puede comb{aria par COOKBY TIME
(cocinar par tiempo), COOKBYTIME l&2
(cocinar par tiempo l&2), MICRO30
SEC(micro 30 seg),y DEFROSTBYTIME
(descongelar par tiempo).
1. Primero, siga los instrucciones para
COOKBYTIME (cocinar par tiempo),
COOKBYTIME l&2 (cocinar par
tiempo l&2), MICRO30 (micro 30), y
DEFROSTBYTIME(descongelar par
tiempo).
2. Seleccione START(iniciar) o presione
el bot6n START/PAUSE(iniciar/pausa)
para iniciar.
3. Presione EDIT(editor) para comb{at
el tiempo de cocci6n y luego el nivel
1. Presione la tecla MICROWAVE
Si no hace ninguna seleccidn en 15
segundos, la pantalla regresard a la
hora del dla.
2. Gire el dial para seleccionar COOK
(cocinar), DEFROST(descongelar),
BEVERAGE(bebida), POPCORN
alomitas de ma[z), MELT(derretir),
HEAT(recalentar), SIMMER(fuego
lento) y SOFTEN(ablandar).
3. Gire el dial para encontrar la comida
que de.seacocinar, descongelar
o recalentar. Presione el dial para
seleccionar
4. Gire el dial selector para seleccionar el
tipo, cant{dad, peso y/o tamano, coma
deenergia delmicroondas.Presione
el dial para ingresarel tiempo de
cocci6ny loscambios al nivelde
energia.
Lossiguientes son algunos ejemplos
de diferentes niveles de energia
High {alto} 10: Pescado,tocino,
vegetales, liquidos en hervor.
Med-High {med-alto) 7: Cocci6n suave
de came de resy de ave; horneado de
estofados y recalentamiento.
Medium (media) 5: Para cocci6n lento
y para tiernizar estofados y cortes de
came menos tiernos.
Low (abajo) 2 6 3: Descongelar, hervir
a fuego lento, salsas delicadas.
Warm (tibia) 1: Mantener alimentos
calientes; ablandar mantequilla.
le indique el horno. Presione el dial
despues de coda selecci6n.
5.
Presione el dial o el bot6n START/PAUSE
(iniciar/pausa) para iniciar la cocci6n.
Presione el dial selector para revisor los
a]ustes durante el cocimiento.
Si abre la puerto durante el cocimiento,
el homo se detendrd y la pantalla
mostrard PAUSE. Cierre la puerto y
presione START/PAUSE para reanudar
elcocimiento.
Si entr4 una selecci6n no deseada
simplemente presione en cualquier
momenta la tecla BACK y vuelta a
introducir lasselecciones deseadas.
Cocimiento
con tiempo
Cocimiento con
tiempo 1 y 2
Utilice COCINAR CON TIEMPOpara
cocinar en e! microonda alimentos que
no se encuentran en los selecciones
predeterminadas de/microondas.
2. Presione la tecla MICROWAVE.
3.
Utilice COOK BY TIME l&2 (COCINAR
CON TIEMPO1 Y2) para cocinar con
microonda los alimen-tos que requieren
dos diferentes tiemposy niveles de
potencia.
1. Presione la tecla MICROWAVE.
2. Gireel dial para seleccionar COOKy
24
.
Presioneel dial para seleccionar
CO-CINARCONTIEMPOy luego pre-
si6nelopara seleccionar.
Gireel dial para ajustar eltiempo de
cocimiento y luego presi6nelopara
seleccionar.
presi6nelo para seleccionar.
4. Gireeldial para ajustar el nivelde
poten-cia luego presi6nelopara
seleccionar.
5. Presione el dial o la tecla START/PAUSE
para comenzar a cocinar.
Puede abfir la puerto durante el COCI-
MIENTOCON TIEMPOpara revisor la
co-mida. Cierre la puerta y presione
START/PAUSEpara reanudar el
cocimiento.
3_
Gire el dial para seleccionar el COOK
BYTIME l&2 (Cocimiento con tiempo
1 y 2)y presi6-nelo para seleccionar.
.
Gireel dial para ajustar el ler
tiempo ypresi6nelo para seleccionar.
Repitaparael ler nivelde potencia, el
2dotiempo y el 2do nivelde potencia.
.
Presione el dial o la tecla START/
PAUSEpara comenzar a cocinar.
Page 65

Cocinondo en el Microond
Homo Advontium
Micro 30
segundos
Mis Recetas
Consejos para
descongelar
Presione MICRO 30 SECSrepet[damente
para incrementar 30 segundos el tiem-
po de cocimiento en el microondas. El
homo arranca inmediatamente
Vea los secciones de MYRECIPE(Mis
Recetas) en la secci6n de Cocimiento
R_pido de este libra para ver los
instrucciones de c6mo guardar,
usar, cambiar o eliminar una receta
personalizada del microonda
Utilice DESCONGELARPORTIPODE
COMIDA para came, polio, pescado y pan.
Utilice DESCONGELARCON TIEMPOpara
!a mayorfa de !as comidas conge!adas.
[] Las comidas congeladas en papel
o pl6stico pueden descongelarse
en el empaque cuando utiliza
DESCONGELACIONCONTIEMPO.
Cuando utiliza DESCONGELACION
PORTIPODECOMIDAdeber retirar la
came del empaque. Losempaques
cerrados deben ranurarse, pincharse
o ventilarse despu@sde que la comi-
da est@parcialmente descongelada.
Losrecipientes pl6sticos deben
estarparcialmente destapados.
[] Las cenas familiaras congeladas
pre-empacadas pueden
descongelarse y cocinarse en el
microondas. Silacomida esta en un
recipiente de aluminio, transfi@ala a
un plato seguro para el micoondas.
El nivel de potencia se ujusta
autom@icamente en alto, pero Io puede
cambiar para mayor flexibilidad. Vea las
instrucciones en la secci6n Niveles de
Potencia del Microondas.
[]
Lascomidas que se arruinan
f6cilmente no deben permanecer
afuera por mds de una hora,
despues de descongelarla. La
temperatura ambiente promueve el
crecimiento de bacterias da_inas.
[] AI descongelarse, la comida debe
estar fria pero suave en todas las
c_reas.Sitodavia tiene un poco de
hielo, regr6sela brevemente al
microondas odAjela descansar un
par de minutos.
[] AI descongelar Bo mds libras de
came molida o en cubos, retire las
porciones descongeladas, cuando
se le indique que debe voltearlo.
Descogelaci6n
con tiempo
Ui:ilice la DESCONGELACION CON
TIEMPO para descongelar durante
untiempo seleccionado.
1. Presione la tecla MICROWAVE.
2. Gire el dial selector a DEFROST.
B. Gire el dial selector a DEFROST
S.
Presione el dial para seleccionar.
BY TIME. Presione el dial para
seleccionar.
It.
Gire el dial selector para seleccio-
nar el tiempo que desea. Presioneel
dial para seleccionar.
Presione el dial o la tecla
START/PAUSEpara comenzar a
descongelar.
.
Voltee la comida cuando el homo
le indique TURN FOOD OVER.
El nivel de potencia se ajuste
autom@icamente en 3, pero Io puede
cambiar. Para cambiar los niveles
de potencia, vea las instrucciones de
Niveles de Potencia del Microonda.
Usted puede descongelar rdpidamente
peque_as cantidades de alimentos
a! elevar e! nive! de potencia despuds
de entrar e! tiempo. E! nivel de
potencia 7 acorta e! tiempo total de
desconge!acidna !a mitad; e! nive! de
potencia 10 acortae! tiempo total en
aproximadamente 1/3.A! descongelar en
niveles de potenciaaltos, los alimentos
necesitardn una fre-cuente atenciOn,
rods de la usual y dstos se pueden
cocinar un poco.
25
Page 66

Cocinando en el Microondo
Homo Advantium
Descongelar par
tipo de comida
DESCONGELAR PaR TIPO DE COMIDA
ajusta automc_ticamente los tiempos
y niveles de potencia de desconge-
laci6n, para dar resultados mds
parejosa las comes, polio y pescado
que pesanhasta 6 libras.
.
Retire la came del empaque y
col6quela en un plato seguro
para el microondas. El pan debe
permanecer en el empaque, pero
retire los amarres de metal.
2. Presione la tecla MICROWAVE.
.
Gire el dial a DEFROST. Presione el
dial para seleccionar.
4.
Gire el dial para DESCONGELAR
PaR TIPO DE COMIDA. Presione el
dial para seleccionar.
S.
Presione el dial para escogerr el
tipo de comida. Presione el dial
para seleccionar.
.
Gire el dial al peso de la comida,
utilice la Guia de Conversi6n de la
derecha. Par ejemplo, dial 1.2 para
1.2 libras (1 libra, 3 onzas).Presione
el dial para seleccionar.
.
Presione el dial o la tecla START/
PAUSE para comenzar a desconge-
lar.
8. Voltee la comida cuando el homo
le indique TURN FOOD OVER.
[]
Para una descongelaci6n pareja
retire la came descongelada o
forre las @eastibias con pequeflos
pedazosde aluminio.
[]
Despu@sde descongelar, la mayoria
de las carnes necesitan descansar
S minutos para completar la
descongelaci6n. Losrostizados
grandes deben descansar
aproxidamente 30 minutos.
Guia de Conversi6n
Si el peso de la comida estd en libras y
onzas, los onzas deben ser convertidas
a la ddcima parte (.2) de una libra.
Weight of Food Enter Food Weight
in Ounces (tenths of a poundl
1-2 .!
3 .2
4-5 .3
6-7 .4
8 .5
9-10 .6
11 .7
12-1:3 .8
14-15 .9
26
Page 67

Cocinondo en el Microonda
Homo Advontium
Consejos para
el cocimiento
con sensor del
microonda
El modo de microonda del homo
Advantium tiene un sensor de
cocimiento y recalentamiento. Elhomo
detecta autom@icamente si la comida
esta cocinada y se apaga el solo -
eliminando la necesidad de programar
tiempos de cocimiento y niveles de
potencia.
Las funciones con sensor detectan
la humedad creciente liberada
durante el cocimiento. El homo
c_justaautomdticamente el tiempo
e cocimiento para varios tipos y
cantidades de comida.
ADVERTENCIA:
Riesgo de fuego
No utiliee /as funciones con sensor dos
veees conseeutivas en la misma porciOn
de comida - se puede sobre coeinar o
qduemar.Si la comida estd cruda despuds
e terminar e! primer tiempo, utilice
TIMECOOK (cocimiento con tiempo) para
agregar tiem-po adiciona! de cocimiento.
Los recipientes y cubiertas adecuadas
son esenciales para un mejor
cocimiento con sensor.
[]
Siempreutilice recipientes seguros
para el microondas y c0bralos con
tapaderas o envoltura pl@stica
ventilada. Nuncautilice cubiertas
pl6sticas herm@icas- ya que evitan
que la humedad salga y se puede
sobrecocinar la comida
[]
Antes de colocar la comida adentro
delhorno aseg0resede que el exterior
de los recipientesy que el interior
del homo est@nsecos. Lasgotas de
humedad que seconvierten en vapor
pueden engaflar al sensor..
[]
Las palomitas de maiz y las papas
se calientan mejor destapadas.
\ /
Cubierta
Ventilada
Seque los platos para que
no seequivoque el sensor.
w
PROGRAMAS DE SENSOR DEL MICROONDA
[] Came molida
[] Palomitas de Plaiz
(Palomitas de mafz en paquete
para el microondas, 2.9 oz. a 3.5 oz.)
[] Papa
[] Arroz
[] Sopa
[] Vegetales (enlatados, frescos,
congelados)
[] Recalentar polio
[] Recalentar pasta
[] Recalentar un plato decomida
[] Recalentar sopa
[] Recalentar vegetales
[] Recalentar vegetales
[] Cocimiento lento
27
Page 68

Cocinundo en el Microondu y Otros Funciones Advuntium
Homo Advuntium
Pare user todos
los programas
con sensor
[]
Paro usor todas los funciones con sensor: []
Z. Presione el bot6n MICROWAVE
(microondas).
2. Gire el dial para seleccionar COOK
BY FOOD (cocinar par alimento)
(ubicado debajo de COOK), REHEAT
(recalentar), o SIMMER (fuego lento).
3. Gara COOK BY FOOD (cocinar par
alimento) y REHEAT(recalentar),
seleccione un alimento y presione
el dial pare ingresar. Pare SIMMER
(fuego lento), configure el tiempo
pare cocci6n a fuego lento
despu6s de que la sopa, salsa o
estofado haya alcanzado el hervor.
4. Presione el dial o el bot6n START/
PAUSE (iniciar/pausa) pare iniciar la
cocci6n.
No abra la puerta del horno haste
que comience la cuenta regresiva en
la pantalla. Si usted abre la puerta
mientras se realize la cocci6n par
sensor, aparecer6 en la pantalla "Sensor
Error - Close door and press START"
(Error de sensor - Cierre la puerta y
presione START). Cierre la puerta de
inmediato y presione el bot6n START/
PAUSE(iniciar/pausa) pare recomenzar
ADVERTENCIA:
Riesgo de sFeUoeagooo
No utlice la functi6n con
veces consecutivas en la misma porci6n
de comida -la comida puede resultar
seriamente cocinada o quemada. Si le
falta cocimiento ala comida al final del
tiempo de cocimiento con sensor utlice
COOKBY TIME(cocimiento con tiempo)
en el selector del microonda pare
cocinarla m6s tiempo.
[] Si usted ha estado cocinando
y el homo est6 caliente, puede
indicar que se encuentra muy
caliente pare cocinar par sensor.
En ese caso, el homo cambiar6
automdticamente a cocci6n par
tiempo y puede preguntar sabre el
peso ola cantidad de alimentos
Pare acortar o prolonger el tiempo
de cocci6n, espere a que la cuenta
regresiva aparezca en la pantalla.
Luego gire el dial pare agregar o
restar tiempo
Notes sobre el programa Reheat
(recelenter):
Losalimentos recalentados pueden
tener amplias variaciones de
temperatura. Algunas 6reas pueden
ester extremadamente calientes.
Es mejor utilizar COOK BY TIME
(cocinar par tiempo) y no REHEAT
(recalentar) con estos alimentos:
[]
Productos panificados.
[]
Alimentos que deben recalentarse
sin tape.
[]
Alimentos que deben mezclarse o
girarse
[]
Alimentos que deben quedar con
aspecto o superficies crujientes
despu6s de recalentarse.
C6mo ajustar las configuraciones
autom6ticas del homo COOKBY
FOOD (cocinar par alimento)y REHEAT
(recalentar) para obtener un tiempo de
cocci6n mayor o menor (nodisponible
en todos los tipos de alimentos):
Parareducir los tiempos de cocci6n
autom6ticos: Despu_sde que el homo
se acciona, gire el dial en sentido
contrario a las agujas del reloj hasta
que aparezca un signo menos ("-")o un
signo menos doble ("- -")y presione ("el-")
dial para ingresar. Un signo menos
es una reducci6n del _t0%del tiempo
de cocci6n y un signo menos doble ("--
") es una reducci6n de120% del tiempo
de cocci6n.
Para aumentar los tiempos de cocci6n
autom6ticos: Despu_s de que el homo
se acciona, gire el dial en sentido de las
agujas del reloj hasta que aparezca un
signo m6s ("+")o un signo mds doble
("++") y presione el dial para ingresar.
Un signo m6s ("+") es un aumento del
O
lOB del tiempo de cocci6n yun signo
m6s doble ("++") es un aumento del
20% del tiempo de cocci6n.
Cocimiento
completo
28
Para recordarle que hay alimentos
en el homo, en la pantalla podr6
verse el modo de cocci6n y COOKING
COMPLETE (cocci6n complete) y se
air6 un pitido una vez par minuto
hasta que se abra la puerta del horno
o se presione el bot6n CLEAR/OFF
(borrar/apagado).
Page 69

Otras Funciones Advantium
Horno Advantium
Repita la
01tima
funci6n
Funci6n para
Reanudar
Clock
(reloj)
Utilice esta funciGn para ahorrar tiempopara
alimentos que cocina repetidas ve-ces,como
galletas y aperitivos.
NOTA: ElUltimo programa que utiliz6se guarda
durante dos horas.
1.Presione COOKINGOPTIONS(op-ciones de
cocimiento) y seleccioneREPEATLAST(repita el
Ultimo).
.
Si necesita cocinar la comida pormds tiempo,
usted puede reiniciarel homo al presionar la
tecla START/PAUEo el dial selector.
.
La pantalla mostrard RESUMECOOKING
(reanudar el cocimiento)y el homo volverd a
iniciar automdti-camente al !0% del tiempo
original.
Debe programar el reloj antes de utilizar elhorno
pot primera vez. Cuando programe elreloj pot
primera vez vaya directamente alpaso dos.
1. Paracambiar Ia hora de! reloj, presione Ia
tecla SETTINGSy gire e! dial a CLOCKSETTINGS
(ajustesde! retoj).SeleccioneSETTIME(Iahora)
2. La pantalla mostrard el Ultimo ali-mento que
pre-ajust6.
3.Presione la tecla START/PAUSEo el dial selector
para comenzar acocinar.
El programa permanece en memoria du-rante
5 minutos. DespuGs necesitardprogramar
de nuevo. Vea la secci6n deUso del menu
predeterminado de coci-miento rdpido.
2. Gire el dial para ajustar la hora.
Presi6nelopara seleccionar. Nota: Se
programa AM/PM.
3. Gire el dial para ajustar los minutos. Presio-ne
el dial para seleccionar.
Auto Conversion
(conversi6n
automGtica)
Display
On/Off
(pantalla On/Off)
Beeper Volume
(voumendel pito)
Reminder
(recordatorio)
La conversi6n automdtica reduce automdtica-
mente la temperatura de hornear con con-
vecci6n. Siempre debe introducir la tempera-
tura de la receta y el homo hard el resto.
Utilice esta funci6n para encender o apagarla
pantalla del reloj.
Utilice esta caracterfstica para ajustar el volumen
del pitido. Usted tambiGn puede desactivarla.
Utilice esta funci6n para configurar el
accionamiento del sonido de una alarma en un
momento especifico del dfa.
1. Presioneelbot6n SETTINGS(configuraciones),gire
el dialpara seleccionarREMINDER(recordatorio)y
presioneel dial para ingresar.
2. Seleccione SETREMINDER (configurar
recordatorio) y presione el dial para ingresar.
S. Gire el dial para configurar la hora y minutos
y presione el dial para ingresar. NOTA:La
configuraci6n de hora se hace en AlVl/pivl.
Para cambiar el ajuste, presi6ne la tecla SET-
TINGSy gire el dial a AUTOCONVERSlON.Presione
el dial para seleccionar. Gire el dial para cambiar
los ajustes a CONVERSIONON or CONVERSION
OFF(Conversi6n encendido oapagado). Presione
el dial para seleccionar.
Presione la tecla SETTINGS,gire el dial para
seleccionar DISPLAYON/OFF(pantalla encendida/
apagada). Gire el dial para seleccionar CLOCK
DISPLAYON or CLOCKDISPLAYOF(el relojde la
pantalla encendido o apagado). Presioneel dial
para seleccionar.
Presione el bot6n SETTINGS(configuraciones),
gire el dial para seleccionar BEEPERVOLUME
(volumen del pitido), presione el dial para
ingresar. Seleccione el volumen del pitido,
presione el dial para ingresar.
Paradesactivar el recordatorio,presioneel bot6n
SETTINGS(configuraciones),gireeldial para
seleccionar REMINDER(recordatorio)y presione eldial
para ingresar. Gireeldial para seleccionar CLEAR
REMINDER(borrar recordatorio)y presione el dial para
ingresar.
Paradesactivar la hora del recordatorio,presione el
bot6n SETTINGS(configuraciones),gireel dial para
seleccionar REMINDER(recordatorio)y presione eldial
para ingresar. Gireeldial para seleccionar REVIEW
REMINDER(revisarrecordatorio)y presioneeldial para
ingresar. La pantalla mostrar@.
29
Page 70

Otras Funciones Advantium
Horno Advuntium
Turntable On/
OFF
(plato giratorio
On/Off)
Auto Night
Light
(luz nocturnu
uutom6ticu)
Utilice esta funci6n para evitar que el plato
giratorio gire cuando usa un plato demasiado
grande para poder girar en la cavidad.
Presione el bot6n SETTINGS(configuraciones),
gire el dial para seleccionar TURNTABLEON/OFF
(plato giratorio encendido/apagado) y presione el
dial para ingresar. Gire el dial para seleccionar
TURNTABLEON (plato giratorio encendido) o
TURNTABLEOFF(plato giratorio apagado) y luego
presione el dial para ingresar.
NOTA:
, El plato giratorio no se desactiva en los modos
cocci6n rapida, asar, tostar o sensor de
Utilice esta funci6n para configurar que la luz
de superficie se encienda y apague a una hora
determinada.
.
Presione el bot6n SETTINGS(configuraciones),
gire el dial para seleccionar AUTO NIGHTLIGHT
(luz nocturna automatica) y presione el dial
para ingresar.
.
Seleccione SETON TIME (configurar para hora)
y presione eldial para ingresar.
3.
Gire el dial para configurar la hora y minutos y
presione el dial para ingresar. Gire el dial para
desactivar la configuraci6n de hora y minutos
y presione eldial para ingresar. Nora: La
configuraci6n de hora se hace en AM/PM.
Para desactivar la luz nocturna autom6tica en
forma permanente, presione el bot6n SETTINGS
(configuraciones), gire el dial para seleccionar
AUTO NIGHT LIGHT(luz nocturna automatica) y
presione el dial para ingresar. Gire el dial para
seleccionar DEACTIVATE(desactivar) y presione el
dial para ingresar.
Para desactivar la luz nocturna autom6tica en
forma permanente, presione el bot6n SETTINGS
(configuraciones), gire el dial para seleccionar
microondas.
Si se selecciona TURNTABLEOFF(plato giratorio
apagado) durante la cocci6n, el plato giratorio
se desactivard hasta el final de este ciclo de
cocci6n. El plato giratorio volver6 a funcionar
en el pr6ximo ciclo de cocci6n y si se utiliza la
funci6n RESUME (reanudar).
Si se selecciona TURNTABLEOFF(plato giratorio
apagado) antes de comenzar a cocinar, el
plato giratorio permanecer@desactivado
para cualquier cocci6n que se inicie en los
pr6ximos 5 minutos. Despu6s de los 5 minutos,
el plato giratorio volver@automcXicamente a
TURNTABLEON(plato giratorio encendido).
AUTONIGHT LIGHT(luz nocturna autom@tica)
y presione el dial para ingresar. Gire el dial
para seleccionar REVIEWON/OFFTIMES(revisar
hora encendido/apagado) y presione eldial
para ingresar. La pantalla mostrarc_la hora
de encendido y apagado de la luz nocturna
automatica.
Nota:
Si se presiona el bot6n SURFACELIGHT(luzde
superficie) mientras se encuentra encendida la
luz nocturna autom@tica, la luz de superficie se
quita de la luz nocturna automatica por esa vez.
El bot6n SURFACELIGHT(luz de superficie) debe
presionarse para apagar la luz de superficie. La
luz nocturna autom@tica se encender@de nuevo
en el pr6ximo horatio programado.
Si la luz de superficie ya se encuentra encendida
cuando la luz nocturna automatica se encuentra
programada para encenderse, la luz de superficie
no utilizarc_las configuraciones de la luz nocturna
automcXica. El bot6n SURFACELIGHT(luz de
superficie) debe presionarse para apagar la
luz de superficie. La luz nocturna autom@ica
se encenderc_de nuevo en el pr6ximo horatio
programado.
Temperature
Units
(unidudes de
temperoturo)
Delay Start
(inicio
returdudo)
30
Para cambiar las unidades de temperatura,
presione el bot6n SETTINGS(configuraciones) y
seleccione TEMPERATURE UNITS(unidades de
temperatura). Gire el dial para seleccionar Fo Cy
presione el dial para ingresar.
Utilice esta funci6n de retardo cuando el homo
comienza a cocinar en CONVBAKE(hornear por
convecci6n), COOKBYTIME(cocinar por tiempo),
COOKBYTIME 1&2 (cocinar por tiempo 1&2),
DEFROSTBYTIME(descongelar por tiempo), o
DEFROSTBYWEIGHT(descongelar por peso).
1. Presione el bot6n COOKINGOPTIONS(opciones
de cocci6n).
2. Gire el dial para seleccionar DELAYSTART(inicio
retardado) y presione el dial para ingresar.
3.
Gire el dial para configurar la hora y minutos
de la hora de inicio y presione el dial para
ingresar. NOTA:La configuraci6n de hora se
hace en AM/PM.
4. Configure el modo de cocci6n.
Elhomo comenzar@ el modo de cocci6n
programado cuando la hora actual y la hora de
inicio retardado sean la misma.
Page 71

Otras Funciones Advantium
Horno Advantium
Help
(ayuda)
Utilice esta funci6n para saber mds
acer-ca de su homo y sus funciones.
1. Presione la tecla HELP.
2. Gire el dial para escoger el
nombrede la funci6n. Presione el
dial paraseleccionar.
Caracteristicas que encontrar6 en lafunci6n HELP layudaL.
Agregar tiempo
Conversi6n Autom6tica
Luz Nocturna Autom6tica
Regresso
Volumen del Pito
Bebidas
Asar
Borrar/Apagar
Reloj
Bloqueo del Control
Hornear con Convecci6n
Cocinar
Cocinar par Tipo de Co-
mida
Cocinar con Tiempo
Cocinar con Tiempo 1 y 2
Opciones de cocimiento
Descongelaci6n
Descong. par Comida
Descong. con Tiempo
Descong. par Peso
Inicio demorado
Pantalla ON/OFF
Editar
Ayuda
Derretir
Micro BO Segs
Microonda
Mis Recetas
Fermentar
Recalentar
Recordatorio
La pantalla le mostrar6 una
descripci6ndel programa que
seleccion6.
Repetir el Oltimo
Reanudar
Cocimiento con sensor
Cocimiento lento
Ablandar
Cocimiento r6pido
Inicio/PAUSA
Unidades de temperatura
Cron6metro On/Off
Tostar
Plato Giratorio ON/OFF
Calentar
Control lock-out
(bloqueo del control)
Timer
(cron6metro)
Automatic fans
(ventiladores
autom6ticos)
Puede bloquear el panel de control
para evitar que enciendan el homo
accidentalmente durante la limpieza o
paraque no Io utilicen los nihos.
Presione y sostenga durante 3
segundoa la tecla CLEAR OFF para
bloqueary desbloquear.
Utilice esta funci6n coda vez que
necesi-te un cron6metro. Lo puede
utilizar mientras cocina en el homo.
1. Presione la tecla TIMER.
Los ventiladores de enfriamiento se
en-cienden autom6ticamente para
evitar elsobrecalentamiento de los
componentesinternos del homo y del
control.
Losventiladores se apagar6n autom6ti-
camente cuando se enfrien las
piezasinternas. Uno o mds pueden
permane-cer encendidos durante 5
minutos o m6s, despu@sde que el
control del homo se haya apagado.
Cuando el panel de control est6
bloqueado, cada vez que presiona
una tecla o eldial se mostrar6 en la
pantalla CONTROL IS LOCKED (control
est6 bloqueado).
2. Gire el dial para escoger los minu-
tos. Presi6nelo para seleccionar.
3. Gire el dial para escoger los segun-
dos. Presi6nelo para seleccionar.
El ventilador del respirador se
puede en-cender autom6ticamente
si el homo secalienta demasiado,
aOn cuando no est6funcionando.
La pantalla mostrar6: "Nor-mal
Operation: Fan is on due to high
heat.Fan will shut off automatically."
(Opera-ci6n Normal. Elventilador
est6 encen-dido debido al calor
alto. El ventilador se apagar6
autom6ticamente.)
31
Page 72

Cuidado y Limpiezo
Homo Advuntium
Surface Light
(luz de superficie)
Vent Fan
(ventilador del
respirador)
C6mo limpiar
el interior del
homo
Seutiliza para iluminar la plancha.
Presione la tecla SURFACELIGHT(luz
de superficie) para cambiar deluz
nocturna a luz apagada.
El respirador del ventilador retira
los vapores de la superficie de
cocimiento.
Presione la tecla VENT FAN para
cambiar de alto, a medio, a bajo,
aapagado.
El ventilador del respirador se puede
encender autom6ticamente si el
Antes de limpiar cualquier parte
delhorno aseg6rese que el control del
horno est_ apagado y que est_ frio o
tibio al tacto.
Limpie el interior del homo frecuente-
mente para que pueda calentar ade-
cuadamente.
homo secalienta demasiado, a0n
cuando no est6funcionando. La
pantalla mostrar6: "Normal Operation:
Fan is on due to high heat.Fan will
shut off automatically." (Operaci6n
Normal. El ventilador est6 encendido
debido al calor alto. El ventilador se
apagar6 autom6ticamente.)
Algunas salpicaduras pueden ser
removidas con papel toalla, otras
requieren un paso tibiojabonoso.
Remueva las salpicaduras de grasacon
un paBo jabonoso, luego enjuague con
un paso h0medo.
Si el sucio y las salpicaduras no
salenf6cilmente con un paso tibio jabo-
noso, coloque un taz6n mediano Ileno
de agua adentro de la unidad, sobre
la bandeja de metal y presionela tecla
SPEEDCOOK. Seleccione MY RECIPES
y ajuste 10 minutos a U=S, L=3, IVl=7.
Esto debeafiojar el sucio adentro del
homo demanera que Io pueda remover
conun paso tibio jabonoso.
Siobserva un amarillentamiento
enel metal adentro del homo que no
puede ser removido con un pa_otibio
jabonoso, utilice un limpiadorpara
acero inoxidable que remuevela
decoloraci6n por calor y/o manchas.
Puedelimpiar elinterior del homo como
Io haria normalmente.
No utilice limpiadores abrasivos
niutensilios filosos en las paredes
delhorno.
I
Nunca utilice limpiadores comerciales
para hornos en ninguna parte de
suhorno.
No limpie el interior del homo con
estro-pajos de metal. Se pueden
quebrar pe-dazos del estropajo adentro
del horno,causando un toque el6ctrico,
asi comoda_o al acabado de la
superficie interiordel horno.
32
Page 73

Cuidado y Limpieza
Horno Advantium
Plato giratorio
removible
Bandejas de
cocimiento y
parrilla de alambre
del homo
El drea debajo del plato giratorio debe
lim-piarse frecuentemente para evitar
oloros y humo durante el ciclo de
cocimiento.
El plato giratorio se puede quebrar si
Iodeja caer. Ldvelo con cuidado en
aguatibia yjabonosa. S6quelo bien y
col6-quelo en su lugar.
Para colocar el plato giratorio, coloque
elcentro sabre el eje en el centro del
hornoy girelo hasta que est6 colocado
en sulugar.
Para evitar que se quiebren,
permitaque las bandejas se enfrfen
comple-tamente antes de limpiarlas.
Lave concuidado en agua caliente
jabonosa oen la lavadora de platos.
Bandeja de vidrio clara
Plato giratorio
No utilice el homo sin el
platogiratorio en su lugar.
No utilice abrasivos para limpiar la
bande-ja de vidrio ni la parrilla de
alambre delhorno, ya que se puede
da_ar el acabado.
Se debe utilizar un estropajo pldstico
paralimpiar las bandejas de metal.
Bandeja de metal
L6mina de mica Para limpiar la I@mina de mica:
Permitaque el homo se enfrie
completamente.Limpie con un pa_o
tibia jabonoso.
Parrilla de alambre del homo
Mica Sheet
33
Page 74

Cuidodo y Limpiezo
Homo Advuntium
C6mo limpior el
exterior del horno
No recomendamos el uso de limpia-
dores con amoniaco o alcohol, ya
que pueden da_ar la apariencia del
homo. Si escoge utilizar un limpiador
casero com_n, aplique primero el
limpiador directamente en el pa_ode
limpieza, luego limpie el 6rea sucia.
caja
Limpie el exterior del microonda con
un paBojabonoso. Enjuague y seque.
Limpie el vidrio con un paso h0meda.
Panel de Control
Limpie con un pa_o h0medo. Seque
completamente. No utilice limpiadores
en espray, grandes cantidades de
jab6n y agua, abrasivos u objetos
filosos en el panel- estos Io pueden
da_ar. Algunos tipos de papel toalla
tambi6n pueden rayar el panel de
control.
Superficies de Acero Inoxidable
(en algunos modelos)
Puedelimpiar el panel de acero
inoxidable con Stainless Steel Magic
o un producto similar, con un pa_o
limpio y suave. Aplique con cuidado
el limpiador de acero inoxidable,
evite las piezas pl6sticas y de
vidrio de alrededor. No utilice en el
aceroinoxidable cera para aparatos,
pastas, blanqueadores o productos
que contengan cloro.
Paneles PI6sticos de Color
(en algunos modelos)
Utilice un paso limpio, suave,
ligeramente humedecido, luego seque
completamente.
Sello de la Puerta
Es importante mantener limpia el
drea donde sella la puerta con el
homo. Utilice detergentes suaves,
no-abrasivos aplicados con un pa_o o
esponja. Enjuague bien.
Parte Inferior
C6mo
reemplazar
la luz de
superficie
1. Para cambiar la luz de superficie,
primero desconecte la energia
en el fusible principal o panel del
interruptor automdtico.
.
Retire el tornillo del interior de la
cubierta del compartimiento de la
luz y bdjela basra que se detenga.
.
Antes de retirar el bombillo que va
acambiar, asegOrese que est6 fifo.
H61elo suavemente del receptdculo
Cdmbielo par un bombillo hal6geno
de 150 voltios, 50-watts. Ordene
el bombilloWBO8XlOO51 de su
distribuidor GE.
4. Levante la cubierta y coloque el
tornillo. Conecte la electricidad al
horno.
Limpie regularmente la grasa y el
polvo de la parte de abajo. Utilice una
soluci6n de agua tibia con detergente.
Retire e tornillo
34
Page 75

Cuidado y Limpieza
Homo Advantium
Retiro y
limpieza de
los filtros
C6mo
reemplazar
la luz de la
cavidad
.
Losfiltros de metal atrapan la grasa
que sueltan losalimentos en la
plancha. Tambi@nevitan que las
llamas de losalimentos en la plancha
darien elinterior del homo.
.
Por esta raz6n, los filtros deben estar
colocados en su lugar siempre que
utiliza el extractor. Los filtros del
respirador deben limpiarse una vez al
meso cuando sea necesario.
.
Para retirarlos, utilice las orejetas para
deslizarlos hacia la parte de atrcis.
Hale hacia abajo y hacia afuera.
.
Desconecte la energ[a en el fusible
principal o panel del interruptor
autom@ico.
2.
Retire la parrilla superior, retire los dos
tornillos que la sostienen en su lugar.
.
Retire el filtro de carb6n, si Io tiene.
Desl[celo hacia la izquiercta y hBlelo
hacia el frente para retirarlo. NOTA: El
filtro de carb6n es un kit opcional, no
es necesario tenerlo.
.
Retire el tornillo que sostiene el
protector de la I(_mpara en su lugar.
.
Paralimpiar losfiltros del respirador,
rem6jelosy luegosacOdalosenagua
caliente yjab6n. No utilice amon[aco
ni productos con amon[aco ya que
pueclenoscurecerel metal. Lopuede
cepillar suavemente para remover
elsuciopegado.
.
Antesde colocarlosenjuciguelos,
sacOdalosy d@jelossecar.
.
Paracolocarlos, deslice losfiltros
adentro delas ranuras del marco en
la parte de atrcis de cada abertura.
Presionehacia arriba y hacia elfrente
para cerrarlos en su lugar.
.
Saque el protector de la 16mpara.
Hale el bombillo afuera y cBmbielo
pot una kimpara de homo de
Z2OV-Z3OV,20W. Ordene el bombillo
WB25XlO019 de su distribuidor GE.
.
Regresela kimpara y el protector a su
posici6n original y coloque el tornillo y
elfiltro de carb6n.
.
Coloque la parrilla y los 2 tornillos.
Reconecte la energ[a al horno.
Filtro de carb6n
(JX81D - kit
opcional)
Para instalar el
filtro de carb6n
Siel modelo no est6ventilado hacia el
exterior,el aire recircular@a trav@sdel
filtro de carb6n desechable,el cual ayuda
a retirar el humo y los olores.
Elfiltro de carbdn nosepuede limpiar,
debeset cambiado. Ordenela PiezaNo.
WB2X9883de su distfibuidor GE.
Para instalar un filtro nuevo:
1. Retire del filtro nuevo el pl6stico y el
otro envoltorio exterior.
2. Retire la parrilla superior, para eso
debe retirar los dos tornillos que la
sostienen en su lugar.
3. Inserte el filtro adentro de la aber-
tufa superior del homo, como se
muestra.
Elfiltro de carb6n debe cambiarse cuan-
do Io yea sucio o decolorado (general-
mente de 6 a 12 meses, dependiendodel
USO).
4. Descansar6 en un 6ngulo sobre las
dos orejetas de soporte traseras y por
el frente por dos orejetas.
5. Coloque la parrilla y los dos tornillos.
Para retirar el filtro, repita el paso 2
anterior, retire el filtro y repita el paso
5.step 5.
35
Page 76

Consejos poro Io Soluci6n de Problemas
Horno Advantium
LPreguntas?
Utilice este
solucionador
de problemas
Problema Causas Posibles (_u_ se debe hacer / Explicaci6n
LUCES
Se opaca la luz duran- Esto es normal. El nivel
te un ciclo de cocimien- de potencia ha sido redu-
to rSpido y se enciende cido autom6ticamente ya
y apaga, aQn en niveles que el homo est(_caliente.
de potencia completa.
Luz visible alrededor
de la puerta y de la
caja exterior al cocinar
r(_pido.
VENTILADOR
Esto es normal.
• Esto es normal. El horno detecta el-
nivel de calory se ajusta autom@ica-
mente.
• Cuando el horno est6 encendido, hay
una luz visible alrededor de la puerta
y de la caja exterior.
Elventilador continOa Elhorno se est(]enfriando. • Elventilador se apagarciautom@ica-
funcionando despu@s mente cuando las piezas internas del
de terminar decocinar, homo se hayan enfriado.
Elrespirador del horno
emite un aire caliente
mientras el homo
est@encendido.
Elventilador del respi-
rador se enciende auto-
mciticamentecuando el
Esto es normal.
Esto es normal.
• ISila plancha o el horno se calientan, el
ventilador del respirador se enciende.
((Vea la secci6n Ventilador Autom@ico)
homo no est_ en uso.
Elventilador se encien- Estoes normal.
de autom@icamente
cuando se utiliza el
microonda.
El horno hace sonidos
inusuales al cocinar.
Chasquidosy elventilador
soplando son sonidos norma-
les. Eltel@deltablero est6
encendiendo y apagando los
componentes.
Elsonido del ventilador Esto es normal.
cambia al cocinar.
COClMIENTO
Salehumo del homo
cuando se abre la
puerta.
AIfinal del programa
de cocimiento la comi-
da no est6 completa-
mente cocida ni
La comida tiene alto conte-
nido de grasa. Se utiliz6
espray en las panas.
Lostiempos programados
no concuerdan con el ta-
maBo ni la cantidad de co-
mida que va a cocinar.
dorada.
Si se utiliza el horno despu@s de coci-
miento r6pido, el homo detectarci que
est_ demasiado caliente, el ventilador
del respirador se encender(_ para en-
friar el horno.
Estos sonidos son normales.
• Elventilador se enciende y apaga
durante el cocimiento para mantener
la temperatura.
• Elhumo esnormal al cocinar comidas
con mucha grasa. Utiliceaceite vege-
tal o de oliva en la came, en lugar de
cubrir toda la pana.
• Aumente o disminuya el tiempo para
cocinar o ajuste las kimparas superior
e inferior para dorar.
36
Page 77

Consejos poro Io Soluci6n de Problemas
Horno Advantium
¢Preguntas?
Utilice este
solucionador
de problemas
Problema Causas Posibles Qu_ se debe hacer / Explicaci6n
DISPLAY
La pantalla est6 en La pantalla est6 apagada. , Revise el ment] de SETTINGS para los
blanco, ajustes del reloj. Encienda la pantalla.
Aparece en la pantalla El control est6 bloqueado. , Presione y sostenga CLEAR/OFF duran-
"Control Panel te 3 segundos para desbloquear el con-
LOCKED" trol. Yea la secci6n Otras Funciones.
La pantalla
delcontrol est6
encendida pero el
homo no arranca.
Elreloj no est(_programado. • Siga las instrucciones para programar
ei reloj.
Lapuerta no est(_cerrada. • Abra la puerta y ci@relasegura.
Nose presion6 la tecla • Siga las instrucciones.
START/PAUSEdespu@sde
seleccionar el cocimiento.
Seseleccion6 accidental- • PresioneCLEAR/OFFy vuelvaa
mente el Inicio Demorado. ajustar.
Elhomo estB enel modo • Desenchufeel homo pot 1 minuto, luego
de demostraci6n, ench0felo en la pared. NOprograme el
reloj. Presioney sostenga durante 3 se-
gundos lasteclas HELPy START/PAUSE.
Elcontrol debesalir del modo de demos-
traci6n. Programe el reloj y contin0e.
Se presion6 accidental- • Reajuste el programa de cocimiento
mente CLEAR/OFF y presione START/PAUSE
OTROS PROBLEMAS
Lapuertayel interior Elhornoproduce uncalor
del homo sesienten intenso en espacios pe-
caliente, queBos.
El piso del homo est_
tibio, aOn cuando no
ha sido utilizado.
Laluzde la plancha est6
ubicada debajo del piso
del homo. Cuando seen
ciende,el calor que produce
puede calentar el piso del
homo.
Elhorno no arranca.
Se pudo haber quemado
un fusible o disparado el
interruptor autom@ico de
su casa.
Sobrevoltaje • Desenchufe el horno y enchOfelo de
Elenchufe no est6 comple- • Aseg0rese que el enchufe del horno
tamente insertado en el en est@completamente insertado en el
chufe de la pared, enchufe de la pared.
• Esto es normal.
• Cuando la comida est@lista, utilice
guantes para retirarla.
• Esto es normal.
• Cambie el fusible o reajuste el interrup-
tor autom@ico.
nuevo.
La bandeja de vidrio
del microonda no se
traba en el eje cen-
tral.
Alinee los salientesen la parte de abajo
de la bandeja devidrio para el micro-
onda con las indentaciones en el plato
giratorio. Esteajuste no queda apreta-
do,es normal algo de movimiento.
37
Page 78

Not(]
Homo Adv(]ntium
38
Page 79

Garantfa del Horno Advantium
Horno Advantium
Todo el servicio de gamntia se suministra par media de
nuestrosCentros de Servicio de Fdbrica o un tdcnico autorizado
porCustomer Care@. Para programar un servicio, en-lfnea,
visftenosen GEAppliances.com o Ilame a 800.GE.CARES
(800.432.2737). Cuando so-licite servicio par favor tenga
disponible el nOmero de serie y modelo.
Engrape aqui su recibo.
Para que la garantia cubra
Iosservicios se necesita
elcomprobante original de
lafecha de compra.
Para el Perfodo de: GE Cambiar6:
Un Aria
Dela fecha dela
compra original
Cualquier pieza del horno que falle debido a defectos en los materiales
o en la fabricaci6n. Durante esta garantia limitada de un aria, GEtam-
bi6n suministrarc_,sin costa alguno, toda mano de obra y servicios rela-
cionados con el cambio de la pieza defectuosa.
Cinco ASos Eltuba del magnetr6n, si este falla debido a defectos en los materiales
Dela fecha de la o en la fabricaci6n. Durante esta garantfa limitada de cinco ahos, usted
compra original serd responsable de toda mano de obra y costos de sevicio en su casa.
Lo ue GE no cubre:
[] Viajes de servicio o su casa para enseSarle a [] Cambio de los fusibles de la casa o
utilizar el producto, reajuste del interruptor autom6tico.
[] Instalaci6n, entrega o mantenimiento inade-
[] Cambio de los bombillos de la plancha.
cuados.
[] Do_o al producto causado par accidente,
[] Producto no accesible para dorle el servicio
requerido.
[] Falla en el producto si_ste es maltratado,
mal usado (par ejemplo, chispas en la cavi-
dad de la parrilla de alambre o metal/alumi-
fuego, inundaciones o caso fortuito.
[] Da_o incidental o consecuente causado
par posibles defectos con este aparato.
[] Da_o causado despu_s de la entrega.
nio), o si es utilizado para otto fin qua no sea
el pretendido o si se utiliza comeraalmente.
EXCLUSION DE GARANTIAS IMPLICITAS--Su (snico y exclusivo derecho es reparar el
producto como se establece en esta Garantia Limitada. Cualquier garantia implicita,
incluyendo las garan-tias implicitas de comercializaci6n o adecuaci6n para un
prop6sito especifico, est6 limitada a un afio o el periodo m6s corto que permite la
ley.
Esta garantia se extiende al comprador original y cualquier dueho posterior para productos
com-prados para usa domdstico dentro de los EUA. Si el producto se encuentra en una regi6n
donde no hay Servicio T4cnico autorizado de GE,usted serd responsable del costa del viaje
o se le soli-citard que Ileve el producto a un Servicio T4cnico Autorizado de GE. En Alaska, la
garantfa exclu-ye el costa de envfo o visitas de servicio en su hogar.
Algunos estados no permiten la exclusi4n o limitaci6n de dahos incidentales o consecuentes.
Esta garantfa le otorga derechos legales especfficos y tambi4n puede cantor con otros dere-
chos qua vaffan de estado a estado. Para conocer sus derechos legales, consulte a la oficina
local del consumidor o de su estado o al Fiscal General de su estado.
Garante: General Electric Company. Louisville, KV 40225
39
Page 80

Soporte al consumidor.
PdginaWeb de GEAppliances GEAppli(]nces.com
_LTiene(]lgun(] pregunt(] sobre su electrodom6stico? iPruebeI(]pc_gin(]Web de GEAppliances 24 hor(]s (]1dk],
cu(]lquier dfa del (]ho! P(]r(]mayor convenienci(] y servicio mc_src_pido,y(] puede desc(]rgar los IVk]nualesdelos
Propiet(]rios,pedir piez(]so incluso h(]cerun(]cit(] en I[ne(]p(]r(]queveng(]n (] re(]liz(]run(] rep(]r(]ci6n.
Solicite un(] repar(]ci6n GEAppli(]nces.com
Elserviciode expertos GEest(_o tan s61oun pasode su puert(],iEntreen I[neay solicitesu rep(]r(]ci6n cu(]ndo
le veng(] bien 24 hor(]s (]1d[(] cu(]lquier dk] del (]ho! O II(]me(]1800.GE.CARES(800.432.2737)dur(]nte horus
norm(lies de oficin(].
RealLifeDesignStudio(Estudiodedise_op(]ralavid(]real)
GE(]poy(] el concepto de Disefio Univers(]l-productos, serviciosy (]mbientes que pueden us(it gente de tod(]s
I(]sedodes, t(]m(]fios y c(]p(]cid(]des.ReconocemosI(] necesid(]d de dise_(]r p(]r(] un(] gr(]n gum(] de h(]bilid(]des
y dificult(]desfisic(]sy ment(]les. P(]r(]m(_sdet(]llescobre I(]s(]plic(]cionesde GEDise_oUniversal,incluyendo
ideasde dise_o p(]r(] I(]cocin(] p(]r(] personas con disc(]p(]cid(]des,mire nuestr(] p(_gin(]Web boy mismo. P(]r(]
personas con dificult(]des (]uditiv(]s,favor de II(]m(]r(]1800.TDD.GEAC(800.833.4322).
GEAR__pli(]nces.com
Garantk]s ampliadas GEAppli(]nces.com
Compre un(] g(]r(]nt[(](]mpli(]d(]y obteng(] det(]lles sobre descuentos especi(]lesdisponibles mientr(]s su g(]r(]nt[(]
est(_(]On(]ctiv(]. Puedecompr(]rl(] enline(]en cu(]lquier momento, o II(]m(]r (]1(800.626.2224)dur(]nte hor(]s
norm(]les de oficin(]. GEConsumer Home Servicesest(]r(_(]On(]hi cu(]ndo su g(]r(]nt[(]termine.
Piez(]sy (]ccesorios GEAppli(]nces.com
Aquellosindividuos con I(]c(]lific(]ci6n neces(]ri(]par(] rep(]r(]r sus propios electrodom_sticos pueden
pedir que se lesm(]nden I(]spiez(]so (]ccesoriosdirect(]mente (]sus hog(]res ((]cept(]mos I(]st(]rjet(]s
VISA,M(]sterC(]rdy Discover).H(]g(]su pedido en line(] boy, 24 hor(]s c(]d(] d[(]o II(]m(]r por tel6fono
(]1800.626.2002dur(]nte hor(]s norm(]les de oficin(].
L(]sinstrucciones descrit(]sen este manual cubren los procedimientos (]seguir por cu(]lquier usu(]rio. Cu(]lquier
otr(] rep(]r(]ci6n deber[(],por regl(] general, referirse(] personal c(]lific(]do(]utoriz(]do. Debe ejercerse prec(]uci6n
y(] que I(]srep(]r(]cionesincorrect(]s pueden c(]us(]rcondiciones de funcion(]miento insegur(]s.
P6ngase en cont(]cto con nosotros GEAppliances.com
Sino est(_s(]tisfechocon el servicio que recibe de GE,p6ng(]seen cont(]cto con nosotros en nuestr(] pc_gin(]
Web indic(]ndo todos losdet(]llesas[como su n0mero de tel6fono o escr[b(]nos(]:
General Manager, Customer Relations
GEAppliances,Appliance Park
Louisville,KY40225
Registre su electrodom6stico GEAppliances.com
iRegistresu nuevo electrodom6stico en I[ne(]-cu(]ndo usted prefier(]! Elregistrar su producto (] tiempo le
proporcion(]r(_,si surgier(] I(]necesid(]d,un(] mejor comunic(]ci6n y un serviciom(_src_pidob(]jo lost6rminos de
su g(]r(]nt[(].T(]mbi6n puede envi(]r su t(]rjet(] de registro pre-impres(] que se incluye en el material
de emb(]l(]je.
Printed in Korea
 Loading...