

Page 1
For Customer Assistance Please Call: 1-877-556-0973
840092300
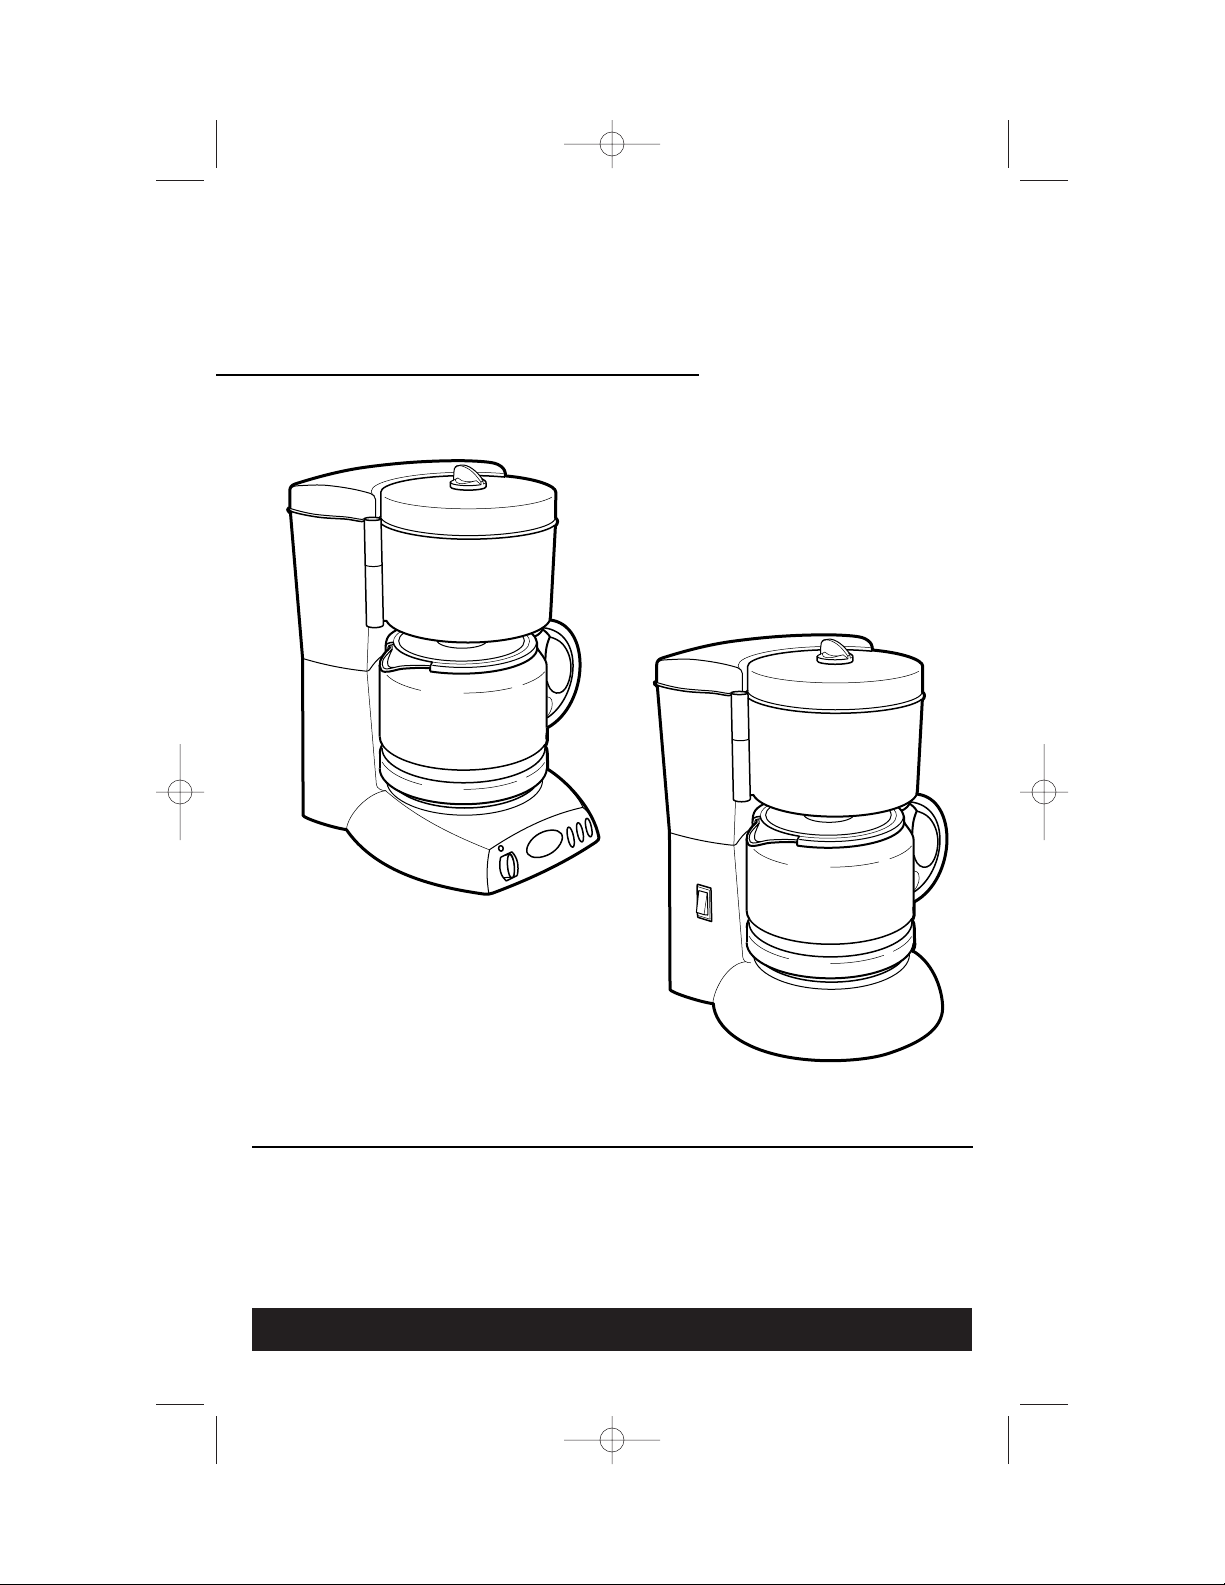
Coffeemaker
g
Coffeemaker Safety................................ 2
Parts and Features.................................. 3
Using Your Coffeemaker ...................... 4
Optional Features.................................... 5
Cleaning .................................................... 7
Troubleshooting ...................................... 9
Customer Assistance .......................... 10
Digitally signed by A. Creery
cn=A. Creery, c=US
Date: 2002.01.04 09:13:06 -05'00'
Reason: I am approving this document
5.5"x8.5"; 20 pg.; English/French; black ink; no bleed; saddlestitch;
flip.
840092300 Ev00 12/21/01 2:40 PM Page 1
Page 2

IMPORTANT SAFEGUARDS
SAVE THESE INSTRUCTIONS!
When using electrical appliances, basic safety precautions should always be followed to reduce
the risk of fire, electric shock, and/or injury to persons, including the following:
1. Read all instructions.
2. Do not touch hot surfaces. Use handles or
knobs. Care must be taken, as burns can
occur from touching hot parts or from
spilled, hot liquid.
3. To protect against electric shock, do not
place cord, plug or coffeemaker in water
or other liquid.
4. Close supervision is necessary when any
appliance is used by or near children.
5. Unplug from outlet when either the
coffeemaker or clock is not in use and
before cleaning. Allow to cool before
putting on or taking off parts and before
cleaning the appliance.
6. Coffeemaker must be operated on a flat
surface away from the edge of counter to
prevent accidental tipping.
7. Do not operate any appliance with a
damaged cord or plug, or after the
appliance malfunctions or is dropped
or damaged in any manner. Call our
toll-free customer assistance number for
information on examination, repair, or
adjustment.
8. The use of an accessory not evaluated for
use with this appliance may cause injuries.
9. Do not use outdoors.
10. Do not let cord hang over edge of table
or counter or touch hot surfaces,
including stove.
11. The carafe is designed for use with this
coffeemaker. It must never be used on
a range top or in a microwave oven.
12. Do not set a hot carafe on a wet or cold
surface.
13. Do not use a cracked carafe or one with
a loose or weakened handle.
14. Do not clean carafe with cleansers, steel
wool pads, or other abrasive cleaners.
15. Be certain carafe lid is securely in place
during brew cycle and when pouring
coffee. Do not use force when placing
lid on carafe.
16. Do not place coffeemaker on or near
a hot gas or electric burner or in a
heated oven.
17. To disconnect coffeemaker, turn
controls to OFF; then remove plug from
wall outlet.
18. Warning: To reduce the risk of fire or
electric shock, do not remove the bottom
cover. No user serviceable parts are inside.
Repair should be done by authorized
service personnel only.
19. Do not use appliance for other than
intended use.
This appliance is intended for household
use only.
This appliance is equipped with a polarized
plug. This type of plug has one blade wider
than the other. The plug will fit into an
electrical outlet only one way. This is a safety
feature intended to help reduce the risk of
electrical shock. If you are unable to insert
the plug into the outlet, try reversing the
plug. If the plug should still fail to fit,
contact a qualified electrician to replace
the obsolete outlet. Do not attempt to defeat
the safety purpose of the polarized plug by
modifying the plug in any way.
The length of the cord used on this
appliance was selected to reduce the hazards
of becoming tangled in, or tripping over a
longer cord. If a longer cord is necessary an
approved extension cord may be used. The
electrical rating of the extension cord must
be equal to or greater than the rating of the
coffeemaker. Care must be taken to arrange
the extension cord so that it will not drape
over the countertop or tabletop where it can
be pulled on by children or accidentally
tripped over.
To avoid an electrical circuit overload, do
not use another high wattage appliance on
the same circuit with your coffeemaker.
Coffeemaker Safety
Consumer Safety Information
2
840092300 Ev00 12/21/01 2:40 PM Page 2
Page 3
3
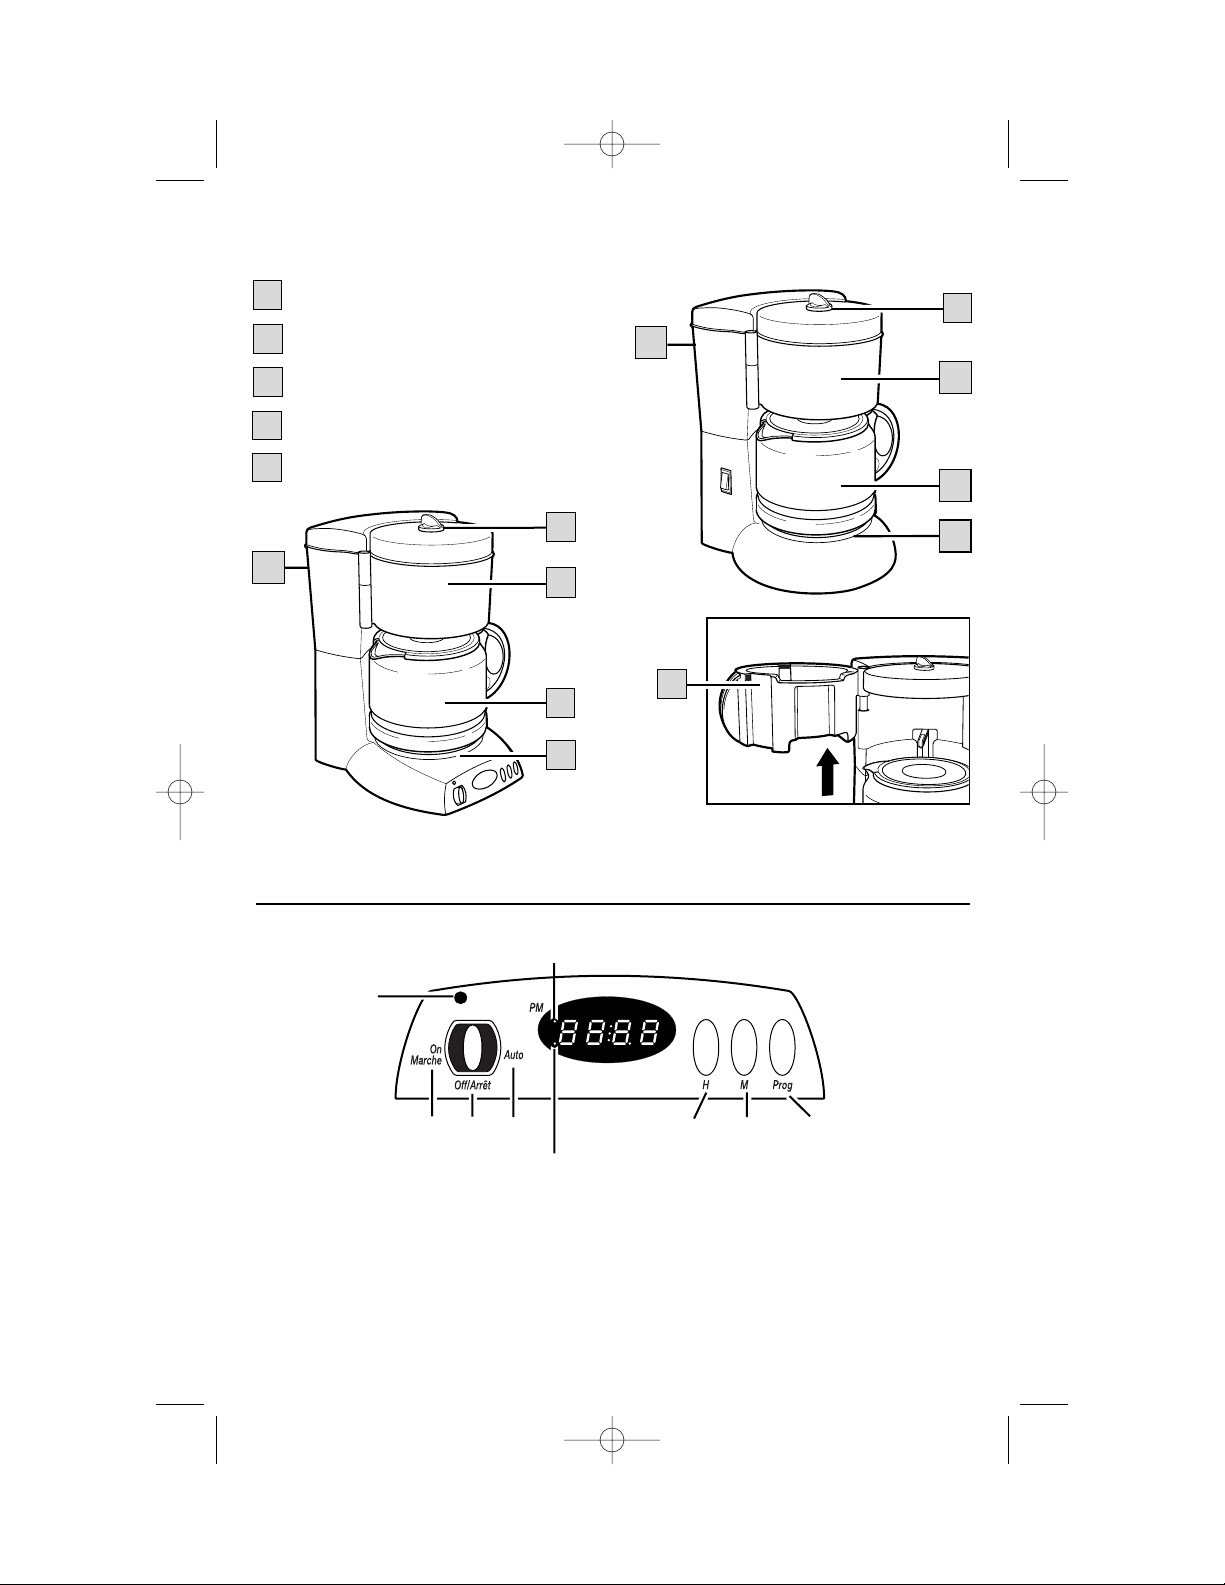
Reservoir
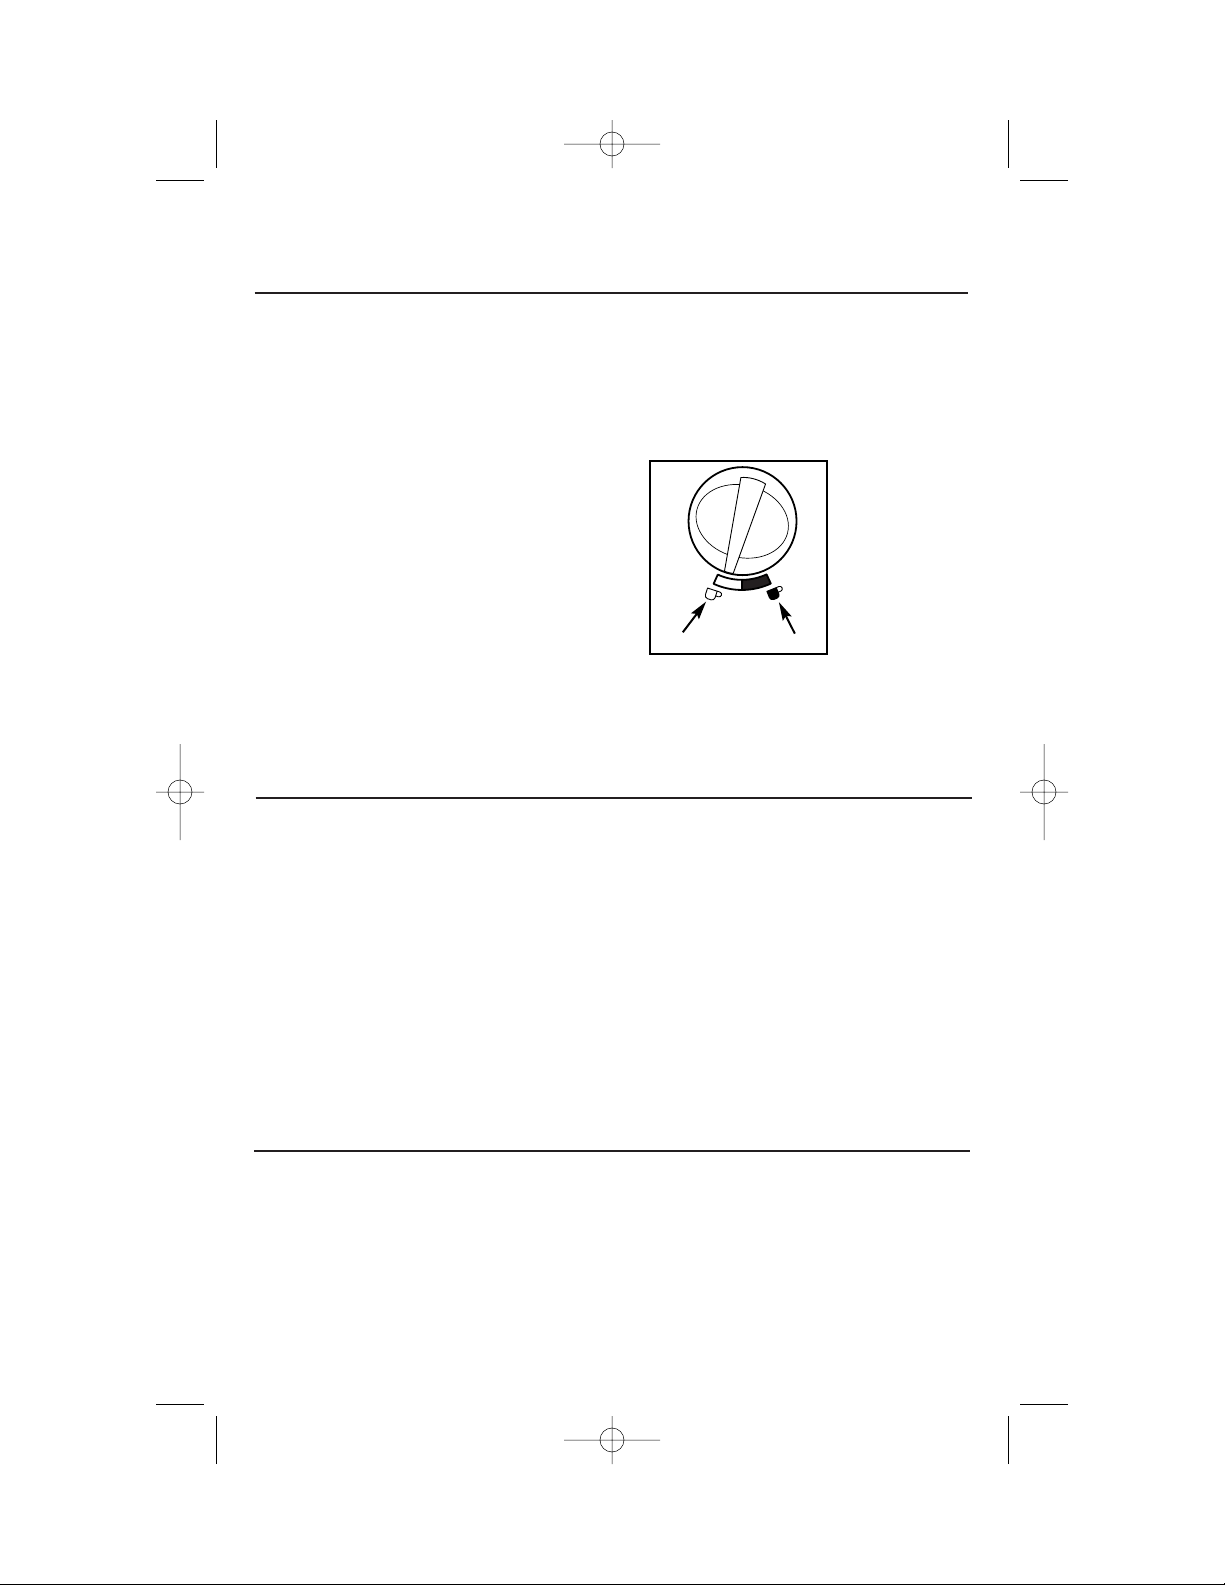
Brew Select Knob
Swing-Open Filter Basket
Carafe
Keep-Hot Plate
Parts and Features
1
1
2
3
4
3
5
4
3
5
4
Clock model features 2-hour
Automatic Shutoff
3
5
2
2
1
Control Panel (for clock model)
Hour
Minute
Program
On
Off
Auto
On Indicator
PM Indicator
Automatic Brew Indicator
840092300 Ev00 12/21/01 2:40 PM Page 3
Page 4
4
Tips to Brew Good Coffee
1. Plug in coffeemaker. The numbers
on the clock will flash until the time
is set or the coffeemaker is turned on.
2. Press the H button until the current
hour is displayed. A red dot will glow
to indicate PM. Press the M button
until the current minute is displayed.
The clock is now set.
3. To program coffeemaker to automatically begin brewing, press and hold
the Prog button while pressing the
H button to set hours and then press
the M button to set minutes
until the
desired brew time is displayed.
4. To have coffeemaker automatically
begin brewing, move the switch from
Off to Auto. A red dot will glow in
the lower left corner to indicate
the coffeemaker is ready to begin
automatic brewing.
5. The coffeemaker will shut off two
hours after brewing begins.
To Set the Clock and Program Automatic Brew
(clock models only)
Using Your Coffeemaker
1. Plug in coffeemaker and set clock if
clock model. See “To Set the Clock
and Program Automatic Brew.”
2. Before first use, wash carafe. See
“To Clean The Coffeemaker Parts.”
Then run one full carafe of clean
water through a complete cycle by
following steps 6 through 10.
3. To make coffee, swing open removable filter basket. Place disposable
paper filter in filter basket. Use a
good quality cupcake (basket) style
filter, 8 to 12 cup size. A permanent
filter may also be used.
4. For each cup of coffee being made,
place one level measuring tablespoon
of ground coffee into filter.
5. Close filter basket, making sure it is
securely snapped closed.
How To Make Coffee
6. Fill carafe with the desired amount of
cold water. Flip open reservoir cover
and pour into reservoir. Flip reservoir
cover down to close.
7. Place carafe with carafe lid attached
on Keep-Hot
Plate. Select
Mild to Strong
coffee by turning the Brew
Select Knob
to desired
setting.
8. Turn coffeemaker ON.
9. If clock or auto shutoff model, the
coffeemaker will shut off in 2 hours.
10. When finished, turn OFF and
unplug.
Quality coffee comes from quality
ingredients. For the best coffee, you
should start with freshly ground coffee
from freshly roasted beans. The beans
can be purchased and stored in an
airtight container. Just prior to brewing,
remove the amount needed and grind
the beans. Once the bean is broken, the
intense, rich flavor begins to deteriorate.
The amount of coffee to water depends
upon personal preference. One tablespoon
of ground coffee per cup is recommended.
Mild Strong
840092300 Ev00 12/21/01 2:40 PM Page 4
Page 5
5
If using a blade-type coffee grinder,
shake it occasionally during grinding to
redistribute the whole beans for a more
uniform grind. Experiment to find the
right grind for your coffeemaker and
taste. If the beans are ground too finely,
it will produce a bitter taste. If ground
too coarsely the coffee will taste weak
and watery.
Some specialty coffees recommend
using more than one tablespoon of
ground coffee per cup. Your new
coffeemaker is designed to brew good
quality coffee using less amounts of
ground coffee. One level tablespoon of
ground coffee per cup is recommended.
Of course, the amount of ground
coffee used depends upon your
personal preference.
The quality of your drinking water will
affect the flavor of your coffee. If you
do not drink water straight from the
tap, do not use it to make coffee. If your
water has an off-taste or smell, or if you
have extremely hard water, use bottled
drinking water or filtered water to make
coffee. If the water is from the tap, it
should be freshly drawn and cold for
the best coffee flavor.
Automatic coffeemakers generally use
a 5-ounce cup size. The coffeemaker’s
carafe and reservoir are marked in
“cups” for easy measuring.
Try different flavored coffees and
flavored creamers available at supermarkets
or specialty coffee stores. Regular coffee
can be flavored at home. Add a sprinkle
of cinnamon* or a drop of a pure
extract–like almond, vanilla, or mint–to
the ground coffee before brewing. For a
mocha flavor, stir a spoon of chocolate
syrup or instant cocoa mix to each cup
of brewed coffee.
* (Too much cinnamon may clog the
filter causing basket overflow.)
Optional Features
(available on selected models)
10-Cup Removable Water Reservoir
Please wash before first use. Hand
wash or place in
top rack of
automatic
dishwasher. The
10-cup reservoir
can be removed
for easy filling
or occasional
washing. Simply
flip open
reservoir
cover
and raise the removable reservoir han-
dle. Lift out the removable reservoir and
fill with water to desired level. Carefully
place removable reservoir back into the
coffeemaker’s reservoir. Make sure the
removable reservoir is fully seated for
proper water flow. When using the
removable reservoir it is only possible to
make a 10-cup pot of coffee, as the
water level marks indicate. To make a
full 12-cup carafe, remove the removable reservoir and fill the coffeemaker’s
reservoir.
This feature allows you to pour a cup of
coffee before the entire brew cycle has
completed. By removing the carafe, the
flow of coffee from the bottom of the
filter basket will stop.
CAUTION: The carafe should be replaced
within 20 seconds. The flow of coffee
will resume when carafe is returned to
the Keep-Hot Plate.
Pause ’N Serve
840092300 Ev00 12/21/01 2:40 PM Page 5
Page 6

6
The Permanent Filter takes the place of
disposable paper filters. Simply place
the Permanent Filter in the filter basket.
Please rinse the Permanent Filter in hot
water before first use. Clean Permanent
Filter under hot running water. Let dry.
Automatic Shutoff
The Automatic Shutoff feature
shuts off the Keep-Hot Plate 2 hours
after brew cycle begins. Always turn
coffeemaker OFF and unplug
when finished.
Permanent Filter
The Permanent Filter can be washed in
the top rack of automatic dishwasher.
NOTE: If grinding coffee in a coffee mill
for use in a permanent filter, do not
grind too finely. This may clog the filter,
causing overflow.
Optional Features
(continued)
How to Make Tea
The tea infusor displaces some of the
water in the carafe so we recommend
making not more than 10 cups of tea.
Before first use of the tea infusor, wash
and rinse.
If you use the unit to make coffee,
make sure that all washable parts of
the coffeemaker have been washed to
remove any coffee residue or taste.
When using tea bags, you may leave
the string attached but remove the
paper label.
Do not use Auto Pause ’N Serve while
brewing tea. Do not remove carafe until
brewing cycle is complete.
1. Plug in coffeemaker and set clock
model.
2. Fill carafe with desired amount of
cold water. Do not exceed the 10-cup
level. Flip open reservoir cover and
pour into reservoir.
3. Place desired amount of tea bags or
loose tea into
tea infusor. If
using tea bags,
gently push
bags to bottom
of tea infusor.
Place inside
carafe as illustrated. Close
carafe lid.
4. Place carafe with carafe lid attached
on Keep-Hot Plate.
5. Press the On button or switch.
6. When the unit has finished brewing
tea, the tea is ready to serve. For
strong tea, let steep for several minutes before serving. To serve, open
the carafe lid and carefully remove
the tea infusor before pouring from
the carafe.
CAUTION: Escaping steam may burn.
Empty infusor immediately to avoid
staining.
840092300 Ev00 12/21/01 2:40 PM Page 6
Page 7

7
TEA CHART
Water Level in Carafe
Standard Tea Bags OR Loose Tea
10 cup 4 10 teaspoons
8 cup 3 8 teaspoons
6 cup 2 6 teaspoons
4 cup 1 4 teaspoons
7. The tea is now ready to serve.
8. If a clock model, the coffeemaker will
shut off in 2 hours. When finished,
press the Off button or switch. Then
unplug.
9. The tea infusor should be washed in
hot, soapy water. Then rinse and dry.
The infusor can also be washed in the
top rack of the dishwasher.
Tea strength is a personal choice. The
following amounts are only guidelines.
Cleaning
1. Place empty carafe on Keep-Hot
Plate. Firmly close filter basket.
2. Pour one pint of plain white vinegar
into the reservoir.
3. Plug in coffeemaker and turn ON.
4. After 30 seconds turn OFF.
5. Wait 30 minutes to allow the vinegar
to clean. Then turn ON again. When
the brew cycle is finished, turn OFF.
To Clean the Inside of the Coffeemaker
6. Empty carafe and rinse. Pour one
carafe of cold tap water into the reservoir. Place carafe on Keep-Hot Plate.
7. Turn ON. When the brew cycle is
finished, empty the carafe. Repeat
this process with one more carafe
of cold tap water.
8. Turn OFF when complete.
9. Wash carafe and filter basket.
1. Unplug coffeemaker and allow to
cool before cleaning.
2. Wipe Keep-Hot Plate with a clean,
damp cloth. Do not use abrasives.
3. Occasionally wipe the water spreader
area, located above the filter basket,
with a clean, damp cloth.
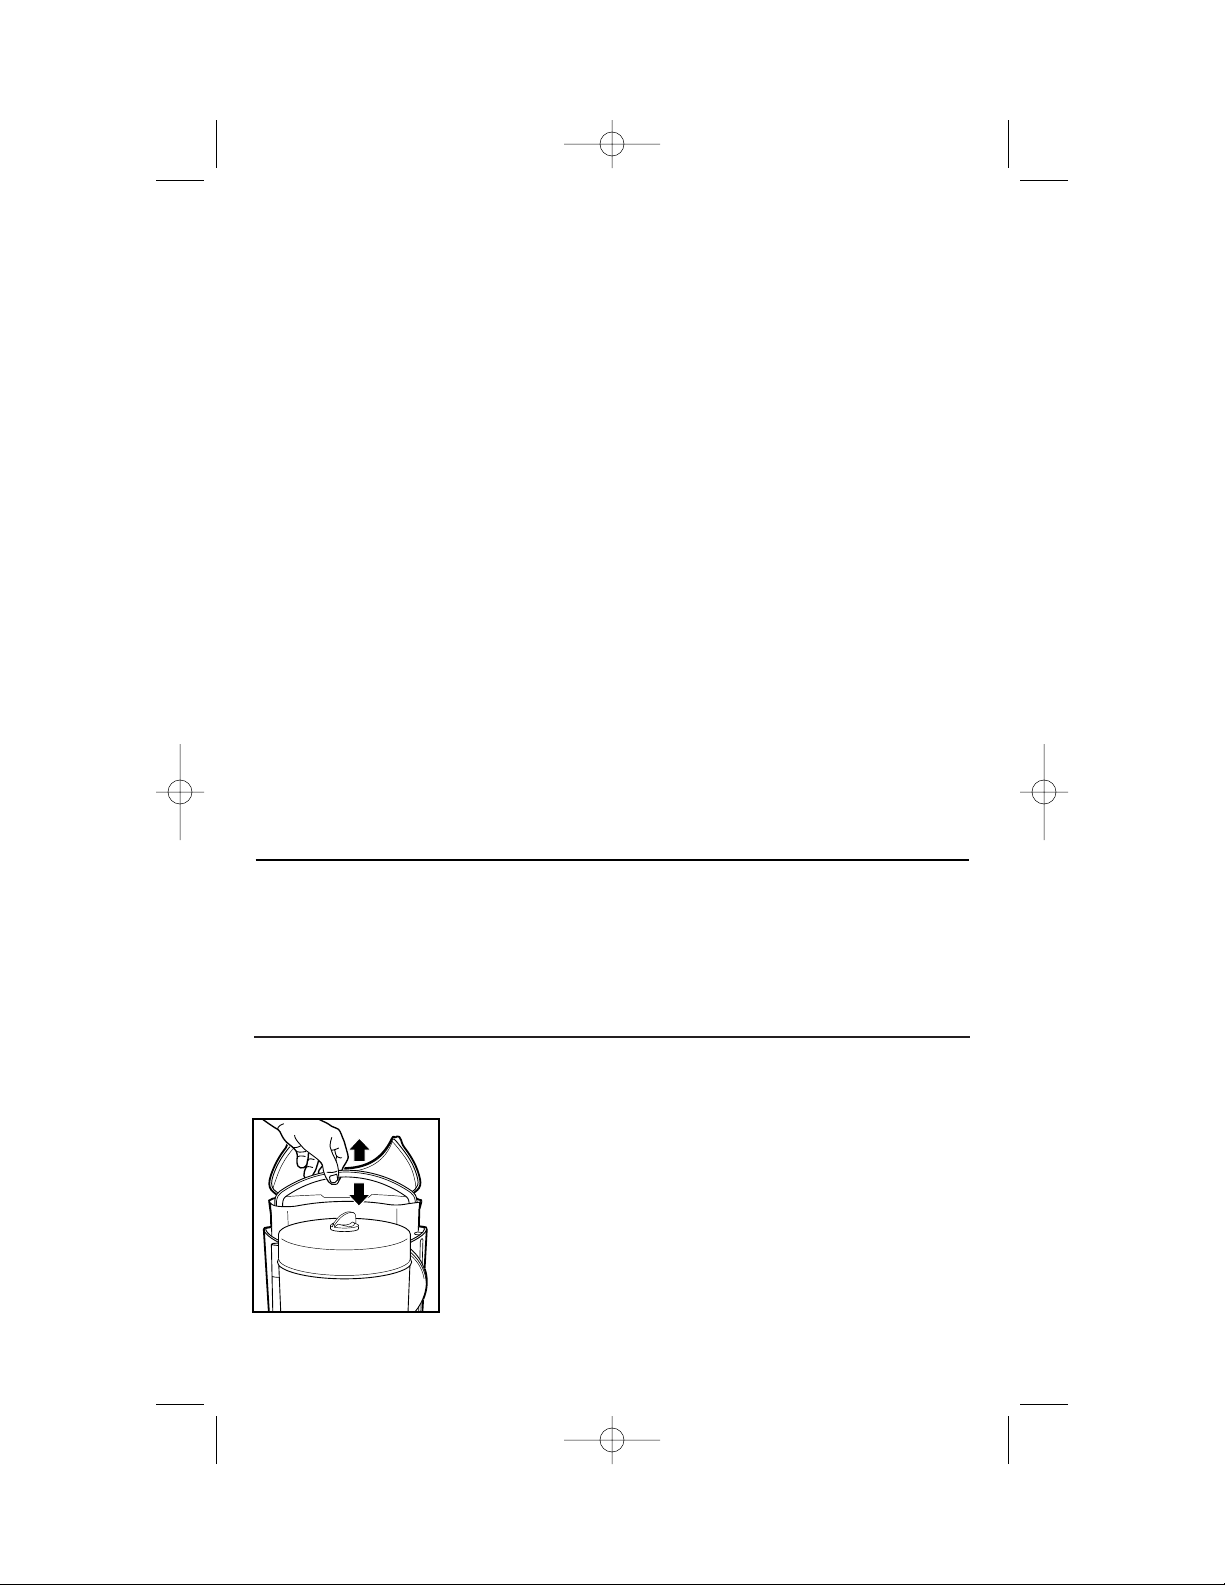
4. To remove the carafe lid, push the
hinge part of the lid to one side,
then twist and lift the other side. The
pin will release from the hinge. Then
remove lid.
To Clean the Coffeemaker Parts
5. The carafe, carafe lid, and removable
filter basket may be washed in the top
rack of automatic dishwasher or in
hot, soapy water. Rinse and dry.
6. To remove stains on the carafe, scrub
with baking soda or a mild cleanser.
For hard-to-remove stains, fill the
carafe with hot tap water and add 2
tablespoons of automatic dishwasher
detergent. Let this sit overnight; then
wash and rinse.
7. All other outside surfaces of the
coffeemaker can be cleaned with a
clean, damp cloth.
840092300 Ev00 12/21/01 2:40 PM Page 7
Page 8

8
Carafe Safety Precautions
• Do not use a cracked carafe or a carafe
having a loose or weakened handle.
• This carafe is designed to be used
only on the Keep-Hot Plate of your
coffeemaker. Do not use on a gas or
electric rangetop, or in a microwave
or conventional oven.
• To avoid breakage, handle carafe with
care. Avoid impact. Glass will break as
a result of impact. Use care when filling
with water to avoid hitting faucet.
• Do not place hot carafe on cool or
wet
surface. Allow to cool before washing
or adding liquids.
• Do not set empty carafe on a hot
heating surface.
• Do not clean carafe with steel wool
pads, abrasive cleanser or any other
materials that may scratch.
This symbol reminds you that glass is fragile and can break which could result in
personal injury.
This symbol alerts you to the potential danger for personal injury if you fail to
read and follow these safety precautions.
• Do not place hands inside carafe.
When handling, be careful if wearing
any hand jewelry, especially diamond
rings. Jewelry can scratch the glass,
which increases possibility of breakage.
• Do not bump, scratch, or boil dry
the carafe.
• Discard carafe if it is cracked,
scratched, or heated while empty for
an extended period of time.
• To avoid accidents, do not pour in the
direction of people.
•
If stirring in the carafe, use only wooden,
plastic, or rubber utensils. Do not use
metal utensils.
• Follow the above safety precautions
carefully to avoid serious burn injuries
which may result if breakage occurs
while carafe holds heated liquids.
840092300 Ev00 12/21/01 2:40 PM Page 8
Page 9

9
Troubleshooting
Most questions you may have about your new coffeemaker can be easily answered.
This handy guide lists some common coffeemaker problems and tells you how to
correct them. If you need further assistance, please call our toll-free customer
assistance
number listed on the front cover of this booklet and found on the back of the
coffeemaker.
Doesn’t brew or
won’t heat.
Filter Basket or
Pause ’N Serve
overflows.
To Correct Problem
Longer than
normal brew time.
Problem
• Check to be sure power cord is firmly plugged into a live
power outlet.
• The Automatic Shutoff feature turns the coffeemaker off
two hours after making the coffee. Turn coffeemaker OFF
then back to ON.
• For clock models, if power has been interrupted the
automatic brew time must be reset.
• Excessive amounts of ground coffee will clog the filter
basket. One level tablespoon of ground coffee per cup
is recommended.
• Make sure coffee is not ground too finely. This will
clog the filter. Permanent filters are more likely to clog
than paper filters.
• Be sure to use a good quality cupcake or basket style
filter. The sides of the filter should be upright against
side of filter basket to avoid filter collapsing.
• When using Pause ’N Serve, hot water continues to
flow into the filter basket and may overflow if the carafe
is not returned to the Keep-Hot Plate within 20 seconds.
•
Make sure that carafe is fully seated on the Keep-Hot
Plate.
• Filter basket must be securely closed.
• Mineral deposits can build up in the pump of your
coffeemaker. Periodic cleaning of the inside of your
coffeemaker is recommended. More frequent cleaning
may be necessary, depending upon the hardness of
your water. See “Cleaning instructions.”
• If using the removable reservoir, make sure it is firmly
seated in coffeemaker’s reservoir.
840092300 Ev00 12/21/01 2:40 PM Page 9
Page 10

10
840092300
If you have a claim under this warranty, please call our Customer Assistance Number.
For faster service please have model, series, and type numbers ready for operator to
assist you. These numbers can be found on the bottom of your coffeemaker.
MODEL: ________________ TYPE: _________________ SERIES: __________________
Customer Assistance Number 1-877-556-0973
Keep this number for future reference!
E-mail inquiries: www.gehousewares.com
Customer Assistance
Two-Year Limited Warranty
12/01
WAL-MART Canada Corp.
Mississauga, Ontario L5N 1P9
gis a trademark of
General Electric Company
and is used under license
by WAL-MART.
What does your warranty cover?
• Any defect in material or workmanship.
For how long after the original purchase?
• Two years.
What will we do?
• Provide you with a new one.
How do you make a warranty claim?
• Save your receipt.
• Properly pack your unit. We recommend
using the original carton and packing
materials.
• Return the product to your nearest
WAL-MART store or call Customer
Assistance at 1-877-556-0973.
What does your warranty not cover?
• Glass parts, glass containers, cutter/strainer,
blades and/or agitators.
• Commercial use or any other use not
found in printed directions.
• Damage from misuse, abuse, or neglect.
• Products purchased or serviced outside
Canada.
How does provincial law relate to this warranty?
• This warranty gives you specific legal rights,
and you may also have other rights which
vary from province to province.
•
WAL-MART expressly disclaims all responsi-
bility for consequential damages or
incidental losses caused by use of this
appliance. Some provinces do not allow
this exclusion or limitation of incidental
or consequential losses so the foregoing
disclaimer may not apply to you.
What if you purchased your product in the
U.S., Canada or Mexico and encounter a
problem while using it outside the country of
purchase?
• The warranty is valid only in the country of
purchase and if you follow the warranty
claim procedure as noted.
840092300 Ev00 12/21/01 2:40 PM Page 10
Page 11

Pour l'assistance à la clientèle, composer le 1-877-556-0973
840092300
Cafetière
g
Sécurité de la cafetière ........................ 2
Nomenclature.......................................... 3
Utilisation de votre cafetière .............. 4
Caractéristiques facultatives .............. 5
Nettoyage.................................................. 7
Dépannage................................................ 9
Assistance à la clientèle.................... 10
840092300 FRv00 12/21/01 2:41 PM Page 1
Page 12

PRÉCAUTIONS IMPORTANTES
CONSERVEZ CES INSTRUCTIONS
Lorsque vous utilisez des appareils électriques, vous devriez toujours prendre des précautions
élémentaires afin de réduire les risques d’incendie, de choc électrique et/ou de blessures
corporelles. Voici quelques consignes à suivre :
1. Lisez toutes les directives.
2. Ne touchez pas aux surfaces chaudes.
Utilisez les poignées ou les boutons.
Vous devez être très prudent car vous
pourriez vous brûler en touchant des
pièces chaudes ou en renversant un
liquide chaud.
3. Afin de vous prémunir contre les chocs
électriques, ne plongez pas le cordon
d’alimentation, la fiche ou la cafetière
dans l’eau ou tout autre liquide.
4. Surveillez attentivement les enfants
lorsque ceux-ci utilisent l’appareil ou se
trouvent à proximité de celui-ci.
5. Débranchez l’appareil de la prise de
courant lorsque vous ne vous servez pas
de la cafetière ou de l’horloge ou avant
de le nettoyer. Laissez-le refroidir avant
d’enlever ou de remettre en place des
pièces ou de nettoyer l’appareil.
6. Lorsque la cafetière est en marche, elle
doit toujours se trouver sur une surface
plate et loin du bord du comptoir pour
éviter tout contact accidentel qui
pourrait la renverser.
7. Ne pas faire fonctionner un appareil
avec un cordon ou une fiche
endommagés, ou lorsque l’appareil ne
fonctionne pas bien, est tombé ou a été
endommagé d’une manière quelconque.
Composer notre numéro d’assistance à la
clientèle sans frais d’interurbain, pour
des renseignements concernant
l’examen, la réparation ou le réglage
électrique ou mécanique.
8. L’utilisation d’accessoires qui ne sont pas
recommandés par le fabricant de l’appareil peut causer un incendie, un choc
électrique ou une blessure corporelle.
9. N’utilisez pas à l’extérieur.
10. Ne laissez pas le cordon pendre au bord
d’une table ou d’un comptoir ou entrer
en contact avec une surface chaude y
compris la cuisinière.
11. La verseuse est conçue pour être utilisée
avec cette cafetière. Elle ne doit jamais
être utilisée sur la cuisinière ou dans un
four à micro-ondes.
12. Ne laissez pas une verseuse chaude sur
une surface froide ou humide.
13. N’utilisez pas une verseuse fêlée ou dont
la poignée est desserrée.
14. Ne nettoyez pas la verseuse avec des nettoyants abrasifs, tampons en laine d’acier
ou autres matériaux abrasifs.
15. Assurez-vous que le couvercle est bien
fermé durant la préparation du café et
lorsque vous le versez; ne forcez pas le
couvercle lorsque vous le posez sur la
verseuse.
16. Ne placez pas la cafetière près d’un
brûleur électrique ou à gaz, ou dans un
four chaud.
17. Pour débrancher la cafetière, placez
l’interrupteur à la position ARRÊT, puis
enlevez la fiche de la prise de courant.
18. Avertissement : afin de diminuer le
risque d’incendie ou de choc électrique,
n’enlevez pas le couvercle du dessous. Il
ne s’y trouve aucune pièce réparable.
Toute réparation ne devrait être
effectuée que par un technicien autorisé.
19. N’utilisez cet appareil qu’aux fins pour
lesquelles il a été conçu.
Sécurité de la cafetière
2
840092300 FRv00 12/21/01 2:41 PM Page 2
Page 13

Renseignements pour la sécurité du consommateur
3
Réservoir
Bouton de sélection de filtrage
Panier-filtre pivotant
1
1
2
3
3
5
4
3
5
4
Le modèle à horloge comporte un
arrêt automatique après 2 heures
3
2
2
1
Cet appareil est conçu uniquement pour
l’usage domestique.
Cet appareil est muni d’une fiche polarisée. Ce
type de fiche présente une broche plus large
que l’autre. Par mesure de sécurité, la fiche
peut être introduite dans une prise que dans un
sens seulement. Il s’agit d’une caractéristique
de sécurité visant à réduire le risque de choc
électrique. Si la fiche ne peut pas être insérée
dans la prise, la tourner dans l’autre sens. Si elle
ne peut toujours pas être insérée dans la prise,
contacter un électricien pour qu’il remplace la
prise désuète. Ne pas essayer de contourner
l’objectif de sécurité de la fiche polarisée en la
modifiant de quelque manière que ce soit.
La longueur du cordon de cet appareil a été
choisie de façon à ce que l’on ne risque pas de
trébucher dessus. Si un cordon plus long est
nécessaire, utiliser une rallonge appropriée. Le
calibrage de la rallonge doit être le même que
celui de l’appareil ou supérieur. Lorsqu’on
utilise une rallonge, s’assurer qu’elle ne traverse pas la zone de travail, que des enfants ne
puissent pas tirer dessus par inadvertance et
qu’on ne puisse pas trébucher dessus.
Afin d’éviter une surcharge électrique, évitez
d’utiliser un autre appareil à haute puissance
sur le même circuit que la cafetière.
Verseuse
Plaque chauffante
4
5
Tableau de commande (pour le modèle à horloge)
Heure
Minute
Programme
Marche
Arrêt
Auto
Témoin de march
Témoin PM
Témoin de filtrage automatique
840092300 FRv00 12/21/01 2:41 PM Page 3
Page 14

4
Réglage de l’horloge et programmation de l’infusion
automatique (pour les modèles avec horloge seulement)
Utilisation de votre cafetière
1. Branchez la cafetière et régler l’horloge le cas échéant. Voir «Réglage de
l’horloge et programmation du filtrage automatique».
2. Avant la première utilisation, lavez la
verseuse. Voir «Nettoyage des pièces
de la cafetière». Puis faites effectuer
un cycle complet avec une verseuse
pleine d’eau propre en suivant les
étapes 6 à 10 inclusivement.
3. Pour faire du café, faites pivoter le
panier-filtre amovible. Mettez un
filtre de papier jetable dans le
panier-filtre. Utilisez un filtre de
bonne qualité en forme de moule à
muffin pour 8 à 12 tasses. Un filtre
permanent peut aussi être utilisé.
4. Pour chaque tasse de café à préparer,
mettez une cuillère à soupe rase de
café moulu dans le filtre.
5. Fermez le panier-filtre et assurez-vous
qu’il est emboîté solidement.
Préparation du café
6. Mettez la quantité désirée d’eau
froide dans la verseuse. Relevez le
couvercle du réservoir et versez-y
l’eau. Rabattez le couvercle.
7. Mettez la verseuse et son couvercle
sur la plaque
chauffante.
Sélectionnez
un café doux à
fort en tournant le bouton
de sélection au
réglage désiré.
8. Mettez la cafetière en marche.
9. Si le modèle comporte une horloge
ou l’arrêt automatique, la cafetière
s'arrêtera dans 2 heures.
10. Éteignez et débranchez la cafetière
après avoir terminé.
Doux Fort
1. Branchez la cafetière. Les chiffres
apparaissant sur l’horloge clignoteront
jusqu’à ce que l’heure soit réglée ou
que la cafetière soit mise en marche.
2. Appuyez sur le bouton de H jusqu’à
ce que l’heure exacte apparaisse. Un
point rouge s’illuminera dans le coin
gauche supérieur pour indiquer P.M.
Appuyez sur le bouton M jusqu’à ce
que l’heure exacte apparaisse.
L’horloge est maintenant réglée.
3. Afin de programmer la cafetière pour
la mettre en marche automatiquement, appuyez sur le bouton Prog
tout en appuyant sur le bouton H
puis sur le bouton M jusqu’à ce que
l’heure à laquelle vous désirez que le
café soit prêt apparaisse.
4. Pour que la cafetière commence le filtrage automatiquement, déplacez le
curseur de Arrêt à Auto. Un point
rouge s’illuminera dans le coin
gauche inférieur pour indiquer que la
cafetière est prête à se mettre en
marche automatiquement.
5. La cafetière s’éteindra 2 heures après
le début de la préparation du café.
840092300 FRv00 12/21/01 2:41 PM Page 4
Page 15

5
Un café de qualité est composé d’ingrédients de qualité. Utilisez du café frais
moulu provenant de grains torréfiés. Les
grains peuvent être achetés et congelés
dans un récipient scellé. Retirez la quantité de grains nécessaires et moulez-les
tout juste avant la préparation du café.
Une fois que le grain a été moulu, la
saveur riche et intense du café
commence à diminuer.
La proportion d’eau et de café dépend
de vos goûts. Nous vous recommandons
d’utiliser une c. à soupe de café moulu
par tasse.
Si on utilise un moulin à café de type
avec lame, secouez-le de temps à autre
pendant le broyage pour redistribuer les
grains entiers afin qu’ils fournissent un
café moulu plus uniforme. Faites des
expériences pour découvrir le bonne
mouture pour votre cafetière et votre
goût. Si les grains sont moulus trop finement, ils produiront un goût amer. Si la
mouture est trop épaisse, le café aura un
goût faible et aqueux.
Lorsqu’on prépare certains cafés de
spécialité, il est nécessaire de verser plus
d'une c. à soupe de café moulu par
tasse. Votre nouvelle cafetière est
conçue pour préparer du bon café en
utilisant le moins de café moulu
possible. Nous recommandons d’utiliser
une c. à soupe de café moulu par tasse.
Évidemment, la quantité de café moulu
utilisée dépend de vos goûts.
La qualité de votre eau potable affecte la
saveur du café. Si vous ne buvez pas
l’eau du robinet, n’utilisez pas celle-ci
pour préparer votre café. Si votre eau
possède un goût ou une odeur bizarre,
utilisez de l’eau potable en bouteille ou
de l’eau filtrée pour préparer le café. Si
l’eau provient du robinet, elle doit être
fraîchement puisée et froide pour
donner la meilleure saveur de café.
Les cafetières automatiques utilisent en
général un format de tasse de 5 oz. La
verseuse de la cafetière et le réservoir
sont marqués en «tasses» pour faciliter
le mesurage.
Essayez différents cafés aromatisés et
colorants à café aromatisés disponibles
dans les supermarchés ou les magasins
de cafés de spécialité. Le café ordinaire
peut être aromatisé à domicile.
Ajoutez une pincée de cannelle*, ou
une goutte d’extraits purs comme
amande, vanille ou menthe, au café
moulu avant le filtrage. Pour une saveur
au moka, mélangez une cuillerée de
sirop de chocolat ou de mélange de
cacao instantané à chaque tasse de café
filtrée.
* (Trop de cannelle peut obstruer le
filtre causant le renversement du
panier.)
Comment préparer un café
Caractéristiques facultatives
(disponibles sur certains modèles)
Comment préparer le thé
L’infuseur à thé occupe un certain
volume dans la verseuse et nous recommandons donc de ne pas préparer plus
de 10 tasses de thé.
Lavez et rincez l’infuseur à thé avant la
première utilisation.
Si la cafetière est utilisée pour la préparation du café, assurez-vous que toutes
ses pièces lavables ont été lavées pour
éliminer tout résidu ou goût de café.
Lors de l’utilisation de sachets de thé, on
peut laisser le fil, mais il est préférable
d’enlever l’étiquette de papier.
N’utilisez pas Pause et service durant
l’infusion. Ne retirez pas la verseuse
avant la fin du cycle d’infusion.
840092300 FRv00 12/21/01 2:41 PM Page 5
Page 16

Arrêt automatique
L’arrêt automatique permet d’éteindre la
plaque chauffante 2 heures après que le
cycle de préparation a commencé.
Éteignez la cafetière et débranchez-la
lorsque vous avez terminé.
Cette fonction est conçue pour vous
permettre de verser une tasse de café
avant que le cycle de préparation n’ait
été complété. En enlevant la verseuse,
l’écoulement du café à la base du
panier du filtre s’arrêtera.
ATTENTION : La verseuse doit être
replacée dans un délai de 20 secondes.
Le café recommencera à couler dès que
la verseuse sera remise en place sur la
plaque chauffante.
Pause et service
1. Branchez la cafetière et réglez
l’horloge le cas échéant.
2. Mettez la quantité désirée d’eau
froide dans la verseuse. Ne dépassez
pas le niveau de 10 tasses. Relevez le
couvercle du réservoir et versez-y
l’eau.
3. Mettez le nombre de sachets de thé
désiré ou du
thé en vrac
dans l’infuseur.
Dans le cas de
sachets,
poussez-les gentiment jusqu’au
fond de l’infuseur. Placez
ce dernier dans
la verseuse comme dans l’illustration.
Fermez le couvercle de la verseuse.
4. Placez la verseuse et son couvercle sur
la plaque chauffante.
5. Appuyez sur le bouton ou l’interrupteur Marche.
6. Lorsque l’appareil a terminé l’infusion, le thé est prêt à servir. Pour un
thé fort, le laissez reposer quelques
minutes avant de le servir. Pour servir,
ouvrez le couvercle de la verseuse et
retirez l’infuseur avec précaution
avant de verser avec la verseuse.
MISE EN GARDE : La vapeur qui
s’échappe peut causer des brûlures.
Videz l’infuseur immédiatement pour
éviter qu’il se tache.
7. Le thé est maintenant prêt à servir.
8. S’il s’agit d’un modèle à horloge, la
cafetière s’éteindra dans 2 heures.
Appuyez sur le bouton ou l’interrupteur Arrêt après avoir terminé, puis
débranchez la cafetière.
9. L’infuseur à thé devrait être lavé à
l’eau chaude savonneuse, puis être
rincé et séché. L’infuseur peut aussi
être lavé dans le panier supérieur du
lave-vaisselle.
La force du thé est un choix personnel.
Les quantités suivantes ne sont données
qu’à titre indicatif.
TABLEAU DE THÉ
Niveau d’eau dans la verseuse
Sachets de thé standard OU Thé en vrac
10 tasses 4 10 c. à thé
8 tasses 3 8 c. à thé
6 tasses 2 6 c. à thé
4 tasses 1 4 c. à thé
6
840092300 FRv00 12/21/01 2:41 PM Page 6
Page 17

7
Réservoir d’eau amovible pour 10 tasses
Veuillez laver avant la première utilisa-
tion. Lavez le
réservoir à la
main ou placezle dans le panier
supérieur du
lave-vaisselle
automatique. Le
réservoir de 10
tasses peut être
facilement
enlevé pour le remplissage ou le lavage
occasionnel. Soulevez tout simplement
le couvercle du réservoir et soulevez la
poignée amovible du réservoir. Retirez
le réservoir amovible et remplissez-le
d’eau au niveau désiré. Placez
soigneusement le réservoir amovible en
place dans le réservoir de la cafetière.
Assurez-vous que le réservoir amovible
est bien en place pour un écoulement
approprié de l’eau. Lors de l’utilisation
du réservoir amovible, il est seulement
possible de faire une quantité de café de
10 tasses, tel que l’indique la marque du
niveau de l’eau. Pour préparer une
verseuse de 12 tasses, enlevez le réservoir amovible et remplissez le réservoir
de la cafetière.
Caractéristiques facultatives
(suite)
Le filtre permanent remplace les filtres
jetables en papier. Placez tout simplement le filtre permanent dans le panier
de filtre. Veuillez rincer le filtre permanent dans l’eau chaude avant de
l’utiliser pour la première fois. Nettoyez
le filtre permanent sous l’eau chaude
courante. Laissez sécher. Le filtre per-
Filtre permanent
manent peut être placé dans le panier
supérieur du lave-vaisselle.
REMARQUE : si le café est moulu dans un
moulin à café avant d’être versé dans le
filtre permanent, évitez de le moudre
trop fin. Cela pourrait bloquer le filtre
et causer un débordement.
Nettoyage
1. Placez la verseuse vide sur la plaque
chauffant. Fermez bien le panier-filtre.
2. Versez une chopine de vinaigre blanc
dans du réservoir.
3. Branchez la cafetière et mettez-la en
marche.
4. Après 30 secondes, arrêtez la cafetière.
5. Attendez 30 minutes pendant que le
vinaigre nettoie la cafetière. Puis
remettez celle-ci en marche. Lorsque
le cycle de préparation est complété,
fermez-la de nouveau.
Pour nettoyer l’intérieur de la cafetière :
6. Videz la verseuse et rincez-la.
Remplissez la verseuse d’eau froide
et versez le liquide dans le réservoir.
Placez la verseuse sur la plaque
chauffante.
7. Placez l’interrupteur à la position
MARCHE. Lorsque le cycle est complété, videz la verseuse. Répétez
l’opération en ajoutant la même
quantité d’eau froide.
8. Arrêtez la cafetière lorsque le processus est terminé.
9. Lavez la verseuse et le panier-filtre.
840092300 FRv00 12/21/01 2:41 PM Page 7
Page 18

8
Précautions à prendre avec la verseuse
Ce symbole vous rappelle que le verre est fragile et qu’une brisure peut entraîner
des blessures corporelles.
Ce symbole vous indique les dangers possibles de blessures corporelles si vous
omettez de lire et de suivre ces précautions de sécurité.
1. Débranchez la cafetière et laissez-la
refroidir avant le nettoyage.
2. Essuyez la plaque chauffante avec un
linge humide et propre. N’employez
pas de nettoyant abrasif.
3. De temps à autre, essuyez l’endroit où
se répand l’eau, situé au-dessus du
panier-filtre, avec un linge propre et
humide.
4. Pour enlever le couvercle de la
verseuse, poussez la partie de la
charnière du couvercle sur un côté,
puis tordez et soulevez l’autre côté.
La tige se dégagera de la charnière.
Enlevez ensuite le couvercle.
5. La verseuse, le couvercle de la
verseuse et le panier-filtre amovible
peuvent être lavés dans le panier
supérieur du lave-vaisselle ou à l’eau
chaude savonneuse. Rincez et séchez.
6. Pour enlever les taches sur la
verseuse, frottez avec du bicarbonate
de sodium ou un nettoyant doux.
Pour enlever les taches tenaces,
remplissez la verseuse avec de l’eau
chaude du robinet et ajoutez 2 c. à
soupe de détergent pour lave-vaisselle. Laissez reposer pendant la nuit,
ensuite lavez et rincez.
7. Toutes les autres surfaces externes de
la cafetière peuvent être nettoyées
avec un linge propre et humide.
Nettoyage des pièces de la cafetière :
• N’utilisez jamais une verseuse fêlée ou
dont la poignée est desserrée.
• Cette verseuse est conçue pour être
utilisée uniquement sur la plaque
chauffante de votre cafetière. Ne pas
l’utiliser sur le dessus d’une cuisinière
électrique ou à gaz, ou dans un four à
micro-ondes ou conventionnel.
• Pour éviter de la briser, manipulez la
verseuse avec soin. Évitez tout impact
car le verre cassera. Lorsque vous la
remplissez d’eau, agissez avec
précaution pour éviter de heurter
un robinet.
• Ne placez pas la verseuse chaude sur
une surface froide ou humide.
Laissez-la refroidir avant de la
nettoyer ou d’y verser un liquide.
• Ne laissez pas une verseuse vide sur
une surface chauffante.
• Ne nettoyez pas la verseuse avec des
tampons en laine d’acier, un nettoyant abrasif ou tout autre matériau qui
risque de l’égratigner.
• Ne pas insérez les mains dans la
verseuse. Manipulez celle-ci avec soin
si vous portez des bijoux, particulièrement des bagues à diamant. Les
bijoux peuvent égratigner le verre, ce
qui augmente la possibilité de casse.
• Évitez de heurter ou d’égratigner la
verseuse ou d’en laisser l’eau s’évaporer complètement.
• Jetez la verseuse lorsque celle-ci est
craquelée, égratignée, ou chauffée à
vide durant une longue période de
temps.
• Afin d’éviter les accidents, ne versez
pas le liquide en faisant face aux gens.
• Pour remuer le liquide dans la
verseuse, n’utilisez que des ustensiles
en plastique, en bois ou en
caoutchouc. N’utilisez pas d’ustensiles
en métal.
• Veuillez suivre à la lettre ces
précautions de sécurité pour éviter
toute brûlure grave qui pourrait être
causée par le bris d’une verseuse
remplie de liquide chaud.
840092300 FRv00 12/21/01 2:41 PM Page 8
Page 19

9
Dépannage
Il est facile d’obtenir une réponse à la plupart des questions au sujet de votre nouvelle cafetière. Ce guide pratique énumère certains problèmes courants et vous
explique comment y remédier. Si vous avez besoin de plus amples renseignements,
veuillez appelez le service d’assistance aux clients en composant sans frais le
numéro d’assistance à la clientèle mentionné sur la couverture de ce livret et à
l’arrière de la cafetière.
La cafetière ne
fonctionne pas ou
ne chauffe pas.
Mesures rectificatives
Problème
Le panier-filtre
déborde ou la
fonction Pause et
service fait déborder
la verseuse.
Durée de filtrage
plus longue que
d’habitude.
• Vérifiez si le cordon d’alimentation est bien branché
dans une prise de courant fonctionnelle.
• La caractéristique d’arrêt automatique éteint la cafetière
deux heures après la préparation du café. Eteignez la
cafetière puis remettez-la en marche.
• Pour les modèles avec horloge, si le courant a été
interrompu, le temps de filtrage automatique doit être
réglé de nouveau.
• De trop grandes quantités de café moulu peuvent
bloquer le panier-filtre. Nous recommandons une
c. à soupe de café moulu par tasse.
• Assurez-vous que le café n’est pas moulu trop fin. Ceci
peut bloquer le filtre. Les filtres permanents sont plus
enclins à bloquer que les filtres en papier.
• Assurez-vous d’utiliser un filtre de style panier ou de
style moule à muffin de bonne qualité. Les côtés du
filtre doivent être verticaux contre la paroi du
panier-filtre pour éviter l’affaissement du filtre.
• Lorsque vous utilisez la fonction Pause et service, l’eau
chaude continue de couler dans le panier-filtre et peut
déborder si la verseuse n’est pas remise en place sur la
plaque chauffante dans un délai de 20 secondes.
• Assurez-vous que la verseuse est bien à plat sur la
plaque chauffante.
• Le panier-filtre doit être bien fermé.
• Des dépôts de minéraux peuvent s'accumuler à
l’intérieur de la pompe de votre cafetière. Nous
recommandons de nettoyer périodiquement
l’intérieur de votre cafetière. Un nettoyage plus
fréquent peut s’avérer nécessaire selon la dureté de
l’eau utilisée. Voir la section «Nettoyage.»
• Si on utilise le réservoir amovible, assurez-vous qu’il est
bien en place dans le réservoir de la cafetière.
840092300 FRv00 12/21/01 2:41 PM Page 9
Page 20

10
840092300
Si vous avez une réclamation en vertu de cette garantie, veuillez composer le
numéro de l’assistance à la clientèle. Pour obtenir un service plus rapide, ayez à la
portée de la main les numéros de modèle, de série et de type pour que l’opérateur
puisse vous aider. Ces numéros se trouvent à la base de votre cafetière.
MODÈLE : _______________ TYPE : ________________ SÉRIE : _________________
Numéro d’assistance à la clientèle : 1-877-556-0973
Conservez ce numéro pour référence ultérieure !
Demandes de renseignement par courriel : www.gehousewares.com
Assistance à la clientèle
12/01
Garantie limitée de deux ans
WAL-MART Canada Corp.
Mississauga, Ontario L5N 1P9
Que couvre la garantie ?
• Tout vice de matériau ou de fabrication.
Pendant combien de temps après l’achat
initial ?
• Deux ans.
Que ferons-nous ?
• Nous vous fournirons un appareil neuf.
Comment faire une réclamation ?
• Conservez votre reçu.
• Emballez bien l’appareil. Nous recommandons l’utilisation de la boîte et du matériel
d’emballage d’origine.
• Retournez le produit au magasin
WAL-MART le plus près ou téléphonez à
l’assistance à la clientèle au 1-877-556-0973.
Quelles sont les exclusions au titre de la
garantie ?
• Les pièces et récipients en verre, couteau/
tamis, lames et/ou agitateurs.
• L’utilisation à des fins commerciales ou
tout autre usage non prescrit dans le mode
d’emploi.
• Les dommages causés par le mésusage,
l’abus ou la négligence.
• Les produits achetés ou réparés à
l’extérieur du Canada.
Comment la loi provinciale affecte-t-elle cette
garantie ?
• Cette garantie vous confère des droits
spécifiques et vous pouvez également jouir
d’autres droits qui peuvent varier d’une
province à l’autre.
•
WAL-MART décline toute responsabilité
concernant les dommages ou les pertes
accidentels causés par cet appareil.
Certaines provinces ne permettent pas
l’exclusion ou la restriction des dommages
ou des pertes accidentelles, de telle sorte
que cette renonciation peut ne pas vous
être applicable.
Qu’advient-il si vous avez acheté le produit
aux États-Unis, au Canada, ou au Mexique et
que vous avez un problème alors que vous
l’utilisez en dehors du pays de l’achat ?
• Cette garantie n’est valable que dans le
pays de l’achat et si vous suivez les modalités de réclamation au titre de la garantie
tel qu’indiqué.
g est une marque de commerce
de General Electric Company et est
utilisée en vertu d’une licence par
WAL-MART.
840092300 FRv00 12/21/01 2:41 PM Page 10
 Loading...