

Page 1

Page 2
FCC REGISTRATIONINFO_V_TION
Your GE telephone equipment isregistered with the Federal Communications Commission and is in compliance
with parts 15and 68. FCC Rules and Regulations.
1 Notification to the Local Telephone Company
On the bottom of this equipment is a iahol indicating, amonng other information, the FCC Registrstion numhor
and Ringer Equivalence Number (REN) for the equipment, You must, upon request, provide this information to
your teJephone company,
The REN is usefulin determining the number of devices you.may connect to your telephone line and edll have
all ofthese devices ring when your telephor_ number is celled. [n most (but not all) areas, the sum of the RENs
of all devices connected to one line should not exceed g. To be_rtain of the number of devicesyou may connect
to your line as determined by the REN,you should contact your localtelephonecompany.
Notes
. This equipment may not be used on coin seP.'iceprovided by the telephone company.
• Party Rnse are sub ect to statetariff=, and therefore you may not be able to use your own telephone
equpment fyouareonaperty ne. Chockwthyour ocalteephonecompany.
• Notice must be given to the telephone company upon permanent disconnection of your telephone from your
line.
2 Rights of the Telephone Company
Should your equipment cause troubie on your line which may harm the telephone networ_ the telephone
company shall where practicable notify you that temporary discontinuance of set/ice may be required. Where
prior nobce [snot practicable and the circumstances warrant such action, the telephone company may
temporarily discontinue service immediately. In case of such temporary discontinuance, the telephone company
must: (1) promptly notify you of such temporary discontinuance (2) afford you the opportunity to correct the
situation and (3) inform you of your right to bring a complaint to the Commission pursuant to procedures set
forth n Subpart E of Part 68. FCC Rules and Regulations.
The telephone company may make chanJgesin its communications thci]itles, equipment, operations of
procedures where such action is requiredin the operation of Its businessand not inconsistent with FCC Rules
and Regulations. If these changes are expected to affect the use or performance of your telephone equipment,
the telephone company must give you adequate not _,e.in writing, to a,ow you to maintain uninterrupted service.
INTERFERENCE INFORMATION
This device complies with part 15 of the FCC Rules. Operation is subject to the following two conditions: (1) This
device may not cause harmful interference and (2) This device must accept any interference received, including
nterference that may cause undesired operat on.
This equigment has been tested....and found to comply with the limits for a ClassB diplta[ device, pursuant to Part.
15 of the FCC Rules. These hmts are designed to prowde easonable protecPon agamst harmfuJ nterference n a
residential installation.
This equipment generates, uses, and can radiate radio frequency energ_ and, if not installed and usedin
accordance with the instructions, may cause harmful interterance to ra-dlocommunications. However, there is no
guarantee that interference will not occur in a particular Installation.
Jfthis equipment does cause horrnful interference to radio or television reception which can be determined bY
turnln_lthe equipment off and on the user is encouraged totry to correctthe interference by one or more of the
to owing measures:
o Reorient or relocate the receiving antenna (that is. the antenna for radio or television that is "receiving" the
]ntederence).
° Reorient or relocate and increase the separation between the telecommunications equipment and receiving
antenna.
• Connect the telecommuni_tions equipment into an outiet on a circuit different from that to which the r_elving
antenna is connected.
• Consult the dealer or an experienced radio/TV technicisn for help.
If these measures do not eliminate the interference, please consult your dealer or an experienced radio/
television technician for additional suggestions. Also, the Federal Cornmunicotions Commission has erepared
a helpful booklet, "How To identify and Resolve Radio/TV Interference Problems." This book]nt is available
from the U.S. Government Printing Office, Washington. D.C. 20402. Please specify stock number 004-000-
00345-4 when ordering copies.
_r'-[-F_NG AID COMPATIBILITY
This telephone system meets FCCstandserds for Hearing Aid Compatibli[ity.
L FCC NUMBER [S LOCATED ON THE CABINET BOTTOM [REN NUMBER IS LOCATED ON THE CABINET BOI-i'OM
Page 3
INTRODUCTION
Your GE cordless telephone/answerer is designed to give you flexibility in use
and high quality performance To get the most from your new cordless
telephone/answerer, we suggest that you take a few minutes right now to read
through this instruction manual.
TABLEOF CONTENTS
INSTALLATION AND SETUP ............................ 2
MOI_ULAR JACK REQUIREMENTS ............... 2
INSTALLATION ......................................... 3
TELEPHONE SETUP .................................. 4
ANSWERING MACHINE SETUP ................... 4
TURNING ON THE ANSWERING MACHINE 4
SE3"nNG THE VOICE TIME/DAY STAMP .... 5
SETFING THE SPEAKER VOLUME ............. 5
SETTING THE RING SELECT ................... 5
USING TOLL SAVER ............................. 5
SE'FT]NG THE INCOMING
MESSAGE LENGTH ........................... 5
RECORDING THE OUTGOING
ANNOUNCEMENT ................................ 6
REVfEW_NG ANNOUNCEMENT ................. 6
USING THE MAILBOXES ........................ 6
USING THE SPEAKERPHONE .......................... 7
MAKING A CALL .................................. 7
RECEIVING A CALL ............................... 7
SPEAKER AND HANDSET 3_WAY ........... 7
TELEPHONE OPERATION ............................... 8
MAKING A CALL ..................................... 8
RECEIVING A CALL .................................. 8
CHANNEL BU'I'rON .................................. 8
FLASHBU1-rON...................................... 9
HANDSET VOLUME SWITCH ...................... 9
RINGER SWITCH ...................................... 9
PAGING THE HANDSET/INTERCOM FEAUTRE. 9
PAGING THE BASE .....................................
THEMEMORYFEA'rUR_............................. 10
STORING A NUMBER IN MEMORY ............ 10
CHANGING A STORED NUMBER ............... 10
DIALING A STORED NUMBER ................... 10
CHAIN DIALING FROM MEMORY ............... 11
TEMPORARY TONE ................................ 1 1
ANSWERING MACHINE OPERATION .............. 12
MESSAGE INDICATOR ............................. 12
MESSAGE PLAYBACK ............................. 12
ERASING MESSAGES ............................. 13
LEAVING A MEMO ................................. 13
CONVERSATION RECORD ......................... 13
MEMORY FULL ..................................... 14
CALL SCREENING (FROM THE BASE) .._ ....... 14
VOICE MAiL MENU ............................... 14
REMOTE ACCESS ...................................... 15
USING THE HANDSET ............................. 15
SCREENING CALLS FROM THE HANDSET .., 15
ACCESSING THE ANSWERER FROM ANOTHER
LOCATION ........................................ 16
CHANGING THE SECURITY CODE .............. 16
CHANGING THE HANDSET BATTERY .............. 17
BAI"rERY SAFETY PRECAUTIONS ........... 17
GENERAL PRODUCT CAR_ .......................... 18
SERVICE .................................................. 18
H_DsETSOUNOSmNALS........................ 19
TROUBLESHOOTINGGU©E ......................... 19
ACCESSORY ORDER FORM ......................... 22
INDEX ..................................................... 23
WARRANW............................................. 24
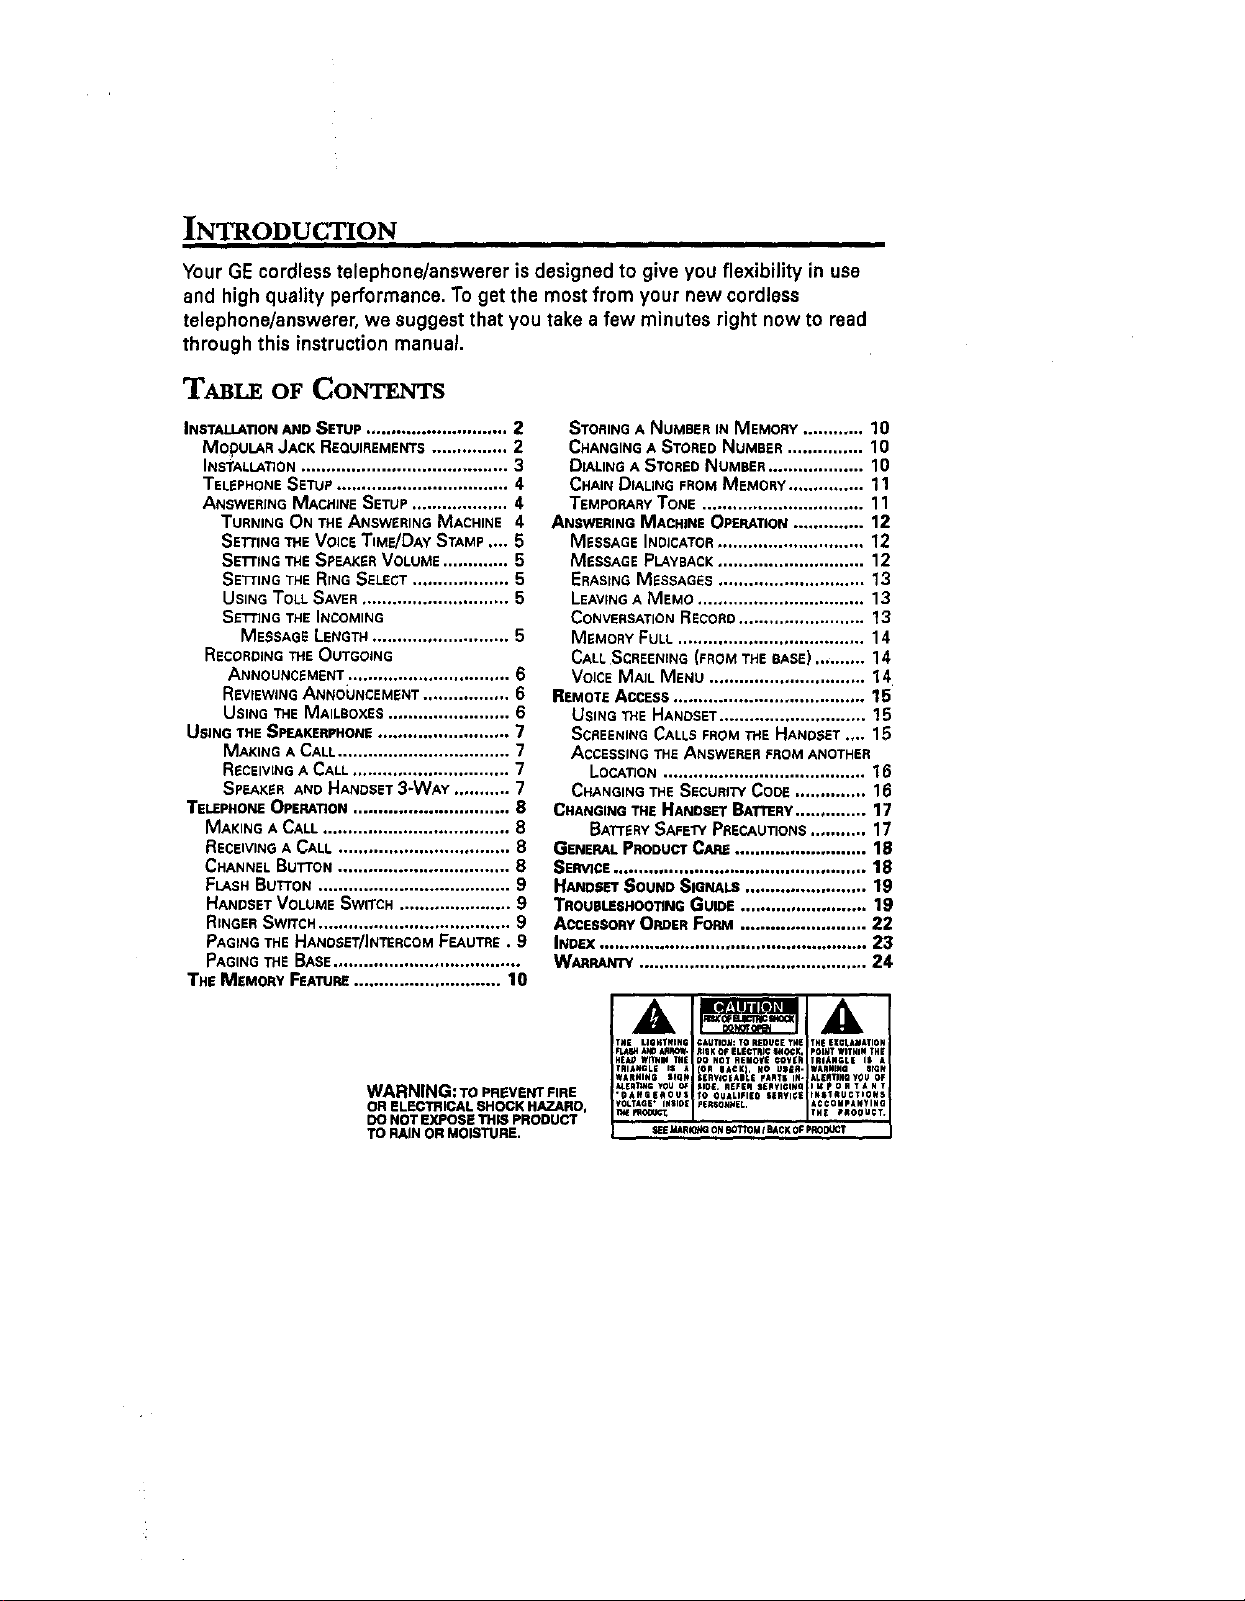
WARNING: TO PREVENT FIRE
OR ELECTRICAL SHOCK HAZARD,
DO NOT EXPOSE THIS PRODUCT
TO RAIN OR MOISTURE.
l'E MARIO_IGON EOTIOM / BACK OF _0_
Page 4
INSTALLATION AND SETUP
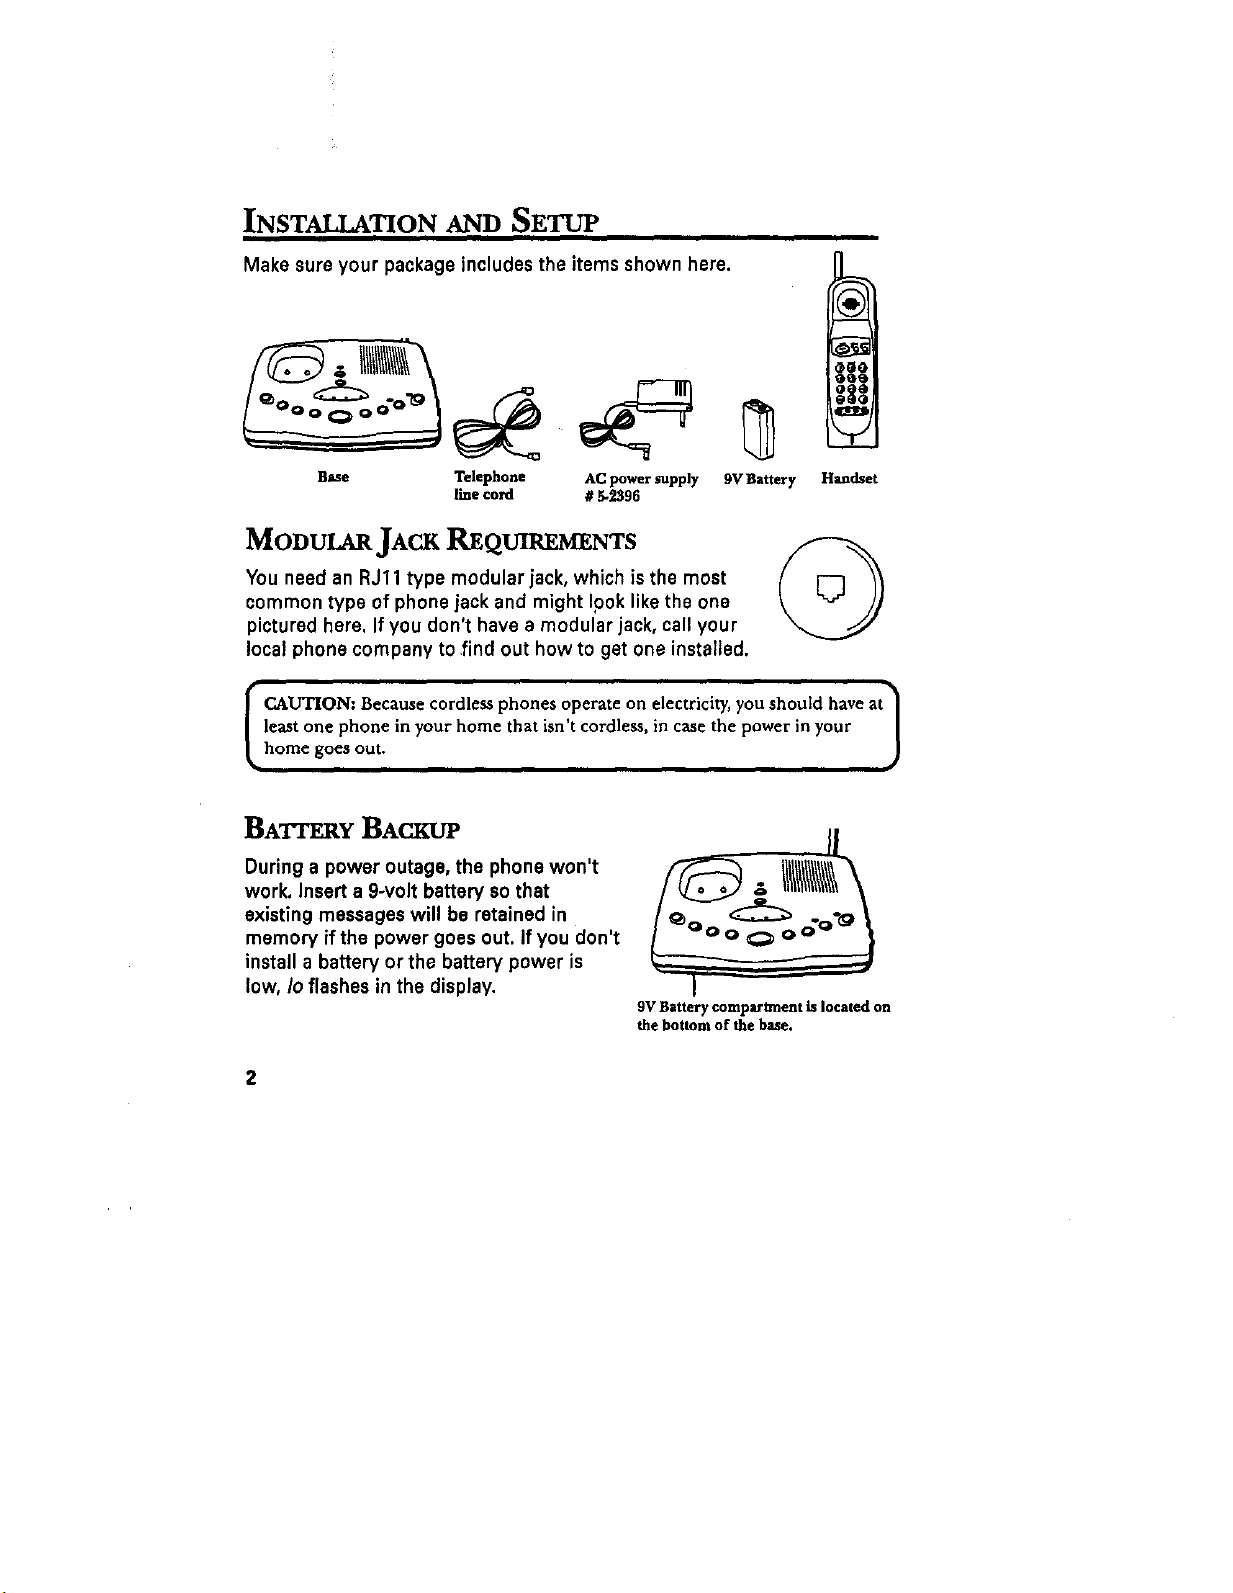
Make sure your package includes the items shown here.
B=e Telephone AC power supply 9V Battery
MODULAR JACK REQUIREMENTS
You need an RJ11 type modular jack, which is the most
common type of phone jack and might Ipok like the one
pictured here, If you don't have a modular jack, call your
local phone company to find out how to get one installed.
I CAUTION: Because cordless phones operate on electricity, you should have at "_
least one phone in your home that isn t cordless, in case the power in your [
home goes out. )
BATIT_,RYBACKUP
line cord # 5-2596
Handset
©
I
During a power outage, the phonewon't
work. Insert a 9-volt battery so that
existing messages will be retained in
memory if the power goes out. If you don't
install a battery orthe battery power is
low, Io flashes in the display.
I
9V Battery compara_nent is located on
the bottom of the base.
2
Page 5
INSTALLATION
(D
(D
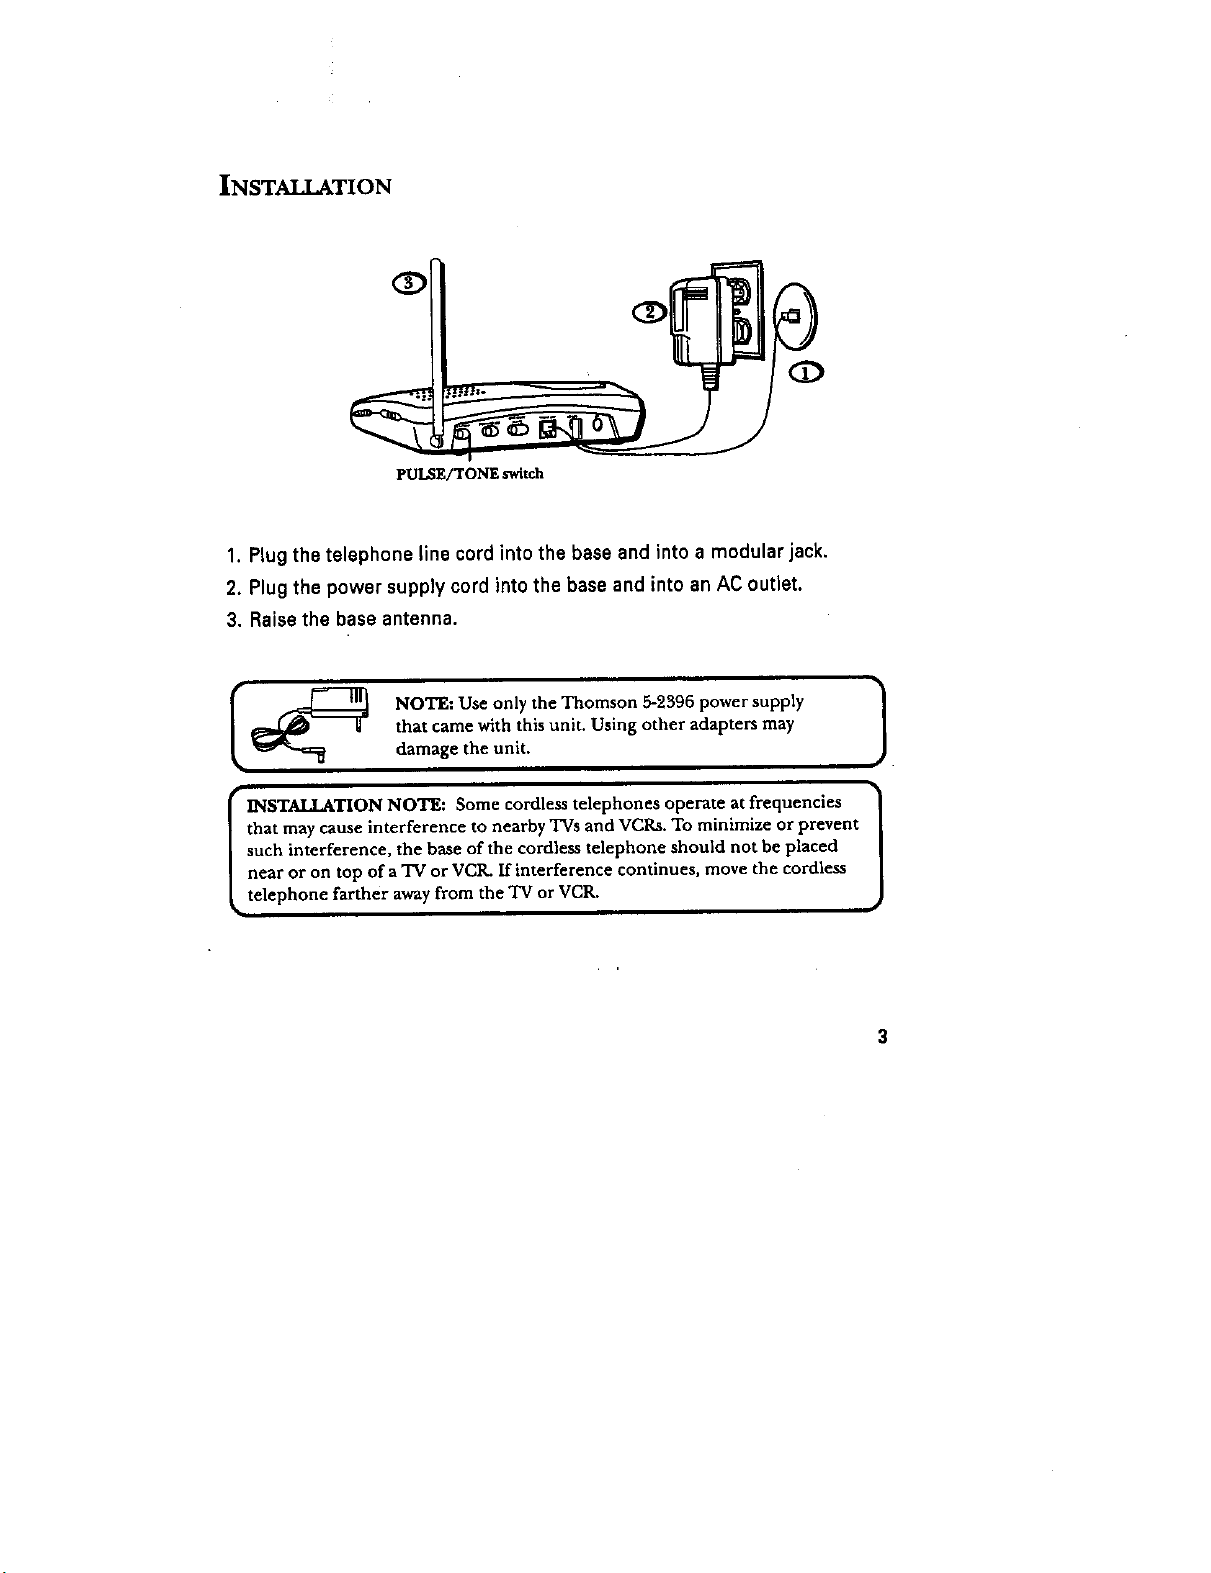
PUlSE/TONE switch
1. Plug the telephone line cord into the base and into a modular jack.
2. Plug the power supply cord into the base and into an AC outlet.
3. Raise the base antenna.
that came with this unit. Using other adapters may
I_ NOTE: Use only the Thomson 5-2396 power supply
damage the unit.
I NSTALLATION NOTE: Some cordless telephones operate at frequencies
that may cause interference to nearby TVs and VCRs. To minimize or prevent
such interference, the base of the cordless telephone should not be placed
near or on top of a TV or VCR. If interference continues, move the cordless
telephone farther away from the TV or VCR.
Page 6
TELEPHONE SETUP
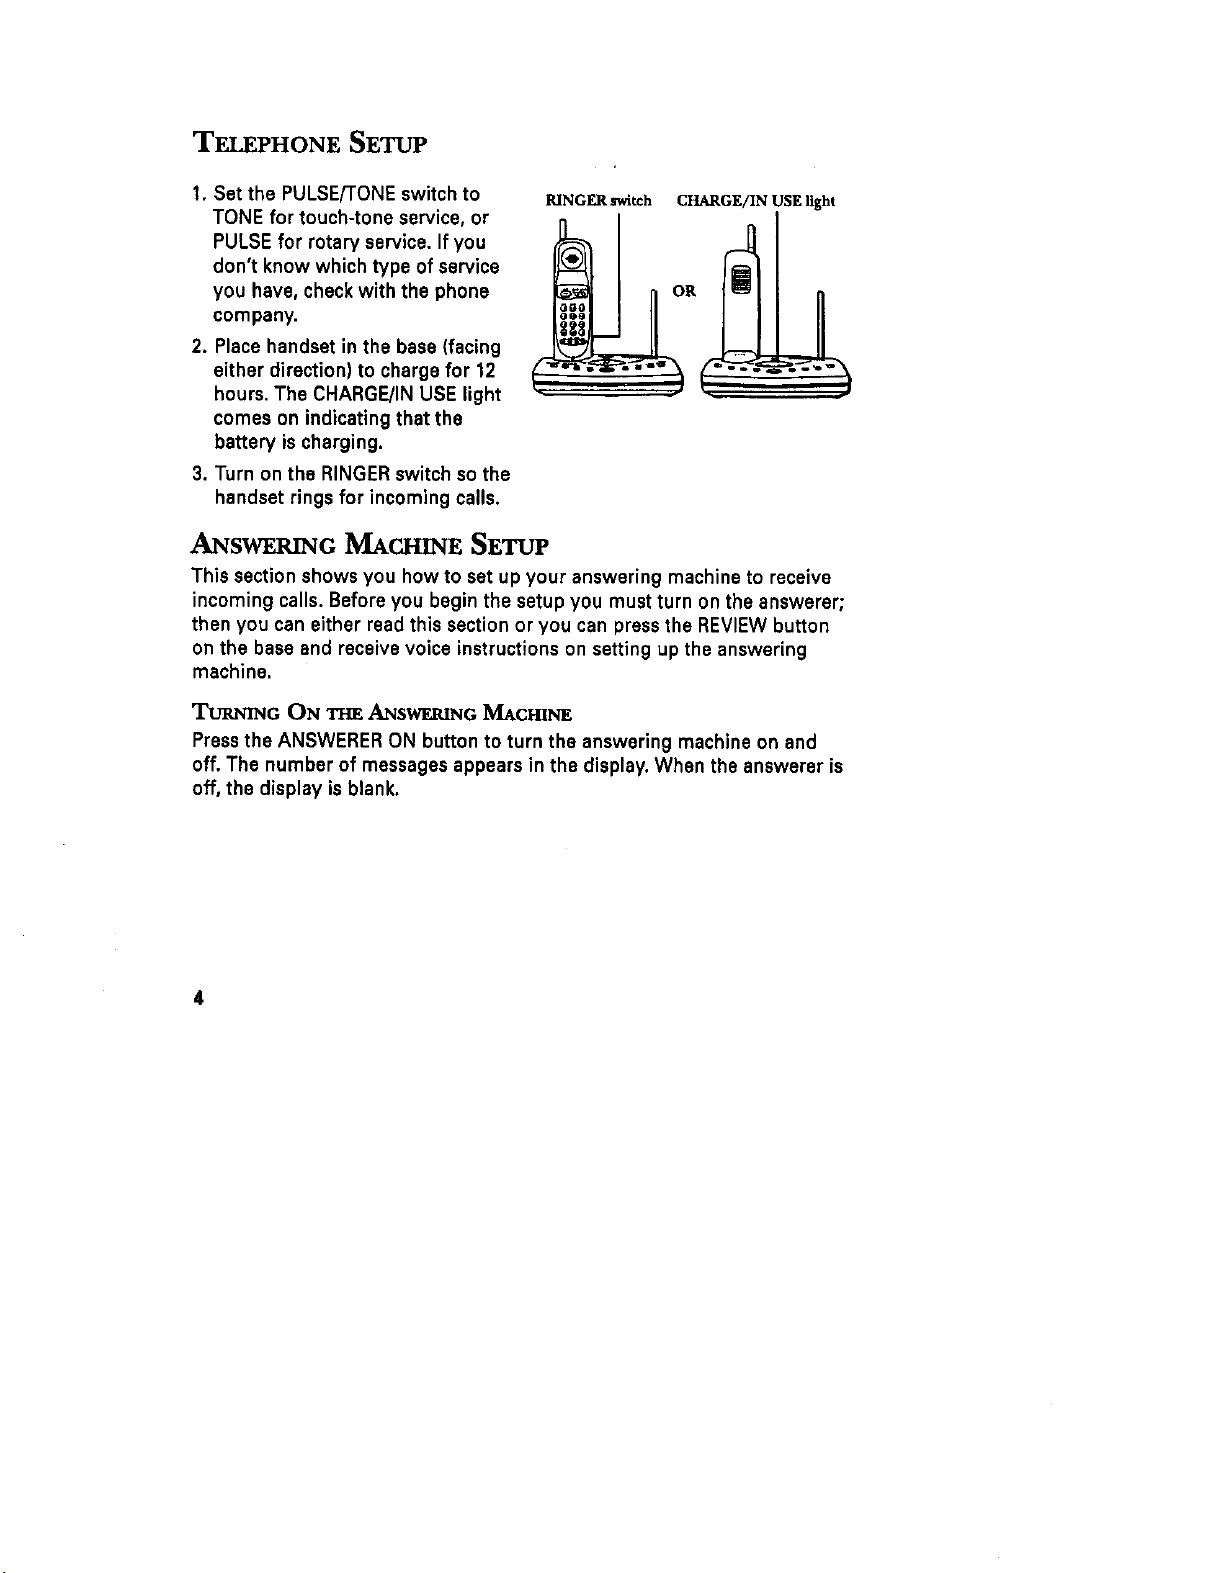
1. Set the PULSE/TONE switch to
TONE for touch-tone service, or
PULSE for rotary service. If you
don't know which type of service
you have, check with the phone
company.
2. Place handset in the base (facing
either direction) to charge for 12
hours.The CHARGE/IN USE light
comes on indicating that the
battery ischarging.
3. Turn on the RINGER switch so the
handset rings for incoming calls.
RINGER m_itch CHARGE/IN USE light
ANSWER GMACHn SETUP
This sectionshows you how to set up your answering machineto receive
incoming calls. Before you begin the setup you must turn on the answerer;
then you can either read this section or you can press the REVIEWbutton
on the base and receive voice instructions on setting up the answering
machine.
TURNING ON THE ANSWERING MACHINE
Press the ANSWERER ON button to turn the answering machine on and
off. The number of messages appears in the display.When the answerer is
off, the display is blank.
4
Page 7

SETTING THE VOICE TIME/DAY STAMP
Press and hold the DAY/CHECKbutton to set [
i the day of the week.
Press the HOUR button to set the hour (a.m. (_"- ]
or p.m.).
• Press the MIN button to set the minute. If Speakervolumecontrol
you hold the MIN button, it advances the
time in 10-minute intervals.
• Press and release the DAY/CHECKbutton
to review the day/time setting.
S_rnNG TH_ SPV_R VOLUME
Use the VOLUME control to adjust speaker
volume to a comfortable level.
SETrING THE RING SELECT
Set the RING SELECT switchto choose the
number of times you want the phone to
ring before the machine answers the call.
You can choose 2 rings, 4 rings, or TS (the
toll saver option).
USINGTOLLSAV_
Toll Saver can save you the cost of a call when you accessyour messages
from a remote location:
Message length Ring select
selector switch
I J
I
I
• If you have new messages, the unit answers after the 2rid ring.
• If you have no new messages, the unit answers after the 4th ring.
You can hang up after the 3rd ring and save the paytelephone or long
distance charge.
SETTING THE INCOMING M_SAGE LF.NGTH
Usethe selector on the back of the unit to limit the time a caller hasto
leave a message bychoosing 1 MIN. If you don't want to limit the time, set
it to NO LIMIT.
Page 8
RECORDING THE OUTGOING ANNOUNCEMENT
For best results when recording, you should be about 9 inches from MIC,
and eliminate as much background noise as possible. Your outgoing
announcement must be 30 secondsor less.
1. Press and hold the ANNOUNCE button. You need to hold the button
until you finish the announcement.
2. Begin talking after you hear the beep.
3. Release the button when you finish your announcement.
Ifyou choose not to record an outgoing announcement, a default an-
nouncement will play. To return to the default announcement after you
have recorded your own outgoing announcement, press the ANNOUNCE
button and release upon hearing the heap.
REVU_WINGANNOL_C.F._mNT
Press ANNOUNCE button for less than 2 seconds.
USING THE MAII_OXES
Because your system hasfour mailboxes, (main and three extra message
locations)a caller using a touch-tone phone can choose to place a mes-
sage in one of those mailboxes by pressing the pound key (#) followed by
1,2, 3, or 4 after the tone that sounds when the outgoing announcement is
finished. If no button is pressed, the message is automatically placed in
the Main mailbox (Mailbox I).
SAMPLE OUTGOING ANNOUNCEMFaNTS
Sample I
Hello,ws can't corn to thephoue_ght now,If you arecdlingfioma to_h-_ pho_, _ the
pound key(#)followedby2 to leave a owasageforMau; _ the pound Ice](#) [oUowedby3 to bare
a messageforfohn; press thepound by (#)followed by 4 to leavea messagefor Kathy, or waitfor the
toneand leavea ra_asagein themain maigaox.After leavingyour messagt,press the TONE by (*) to
revieworchange your ow_sage,or hang up. Thank you.
Sample 2
Hello, this is XYZ company. Wecannottakeyour call dgl_ now. If you are callingfrom a touch-tone
phone,pre_ thepound key (#)followed by I to leavea owssagefor the rea'ptiouist; pressthepound
by (#)followed by2 tOleavea owssagefor accounting;pressthepound by (#)followed by 3 tOleavea
messagefor sales;pressthepound key (#) followedby 4 to leavea messagefor service;or waitfor the
One to leavea messagein theMain mailbox.After leavingyour message,pressthe TONE key (*) to
review orchangeyour message,orhang up. Thank you.
Page 9
USING THE SPEAKERPHONE WITH FULLVoicv. TM
Note the following guidelines when using the speakarphone:
• The speakerphone works similar to a regular telephone. The advanced
technology allows two parties to talk at the same time. This is different
from a traditional speakerphone where only one person can talk at a
time.
• Stay reasonably close to the phone so you can be heard by the person
to whom you are talking.
• Adjust the speaker volume by using the VOLUME control.
• The speakerphone indicator lights when the spaakerphoneis in use.
AC.,,u.
1. Press PHONE ON/OFF to get a dial tone.
2. Dial the phone number,
3. Press the SPEAKER button.
4. Press PHONE ON/OFF button and return handset to the base.
5. Press SPEAKERto hang up the phone.
RECEIVING A CALL
When the handset is in the base unit, the base unit doesn't ring. You must
turn on the RINGER switch on the handset when the handset is in the base
in order to hear incoming calls.
1. Press the SPEAKER button when the phone rings to answer the call.
2. Adjust the volume if needed.
3. Press SPEAKERto hang up the phone.
Page 10

UsrNo MUTE FF.ATtmE
Press MUTE on the base to keep the person on the other end of the phone
from hearing you. Press MUTE again to continue your conversation.
SPma_.a m;D HX_SZT 3-WA¢
Handsetandspeakerphonemay be on simultaneously for a 3-way conver-
sation,orto switchbetweenhandsetandspeakerphone.
• Speaker to Handset -- PressPHONE ON/OFF,then hang up the
speakerphone by pressing SPEAKER.
• Handset to Speaker -- Press SPEAKER,then hang up handset by
pressingthe PHONE ON/OFF button.
TELEPHONE OPERATION
Using a cordless phone is pretty much the same as using a corded phone
except that you have to press a button after you pick up the handset
before you can talk. Otherwise, it works just like any other phone.
!_m_G A
The two things you need to know to make a
call are:
Press PHONE ON/OFF before you dial.
Press PHONE ON/OFF or place the handset
in the baseto hang up.
Phone-in.melight
• TIP:'You know the phone is on when you see the')
• Phone-in-Use light on the handset come on. J
REDI_L
Pressthe REDIAL button to redial the last
number you called. If you get a busy signal,
and want to keep dialing the number, just
press REDIAL again (you don't have to turn the
phone off and back on).
Page 11
RECEIVING A
To answer a call with the handset, you must
press PHONE ON/OFF before you cantalk.
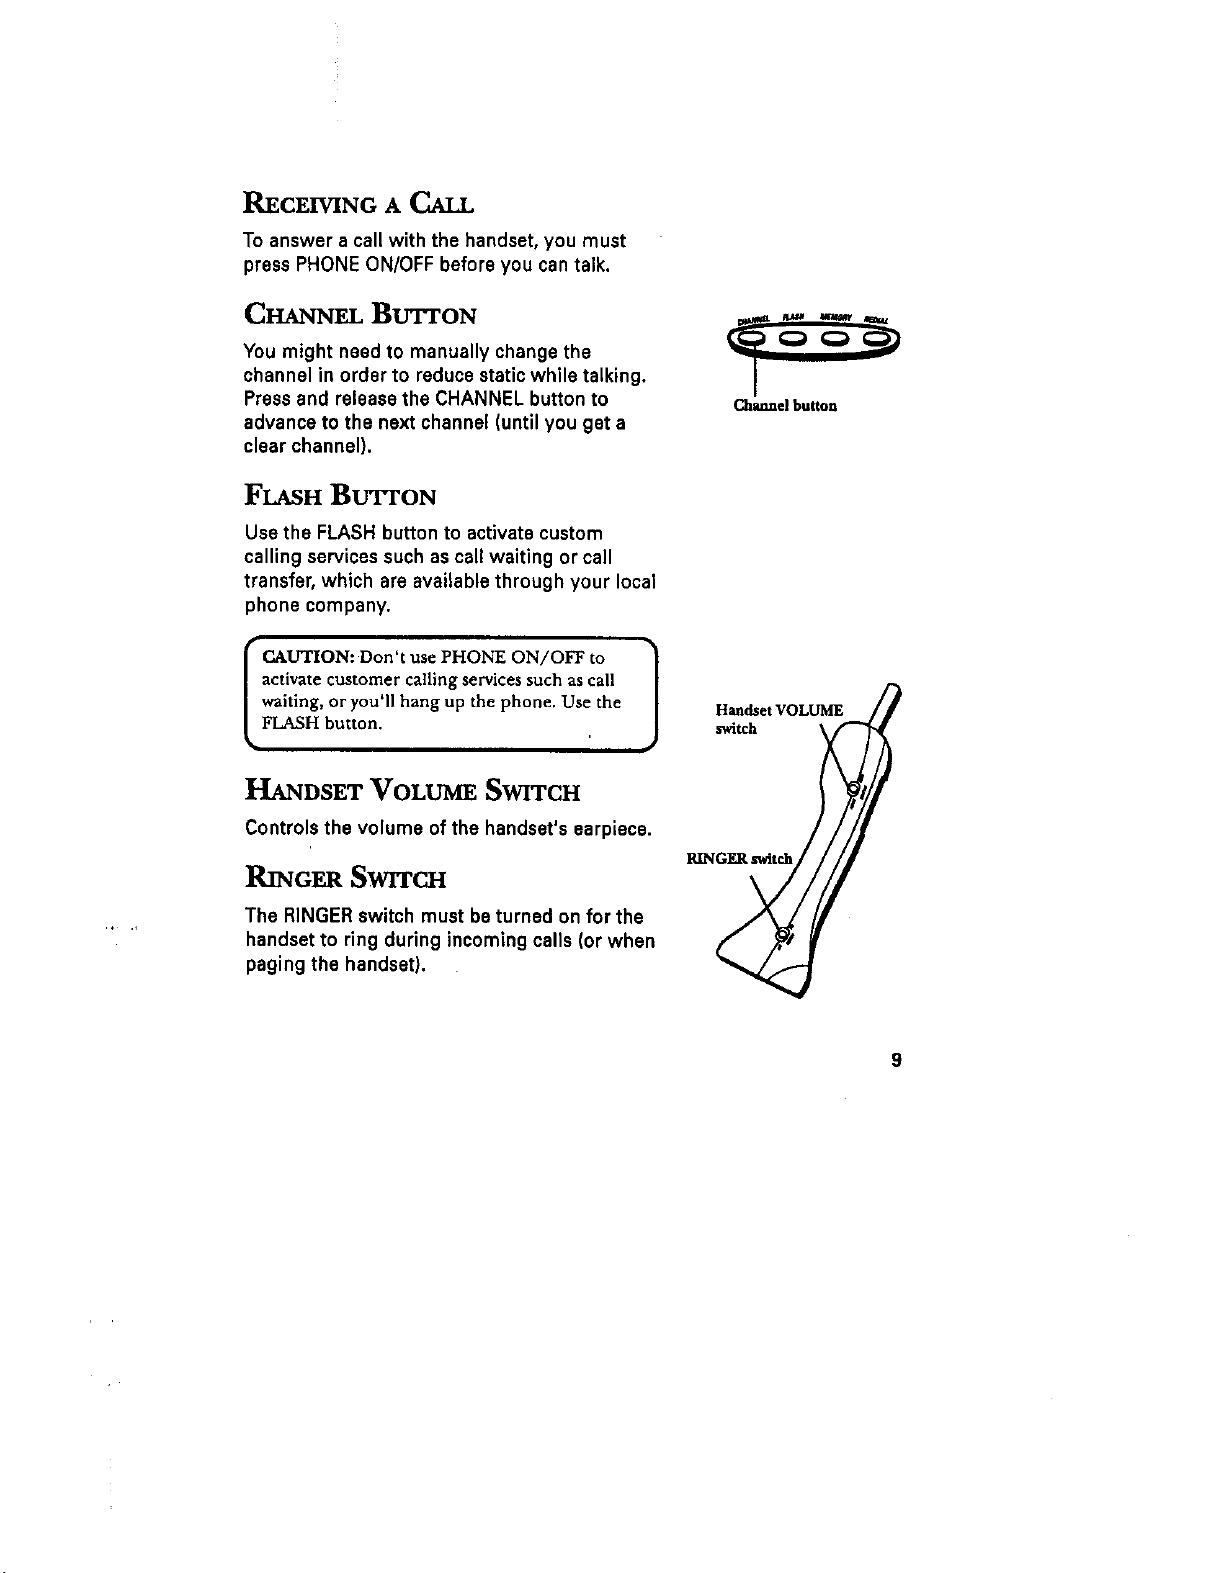
CHANNEL BUTTON
You might need to manually change the
channel in order to reduce static while talking.
Press and release the CHANNEL button to
advance to the next channel (until you get a
clear channel).
FLASH BUTTON
Use the FLASH button to activate custom
calling services such as call waiting or call
transfer, which are available through your local
phone company.
• CAUTION: Don't use PHONE ON/OFF to
activate customer calling services such as call
waiting, oryou'll hang up the phone. Use the
FLASH button.
J
ChtmmelbuRon
Handset VOLUME/_
switch
HANDSET VOLUME SWITCH
Controls the volume of the handset's earpiece.
R NGF SW CH
The RINGER switch must be turned on for the
handsetto ring during incoming calls (or when
paging the handset).
PAN
9
Page 12

PAGING THE HANDSET/INTERCOM FF_ATURE
Press and release PAGE/INTERCOM button
on the base to get the attention of the
person near the handset. The handset
beeps. When the person using the handset
presses INT/PAGE button, the phone's
intercom feature is activated and the
person using the handset can talk to the
person who is using the base unit.
Press and hold PAGE/INTERCOM button on
the base for several secondsto locate a
misplaced handset (the phone beeps for
approximately 20 seconds). Press INT/
PAGEon the handset or PAGE/INTERCOM
on the base when you locate the handset.
PAGE/FIND button
handset must be on in order for the
handset to ring when you use PAGE/
NOTE: The RINGER switch on the ]
INTERCOM button on the base.
PAGING THE BASE/INTERCOM
1
FEATURE
Press and release INT/PAGE button on the
handsetto get the attention of the person
near the base. The base beeps. When the
person at the base presses PAGFJINTERCOM,
the phone's intercom feature is activated and
the person using the handset can talk to the
person who is using the base unit.
10
_ NT/PAGE
button
Page 13

THE MEMORY __.ATURE
Store up to 10 numbers in memory for quick dialing.
STORING A NU_SL'_ IN MEMORY
The phone must be OFF when you store numbers.
I. Press the MEMORY button.
2. Dial the number (up to 16 digits).
3. Press MEMORY; then press a number key (0-9) to
store the dialed number in that memory location
(the phone beeps when you've successfullystored
the number).
4. Recordwhose number it is on the memory direc-
tory card located on the back of the handset.
TIP: Use the FLASH button to insert a delay in the
dialing sequence when storing a number if, for
example, you need to dial 9 to get an outside line.
You can also use FLASHto insert pauses to wait for
access codes when storing long distance numbers.
(See "Chain Dialing' on page 12.)
CHANGINGA STORF DNUMBrm
_O0
@O@
MEMORY
button
Usethe same procedure to change a stored number as you do to store a
number--in a sense, you're just reassigning the memory location.
DIALING A STORED NUMBER
1. Press PHONE ON/OFF to turn the phone on.
2. Press MEMORY, and then press the number for that memory location.
CAUTION: Ifyou make test calls to emergency numbers stored in memory, ")
remain,on the line and brieflyexplain the reason for the call to the dispatcher. ]
Also, it s a good idea to make these calls in off-peak hours, such as early [
morning or late evening. 11_
Page 14

CHAIN DIALING FROM MEMORY
Usethis feature to make calls which require a sequence of numbers, for
instance if you use a calling card for a frequently called long distance
number. The following example shows how you can use chain dialing to
make a call through a long distance service:
TheNumberFor MemoryLocation
Long distanceaccessnumber 7
Authorizationcode 8
Frequentlycalledlongdistancenumber 9
1. Make sure the phone is ON.
2. Press MEMORY and then press 7.
3. When you hear the accesstone, press MEMORY and then press 8.
4. At the next accesstone, press MEMORY and then 9.
I TIP:.Don't get in too big of a hurry.Wa_tfor the access tones before pressing
the next memory button, or your call might not go through.
TEMPORARYTONE
This feature enables pulse (rotary) service phone users to accesstouch-
tone servicesoffered by banks,credit card companies, etc., by pressing
the TONE button to temporarily make the phone touch-tone compatible. To
get information about your bank account,for example, you would:
1. Call the bank's information line.
2. Press the TONE key, denoted with (.) on the keypad, when your call is
answered.
)
3. Follow the voice menu instructions to get the information. When you
hang up,the phone goes backto pulse (rotary) service.
12
Page 15

ANSWERING MACHINE OPERATION
This section discusses the buttons and features on the answering machina.
MESSAGE INDICATOR
The message indicator shows you the following:
• The total number of massages.
• Which mailboxes have new messages
(light blinks).
• Which mailboxes have old messages
(light stays on).
• Number of messages in selected mailbox.
• Whether or not the answering machine is on.
--When it is on you seethe number of messages.
--When it is off, the display is blank.
• When your 9V backup battery is low, you see Io
blinking in the display.
• When 39 messages/memos are stored in memory,
three horizontal bars (__) appear in the display.
I_ESSAGE PLAYBACK
The display lets you know when you have messages, and in which mail-
boxes those messages are stored. To play messages inthe main mailbox,
press PLAY. To play messages in mailboxes 2, 3, or 4, pressthe MAILBOXES
button to select the desired mailbox number, then press PLAY.
While a message is playing, you can do the following:
Press STOP to stop the message playback.
Press and release REVIEW to restart the current message; continua to
press and release REVIEWto go to previous messages.
• Press and release SKIP to go to the next message.
13
Page 16

ERASING MESSAGES
Press and release the ERASE button to erase the message currently
playing. Holding the ERASE button enables you to erase all messages in a
mailbox.
f
f NOTE: Messages erased with either of the preceding methods cannot |
_be restored.
TOTAL MESSAGEERASE
1. Make sure the unit is not playing messages.
2. Press the MAILBOXES button to select the mailbox
that you want to erase.
3. Press and hold down the ERASE button. When the unit beeps, the
messages are erased.
4. Repeat the processfor each mailbox that you want to erase.
LEAVING A MEMO
Use the Memo feature to leave a message directly into one of the four
mailboxes.
1. Press MAILBOXES button to select desired mailbox.
2, Press and hold the MEMO button.
3. Begin talking after you hear the beep.
4. Release the MEMO button when you finish,
)
COI v-Ze SATIONRECORD
You cannot record a conversation when using the speakerphone;you must
usethe handset.To recorda conversation,just pressthe handset ANSWERER
button while you're talking. Press the handsetANSWERER button again to
stop recording during a conversation. Hanging up will also stop recording.
I WARNIN_._' It may be illeg,l in some areaL5 to record a conver,adon without !
proper notification and consent.
t
14
=
J
Page 17

MEMORYFULL
When the memory is full, the system answers after the 1Othring, beeps, and
waits up to 20 secondsfor the callerto enter your 3-digit securitycode.
You need to erase messages from some or all of the mailboxes in order for
the system to record new incoming messages (see =Erasing Messages"
section on the preceding page).
If you are accessingyour answerer from another phone, enter your
security code and then erase messages (see =Accessing the Answerer from
Another Location"on p. 17).
I TIP: Because all four mailboxes share memory space, erasing messages from
any mailbox makes memory available for all mailboxes.
r i
NOTE: The unit also answers after the 10th ring if it is turned off. To access
the answerer, enter your 3-digit security code after you hear the beep. The
answerer turns on automatically when you enter your security code.
CALLSCR NING(FROM BASE)
You can screen incoming calls bywaiting for the caller to begin leaving a
message (to hear who it is), and then pressing SPEAKERor picking up the
handset (or any extension phone) to talk to that person. The answering
machine automatically stops recording after you activate the handset.
VOICE MAIL MENU
The system contains a voice mail menu that enablescallersto review a
message they have left, and to delete the messageand record a new one.
The caller must press the TONE key, denoted with (,), after recording a
messageto accessthis feature.
option for this feature to be effective (see the outgoing announcement
NOTE: Your outgoing announcement must tell callers about the voice mail l
examples on page 6).
J
15
Page 18
REMOTE ACCESS
The handset contains integrated buttonsthat enable you accessthe
answering machine from anywhere within the handset's range.
Furthermore, you can accessyour answering machine from any phone
that istone-dial compatible by entering a 3-digit security code after you
hear the tone that follows the outgoing announcement. A voice menu
system then guides you through any procedure that you want to perform.
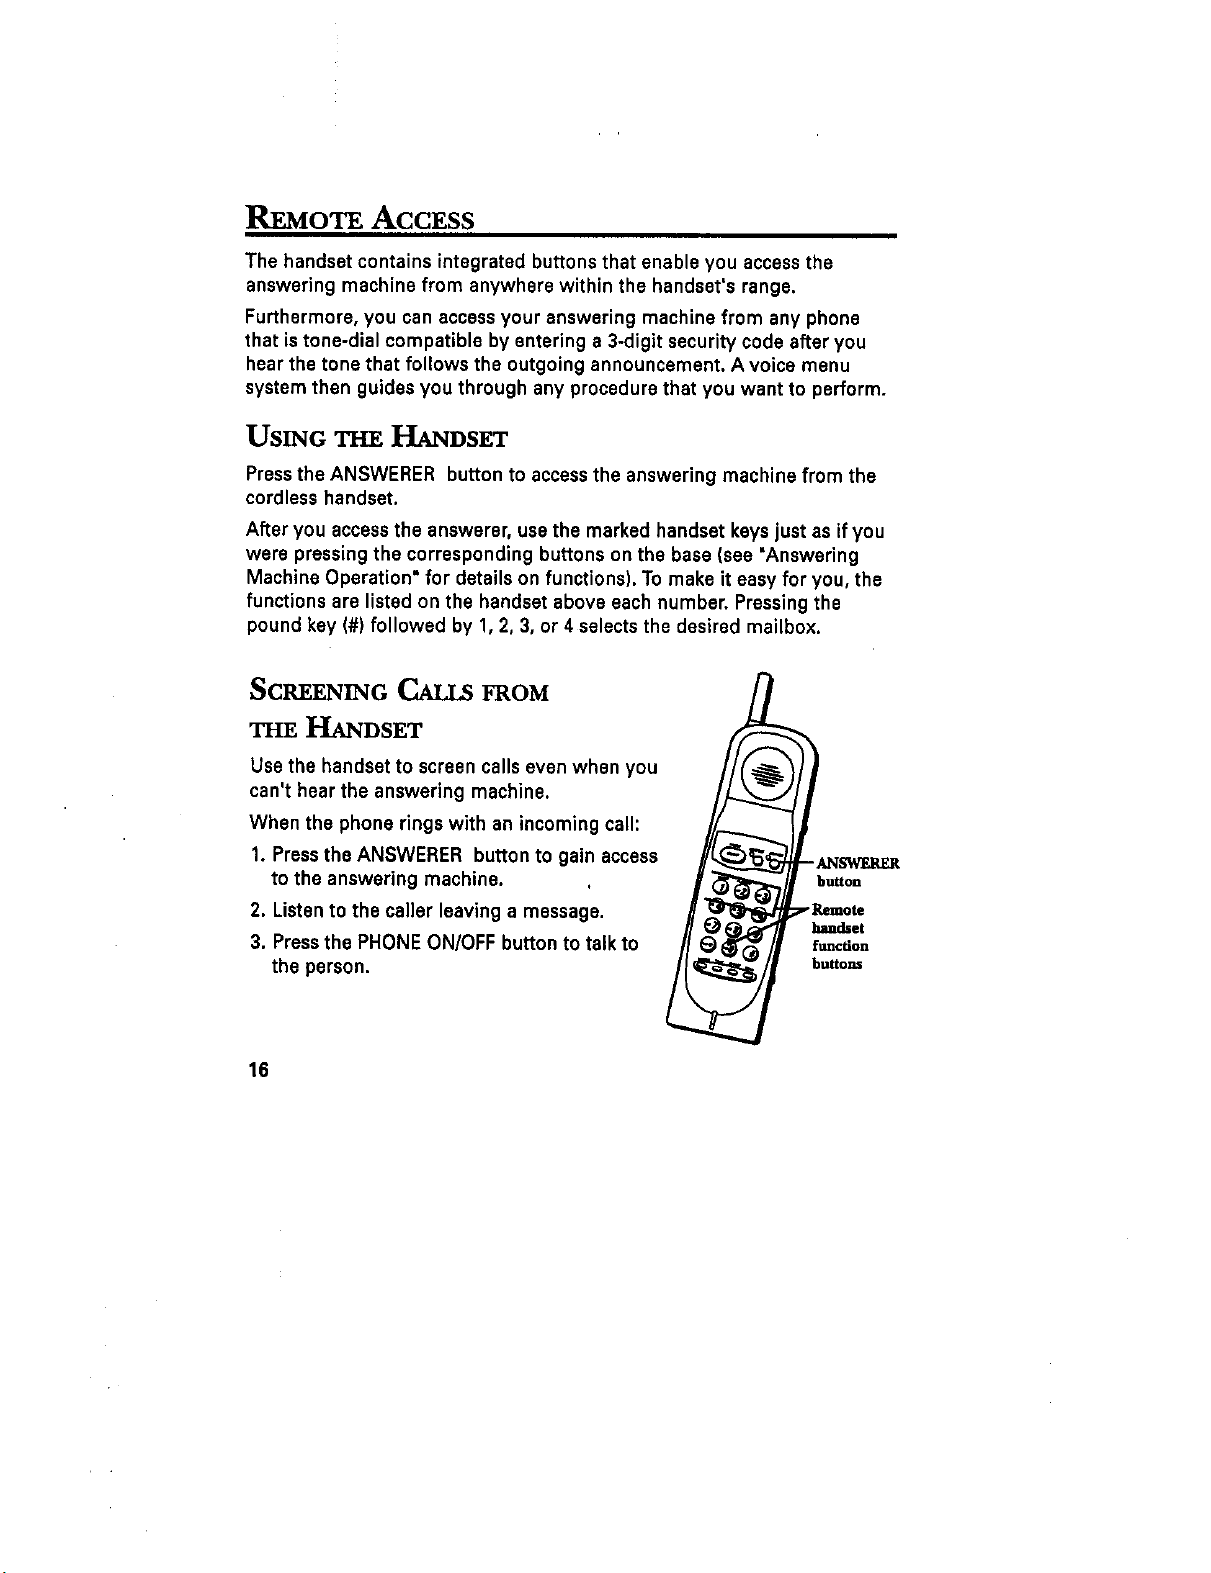
USING THE HANDSET
Pressthe ANSWERER button to accessthe answering machine from the
cordless handset.
After you accessthe answerer, use the marked handset keys just as ifyou
were pressing the corresponding buttons on the base (see "Answering
Machine Operation" for details on functions). To make it easy for you, the
functions are listed on the handset above each number. Pressing the
pound key (#) followed by 1, 2, 3, or 4 selectsthe desired mailbox.
SCREENING CALLS FROM
THE HANDSET
Use the handset to screen calls even when you
can't hear the answering machine.
When the phone rings with an incoming call:
1. Press the ANSWERER button to gain access
to the answering machine, button
2. Listento the caller leaving a message. -Remote
3. Press the PHONE ON/OFF button to talk to function
the person, butto_
Imadset
16
Page 19

ACCESSING THE ANSWERER FROM ANOTHER LOCATION
You can accessyour answering machine from a tone-dial phone by enter-
ing the factory set, three-digit, security code 1 23 after you hear the tone
that follows the outgoing announcement,
1. Dial the phone number for the answering machine.
2. Enter the security code after you hear the tone.
3. Follow the voice menu to use the answerer's remote functions.
The remote feature enables you to perform the following functions:
To
Review message
Play messages
Stop message playback
Erasemessage
Skip message
To turn off answerer
To turn on answerer
To reviewvoice menu options
Toselect mailbox
phone, it automatically turns on when you enter your security code. The
I OTE: If your answerer was offwhen you called your answerer from another
answerer remains on. To turn the answerer off, you must press 4.
CHANGING THE SECURnY CODE
Pressthis Button
1
2
2
0 (during message playback)
3
4
enter securi_ code after tone (unit
turns on automatically)
7
# (pound key followed by 1, 2, 3 or 4)
?
The default security code for accessing the answerer from another loca-
tion is 1 2 3.
You must use the handset to change the security code. With the phone off,
follow these steps:
1. PressMEMORY (the Phone-in-Use light blinks).
2. Dial 3 numbers to be used as the new security code.
3. Press MEMORY again.
4. Pressthe pound kay (#) once (the handset beeps three times).
I TIP:You can bypass the OGA by pressing any numbered key on the keypad "_
whicle:sthhea:::wuenC:genatcih_P_aying.Then, you ca,,enter your security code t_ 1
Page 20

CHANGING THE HANDSET BATTERY
The handset runson a consumer-replaceable nickel cadmium battery pack.
If you experience any of the following problems,you may need to replace
the battery pack:short talk time, poor sound quality, limited range, or
CHARGE/IN USE light fails to come on.
Make sure phone is OFF beforeyou replace battery.
1. Slide open 2. Unscrew and 3. Pull out the 4. Remove the
the battery remove the battery plug. battery pack.
compartment bracket holding
door. battery in place.
Bracket PI_
5. Replace and 6. Replace the 7. Replace the 8. Charge the
plug inthe new bracket and battery battery for
battery pack secure it with compartment 12 hours
(use GE # BT-12) the screw, door. before use.
BATrERY SAFETY PRECAUTIONS
Don't disassemble, mutilate, puncture, wet, or dispose of battery in fire. Like
other batteries of this type, if it is burned or punctured, it could release toxic
materials which can cause injury.
Keep batteries out of the reach of children.
NOTE: The RBRC seal on the battery used in your Thomson |
Consumer Electronic* product indicates that we are participating
in a program to collect and recycle Nickel Cadmium batteries
throughout the United States. Please call 1-800-8-BATTERY for
information or contact your local recycling center.
18
J
Page 21

GENERAL PRODUCTCARE
To keep your telephone working and looking good, follow these guide-
lines:
• Avoid putting the phone near heating appliances and devicesthat
generate electrical noise (for example, motors or fluorescent lamps).
• DO NOT expose to direct sunlight or moisture.
. Avoid dropping the handset, as well as other rough treatment to the
phone.
• Clean the phone with asoft cloth.
• Never use a strong cleaning agent or abrasive powder becausethis will
damage the finish.
• Retainthe original packaging in case you needto ship the phone at a
later date.
Periodically clean the charge contacts on the handset and base with a
soft cloth.
SERVICE
The FCC requires this product to be serviced only by the manufacturer or
its authorized service agents. In accordancewith FCC requirements,
changes or modifications not expressly approved by Thomson Consumer
Electronicscould void the user'sauthority to operate this product. For
instructionson how to obtain service, refer to the warranty included in this
Guide or call Consumer Information, 1-800-448-0329.
Attach your sales receiptto the booklet for future reference or jot down the
date this product was purchased or received as a gift, This information will
be valuable if service should be required during the warranty period.
Purchasedate
Name of store
19
Page 22

HANDSET SOUND SIGNALS
Signal Meaning
Three long beeps or continuous beeps Page signal
A long warbling tone (with ringer on) Incoming callsignal
One short beep every 9 seconds Battery Low
TROUBLESHOOTING GUIDE
TELEPHONE SOLUTIONS
Problem Solution
No dialtone • Check installation:
-- Isthe base power cord connected to a working
outlet?
-- Isthe Phone-in-Use light on?
-- Isthe telephone line cord connected to the base
unit and the wall jack?
• Connect another phone to the same jack;the
problem might be your wiring or local service.
• Is the handset out of range of the base?
• Make sure the battery is properly charged (12 hours).
• Is the battery pack installedcorrectly?
• Did the handset heap when you pressedthe PHONE
ON/OFF button? Didthe Phone-in-Use light come
on?The battery may need to be charged.
• Reset the security code by placingthe handset in the
base for about 20 seconds,
Ioflashesindisplay Installnew9-voltbattery.
Dialtoneis OK, * MakesurethePULSE/TONEswitchonthebaseis
20
Page 23

CORDLESS PHONE SOLUTIONS CONTINUF.D
Problem Solution
but can't dial out correctly set (see page 4).
Handset does not ring Make surethe RINGER switch on the handset ts
turned to ON.
• You may havetoo many extension phones on your
line. Try unplugging some phones.
Checkfor dial tone
You experience static, Change channels
noise, orfading in Move closer to base (handset might be out of range).
end out Does the baseneed to be relocated? Make sure base
is not plugged into an outlet with another household
appliance.
Charge battery.
Unit beeps Placehandset in base for 20 seconds; if it still beeps,
charge battery for 12 hours.
Cleancharging contactson handset and base with a
soft cloth, or an eraser.
See solutions for "No dial tone."
Replace battery.
Memory Dialing Did you program the memory location keys
doesn't work correctly?See p, 11.
• Did you follow proper dialing sequence?
See pp. 11-12.
Speakerphone • Move handsetawayfrom the base orturnvolume
screeches or howls down.
ANSWERING MACHINE SOLUTIONS
Problem Solution
Can't hear messages, • Adjust speaker volume (p. 5).
beep, etc.
rsDle COiRInue$
21
Page 24

Problem Solution
Time/Day Stamp • Setthe time clock (p, 5).
stuckat 12a.m Mon.
Answers on t0th ring • Make sure answerer is turned on.
• Memory is full See p. 14.
Incoming messages • Extension was picked up?
are incomplete * 1 MIN time limit was exceeded, set to NO LIMIT. See
Won't respondto Must use tone-dial phone.
remote commands Must enter correct securitycode. See pp. 15, 16.
Answer function Pressthe RESETbutton on the back of the base to
operates erroneously reset unit.
or not at all.
Three horizontal bars Erase messages.The memory isfull. The unit's
(E_ appear in the display memory holds 39 messages and 20 minutes of
p. 5.
• Memoryis full.
• Accidentally pressed PLAY button during playback
and stopped message.
Did unit hang up? If you take no actionfor a period
of time, it automatically han_lsup.
messages and/or memos. When a caller leaves a
message when 39 messages are stored in memory,
the oldest message is automatically erased to make
room for the newest one.
CAUSES OF POOR RECEPTION
• Aluminum siding
Foil backing on insulation
Heating ducts and other metal construction that can shield radio
signals.
• You're too close to appliances such as microwaves, stoves,
computers, etc,
• Atmospheric conditions, suchas strong storms
Baseis installed in the basement or lower floor of the house.
Baseis plugged into AC outlet with other electronic devices.
• Baby monitor is using the same frequency.
• Handset battery is low.
• You're out of range of the base.
Page 25

INDF=_
A
ANSWERER ON button 4
Answering machine setup
4
B
Battery
9V backup
installation 2
Installation 17
Battew Backup 2
Battery Safety 17
Buttons
ANSWERER ON 4
CHANNEL 8
FLASH 9
MEMORY 10, 11
PAGE/FIND 9
PHONE ON/OFF 8
REDtAL 8
TONE 11
C
Call Screening 14
fromthe handset 15
Chain Dialing 11
CHANNEL Button 8
CHARGE/IN USE light 4
C_saningthe phone 18
E
ERASE button 13
Erasing messages 13
F
FLASH button 9
H
Handset Volume Switch 9
I
Incoming message length
NO LIMIT 5
options E
setting 5
Installation 2, 3, 4
M
mailboxes 6
Making a Call 8
Memo
leaving 13
MEMO button 13
Memo feature 13
MEMORY button 10, 11
Memory feature 10
Memory full 14
memory location 10
message.indicator 12
Message Playback 12
N
nickel cadmium battery
pack 17
replacement of 17
NO LIMIT setting E
o
(OGA) Outgoing
announcement 6
recording 6
reviewing 6
P
PAGE/FIND button 9
Paging the Handset g
PHONE ON/OFF 8
Product Care 18
R
REDIAL 8
Remote access 15
From another location
16
Fromthe handset 15
REVIEW button 12
RING SELECT switch 5
Ringer Switch 9
S
security code 16
changing 16
Service 18
Setup
Answering machine 4
SKIP button 12
SPEAKER button 7
speaker volume E
STOP button 12
switching between
speakerphone and
handset 7
T
Temporary Tone 11
lime/Day Stamp
setting up 5
Toll Saver 5
TONE button 11
Total message erase 13
TS (Toll Saver) 5
Page 26

CUSTOMER: CUT ALONG DOTTED LINE. _:_
ACCESSORY ORDER FORM
Re#acmnenl handset beuent 8T-12 $14J5
.+-. I++0+m+I
AC power sepply 5-2396 $9,95
F_ credit cardpurchases
Your complete charge card number, its ex#rafion date and your
signature are necessary to process all charge card orders.
Copy your complete account number from your VISAcard.
FT-N -MN-M R-M
My card expires:
Copy your complete account number [Tom your MasterCard.
m-AM-raM Tm-T
Copy the number above your
name on the MattergaM
My card expires:
Authorized Signature
Pleasemake surethat this form hasbeen filledout completely.
+Pdc_aresubjecttochaqewilkeltiwice.
Total Merchandise ...........
WeareTirnd bylawIoCOUSCIIUSlppplopdliesales1ixfef
eackindividvalstate,countf,andIOCM_II wlh _ll
menchand_seisUSi#9sent
Sales
Tax .................................................................. $__
UseVISAir Maste_lrdpmflrekly+Malayofde_m skeck_ UsIll U,$.¢llfen_
only.NoC00_ Cas_
AllI_awdes aresik_'t t avlilaldlit1.WUSflndldledde,wewill skipa
s_lersndinlmdeL
Shipping, Handling, and Insurance ............. $__ $5.00
Total Amount Enclosed.. $.
Mall order form and money order or check (in U.S. currency)
made payable to Thomson Consumer Electronics, Inc. to:
CImsumerElectrNics
Mail OlderOeparWaut
P.O.Be_8419
Rmk_ PA11157341419
"i_]s is your return label. Please print clearly.
To:
Name
Address Apt.
City State Z
Page 27
WARRANTY
What your warranty covers:
• Any defect in materials or workmanship.
For how long after your purchase:
• One year.
(The warranty psr_odfor rental units begins with the first rental or 45 days from date of
shipment to the rental firm, whichever comes frst.)
What we will do:
Provide you with e new, or at our option, a refurbished unit.
• The exchange unit is under warranty for the remainder of the original product'swarranty
period.
How to make a warranty claim:
• Properly pack your unit, Include any cables, etc., which wars originally provided with the
product. We recommend using the original carton end pecking materials.
• Include in the package evidence of purchase date such as the bill of sale. Also print your
name end address and a description of the defect. Send standard UPS or its equivalent to:
Thomson Consumer Electronics, Inc.
Product Exchange Center
32 Spur Drive
El Paso, Texas 79906
• PayanychargesbilledtoyoubytheExchangeCenterforservicenotcoveredbythe
warranty.
• A new or refurbished unit will be shipped to you prepaid freight.
What your warranty does not cover:
. Customer instruction. (Your Owner's Manual provldes information regarding operating
instructions and user controls. For additional information, ask your dealer.)
• Installation and set-up service adjustments.
. Batteries.
• Damage from misuse or neglect.
• Products which have been modified or incorporated into other products,
• Products purchased or serviced outside the USA.
. Acts of God, such as but not llmited to Ughtning damage.
Product Registration:
• Please complete and mail the Product Registration Card packed with your unit. It will
make it easier to contact you should it ever be necessary. The return of the card is not
required for warranty coverage.
How state law relates to this warranty:
• Thiswarrantygivesyouspecificlegalrights, andyoumayhaveotherrightswhichvary
from state to state.
If you purchased your product outside the USA:
• Thiswerrantydoesnotapply. Contactyourdealerforwarrantyinformation.
Page 28

Model 2-9795
347A8089-0001 (E/S Ray. 3)
96-50
Printed In Philippines
26
_ 'mOM$Oil_DINUMEBB.I_IrRoICS
© 1996 Thomson Consumer Electronics. Inc.
P.O. BOX 1976, Indianapolis, IN 46206
Trademark[s) ® Registered
Marcals) Registrada(s)
 Loading...