


WELCOME
Congratulations and thank you for purchasing the GBF 4 wire smart intercom
system for 2 to 8 unit apartment buildings. Our factory engineers were the first to
enable monitoring multiple security cameras through mobile handheld devices, and
now have used that expertise to bring you a full-featured Multi-unit Doorbell system
that allows you to monitor and interact with visitors at your door, from anywhere on
your mobile device using a Wi-Fi or data connection. Please read these instructions
carefully and follow all of the required steps during setup to ensure your enjoyment
of a fully functional Doorbell system in minutes.
For customer support or any inquiries, please visit our website at
www.gbfelectronics.com or contact us at info@gbfelectronics.com.

INSIDE THE BOX
(1)
GBF PL591BC4(x)* outdoor station
(1)
Metal Back Box
(1)
12VDC Outdoor Station Power Adapter
(1)
Relay/Push-to-Exit Wiring Harness
(x)
SkyBox with power adapter*
(4)
Screws with Anchors
(2)
Hex-Head Screws
(1)
Allen Key
(1)
User Manual
Quantity
* (x) denotes number of call buttons on the outdoor station. All examples and diagrams in
these instructions are for a 4-Button outdoor station (PL591BC4(4))
SYSTEM OVERVIEW
The GBF 4-Wire Intercom system utilizes a minimum of two connected devices; an Outdoor Station
containing an intercom, camera, and call button, and a SkyBox, which is the link between the Outdoor
Station and the Internet. The Skybox also is individually addressable and will only ring to the mobile
device(s) registered to it. The SkyBox is wired to the Outdoor Station with a 4-conductor wire, and
connected to a internet-connected router either through WiFi or via a hardwired ethernet cable. The
Outdoor station comes in a number of designated unit configurations; 2, 3, 4, or 8 Call buttons. The
system will have a corresponding number of SkyBoxes to match the num ber of Call buttons on the
Outdoor Station. The Skyboxes need to be connected to the internet to communicate with your mobile
device, and can all share the same internet connection if desired. When a Call button is pressed on the
Outdoor Station, the connected SkyBox will alert all mobile devices registered to that single SkyBox.
From anywhere their mobile device is connected to the internet (3G/4G or WiFi), the user will be able
to answer the call, communicate with the visitor, observe them on video, and also trigger a door lock
mechanism to allow entry.

1. Installation
* For your convenience, perform the initial configuration of the doorbell
connecting it to a power supply nearby the user’s home internet router. From
this way, it is possible to check the full operational function before place the
parts of the product.
-
Placing the outdoor station: Place the outdoor station beside
your gate, considering field of vision, shadows and background light
(for the camera). You should also consider proximity of AC power and
the ability to wire for additional accessories. The recommended mount
height is 60” (150cm) above the surface where the caller is standing
on. At the chosen place must have at least a 1 ¼” hole on the wall to
allow the wired connection.
-
Placing the Skybox: Place the Skybox in a local with good wi-fi
connection with the user’s router or in a local with access of a ethernet
cable from the user’s router. Remember about the necessary power
supply.
-
Connecting the system: Using the four wires connectors (come
jointly the kit), connect the outdoor station with each corresponding
skybox. Notice that there is a 4-pin connector for each unit inside the
outdoor station (CN1, CN2, CN3, CN4, etc.) and two behind skybox,
the first outdoor station must be connected at the CN1 port of the
corresponding skybox, and the same step must be used for the
subsequent units. Notice that the connectors already come prepared
to be extended, only make sure to match the wires post extension by
the color code.
-
Connecting an electric lock: The outdoor station possesses a
SPDT relay that allows the use of an electric lock with a push-button to
release the gate. Use the red and black wires from the 5-pins
connector (CN5 behind the outdoor station) to connect a push-bottom.
Use the green and blue wires for normal opened contact, or blue and
brown for the normal closed contact, to connect the electric lock.
-
Powering the system: Connect the power supplies to the 2-pins
connectors on each system’s part (outdoor station and skybox).

-
Assembling the outdoor station: Gently place the excess wire
inside the hole behind the outdoor station. Assemble the outdoor
station inside the rain cover mount, placing the top first. Then fix the
two screws on the bottom of the rain cover mount using the Allen key.
Notes:
-
The maximum distance between the outdoor station and the
farthest monitor must be 70m.
-
To each unit work separately, seek the connection label on the
skybox bottom and take out the short circuits labeled as
J1 and J3 behind the skybox. Do it for all the skybox in the
system.
1.1 Wiring Diagrams
Typical Outdoor Station
Connector Layout


General System Wiring Diagram
2. Skybox configuration
Downloading the App
To configure and receive calls from the Outdoor St ation you need to
download the ControlCam2 Application. Available on Play Store
(Android) and App Store (iOS).

ControlCam2
Notes:
notification.
Preparing the App to be used
1. Make sure your smartphone cellular data is turn off and is connected
to your 2.4G Wi-Fi network.
2. Open the app.
3. Click on the ‘Sign up’ button.
4. Enter a username, password, password confirmation, custom
question and answer the custom question.
5. Read the terms and privacy, then click on the checkbox, agreeing
with.
6. Click on ‘Sign up’ button. If the provided information is ok, a popup
message will appear on the screen with ‘Registration Success’, then
click on ‘OK’.
7. You will be redirected to the login screen.
8. Click on ‘Login’. Now you are logged into your account and can see
your home screen.
The ControlCam2 app is free to use.
Keep the ControlCam2 app updated.
The application is subject to changes whit no prior
2.1 Adding devices to your ControlCam2
account
Configuring a new skybox
Before configuring a new device (Skybox), it is necessary to
perform the factory reset.

With the device powered on, in three seconds please hold the ‘reset’
button on Skyboxes for 1 minute, a long beep will be heard. That
means the factory reset is performed successfully.
Then, you can continue configuring your device, using the smart phone.
2.1.1 Configuring a new device using Android
1. Wait 2 minutes after the factory reset, allowing the device to restart
properly.
2. Make sure your smartphone cellular data is turn off and is
connected to the Wi-Fi network in which the device (Skybox) will work
on.
3. Inside the app, click on the “add” button.
4. Choose the “Doorbell1” option, then choose the ‘Hotspot
Connection’ option.
5. Click ‘Next’ to start searching automatically the new device on the
network. When found, a popup window will appear showing the Wi-Fi
network and asking its password. (If the search finds more than one
new device, a popup screen will appear showing the identification of
each one. Choose the desired one, looking on the GID label placed on
the device).
6. Enter the Wi-Fi password, and press ‘OK’.
7. A popup message will appear, showing the device was configured
successfully, press ‘OK’ to confirm.
8. In the device’s details screen, insert the default password ‘1234’,
change the device’s name to the desired name, and press ‘Save’.
(Do not change the GID identification).
9. Now you can see the device’s image on the ‘Home screen’. To
access it, click on its image or its identification.
Once the Device has been added to the app, you will be able to
access it by Wi-Fi or mobile data (3G/4G).
3.1.2 Configuring a new device using iOS
1. Wait 2 minutes after the factory reset, allowing the device to restart
properly.

2. Make sure your smartphone cellular data is turn off and is
connected to the 2.4G Wi-Fi network in which the device (Skybox) will
work on.
3. Inside the app, click on the “add” button.
4. Choose the “Doorbell1” option, then choose the ‘Hotspot
Connection’ option.
5. Press on ‘Next’.
6. The name of the Wi-Fi network will appear, and the app will ask its
password to continue.
7. Enter the Wi-Fi password. (Do not press ‘Next’ yet)
8. Go to the Smartphone’s Wi-Fi configuration (outside the
ControlCam2 app) and look for the device identification (It will appear
as ‘LID + GID identification’. The identification can be consulted
looking on the GID label placed on the device).
9. Go back to the ControlCam2 application and click on ‘Next’.
10. In the device’s details screen, insert the default password ‘1234’,
change the device’s name to the desired name, and press ‘Save’.
(Do not change the GID identification).
11. Now you can see the device’s image on the ‘Home screen’. To
access it, click on its image or its identification.
Once the Device has been added to the app, you will be able to
access it by Wi-Fi or mobile data (3G/4G).
3.2 Adding a previously configured or wired
device
You can add a previously configured or wired device through three
methods: LAN search, QR code scan and manually.
1. Connect to the Wi-Fi network which contains the device.
2. Inside the app, click on the “add” button.
3. Choose the “Doorbell1” option, then choose the ‘Add Manually’
option.
4. On the ‘Add Device’ screen, choose one of the following methods.
LAN Search
5. The “Add Manually” option will start automatically a search trough
the currently network.

6. A list of all devices in the network will appear, click on the desired
one.
7. On the ‘Add Device screen’ will appear the information from that
device.
8. insert the password (default password is ‘1234’), change the
device’s name to the desired name, and press ‘Save’. (Do not
change the GID identification).
9. Now you can see the device’s image on the ‘Home screen’. To
access it, click on its image or its identification.
QR Code Scan
5. Press the ‘QR CodeScan’ button.
6. Accept the popup message to allow the app to access your
camera.
7. Using the camera, look on the QR code placed on the device.
8. On the ‘Add Device screen’ will appear the information from that
device.
9. insert the password (default password is ‘1234’), change the
device’s name to the desired name, and press ‘Save’. (Do not
change the GID identification).
10. Now you can see the device’s image on the ‘Home screen’. To
access it, click on its image or its identification.
Manually
5. Manually insert the device's GID. The identification can be
consulted looking on the GID label placed on the device
6. Enter the default password ‘1234’.
7. insert the password (default password is ‘1234’), change the
device’s name to the desired name, and press ‘Save’. (Do not
change the GID identification).
8. Now you can see the device’s image on the ‘Home screen’. To
access it, click on its image or its identification.
NOTES:
• It is possible to add an unlimited number of devices to your app.
• Each device will support up to 4 concurrent connections.

3. Operating the Indoor Monitor
Note: In case of the system has more than one Indoor Monitor: the
connector J2 must be connected only in the farthest Indoor Monitor (in
relation to the Outdoor Station) and disconnected in the others; and the
connector J1 must be connected in the Indoor Monitor closest to the
Outdoor Station and disconnected in the others.
Please be advised that this indoor monitor has two different modes, one
is single family mode and the other is apartment mode. By pressing
and holding the unlocking button for 3 seconds, one long beep sound
will be heard, that means the indoor monitor is on apartment mode.

- Receiving a Call from the Outdoor Station:
1.
When a visitor presses the “Bell” button on the outdoor station, your
indoor monitor(s) will turn on the screen with the outdoor station image
and will ring.
2.
Press the ‘Talk’ button to answer the call and start a conversation with
the visitor.
3.
Press the ‘Talk’ button to hang up.
- Monitoring the Outdoor Station(s):
1.
At any time, press the ‘Monitor’ button to watch the image from the
outdoor station (once for the outdoor station 1 and twice for the outdoor
station 2).
2.
Press the ‘Monitor’ button once more to turn off the screen.
-
It is possible to start a conversation from the monitoring mode only
pressing the ‘Talk’ button, and pressing again to hang up.
- Unlocking the electronic lock:
During a conversation, monitoring mode or receiving a call, press the
‘Unlock’ button to activate the unlock contact relative to that outdoor
station.
- Transferring an Outdoor Station’s call:
1.
During a conversation with the outdoor station, press the ‘transfer’
button to transfer the call.
2.
The ControlCam App will ring, as well as the others monitors in the
system. All of them will be enabled to answer the call.
- Calling from the indoor monitor:
While in standby mode, press ‘Transfer’ button to call others indoor
monitor or call the ControlCam app (with no video).
- Managing images:

When the indoor monitor receives a call, it saves automatically a
screenshot. Follow the steps to access and delete these files.
1.
While in standby mode, press ‘Talk’ button to access the storage of
images.
2.
Scroll through the images using ‘Unlock’ and ‘Transfer’ buttons.
3.
Delete an image pressing ‘Monitor’ button and pressing again to
confirm.
4.
Exit this mode pressing the ‘Talk’ button.
If you have an SD card inserted in the indoor monitor, the screenshots
taken will be saved on the card.
- Recording videos:
During a call or monitoring mode, it is possible to record a video from
the outdoor station image, pressing the ‘Talk’ button for 3 seconds,
selecting ‘video’.
1.
Press the ‘Talk’ button for 3 seconds to entry in the record mode.
2.
Select ‘video’ pressing the ‘Talk’ button to scroll over the menu, then
press the ‘Unlock’ button to record. You can stop recording by pressing
‘Talk’ or ‘Monitor’ buttons.
3.
While in standby mode, press ‘Talk’ button for three seconds to
access the storage of videos.
4.
Select ‘play’ pressing the ‘Talk’ button to scroll over the menu, then
press the ‘Unlock’ button to watch the video.
5.
Exit this mode pressing the ‘Monitor’ button.
In case of using SD card, it is possible to remove that and watch the
videos using a computer with SD card slot and a player able to play
‘.AVI’ files.
If you have an SD card inserted (the system asks you to format when
you insert it), the indoor monitor will record a short video always you
receive a call from the outdoor station.

- Adjusting ringer and talk volumes:
At any time, use the volume scrolls to adjust the ringer and talk
volumes to the desired level.
- Adjusting indoor monitor’s screen settings:
1.
During any mode, press ‘Talk’ button and hold for three seconds to
access the configuration menu.
2.
Pressing the ‘Talk’ button, scroll over the ‘Brightness’, ‘Contrast’ and
‘Chroma’ options.
3.
Use the ‘Transfer’ button to increase and the ‘Unlock’ button to
decrease the options levels.
4.
Exit the menu pressing the ‘Monitor’ button.
- Adjusting date and time:
1.
During any mode, press ‘Talk’ button and hold for three seconds to
access the configuration menu.
2.
Pressing the ‘Talk’ button, scroll over the ‘Date’ and ‘Time’ options.
3.
Press the ‘Unlock’ button to access the option.
4.
Use the ‘Talk’ button to change among ‘Year’, ‘Month’ and ‘Day’ or
‘Hours’, ‘Minutes’ and ‘Seconds’.
5.
Use the ‘Transfer’ button to increase and the ‘Unlock’ button to
decrease the options.
6.
Press the ‘Talk’ button until pass through all the options to go back to
the main menu.
7.
Exit the menu pressing the ‘Monitor’ button.

- Clearing the indoor monitor’s storage:
1.
During any mode, press ‘Talk’ button and hold for three seconds to
access the configuration menu.
2.
Pressing the ‘Talk’ button, scroll over the menu until the ‘Delete All’
option.
3.
Press the ‘Unlock’ button to access the option.
4.
Use the ‘Unlock’ and ‘Transfer’ buttons to select between ‘Video’ and
‘Photo’ options.
5.
Press the ‘Talk’ button to confirm and clear all the selected files.
6.
At the end of the process, the configuration menu will be quitted
automatically.
4. Advanced Settings
Many other advanced features can be configured in your Outdoor Station. To
access these features, use the outdoor station Web Server through Internet
Explorer web browser (IE) with ActiveX controls enabled (Some features will
not be visible or configurable with other web browsers). Tutorial videos and
instructions for these advanced features can be accessed from our website at
www.gbfelectronics.com.
1. 5. Using the ControlCam2 App
5.1. Device’s Settings
From the device’s setting screen is possible to adjust some settings
to the device.

Access the ‘Device’s setting screen’ by clicking on the ‘engine’
button on the device’s image.
Changing device’s name, username and password
When desired you can change the device’s username and password,
or after another user has changed, it is necessary to change on the
other users.
1. In the ‘Device’s setting screen’ enter the new information (username
and/or password, and name if desired).
2. Press ‘Save’.
3. The app will go back to the ‘Home screen’ and the device will be
actualized with the new information.
Unlock Time
It is possible to change the time which the auxiliary contact for gate
opener will be activated.
1. In the ‘Device’s setting screen’ enter the new unlock time (1 -100
seconds, where the default is 1 second), and press ‘OK’.
2. Press ‘Save’.
3. The app will go back to the ‘Home screen’ and the device will be
actualized with the new unlock time.
One-Key Unlock
To activate the device’s auxiliary contact (gate opener) from the app
without the necessity to enter the ‘unlock password’, it is necessary
to activate the ‘One-Key Unlock’ option.
1. In the ‘Device’s setting screen’ click on the ‘One-Key Unlock’ button.
2. Press ‘Save’.
3. The app will go back to the ‘Home screen’ and the device will be
actualized with the new unlock time.
5.2. Advanced Device’s Settings
On the ‘Device’s setting screen’ click on the ‘Advanced Settings’
button.
Modify Device Password

It is possible to change the access password (which the device
request to the app each time it is accessed).
1. In the ‘Advanced Settings screen’ click on ‘Modify Device
Password’.
2. Enter the ‘device password’ (current), then insert the ‘new password’
and the ‘password confirmation’.
3. Press ‘Save’.
4. Exit the ‘Device’s Settings Screen’.
Note: It is a good feature for building managers. During a change of
tenants, there is only the necessity to change the device password and
offer the device’s GID and new password for the new tenant, blocking
the access to the old tenant.
5.3. Deleting a device from the app
1. Click on the ‘delete’ button. From the ‘Home screen’ click on the
‘trash bin’ button on the device.
2. A popup notification will appear, asking you to confirm. Click on ‘OK’
3. The device will be removed from the account in use, but it will still
be configured and connected to the local network and other
ControlCam2 accounts which have this device.
5.4. ControlCam2 Operations
Answering a call
When the visitor presses the call button on the outdoor station, your
smartphone will receive a ring notification. (Make sure to enable
notifications from the app to your smartphone). You can 'Accept' or
'Decline' on the pop-up call alert of the app.
If accept, use the following steps to have a conversation with the
visitor
1. Press on the microphone icon and the audio from the outdoor
station and the ‘Push to talk’ microphone will be enabled.
2. Press and hold the ‘Press to Talk’ button to talk with the visitor.
Unlocking the Door
During a call or monitoring mode, click on the ‘locker’ button to
activate the gate opener
1. Press the ‘locker’ button on ‘device’s home screen’ to unlock
the door.
2. If the ‘One-Key Unlock’ is not turned on, a popup message will ask
you to enter the unlock password (default is ‘1111’).
3. The door will unlock during the configured unlock time.
Monitoring the Outdoor Station
At any time, from the ‘Home screen’ click on a device’s image to
access the live stream from the outdoor station. The monitor mode
allows you to access all the option than during a call (take a
snapshot, record video, listen the outdoor station sound and talk
through the outdoor station microphone.
Image Capture
During a call or monitoring mode, click on to take a snapshot of
the outdoor station’s image. It can be accessed from the home
screen’s menu, in ‘Media’.
Video record
During a call or monitoring mode, click on icon to start recording
a video from the outdoor station’s image. Click again to finish the
record. It can be accessed from the home screen’s menu, in ‘Media’.
Accessing recorded videos/images
1. From the device home screen, click on the main men u icon.
2. Select the ‘Media’ option.
3. The first tab shows the recent files (images and videos), the second
shows only videos and the third only images.
4. To delete a file, press and hold on the image then confirm the
popup message.

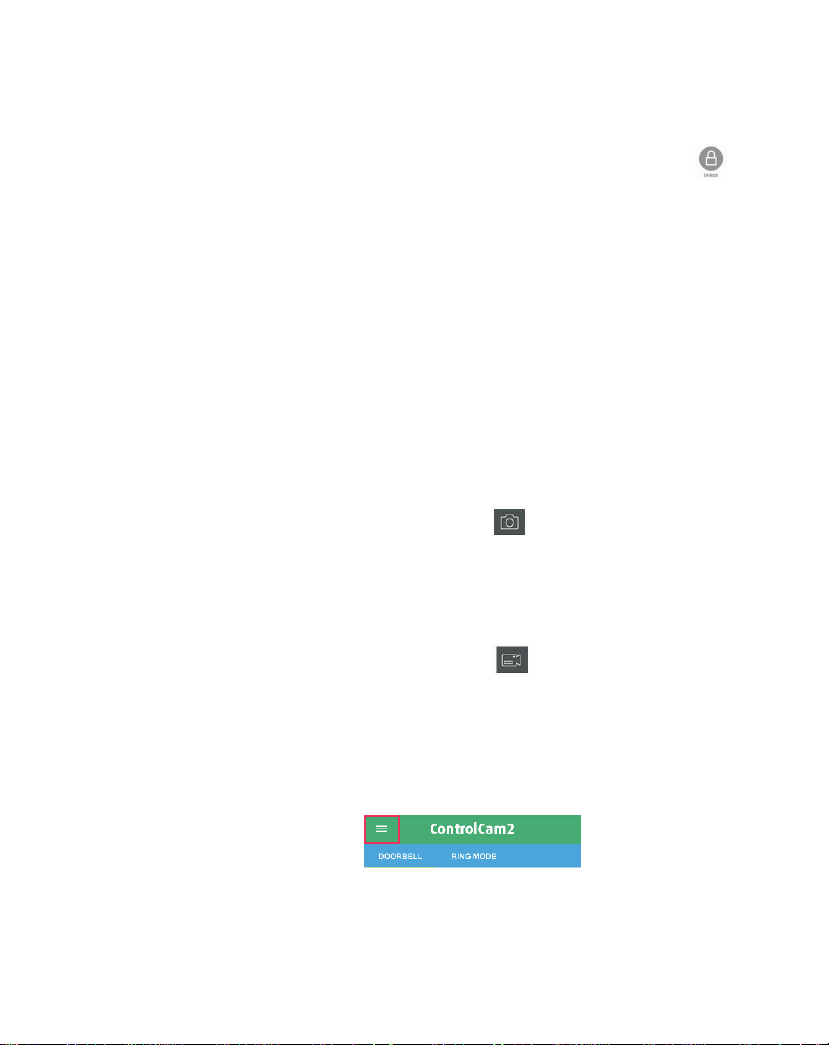
App Mode
The second tab of the ControlCam2 ‘Home Screen’ shows the app
modes which you can choose the best option for you.
Silent Mode – does not show any notification on the smartphone
screen. However, the app continues storing the device's alarms.
Global Ring-in Mode – allows all the devices listed in the user
account to notify the smartphone.
Selective Ring-in Mode – allows you to choose which device can or
can not notify you with ring and notifications.
1. From the device home screen, click on the second tab which
shows your current mode.
2. Select the desired mode. If this is not the current one, a popup
message will appear asking you to confirm the change.
Note: If you change to Selectiv e Mode, you will be able to click on
the mode and select which devices can notify you.
5.5. User Account Configuration
Access the user account’s settings by clicking on the ‘menu’ button
from the ‘home screen’, then click on your profile image or your
username.
Change User Account Password
1. From the device ‘Account screen’, click on ‘Change Password’.
2. Enter your ‘password’ (current), then insert the ‘new password’ and
the ‘password confirmation’.
3. Click on the ‘Done’ button.

4. You will be redirected to the login screen and will need to insert
For more product information, please watch GBF smart 4
wire multi units doorbell intercom introduction video at:
www.youtube.com/watch?v=FCwflit7P5g&t=61s
username and the new password.
Change Verification Question and Answer
1. From the device ‘Account screen’, click on ‘Reset Verification’.
2. Enter your ‘password’ (current), then insert the ‘new custom
question’ and the ‘new custom answer’.
3. Click on ‘Save’.
Log Out the App
1. From the device ‘Account screen’, click on ‘Logout’.
2. You will be redirected to the login
screen and will need to insert username
and password to reconnect.

 Loading...