

Gazer CM50-100 User Manual
GAZER CAR MULTIMEDIA SYSTEMS
USER MANUAL


ENG
User manual ..................................................................................................................................................................4-32
RU
Руководство пользователя
Посібник користувача
UA
.................................................................................................................................... 33-61
............................................................................................................................................ 62-90

Content
ENG
1. Gazer multimedia system package contents ...........................................................................................................................................6
2. Installation diagram
3. Installation tips
4. Radio App
5. Music App
6. Video App
..........................................................................................................................................................................................................9
....................................................................................................................................................................................................... 11
....................................................................................................................................................................................................... 12
7. Bluetooth App
8. A2DP App
....................................................................................................................................................................................................... 19
9. AirPlay and MirrorLink functions
• AirPlay
........................................................................................................................................................................................................ 20
• MirrorLink USB
• MirrorLink Wi-Fi
10. Installing apps from Google Play
11. Conguring GPS navigation voice prompts
12. Conguring equalizer
13. Front panel buttons
14. Conguring steering wheel controls
15. Additional settings
16. Rear view camera settings
17. Front view camera settings
18. Changing boot logo
19. Front panel backlight customization
20. Problems and troubleshooting
......................................................................................................................................................................................7
...............................................................................................................................................................................................8
................................................................................................................................................................................................ 13
.............................................................................................................................................................. 20
.......................................................................................................................................................................................... 22
......................................................................................................................................................................................... 23
........................................................................................................................................................... 24
......................................................................................................................................... 24
................................................................................................................................................................................ 25
.................................................................................................................................................................................. 27
...................................................................................................................................................... 27
.................................................................................................................................................................................... 29
..................................................................................................................................................................... 29
..................................................................................................................................................................... 30
................................................................................................................................................................................... 30
.................................................................................................................................................... 31
............................................................................................................................................................... 32
4

Gazer multimedia system
We congratulate you on purchasing Gazer multimedia system!
Please, read this guide carefully before using your Gazer multimedia system and storeit safely
for future reference.
Gazer multimedia systems are designed for standard installation in a specic car model or model range. All Gazer multimedia
systems support Plug&Play mounting and connection. Operation via control bus and CAN bus data transfer are also supported.
When connected to CAN bus via a special module, the system is managed by the car’s onboard computer (turning on/o,
climate control status, steering wheel buttons, car speed data, door opening sensors status, and other functions supported
by CAN bus of a specic car). The user can program the steering wheel control buttons on one’s own.
ENG
5
ENG
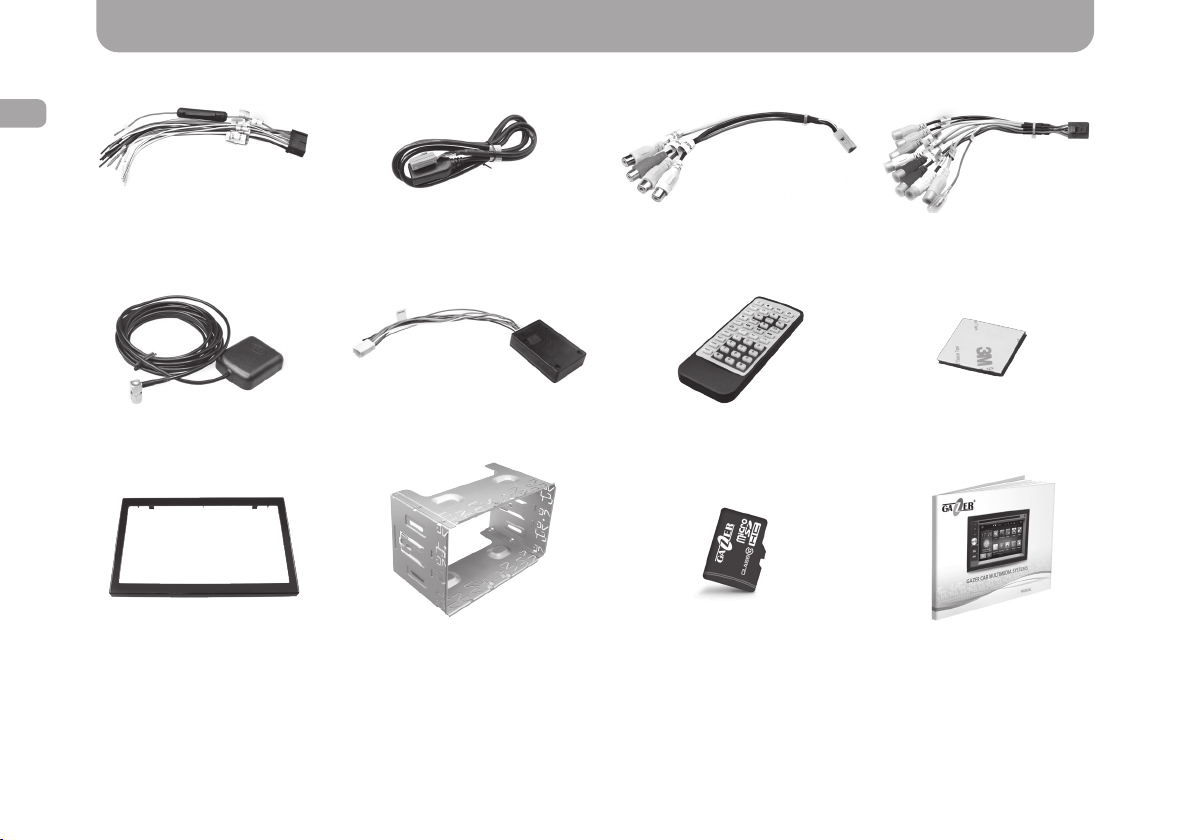
Gazer multimedia system package contents
Power cable
GPS antenna
Adapter bracket*
USB cable
CAN unit*
Adapter shaft for
installation*
Audio/Video In cable
Remote control*
Memory card with licensed
Navitel software**
Audio/Video Out cable
Velcro band*
User manual
* Depends on the model
** Depends on the region
6
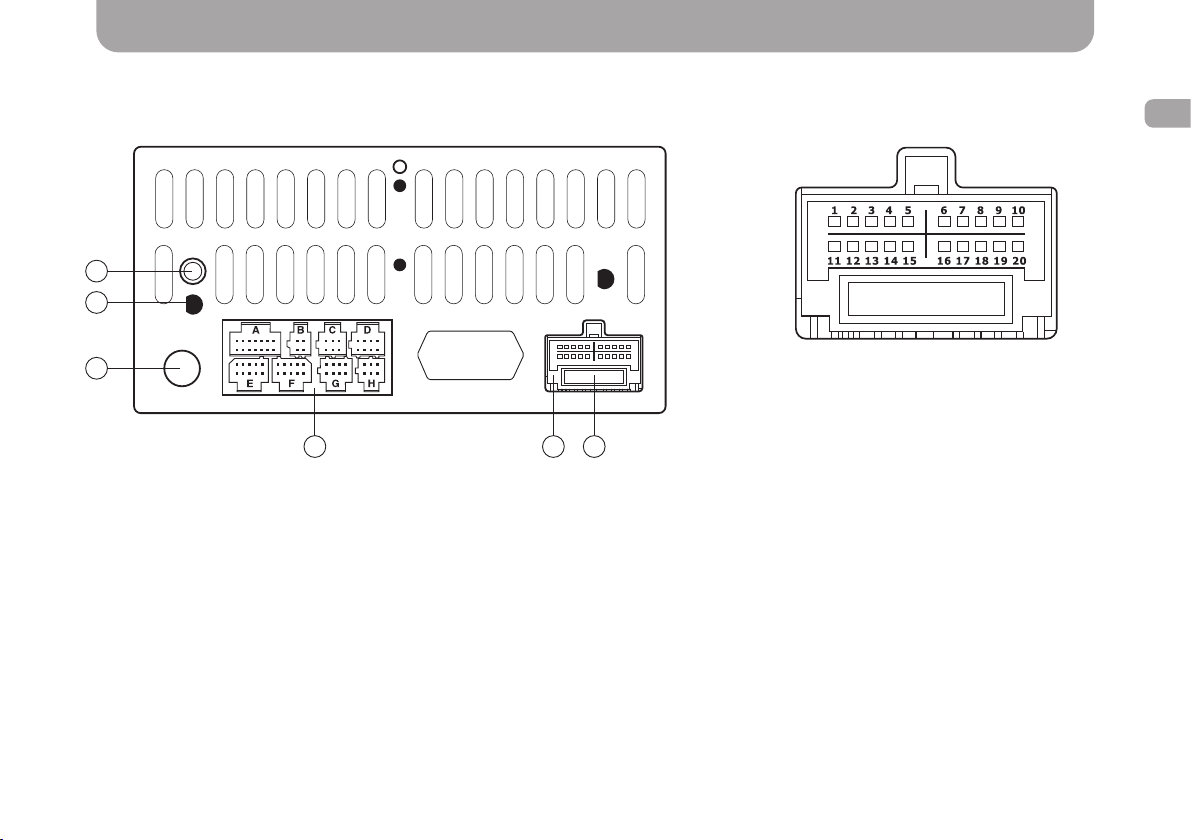
Installation diagram
Connection diagram
For Gazer CM50-100 model
GPS
1
2
3
4 5 6
1. GPS antenna jack
2. Wi-Fi antenna
3. FM antenna jack
4. Peripheral equipment connection interfaces:
A. Audio/Video Out
B. USB
C. Camera in, AUX, Audio/Video in
D. Not usable
E. Not usable
F. Not usable
G. Not usable
H. Not usable
5. Power cable socket
6. Fuse (15A)
Power cable socket
1. Black – GND
2. Purple+Black
3. Gray+Black – Front Right -
4. Green – Rear Left +
5. White – Front Left +
6. Brown – Brake
7. Orange – Amplier
8. White – SWC
9. Black – SWC GND
10. White+Red – Illumination
11. Yellow – B+ 12V
12. Purple – Rear Right +
13. Gray – Front Right +
14. Green+Black – Rear Left -
15. White+Black – Front Left -
16. Red – ACC
17. Pink – Reverse
18. Blue – Antenna Control
19. Brown+Black – CAN +
20. Blue+White – CAN -
–
Rear Right -
ENG
7

Installation tips
ENG
• For Gazer multimedia system installation, one must check that all plugs and jacksare connectedin accordance with the
connection diagram.
• Make sure that the yellow “BATT+” wire of the power cable is connected to the plus terminal of the car battery while the
red “ACC” wire is connected to the auxiliary equipment bus (+12V voltage is supplied when the ignition key is turned to
АСС position).
Caution! Incorrect power connection may cause the multimedia system to malfunction or fail.
• Prior to installing the system, one must consider where to place the remote elements such as GPS antennas and USB
ports.
• Lay all cables under the trim.
• Connect the stock USB and AUX connectors to the multimedia system (depending on the car model).
• If your multimedia system has a built-in DVD drive, unscrew two safety screws located in the center of the top panel.
• Prior to using the device, insert a memory card in the “SD card” slot.
Caution! Remove the memory card only when the device is switched o.
• To use all Gazer multimedia system features, one must connect it to the Internet.
8
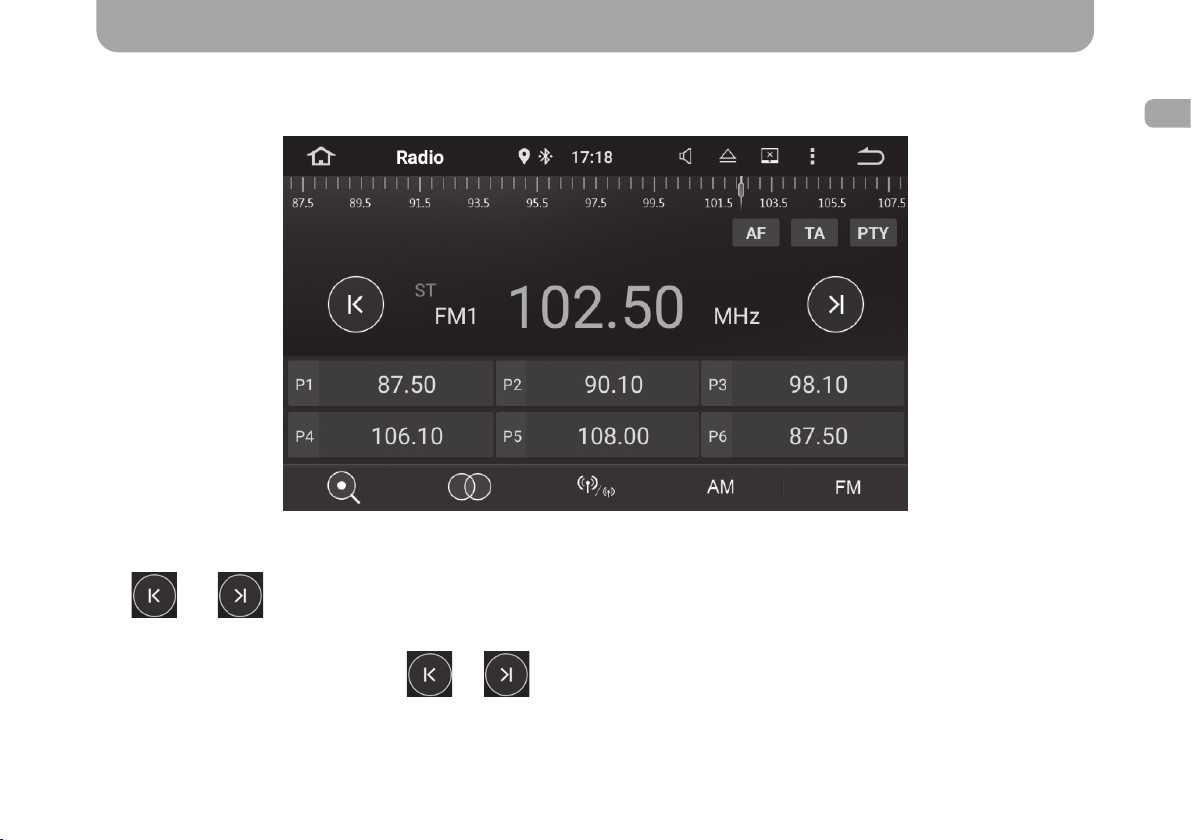
Radio App
To launch Radio app, tap on the corresponding icon in the installed apps list.
Use and buttons to initialize automatic search for available radio stations.
For manual tuning of the radio receiver, use the slider on the frequency range scale.
ENG
To enable manual tuning, hold down
required frequency.
or buttons for 2 sec. After that, you can ne-tune the receiver to the
9
Radio App
ENG
To make the radio station accessible from a memory button, hold down the required button for 2 sec.
Use
button to make the receiver search and memorize all the available radio stations automatically. During the
scanning process, the radio receiver will detect all the available radio stations and assign them consecutively to memory
buttons in FM1, FM2, FM3 or AM1, AM2 groups depending on the frequency range.
Note. Keep in mind that the multimedia system has 6 memory buttons in each group, which allows memorizing a total of
18 radio stations for FM frequency range and 12 radio stations for AM frequency range.
To switch between FM1, FM2, FM3 or AM1, AM2 memory button groups, use on-screen
and .
button enables or disables Stereo mode.
By pressing
button, one can switch between “local/long-distance” reception modes. “Local mode” is used for
receiving strong radio signals, while “long-distance mode” is used for weak radio signals reception.
By default, the multimedia system operates in the long-distance reception mode. When the local reception mode is enabled,
“LOC” indicator appears on the display. Press the button again to disable this mode.
When listening to radio in the background, one can switch between stations using the mini-player built into the widget on
the home screen.
button is designed for searching radio stations by genre. Once this button is pressed, a drop-down list is displayed
where one can select the genre of the required radio station.
button is designed for searching radio stations broadcasting live trac information.
button enables automatic retuning of the radio receiver (e.g., in case of poor reception on the current frequency) to
a dierent frequency where the current program is also broadcast.
10
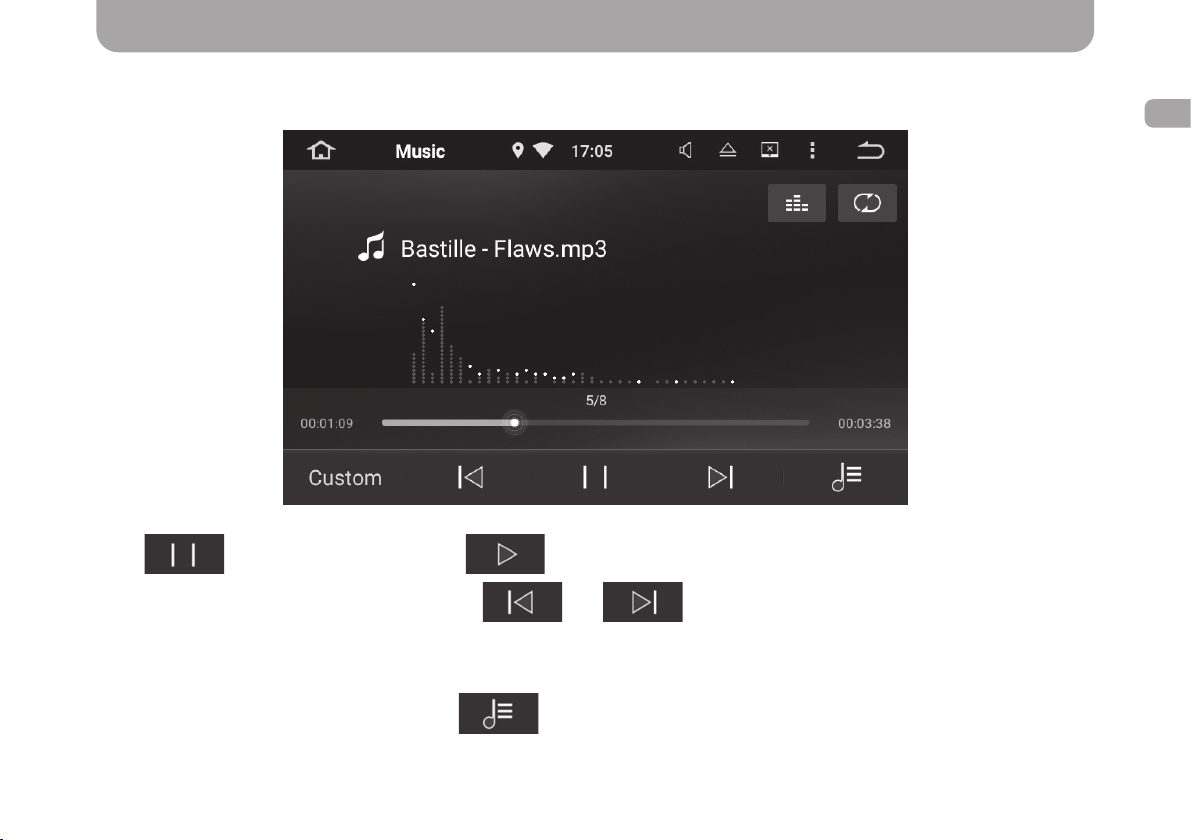
Music App
To launch Music app, tap on the corresponding icon in the installed apps list.
Press
To skip to the next or previous audio track, use
to pause audio playback and to resume it.
and buttons.
To fast forward/rewind the recording, move the slider on the audio track progress bar.
To fast switch between audio equalizer presets, press the button in the bottom left corner. The current equalizer preset is
indicated on the button.
ENG
To select a media source for playback, press
button or pull the main screen to the right.
To view the current playlist, pull the main screen to the left.
11

Music App
ENG
Buttons located in the top right corner are used for switching information display and audio playback modes.
When audio tracks are played back in the background, one can switch between stations using the mini-player built into the
widget on the home screen.
Video App
To launch Video app, tap on a corresponding icon in the installed apps list.
12
Press
playback completely.
, to pause video playback, use button to start playing a video le, and tap to stop video
Video App
To skip to the next or previous video clip, use and buttons.
To navigate to a certain scene in the video clip, move the slider on the video playback progress bar either back or forward.
To select a media source for playback, press
To view the current playlist, pull the main screen to the left.
When
Set playback order using the second button on the left (located on the lower panel). Once pressed, the button changes
depending on the selected order.
To quickly increase/decrease the brightness, swipe up or down in the left half of the screen.
To quickly increase/decrease the volume, swipe up or down in the right half of the screen.
button is pressed, the video image will be stretched to t the screen margins.
button or pull the main screen to the right.
Bluetooth App
Bluetooth app allows making and receiving hands-free calls.
To connect a mobile phone to the multimedia system, follow the instructions below:
• Enable bluetooth in the mobile phone.
• Find the multimedia system in the list of available bluetooth devices. Pair your phone with the multimedia system and
enter the password (“0000” by default).
If mobile phone pairing is successful, its name will appear in the Search tab of Bluetooth app. All other tabs in the app will
also become active.
To disconnect the device, use
button.
ENG
13
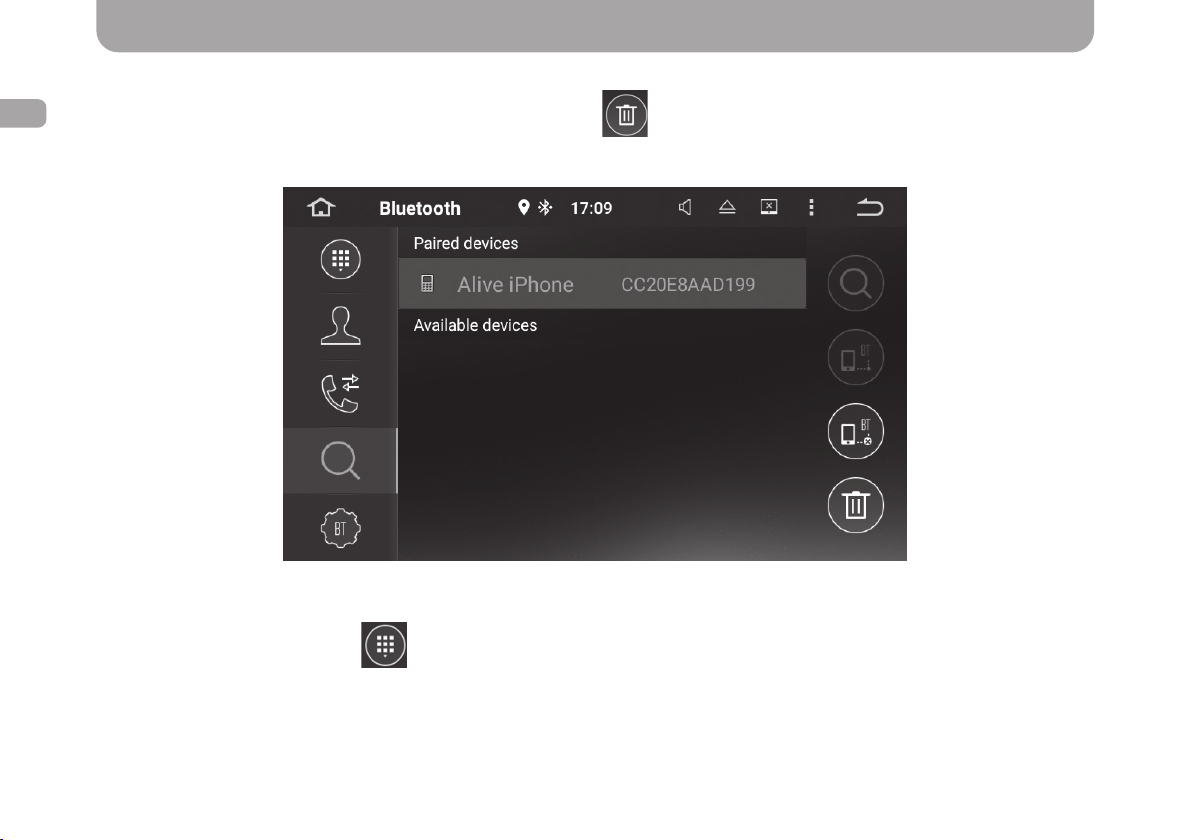
Bluetooth App
ENG
To remove mobile device from the list of paired devices, press button.
To navigate to the dialer tab, hit button.
14
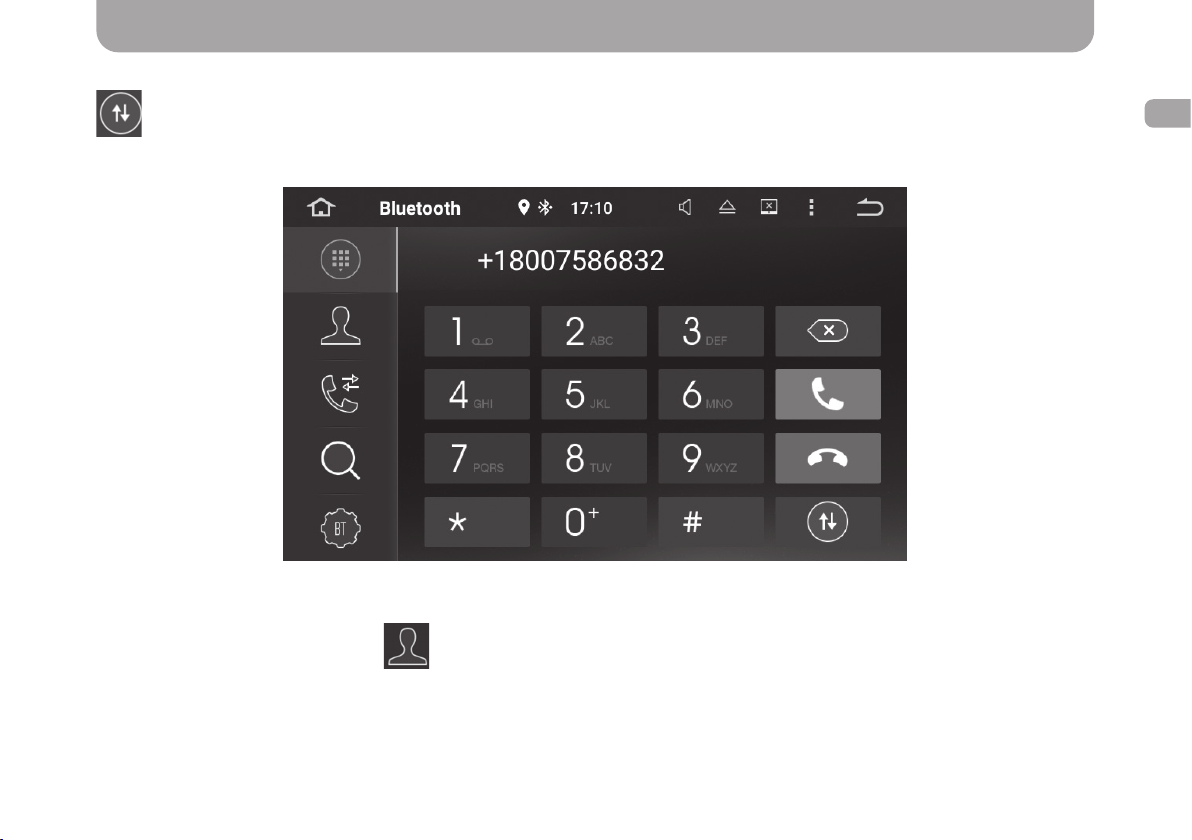
Bluetooth App
button is used to enable/disable hands-free mode during a telephone call.
To navigate to the contacts tab, hit
button.
ENG
15
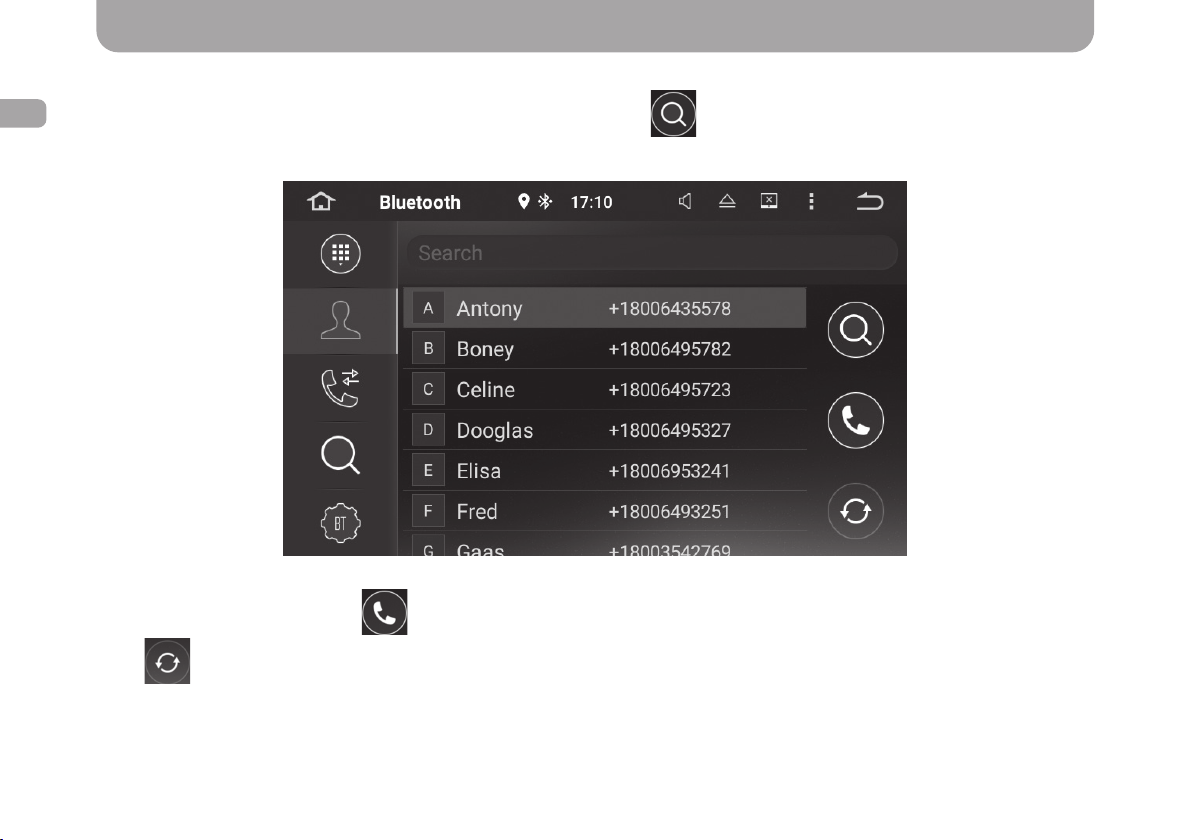
Bluetooth App
ENG
Use the search bar to search in the contacts list. One can also press button for quick alphabetic navigation.
To dial the selected number, use button.
Press
button for manual synchronization of contact data saved on your mobile phone.
16
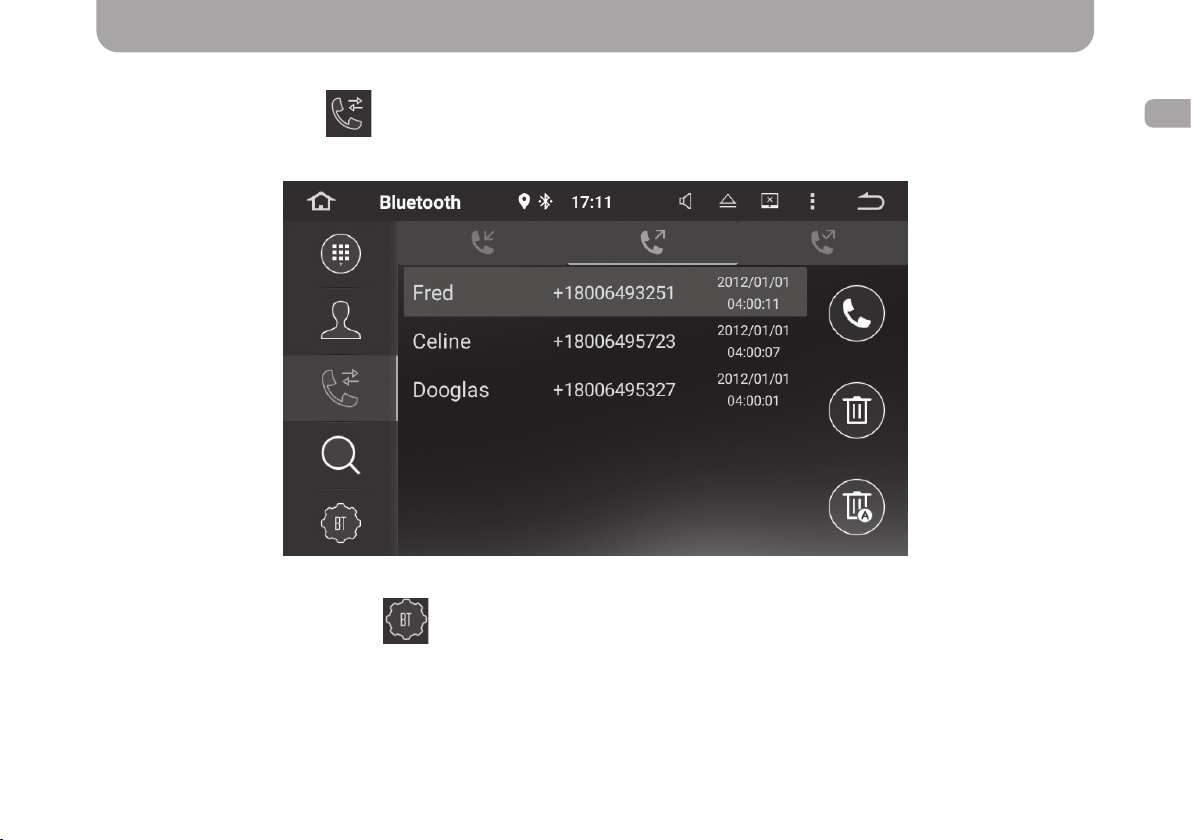
Bluetooth App
To access the call log, press button.
To access bluetooth settings, press
ENG
button.
17
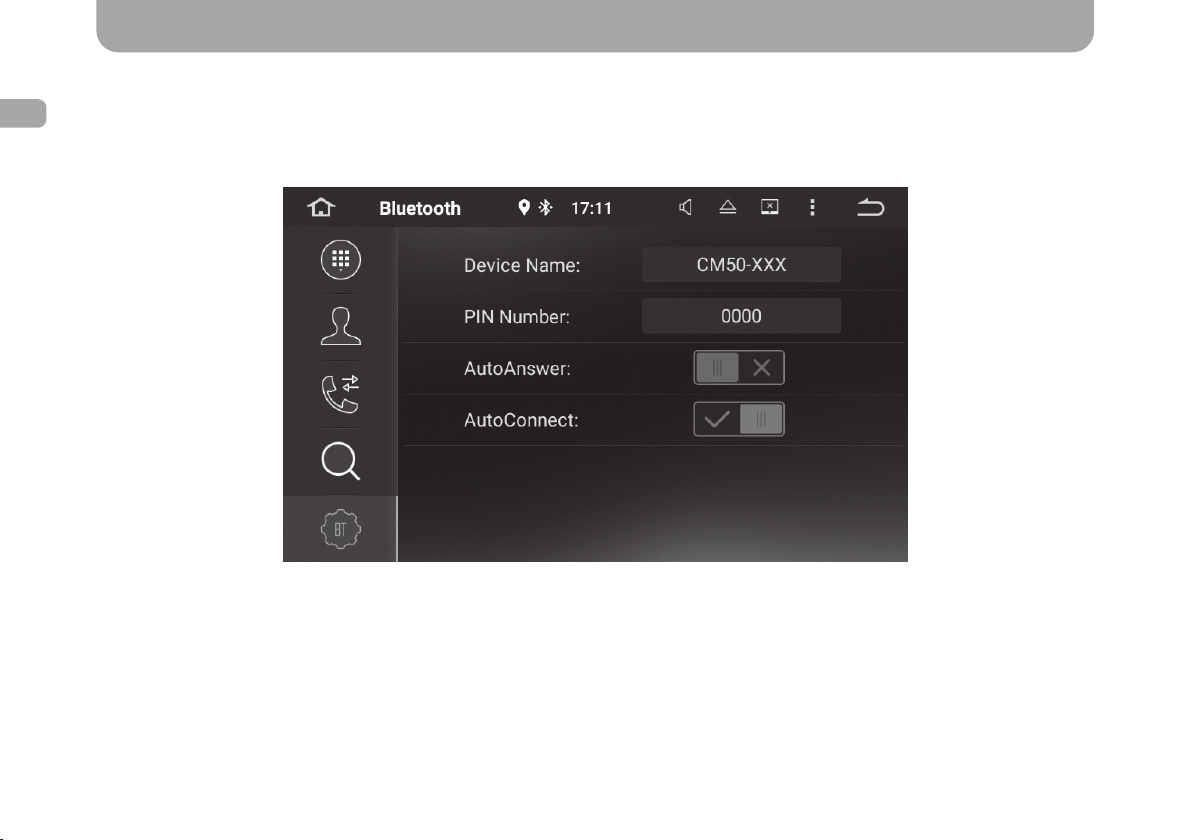
Bluetooth App
ENG
One can use this tab to change the bluetooth name of the device, connection password, and congure the auto-answer
settings for incoming calls as well as enable automatic pairing whenever a previously paired device is detected.
18
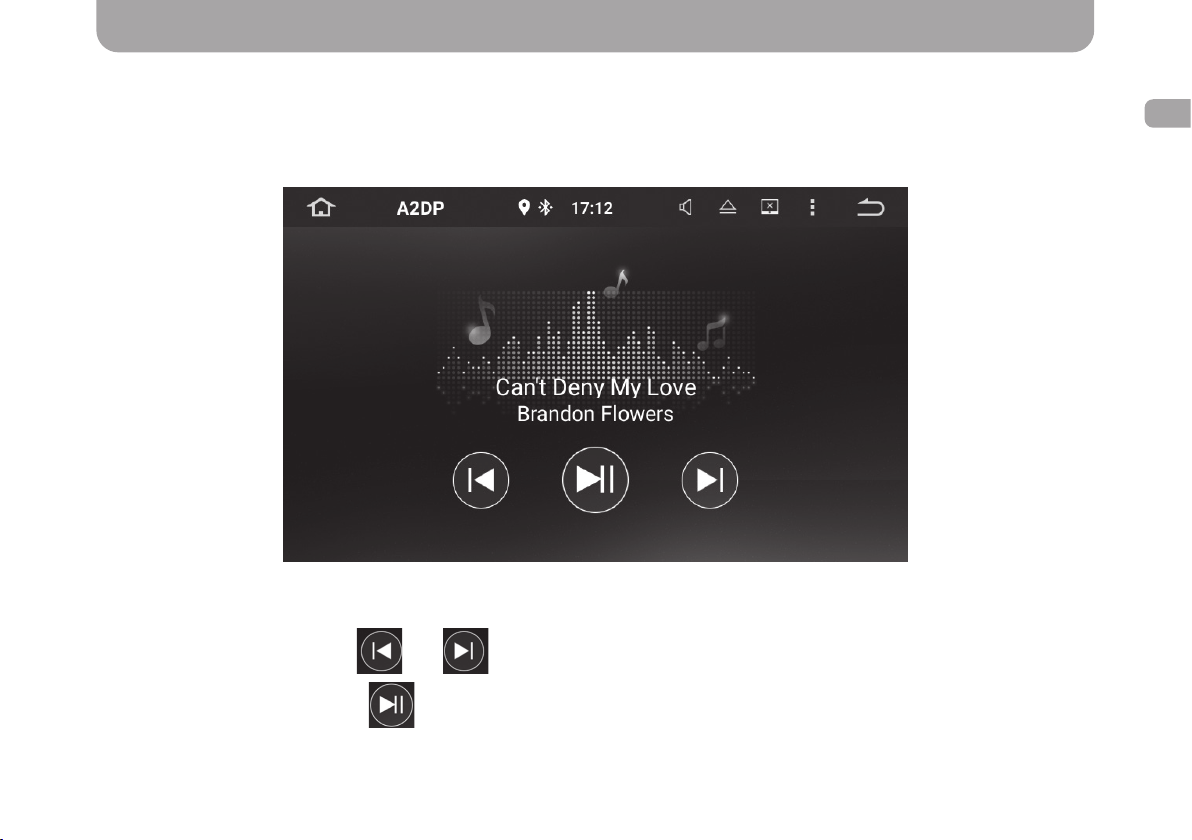
A2DP App
A2DP App is designed for listening music from the mobile phone via bluetooth.
To use the app, connect your mobile phone to the multimedia system via bluetooth, as described in the “Bluetooth” section
of this guide (p. 13).
The app can be launched by tapping on the corresponding icon in the installed apps list.
Switch audio tracks by pressing
and buttons.
ENG
To start or pause playback, press
button.
During audio playback, one can see the name of the track and the artist.
19

AirPlay and MirrorLink functions
ENG
AirPlay
AirPlay function is designed for mirroring the screen and playing back audio les from iOS-running devices on the multimedia
system display.
To use AirPlay function, the multimedia system and the mobile device must be connected to the same Wi-Fi network. One
can connect the devices into a single network in a number of ways:
1. By connecting both devices (a mobile device and a multimedia system) to the same Wi-Fi network (home network,
public network, mobile 3G network, etc.).
2. By creating a Wi-Fi network on a mobile device and connecting the multimedia system to it.
3. By creating a Wi-Fi network on a multimedia system and connecting the mobile device to it.
To setup a Wi-Fi network on an iOS mobile device, do as follows:
• Open “Settings” – “Personal Hotspot”.
• Activate a personal hotspot.
Note. This menu also allows changing the access password to the newly created network.
To setup a Wi-Fi network on a multimedia system, do as follows:
• Open “Settings” – “More” – “Tethering & portable hotspot”.
• Enable the “Portable Wi-Fi hotspot” optio.
Note. Use the “Set up Wi-Fi hotspot” item of this menu to change the access password and the name of the newly
created network.
Once both the devices (the multimedia system and the iOS mobile device) are connected within a single Wi-Fi network, one
can proceed to enabling AirPlay function.
20
AirPlay and MirrorLink functions
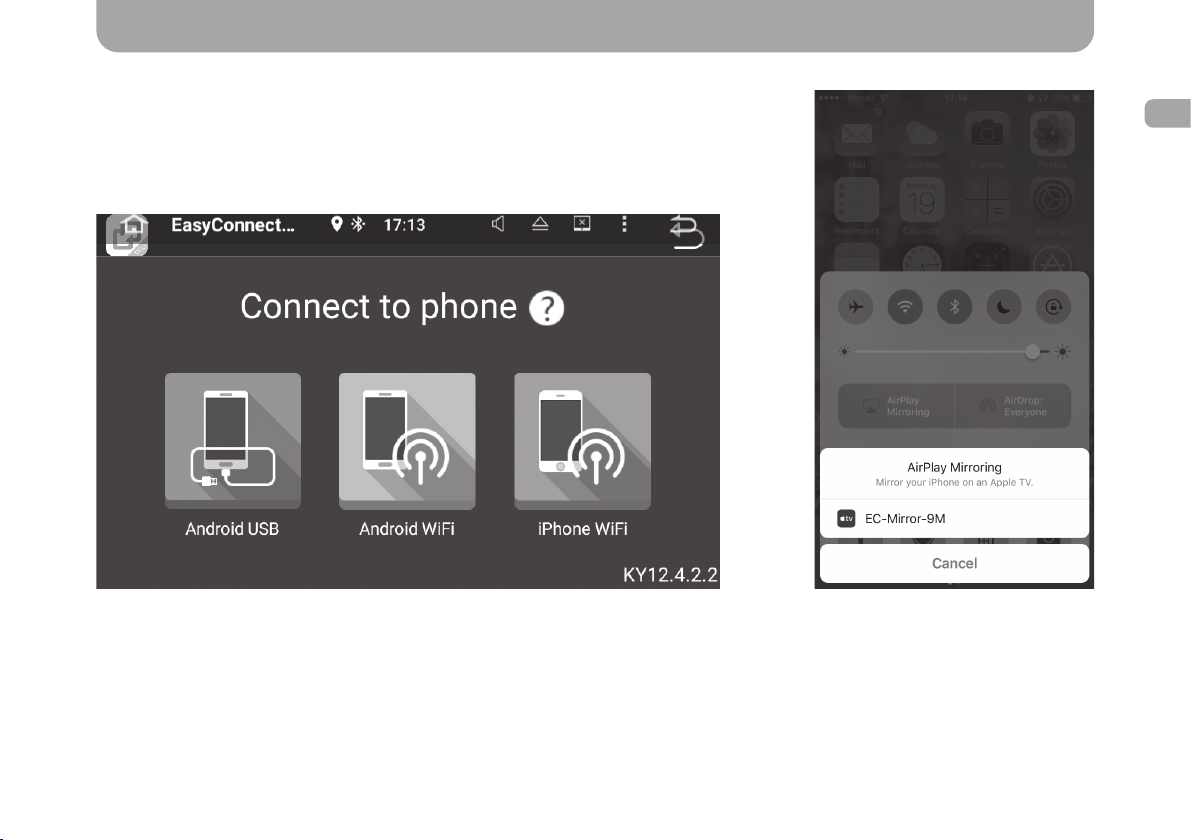
To enable AirPlay function, do the following:
• Open EasyСonnected app available in the installed apps list.
• Select “iPhone WiFi” option.
ENG
• Select “AirPlay mirroring” in the
the mobile device control panel
and establish connection with the
“EC-Mirror-XX” device.
21

AirPlay and MirrorLink functions
ENG
MirrorLink USB
MirrorLink function allows mirroring the screen of an Android mobile device to a multimedia system display.
For this function to work, one must enable the “USB debugging” option on the mobile device.
To do this, follow the steps below:
• Open “Settings” – “About device”.
• Tap “Build number” 5 times to activate the developer mode (for the majority of smartphones).
Caution! Developer mode activation method may dier depending on the smartphone model.
• Then open “Settings” – “Developer options” and activate “USB debugging”.
Perform this procedure once for each device you want to connect.
To complete the connection process, do as follows:
• Open EasyСonnected app available in the installed apps list.
• Select the “Android USB” option.
• Use a USB cable to connect the mobile device to the multimedia system.
• Conrm the connection on the mobile device.
Important notice! When conrming the connection on the mobile device, we recommend activating “Always allow USB
debugging from this computer” option for faster MirrorLink connection of previously congured devices.
22

AirPlay and MirrorLink functions
MirrorLink Wi-Fi
For MirrorLink function to work via Wi-Fi, both the devices (the multimedia system and the Android mobile device) must be
connected to the same Wi-Fi network. There are several ways to do that:
1. By connecting both devices (a mobile device and a multimedia system) to the same Wi-Fi network (home network,
public network, mobile 3G network, etc.).
2. By creating a Wi-Fi network on a mobile device and connecting the multimedia system to it.
3. By creating a Wi-Fi network on a multimedia system and connecting the mobile device to it.
To setup a Wi-Fi network on a multimedia system or an Android mobile device, do as follows:
• Open “Settings” – “More” – “Tethering & portable hotspot”.
• Enable the “Portable Wi-Fi hotspot” option.
Note. Use the “Set up Wi-Fi hotspot” item of this menu to change the access password and the name of the newly
created network.
When this function is used for the rst time, one needs to connect the mobile device with a USB cable and enable the “USB
debugging” function. See MirrorLink USB item of this guide (p.22.) for a detailed description of the procedure.
Once both the devices (the multimedia system and the Android mobile device) are connected within a single Wi-Fi network,
one can proceed to enabling MirrorLink function.
To do this, follow the steps below:
• Open EasyСonnected app available in the list of installed apps.
• Select “Android WiFi” option.
• Use a USB cable to connect the mobile device to the multimedia system.
• Conrm the connection on the mobile device.
• Disconnect the USB cable after the successful connection when “Disconnect the USB cable” message appears on the screen.
ENG
Note. Connection with a USB cable is required only when MirrorLink Wi-Fi function is used for the rst time. After that,
the devices will only need to be connected to the same Wi-Fi network.
23

Installing apps from Google Play
ENG
One of the key advantages of having Android as an OS on the multimedia system is the ability to install any app from Google
Play market.
To install Android apps, one needs to have access to the Internet.
If you want to use Play Market and download apps, you will have to enter the name of your Google account or create a new
one by following the instructions on the screen.
Conguring GPS navigation voice prompts
“Settings” – “GPS”:
• GPS monitoring – enable/disable voice prompts with the navigation app running in the background.
• GPS sound mode – two options are available:
– Mixing – when the volume of music playing in the background goes slightly down during a voice prompt and then
returns to the original level after the voice prompt ends.
– Switch – when the music playing in the background turns o completely during a voice prompt and then goes back
on after the voice prompt ends.
• GPS mixing ratio – setting the volume of voice prompts in relation to background music volume in “Mixed” mode.
24
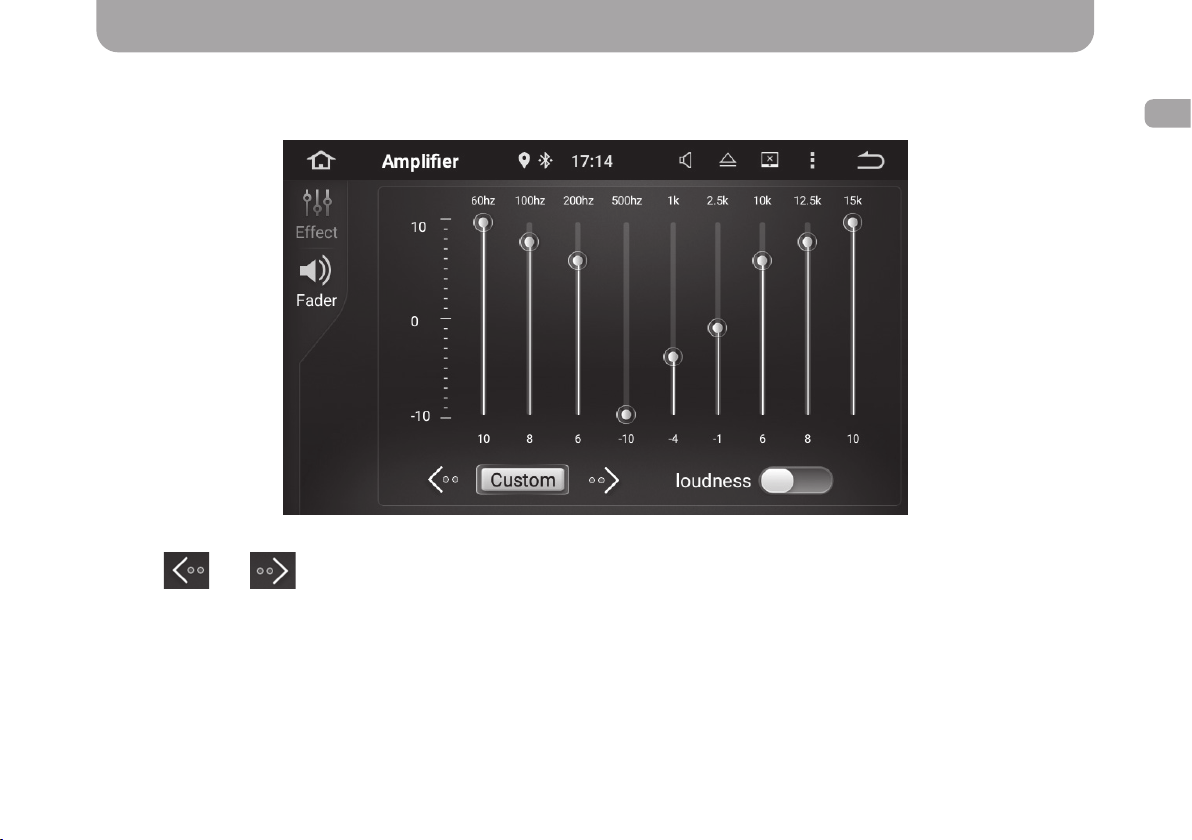
Conguring equalizer
To congure the equalizer settings, use a dedicated Amplier app available in the installed apps list.
Buttons
and are designed for switching between equalizer presets.
In addition, one can change the equalizer settings manually by moving sliders assigned to each frequency range. In case of
manual equalizer conguration, the system will automatically switch to “Custom” preset where all the changes to the initial
equalizer settings will be saved.
One can also enable tone compensation (sound leveling) using the Loudness switch.
ENG
25
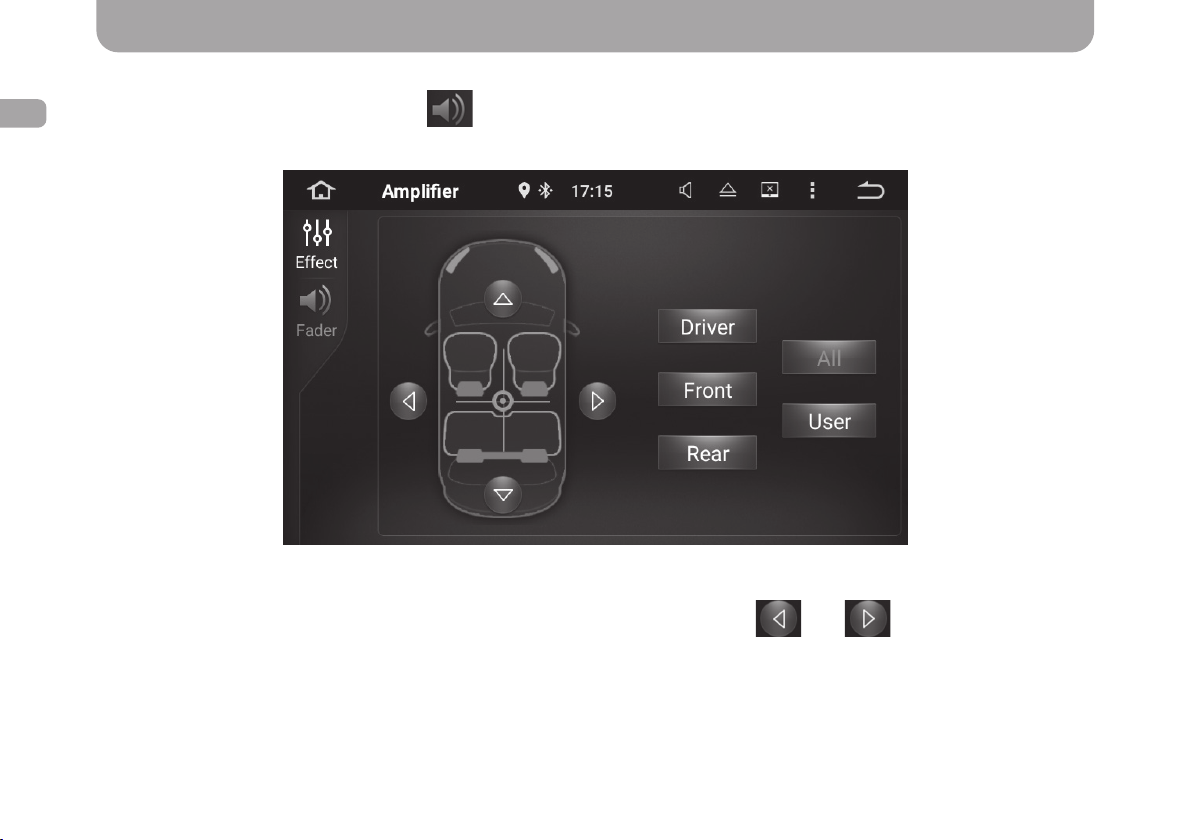
Conguring equalizer
ENG
To navigate to the fader settings tab, hit button.
To set up the sound eld, move the pointer along the vehicle diagram or press and , buttons for ne-tuning.
To speed up the conguration procedure, one can use the Driver, Front, and Rear buttons.
To reset all settings and go back to the standard sound scene, tap on the All button.
Press the User button to return to the previously congured custom settings.
26
Front panel buttons
There are 3 control buttons and a volume rocker on the front panel of the device.
button ejects DVDs from the DVD drive.
button takes the user back to the home screen.
button performs “Go back” function by taking the user back to the previous menu or setting.
The rotating slider in the center of the panel is designed to adjust the sound volume. When pressed, it will quickly mute the
sound (MUTE). When held down, it will switch the multimedia system to the standby mode.
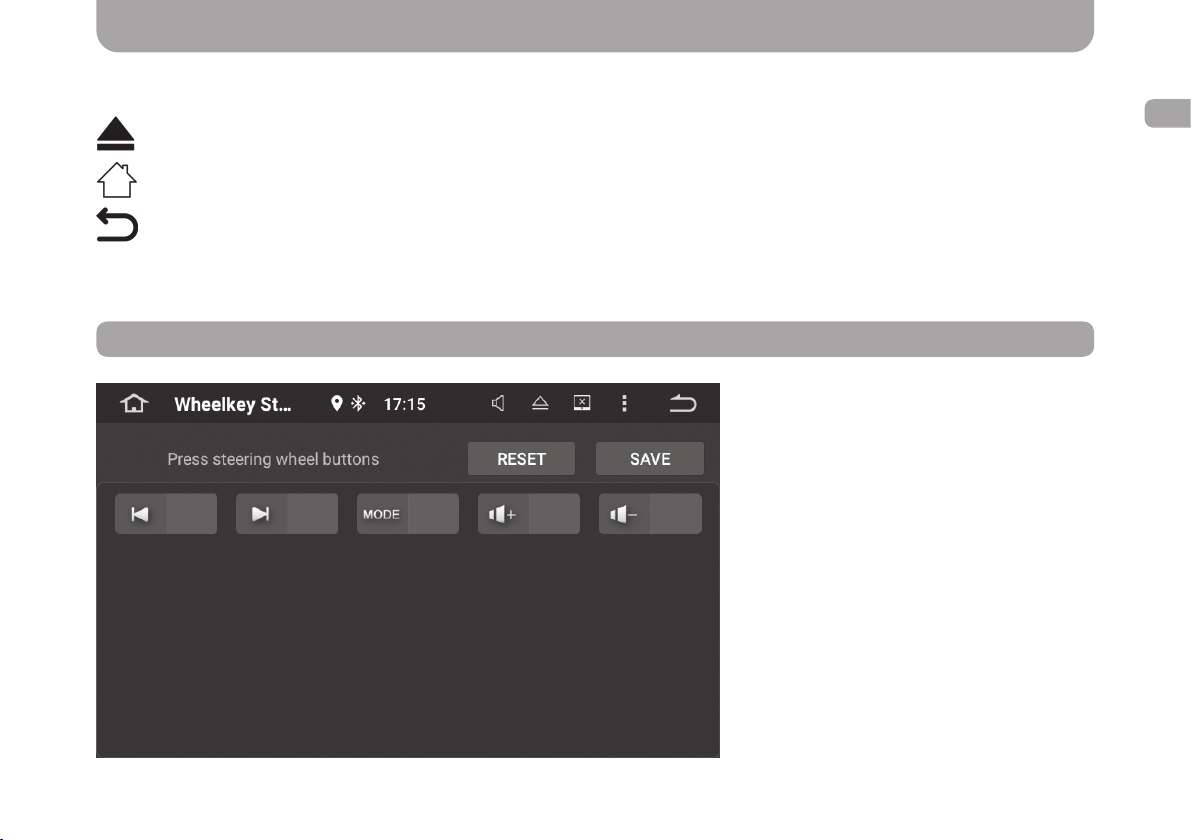
Conguring steering wheel controls
To congure steering wheel controls, follow
thhe steps below:
• Open Wheelkey app available in the
installed apps list.
• Press one of the controls on the the
steering wheel.
ENG
27
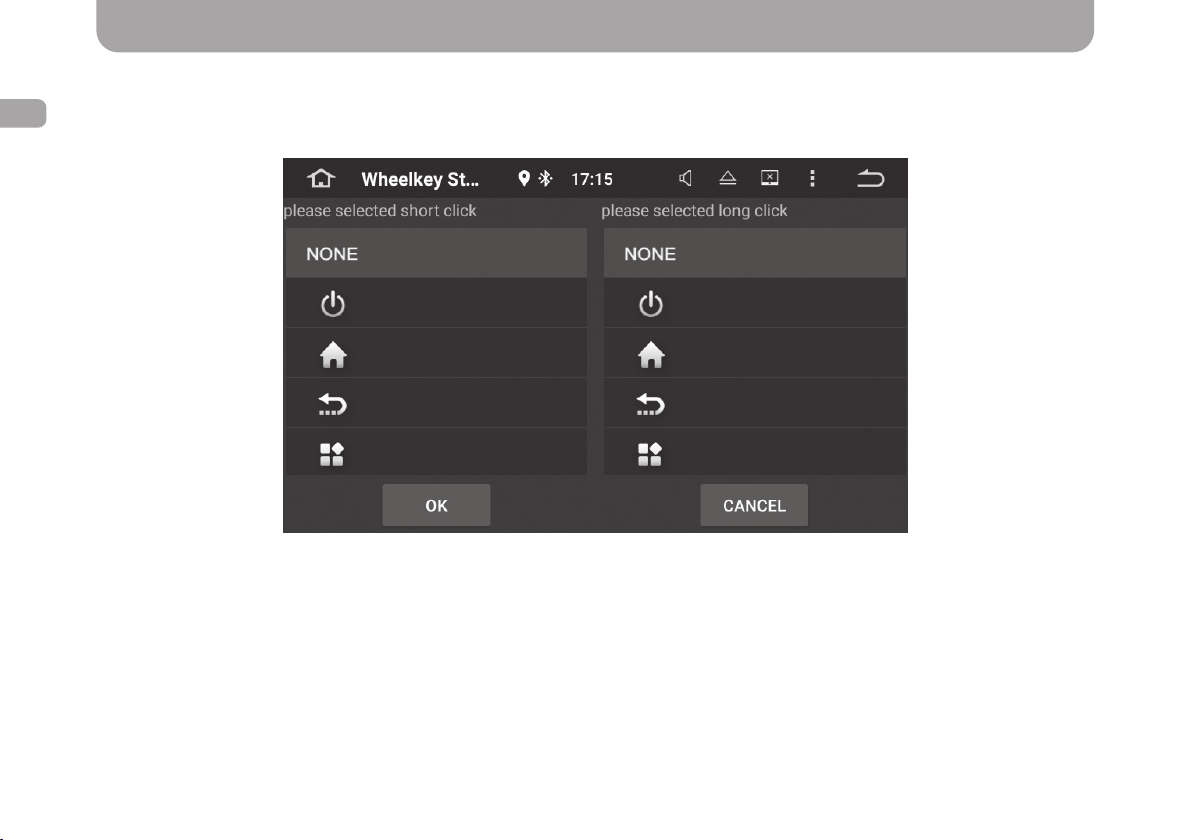
Conguring steering wheel controls
ENG
• In the pop-up window, assign an action for the short and long press on the button.
• Then hold down “ОК”.
• After that, repeat the above procedure for each of the steering wheel controls.
• Once all the buttons are congured, save the modied settings by pressing “Save” button.
28
 Loading...