

Gazelle 26800 Assembly And Use Instructions
WARNING
________________________________________________
READ AND UNDERSTAND ALL ASSEMBLY, INSPECTION, & USE
INSTRUCTIONS PROVIDED BEFORE EACH USE. FAILURE TO FOLLOW
INSTRUCTIONS COULD RESULT IN SERIOUS INJURY OR DEATH.
NEVER ALLOW CHILDREN TO PLAY IN THIS PRODUCT UNATTENDED.
KEEP ALL FLAME AND HEAT SOURCES AWAY FROM THIS TENT FABRIC.
THIS TENT IS MADE WITH FLAME RESISTANT FABRIC WHICH MEETS
CPAI84 SPECIFICATIONS. IT IS NOT FIREPROOF. THE FABRIC WILL
BURN IF LEFT IN CONTINUOUS CONTACT WITH ANY FLAME SOURCE.
THE APPLICATION OFANY FOREIGN SUBSTANCE NOT THE TENT FABRIC
MAY RENDER THE FLAME RESISTANT PROPERTIES INEFFECTIVE.
THE USE OF ELECTRICAL DEVICES IS NOT RECOMMENDED INSIDE THE
GAZELLE CAMPING TENT.
CAMPING / LEISURE TENT
ASSEMBLY AND USE INSTRUCTIONS
SIDE WALL
2
SIDE WALL
3
WHAT’S INCLUDED IN THE BAG
• Gazelle Camping / Leisure Tent • Detachable rain y
• Detachable oors • Detachable overhead gear lofts
• Ground Stakes • Tie-down ropes
BEFORE YOU BEGIN
• Locate a level site clear of all debris and sharp objects to prevent
tears while setting up your tent.
• For easy set-up in windy conditions, make sure to position a
narrow end of the tent into the wind, and stake down both
corners through the provided grommets.
• Do not set up your tent under any overhead obstructions in case
of falling objects or lightning strikes in inclement weather.
• The Gazelle 2-room camping tent can be set up and taken
down with the oors installed in the unit. It is recommended
that the rain y, privacy panels, and gear lofts be taken down
before collapsing the tent.
SETUP INSTRUCTIONS
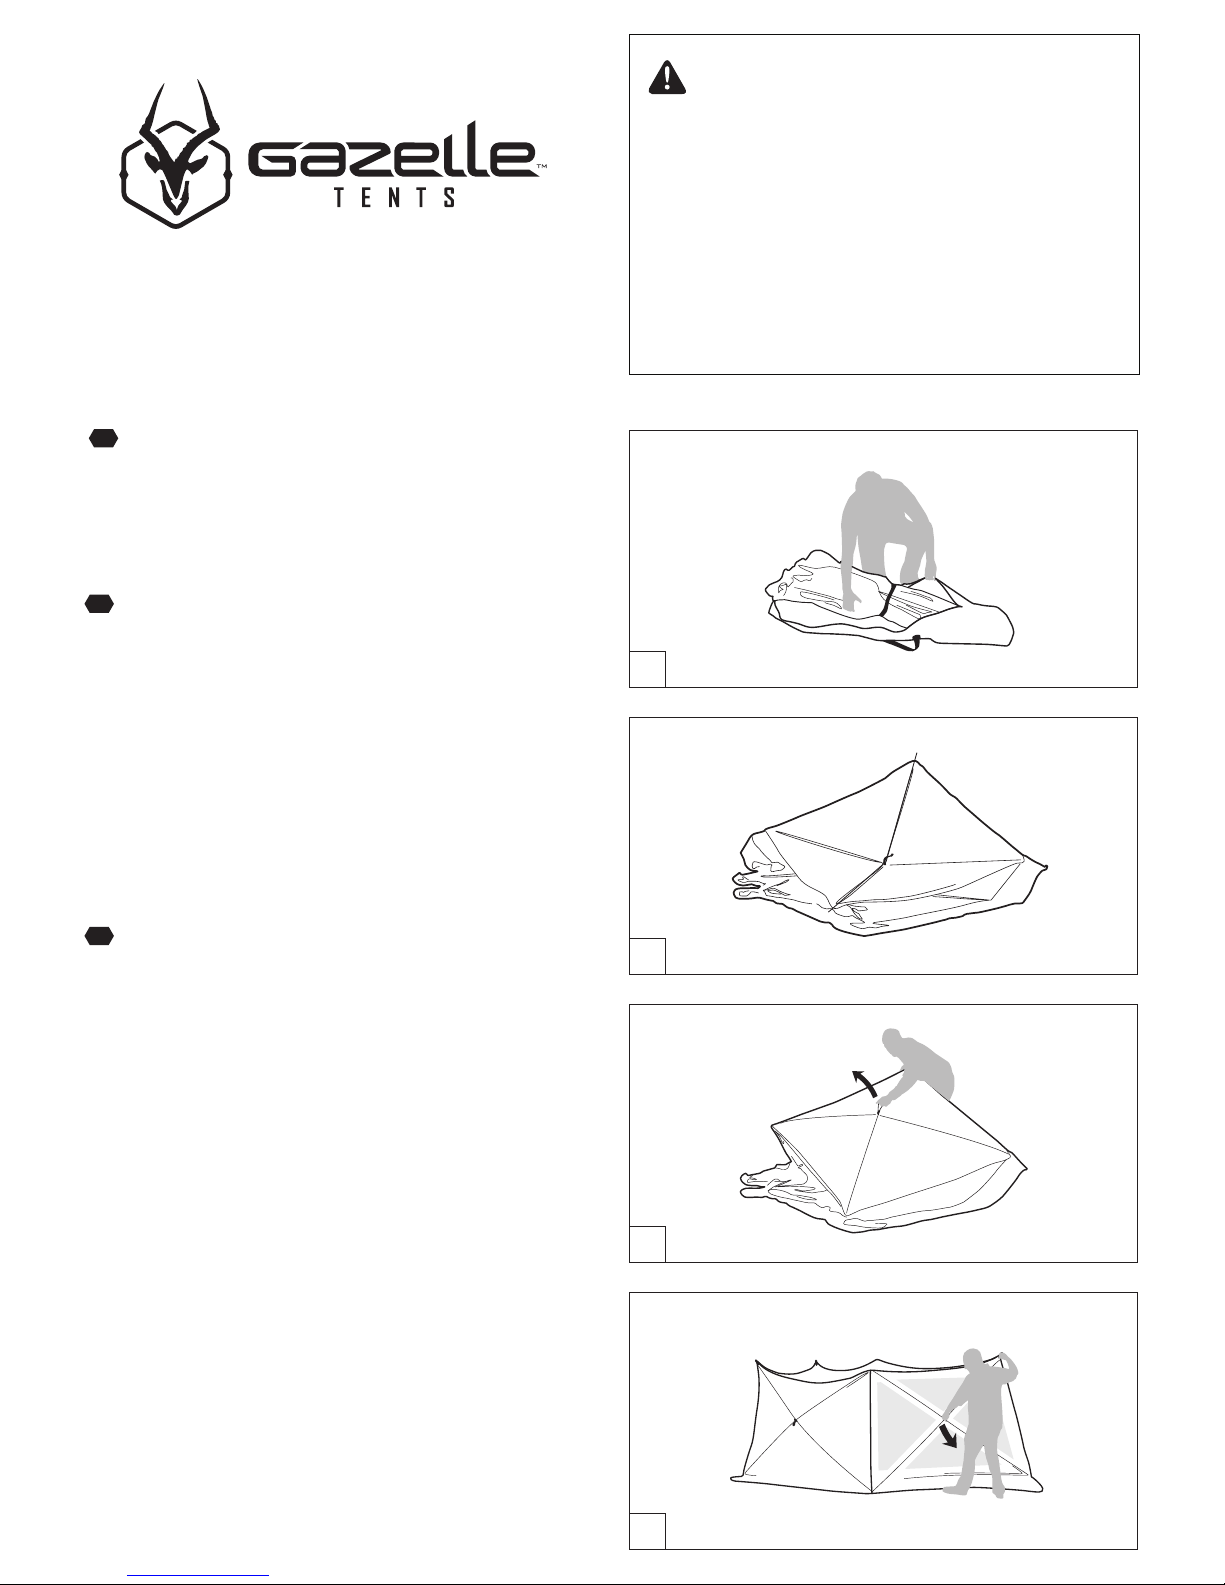
1. Remove the camping tent from the carrying bag. Remove the
tie strap from around the unit. [ SEE FIGURE 1 ]
2. Lay the tent at on the ground and check that there is no material
twisted or overlapping the ends of any poles. DO NOT force shelter
when folding or unfolding. Watch for the entanglement of poles.
[ SEE FIGURE 2 ]
NOTE: For easy set-up in windy conditions, make sure to position
a narrow end of the tent into the wind, and stake down both
corners through the provided grommets.
3. Grasp the webbing loop sewn onto the eyelet located in the center
of one of the walls and pull outward until the wall pops open.
[ SEE FIGURE 3 ]
NOTE: For added assistance, grasp the top seam of the panel when
popping open a side wall panel to help hold the tent in place.
4. Proceed by walking around the entire tent, pulling out on each
webbing loop until all the side walls are popped out. [ SEE FIGURE 4 ]
NOTE: At this time the rain y can be assembled.
See INSTALLING THE RAIN FLY.
4
1
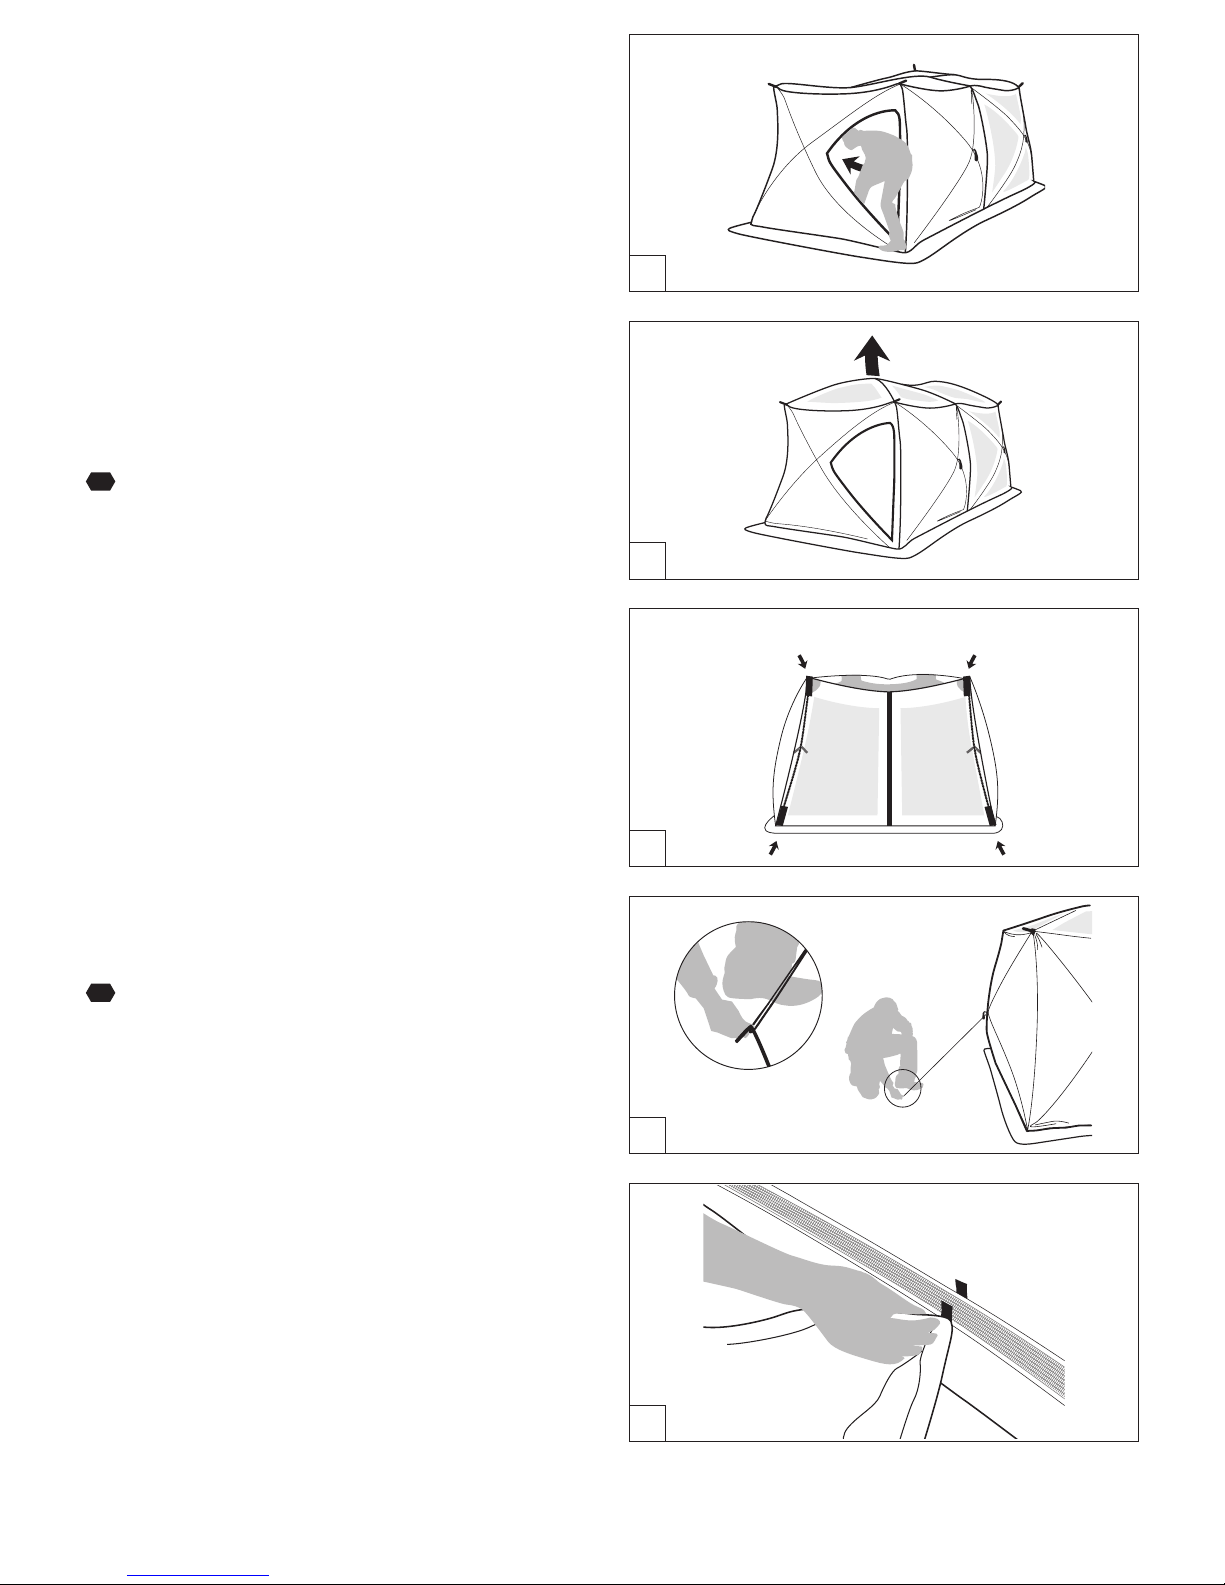
5. Your tent should now be freestanding. Locate a zippered door and
walk inside the tent. Once inside of the tent, place one hand on the
bottom of a roof hub and push up until the roof pops into position.
[ SEE FIGURES 5 & 6 ]
NOTE: This step should be done with caution as there is a lot of
tension on the roof hub and pole assemblies.
6. Locate the (2) large diameter corded poles and assemble the corded
sections together to create one long pole each. Place the assembled
poles in the small pockets located at each inside corner of the vertical
screen door. Fasten poles to the vertical seams with the hook and loop
tie located about halfway up the seam. [ SEE FIGURE 7 ]
7. Move outside of your tent and begin securing your tent to the ground
by using the provided stakes and tie down ropes. The stakes can be
fastened through each of the tent grommets, and the tie down ropes
can be tied around hub eyebolts and tightened to a stake in the
ground. Use adjustment slides on the rope to achieve proper tension.
[ SEE FIGURE 8 ]
8. Hammer stakes through the grommets located in each corner
completely.
CONVERTING SCREEN SECTION
INTO A SLEEPING SECTION
This tent comes with a section that is convertible between a screened-in
sitting/storage area to a private sleeping area for up to four people.
Follow these simple steps to complete the transition.
1. Make sure that the large diameter corded poles are assembled into
the small pockets as described in [ STEP 6 ] of SET-UP
INSTRUCTIONS
2. Zip up the zippered door coverings on either side of the vertical
screen door.
3. Find the privacy panels located on the left and right of the large
internal door of the tent. Unroll these along the side screen panels
and use the plastic hooks to secure the panel taut to the fabric loops
located in the top and bottom corners, close to the ends of the
corded pole.
4. Follow directions in the INSTALLING FLOOR section to complete this
conversion.
NOTE: The rainy must be assembled onto the tent with the large
triangular panels fully extended to protect this area from the rain.
The privacy panels are not intended to keep this area dry.
INSTALLING FLOOR
1. The tent must be set up before installing the oor.
2. Spread the oor out loosely inside the tent.
NOTE: There are colored alignment tabs both at the center of the
tent panels and the center of each edge of the oor. Make sure
that you have lined appropriately colored oor tabs with the
corresponding color tab on the wall panel to ensure the correct t.
3. Start at the center of each wall using the colored aligning tabs as
guides. Press the hook and loop strips together, working towards
the corners. [ SEE FIGURE 9 ]
NOTE: The Gazelle camping / leisure tent can be taken down and
stored with or without the oor attached.
5
6
SCREEN MESH END
NO RAIN FLY
SMALL
POCKETS
HOOK &
LOOP TIES
7
8
INSIDE WALL BASE
9
 Loading...