

™
Control who eats
Owner’s Guide
Model No. GF100
1

Contents
Important safety instructions ....................................................................................................... 3
Product overview......................................................................................................................... 4
Set up your GateFeeder in 4 quick steps ....................................................................................... 6
Step 1 – Unpack your GateFeeder.......................................................................................................6
Step 2 – Install the batteries ..............................................................................................................6
Step 3 – Clean your GateFeeder..........................................................................................................7
Step 4 – Fill with food..........................................................................................................................7
Using the GateFeeder...................................................................................................................8
A – Finding the food............................................................................................................................8
B – Opening the gate ..........................................................................................................................8
C – Using the Smart Tag......................................................................................................................8
Replacing the batteries ................................................................................................................9
Re-programming the Smart Tag.................................................................................................. 10
Cleaning and care....................................................................................................................... 11
Resetting your GateFeeder......................................................................................................... 12
Specifications............................................................................................................................. 12
Warranty ...................................................................................................................................12
Customer support ...................................................................................................................... 13
2

Important safety instructions
To protect you, your pet and your GateFeeder, please read the entire owner’s guide before
installing and using this product.
• To avoid any risk of fire or electric shock, do not expose the unit to rain, sources of splashing
water and do not operate it with wet hands.
• Place the unit in a dry, well-ventilated place and never put anything on top of or behind the
unit.
• Do not place the unit near heat sources or expose it to direct sunlight or excessive dust.
• Clean the unit regularly following the instructions in the ‘Cleaning and care’ section.
• Only use GateFeeder for its intended use as a pet feeder.
• Only cats weighing 5lbs to 20lbs should use this product.
• Refer all servicing and repairs to qualified service personnel. Any modifications or changes not
explicitly detailed in this manual could void your warranty.
Keep this owner’s guide in a safe place for future reference. If you have any questions or problems
with your GateFeeder, please contact our customer support team at:
info@GateFeeder.com or call XXXXX XXXXX
3

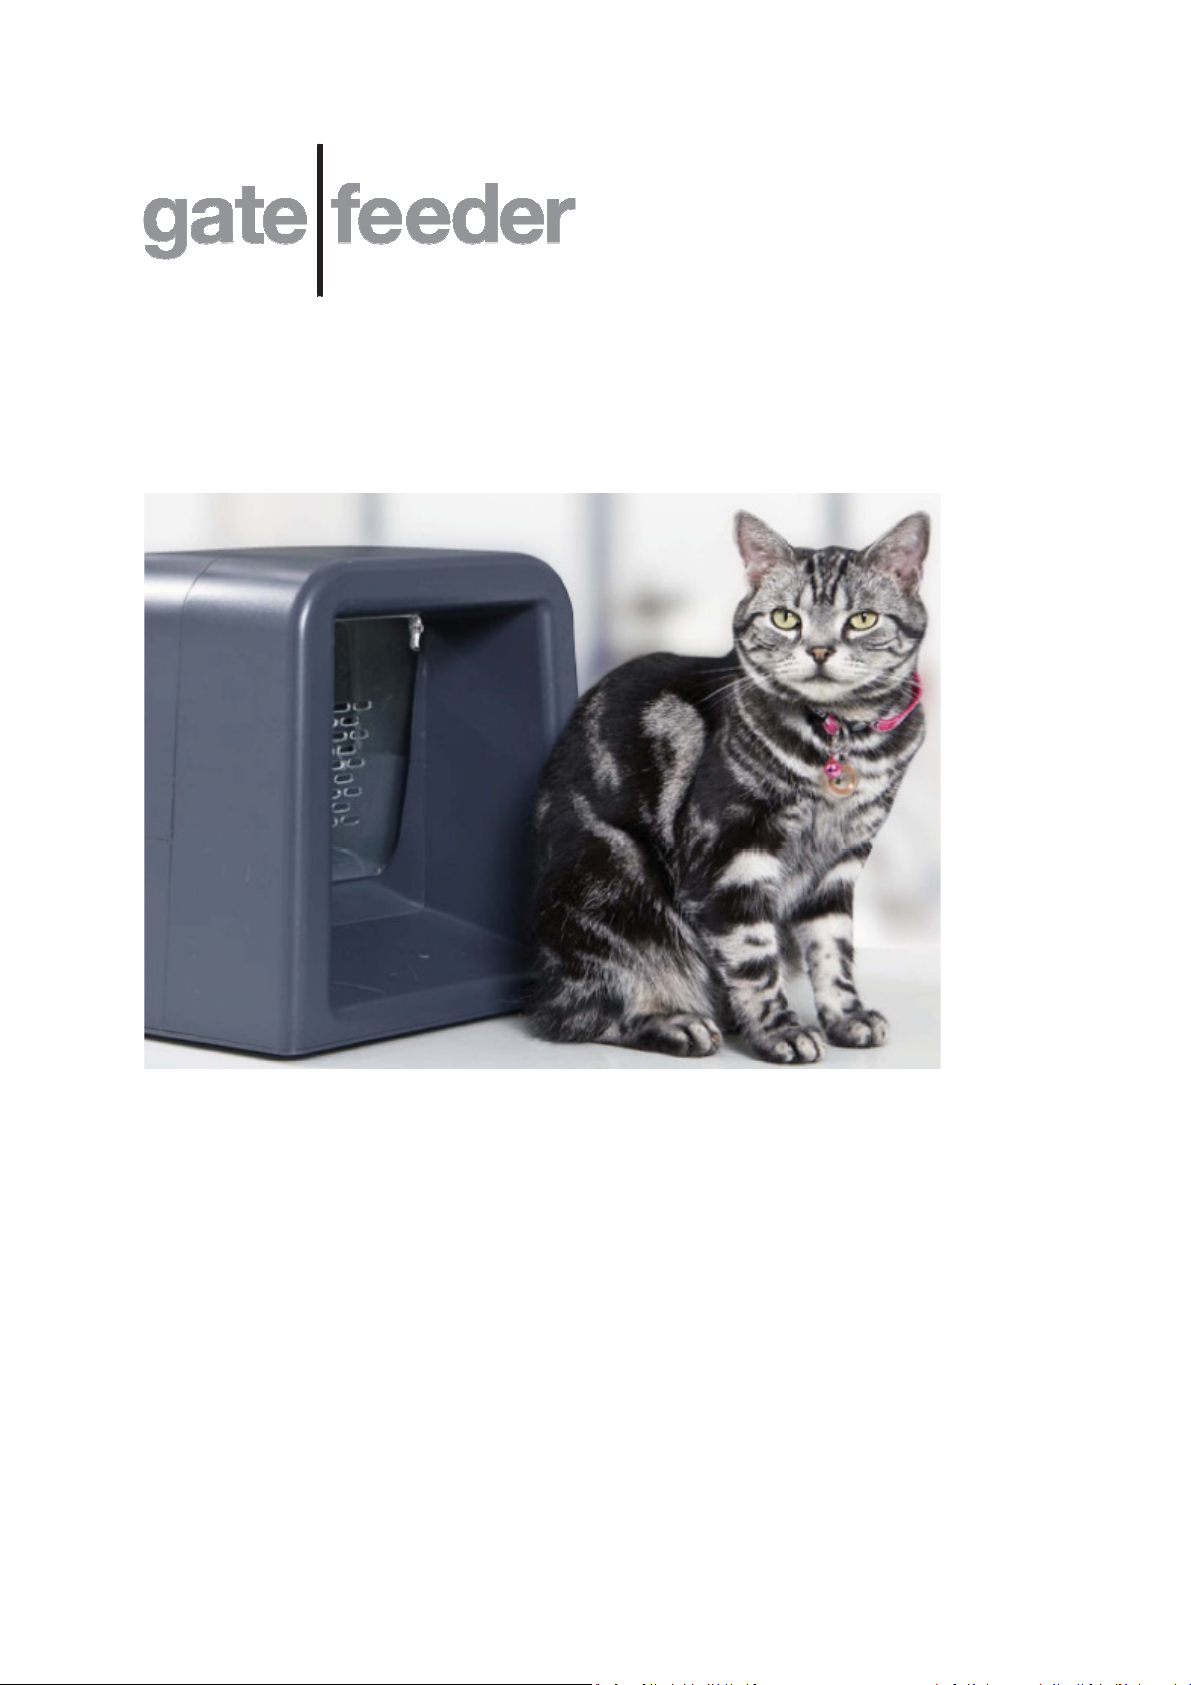
Product overview
Whether you are going away for a long weekend or simply going out, GateFeeder is an innovative
and cutting-edge solution to effortless pet feeding. The perfect complement to your pet’s daily
routine, it uses a unique, collar-mounted Smart Tag to enable one designated cat access to food
within an enclosed space. It guarantees all food – canned, kibble, a special diet or medication – goes
straight to the right cat, while simultaneously keeping mess and odors contained.
No other cat feeder does this.
Private dining
GateFeeder provides your pet with a safe, hygienic and private environment that is tailor-made to its
eating habits. It eliminates competitive eating if there is more than one pet in the household and
prevents neighborhood animals from inviting themselves to dinner.
Food, glorious food
GateFeeder can store and keep fresh up to five days’ worth of food for an average cat. One meal of
canned food can be kept cool by means of an ice pack for up to 10 hours.
Stylish but safe
Easy to keep clean, the feeder’s modern design has an ergonomic door to prevent head or collar
entanglement. Its removable hood allows for quick owner access while a viewing window enables
owners to check on their cat without disturbing it.
GateFeeder’s creative feeding solution takes the stress out of mealtimes and makes sure your pet is
well fed at all times.
GateFeeder at a glance
Your Pet’s Benefits Your Benefits
Single-cat access only
Delivers medicine precisely No need to supervise feeding
Controls individual eating to maintain optimum
pet weight and health
Feeding on demand – without overeating and
bloating
Eliminates competitive eating Allows outdoor feeding in a covered area
Cuts down surrounding noise and activity for
stress-free eating
Stainless steel food bowl minimizes pet
allergies
Stops other pets or neighborhood animals from
eating the food
Ideal for unpredictable schedules, elderly people
or those with disabilities
Promotes child safety
Maintains a sanitary environment
Battery powered – no electrical sockets or
unsightly cables
Highly durable and sturdy
Removable, dishwasher-safe food bowl
4

About the designer
GateFeeder is the brainchild of an American pet owner, who needed to give one of his cats a
medicated diet while keeping his healthy pets at bay. Frustrated by the lack of suitable products on
the market, he took eight years to devise, design and patent the unique feeding solution you have
recently purchased or received as a gift.
Customer feedback is important to us. If you have any comments and stories you would like to
share, please email us at: info@GateFeeder.com
5

Set up your GateFeeder in 4 quick steps
The GateFeeder is designed for only one cat per feeder. In this way, you can control who eats the
food.
Step 1 – Unpack your GateFeeder
To keep things simple, we have assembled the GateFeeder for you. Once you have unpacked the
GateFeeder, check the following parts are included:
1. Hood
2. Base tray
3. Battery door (on the base)
4. Gate
5. Gate lock
6. Stainless steel food bowl
Look through the clear window on the top of the GateFeeder to view this item.
7. Smart Tag
WARNING: All packaging materials, such as tape, plastic sheets and wire ties are not part of this
product and should be discarded.
Step 2 – Install the batteries
1. The battery door is on the base of the GateFeeder. Use a ‘+’ head screwdriver (i.e. Philips) to
undo the 6 screws. Then gently lift off the battery door.
2. Insert 6 x AA alkaline batteries (not included) into the battery compartment making sure the
polarity (+/-) matches the markings in the battery compartment.
3. Place the battery door over the battery compartment.
4. Insert the screws and tighten each one to secure the battery door firmly in place.
6

Step 3 – Clean your GateFeeder
To create the most hygienic environment for your pet, we recommend that you clean this product
before first use.
1. Gently slide the hood from the base tray and put to one side.
2. Lift out the food bowl. You now have access to all the product’s parts for cleaning.
3. Mix a biodegradable detergent with warm water to create a soapy solution.
4. Take a soft cloth and dip it into the soapy water. Then wring the cloth so that it is slightly moist
and wipe all the product’s parts.
5. To remove any soap residue, use a soft cloth moistened with warm water and wipe all the
product’s parts.
Note: Please see the ‘Cleaning and care’ section for additional care information.
Step 4 – Fill with food
1. Place the GateFeeder at a convenient place inside your home or in a covered areas outdoors.
2. If your GateFeeder is in a new location from your pet’s usual feeding place, make sure your pet
knows where to find it.
3. Take the clean feeding bowl and fill it with your pet’s daily kibble quantity or 1 portion of canned
food. The food bowl holds a maximum of 6 cups of kibble food. To keep the canned food fresh
for up to 10 hours, place a small ice bag under the feeding bowl.
4. Place the full food bowl back into its slot.
5. Slide the hood on until it clicks into place.
7

Using the GateFeeder
Most cats quickly learn how to use the GateFeeder while others need a little encouragement and
may take a few weeks to accept it. Here are some useful tips and a step-by-step guide to help your
pet get the most out of the GateFeeder. If your cat seems comfortable, you can skip a step or if it
needs a bit more time, then repeat a step.
A – Finding the food
Show your cat the GateFeeder. Prop the gate fully open
with a chock of wood or long pole so the cat can go
inside. Let it explore and familiarize itself with the
GateFeeder and find the food.
B – Opening the gate
Once the cat is comfortable eating in the GateFeeder,
remove the gate prop and place masking tape (or similar)
over the gate lock so that it is in the open position. The
gate can now swing freely. Let your cat learn how to open
the door and become relaxed while eating with the gate
in place.
C – Using the Smart Tag
Attach the Smart Tag to the cat’s collar. Remove the
masking tape so that the gate can be activated by the
Smart Tag. The cat must touch the gate with its head to
activate the Smart Tag signal and then push the gate
open to access the feeding area.
Training tips
TIP 1
The best way to succeed is not to rush
your pet. Cats are as individual as their
owners and they will choose to accept the
GateFeeder in their own time. Do not
worry, our 90-day, money-back guarantee
means you have plenty of time to
familiarize your pet with the GateFeeder.
TIP 2
If one cat is happy with the GateFeeder
but another is taking time to adjust, do not
go back to feeding either animal by the old
feeding system, it will confuse them,
particularly the cat that has accepted the
GateFeeder.
TIP 3
Talking, stroking or treating your pet while
they are exploring the GateFeeder will
reassure them. Act normally and
confidently around the GateFeeder
otherwise your cat may think something is
up. Be gentle and keep to the step-by-step
guide and your cat will quickly accept the
GateFeeder.
When your cat has finished eating and leaves the box, the magnetic gate lock quickly closes and
makes sure other animals cannot access the food.
8

Replacing the batteries
Your GateFeeder is powered by 6 x AA alkaline batteries (not included) so you can place it anywhere
in your home – inside or under a covered outdoor area.
The red LED light flashes when the batteries are low and should be changed within the next 5 days.
To replace the batteries:
1. The battery cover is on the base of the GateFeeder. Use a ‘+’ head screwdriver (i.e. Philips) to
undo the 6 screws. Then lift off the battery door.
2. Remove the old batteries.
3. Insert 6 x AA alkaline batteries (not included) into the battery compartment making sure the
polarity (+/-) matches the markings in the battery compartment.
4. Place the battery door over the battery compartment.
5. Insert the screws and tighten each one to secure the battery door firmly in place.
Important battery information
Non-rechargeable batteries are not to be recharged. Rechargeable batteries are to be removed from
the product before being charged. Rechargeable batteries are only to be charged under adult
supervision. Different types of batteries or new and used batteries are not to be mixed. Only
batteries of the same or equivalent type as recommended are to be used. Batteries are to be
inserted with the correct polarity. Exhausted batteries are to be removed from the product. The
supply terminals are not to be short-circuited. Do not throw batteries into a fire. Remove the
batteries if you are not going to use the product for a long period of time.
9

Re-programming the Smart Tag
If the Smart Tag does not open the gate, is lost, damaged or replaced, you need to re-program it.
Replacement tags are available from www.GateFeeder.com.
The GateFeeder stores up to 5 Smart Tags in its memory. If you lose a tag and later find it, you can
continue to use this tag or put it in a safe place as a backup. When more than 5 tags have been
programmed into your GateFeeder, the oldest tag will be erased and replaced by the newest tag.
To re-program the Smart Tag:
1. Quickly press the MAPPING button for less than 3 seconds and the green LED will flash.
2. Within 10 seconds of the green LED flashing, place the new tag in the tunnel of the GateFeeder
(the tag reading area).
3. The green LED will flash slowly 6 times to confirm that the re-programming of the tag is
successful.
To test the Smart Tag:
1. Remove the tag from the tunnel. Wait a few seconds, then move it back into the tunnel’s tag
reading area and gently press it against the gate.
2. You should see and hear the gate’s lock pop out of the way. You can push the gate inwards to
double check that the locking mechanism has unlocked. When the gate unlocks, your reprogramming has been successful.
3. If the gate does not unlock and open, follow the ‘To re-program the Smart Tag’ instructions
again. Make sure you place the new tag in the tunnel of the GateFeeder within 10 seconds of
pressing the MAPPING button.
10

Cleaning and care
Protect your cat and keep it healthy by regularly cleaning your GateFeeder when it appears to be
dirty.
Important cleaning and care information
1. Clean all parts with a soft, damp cloth slightly moistened with water. If you are using soapy
water, we recommend that you use biodegradable detergent.
2. Never immerse or spray the unit with water.
3. Do not use any type of abrasive pad, scouring powder or solvent such as alcohol or benzene.
How to clean your GateFeeder
1. Remove all food from the food bowl.
2. Gently slide the hood from the base tray and put to one side.
3. Take out the stainless steel food bowl.
4. Mix a biodegradable detergent with warm water to create a soapy solution.
5. Take a soft cloth and dip it into the soapy water. Then wring the cloth so that it is slightly moist
and wipe all the product’s parts.
6. To remove any soap residue, use a soft cloth moistened with warm water and wipe all the
product’s parts.
7. Fill up the food bowl and place it back into its slot.
8. Slide the hood on until it clicks into place.
11

Resetting your GateFeeder
If the gate on the feeder does not open, try resetting the system by removing the batteries and then
re-inserting them. You can also try putting in new batteries. If this does not help, please contact our
Customer Support Team for assistance:
info@GateFeeder.com or call XXXXX XXXXX.
Specifications
Power
Size ?
Weight Approx. 5lbs
RF frequency ?
RF range ?
Temperature
range
Humidity range ?
Plastic casing ?
6 AA (1.5V, LR6) alkaline
batteries
?
Warranty
This product is covered by a 6-month manufacturer warranty and a 90-day, money-back guarantee.
GateFeeder Limited cannot assume responsibility for any and/or all possible damage if the
GateFeeder is inappropriately operated or used for a purpose other than that for which it is
intended.
GateFeeder Inc. reserves the right to change the design and specifications without notice.
[Insert Warranty Registration Card / Form here]
12

FCC WARNING
This device complies with Part 15 of the FCC Rules. Operation is subject to the following two
conditions:
(1) this device may not cause harmful interference, and
(2) this device must accept any interference received, including interference that may cause
undesired operation.
NOTE 1: The manufacturer is not responsible for any changes or modifications not expressly
approved by the manufacturer for compliance, such modifications could void the user’s authority
to operate the equipment.

Customer support
If you need help or information with your GateFeeder product or your cat’s adjustment to it, please
contact our Customer Support Team – we are happy to assist you with all your needs.
Toll free phone:
Email: info@GateFeeder.com
Website: www.GateFeeder.com
[Back cover]
Keep up to date on the latest discussions and events
by joining our GateFeeder community at
www.GateFeeder.com
GateFeeder – The gateway to successful pet feeding
Copyright © 2010 GateFeeder Ltd
13
 Loading...