

Page 1
INSTALLATION INSTRUCTIONS FOR LAMP KIT, 8700E OR 9100A/7500A
This instruction sheet details the steps required to install the lamp kit for your 8700E or 9100A/7500A unit. The
available kits are listed below: Be sure to follow all warnings and safeguards as outlined in the enclosed Warnings
and Safeguards sheet before working on the unit.
032122 220V/50 Hz 8700E/9100A/7500A
032123 220V/60 Hz 8700E/9100A/7500A
032124 120V/60 Hz 8700E/9100A/7500A
032125 220V/50 Hz. 8700ETW/9100ATW/7500ATW
032126 220V/60 Hz. 8700ETW/9100ATW/7500ATW
032127 120V/60 Hz. 8700ETW/9100ATW/7500ATW
KIT CONTENTS
Kit Contents 032122 032123 032124 032125 032126 032127
033456 Lamp Assy. 1 ----033461 Lamp Assy. - 1 ---033455 Lamp Assy. - - 1 - - 033458 Lamp Assy. - - - 1 - 033460 Lamp Assy. ----1033454 Lamp Assy. -----1
021433 Cable MI 1 1 1 1 1 1
068816 Washer ¾ to ½” Conduit 2 2 2 2 2 2
039130 Nut, ½” Conduit 2 2 2 2 2 2
066400 Union, Conduit 1 1 1 1 1 1
021732 Connector, Wire 18AWG 2 2 2 2 2 2
Z09273 Nut, Hex 10-32 2 2 2 2 2 2
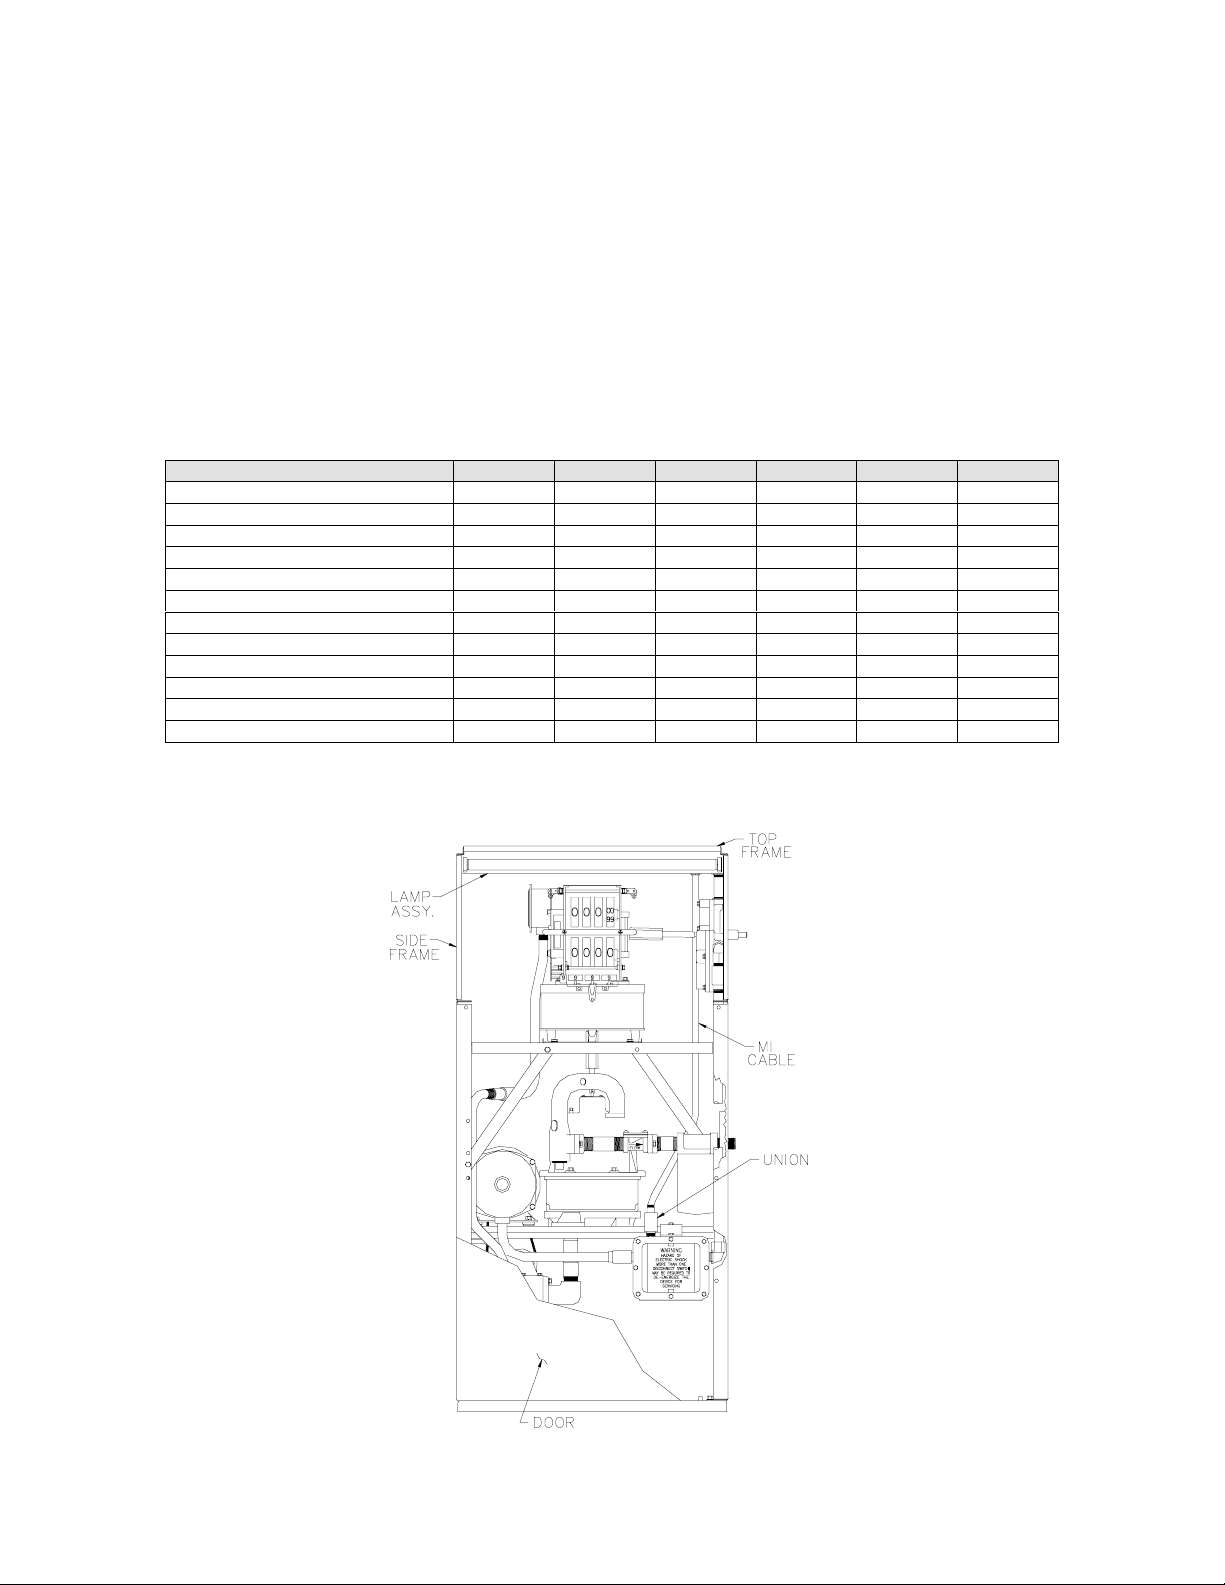
Refer to the diagram below for an overview. Turn sheet over for detailed instructions.
032121 Rev. 7297 Page 1
Page 2
1. Remove front and rear doors.
2. Remove front and rear bezels by unfastening 4 bezel screws (2 per side).
3. Remove 4 nuts that secure the top cover and remove cover.
4. Remove the 6 nuts that secure the top frame and remove the top frame.
5. Install lamp assembly to top frame with 2 new Z09273 nuts.
6. Using 6 existing nuts, reinsta ll top fram e/lam p ass embly. NO TE: MI cable h ole l ocation s hould b e on AC J -box
side.
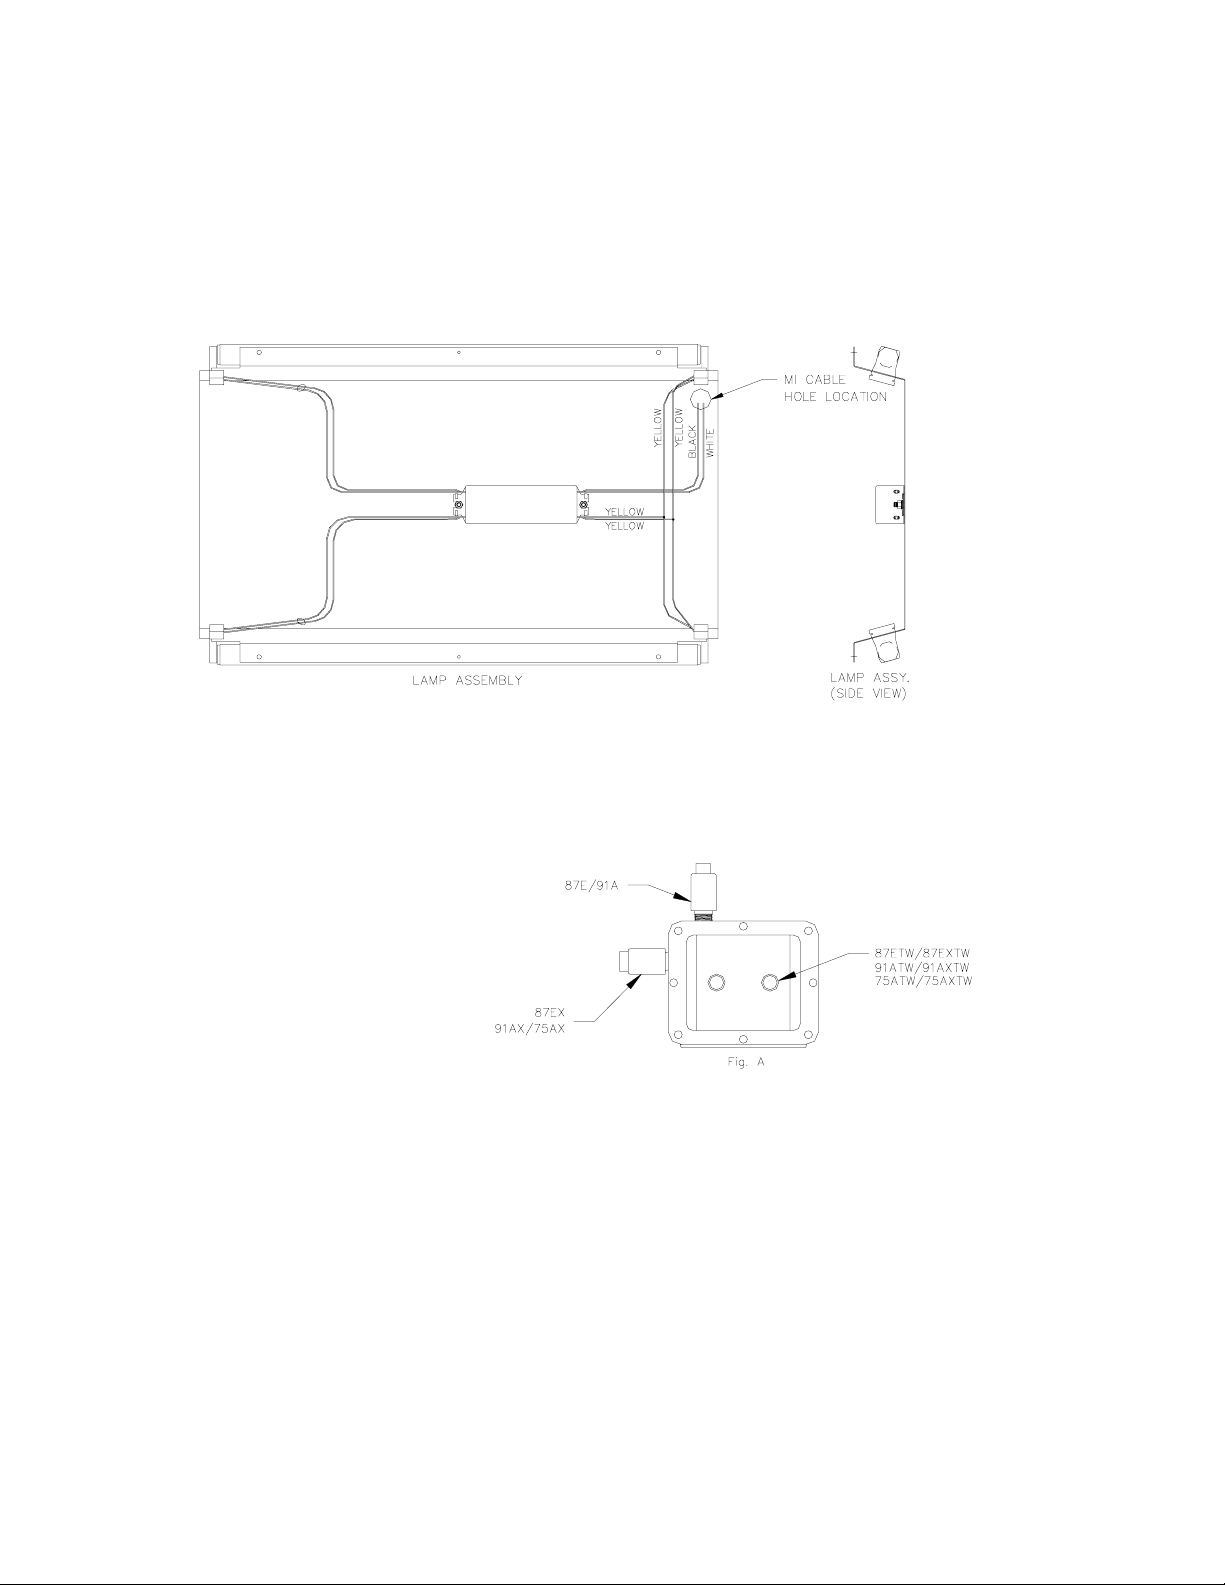
7. Install flexible MI cable to AC J-box
with 066400 union. See Figure A for
the appropriate location for your
application.
8. Install other end of MI c able to lamp
assembly with 068816 washer and
039130 nut. Assemble nut and
washer on both top and bottom of
lamp assembly.
9. Connect wires from MI cable to lamp bracket assembly with wire connectors (white to white, black to black).
10. Connect wires from MI cable to hot and neutral feed in AC J-box. Installer must ensure that electrical rating of
the lamp assembly corresponds to the electrical supply. Refer to the Installation/O peration Manual for your
model pump for other pertinent wiring information.
11. Verify that lights work.
12. Reinstall top cover with existing 4 nuts.
13. Reinstall bezels and doors.
032121 Rev. 7297 Page 2
 Loading...