

Page 1
ISLANDER II FLOPPY DRIVE INSTALLATION FOR SOFTWARE UPGRADES
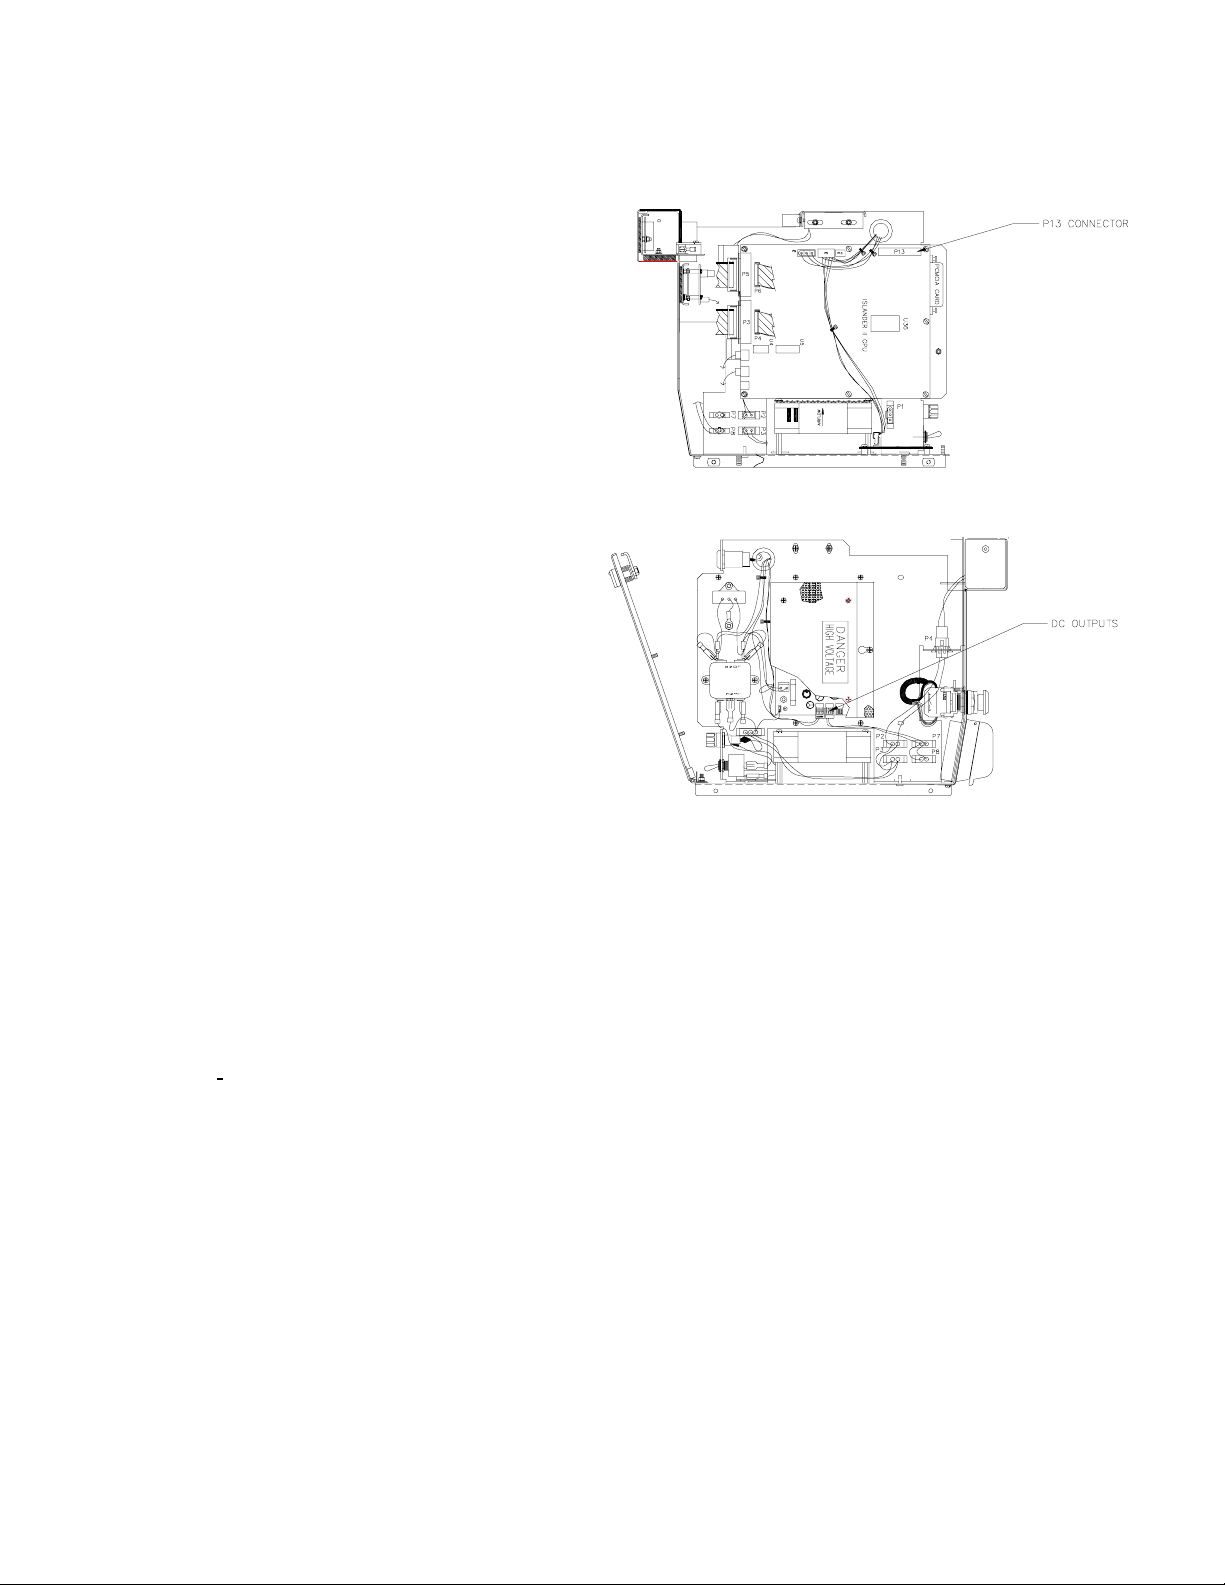
1. Turn the AC power off.
2. Connect the ribbon cable to P13 of the Islander
CPU board.
3. Connect the DC power cable to any one of the
three DC outputs of the power supply. For
Islanders with receipt printers, you will need to
remove the printer cable and plug the floppy drive
cable in its place.
4. Turn the AC power on.
5. Poll the site and if interfaced to a bank network,
perform a settlement (see the section in your
network manual pertaining to settlem ents). If the
bank router software has a menu, choose the
write to file
option.
6. Perform a
SYSBACK.DTA
formatted floppy diskette labeled Backup.
7. Copy the existing
created command files to the Backup floppy
diskette.
8. Put the new Release disk in floppy drive and type
RCP A: E:
written to the PCMCIA card in drive E:. When the
copying is complete remove the Release disk.
9. Put the new Applications disk in floppy drive and
type
copying is complete remove the Applications disk.
10. If the Site is using a Bank Network, put the Network disk in floppy drive and type
Network that the site is using and the proper network support f iles will copy to the PCMCIA card in drive E:.
When the copying is complete remove the Network disk.
11. Type
12. Put the backup floppy diskette in drive A: and type
PCMCIA card in drive E: When the copying is complete remove the Backup disk.
13. Type
NOTE: You must run TABLE to verify that memory s pace has not been ov er allocated before you proceed with
Step 14. Always make sure that the space remaining is a positive number and not a negative number. If more
free space is needed, try reducing the transaction table size.
SYSBACK
All the files on the Release disk are
RCP A: E:
REBOOT;A
FIX CONF
and
TRANBACK.
and
TRANBACK.DTA
FRAMOS.CFG
. All the files on the Applications disk are written to the PCMCIA card in dr ive E:. W hen the
so that the Islander is running the new software. After the site reboots, sign back on.
and press ENTER.
Copy the
files to a
and any user-
RCP A: E:
A:CPROUT
. All the files on the Backup dis k are written to the
. Select the
14. Type
15. Turn the AC power off.
16. Remove the ribbon and DC power cables. If the receipt printer cable was removed in Step 3, replace it.
17. T urn the AC power on. Verify the Islander display is scrolling through messages and can turn on the pumps.
C36013 Rev. 1108
REBOOT;A.
in
SYSBACK.DTA
TRANBACK.DTA
Upgrade procedure is complete.
After the Islander reboots, sign on and type
. Type
. Type
RESTORE EV FR TRANBACK.DTA
RUN;I.
This will restart the site.
RESTORE EV
. This will restore the data saved in
. This will restore the data s aved
 Loading...