

nüvi
®
2505 series
quick start manual
n
üvi models: 2515, 2545, 2555, 2565, 2595
Getting Started
‹
WARNING
See the Important Safety and Product
Information guide in the product box for product
warnings and other important information.
Connecting the Device to Vehicle
Power
‹
WARNING
This product contains a lithium-ion battery.
To prevent the possibility of personal injury or
product damage caused by battery exposure
to extreme heat, remove the device from the
vehicle when exiting or store it out of direct
sunlight.
Notice
Before mounting the device, see the Important
Safety and Product Information guide for
information about laws pertaining to windshield
mounting.
Charge your device as you drive before using it
on battery power.
1
Plug the vehicle power cable ➊ into the
USB port
➋
on the device ➌.
2
Press the suction cup ➍ to the windshield.
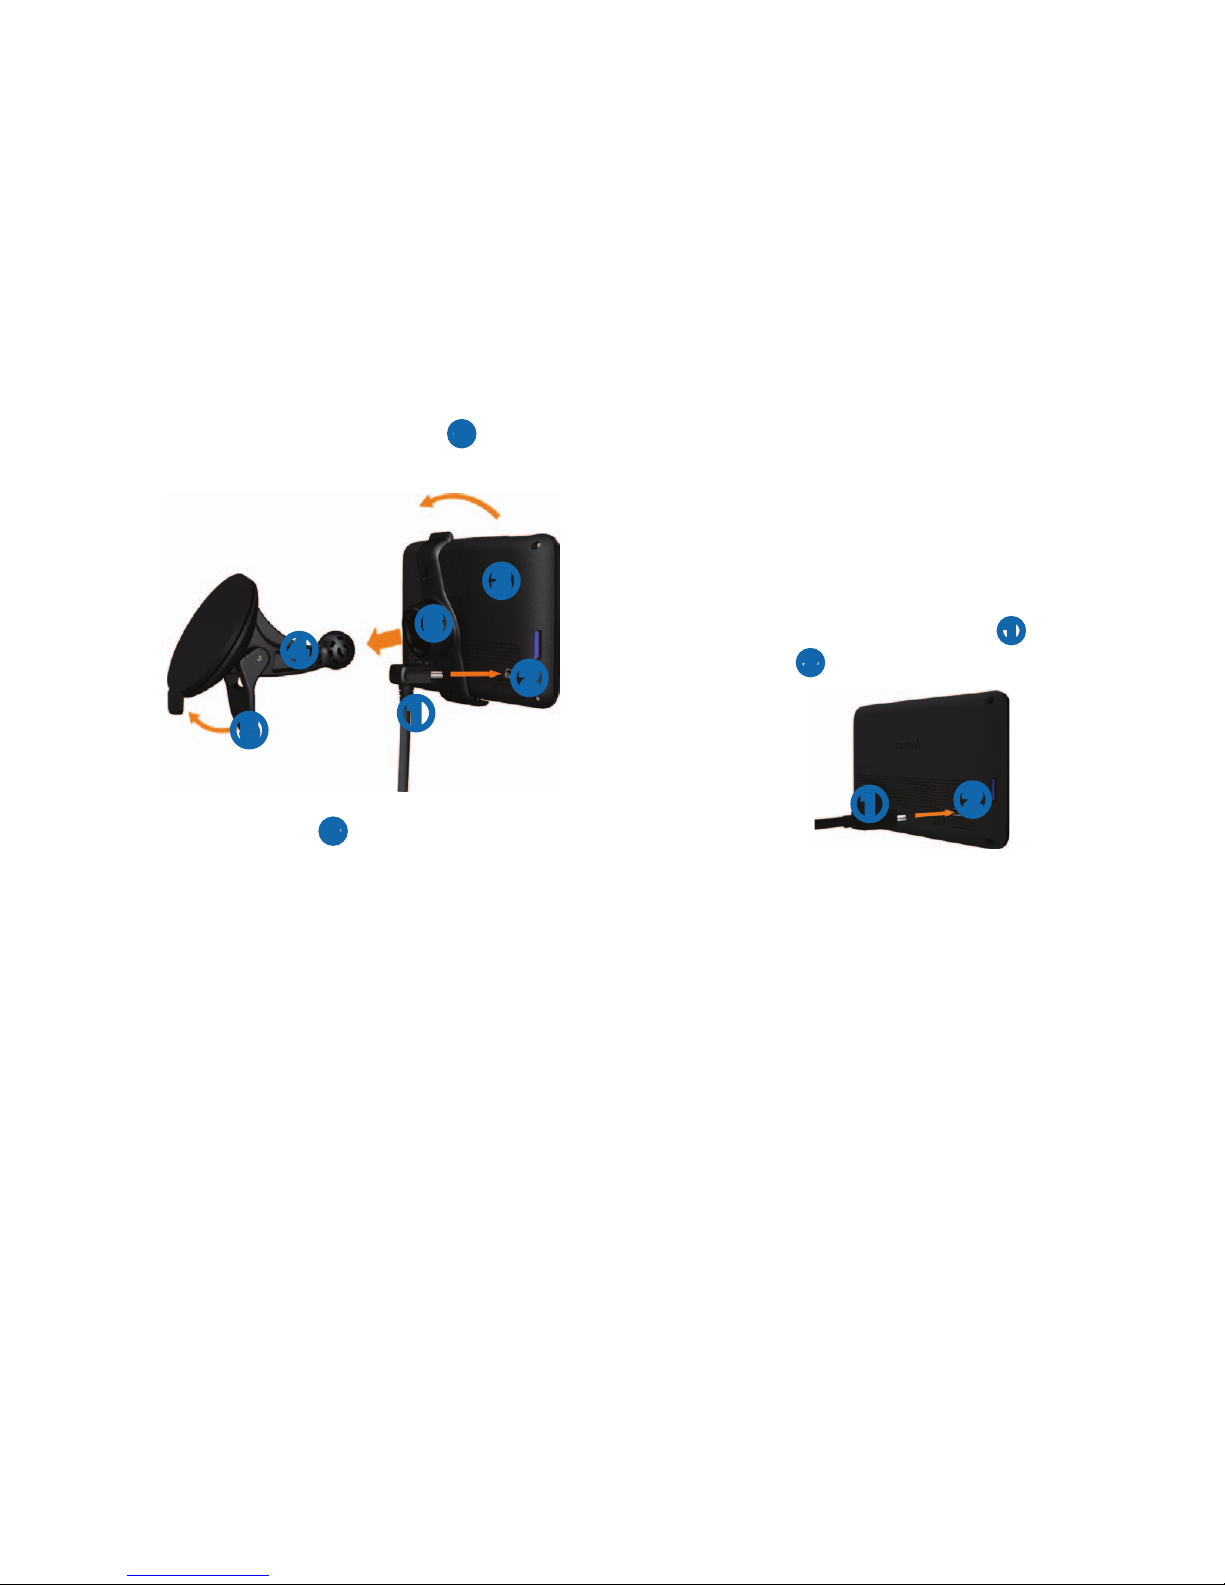
on the device.
3
While pressing, ip the lever ➎ back toward
the windshield.
➊
➋
➍
➌
➎
➏
4
Snap the mount ➏ onto the suction cup.
5
Fit the bottom of your device into the mount.
6
Tilt your device back until it snaps into place.
7
Plug the other end of the vehicle power
cable into a power outlet in your vehicle.
8
If necessary, connect the external antenna to
the vehicle power cable and secure it to the
windshield using the suction cups.
About myDashboard
You can use myDashboard to register your
device, check for software and map updates,
access product manuals and support, and more.
Setting Up myDashboard
1
Connect the mini-USB cable ➊ to the miniUSB port
➋
➊
➋
2
Connect the mini-USB cable to the USB port
on your computer.
.
4
Follow the on-screen instructions.
Registering your Device
1
From myDashboard, click Register Now.
 Loading...