

Page 1
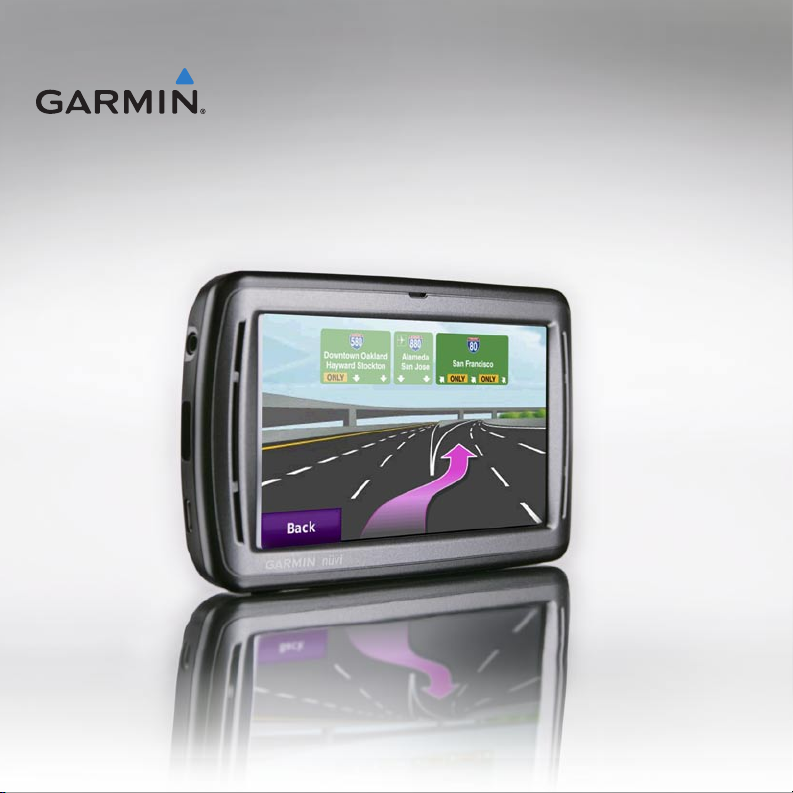
nüvi® 805 series
quick start manual
© 2008 Garmin Ltd. or its subsidiaries
November 2008 190-01047-01 Rev. A Printed in Taiwan
Page 2
Your nüvi Unit
WARNING: See the Important Safety and Product Information guide in the product box for product warnings and other
important information.
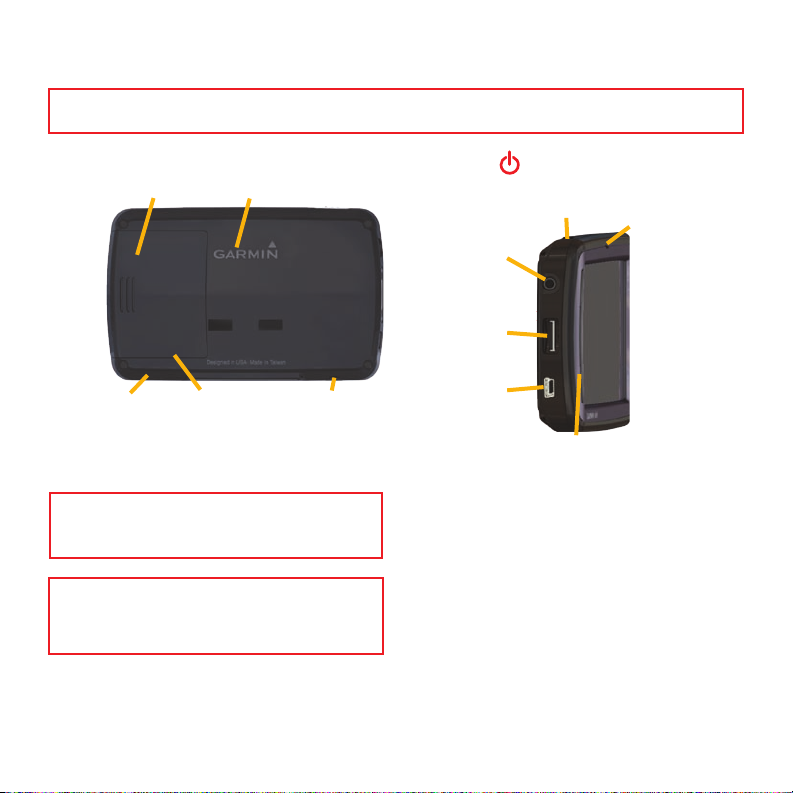
Power key:
Battery cover
GPS antenna
slide to the left to turn the unit on/off;
slide to the right to lock the screen
Microphone
Headphone/
audio out
jack
new
MicroSD
card slot
Microphone
Serial number
under battery
External
antenna
connector
WARNING: This product contains a lithium-ion battery.
To prevent damage, remove the unit from the vehicle
when exiting or store it out of direct sunlight.
Before mounting the nüvi, see the Important Safety
and Product Information guide for information
about laws pertaining to windshield mounting
Mini-USB
connector
Garmin®, the Garmin logo, and nüvi® are trademarks of
Garmin Ltd. or its subsidiaries, registered in the USA and
other countries. Garmin Lock™ and nüMaps Guarantee™
are trademarks of Garmin Ltd. or its subsidiaries. These
trademarks may not be used without the express permission
of Garmin. The Bluetooth® word mark and logos are owned
by the Bluetooth SIG, Inc., and any use of such name by
Garmin is under license. Panoramio™ is a trademarks of
Google Inc.
Speakers
2
Page 3
Step 1: Install the nüvi
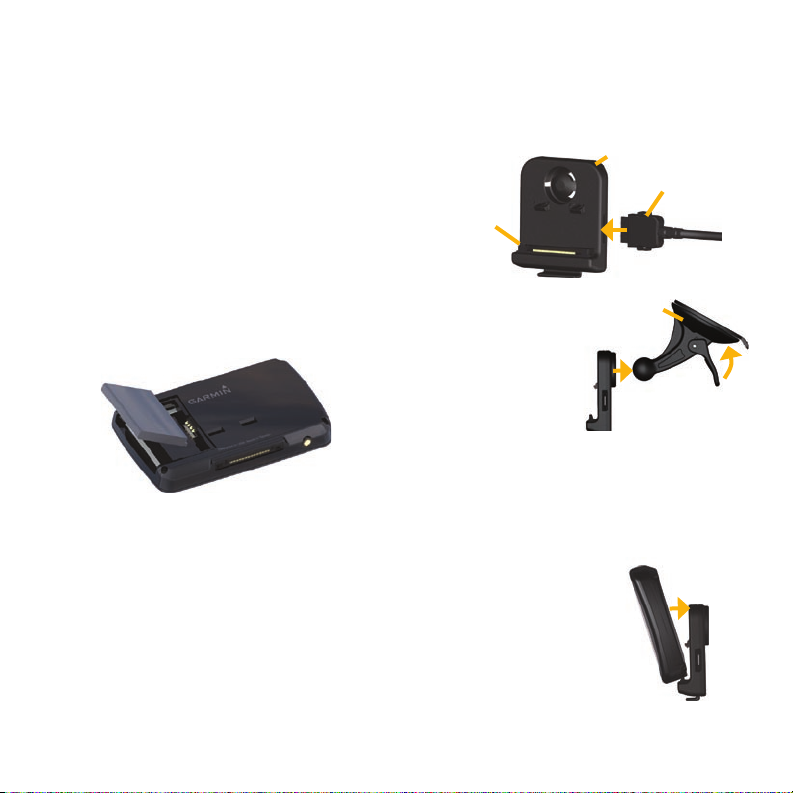
Suction cup
mount
Suction cup
mount
Battery
1. Locate the rectangular lithium-ion battery
that came in the product box.
2. Slide the battery cover off the back of the
nüvi.
3. Locate the metal contacts on the end of
the lithium-ion battery.
4. Insert the battery so the metal contacts
on the battery match up with the metal
contacts inside the battery compartment.
5. Press the battery down into place.
6. Slide the battery cover back on until it
clicks into place.
Ways to Charge Your nüvi
Use the vehicle power cable.
•
Use the USB cable.
•
Use an optional AC adapter cable.
•
Step 2: Mount the nüvi
1. Plug the vehicle power cable into the
power connector on the right side of the
cradle.
Cradle
Microphone
jack
2. Snap the cradle
onto the suction
cup arm.
3. Clean and dry
your windshield
and the suction
cup with a lint-free cloth. Remove the
clear plastic from the suction cup. Place
the suction cup on the windshield.
4. Flip the lever back, toward the
windshield.
5. Fit the bottom of your
nüvi into the cradle.
6. Tilt the nüvi back until it
snaps into place.
Power
cable
3
Page 4
7. Plug the other end of the vehicle power
cable into a power outlet in your vehicle.
Your unit should turn on automatically if it
is plugged in and the vehicle is running.
8. Ifyouareusingatrafcreceiverin
Europe,securethetrafcreceiver’s
antenna to the windshield using the
suctioncups.(Thetrafcreceiveris
included in the nüvi 865 package.)
Step 4: Congure the nüvi
To turn on your nüvi, slide the Power
key to the left and let go after one second.
Follow the on-screen instructions.
Step 3: Activate and Mount
the Speech Recognition
Remote Control
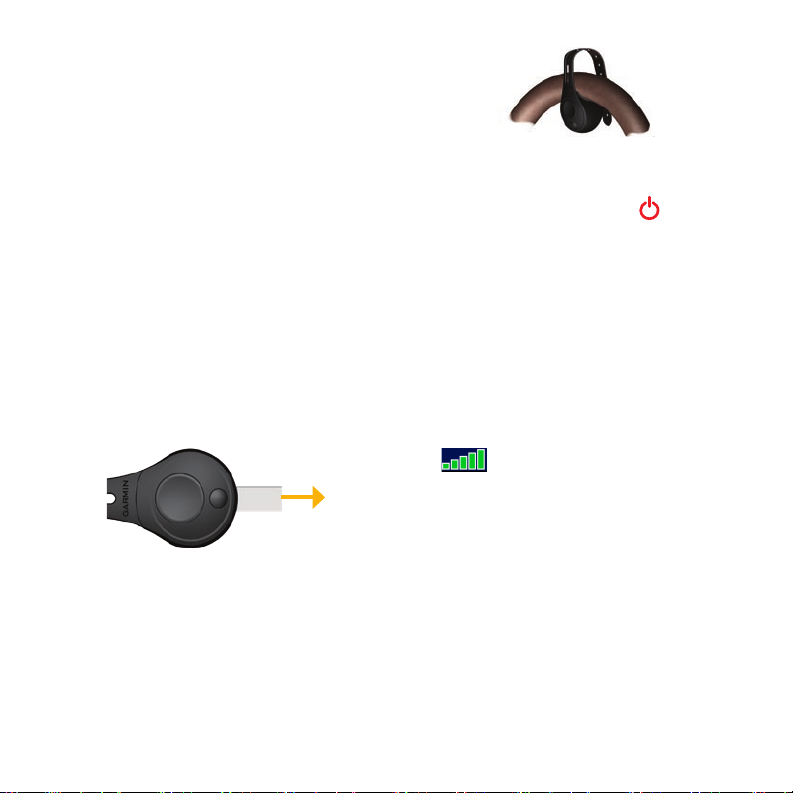
Pull the clear tab out of the remote control to
activate it.
Mount the remote control in a convenient
location in your vehicle, such as on your
steering wheel. Use the strap to secure the
remote control in place.
Step 5: Acquire Satellites
Go outdoors to an open area, out of garages,
and away from tall buildings. Stop your
vehicle, and turn on the nüvi. Acquiring
satellite signals may take a few minutes.
The bars indicate GPS satellite
strength. When one bar is green, the nüvi
has acquired satellite signals. Now you can
select a destination and navigate to it. For
more information about GPS, visit
www.garmin.com/aboutGPS.
4
Page 5
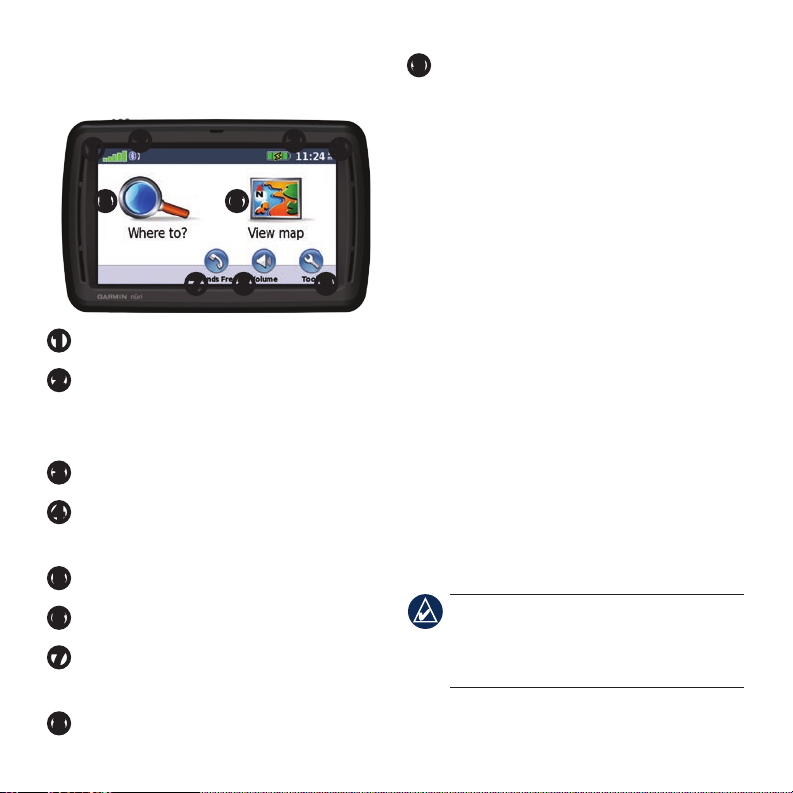
Understanding the Menu
Page
Select to use the tools such as media
➒
players, settings, and Help.
➋ ➌
➊
➍
➎ ➏
➐ ➑ ➒
GPS satellite strength
➊
Bluetooth® technology status
➋
(Bluetooth technology is not available
on the nüvi 855.)
Battery status
➌
Current time. Touch to change time
➍
settings.
Select to nd a destination.
➎
Select to view the map.
➏
Select to make a call when connected to
➐
a compatible mobile phone.
Finding an Address
1. Select Where to? > Address.
2. Select Change State/Province, if
necessary.
3. Select Search All.
OR
Select Spell City, enter the city/postal
code, and select Done. Select the
city/postal code in the list. (Not all
locations can be found using postal code
searching.)
4. Enter the number of the address, and
select Done.
5. Enter the street name, and select Done.
Select the correct street in the list, if
necessary.
6. Select the address, if necessary.
NOTE: Depending on the version of the
maps loaded on your nüvi, the button
names can change and some steps could be
ordered differently.
Select to adjust the volume.
➑
5
Page 6
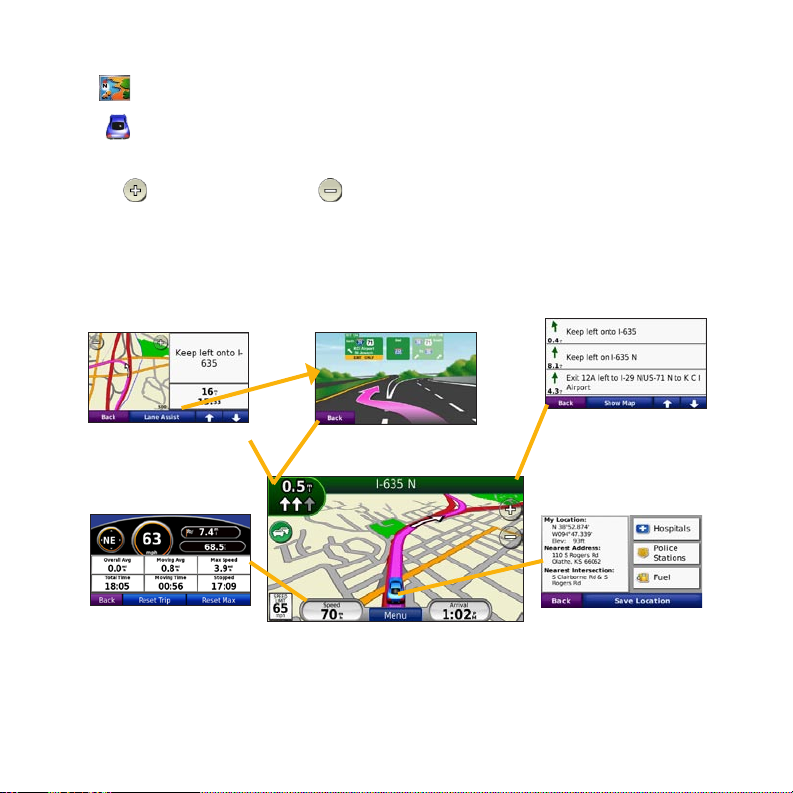
Viewing the Main Pages
Touch View map to open the Map page.
The vehicle icon shows your current location.
•
Touch and drag the map to view a different area of the map.
•
Touch to zoom in, and touch to zoom out.
•
Touch Menu to return to the Menu page.
•
A speed limit icon could appear as you travel on major roadways.
•
Touch to view the Next
Turn page or the Lane
Assist page (if available).
Touch to view the Trip
Computer.
Touch to view the Turn
List page.
Touch to view the
Where Am I? page.
6
Page 7
Taking a Detour
1. With a route active, select Menu.
2. Select Detour.
If the current route is the only reasonable
option, the nüvi might not calculate a detour.
You can also select specic detours while
navigating a route by using the Prompted
Detour feature. Select Tools > Settings >
Navigation > Prompted Detour. While
navigating a route, touch Detour on the
Menu page, and select a detour.
Walking to a Destination
If you are walking to your destination, use
Pedestrian mode to optimize your route for
walking. Select Tools > Settings > System
> Usage Mode > Pedestrian > OK.
Securing Your nüvi
1. Select Tools > Settings > Security.
2. Select Garmin Lock.
3. Enter a 4-digit PIN and drive to a security
location.
Adding a Stop (Via Point) to
Your Route
1. With a route active, select Menu >
Where to?.
2. Search for the extra stop (via point).
3. Select Go!.
4. Select Add as Via Point to add this stop
before your destination. Select Set as
new Destination to make this your new
naldestination.
TIP: To add more than one stop, edit the
current route. Select Where to? > Routes.
NOTE: If you forget your PIN and your
security location, you must send your nüvi
to Garmin to get it unlocked. You must
also send a valid product registration or
proof of purchase.
Resetting the nüvi
If the nüvi screen stops functioning, turn the
nüvi off and on again. If this does not help,
slide the Power key to the left and hold it
there for a minimum of 8 seconds. The nüvi
should operate normally.
You can also remove the battery, and then
reinstall it.
7
Page 8
Using Speech Recognition
Use the speech recognition feature to speak
to your nüvi to nd destinations, select
Voice Commands
1. Press the large button on the remote.
2. Wait for the green speak icon to
options, and perform other functions. The
speech recognition feature does not work for
all languages in all areas. See the owner’s
manual at www.garmin.com for more
information.
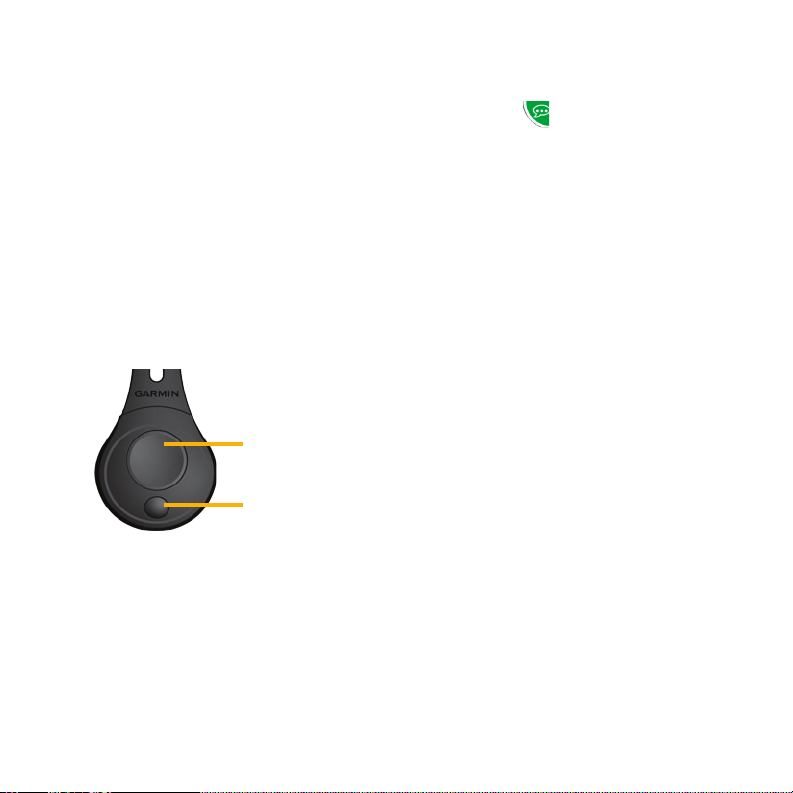
Using the Remote Control
Use the remote control to start or stop a
speech recognition session.
3. Speak a command.
Using Speech Recognition
Speech recognition uses four search
methods:
•
•
•
•
appear.
Speak any text on the screen
Speak shortcut commands
Speak the name of a popular place
Speak an address
Start speech
recognition
Stop speech
recognition
To speak any text on the screen:
1. Speak any word on the screen. For
example, from the Tools menu, you can
speak Routes or Page Down.
2. Listen for the voice prompt before
speaking your next command.
8
Page 9
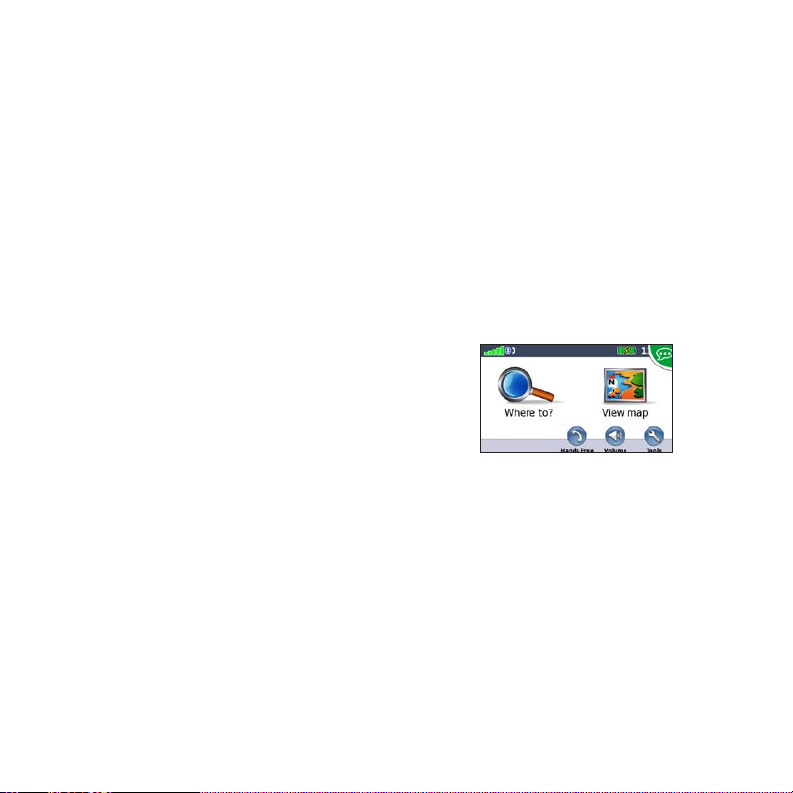
To speak shortcut commands:
1. Speak any shortcut command from the
Shortcut Commands table. You can use
shortcut commands from any screen.
2. Listen for the voice prompt before
speaking your next command.
Shortcut Commands
Audible Player Help
Cancel Route Main Menu
Detour Music Player
Find Address Stop Listening
Find City Tools Menu
Find Favorite Trip Computer
Find Place by
Category
Find Place by Name Volume Down
Find Recently Found Volume Up
Go Home Where Am I?
Hands Free Where To?
View Map
You can also speak Find Nearest to search
a location category. Location categories are
Point of Interest categories contained in
the nüvi. The Find Nearest command only
works from the Menu page, Where to? page,
and Map page.
To search using the Find Nearest
shortcut command:
1. Speak Find Nearest followed by a Point
of Interest category, such as Italian
Restaurant.
“Find Nearest Italian Restaurant”
Additional examples of Find Nearest
commands include:
Find Nearest Gas Station
•
•
Find Nearest Grocery Store
•
Find Nearest Bank
•
Find Nearest Movie Theater
9
Page 10
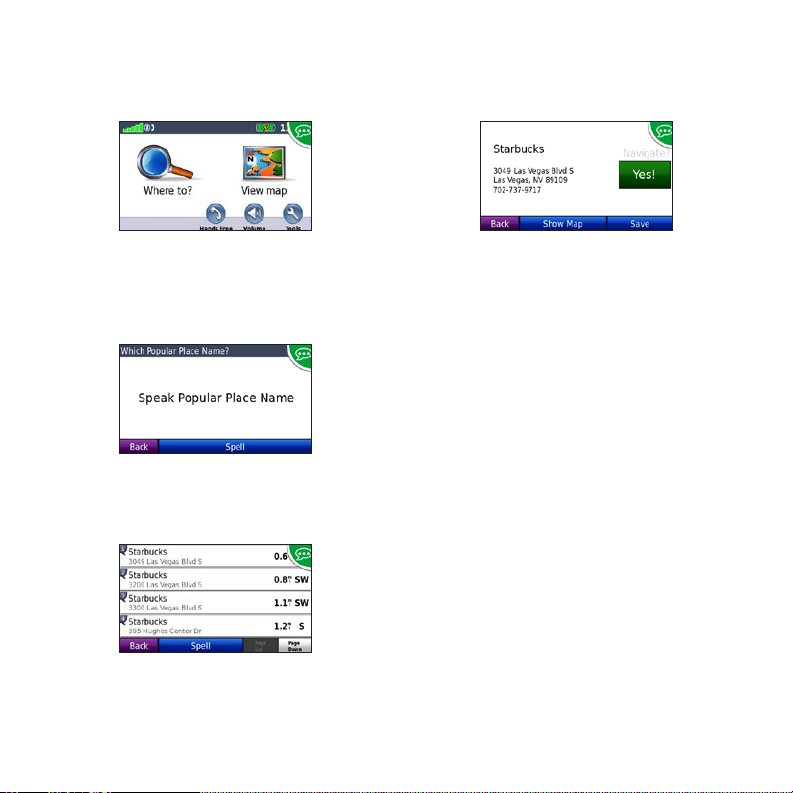
To speak the name of a popular place:
1. Speak Find Place by Name from any
screen.
4. Speak Yes to navigate to the place, or
speak No to go back to the list of found
places.
“Find Place by Name”
2. Listen for the voice prompt, and speak
the name of the place. The nüvi repeats
the name of the place as it is searching.
“Starbucks”
3. A list of places appears. Speak the line
number of the place you want.
“Line 1”
10
“Yes”
To speak an address:
1. Speak Find Address from any screen.
2. Respond to the prompts to speak or spell
the city name, house number, and street.
nüMaps Guarantee™
To receive one free map update, register
your nüvi at http://my.garmin.com within
60 days of acquiring satellites. You are
not eligible for the free map update if you
register by phone or wait longer than 60
days after the rst time your nüvi acquires
satellites. For more information, go to www
.garmin.com/numaps.
Page 11

Using Hands-Free Features
Hands-free phone features are available
only if your nüvi and your mobile phone
have Bluetooth wireless technology. Not
Calling a Number
1. Select Hands Free > Dial.
2. Enter the number, and select Dial.
3. To end a call, touch > End Call.
all phones support all the hands-free phone
features the nüvi provides. To use the handsfree features, you must pair your phone and
the nüvi.
Receiving a Call
When you get a call, the Incoming Call
window opens. Select Answer to answer
the call. Select Ignore to ignore the call and
Pairing Your Phone
1. Verify that your phone is compatible with
the nüvi (www.garmin.com/bluetooth).
2. From the Menu page, select Tools >
Settings > Bluetooth > Add.
3 Select Add.
4. Enable the Bluetooth component of your
phone and enable Find Me/Discoverable/
Visible mode. These settings might be in
a Bluetooth menu, Connections menu, or
Hands-free menu.
5. Select OK on the nüvi.
6. Select your phone, and select OK.
7. Enter the Bluetooth PIN (1234) for your
nüvi in your phone.
stop the phone from ringing.
Using the FM Transmitter
Before using the FM transmitter in your area, see the FM
transmitter legal notice in the owner’s manual. Use of FM
transmitters is currently illegal in certain European countries
due to specic radio frequency restrictions. You must check
the local regulations in all European countries in which you
intend to use the FM transmitter to ensure its legality. For more
information, visit www.garmin.com/fm-notice.
11
Page 12
You can listen to the audio from your nüvi
on your vehicle’s speakers. On the Menu
page, select Volume > Audio Output > FM
Transmitter
. Select an FM channel for the
FM transmitter, and select the same channel
on your nüvi.
automatically recalculates the route.
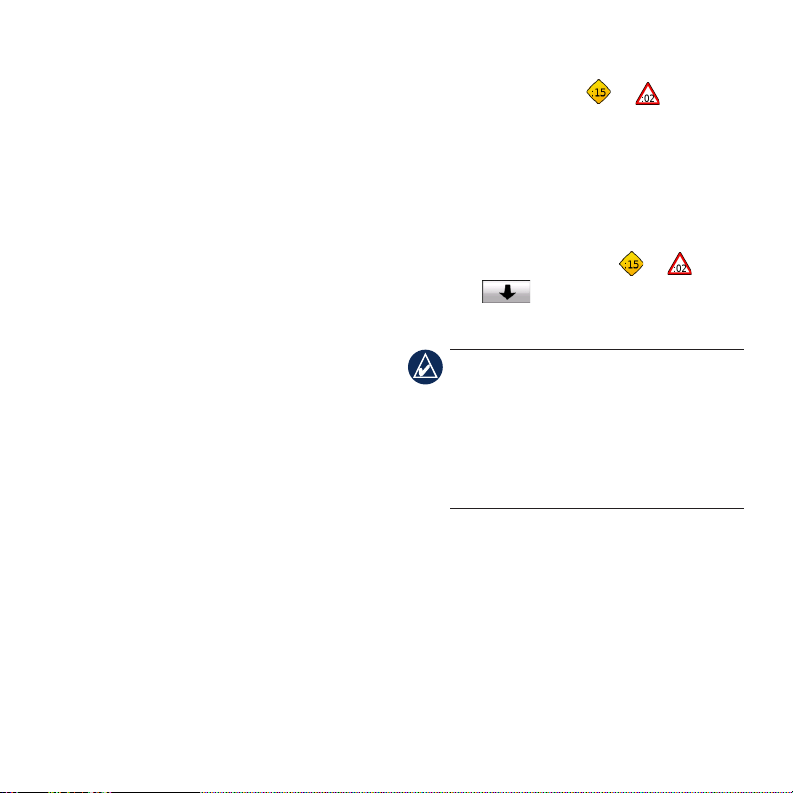
The Map page displays or when
there is trafc on your route. The number in
the icon represents the number of minutes
the trafc has added to your route, which
has been automatically calculated into the
arrival time shown on the map.
Using FM TMC Trafc
The trafc receiver is included in the nüvi
865 package and is an optional accessory for
the nüvi 855. Visit http://buy.garmin.com for
more information.
If the nüvi is connected to the FM Trafc
Message Channel (TMC) trafc receiver,
connected to vehicle power, and you are in
a coverage area, the nüvi can receive trafc
delay information. For more information,
visit www.garmin.com/trafc.
When calculating your route, the
nüvi examines the current trafc and
automatically optimizes the route for the
shortest time. You might still be routed
through trafc if no alternative roads exist.
If a severe trafc delay occurs on your
route while you are navigating, the nüvi
1. On the Map page, touch or .
2. Touch
3. Touch Avoid.
More Information
For more information about your nüvi,
select Tools > Help. You can download the
latest version of the owner’s manual from
www.garmin.com. For information about
accessories, go to http://buy.garmin.com or
contact your Garmin dealer.
toviewtrafcdelays.
NOTE: You do not need to activate the
subscription included with your FM
trafc receiver (if it came with one). The
subscription activates automatically after
your nüvi acquires satellite signals while
receiving trafc signals from the pay
service provider.
12
 Loading...