

Page 1
F4ARGA00 Quick Start
Manual
WARNING
See the Important Safety and Product
Information guide in the product box for
product warnings and other important
information.
Always consult your physician before you
begin or modify any exercise program.
Getting Started
When using your device for the first time, you
should complete these tasks to set up the
device and learn about the basic features.
1
Charge the device (page 6).
2
Put on the optional heart rate monitor
(page 7).
3
Go for a run (
page 3).
4
Upload your run to Garmin Connect™
(page 6).
5
Get more information (page 10).
DRAFT
Page 2
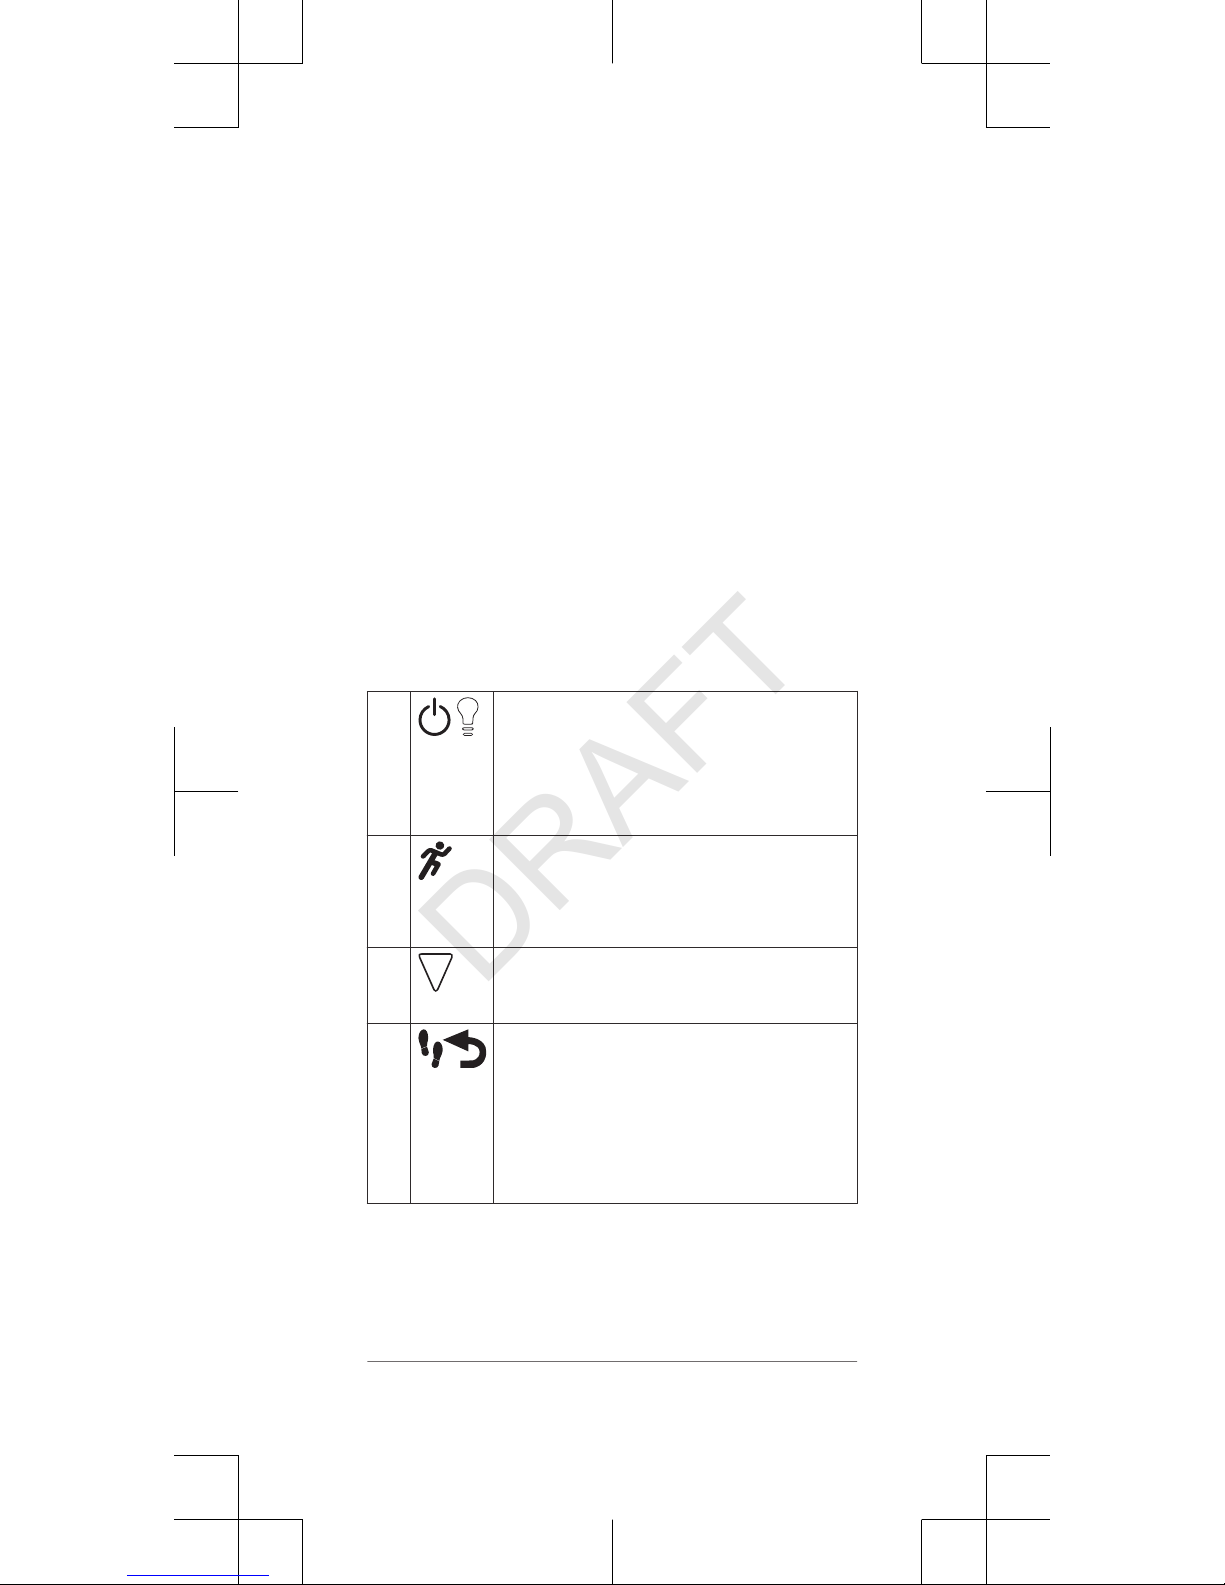
Keys
À
Select to turn the backlight on
and off.
Hold to turn the device on and
off.
Á
Select to start and stop the timer.
Select to choose the highlighted
menu item.
Â
Select to scroll through the data
screens, options, and settings.
Ã
Select to scroll through activity
monitor data.
Select to mark a new lap.
Select to return to the previous
screen.
Status Icons
A flashing icon means the device is searching
for a signal. A solid icon means the signal was
found or the sensor is connected.
2
DRAFT
Page 3
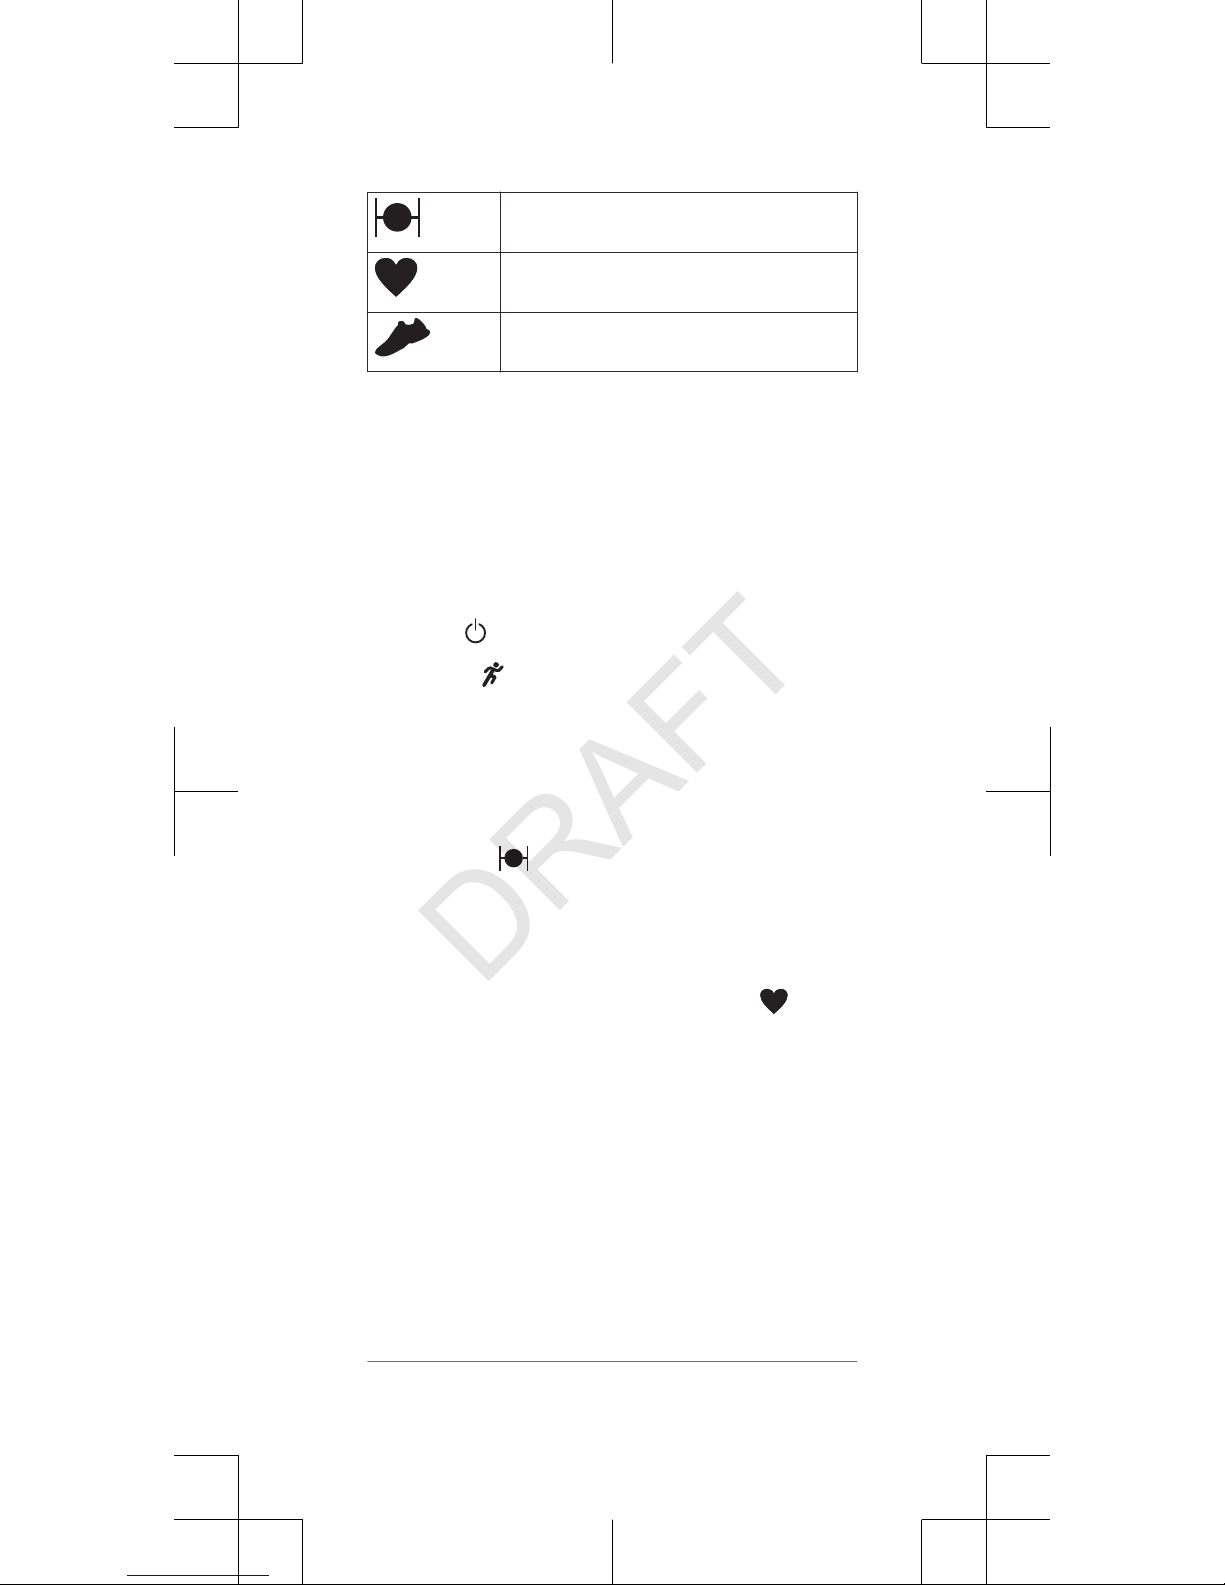
GPS status
Heart rate status
Foot pod status
Going For a Run
The device comes partially charged. You may
need to charge the device (page
6) before
going for a run.
1
Put on the optional heart rate monitor
(page 7).
2
Hold
to turn on the device.
3
Select .
4
Go outside, and wait while the device
locates satellites.
It may take a few minutes to locate
satellite signals. When satellites are
located, displays solid.
5
When using a heart rate monitor, wait
while the device connects to the sensor.
When the device detects the heart rate
monitor, a message appears and
displays solid.
6
Select Start to start the timer.
7
Go for a run.
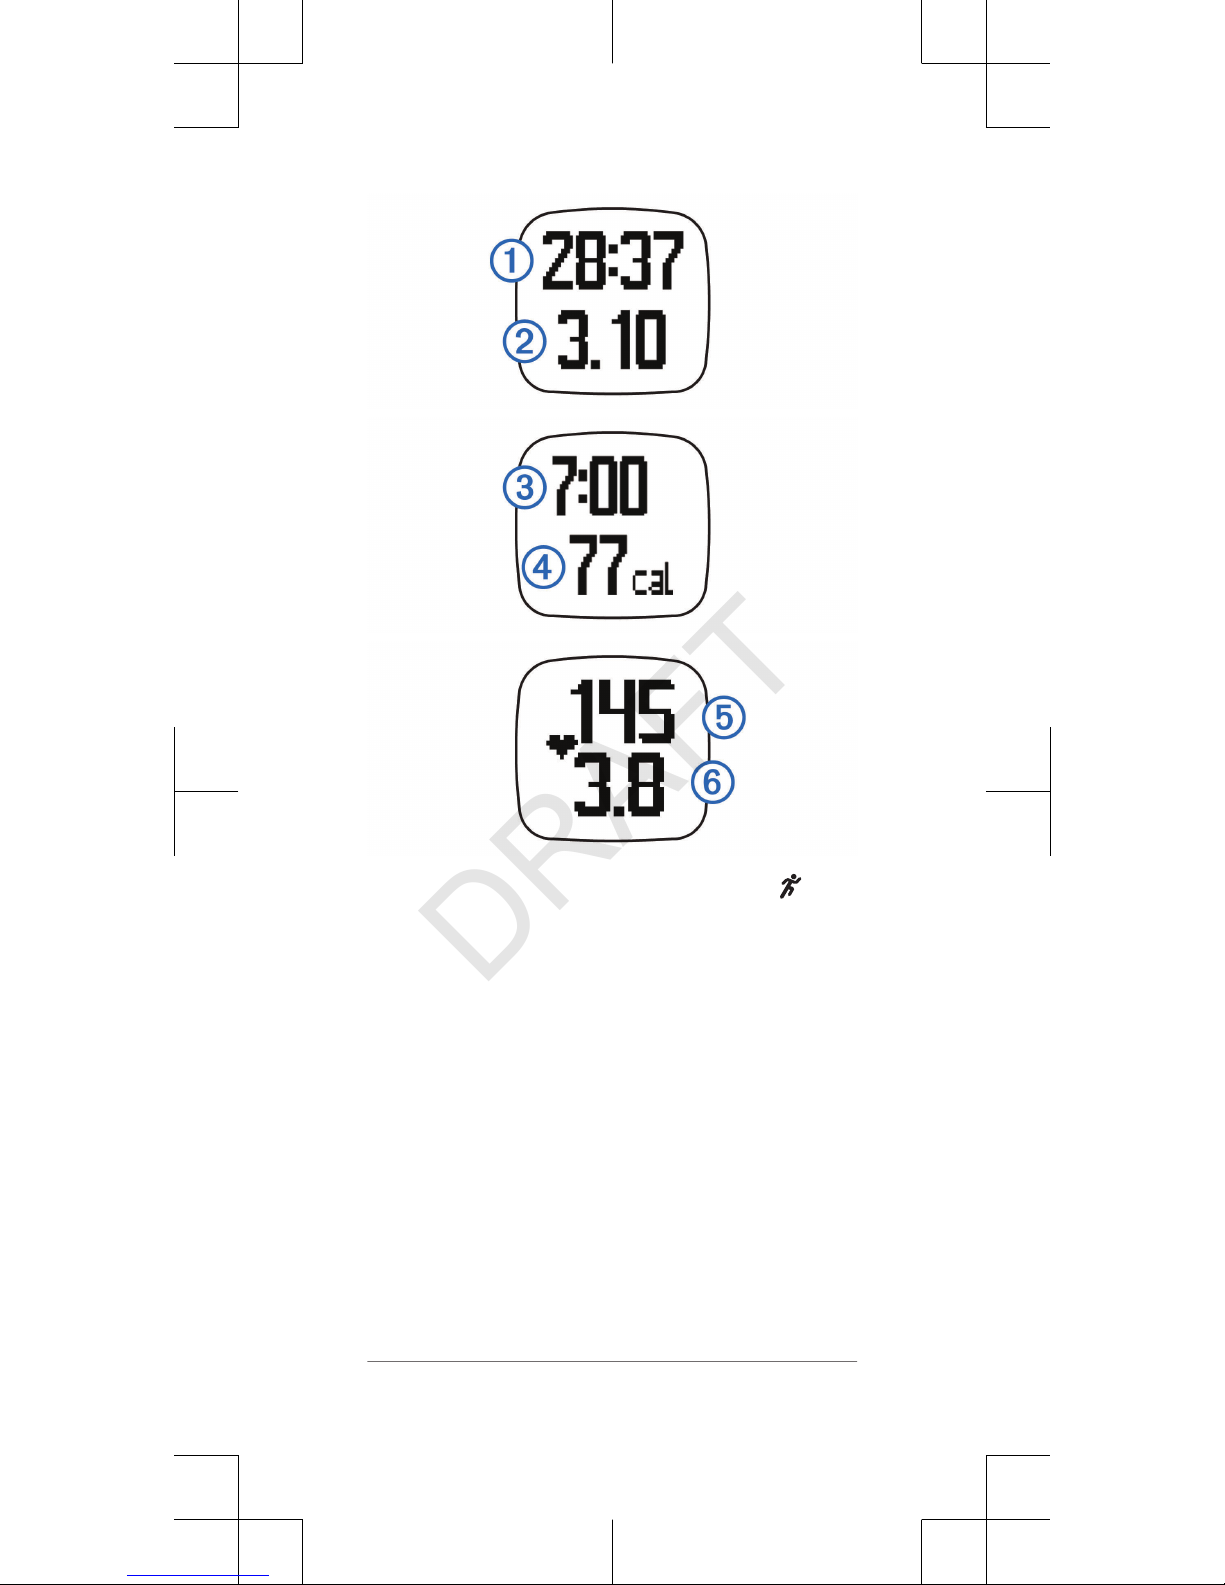
Time À, distance Á, pace Â, calories
burned Ã, beats per minute Ä, and heart
rate zone Å are recorded while the timer
is running.
3
DRAFT
Page 4
8
After you complete your run, select to
stop the timer.
9
Select an option:
• Select Resume
to restart the timer.
NOTE: After a few seconds, a
summary appears.
• Select Save to save the run and reset
the timer. A summary appears.
NOTE: You can now upload your run
to Garmin Connect (page 6).
• Select Discard to delete the run.
4
DRAFT
Page 5
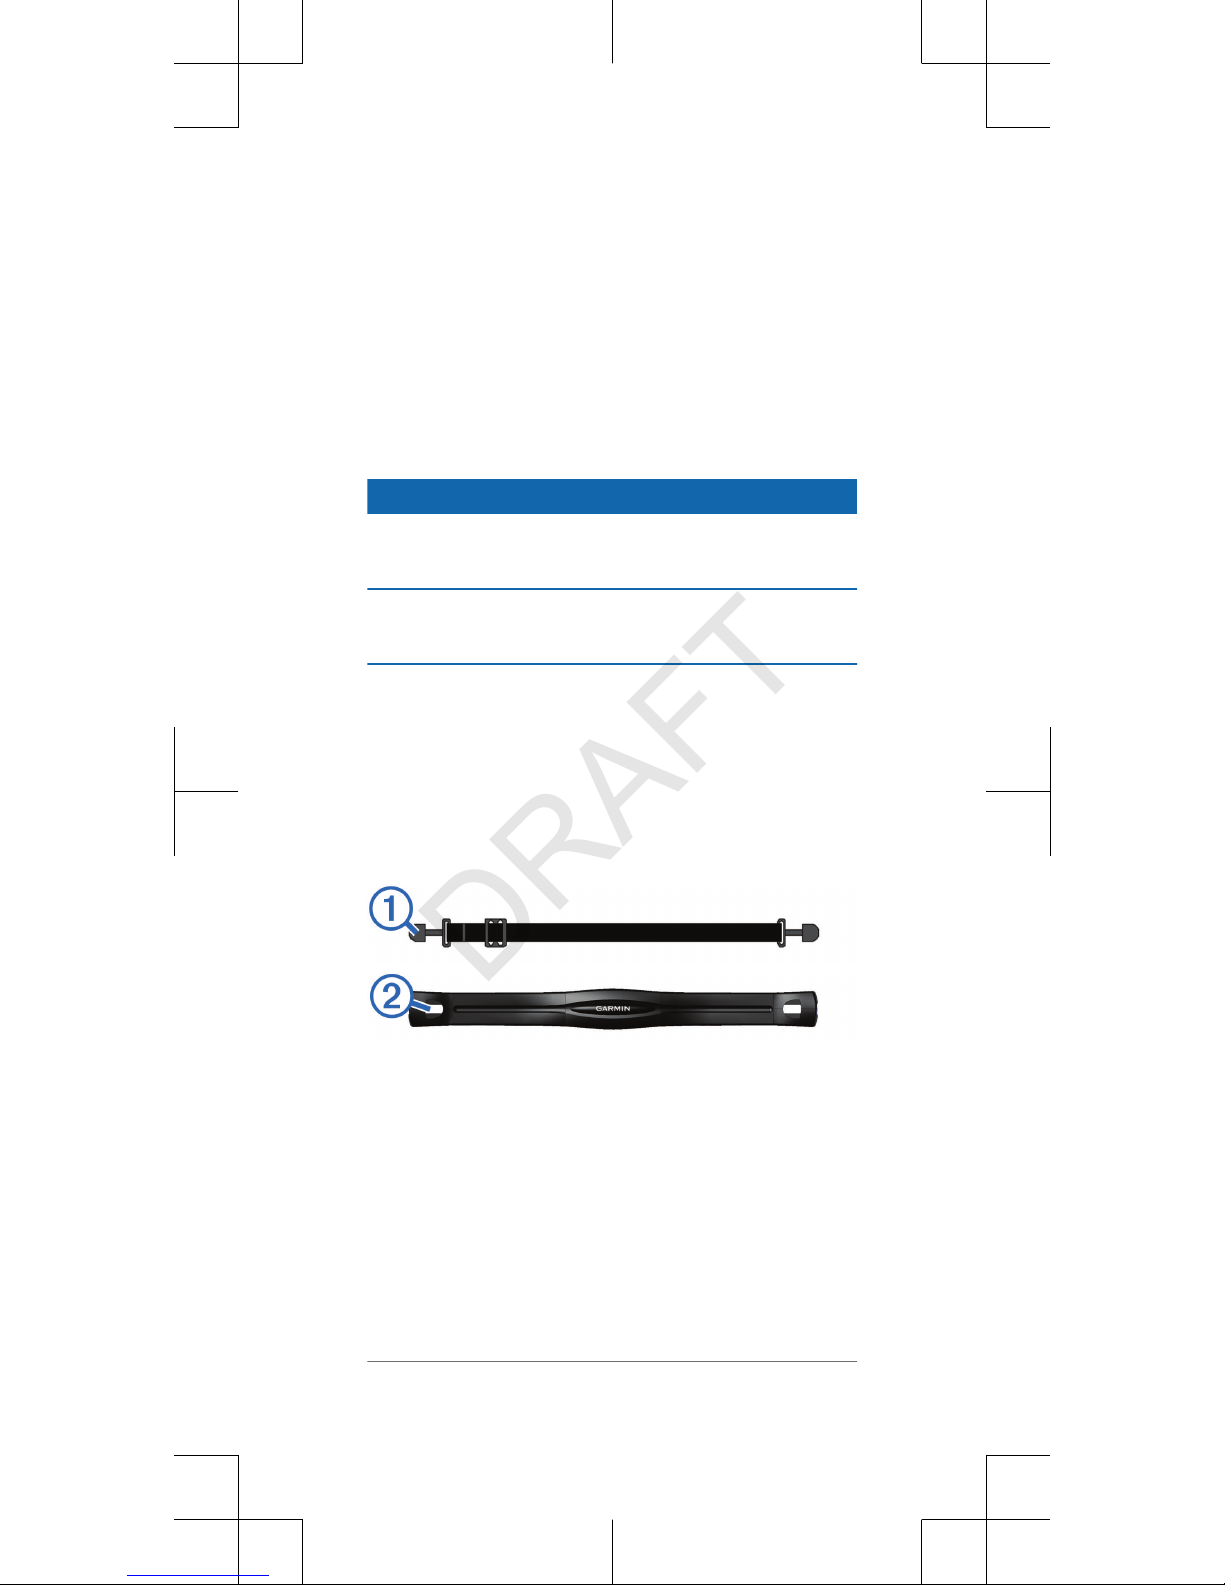
Putting On the Heart Rate Monitor
NOTE: If you do not have a heart rate monitor,
you can skip this task.
NOTE: The device may cause chafing when
used for long periods of time. To alleviate this
issue, apply an anti-friction lubricant or gel to
the center of the module where it contacts your
skin.
NOTICE
Do not apply anti-friction gel or lubricant on the
electrodes.
Do not use gels or lubricants that contain
sunscreen.
You should wear the heart rate monitor directly
on your skin, just below your breastplate. It
should be snug enough to stay in place during
your activity.
1
Push one tab À on the strap through the
slot Á in the heart rate monitor module.
2
Press the tab down.
3
Wet the electrodes  on the back of the
module to create a strong connection
between your chest and the heart rate
monitor module.
7
DRAFT
Page 6
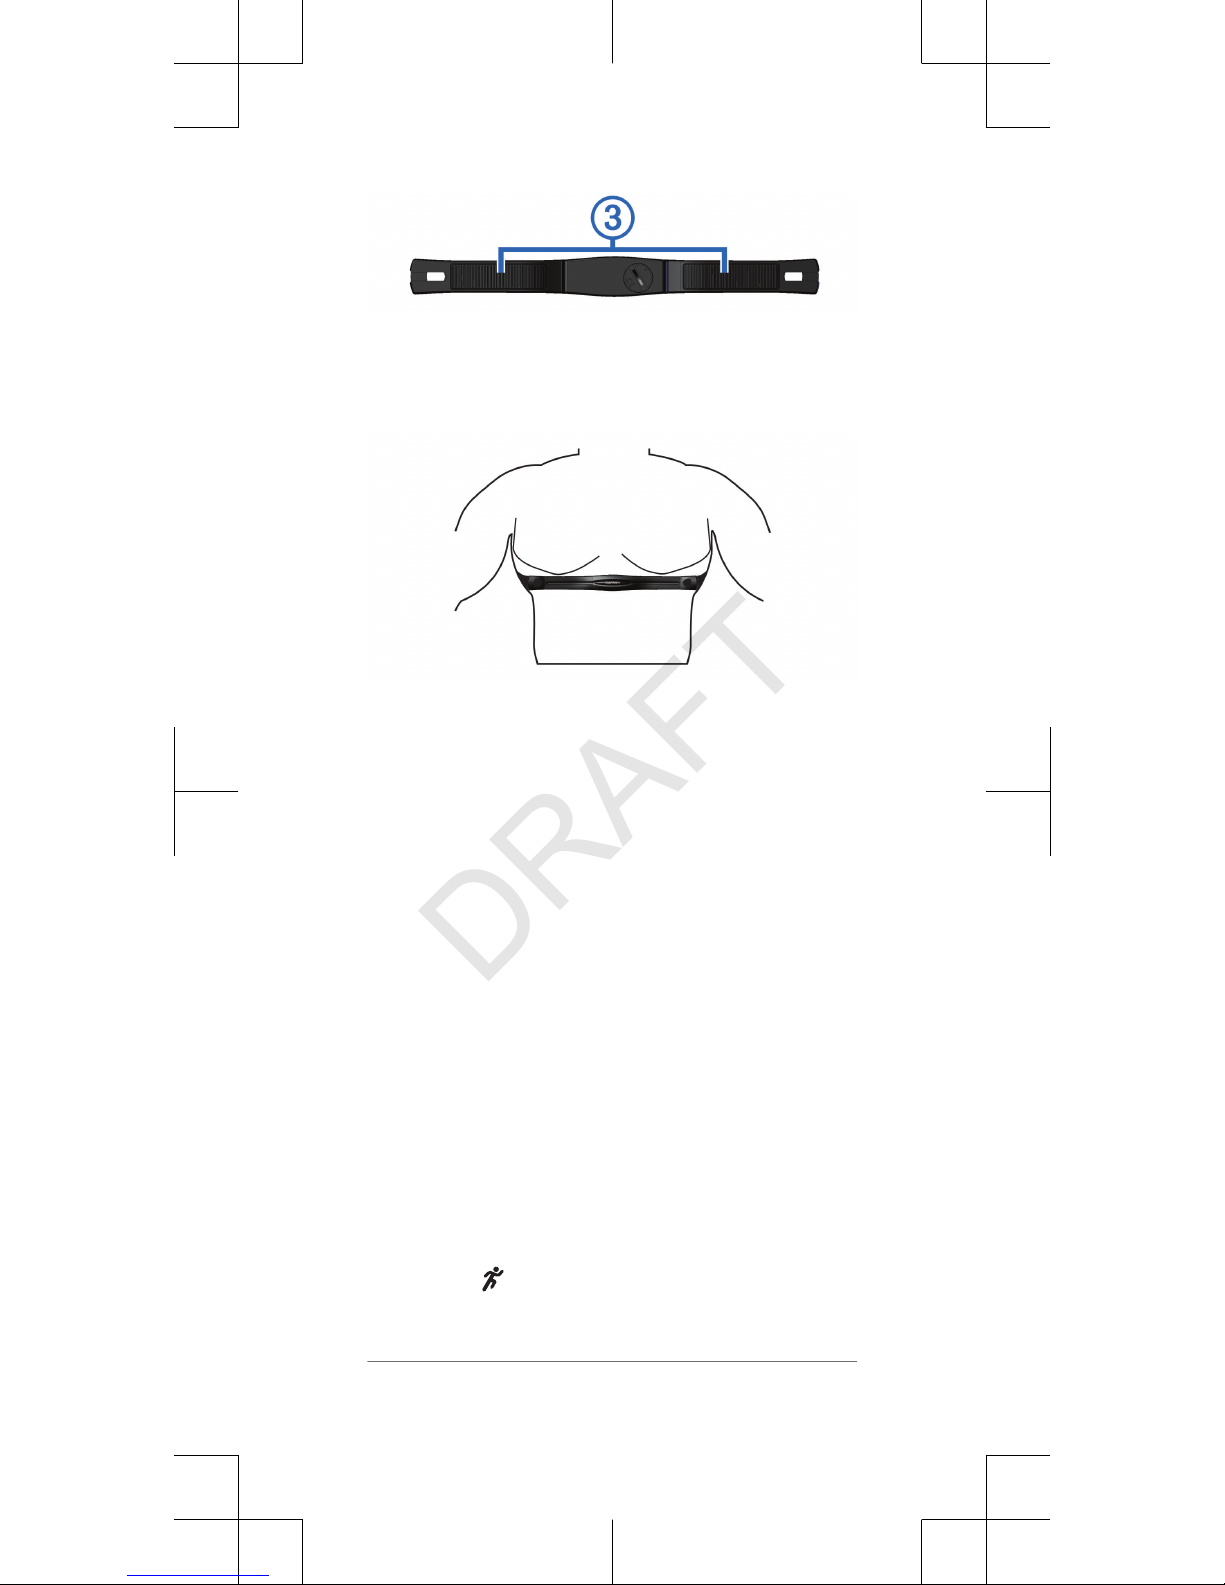
4
Wrap the strap around your chest and
attach it to the other side of the heart rate
monitor module.
The Garmin® logo should be right-side up.
5
Bring the device within 3 m (10 ft.) of the
heart rate monitor.
After you put on the heart rate monitor, it is
active and sending data.
Pairing ANT+
™ Sensors
The first time you connect an ANT+ sensor to
your device, you must pair the device and
sensor. After the initial pairing, the device
automatically connects to the sensor when you
go for a run and the sensor is active and within
range.
NOTE: If your device was packaged with a
heart rate monitor, the device and sensor are
already paired.
1
Put on the heart rate monitor (page 7).
2
Select
.
8
DRAFT
Page 7
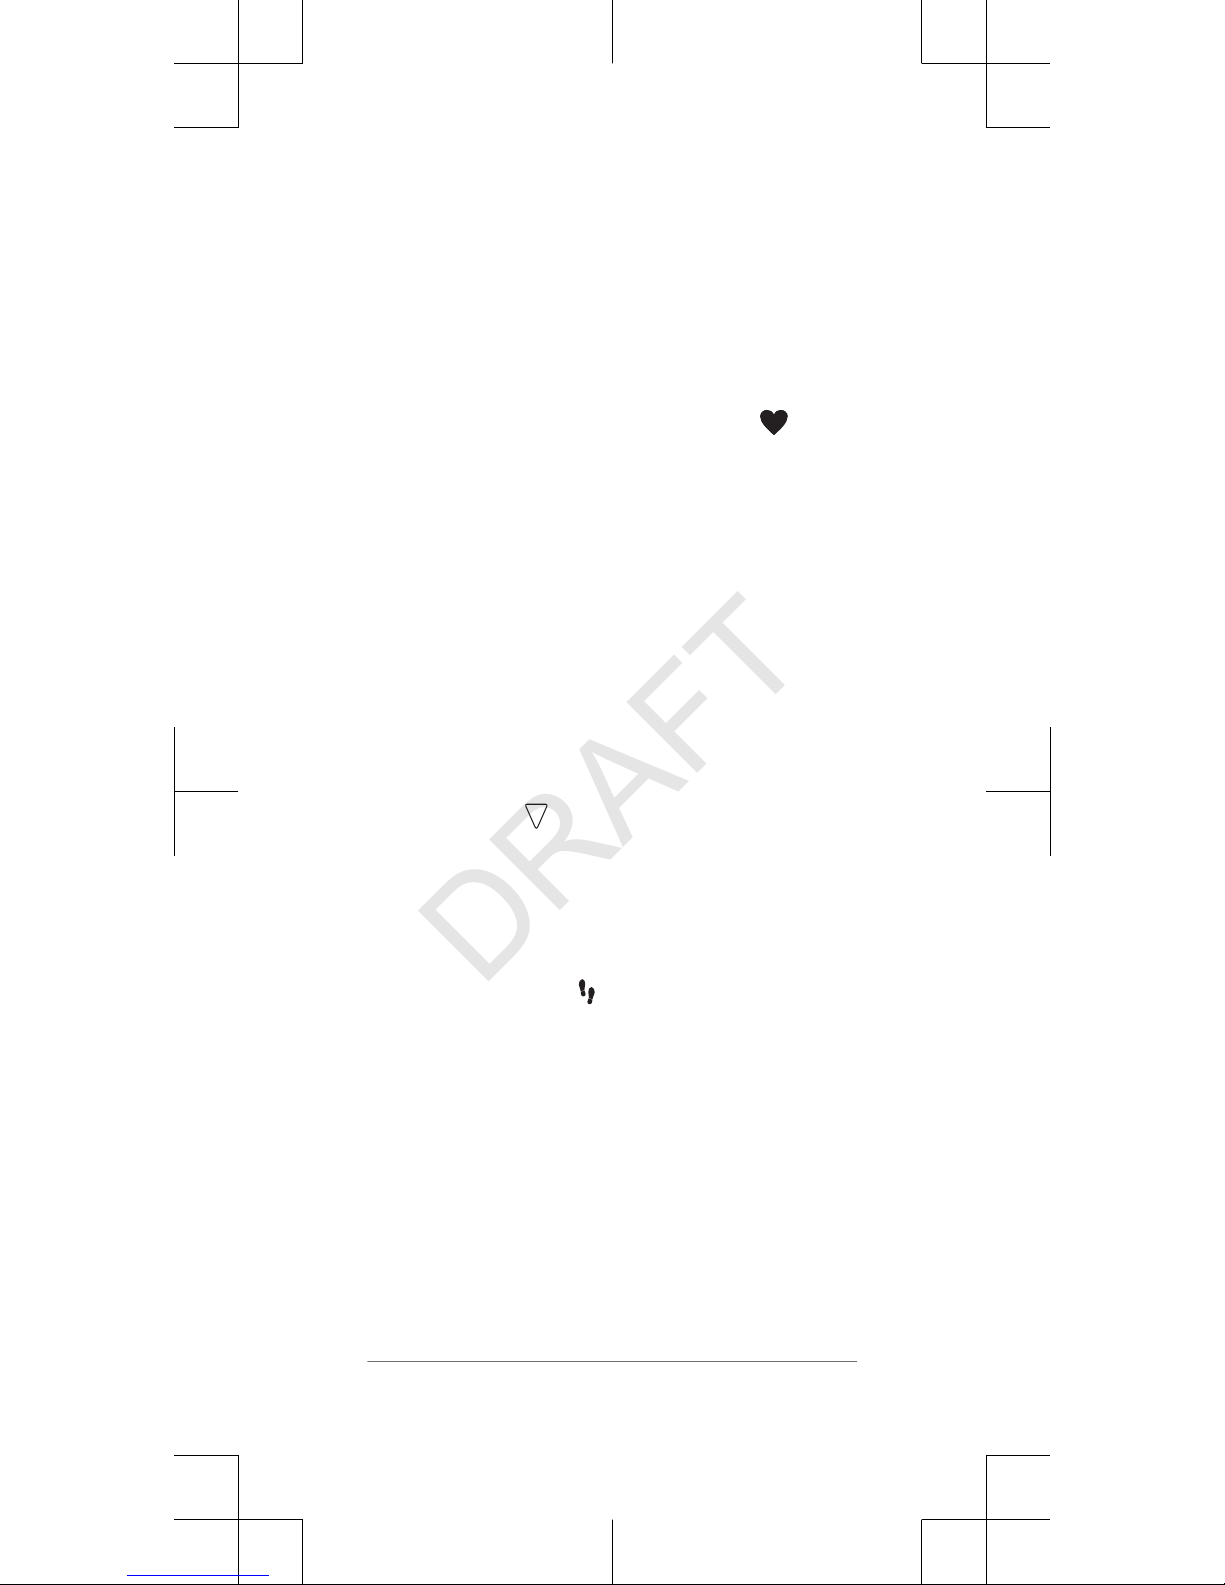
3
Bring the device within 1 cm of the center
of the heart rate monitor, and wait while
the device connects to the sensor.
NOTE: Stay 10 m (33 ft.) away from other
ANT+ sensors while pairing.
When the device detects the heart rate
monitor, a message appears and
displays solid.
Turning On the Activity Monitor
The activity monitor feature records your daily
step count, step goal, distance traveled, and
calories burned for each recorded day. Your
calories burned includes your base metabolism
plus activity calories.
Select an option:
• During the initial setup, select Yes to
turn on activity monitoring.
•
Select
> Settings > Activity
Monitor > Turn On.
Your total number of steps taken during the
day appears beneath the time of day. The step
count is updated periodically.
TIP: You can select to scroll through your
activity monitor data.
History
You can view your last seven running sessions
on your device, and you can
upload and view unlimited running sessions on
Garmin Connect. When the device memory is
full, your oldest data is overwritten.
NOTE: Run history is not recorded while the
timer is stopped or paused.
9
DRAFT
Page 8
Viewing History
1
Select
> History.
2
Select an option:
• Select Daily Steps
to view your step
count, goal, distance traveled, and
calories burned for each recorded day.
• Select Runs to view the date, time,
distance, pace, calories burned, and
lap data for your saved running
sessions.
NOTE: You can also view your
average heart rate and heart rate zone
for saved running sessions using an
optional heart rate monitor.
• Select Records to view your personal
record time, distance, and pace over
various distances.
Device Information
Resetting the Device
If the device stops responding, you may need
to reset it. This does not erase any of your
data or settings.
1
Hold
for 15 seconds.
The device turns off.
2
Hold for one second to turn on the
device.
Getting More Information
• Go to www.garmin.com/intosports
.
• Go to www.garmin.com/learningcenter.
• Go to http://buy.garmin.com, or contact
your Garmin dealer for information about
10
DRAFT
Page 9

optional accessories and replacement
parts.
Getting the Owner's Manual
You can get the latest owner's manual from
the web.
1
Go to www.garmin.com/support.
2
Select Manuals.
3
Follow the on-screen instructions to select
your product.
Temperature Specifications
Operating temperature range
:
From -20º to 60ºC (from -4º to 140ºF)
Charging temperature range:
From 0º to 45ºC (from 32º to 113ºF)
Heart rate monitor operating temperature
range: From -10° to 50°C (from 14° to
122°F)
11
DRAFT
Page 10

Garmin®, the Garmin logo are
trademarks of Garmin Ltd. or its subsidiaries, registered
in the USA and other countries. Garmin
are trademarks of Garmin Ltd. or its
subsidiaries. These trademarks may not be used without
the express permission of Garmin.
© 2014 Garmin Ltd. or its subsidiaries
www.garmin.com/support
April 2014
190-01727-01_0B
Printed in Taiwan
DRAFT
 Loading...