

Page 1
nüvi
®
2505 series
quick start manual
n
üvi models: 2515, 2545, 2555, 2565, 2595
Page 2
Getting Started
‹
WARNING
See the Important Safety and Product
Information guide in the product box for product
warnings and other important information.
Connecting the Device to Vehicle
Power
‹
WARNING
This product contains a lithium-ion battery.
To prevent the possibility of personal injury or
product damage caused by battery exposure
to extreme heat, remove the device from the
vehicle when exiting or store it out of direct
sunlight.
Notice
Before mounting the device, see the Important
Safety and Product Information guide for
information about laws pertaining to windshield
mounting.
Charge your device as you drive before using it
on battery power.
1
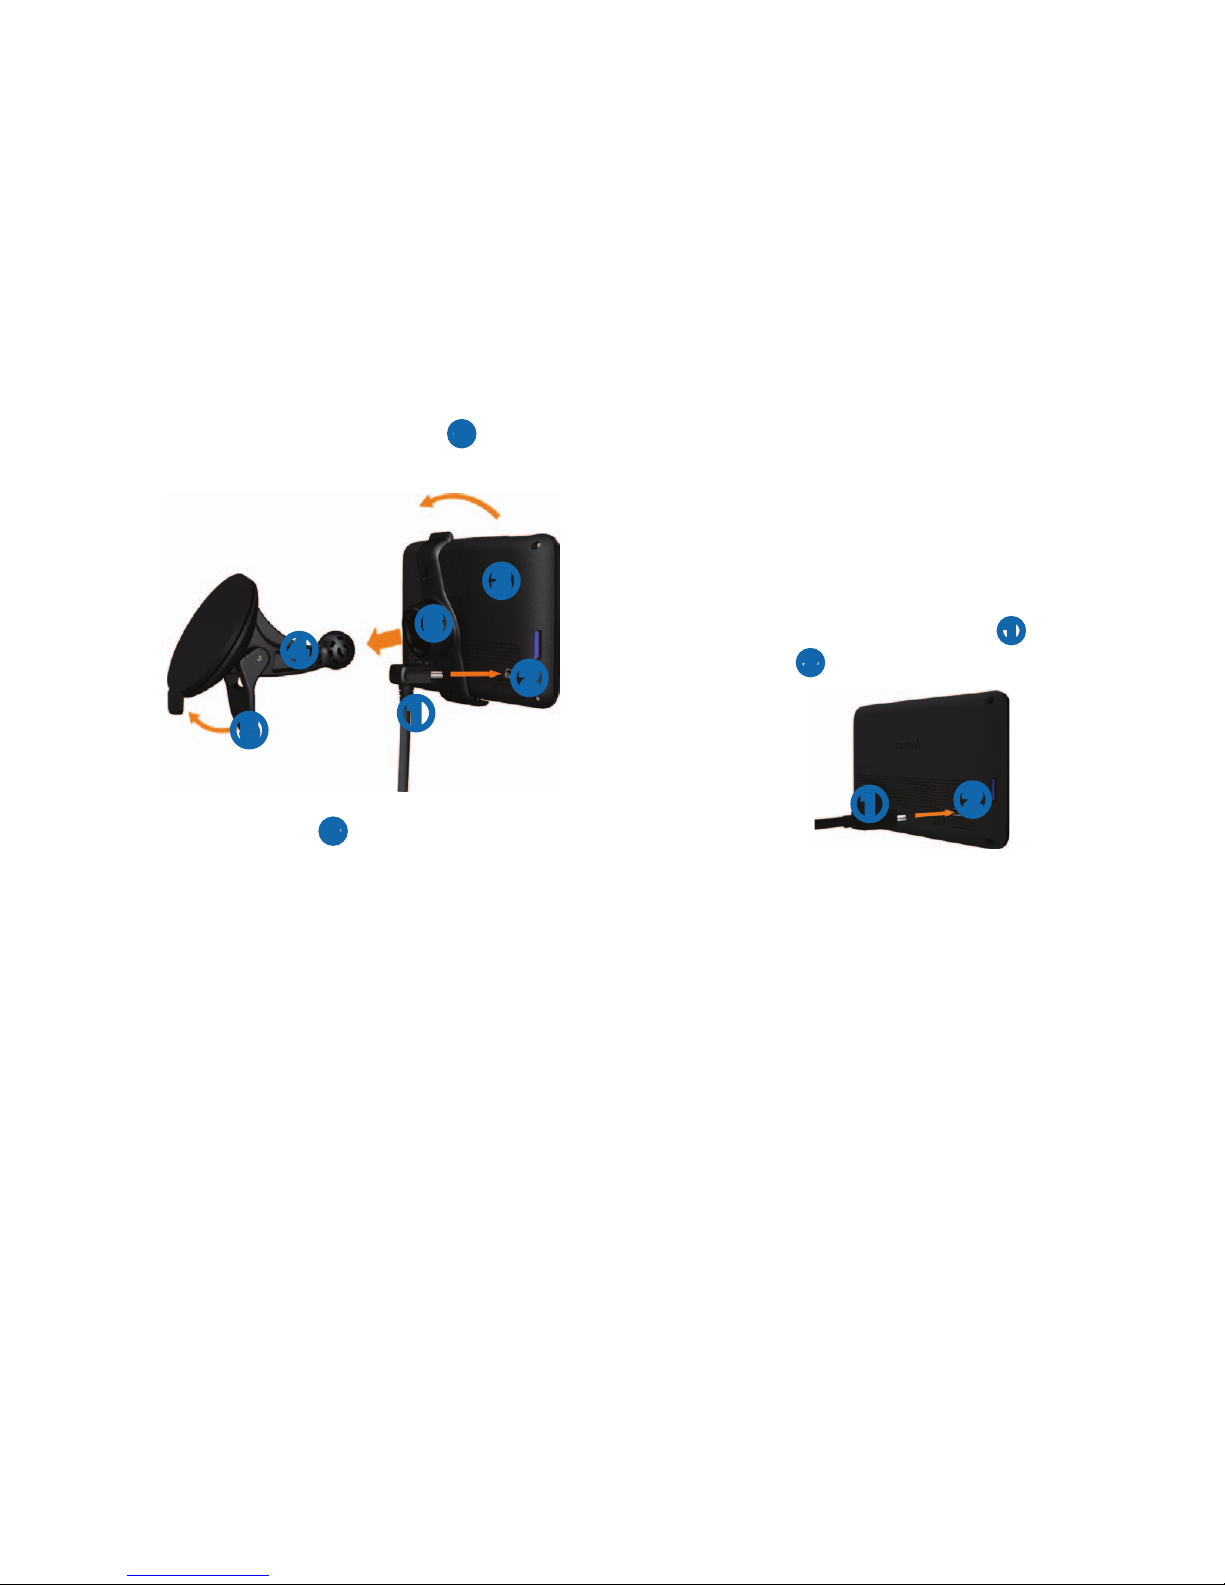
Plug the vehicle power cable ➊ into the
USB port
➋
on the device ➌.
2
Press the suction cup ➍ to the windshield.
Page 3
on the device.
3
While pressing, ip the lever ➎ back toward
the windshield.
➊
➋
➍
➌
➎
➏
4
Snap the mount ➏ onto the suction cup.
5
Fit the bottom of your device into the mount.
6
Tilt your device back until it snaps into place.
7
Plug the other end of the vehicle power
cable into a power outlet in your vehicle.
8
If necessary, connect the external antenna to
the vehicle power cable and secure it to the
windshield using the suction cups.
About myDashboard
You can use myDashboard to register your
device, check for software and map updates,
access product manuals and support, and more.
Setting Up myDashboard
1
Connect the mini-USB cable ➊ to the miniUSB port
➋
➊
➋
2
Connect the mini-USB cable to the USB port
on your computer.
.
4
Follow the on-screen instructions.
Registering your Device
1
From myDashboard, click Register Now.
Page 4
Open myDashboard.
2
Follow the on-screen instructions.
3
Keep the original sales receipt, or a
photocopy, in a safe place.
Using myDashboard Services
1
2
Select an option:
• To update the software, click Update
Now under Software Updates.
• To update the maps, click Update Now
under Map Updates.
• To download the owner’s manual, click
Manuals, and then click Download next
to the manual you want.
3
Follow the on-screen instructions.
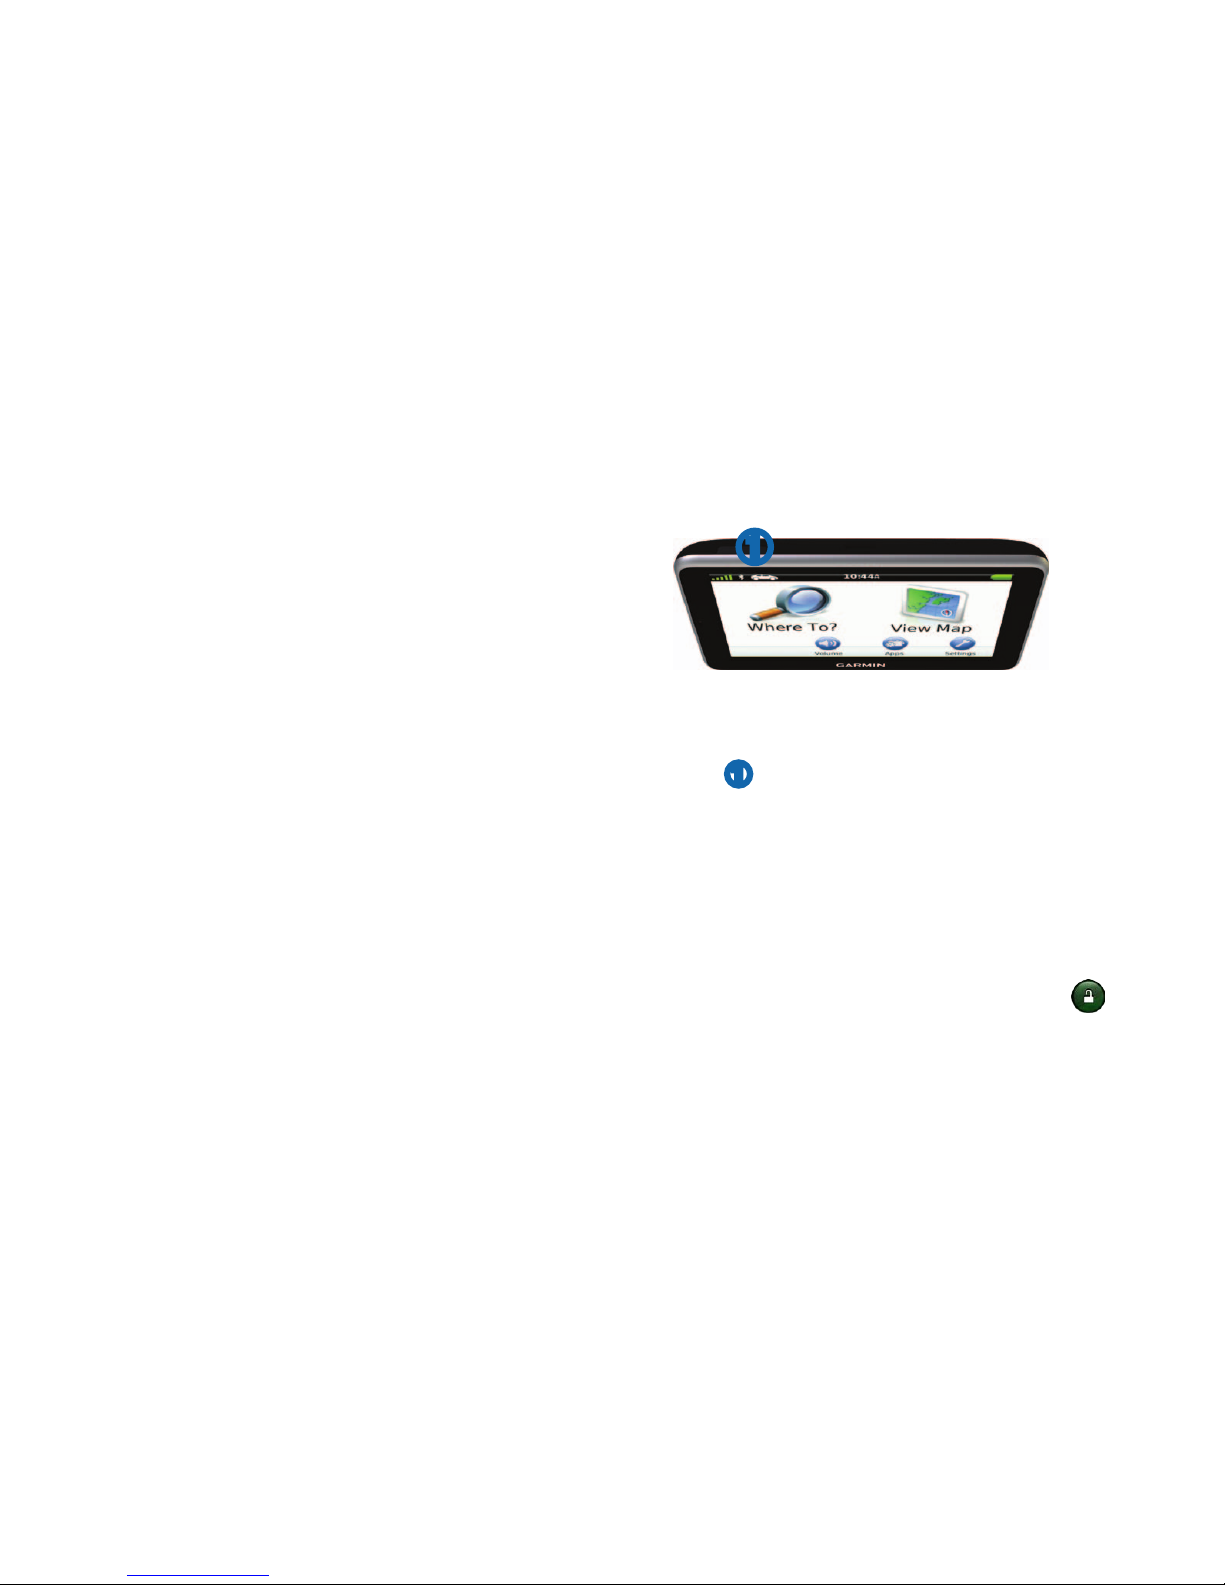
Using the Power Key
➊
Select an option:
• To turn off the device, hold the Power
key
➊
for 4 seconds.
• To reset the device, hold the Power key
for 10 seconds.
• To put the device in sleep mode, press
the Power key.
• To bring the device out of sleep mode,
press the Power key and double-tap
.
Page 5
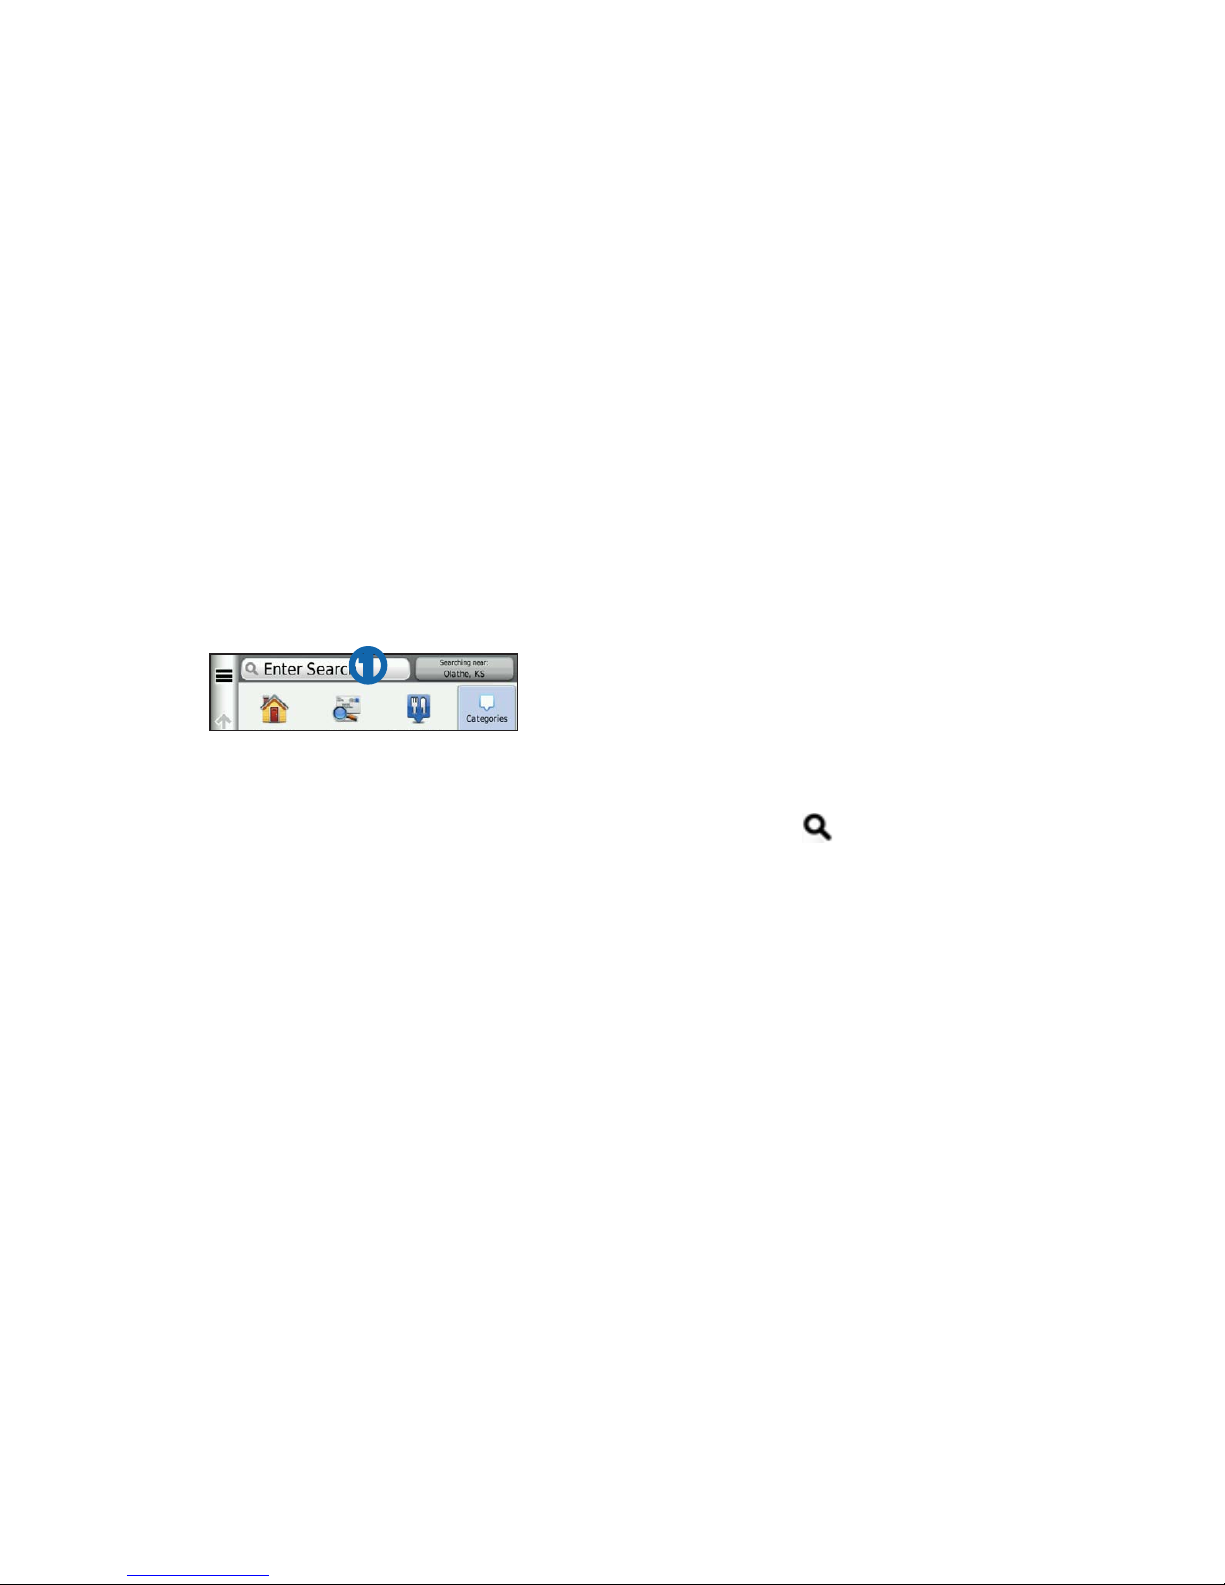
Finding a Location Using the Search Bar
You can use the search bar to search for
locations by entering a category, brand name,
address, or city name.
1
Select Where To?.
2
Select the search bar.
➊
3
Enter a search term.
Suggested search terms appear below the
search bar as you type.
• To search for a type of business, enter a
category name, such as “movie theaters”
or “coffee shops.”
• To search for a business by name, enter
all or part of the name.
• To search for an address near you, enter
the street number and street name.
• To search for an address in another city,
enter the street number, street name,
city, and state.
• To search for a city, enter the city and
state.
• To search for coordinates, enter latitude
and longitude coordinates.
4
Select an option:
• To search using a suggested search
term, select the term.
• To search using the text you entered,
select
.
5
If necessary, select a location.
Searching Near Another Location
From the main menu, select Where To? >
Searching Near.
Page 6
Adding a Stop
1
From the navigation screen, select >
Points of Interest.
2
Search for the extra stop.
3
Select the stop from the search results.
4
Select Go!.
5
Select Add to Active Route.
Your Route on the Map
Notice
The speed limit icon feature is for information
only and does not replace the driver’s
responsibility to abide by all posted speed limit
signs and to use safe driving judgment at all
times. Garmin will not be responsible for any
trafc nes or citations that you may receive for
failing to follow all applicable trafc laws and
signs.
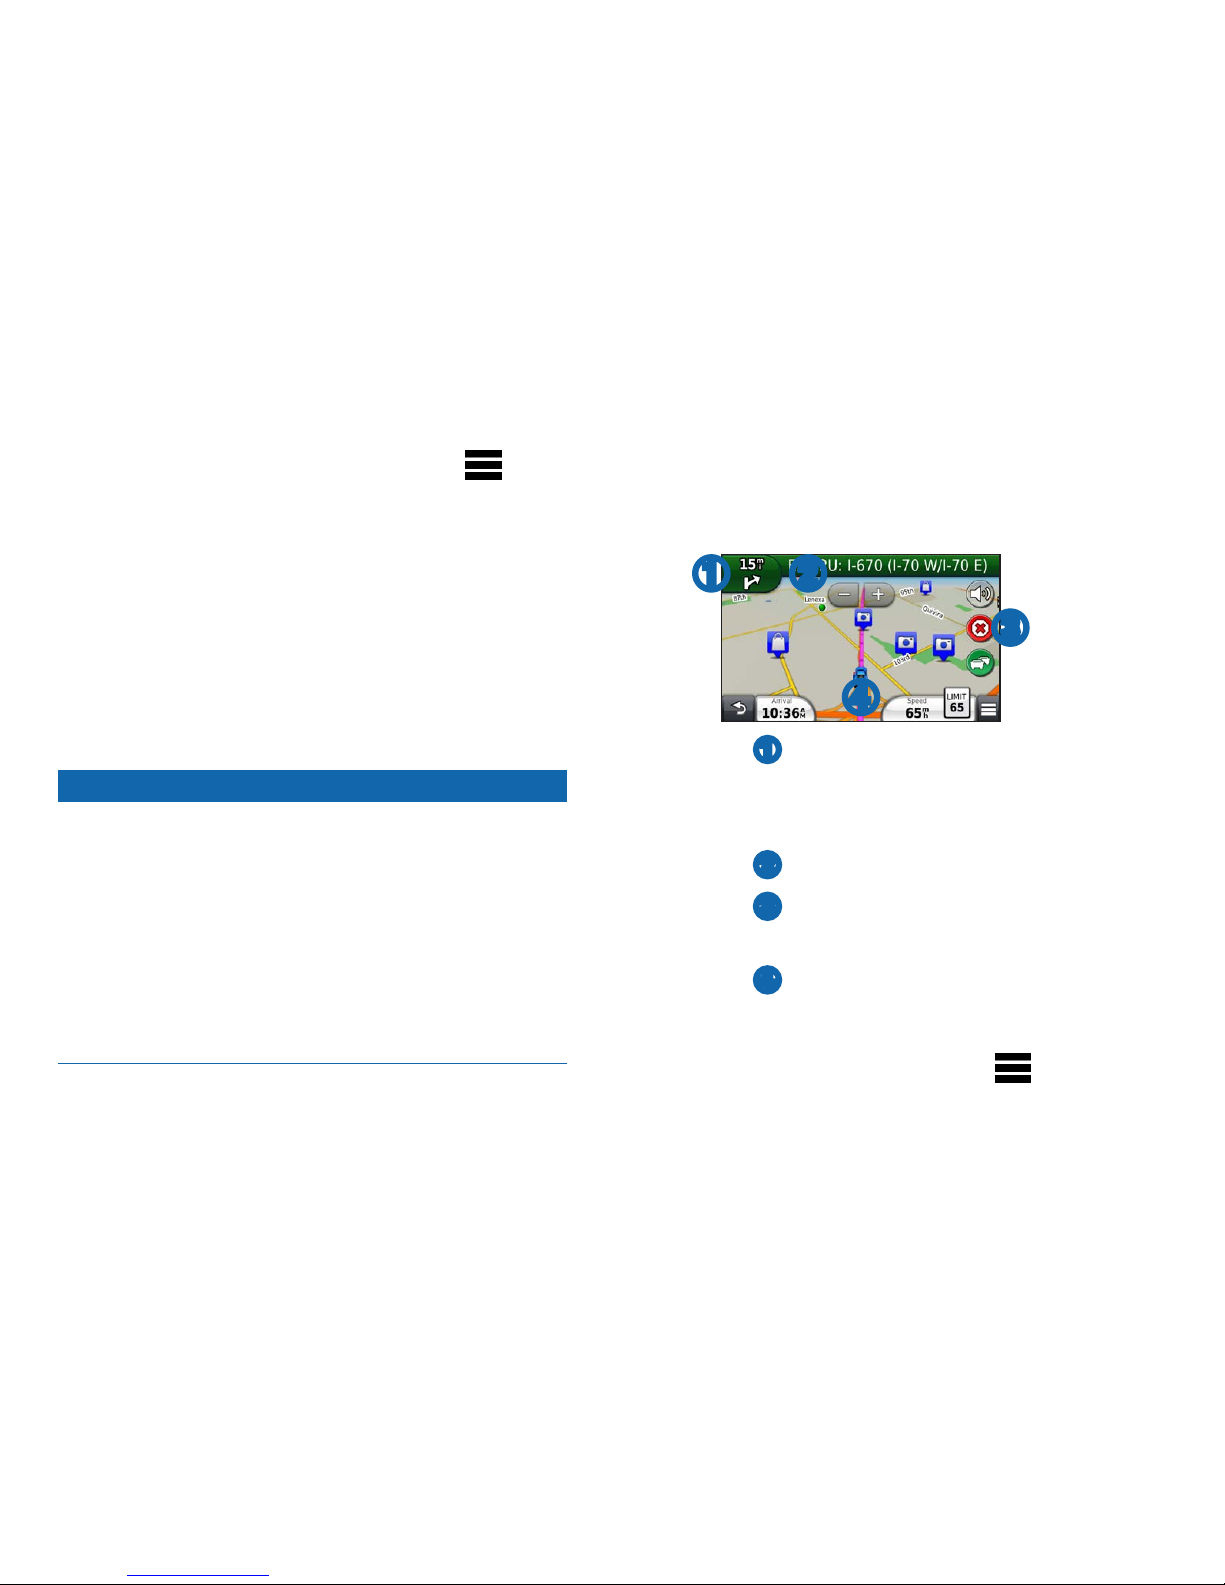
Your route is marked with a magenta line on the
map. If you depart from the original route, your
device recalculates the route. A speed limit icon
could appear as you travel on major roadways.
➍
➌
➊ ➋
• Select ➊ to view the next turn.
If a view of a junction exists, the junction
view appears.
• Select
➋
to view the turn list.
• Select
➌
to stop the route you are
currently navigating.
• Select
➍
to view the Where Am I? page.
Taking a Detour
From the navigation page, select >
Detour.
Page 7
areas or countries.
If the route you are currently taking is the
only reasonable option, the device might not
calculate a detour.
About Trafc
Notice
Garmin is not responsible for the accuracy or
timeliness of the trafc information.
Trafc information may not be available in all
A trafc receiver is included in some packages,
built into either the vehicle power cable or the
device, and is an optional accessory for all
models.
• The device must be connected to vehicle
power to receive trafc information.
• The powered trafc receiver and the
device must be in data range of a station
transmitting trafc data to receive trafc
information.
• You do not need to activate the subscription
included with your trafc receiver.
Pairing Your Phone
Hands-free calling is available on some nüvi
models. Before you can pair, your phone and the
device must be turned on and within 33 ft. (10
m) of each other.
1
Enable the Bluetooth® component on your
phone.
2
Select Settings > Bluetooth.
3
Select Bluetooth.
4
Select Add Phone > OK.
5
Select your phone, and touch OK.
6
Enter the Bluetooth PIN (1234) for your
device in your phone.
GARMIN CAR GPS
GPS SYSTEMS
 Loading...