

Page 1
Manual
Page 2
Introduction
WARNING
See the Important Safety and Product Information guide in the
product box for product warnings and other important
information.
Always consult your physician before you begin or modify any
exercise program.
• If you are recording an activity, select BACK to return to the
activity data pages.
Charging the Device
WARNING
This device contains a lithium-ion battery. See the Important
Safety and Product Information guide in the product box for
product warnings and other important information.
Device Overview
Select to turn the backlight on and off.
Hold to view the controls menu.
LIGHT
Hold to turn the device on.
Select to view the activity list and start or stop an activity.
Select to choose an option in a menu.
Select to return to the previous screen.
Select to record a lap, rest, or transition during a multisport
BACK
activity.
LAP
Hold to view the watch face from any screen.
Select to scroll through the widget loop and menus.
Hold to view the music controls from any screen.
DOWN
Select to scroll through the widget loop and menus.
Hold to view the menu.
UP
MENU
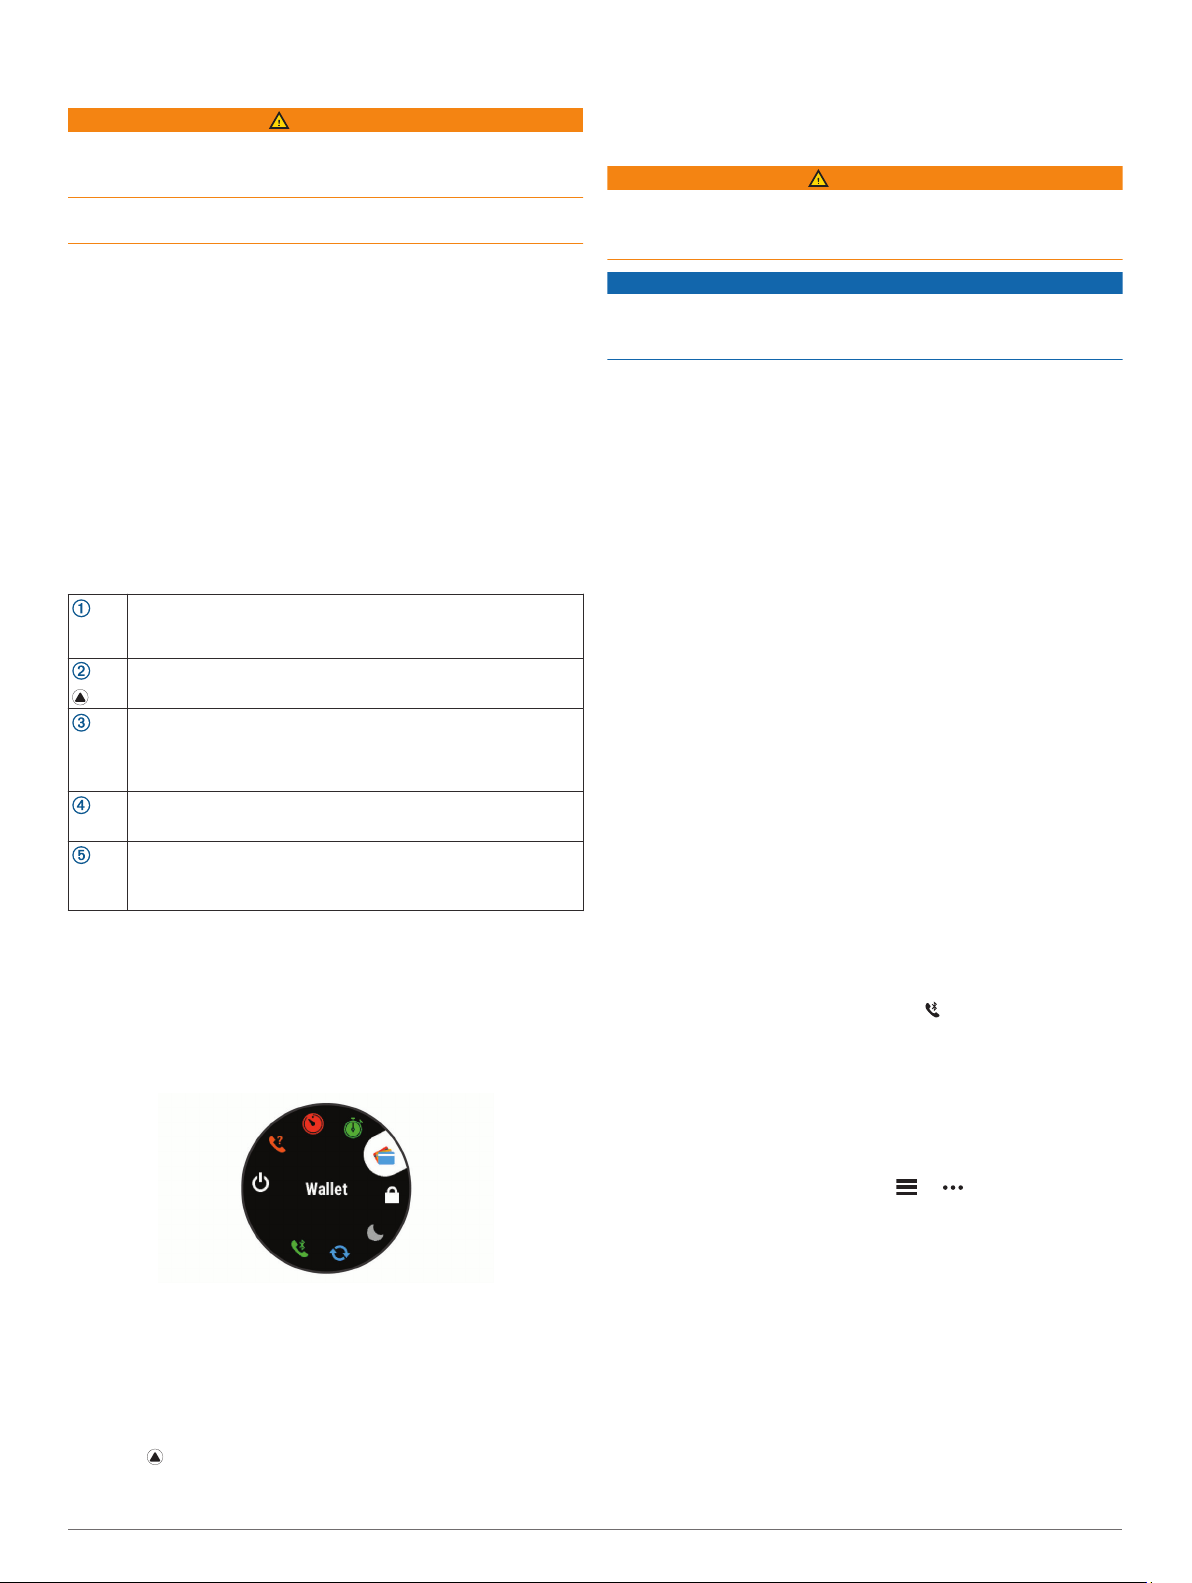
Viewing the Controls Menu
The controls menu contains options, such as turning on do not
disturb mode, locking the keys, and turning the device off. You
can also open the Garmin Pay™ wallet.
NOTE: You can add, reorder, and remove the options in the
controls menu (Customizing the Controls Menu, page 29).
From any screen, hold LIGHT
1
.
NOTICE
To prevent corrosion, thoroughly clean and dry the contacts and
the surrounding area before charging or connecting to a
computer. Refer to the cleaning instructions in the appendix.
Plug the small end of the USB cable into the charging port on
1
your device.
Plug the large end of the USB cable into a USB charging
2
port.
Charge the device completely.
3
Pairing Your Smartphone with Your Device
To use the connected features of the device, it must be paired
directly through the Garmin Connect™ Mobile app, instead of
from the Bluetooth® settings on your smartphone.
From the app store on your smartphone, install and open the
1
Garmin Connect Mobile app.
Bring your smartphone within 10 m (33 ft.) of your device.
2
Select LIGHT to turn on the device.
3
The first time you turn on the device, it is in pairing mode.
TIP: You can hold LIGHT and select to manually enter
pairing mode.
Select an option to add your device to your Garmin Connect
4
account:
• If this is the first time you are pairing a device with the
Garmin Connect Mobile app, follow the on-screen
instructions.
• If you already paired another device with the Garmin
Connect Mobile app, from the or menu, select
Garmin Devices >
instructions.
Add Device
, and follow the on-screen
Product Updates
Select UP or DOWN to scroll through the options.
2
Viewing Widgets
Your device comes preloaded with several widgets, and more
are available when you pair your device with a smartphone.
• Select UP or DOWN.
The device scrolls through the widget loop.
• Select to view additional options and functions for a
widget.
• From any screen, hold BACK to return to the watch face.
Introduction 1
On your computer, install Garmin Express™ (www.garmin.com
/express).
Mobile app.
This provides easy access to these services for Garmin
devices:
• Software updates
• Map updates
• Data uploads to Garmin Connect
• Product registration
On your smartphone, install the Garmin Connect
®
Page 3

Reset: Allows you to reset user data and settings (Resetting All
Default Settings, page 35).
Software Update: Allows you to install software updates
downloaded using Garmin Express.
Time Settings
Hold MENU, and select Settings > System >
Time Format: Sets the device to show time in a 12-hour, 24-
hour, or military format.
Set Time: Sets the time zone for the device. The Auto option
sets the time zone automatically based on your GPS position.
Time: Allows you to adjust the time if it is set to the Manual
option.
Alerts: Allows you to set hourly alerts, as well as sunrise and
sunset alerts that sound a specific number of minutes or
hours before the actual sunrise or sunset occurs.
Sync With GPS: Allows you to manually sync the time with GPS
when you change time zones, and to update for daylight
saving time.
Time
.
Changing the Backlight Settings
Hold MENU.
1
Select Settings > System
2
Select an option:
3
• Select During Activity.
• Select Not During Activity.
Select an option:
4
• Select Keys to turn on the backlight for key presses.
• Select Alerts to turn on the backlight for alerts.
• Select Gesture to turn on the backlight by raising and
turning your arm to look at your wrist.
• Select Timeout to set the length of time before the
backlight turns off.
• Select Brightness to set the brightness level of the
backlight.
> Backlight
.
Customizing the Hot Keys
You can customize the hold function of individual keys and
combinations of keys.
Hold MENU.
1
Select Settings > System > Hot Keys.
2
Select a key or combination of keys to customize.
3
Select a function.
4
Changing the Units of Measure
You can customize units of measure for distance, pace and
speed, elevation, weight, height, and temperature.
Hold MENU.
1
Select Settings > System > Units.
2
Select a measurement type.
3
Select a unit of measure.
4
Viewing Device Information
You can view device information, such as the unit ID, software
version, regulatory information, and license agreement.
Hold MENU.
1
Select Settings > About.
2
Viewing E-label Regulatory and Compliance
Information
The label for this device is provided electronically. The e-label
may provide regulatory information, such as identification
numbers provided by the FCC or regional compliance markings,
as well as applicable product and licensing information.
Hold MENU.
1
From the settings menu, select About.
2
Wireless Sensors
Your device can be used with wireless ANT+ or Bluetooth
sensors. For more information about compatibility and
purchasing optional sensors, go to
Pairing Your Wireless Sensors
The first time you connect a wireless sensor to your device
using ANT+
and sensor. After they are paired, the device connects to the
sensor automatically when you start an activity and the sensor is
active and within range.
If you are pairing a heart rate monitor, put on the heart rate
1
monitor (Putting On the Heart Rate Monitor, page 11).
The heart rate monitor does not send or receive data until
you put it on.
Bring the device within 3 m (10 ft.) of the sensor.
2
NOTE: Stay 10 m (33 ft.) away from other wireless sensors
while pairing.
Hold MENU.
3
Select Settings > Sensors & Accessories >
4
Select an option:
5
• Select Search All.
• Select your sensor type.
After the sensor is paired with your device, the sensor status
changes from Searching to Connected. Sensor data appears
in the data screen loop or a custom data field.
or Bluetooth
technology, you must pair the device
Extended Display Mode
You can use Extended Display mode to display data
screens from your device on a compatible Edge device
during a ride or triathlon. See your Edge owner's manual for
more information.
Using an Optional Bike Speed or Cadence
Sensor
You can use a compatible bike speed or cadence sensor to
send data to your device.
• Pair the sensor with your device (Pairing Your Wireless
Sensors, page 32).
• Set your wheel size (Wheel Size and Circumference,
page 40).
• Go for a ride (Starting an Activity, page 2).
Training with Power Meters
• Go to www.garmin.com/intosports for a list of ANT+ sensors
that are compatible with your device (such as Vector™).
• For more information, see the owner's manual for your power
meter.
• Adjust your power zones to match your goals and abilities
(Setting Your Power Zones, page 18).
• Use range alerts to be notified when you reach a specified
power zone (Setting an Alert, page 26).
• Customize the power data fields (Customizing the Data
Screens, page 26).
Using Electronic Shifters
Before you can use compatible electronic shifters, such as
Shimano
(Pairing Your Wireless Sensors, page 32). You can customize
®
Di2™ shifters, you must pair them with your device
buy.garmin.com.
Add New
.
32 Wireless Sensors
 Loading...