

Page 1

Page 2

© 2 016 G armin Ltd . or its s ubsi diari es
All righ ts re serv ed. U nder the copyr ight laws , thi s ma nual may n ot b e cop ied, in w hole or i n par t, wi thou t the writ ten conse nt of Gar min. Garm in re serve s th e rig ht to cha nge o r imp rove its prod ucts and t o ma ke ch anges in the c onte nt of this
ual with out o blig ation to n otif y any pers on o r org aniz ation of s uch chang es or imp rovem ents . Go to ww w.ga rmin. com f or c urren t upd ates and supp lemen tal i nfor matio n con cern ing t he us e of this pro duct.
man
Ga
rmi n® and the Garm in lo go ar e tr adema rks o f Ga rmin Ltd. or its s ubsi diari es, r egis tered in the U SA an d ot her c ountr ies. The se tr adem arks may not b e use d wi thout the expr ess p ermis sion of G armi n.
Gar min ™, G armin Exp ress™, myT rends™ , nüM aps Guara ntee™, and nüMa ps Li feti me™ ar e tr adema rks o f Ga rmin Ltd. or its s ubsid iari es. Thes e tra demar ks m ay no t be used with out t he e xpres s pe rmiss ion o f Ga rmin.
And roid™ is a trad emark of G oogl e Inc . Ap ple® and M ac® a re tr adema rks of Ap ple I nc, regis tere d in the U .S. and othe r co untri es. The Bluet ooth® word mark and logo s are own ed by the Blue tooth SIG , Inc ., a nd a ny us e of such word mark or logo by
min is u nder lice nse. Fo
Gar
Win dows®, Wind ows Vista ®, and Win dows XP® ar e re giste red trade marks of Micro soft Corp orati on i n the Unit ed S tates and othe r cou ntrie s.
urs quare® is a tra demar k of Four squar e Lab s, I nc. in t he U. S. and in ot her c ount ries. mi croSD® and the micro SDHC logo are trade mark s of SD-3 C, LL C. T ripA dviso r® is a re giste red t rade mark of T ripAd visor LLC .
Page 3

Page 4

Page 5

Page 6

Page 7
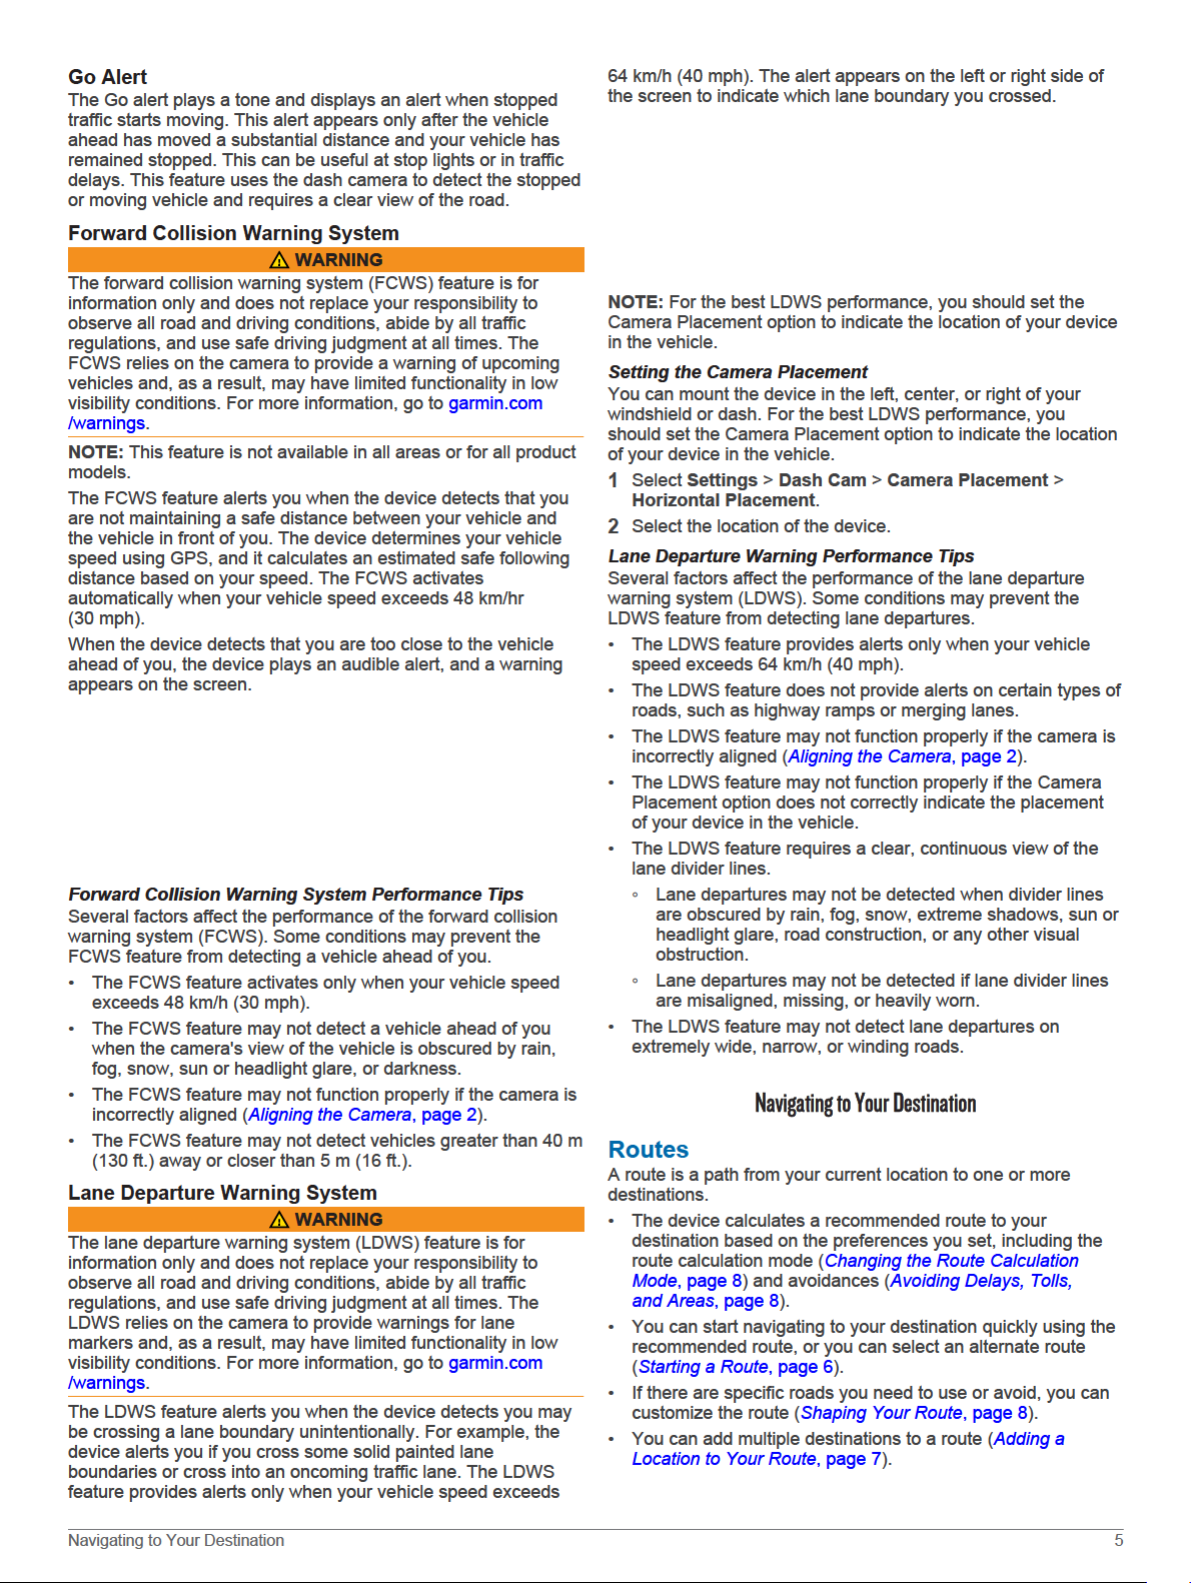
Page 8

Page 9

Page 10

Page 11

Page 12

Page 13

Page 14

Page 15

Page 16

Page 17
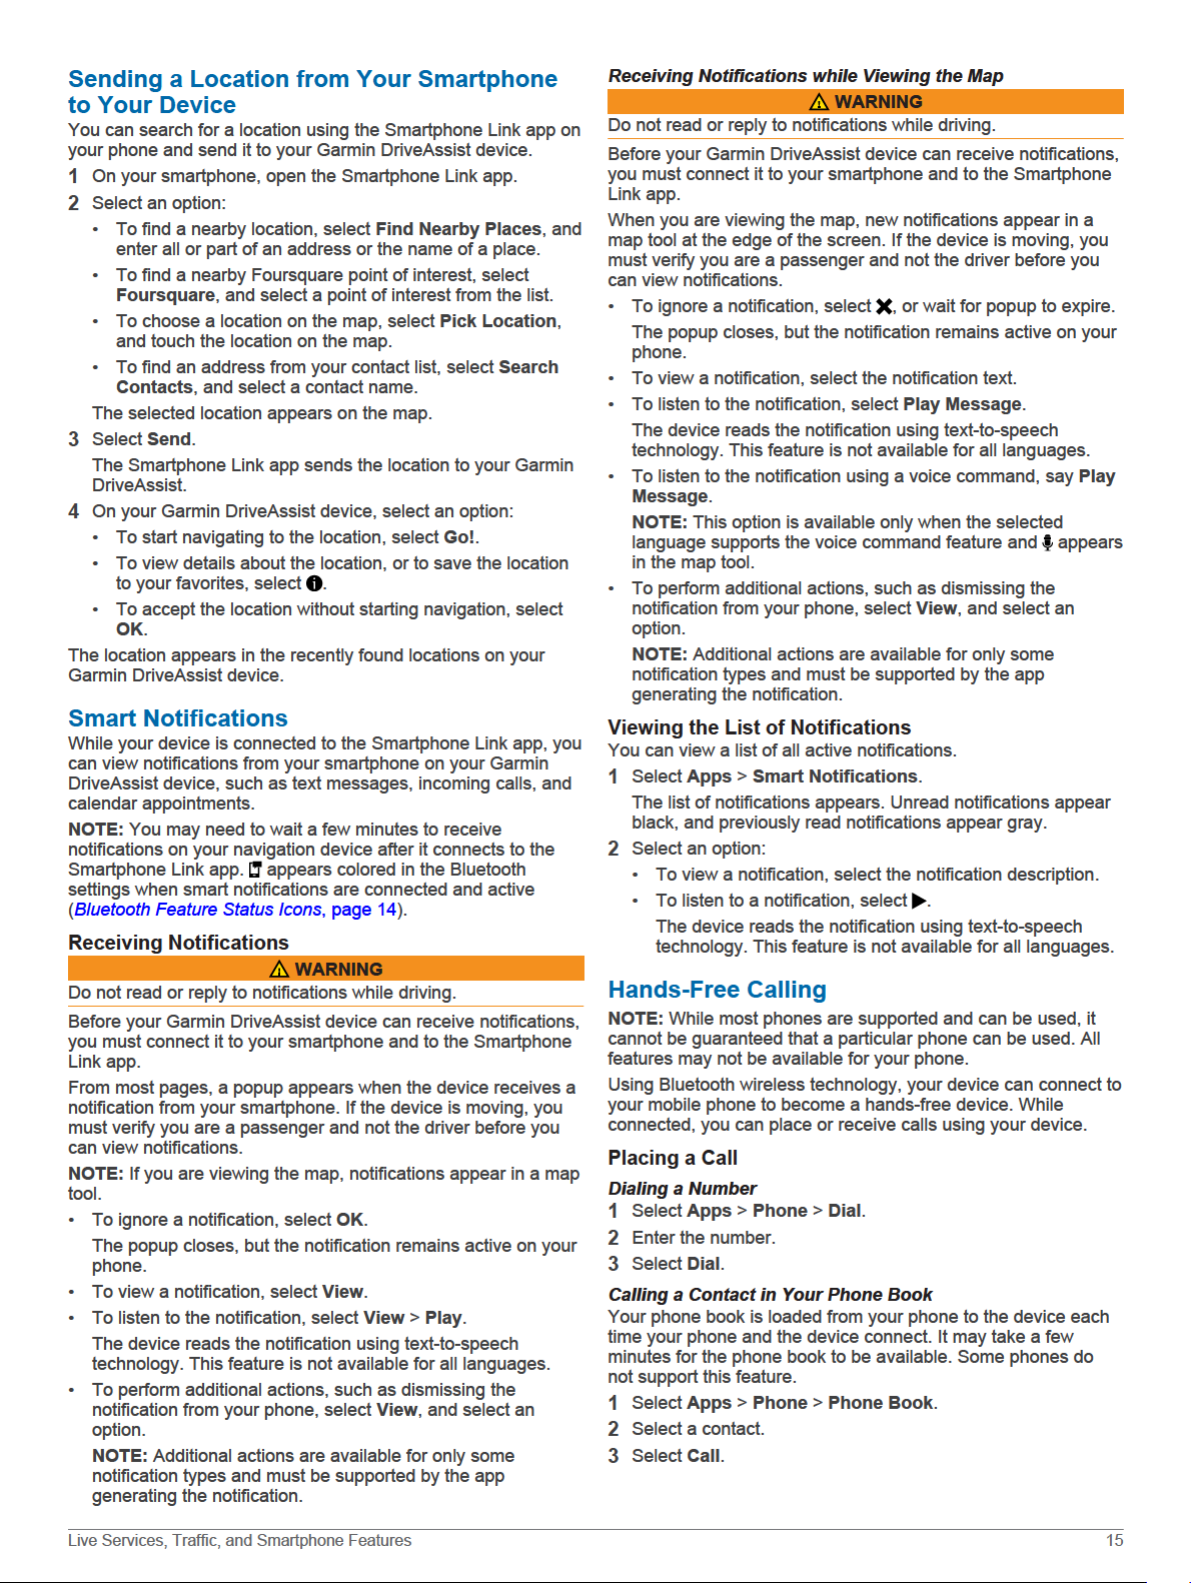
Page 18

Page 19

• To disable specific app notifications, use the settings in
the Smartphone Link app.
Showing or Hiding Notifications for Your Smartphone with
Android
You can use the Smartphone Link app to select which types of
notifications appear on your Garmin device.
On your phone, open the Smartphone Link app.
1
Select .
2
Verify the Smart Notifications check box is selected.
3
From the Notifications section, select
4
A list of notification categories and apps appears.
Select an option:
5
• To enable or disable a notification, select the toggle switch
next to the category or app name.
• To add an app to the list, select
Disconnecting a
You can temporarily disconnect a Bluetooth device without
deleting it from the paired devices list. The Bluetooth
connect to your Garmin device automatically in the
future.
Select Settings > Wireless Networks.
1
Select the device to disconnect.
2
Clear the check box next to the name of your paired device.
3
Bluetooth Device
Settings.
.
device can
Deleting a Paired Phone
You can delete a paired phone to prevent it from automatically
connecting to your device in the future.
Select Settings > Wireless Networks
1
Select the phone, and select Unpair device.
2
.
Traffic
NOTICE
Garmin is not responsible for the accuracy or timeliness of the
traffic information.
Your device can provide information about traffic on the road
ahead or on your route. You can set your device to avoid traffic
when calculating routes, and to find a new route to your
destination if a large traffic delay occurs on your active route
(Traffic Settings
browse the map for traffic delays in your area.
To provide traffic information, your device must be receiving
traffic data.
• Your device receives free traffic data through the
Smartphone Link app (Receiving Traffic Data Using
Smartphone Link, page 17).
• All product models can receive traffic data using an over-theair traffic receiver cable accessory (Receiving Traffic Data
Using a Traffic Receiver, page 17). Go to your product
page at garmin.com to find and purchase a compatible traffic
receiver cable accessory.
Traffic data is not available in all areas. For information about
traffic coverage areas, go to www.garmin.com/traffic.
Receiving Traffic Data Using Smartphone
Link
Your device can receive free traffic data through the
Smartphone Link app.
Connect your device to Smartphone Link (
1
Phone and Connecting to Smartphone Link, page 14).
On your Garmin device, select
2
Traffic, and verify the Traffic check box is selected.
, page 22). The traffic map allows you to
Pairing with Your
Settings >
Receiving Traffic Data Using a Traffic
Receiver
NOTICE
Heated (metallized) windshields could degrade the performance
of the traffic receiver.
A traffic receiver receives traffic data from an over-the-air
broadcast signal, where available. An over-the-air traffic receiver
cable is available as an accessory for all product models. Go to
your product page at garmin.com to find and purchase a
compatible traffic receiver cable accessory. Traffic data is not
available in all areas.
Connect the device to vehicle power using the traffic receiver
cable (
Mounting and Powering the Device in Your Vehicle,
page 1).
When you are within a traffic coverage area, your device can
display traffic information and help you avoid traffic delays.
Traffic Receiver Subscriptions
A regional traffic data subscription is included with most traffic
receivers. You can add subscriptions for additional regions to
your traffic receiver. For more information, go to garmin.com
/traffic.
Viewing Traffic Subscriptions
Select Settings > Traffic > Subscriptions.
Adding a Subscription
You can purchase traffic subscriptions for other regions or
countries.
From the main menu, select Traffic.
1
Select Subscriptions >
2
Write down the FM traffic receiver unit ID.
3
Go to www.garmin.com/fmtraffic to purchase a subscription
4
and get a 25-character code.
The traffic subscription code cannot be reused. You must
obtain a new code each time you renew your service. If you
own multiple FM traffic receivers, you must obtain a new
code for each receiver.
Select Next on the device.
5
Enter the code.
6
Select
7
Done.
.
Enabling Traffic
You can enable or disable traffic data.
Select Settings > Traffic.
1
Select the Traffic check box.
2
Viewing Traffic on the Map
The traffic map shows color-coded traffic flow and delays on
nearby roads.
From the main menu, select Apps > Traffic.
1
If necessary, select
2
traffic map.
> Legend to view the legend for the
Searching for Traffic Incidents
From the main menu, select Apps > Traffic.
1
Select > Incidents.
2
Select an item in the list.
3
If there is more than one incident, use the arrows to view
4
additional incidents.
Voice Command
NOTE:
regions, and may not be available on all models.
Voice command is not available for all languages and
Traffic 17
Page 20

Page 21

Page 22
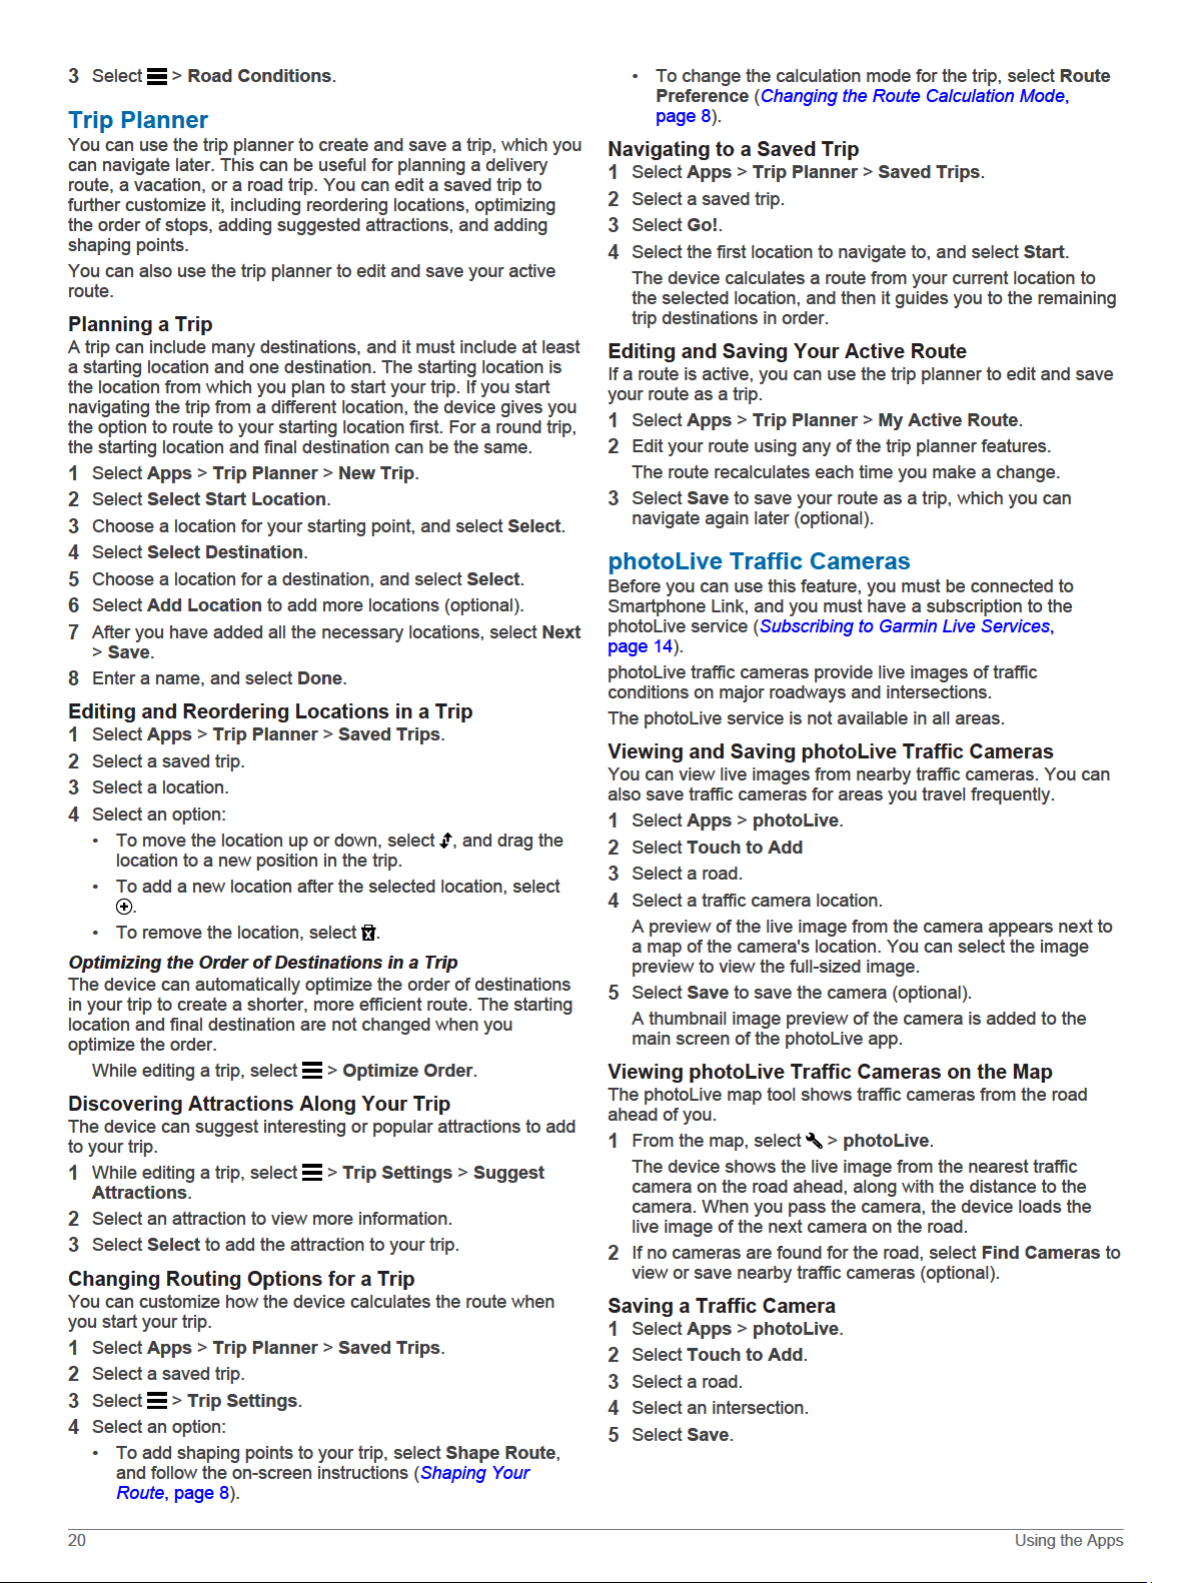
Page 23

Page 24

Page 25

Page 26

Select an option:
2
• To install on a Windows computer, select Download for
Windows.
• To install on a Mac computer, select Download for Mac.
Open the downloaded file, and follow the on-screen
3
instructions to complete the installation.
Start Garmin Express.
4
Connect your Garmin device to your computer
5
using a USB cable.
When your Garmin device prompts you to enter
6
file transfer mode, select
On your computer, click Add a Device.
7
The Garmin Express software detects your device.
Click Add Device.
8
Follow the on-screen instructions to register your device and
9
add it to the Garmin Express software.
When setup is complete, the Garmin Express software
searches for map and software updates for your device.
Select an option:
10
• To install all available updates, click Install All.
• To install a single update, click View Details and select an
update.
NOTE: If a map update is too large for the internal storage of
the device, the software may prompt you to install a microSD
card in your device to add storage space (Installing a
Memory Card for Maps and Data, page 26).
Yes.
Device Care
NOTICE
Avoid dropping your device.
Do not store the device where prolonged exposure to extreme
temperatures can occur, because it can cause permanent
damage.
Never use a hard or sharp object to operate the touchscreen, or
damage may result.
Do not expose the device to water.
Cleaning the Camera Lens
NOTICE
Do not use a dry cloth to clean the lens. Use of a dry cloth may
damage the lens.
Avoid chemical cleaners and solvents that can damage plastic
components.
You should clean the camera lens regularly to improve the
quality of recorded video.
Wipe the lens with a soft, non-scratch cloth dampened with
1
water or alcohol.
Allow the lens to air dry.
2
Cleaning the Outer Casing
NOTICE
Avoid chemical cleaners and solvents that can damage plastic
components.
Clean the outer casing of the device (not the touchscreen)
1
using a cloth dampened with a mild detergent solution.
Wipe the device dry.
2
Cleaning the Touchscreen
Use a soft, clean, lint-free cloth.
1
If necessary, lightly dampen the cloth with water.
2
If using a dampened cloth, turn off the device and disconnect
3
the device from power.
Gently wipe the screen with the cloth.
4
Avoiding Theft
• Remove the device and mount from sight when not in use.
• Remove the residue left on the windshield by the suction cup.
• Do not keep your unit in the glove compartment.
• Register your device using the Garmin Express software
(
garmin.com/express).
Resetting the Device
You can reset your device if it stops functioning.
Hold the power key for 12 seconds.
Removing the Device, Mount, and Suction
Cup
Removing the Device from the Mount
Press the release tab or button on the mount.
1
Tilt the bottom of the device upward, and lift the device from
2
the mount.
Removing the Mount from the Suction Cup
Turn the device mount to the right or left.
1
Apply pressure until the socket on the mount releases the
The Garmin Express
updates onto your device. Map updates are very large, and this
process may take a long time on slower Internet connections.
24 Device Maintenance
software downloads and installs the
2
ball on the suction cup.
Removing the Suction Cup from the Windshield
Flip the lever on the suction cup toward you.
1
Pull the tab on the suction cup toward you.
2
Page 27

Changing the Fuse in the Vehicle Power
Cable
NOTICE
When replacing the fuse, do not lose any of the small pieces
and make sure they are put back in the proper position. The
vehicle power cable does not work unless it is assembled
correctly.
If your device does not charge in your vehicle, you may need to
replace the fuse located at the tip of the vehicle adapter.
Rotate the end piece À counter clockwise to unlock it.
1
TIP: You may need to use a coin to remove the end piece.
Remove the end piece, the silver tip Á, and the fuse Â.
2
Insert a new fast-blow fuse that has the same current, such
3
as 1 A or 2 A.
Place the silver tip in the end piece.
4
Push in the end piece and rotate it clockwise to lock it back
5
into the vehicle power cable Ã.
Troubleshooting
My video recordings are blurry
• Clean the camera lens (Cleaning the Camera Lens,
page 24).
• Clean the windshield in front of the camera.
• Verify the area of the windshield in front of the camera is
cleared by the windshield wipers, and move the device, if
necessary.
My memory card has degraded and needs to
be replaced
microSD
All
large number of times. Because the dash camera records
continuously, you should replace the memory card periodically
Installing the Dash Camera Memory Card, page 1). Your device
(
detects memory card errors automatically and alerts you when it
is time to replace your memory card.
You can take these actions to help extend the useful life of the
memory card.
• Turn off the device when your vehicle is not in use.
If your device is not connected to an ignition-switched vehicle
power outlet, you should turn off the device when your
vehicle is not in use to prevent the dash camera from
recording unneeded footage.
• Transfer saved video footage to a computer.
The memory card lasts longer when more free space is
available on the card.
• Use a high-quality memory card with a speed rating of class
10 or higher.
Purchase your replacement memory card from a high-quality
manufacturer and a reputable vendor.
My video recordings are choppy or
incomplete
• For the best camera and video results, use a high-quality
memory card with a speed rating of class 10 or higher.
A slower memory card may not record video quickly enough.
memory cards wear out after they are overwritten a
• If the device displays a memory card error alert, replace the
memory card (Installing the Dash Camera Memory Card,
page 1).
• Update your device to the latest software (Updating Maps
and Software with Garmin Express, page 23).
The suction cup will not stay on my
windshield
Clean the suction cup and windshield with rubbing alcohol.
1
Dry with a clean, dry cloth.
2
Mount the suction cup (Mounting and Powering the Device in
3
Your Vehicle, page 1).
My device is not acquiring satellite signals
• Verify the GPS simulator is turned off (Navigation Settings,
page 21).
• Take your device out of parking garages and away from tall
buildings and trees.
• Remain stationary for several minutes.
The device does not charge in my vehicle
• Check the fuse in the vehicle power cable (Changing the
Fuse in the Vehicle Power Cable, page 25).
• Verify the vehicle is turned on and is supplying power to the
power outlet.
• Verify the interior temperature of the vehicle is within the
charging temperature range indicated in the specifications.
• Verify the fuse is not broken in the vehicle power outlet.
My battery does not stay charged for very
long
• Decrease the screen brightness (Display Settings, page 22).
• Shorten the display timeout (Display Settings, page 22).
• Decrease the volume (Adjusting the Volume, page 2).
• Turn off the wi-fi radio when it is not in use (Wireless Network
Settings, page 21).
• Put the device in power saving mode when not in use
(Turning the Device On or Off,
• Keep your device away from extreme temperatures.
• Do not leave your device in direct sunlight.
page
1).
My device does not connect to my phone or
Smartphone Link
• Select Settings > Wireless Networks.
The Bluetooth option must be enabled.
• Enable Bluetooth wireless technology on your phone and
bring your phone within 10 m (33 ft.) of the device.
• On your smartphone, open the Smartphone Link app, and
select > to restart the Smartphone Link background
services.
• Verify your phone is compatible.
Go to www.garmin.com/bluetooth for more information.
• Complete the pairing process again.
To repeat the pairing process, you must unpair your phone
and device (Disconnecting a Bluetooth Device,
complete the pairing process (Pairing with Your Phone and
Connecting to Smartphone Link, page 14).
page
17), and
The Smartphone Link app affects the battery
charge level on my smartphone
The Smartphone Link app uses Bluetooth
send data to and receive data from your device. It is normal for
wireless technology to
Troubleshooting 25
Page 28

an active Bluetooth connection to consume some battery power.
The app also periodically checks for updates to available
services, which may consume additional battery power.
You can change the battery usage settings in the Smartphone
Link app to reduce the amount of battery power the app uses.
From the Smartphone Link app on your smartphone, select
1
.
Scroll to the Battery Usage section, and select Settings
2
Select one or more options:
3
• Clear the Bluetooth Auto-Connect check box.
Disabling this option may save a small amount of battery
power, but it prevents the app from connecting to your
Garmin device automatically. While this option
is disabled, you must select
main menu each time you want to connect your device to
Smartphone Link.
• Clear the Live Services Check check box.
On some smartphones, disabling this option may
significantly reduce the battery power used by the app.
While this option is disabled, you must manually refresh
the Smartphone Link main menu to receive updated
information about available live services.
from the Smartphone Link
.
Transferring Data From Your Computer
Connect the device to your computer (Connecting the Device
1
to Your Computer, page 26).
Depending on your computer operating system, the device
appears as either a portable device, a removable drive, or a
removable volume.
On your computer, open the file browser.
2
Select a file.
3
Select
4
5
6
Edit > Copy
Browse to a folder on the device.
NOTE: For a removable drive or volume, you should not
place files in the Garmin folder.
Select Edit > Paste.
.
Viewing GPS Signal Status
Hold
for three seconds.
Purchasing Additional Maps
Go to your device product page at garmin.com.
1
Click the Maps tab.
2
Follow the on-screen instructions.
3
Appendix
Installing a Memory Card for Maps and Data
You can install a memory card to increase the storage space for
maps and other data on your device. You can purchase memory
cards from an electronics supplier, or go to
/maps to purchase a memory card with pre-loaded Garmin
mapping software. The device supports microSD memory cards
from 4 to 32 GB.
Locate the map and data memory card slot on your device
1
(
Garmin Device Overview, page 1).
Insert a memory card into the slot.
2
Press it in until it clicks.
3
Data Management
You can store files on your device. The device has a memory
card slot for additional data storage.
NOTE: The device is not compatible with Windows 95, 98, Me,
Windows NT®, and
About Memory Cards
You can purchase memory cards from an electronics supplier,
or purchase pre-loaded Garmin mapping software
(www.garmin.com). In addition to map and data storage, the
memory card can be used to store files such as maps, images,
geocaches, routes, waypoints, and custom POIs.
Connecting the Device to Your Computer
You can connect the device to your computer using a USB
cable.
Plug the small end of the USB cable into the port on the
1
device.
Plug the larger end of the USB cable into a port on your
2
computer.
When your Garmin device prompts you to enter
3
file transfer mode, select Yes.
A picture of your device connected to a computer appears on
the device screen.
Depending on your computer operating system, the device
appears as either a portable device, a removable drive, or a
removable volume.
Mac OS 10.3 and earlier.
www.garmin.com
Purchasing Accessories
garmin.com/accessories.
Go to
26 Appendix
Page 29

Page 30

 Loading...