

Page 1
nüvi® 1695
quick start manual
01102436
190-01200-01_01.indd 1 4/30/2010 11:25:19 AM
Page 2
2 nüvi 1695 Quick Start Manual
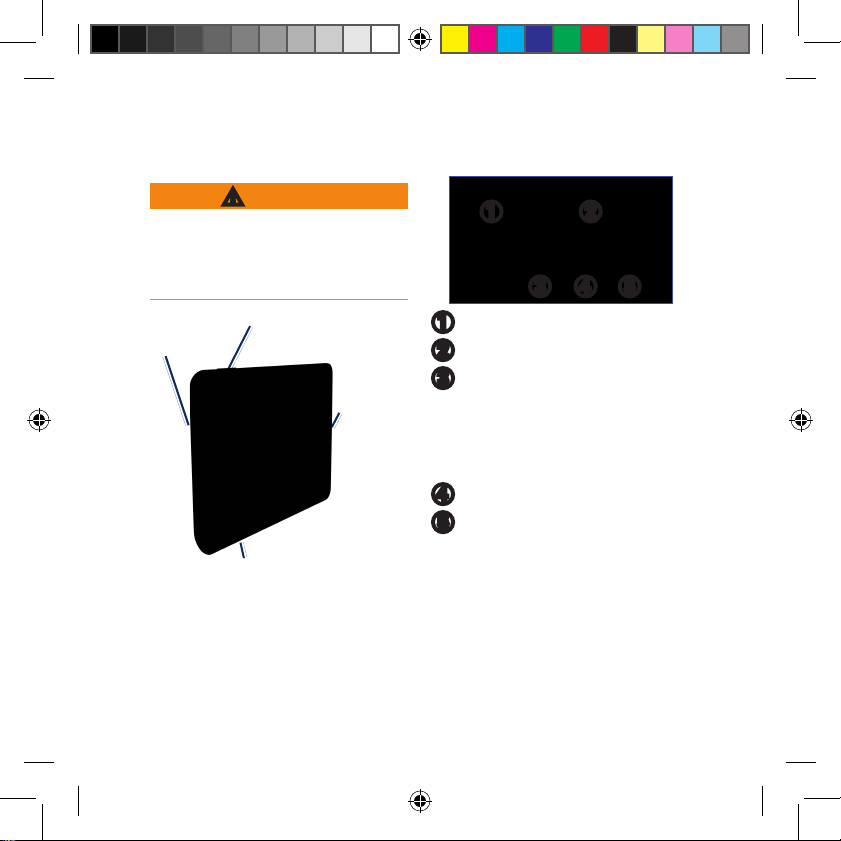
Looking at Your Device
‹
Warning
See the Important Safety and Product
Information guide in the product
box for product warnings and other
important information.
Micro-USB
connector
Power
key
microSD
™
card slot
Microphone
Using the Main Menu
➊ ➋
➌ ➍ ➎
➊
Touch to nd a destination.
➋
Touch to view the map.
➌
Touch to make a call when
connected to a compatible
mobile phone. See
www.garmin.com/bluetooth for
more information.
➍
Touch to adjust the volume.
➎
Touch to use tools such as
settings, help, and weather.
190-01200-01_01.indd 2 4/30/2010 11:25:20 AM
Page 3
nüvi 1695 Quick Start Manual 3
Using the Main Menu
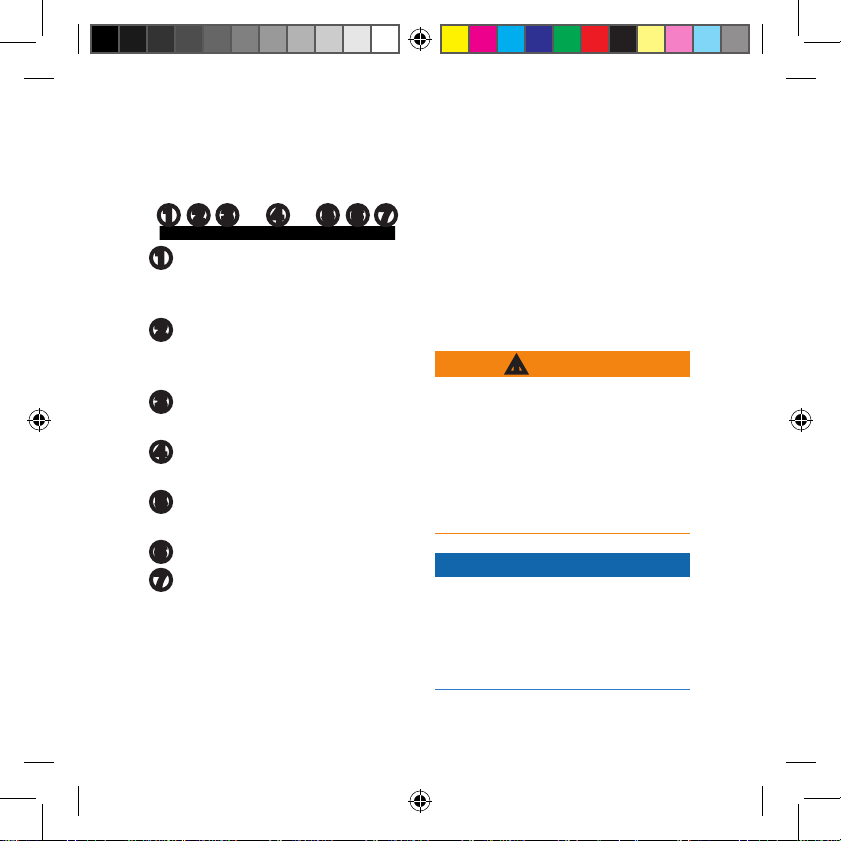
Toolbar
➋ ➌ ➍ ➎➊ ➏ ➐
➊
GPS signal status. Touch
and hold to view satellite
information.
➋
Bluetooth® technology status.
Touch to change Bluetooth
settings.
➌
Usage mode indicator. Touch to
select a usage mode.
➍
Current time. Touch to change
time settings.
➎
Current temperature. Touch to
view weather information.
➏
nüLink! services signal status.
➐
Battery status.
Setting Up Your Device
When using the device for the rst
time, complete the following tasks:
1. Mount the device (page 3).
2. Charge the device (page 5).
3. Acquire satellites (page 5).
Mounting your Device
‹
Warning
This product contains a lithium-ion
battery. To prevent the possibility of
personal injury or product damage
caused by battery exposure to
extreme heat, remove the device
from the vehicle when exiting or
store it out of direct sunlight.
NOTICE
Before mounting the device, see
the Important Safety and Product
Information guide for information
about laws pertaining to windshield
mounting.
190-01200-01_01.indd 3 4/30/2010 11:25:20 AM
Page 4
4 nüvi 1695 Quick Start Manual
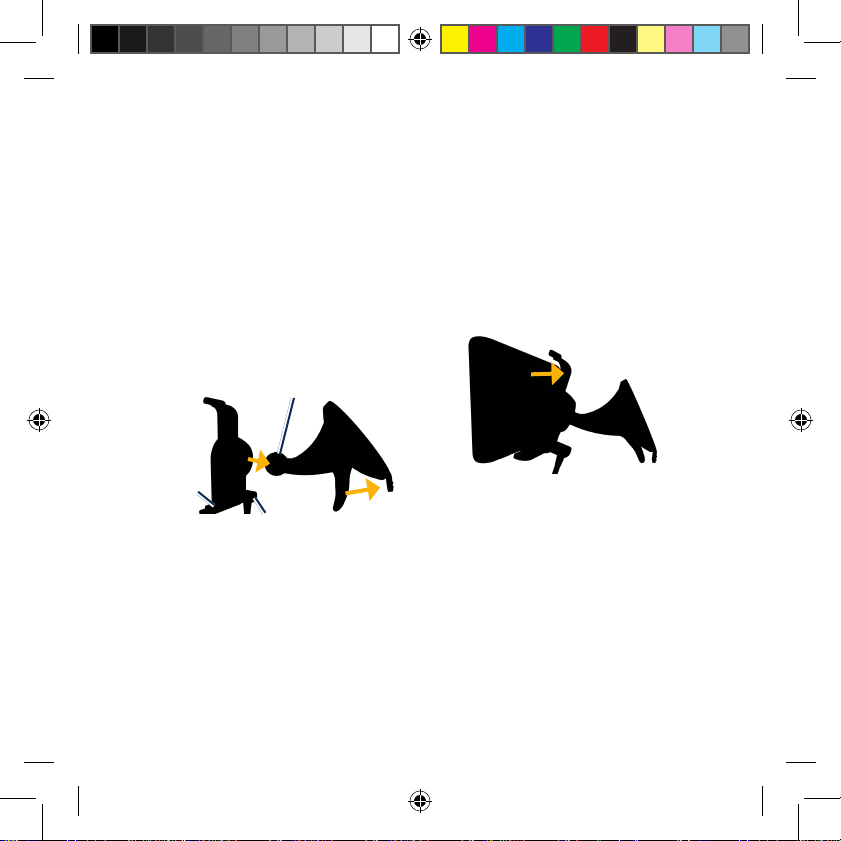
1. Remove the clear plastic from the
suction cup. Place the suction cup
on the windshield.
2. Flip the lever back toward the
windshield.
3. Plug the vehicle power cable into
the back of the cradle.
4. Snap the cradle onto the suction
cup arm.
Suction cup arm
Cradle
Vehicle power cable
5. Plug the other end of the vehicle
power cable into a power outlet
in your vehicle.
6. Fit the bottom of your device into
the cradle.
7. Tilt your device back until it
snaps into place.
Your unit should turn on
automatically if it is plugged in and
the vehicle is running.
190-01200-01_01.indd 4 4/30/2010 11:25:21 AM
Page 5
nüvi 1695 Quick Start Manual 5
Charging Your Device
Charge your device for at least 4
hours before using it on battery
power.
Your device can be powered three
ways.
Connect the vehicle power cable
to the mount while the device is
in the mount.
Connect the USB cable.
Connect an AC adapter (available
on some device models).
acquiring Satellites
1. Go outdoors to an open area,
away from tall buildings and
trees.
2. Turn on your device.
Acquiring satellite signals can take a
few minutes. The satellite icon
indicates signal status. When at least
one of the lines is green, your device
has acquired satellite signals.
•
•
•
Finding a Point of
interest
1. Touch Where To? > Points of
Interest.
2. Select a category and a
subcategory.
3. Select a destination, and touch
Go!.
4. If necessary, touch Start to
navigate the route.
To search for a location in a
different area, touch Where To?
> > Near.
Finding a Point of interest by
name
1. Touch Where To? > Points of
Interest.
2. Select a category and a
subcategory.
3. Touch .
190-01200-01_01.indd 5 4/30/2010 11:25:21 AM
Page 6
6 nüvi 1695 Quick Start Manual
Following Your route
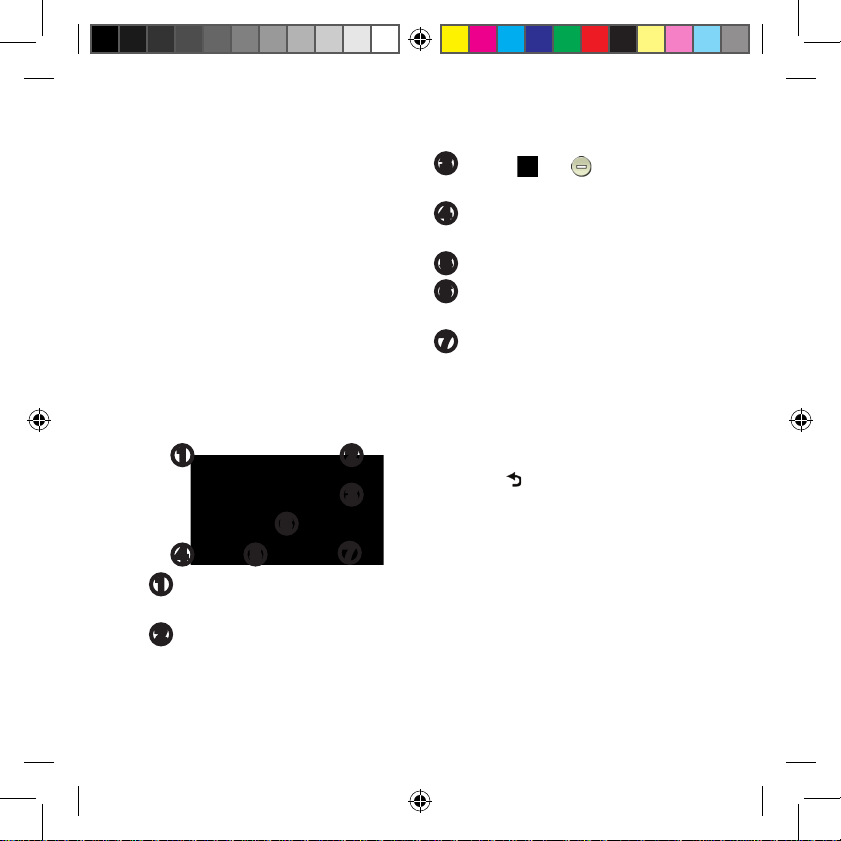
Your route is marked with a magenta
line. As you travel, your device
guides you to your destination with
voice prompts, arrows on the map,
and directions at the top of the map.
If you depart from the original route,
your device recalculates the route.
Touch and drag the map to view a
different area of the map. A speed
limit icon could appear as you travel
on major roadways.
➊ ➋
➌
➍
➎
➏
➐
➊
Touch to view the Next Turn
page or Junction View page.
➋
Touch to view the Turn List.
➌
Touch and to zoom in
and out.
➍
Touch to return to the Main
menu.
➎
Touch to change the data eld.
➏
Touch to view the Where Am I?
page.
➐
Touch to view the trip
computer.
adding a Stop
Before you can add a stop, you must
be navigating a route.
1. Touch to return to the Main
menu.
2. Touch Where To?.
3. Search for the extra stop.
4. Touch Go!.
5. Touch Set as Via Point to
add this stop before your nal
destination.
190-01200-01_01.indd 6 4/30/2010 11:25:21 AM
Page 7
nüvi 1695 Quick Start Manual 7
Taking a Detour
Before you can take a detour, you
must be navigating a route.
1. Touch to return to the Main
menu.
2. Touch Detour.
Using nüLink!™
Services
Your device comes with a
subscription to Garmin nüLink!
services, which allows you to receive
current information on weather, fuel
prices, ight times, and more.
For more information on nüLink!
services, touch Tools > Help, or refer
to the nüvi 1695 Owner’s Manual at
www.garmin.com.
NOTE: nüLink! Services may not be
available in all areas or countries.
Finding Local Businesses
NOTE: nüLink! Services may not
be available in all areas or countries.
To use this feature, you must have
a current nüLink! subscription, and
your device must be receiving a
nüLink! signal.
Local search enables you to search
for the most up-to-date location
information.
In addition to searching by spelling
the name of a location, you can also
search for a specic category of
location, like hair salon or art gallery.
1. Touch Where To? > Points of
Interest > Local Search.
2. Enter the location name or
category.
3. Touch Done.
190-01200-01_01.indd 7 4/30/2010 11:25:21 AM
Page 8
8 nüvi 1695 Quick Start Manual
4. Select a location.
Touch the Google® tab to
perform a local search over
the nüLink! connection.
Touch the Garmin tab to
search the pre-loaded Garmin
POI.
5. Touch Go!.
Finding a Destination
Using Phone Book
Listings
NOTE: nüLink! Services may not
be available in all areas or countries.
To use this feature, you must have
a current nüLink! subscription, and
your device must be receiving a
nüLink! signal.
1. Touch Where To? > White
Pages.
2. Select an option:
•
•
By Name—Touch to search
for a listing using rst and last
names.
By Phone Number—Touch
to search for a listing using a
phone number.
3. Use the on-screen keyboard to
enter a name or a phone number,
and touch Done.
4. Select a listing in the search
results, if necessary.
•
•
190-01200-01_01.indd 8 4/30/2010 11:25:21 AM
Page 9
nüvi 1695 Quick Start Manual 9
Finding Fuel Prices
NOTE: nüLink! Services may not
be available in all areas or countries.
To use this feature, you must have
a current nüLink! subscription, and
your device must be receiving a
nüLink! signal.
1. Touch Where To? > Fuel Prices.
2. Touch > Fuel Type and select
the fuel type for your vehicle. A
list of fuel prices per gallon at
nearby gas stations appears.
3. Select a station.
Checking Movie Times
NOTE: To use this feature, you must
have a current nüLink! subscription,
and your device must be receiving a
nüLink! signal.
1. Touch Where To? > Movie
Times.
2. Touch > Select Day and
select an upcoming day.
3. Select Find By Movie Title or
Find by Theater Name.
4. Select a movie title or a movie
theater.
Finding Local Events
NOTE: nüLink! Services may not
be available in all areas or countries.
To use this feature, you must have
a current nüLink! subscription, and
your device must be receiving a
nüLink! signal.
1. Touch Where To? > Local
Events.
2. Select a category.
3. Touch > Select Day and
select an upcoming day.
4. Select an event.
5. Touch Save to save the event to
Favorites.
190-01200-01_01.indd 9 4/30/2010 11:25:21 AM
Page 10
10 nüvi 1695 Quick Start Manual
Using Trafc
NOTICE
In no event shall Garmin be liable
for any incidental, special, indirect,
or consequential damages, including,
without limitation, damages for any
trafc nes or citations, whether
resulting from the use, misuse
or inability to use the product or
from defects in the product. Some
states do not allow the exclusion of
incidental or consequential damages,
so the above limitations may not
apply to you.
NOTE: nüLink! Services may not
be available in all areas or countries.
To use this feature, you must have
a current nüLink! subscription, and
your device must be receiving a
nüLink! signal.
When you are receiving trafc
information, a trafc icon appears
in the upper-left corner of the map
page. The trafc icon changes
color to indicate the severity of
trafc conditions on your route or on
the road you are currently traveling.
If a severe trafc delay occurs on
your route while you are navigating,
the device automatically recalculates
the route.
Using Weather
‹
Warning
The weather information provided
through this product is subject
to service interruptions and may
contain errors, inaccuracies
or outdated information, and
consequently should not be relied
upon exclusively. Always use
common sense while driving or
navigating and check alternate
weather information sources prior
to making safety-related decisions.
190-01200-01_01.indd 10 4/30/2010 11:25:21 AM
Page 11
nüvi 1695 Quick Start Manual 11
You acknowledge and agree that
you shall be solely responsible for
use of the weather information and
all decisions made with respect to
driving or navigating in weather.
NOTE: nüLink! Services may not
be available in all areas or countries.
To use this feature, you must have
a current nüLink! subscription, and
your device must be receiving a
nüLink! signal.
1. Touch Tools > Weather.
The weather for your current
location appears.
2. Select an option to view weather:
Touch a day in the forecast to
view the weather information
for that day.
From the Weather page, touch
Current Location to change
your current location.
•
•
From the Weather page,
touch Current Location >
Add City to view weather
information for a different
location.
From the Weather page, touch
> Favorite Cities to view
a list of cities you have added.
From the Weather page,
touch > Weather Radar
to view a map that displays
precipitation (if any) near
your current location.
NOTE: The weather radar is
an optional service. For more
information about purchasing
nüLink! subscriptions, please see the
nüvi 1695 Owner’s Manual.
•
•
•
190-01200-01_01.indd 11 4/30/2010 11:25:21 AM
Page 12
12 nüvi 1695 Quick Start Manual
Using Hands-free
Features
To use the hands-free features, you
must pair your phone and your
device. To pair and connect, your
phone and the device must be turned
on and within 33 ft. (10 m) of each
other.
Pairing Your Phone
1. Enable the Bluetooth component
on your phone.
2. On your device, touch Tools >
Settings > Bluetooth.
3. Touch Bluetooth.
4. Touch Enabled > Save.
5. Touch Add Phone > OK.
6. Select your phone, and touch
OK.
7. Enter the Bluetooth PIN (1234)
for your device in your phone.
Calling a number
1. Select Phone > Dial.
2. Enter the number, and touch Dial.
3. To end a call, touch > End
Call.
receiving a Call
When you receive a call, the
Incoming Call window opens.
Touch Answer to answer the call.
Touch Ignore to ignore the call.
•
•
190-01200-01_01.indd 12 4/30/2010 11:25:22 AM
Page 13
nüvi 1695 Quick Start Manual 13
Using the Power Key
1. Press and quickly release the
Power key to view additional
options:
Touch and drag the scroll bar
to adjust screen brightness.
Touch Lock Screen to
prevent accidental screen
touches.
Touch Power Off to turn off
your device. You can also turn
off the device by holding the
Power key for 2 seconds.
2. Press and quickly release the
Power key to exit the menu.
resetting Your Device
If your device stops functioning,
reset your device by pressing and
holding the Power key for 10
seconds.
•
•
•
Securing Your Device
1. Ensure that you are at your
security location and that your
device is receiving satellite
signals.
2. Touch Tools > Settings > System
> Garmin Lock.
3. Touch Lock Device.
4. Touch Enabled > Save.
5. Enter a four-digit PIN.
6. Touch Set.
NOTE: If you forget your PIN and
your security location, you must
send your device to Garmin to get
it unlocked. You must also send a
valid product registration or proof of
purchase.
190-01200-01_01.indd 13 4/30/2010 11:25:22 AM
Page 14
14 nüvi 1695 Quick Start Manual
registering Your Device
1. Go to http://my.garmin.com, and
click Register.
2. Follow the online instructions to
install the myGarmin Agent™ and
register your device.
Updating the Software
1. Connect the device to your
computer using the micro-USB
cable. The AutoPlay menu opens.
2. Double-click to open the
myGarmin Agent Web page.
If the AutoPlay menu does not
open, or you are on a Mac®
computer, go to www.garmin
.com/agent.
3. Follow the on-screen instructions.
After you have installed myGarmin
Agent, you will be prompted to open
myDashboard each time you connect
your device to your computer.
myDashboard checks for current
software updates and provides
additional information about your
device.
nüMaps guarantee
™
To receive one free map update (if
available), register your device at
http://my.garmin.com within 60
days of acquiring satellites while
driving with your device. You are not
eligible for the free map update if
you register by phone or wait longer
than 60 days after the rst time you
acquire satellites while driving with
your device.
More information
For more information about your
device, select Tools > Help.
Download the latest version of the
owner’s manual from www.garmin
.com. For information on
accessories, go to http://buy.garmin
.com or contact your Garmin dealer.
190-01200-01_01.indd 14 4/30/2010 11:25:22 AM
Page 15
nüvi 1695 Quick Start Manual 15
Contact garmin
Contact Garmin Product Support if
you have any questions while using
your device. In the USA, go to
www.garmin.com/support, or contact
Garmin USA by phone at (913)
397.8200 or (800) 800.1020.
In the UK, contact Garmin (Europe)
Ltd. by phone at 0808 2380000.
In Europe, go to www.garmin.com
/support and click Contact Support
for in-country support information,
or contact Garmin (Europe) Ltd. by
phone at +44 (0) 870.8501241.
Garmin®, the Garmin logo, and nüvi are
trademarks of Garmin Ltd. or its subsidiaries,
registered in the USA and other countries.
Garmin Lock
™
, myGarmin Agent™, nüLink!™,
and nüMaps Guarantee
™
are trademarks of
Garmin Ltd. or its subsidiaries. These trademarks
may not be used without the express permission
of Garmin. The Bluetooth
®
word mark and logos
are owned by the Bluetooth SIG, Inc., and any
use of such name by Garmin is under license.
microSD
™
is a trademark of SanDisk or its
subsidiaries. Google
™
is a trademark of Google
Inc. Mac
®
is a trademark of Apple Computer, Inc.,
registered in the U.S. and other countries.
190-01200-01_01.indd 15 4/30/2010 11:25:22 AM
Page 16
For the latest free software updates (excluding map data) throughout the life of
your garmin products, visit the garmin Web site at www.garmin.com.
© 2010 Garmin Ltd. or its subsidiaries
Garmin International, Inc.
1200 East 151st Street, Olathe, Kansas 66062, USA
Garmin (Europe) Ltd.
Liberty House, Hounsdown Business Park, Southampton, Hampshire, SO40 9LR UK
Garmin Corporation
No. 68, Jangshu 2nd Road, Sijhih, Taipei County, Taiwan
www.garmin.com
May 2010 Part Number 190-01200-01 Rev. 1 Printed in Taiwan
06820682
190-01200-01_01.indd 16 4/30/2010 11:25:22 AM
 Loading...