GARLOCK
an EnPro Industries family of companies
1666 Division Street
Palmyra, NY 14522
Tel: 1-877-GARLOCK / 315.597.4811
Fax: 800.543.0598 / 315.597.3216
www.garlock.com
Gasket Factors
Gasket Constants
Stress reqired for tightness
Filler
M
Y (psi)
Gb (psi)
a
Gs (psi)
S 100 (psi)
S 1,000 (psi)
S 10,000 (psi)
Graphite
3.00
10,000
2,300
0.237
13
6,581
11,823
20,405
PTFE
3.00
10,000
4,500
0.140
70
8,575
11,836
16,339
FLEXSEAL® Spiral Wound Gasket
FLEXSEAL® Spiral wound gaskets are made with an alternate combination of preformed metal wire and
soft filler material(s) that forms a highly effective seal when compressed between two flanges. A vshaped crown centered in the metal strip acts as a spring, giving the gasket greater resiliency under
varying conditions.
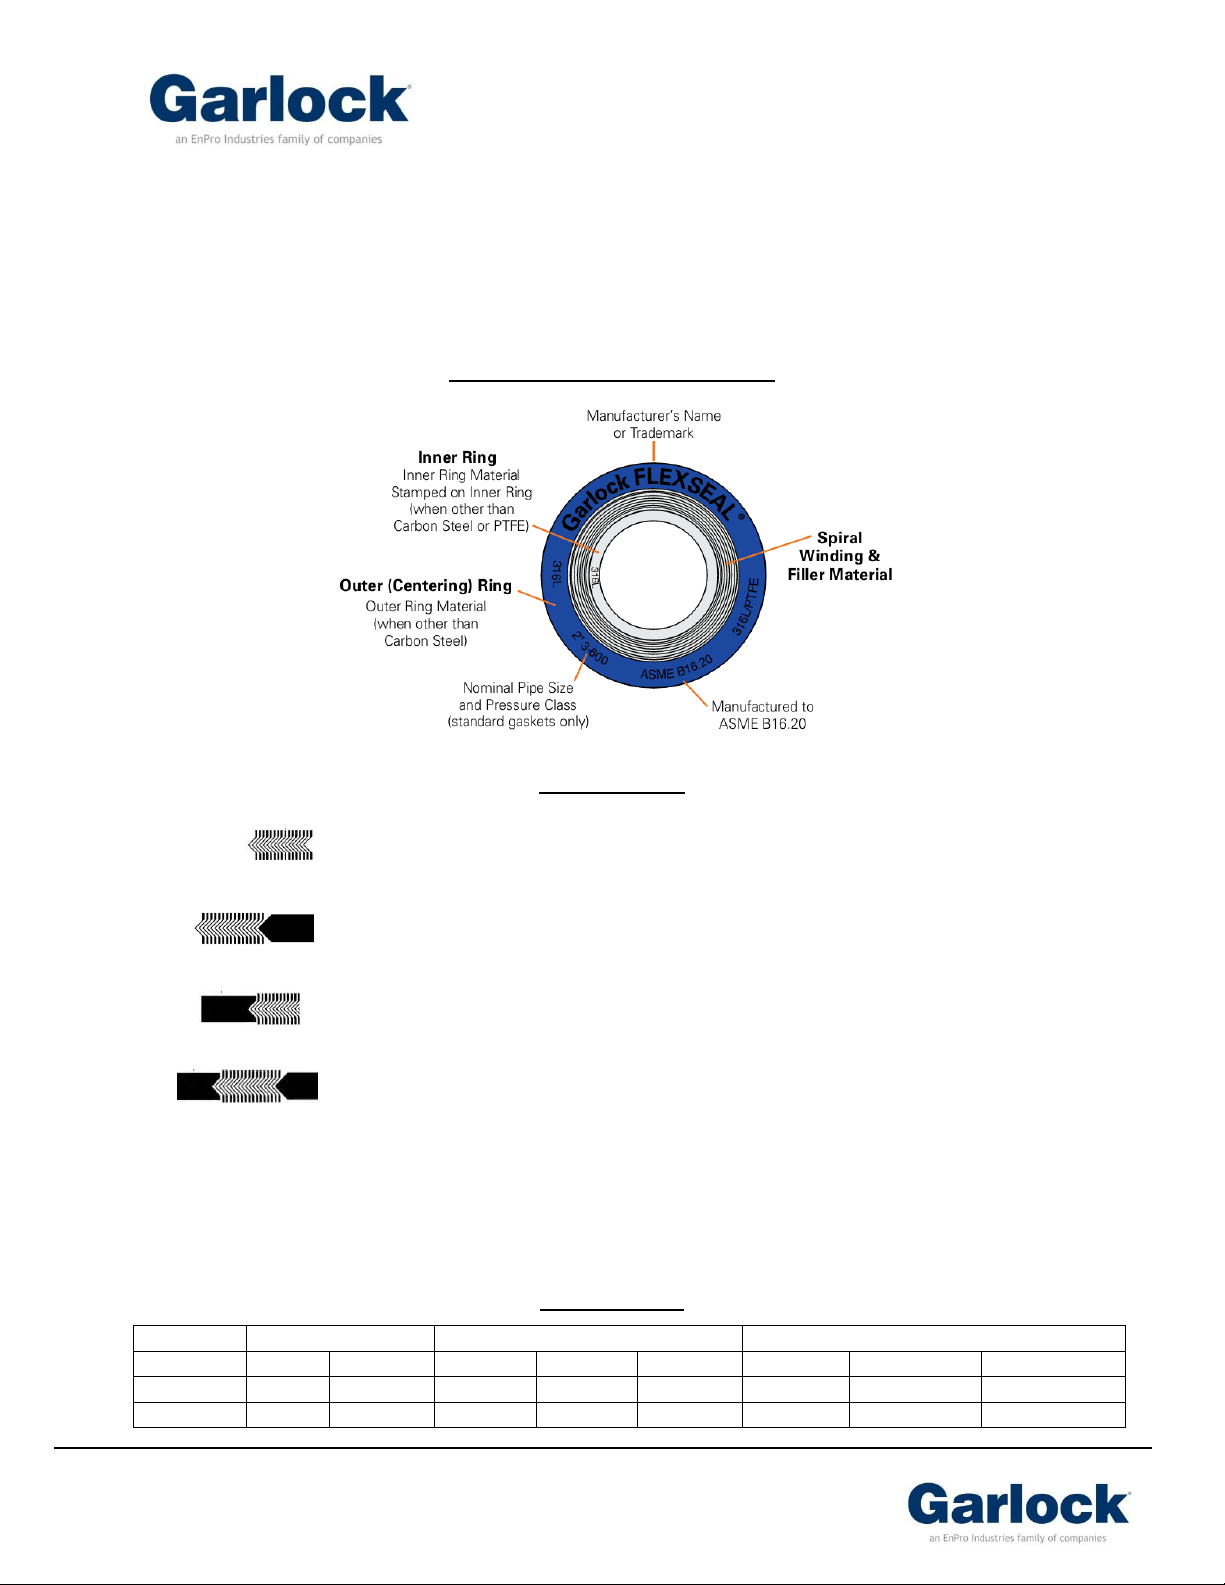
Identification (per ASME B16.20)
Configurations
SW – Spiral windings only – designed for tongue & groove, male-female, and
groove-to-flat flanges.
SWI - Spiral windings and an inner ring* – designed for tongue & groove, male-
female, groove-to-flat flanges were the ID is open to the process stream.
RW – Spiral windings and an outer centering ring that is used to locate the gasket,
provide additional radial strength and can act as a compression limiter.
RWI** - Spiral windings, an outer centering ring that is used to locate the gasket,
provide additional radial strength and can act as a compression limiter, and an
inner ring* to reduce/prevent radial buckling.
*NOTE – Spiral wound gasket inner ring metallurgy is typically the same as the winding material.
**NOTE - ASME B16.20 mandates inner rings on all PTFE filled spiral wound gaskets, and for 24” NPS and larger
gaskets in Class 900#, 12” NPS and larger in 1500#, and 4” NPS and larger gaskets in Class 2500#. Also, gaskets
ordered in compliance with ASME B16.20 are sold with inner rings (FLEXSEAL RWI) unless otherwise specified by
the customer at the time of order.
Design Factors

GARLOCK
an EnPro Industries family of companies
1666 Division Street
Palmyra, NY 14522
Tel: 1-877-GARLOCK / 315.597.4811
Fax: 800.543.0598 / 315.597.3216
www.garlock.com
Outside Diameter Tolerances
Inside Diameter Tolerances
½” through 8” NPS
+/- .030”
+/- .016”
10” through 24” NPS
+.060” / -.030”
+/- .030”
ID
OD
Gasket Thickness
Width Limits
Compressed
Thickness
Up to 1”
+.016” / -0”
+0” / -.031”
Thickness**
Tolerance
Minimum
Maximum†
1” to 24”
+.031” / -0”
+0” / -.031”
.125”
+/- .005”
3/16”
1”
.090” - .100”
24” to 36”
+.047” / -0”
+0” / .063”
.175”
+/- .005”
¼”
1-1/2”
.125” - .135”
36” to 60”
+.063” / -0”
+0” / .063”
.250”
+/- .005”
5/16”
1-1/2”
.180” - .200”
60” and above
+.094” / -0”
+0” / .094”
.285”
+/- .005”
5/16”
1-1/2”
.200” - .220”
Rev. March 2017
Tolerances (for ASME B16.20 gaskets)
Tolerances (for Non-ASME windings)
**Measured across the metallic portion of the gasket not including the filler, which may protrude slightly. The thickness tolerance exception is
+.010” / -.005” on gaskets with 1) less than a 1” ID and greater than 26” ID, 2) PTFE filled gaskets, and 3) gaskets with flange widths of 1” or
greater.
†
For widths larger than what is shown, please contact Garlock.
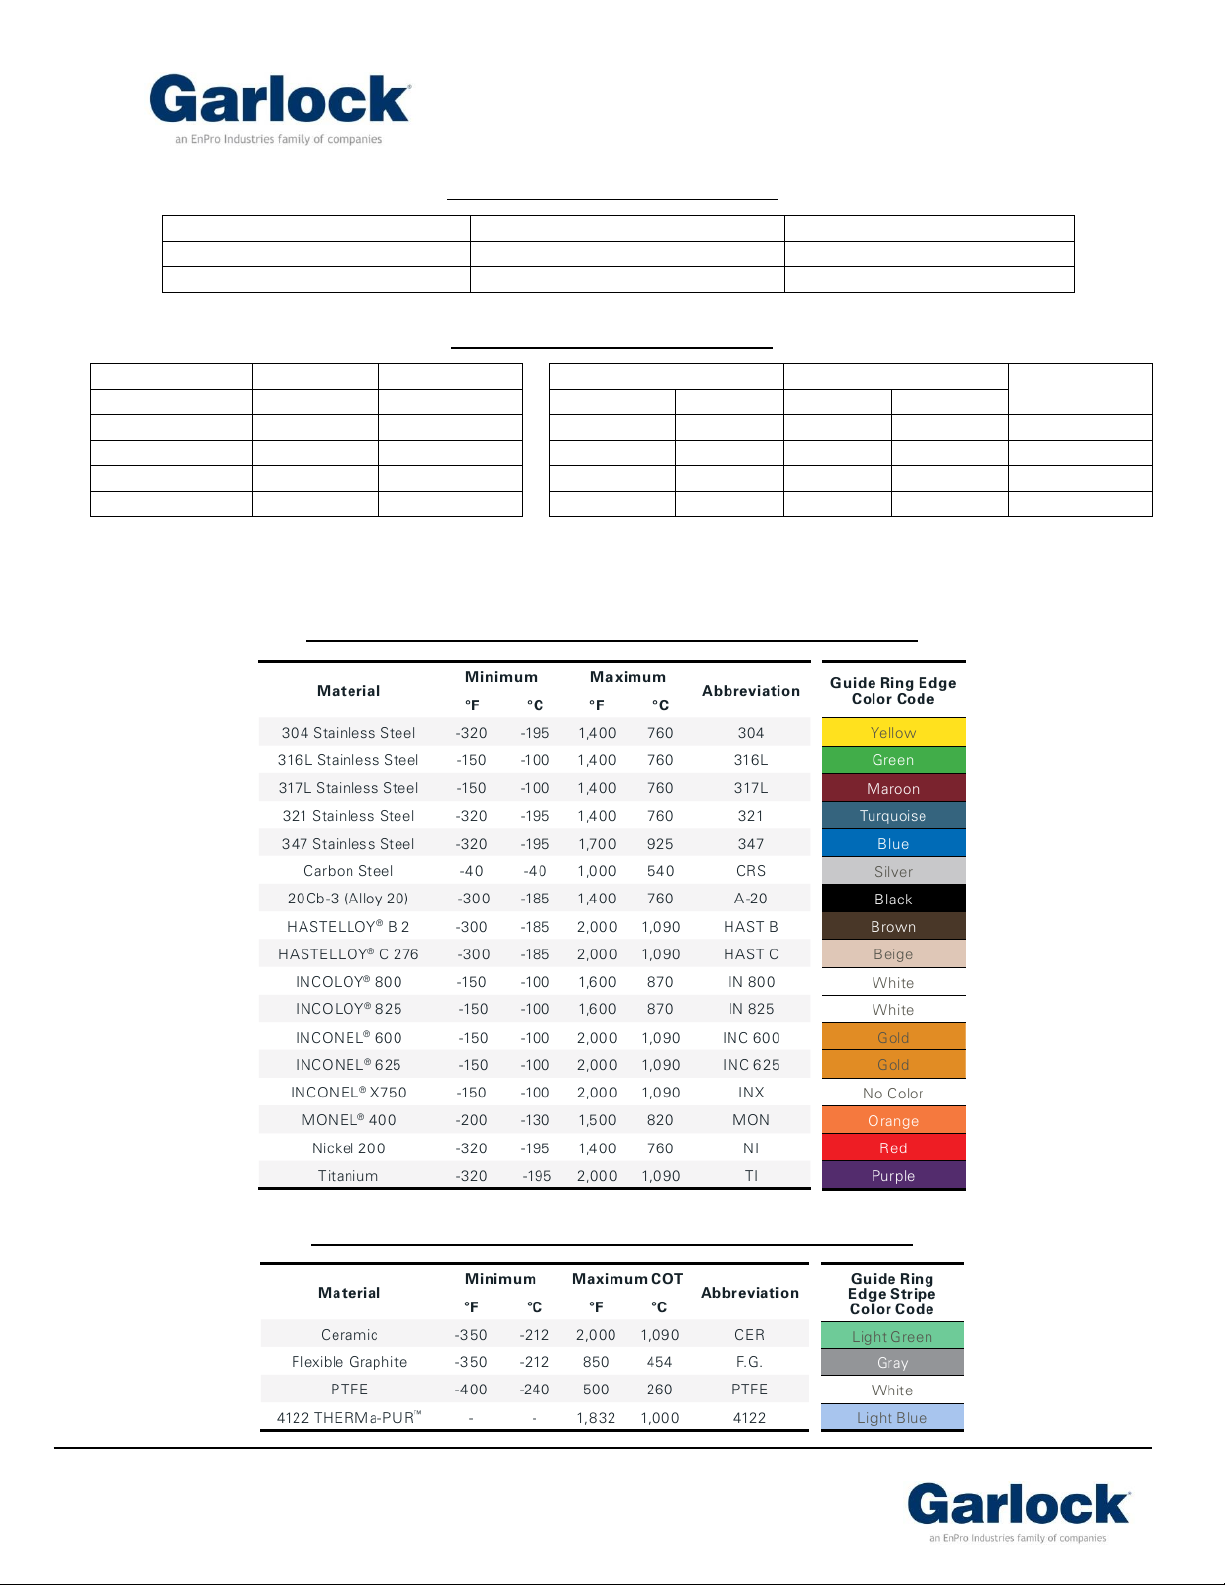
Temperature Limits & Color Coding for Metals (ASME B16.20)
Temperature Limits & Color Coding for Fillers (ASME B16.20)
 Loading...