

Garelick 99187 User Manual
Installation Instructions for
Platform Ladder Mount 99187
Form 12.406
IMPORTANT INSTRUCTIONS
1. Check contents of hardware pack against parts list.
2. Read instructions completely before starting assembly or
installation.
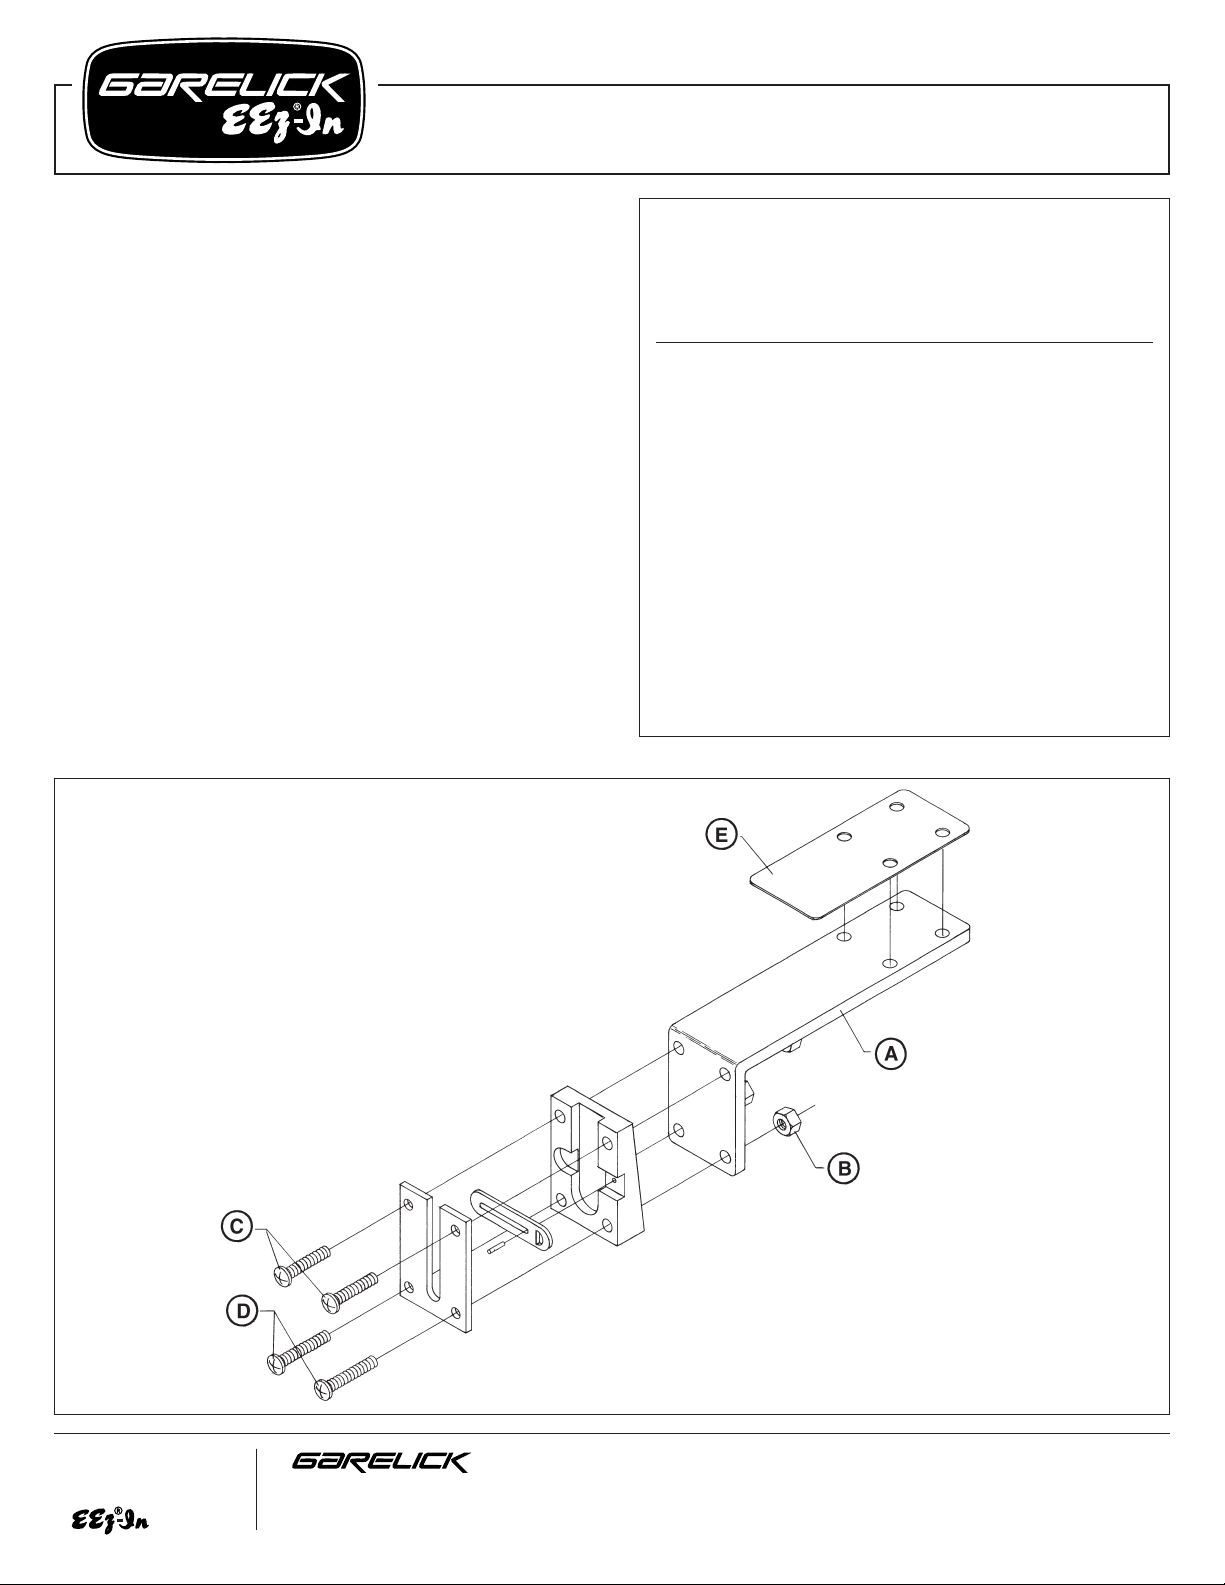
ASSEMBLY INSTRUCTIONS
Attach ladder hardware to platform bracket as illustrated.
MOUNTING INSTRUCTIONS
1. Choose the most suitable side of transom for mounting
ladder. Locate a position that will be clear of the turning
and lowering operation of the motor/out drive.
2. The mounting bracket can be installed on top of the
platform or under the platform. If mounted under platform
the No Slip Pad can be discarded.
3. Using the mounting bracket as a template, locate the
bracket on the desired centerline of the ladder and
extended over edge of platform approximately 1 inch.
Mark 4 holes. Drill 4 holes, 13/32" diameter, through
platform.
4. Put a bead of adhesive calk around perimeter of holes on
the top and bottom of platform. Coat the bolts with antiseize compound and secure bracket in place with 4
washers and locknuts.
Parts List
Platform Ladder Mount 99187
Ref. Factory No.
Letter Part No. Req. Description
A 08.095 1 Platform mounting bracket
B 03.166 4
5
⁄16-18 locknut
C 03.394 2
5
⁄16-18 x 1-3⁄4" s.s. machine screw
D 03.395 2
5
⁄16-18 x 2" s.s. machine screw
E 49.232 1 No-slip pad
NOTE: The following parts are not included due to the
variety of possible installations.
4 - suitable length 3/8-16 stainless steel machine screws, at
least 1" longer than thickness of platform and backing
plate, if needed.
4 - 3/8-16 Stainless Steel Locknuts
4 - 3/8” Stainless Steel Washers
Marine adhesive/sealant and anti-seize compound
FIG. 1
Write for
a Complete
Catalog
Phone: 651-459-9795
PO Box 8, 644 2nd Street E-mail: mail@garelick.com
St. Paul Park, Minnesota 55071 On the Web: www.garelick.com
9/98
 Loading...