

Garelick 99181 User Manual
Installation Instructions for
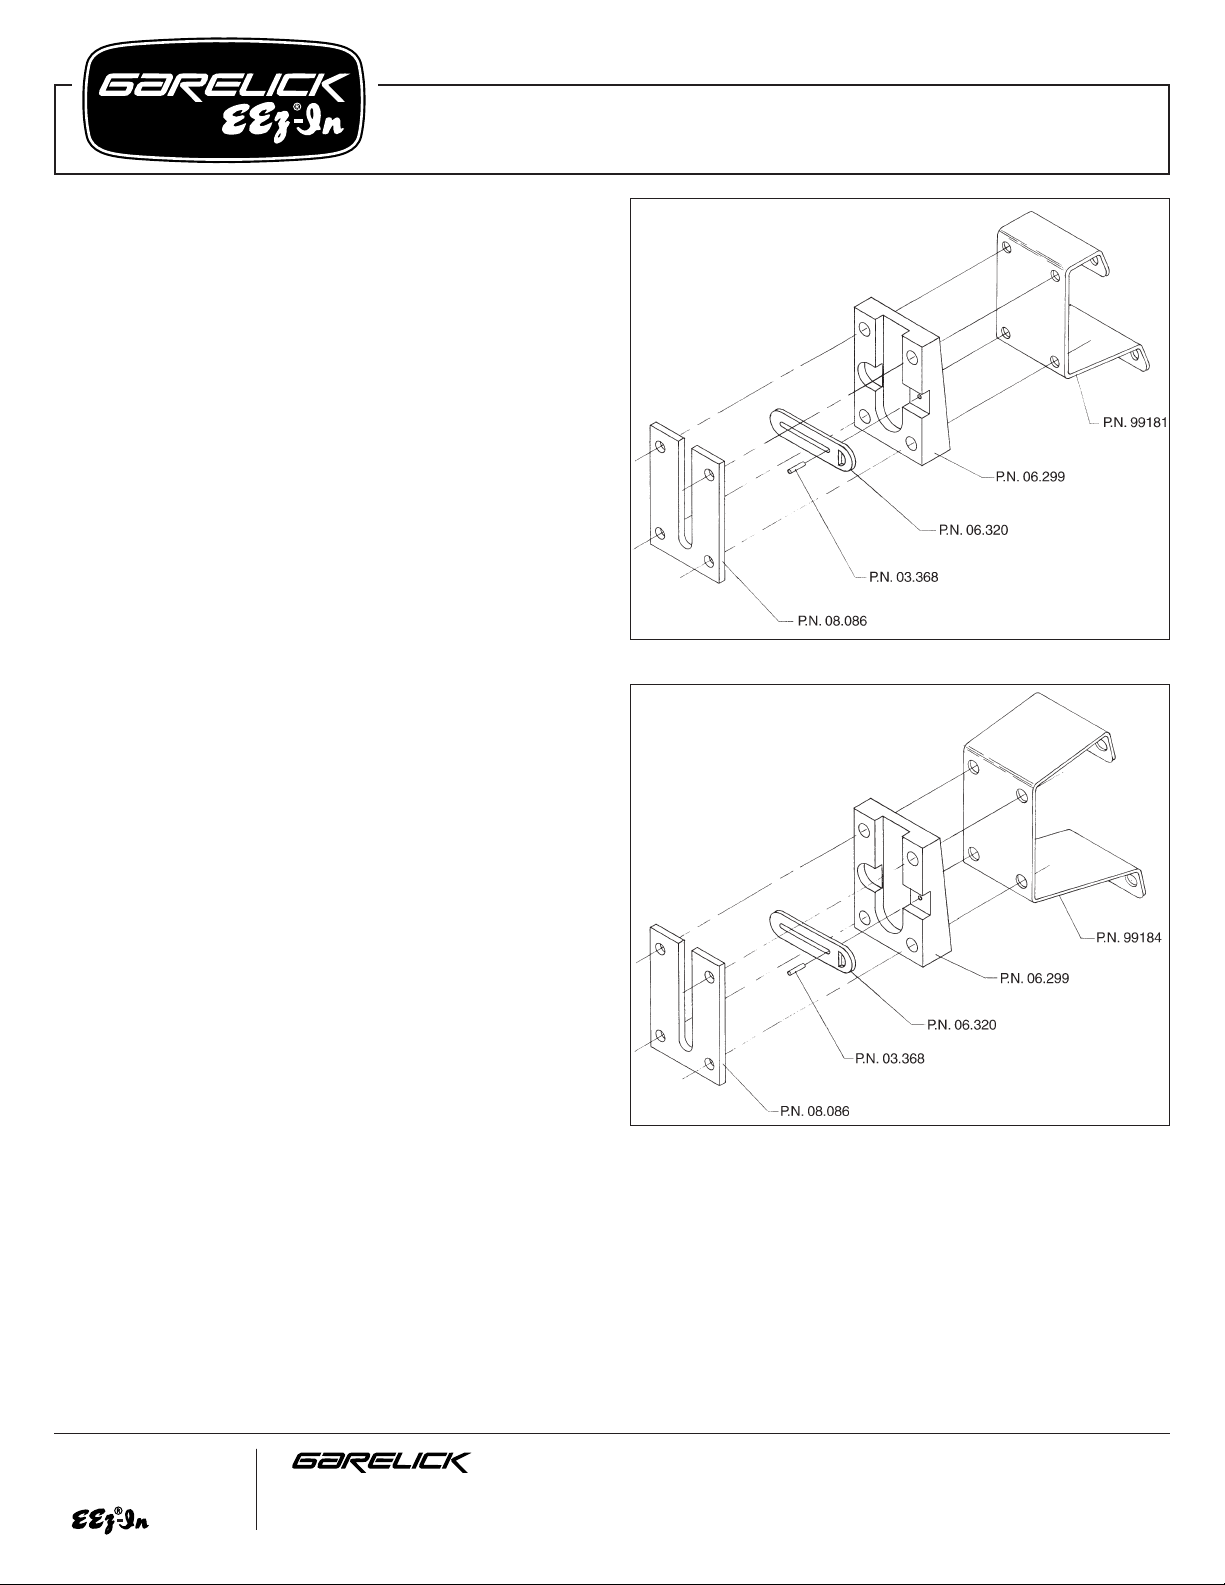
Sport/Diver Ladder Transom Mounting Extension Shims 99181/99184
Form 12.330
Thank you for selecting our superior quality Garelick EEz-In
Brand Boarding Ladder. Your ladder was designed and
manufactured using the finest material available to provide long
product life, all fabricated and finished with boating in mind.
Choosing the proper size ladder for location and correct fit is
important to assure safe, convenient and reliable use.
ASSEMBLY INFORMATION
Read these instructions completely before starting assembly.
REQUIRED HARDWARE
NOTE: The following parts are not included due to the variety of
possible installations.
4 suitable length 5/16"-18 stainless steel bolts
(NOTE: Bolts should be at least 1-1/4" longer than transom
and backing plate thickness.)
4 suitable stainless steel backing washers
4 5/16"-18 stainless steel lock nuts
Marine adhesive/sealant and anti-seize compound
Backing plate (minimum size 4"x8" of suitable material)
TRANSOM OR EXTENSION BRACKET MOUNTING
1. Choose the most suitable side of transom for mounting
ladder.
2. Locate a place on the transom where the ladder will mount
and not interfere with the turning and lowering operation
of your motor. Determine the actual waterline when the
boat is at rest. Mark this location in both the horizontal and
vertical direction.
3. Locate the ladder on this mark and slide it up to the desired
mounting height, keep in mind that it is optimal to have at
least two steps in the water for ease of boarding. Mark the
ladder’s position at the top mounting bolt.
NOTE: This line will locate the top two holes for the
mounting plate.
4. Check the inside of the transom where the mounting is
proposed. Verify that there is ample space to install
a backing plate (minimum size 4"x8") that will support that
ladder installation. A 4"x8" minimum flat area or the size
of the backing plate is required for a secure installation.
NOTE: The backing plate should be made of aluminum,
marine plywood, or some other suitable noncompressive material.
5. Mark four mounting plate hole locations on your transom
using the extension bracket as your template. Drill four
11/32" or 3/8" holes perpendicular to transom.
6. Put a bead of adhesive caulk around perimeter of holes,
coat the bolt threads with anti-seize compound and secure
the mounting bracket in place by tightening all four bolts.
7. Finish installing substrate, lock and faceplate as illustrated
in ladder mounting instructions.
99181
99184
Write for
a Complete
Catalog
Phone: 651-459-9795
PO Box 8, 644 2nd Street E-mail: mail@garelick.com
St. Paul Park, Minnesota 55071 On the Web: www.garelick.com
12/97
 Loading...