

Garelick 71092 User Manual
Operator Instructions for the
Auxilliary Hydraulic Outboard Motor Bracket
Model No: 71092
Form 12.575
READ ALL INSTRUCTIONS AND
WARNING LABELS
PRIORTO OPERATION
7 1/2 to 25 HP Rating
175 lb Motor Weight Limit
- WARNINGS -
Failure to observe these points could result
in personal injury or damage to bracket,
motor, and/or boat!
1. Do not exceed the stated H.P. rating or
weight
Mounting Instructions:
Note:
motor bracket is 14". This travel is based on
installation that is perpendicular to the water
surface. The travel will be different if placed on
a positive or negative angled transom. If the
transom is more than 10 degrees out of
perpendicular, it is recommended to fabricate
a wedge spacer out of suitable material such
as starboard, aluminum, or finished hardwood.
The wedged spacer must fit the mounting
brackets of the motor bracket completely.
! CAUTION !
could cause the hydraulic valve to draw air
during operation and thus prevent the assembly
from operating within normal parameters.
Step 1:
The motor bracket is shipped in the vertical
position. To complete installation, it is
necessary to activate the bracket to the full
down position. Please follow step 2 in the
"Lower Auxiliary Motor Bracket" section.
The approximate travel of the outboard
- Failure to follow these instructions
2. Make sure the motor clamps are tight
before use.
3. Use a safety cable when operating your
motor.
4. Remove the handle while underway.
5. Raise and tilt motor when not in use.
6. Use safety strap when motor is not in use.
7. Remove your motor from the bracket
when trailering.
8. Avoid abrupt maneuvers and/or sharp
turns.
9. Do not raise or lower bracket when motor
is running.
10. Avoid contact with moving parts.
11. Keep pivot bolts lubricated to insure
smooth operation.
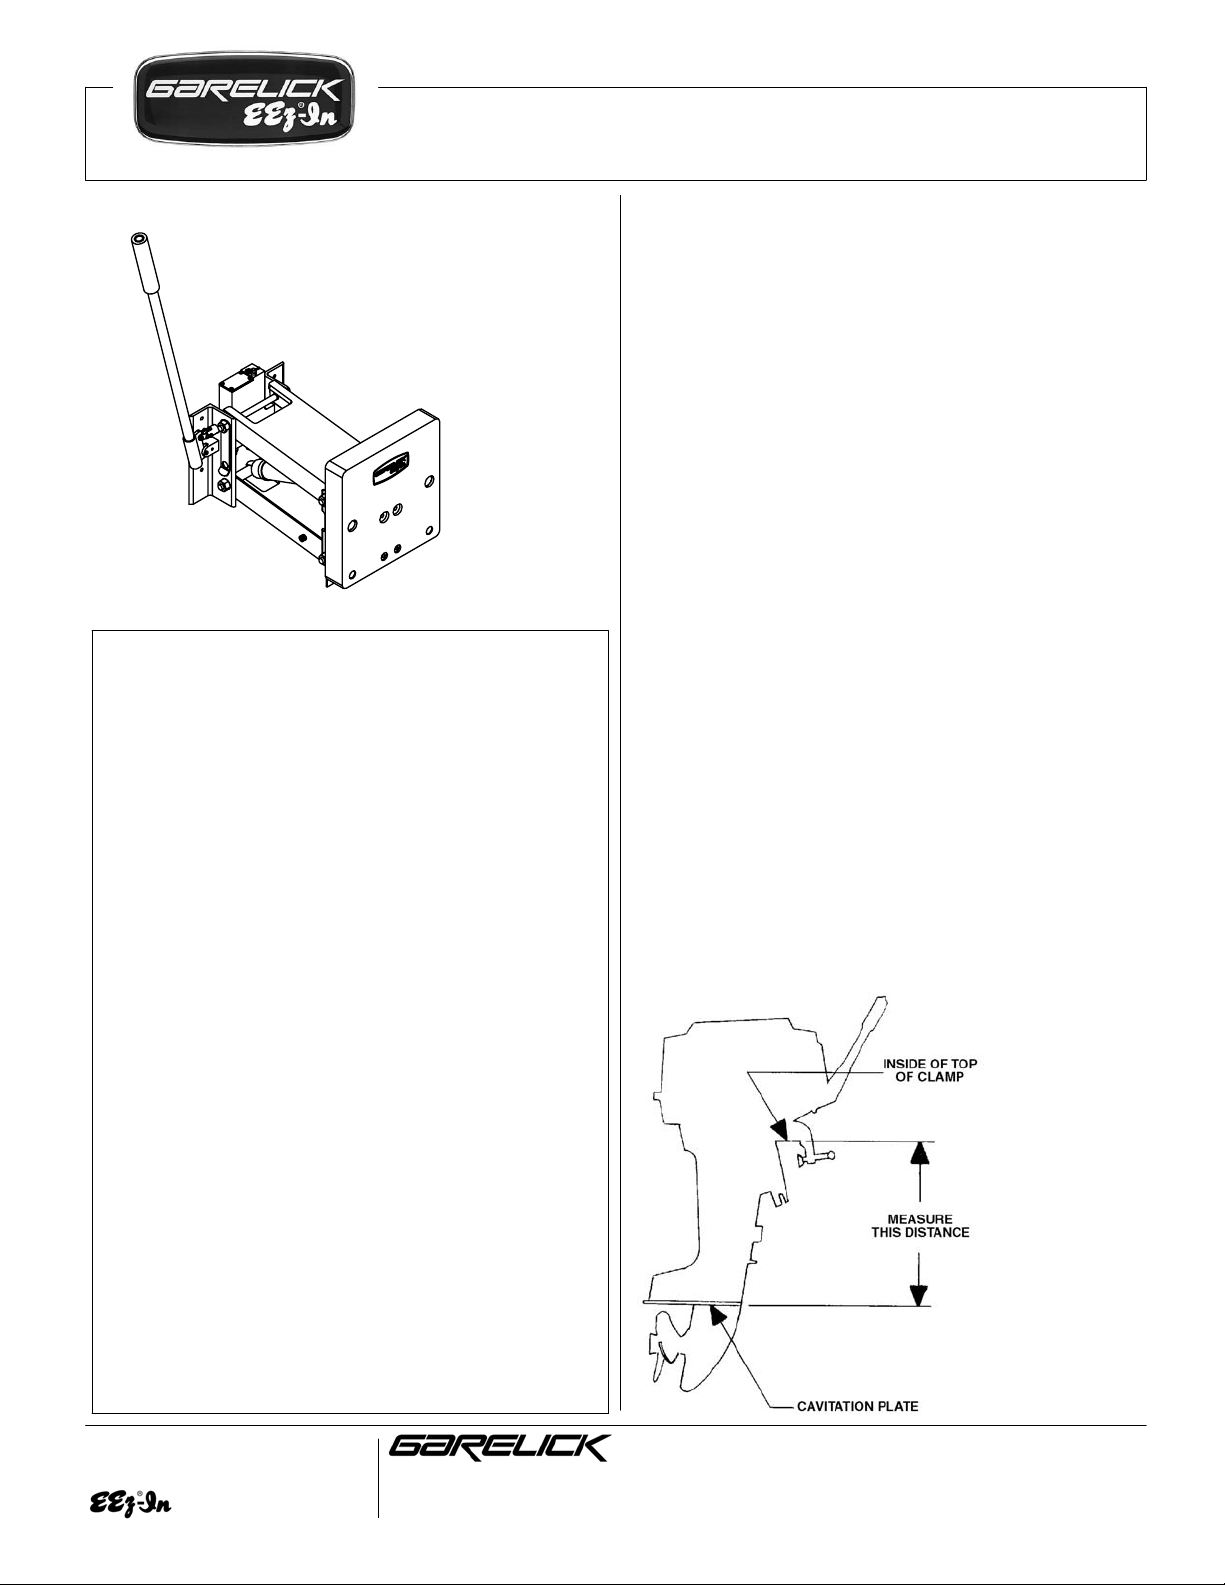
Step 2:
Measure the distance on your outboard motor
between the cavitation plate and the upper
inside edge of the mounting clamp (see fig 1).
Cut a stick to this length and tape it to the
mounting board with one end flush with the
top of the board (see fig 2).
Figure 1
Write for
a Complete
Catalog
644 2nd Street, PO Box 8
St. Paul Park, Minnesota 55071
Phone: 651-459-9795
E-mail: mail@garelick.com
Website: www. garelick.com
04/06
Operator Instructions for the
Auxilliary Hydraulic Outboard Motor Bracket
Model No: 71092
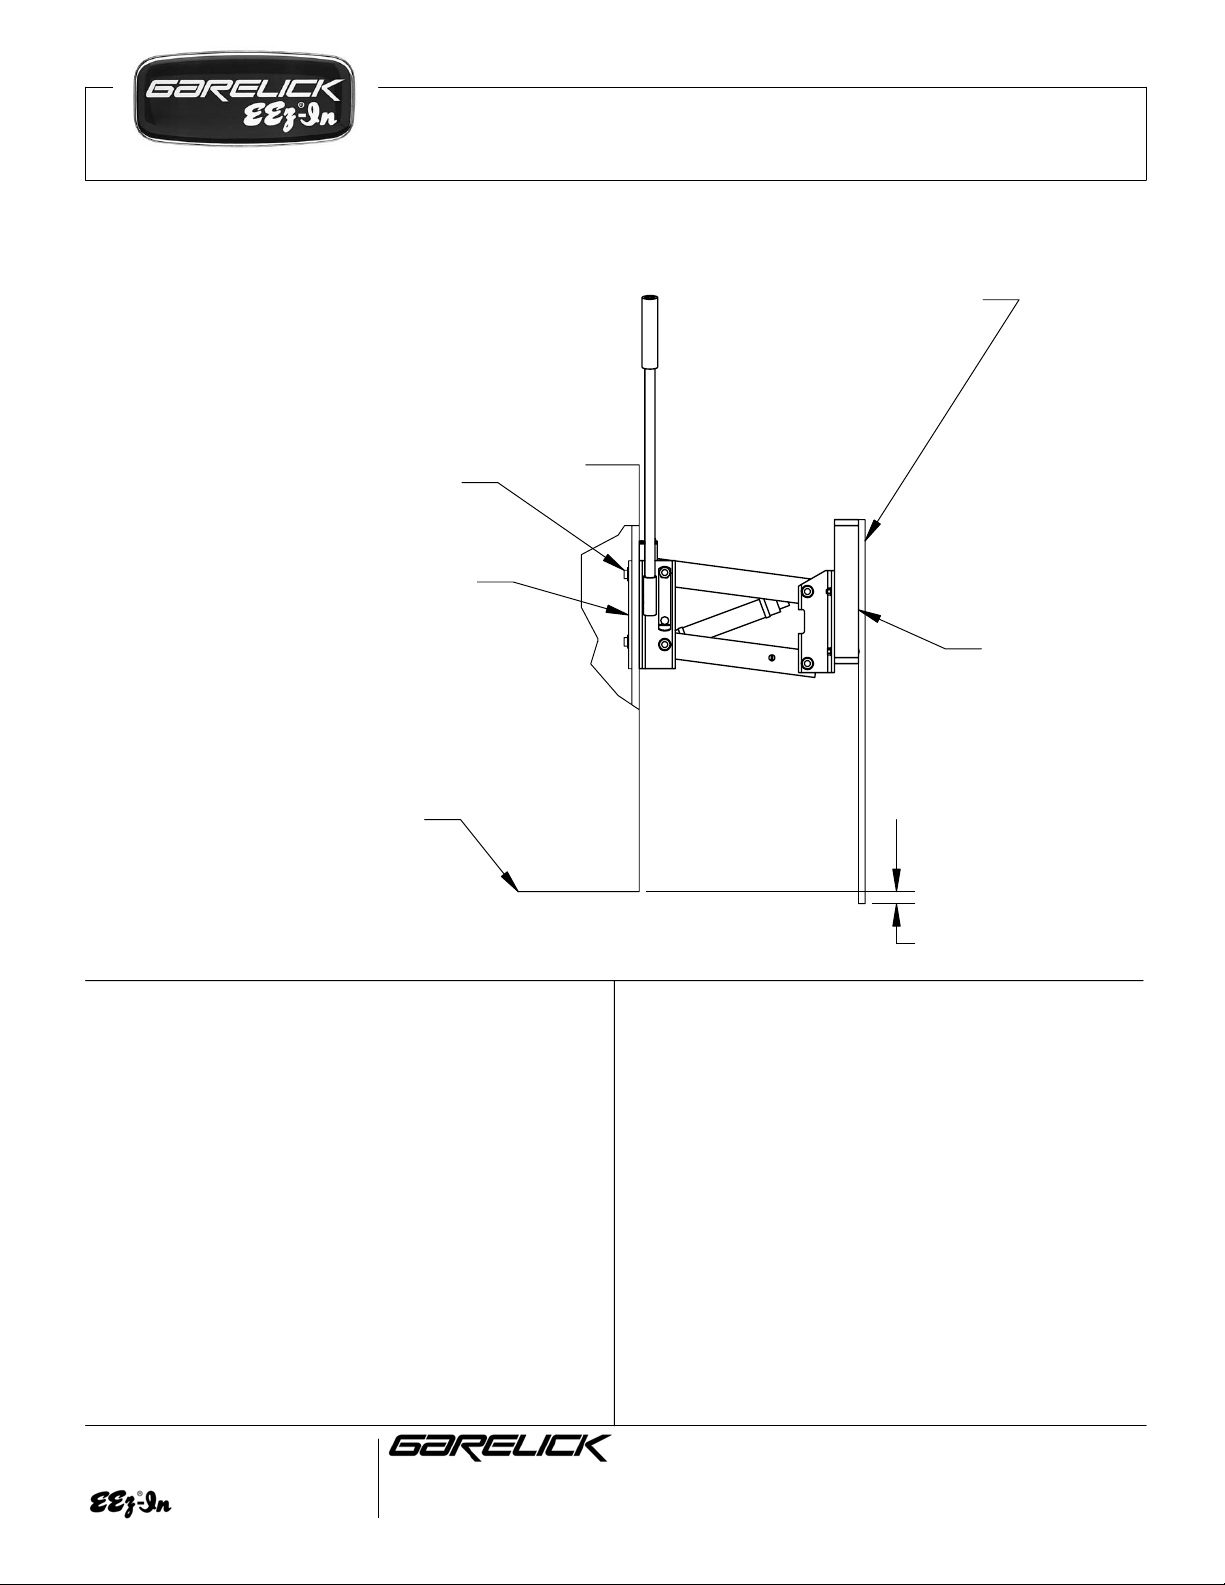
Stick flush with top of bracket
Stick length = Distance from cavitation
plate to upper inside edge of mounting
clamp
Mounting bolts: It is recommended
that "bolt-through" arrangement be
used with with washers and nylon
locknuts or lock washers.
(not included)
Backing plate
(not included)
Form 12.575
Note: Full
down Position
Boat Bottom
Figure 2
Step 3:
Choose the most appropriate side of your transom
for mounting the bracket. Position the bracket so it
will not interfere with the turning operation of your
main motor or rudder. Slide the bracket up or
down so that the bottom of the stick (from step 2)
is approximately 1" to 2" below the bottom of the
boat. NOTE: The bottom of the stick represents
the cavitation plate on your outboard motor, which
must be below the the boat's bottom for best
performance.
Step 4:
Mark 4 mounting holes using the holes in the
bracket. Gain access to the inside of the transom
where the installation is to be bolted through and
make sure the area is clear of any fuel lines,
electrical lines, or obstacles.
1.00
Step 5:
Remove the bracket and using the marks from
step 4 drill (4) holes to accommodate the mounting
hardware as described in figure 3 (NOTE: due to
the various styles of boats, mounting hardware
and backing plates are not provided).
Step 6:
Attach the motor bracket to the transom after
coating the inside surfaces of the mounting flanges
and backing plates with a marine adhesive/sealant
compound.
Step 7:
Motor bracket is now ready for use. Refer to the
motor manufacturer for mounting instructions
and practices. WARNING: Attach safety cable
to motor prior to use.
Write for
a Complete
Catalog
644 2nd Street, PO Box 8
St. Paul Park, Minnesota 55071
Phone: 651-459-9795
E-mail: mail@garelick.com
Website: www. garelick.com
04/06
 Loading...