

Garelick 48490 User Manual
Assembly Instructions for
Boat Seats
Form 12.110
Write for
a Complete
Catalog
Phone: 651-459-9795
PO Box 8, 644 2nd Street E-mail: mail@garelick.com
St. Paul Park, Minnesota 55071 On the Web: www.garelick.com
5/98
CARE & MAINTENANCE
CAUTION: The vinyl seat cushions should only be cleaned with a mild soap and a non-abrasive sponge or cloth.
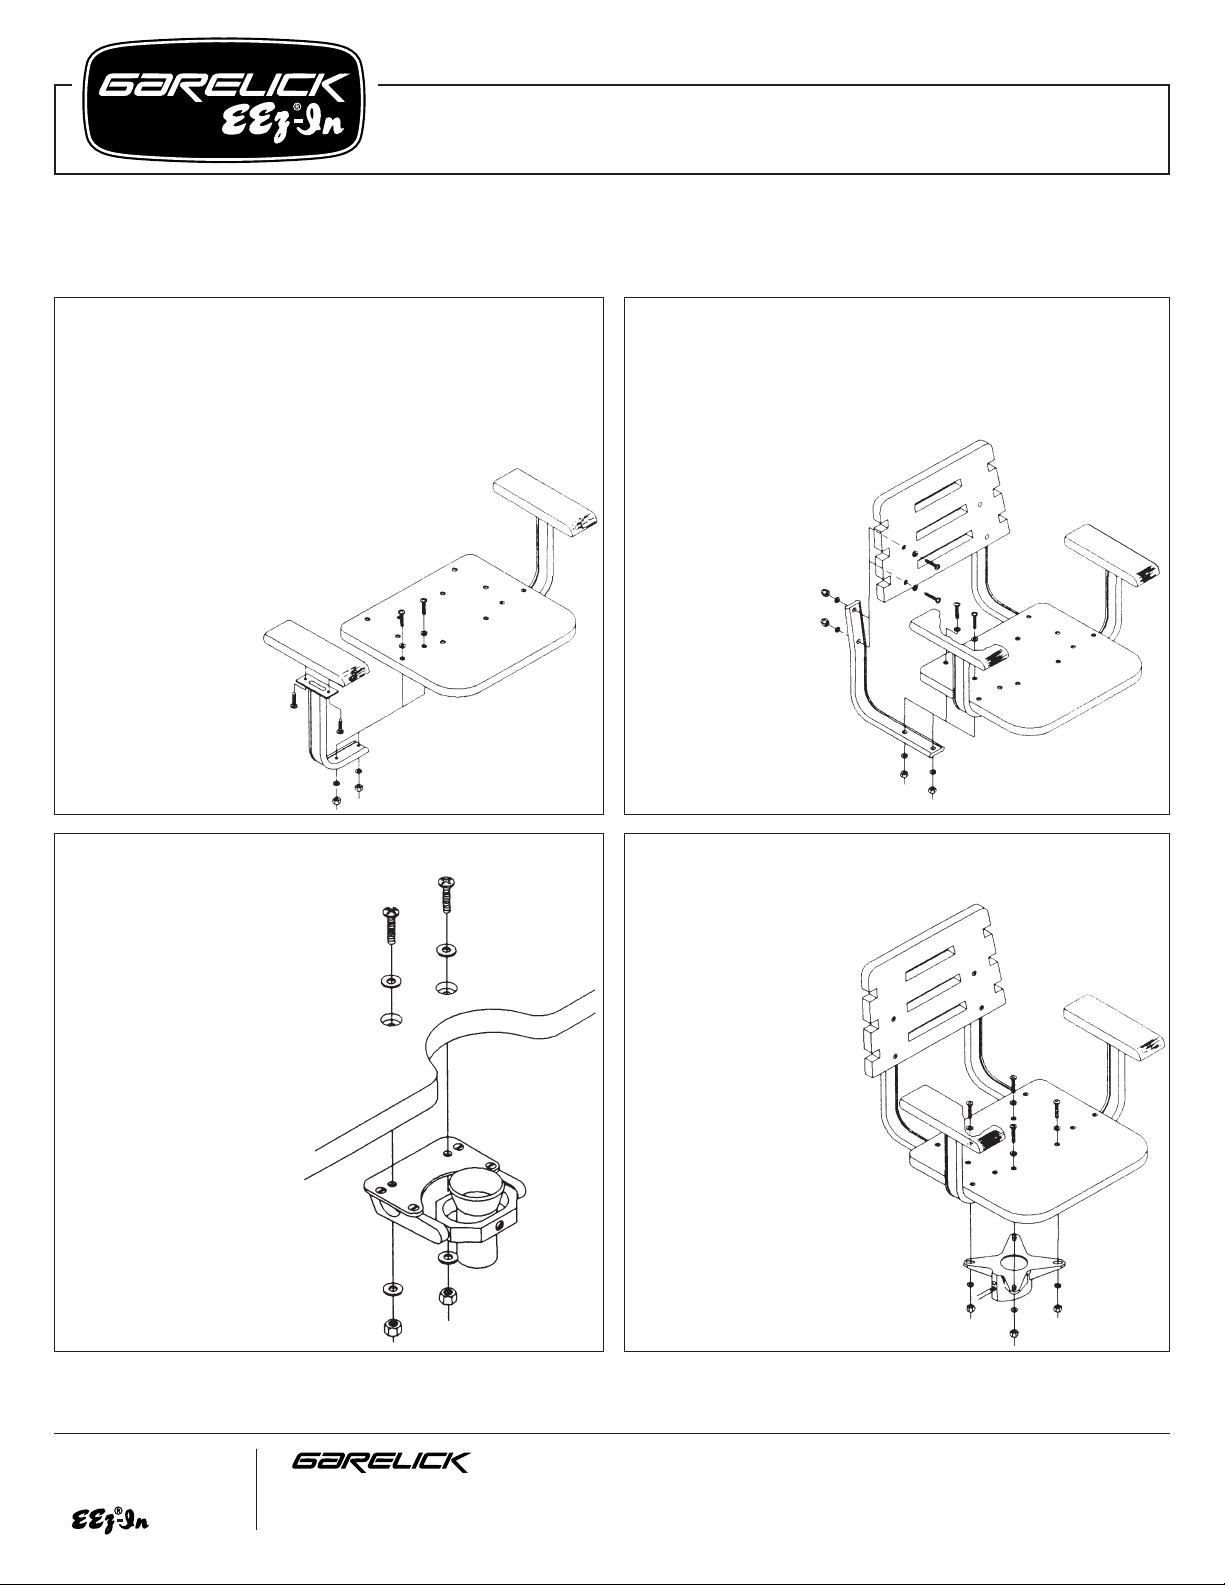
ASSEMBLY INSTRUCTIONS
This instruction sheet is designed to aid in the assembly of several boat seat models. For the assembly of your particular seat,
simply follow the sections below that pertain to it.
ARM REST ATTACHMENT
1. Position the arm rest on the flat plates of the arm
extrusions so that its contoured end will face forward
when mounted to the seat.
2. Align the holes of the flat plate and arm rest; secure with
two #14x1" stainless steel sheet metal screws.
3. Repeat for other side.
ARM EXTRUSION ATTACHMENT
1. Remove the seat cushion from the seat
substrate by unsnapping it.
2. Position the arm extrusions on
the seat bottom by
aligning the holes
of both. Secure
the arm rest in
place with two
1
⁄4-20 x 11⁄2" screws,
washers and
locknuts as illustrated.
3. Repeat for the other side.
SEAT BACK ATTACHMENT
1. Remove the seat back cushions by unsnapping them from
the seat back substrate.
2. Position a seat back extrusion on the seat bottom as
illustrated. Align the holes of both
and secure in place with four
1
⁄
4-20 x 1
1
⁄
4" screws, four
1
⁄
4" hole flat washers in
front, four 1⁄4" lock
washers and four
1
⁄4-20 acorn nuts in
back.
3. Repeat for the
other extrusion.
4. Position the
seatback on the
seat extrusions as
illustrated. Align the
holes in both and
secure in place with
four 1⁄4-20 x 11⁄2" screws,
washers and locknuts.
GIMBAL ATTACHMENT
1. Position gimbal on seat as
illustrated. Align the holes
in both and secure in place
with two
1
⁄4-20 x 11⁄2"
screws, washers and
locknuts as shown.
SEAT ATTACHMENT
1. Position seat on seat slide or
mounting spider as illustrated.
2. Align the holes in both
and secure in place
with hardware.
(Note: Hardware is
not supplied as the
type needed may
vary.)
3. Mount seat to boat’s
hardware.
4. Re-attach seat and back
cushions.
 Loading...